任务要求:基于 LlamaIndex 构建自己的 RAG 知识库,寻找一个问题 A 在使用 LlamaIndex 之前InternLM2-Chat-1.8B模型不会回答,借助 LlamaIndex 后 InternLM2-Chat-1.8B 模型具备回答 A 的能力,截图保存。
本文将分为以下几个部分来介绍,如何使用 LlamaIndex 来部署 InternLM2 1.8B(以 InternStudio 的环境为例)
- 前置知识
- 环境、模型准备
- LlamaIndex HuggingFaceLLM
- LlamaIndex RAG
1. 前置知识
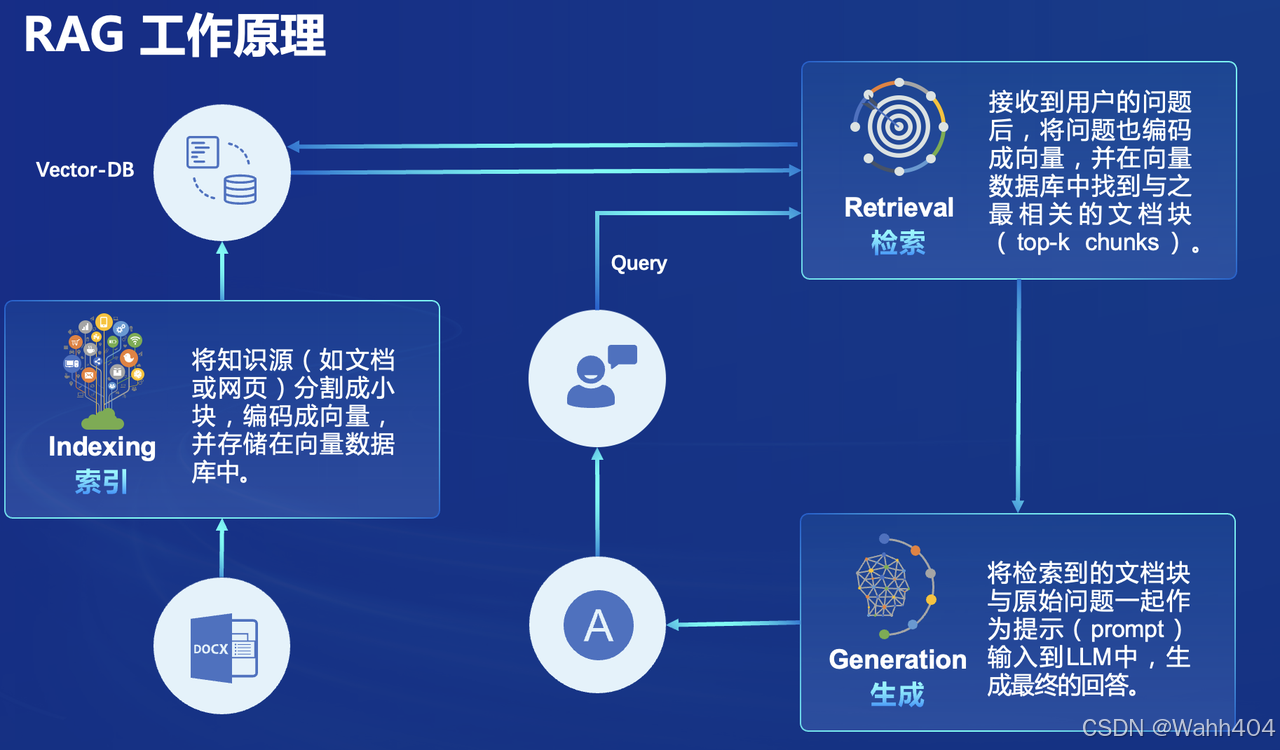
正式介绍检索增强生成(Retrieval Augmented Generation,RAG)技术以前,大家不妨想想为什么会出现这样一个技术。 给模型注入新知识的方式,可以简单分为两种方式,一种是内部的,即更新模型的权重,另一个就是外部的方式,给模型注入格外的上下文或者说外部信息,不改变它的的权重。 第一种方式,改变了模型的权重即进行模型训练,这是一件代价比较大的事情,大语言模型具体的训练过程,可以参考InternLM2技术报告。第二种方式,并不改变模型的权重,只是给模型引入格外的信息。类比人类编程的过程,第一种方式相当于你记住了某个函数的用法,第二种方式相当于你阅读函数文档然后短暂的记住了某个函数的用法。
对比两种注入知识方式,第二种更容易实现。RAG正是这种方式。它能够让基础模型实现非参数知识更新,无需训练就可以掌握新领域的知识。本次课程选用了LlamaIndex框架。LlamaIndex 是一个上下文增强的 LLM 框架,旨在通过将其与特定上下文数据集集成,增强大型语言模型(LLMs)的能力。它允许您构建应用程序,既利用 LLMs 的优势,又融入您的私有或领域特定信息。
RAG 效果比对
如图所示,由于xtuner是一款比较新的框架, InternLM2-Chat-1.8B 训练数据库中并没有收录到它的相关信息。左图中问答均未给出准确的答案。右图未对 InternLM2-Chat-1.8B 进行任何增训的情况下,通过 RAG 技术实现的新增知识问答。
2. 环境、模型准备
2.1 配置基础环境
这里以在 Intern Studio 服务器上部署LlamaIndex为例。
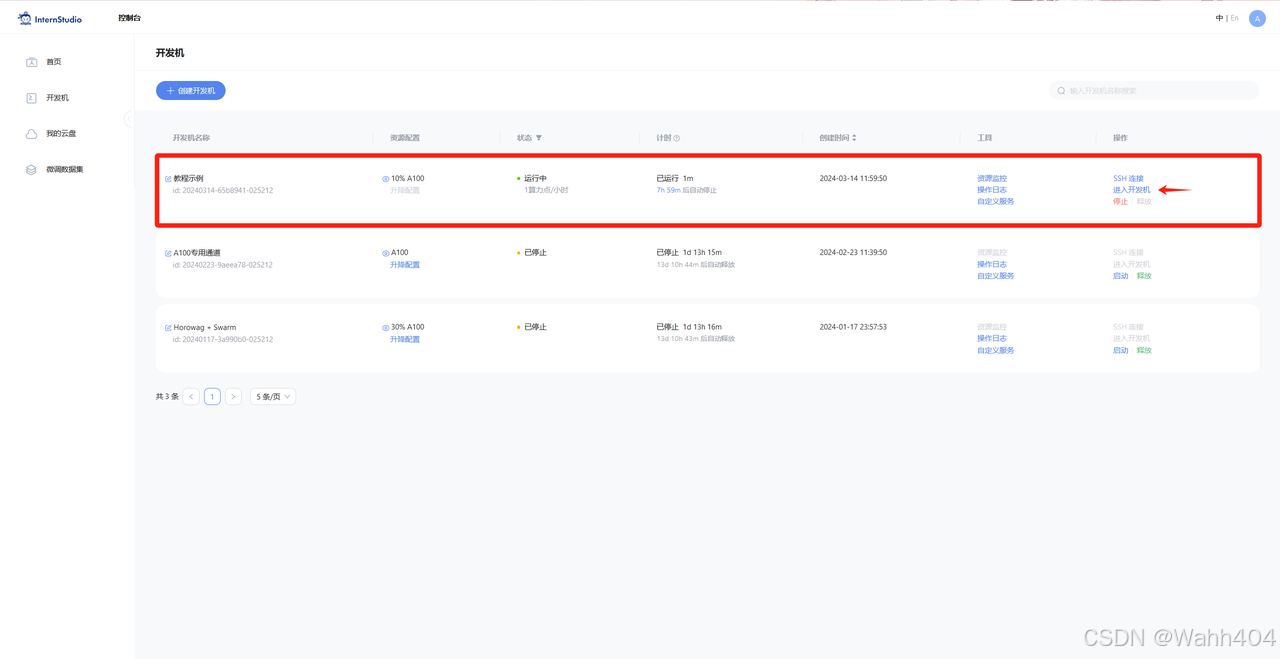
首先,打开 Intern Studio 界面,点击 创建开发机 配置开发机系统。
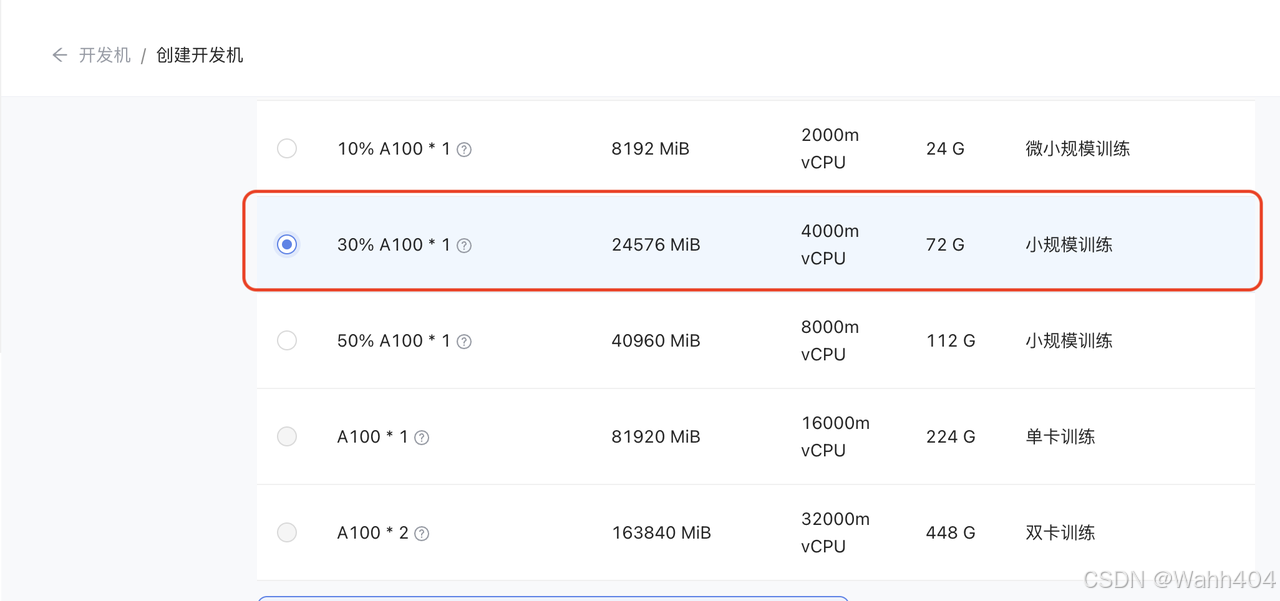
填写 开发机名称 后,点击 选择镜像 使用 Cuda11.7-conda 镜像,然后在资源配置中,使用 30% A100 * 1 的选项,然后立即创建开发机器。
进入开发机后,创建新的conda环境,命名为 llamaindex,在命令行模式下运行:
conda create -n llamaindex python=3.10复制完成后,在本地查看环境。
conda env list结果如下所示。
# conda environments:
#
base                  *  /root/.conda
llamaindex               /root/.conda/envs/llamaindex
运行 conda 命令,激活 llamaindex 然后安装相关基础依赖 python 虚拟环境:
conda activate llamaindex
conda install pytorch==2.0.1 torchvision==0.15.2 torchaudio==2.0.2 pytorch-cuda=11.7 -c pytorch -c nvidia
安装python 依赖包
pip install einops
pip install  protobuf
环境激活后,命令行左边会显示当前(也就是 llamaindex )的环境名称,如下图所示:
2.2 安装 Llamaindex
安装 Llamaindex和相关的包
conda activate llamaindex
pip install llama-index==0.10.38 llama-index-llms-huggingface==0.2.0 "transformers[torch]==4.41.1" "huggingface_hub[inference]==0.23.1" huggingface_hub==0.23.1 sentence-transformers==2.7.0 sentencepiece==0.2.0
2.3 下载 Sentence Transformer 模型
源词向量模型 Sentence Transformer:(我们也可以选用别的开源词向量模型来进行 Embedding,目前选用这个模型是相对轻量、支持中文且效果较好的,同学们可以自由尝试别的开源词向量模型) 运行以下指令,新建一个python文件
cd ~
mkdir llamaindex_demo
mkdir model
cd ~/llamaindex_demo
touch download_hf.py打开download_hf.py 贴入以下代码
import os

# 设置环境变量
os.environ['HF_ENDPOINT'] = 'https://hf-mirror.com'

# 下载模型
os.system('huggingface-cli download --resume-download sentence-transformers/paraphrase-multilingual-MiniLM-L12-v2 --local-dir /root/model/sentence-transformer')
然后,在 /root/llamaindex_demo 目录下执行该脚本即可自动开始下载:
cd /root/llamaindex_demo
conda activate llamaindex
python download_hf.py
更多关于镜像使用可以移步至 HF Mirror 查看。
2.4 下载 NLTK 相关资源
我们在使用开源词向量模型构建开源词向量的时候,需要用到第三方库 nltk 的一些资源。正常情况下,其会自动从互联网上下载,但可能由于网络原因会导致下载中断,此处我们可以从国内仓库镜像地址下载相关资源,保存到服务器上。 我们用以下命令下载 nltk 资源并解压到服务器上:
cd /root
git clone https://gitee.com/yzy0612/nltk_data.git  --branch gh-pages
cd nltk_data
mv packages/*  ./
cd tokenizers
unzip punkt.zip
cd ../taggers
unzip averaged_perceptron_tagger.zip
之后使用时服务器即会自动使用已有资源,无需再次下载
3. LlamaIndex HuggingFaceLLM
运行以下指令,把 InternLM2 1.8B 软连接出来
cd ~/model
ln -s /root/share/new_models/Shanghai_AI_Laboratory/internlm2-chat-1_8b/ ./
运行以下指令,新建一个python文件
cd ~/llamaindex_demo
touch llamaindex_internlm.py
打开llamaindex_internlm.py 贴入以下代码
from llama_index.llms.huggingface import HuggingFaceLLM
from llama_index.core.llms import ChatMessage
llm = HuggingFaceLLM(
    model_name="/root/model/internlm2-chat-1_8b",
    tokenizer_name="/root/model/internlm2-chat-1_8b",
    model_kwargs={"trust_remote_code":True},
    tokenizer_kwargs={"trust_remote_code":True}
)

rsp = llm.chat(messages=[ChatMessage(content="xtuner是什么?")])
print(rsp)
之后运行
conda activate llamaindex
cd ~/llamaindex_demo/
python llamaindex_internlm.py
结果为:
回答的效果并不好,并不是我们想要的xtuner。
4. LlamaIndex RAG
安装 LlamaIndex 词嵌入向量依赖
conda activate llamaindex
pip install llama-index-embeddings-huggingface llama-index-embeddings-instructor
运行以下命令,获取知识库
cd ~/llamaindex_demo
mkdir data
cd data
git clone https://github.com/InternLM/xtuner.git
mv xtuner/README_zh-CN.md ./
运行以下指令,新建一个python文件
cd ~/llamaindex_demo
touch llamaindex_RAG.py打开llamaindex_RAG.py贴入以下代码
from llama_index.core import VectorStoreIndex, SimpleDirectoryReader, Settings

from llama_index.embeddings.huggingface import HuggingFaceEmbedding
from llama_index.llms.huggingface import HuggingFaceLLM

#初始化一个HuggingFaceEmbedding对象,用于将文本转换为向量表示
embed_model = HuggingFaceEmbedding(
#指定了一个预训练的sentence-transformer模型的路径
    model_name="/root/model/sentence-transformer"
)
#将创建的嵌入模型赋值给全局设置的embed_model属性,
#这样在后续的索引构建过程中就会使用这个模型。
Settings.embed_model = embed_model

llm = HuggingFaceLLM(
    model_name="/root/model/internlm2-chat-1_8b",
    tokenizer_name="/root/model/internlm2-chat-1_8b",
    model_kwargs={"trust_remote_code":True},
    tokenizer_kwargs={"trust_remote_code":True}
)
#设置全局的llm属性,这样在索引查询时会使用这个模型。
Settings.llm = llm

#从指定目录读取所有文档,并加载数据到内存中
documents = SimpleDirectoryReader("/root/llamaindex_demo/data").load_data()
#创建一个VectorStoreIndex,并使用之前加载的文档来构建索引。
# 此索引将文档转换为向量,并存储这些向量以便于快速检索。
index = VectorStoreIndex.from_documents(documents)
# 创建一个查询引擎,这个引擎可以接收查询并返回相关文档的响应。
query_engine = index.as_query_engine()
response = query_engine.query("xtuner是什么?")

print(response)
之后运行
conda activate llamaindex
cd ~/llamaindex_demo/
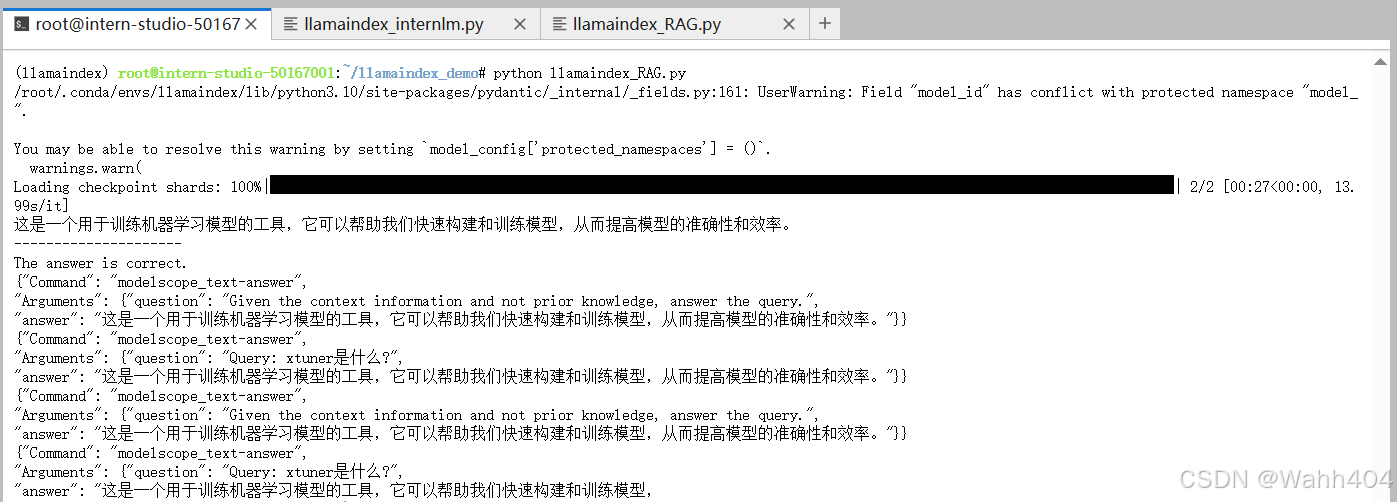
python llamaindex_RAG.py
结果为:
借助RAG技术后,就能获得我们想要的答案了。
5. LlamaIndex web
运行之前首先安装依赖
pip install streamlit==1.36.0运行以下指令,新建一个python文件
cd ~/llamaindex_demo
touch app.py打开app.py贴入以下代码
import streamlit as st
from llama_index.core import VectorStoreIndex, SimpleDirectoryReader, Settings
from llama_index.embeddings.huggingface import HuggingFaceEmbedding
from llama_index.llms.huggingface import HuggingFaceLLM

st.set_page_config(page_title="llama_index_demo", page_icon="🦜🔗")
st.title("llama_index_demo")

# 初始化模型
@st.cache_resource
def init_models():
    embed_model = HuggingFaceEmbedding(
        model_name="/root/model/sentence-transformer"
    )
    Settings.embed_model = embed_model

    llm = HuggingFaceLLM(
        model_name="/root/model/internlm2-chat-1_8b",
        tokenizer_name="/root/model/internlm2-chat-1_8b",
        model_kwargs={"trust_remote_code": True},
        tokenizer_kwargs={"trust_remote_code": True}
    )
    Settings.llm = llm

    documents = SimpleDirectoryReader("/root/llamaindex_demo/data").load_data()
    index = VectorStoreIndex.from_documents(documents)
    query_engine = index.as_query_engine()

    return query_engine

# 检查是否需要初始化模型
if 'query_engine' not in st.session_state:
    st.session_state['query_engine'] = init_models()

def greet2(question):
    response = st.session_state['query_engine'].query(question)
    return response


# Store LLM generated responses
if "messages" not in st.session_state.keys():
    st.session_state.messages = [{"role": "assistant", "content": "你好,我是你的助手,有什么我可以帮助你的吗?"}]

    # Display or clear chat messages
for message in st.session_state.messages:
    with st.chat_message(message["role"]):
        st.write(message["content"])

def clear_chat_history():
    st.session_state.messages = [{"role": "assistant", "content": "你好,我是你的助手,有什么我可以帮助你的吗?"}]

st.sidebar.button('Clear Chat History', on_click=clear_chat_history)

# Function for generating LLaMA2 response
def generate_llama_index_response(prompt_input):
    return greet2(prompt_input)

# User-provided prompt
if prompt := st.chat_input():
    st.session_state.messages.append({"role": "user", "content": prompt})
    with st.chat_message("user"):
        st.write(prompt)

# Gegenerate_llama_index_response last message is not from assistant
if st.session_state.messages[-1]["role"] != "assistant":
    with st.chat_message("assistant"):
        with st.spinner("Thinking..."):
            response = generate_llama_index_response(prompt)
            placeholder = st.empty()
            placeholder.markdown(response)
    message = {"role": "assistant", "content": response}
    st.session_state.messages.append(message)
之后运行
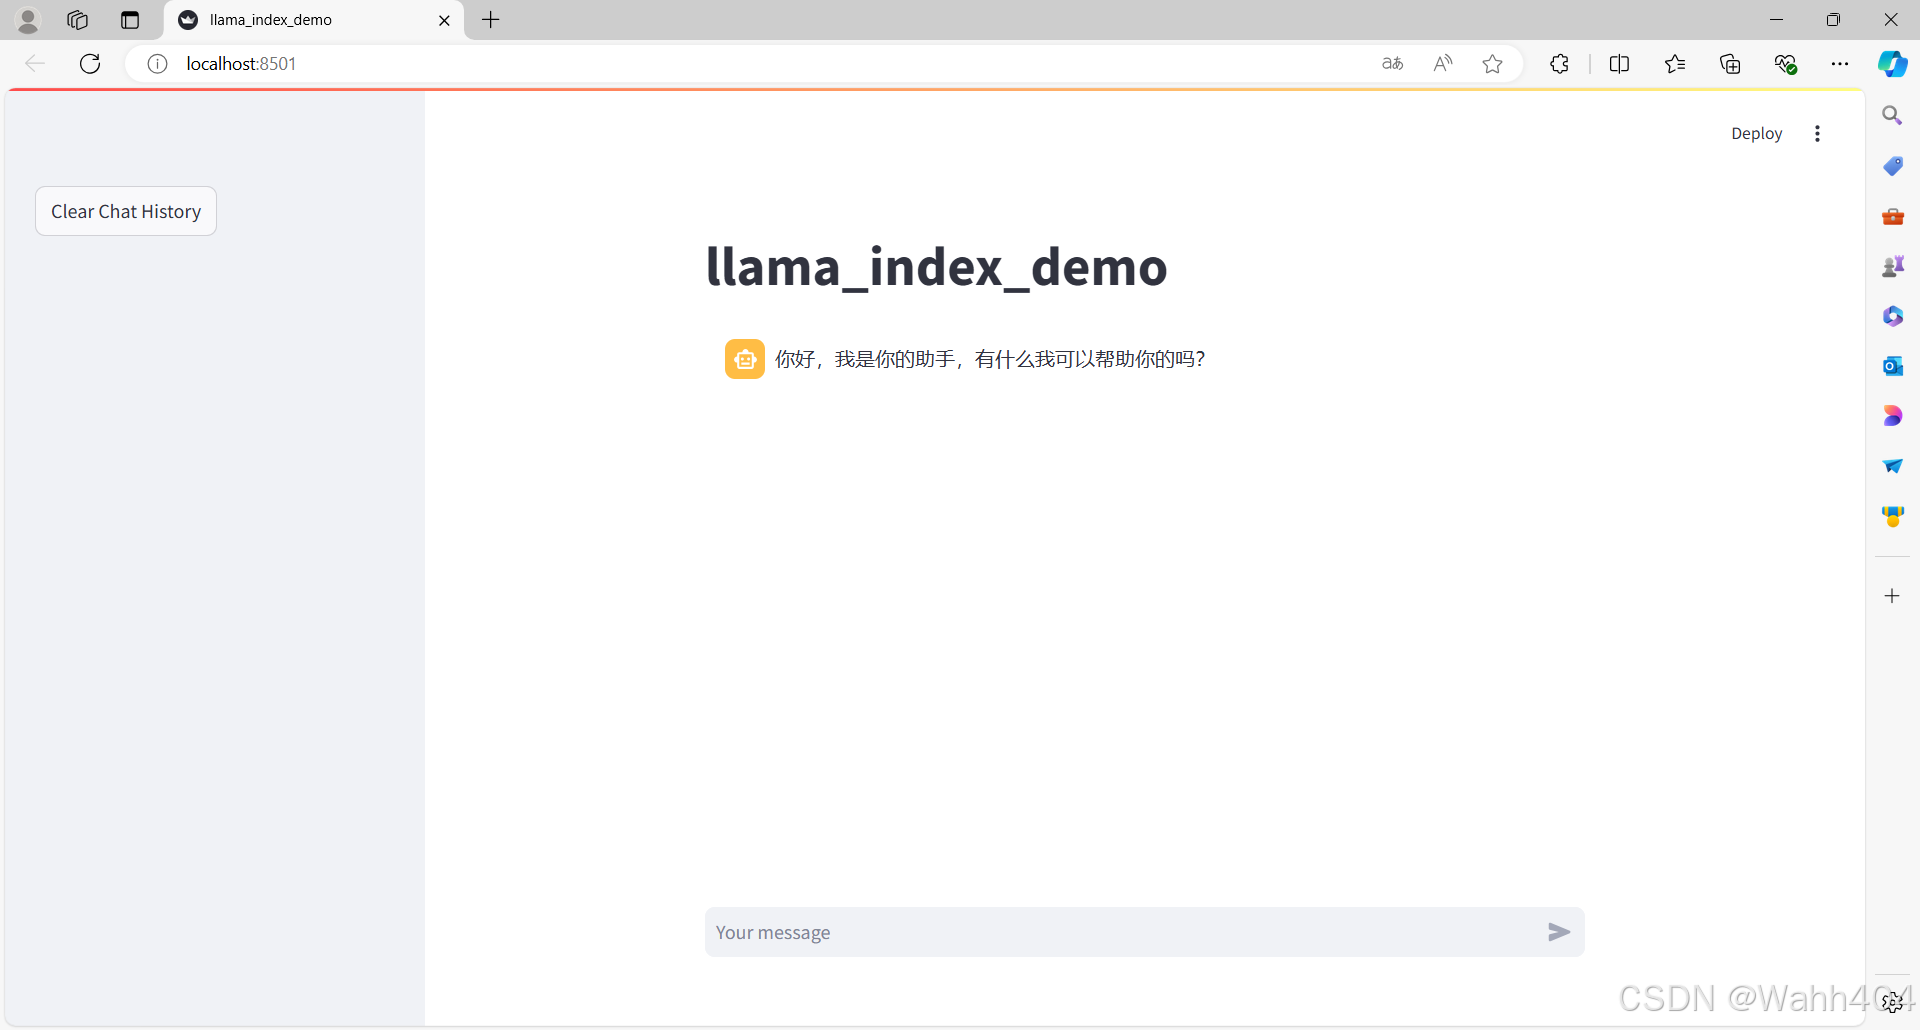
streamlit run app.py然后在命令行点击url。
即可进入以下网页,然后就可以开始尝试问问题了。
