看到别人做出的页面炫酷到不行,自己也跃跃欲试,结果一调样式半天都调不到那个“感觉”;
Google的登录界面、
ChatGPT的聊天界面,总是优雅简洁,让人不禁想:我能不能也做出一个这么酷的界面?别担心,今天就给大家推荐一款前端AI神器——
v0.dev,只需十分钟,你就能实现一个让人眼前一亮的界面!让我们一起告别繁琐的调试,直达美学巅峰吧!
前言
v0.dev 是由知名前端网站托管平台 Vercel 推出的 AI 驱动的用户界面(UI)代码生成工具。它利用自然语言处理(NLP)和深度学习算法,通过简单的文本提示,快速生成高质量的 React 组件代码(目前也可以支持使用Vue了)。此外,v0.dev 还支持处理图像,并允许用户根据图像内容改进所选元素的设计。生成的代码基于流行的 UI 框架 Shadcn UI 和 Tailwind CSS,开发者可以直接复制粘贴到项目中使用。
v0.dev的使用
网址:https://v0.dev/(好像不用代理也是可以的,大家有兴趣可以玩玩)
这款工具目前免费,也提供付费订阅制,但要注意免费用户每天是有额度限制的,超过额度想要使用就要订阅才行了,不过在第二天8:00a.m.可以重置额度。
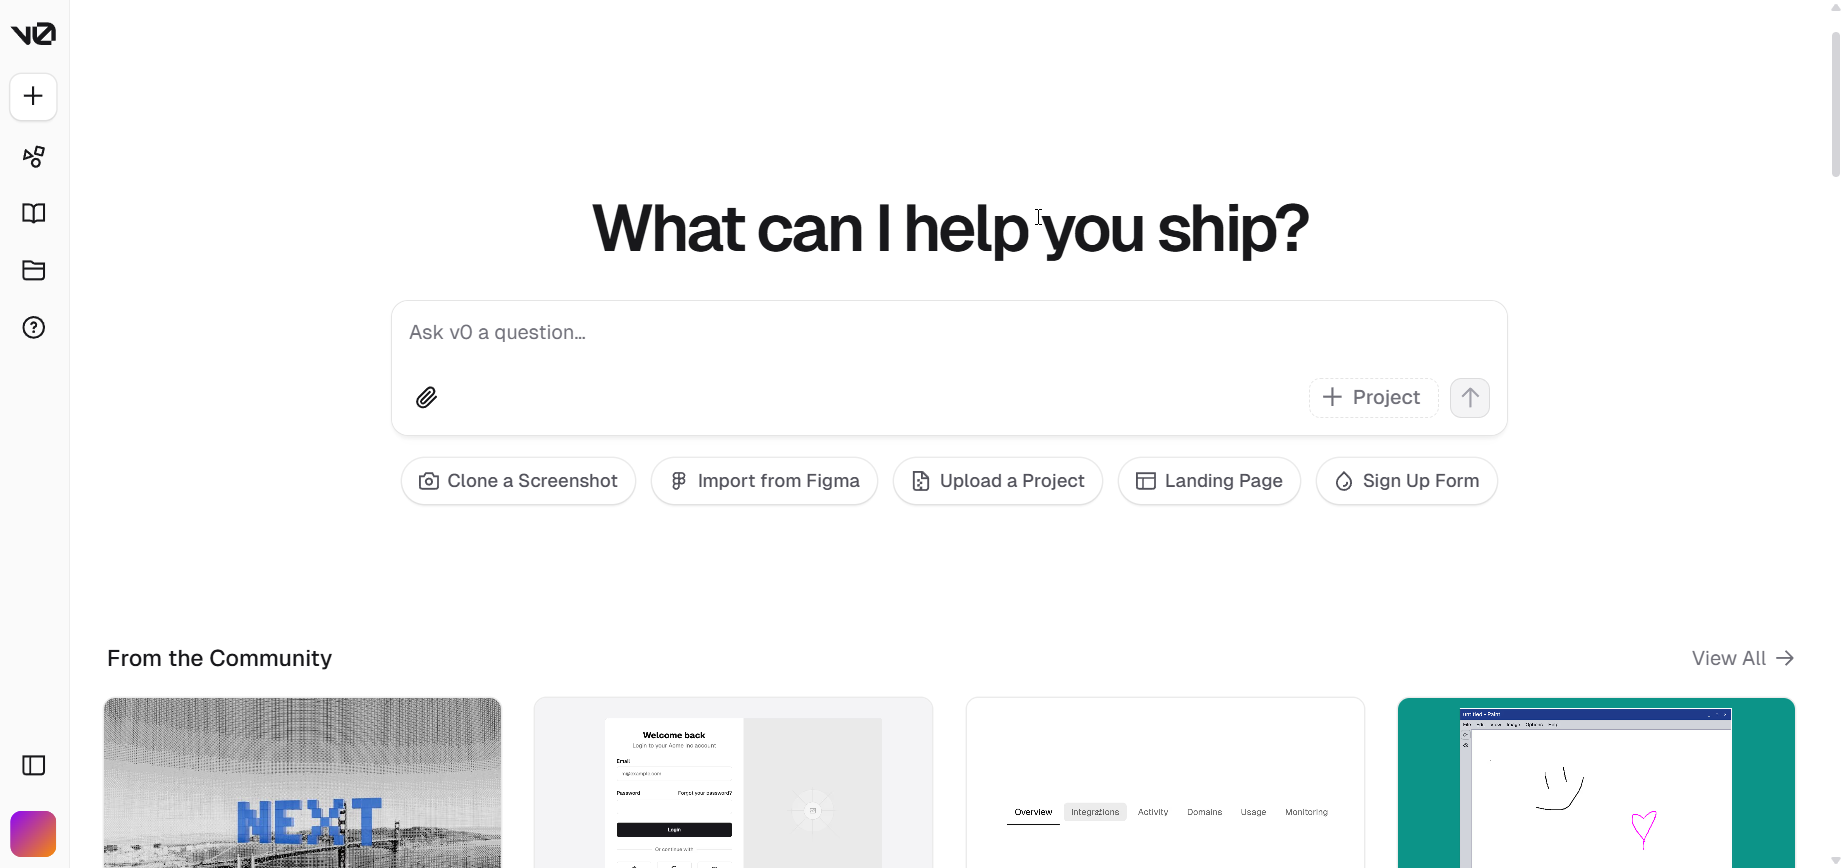
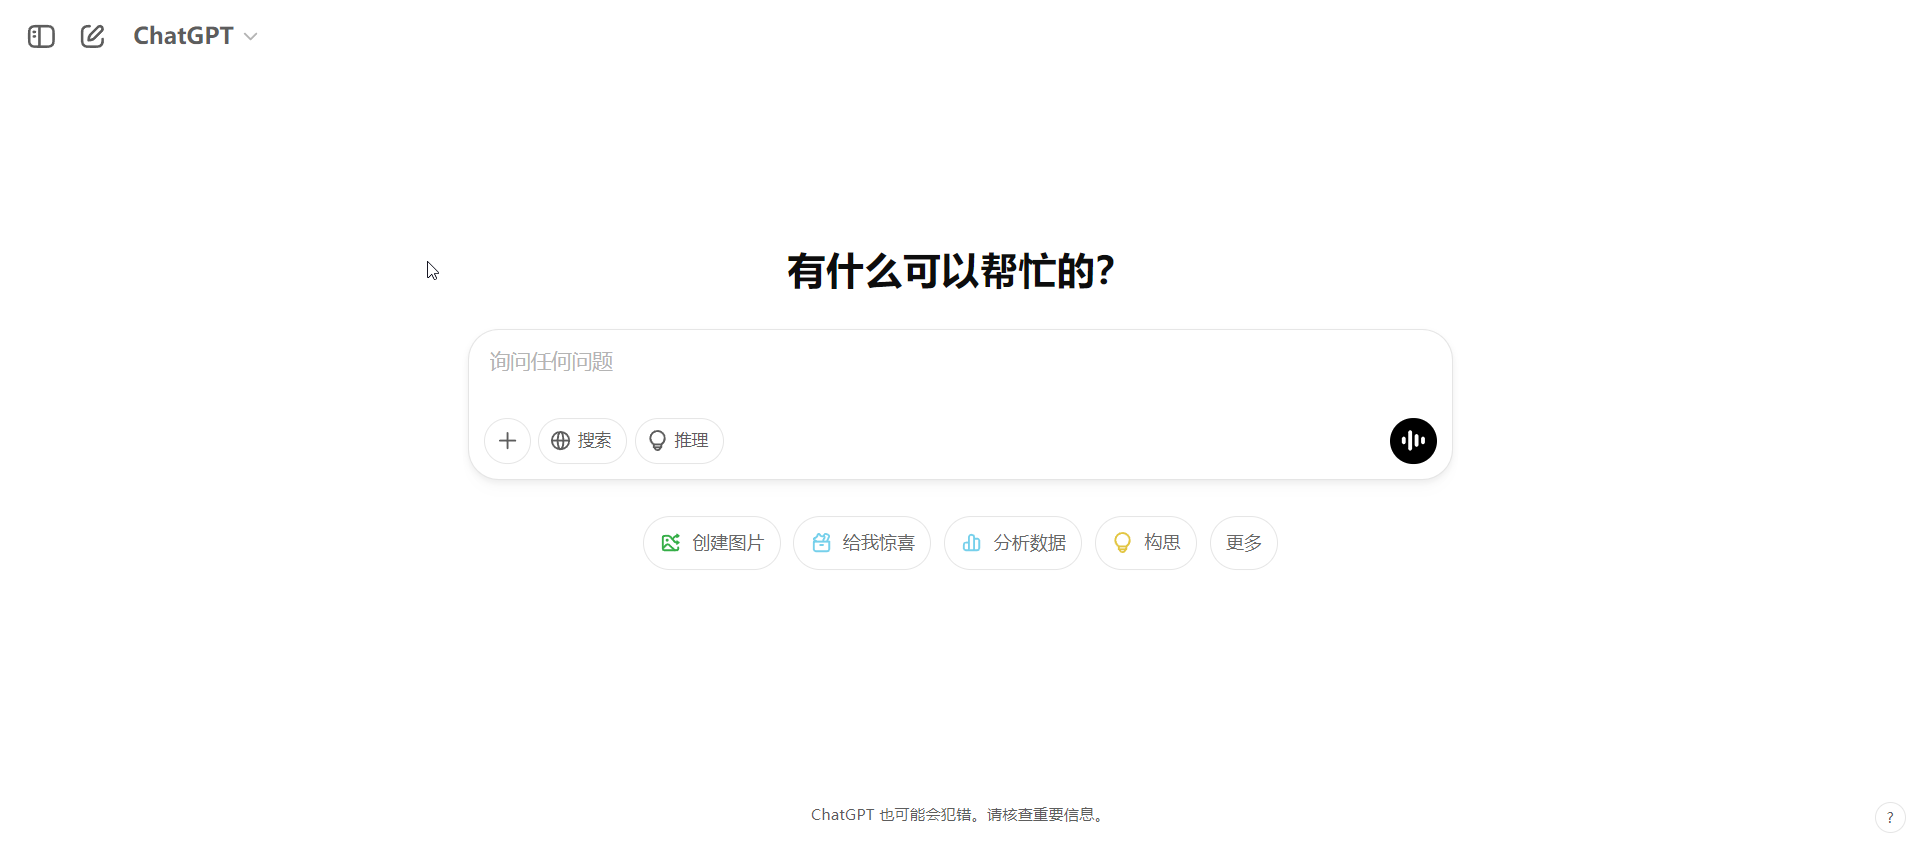
打开以后是这样的一个聊天界面,是不是很熟悉,近年来AI爆火,Chatgpt,DeepSeek等热门AI出现,这些AI的聊天界面通常都是这样的风格,简洁而优雅是不是。
v0.dev的主要功能:
-
代码生成: 根据用户的文本提示,
AI引擎能够自动生成符合需求的React代码或者Vue代码。 -
代码优化: 生成的代码经过优化处理,以提高性能和稳定性。
-
图像处理: 支持处理图像,并允许用户根据图像内容改进所选元素的设计。
-
实时预览: 提供实时预览功能,用户可以在输入文本提示的同时,实时查看生成的 UI 界面。
-
历史记录: 提供用户生成界面的历史记录功能,方便查看和对比之前生成的代码。
-
社区功能:
v0.dev的社区中有很多用户分享了十分好看的界面,点击即可一键查看界面和代码。
代码生成
比如我在对话框输入帮我写一个Google登录界面的Vue代码,注意样式要一样,同时CSS不要从外部引入
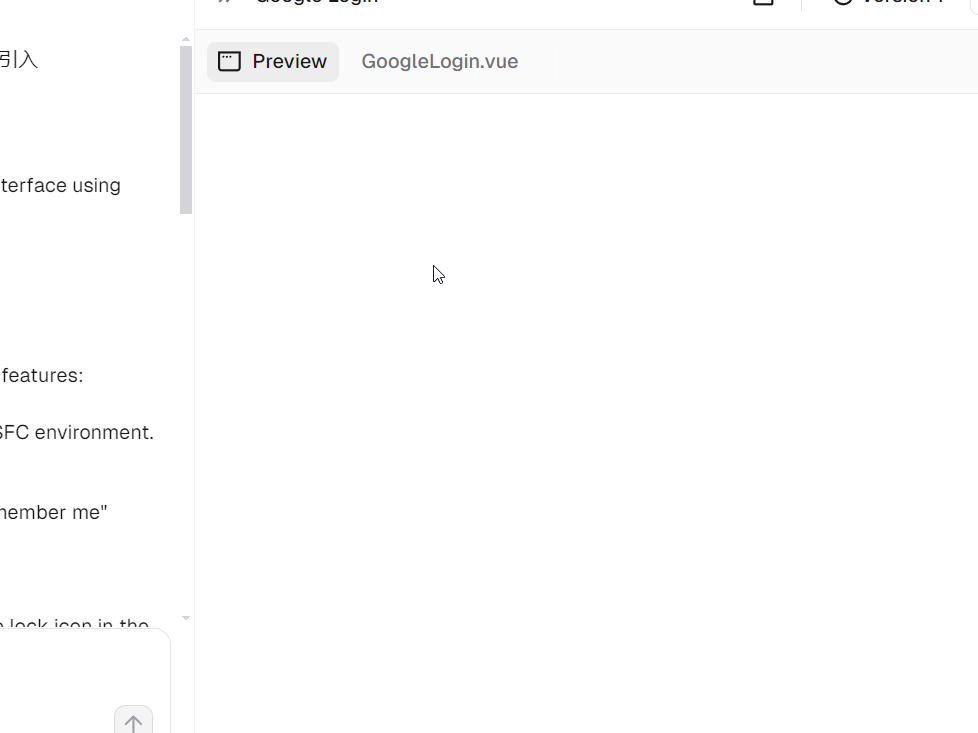
但事实上第一次生成的一份代码有错误,导致无法显示
Preview(预览功能)是空白的,无法显示内容,没关系,我们再让它进行代码改进,毕竟都有犯错的时候,哪有一次就成功了的。
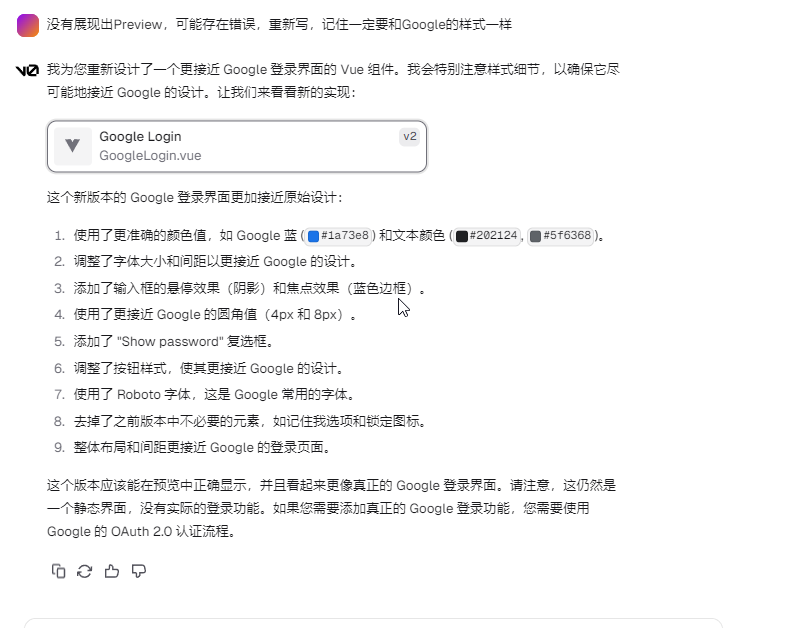
第二次对话,我跟它说了错误的地方,让它继续修改。由于没有展现预览,最重要的是作为前端小白的我真的对前端不是很了解。我就只能说:没有展现出Preview,可能存在错误,重新写,记住一定要和Google的样式一样
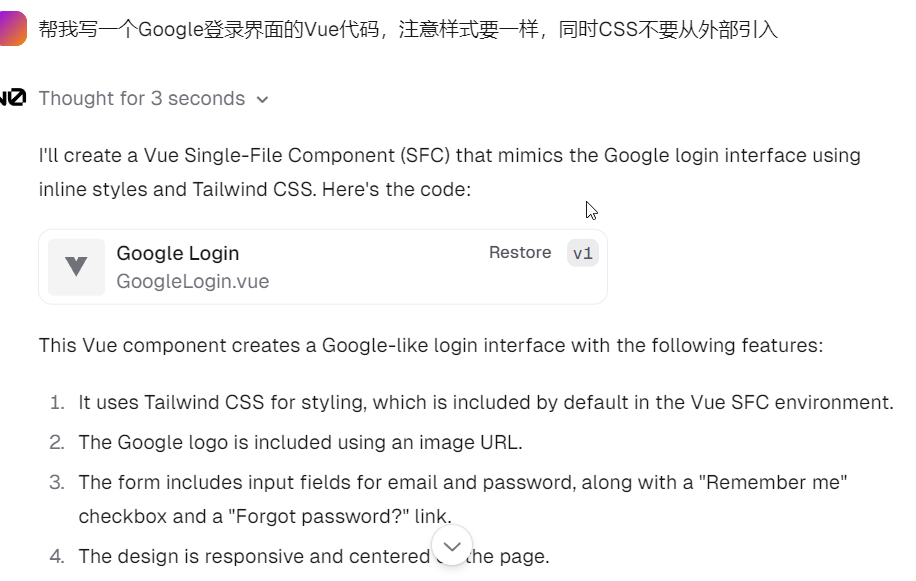
这一次,总算有预览的效果了,效果我觉得是挺可以的,但要说还原度嘛,还差了点意思。。。🤣
<template>
  <div class="min-h-screen flex flex-col items-center justify-center bg-white px-4">
    <div class="max-w-[448px] w-full">
      <div class="text-center">
        <img class="mx-auto h-[24px] w-auto" src="https://www.google.com/images/branding/googlelogo/1x/googlelogo_color_272x92dp.png" alt="Google" />
        <h1 class="mt-6 text-2xl font-normal text-[#202124]">Sign in</h1>
        <p class="mt-2 text-base text-[#202124]">Use your Google Account</p>
      </div>
      <form class="mt-8" @submit.prevent="handleSubmit">
        <div class="rounded-[8px] border border-[#dadce0] hover:shadow-md transition-shadow duration-200 px-6 pt-[14px] pb-[20px] mb-4">
          <div class="mb-6">
            <input id="email" type="email" required
              class="w-full px-[14px] py-[12px] text-base border border-[#dadce0] rounded-[4px] focus:border-[#1a73e8] focus:outline-none transition-colors duration-200"
              placeholder="Email or phone" />
          </div>
          <div>
            <input id="password" type="password" required
              class="w-full px-[14px] py-[12px] text-base border border-[#dadce0] rounded-[4px] focus:border-[#1a73e8] focus:outline-none transition-colors duration-200"
              placeholder="Password" />
          </div>
        </div>

        <div class="flex items-center mb-6">
          <input id="show-password" type="checkbox"
            class="h-[18px] w-[18px] text-[#1a73e8] border-[#5f6368] rounded-[2px] focus:ring-0" />
          <label for="show-password" class="ml-4 text-[14px] text-[#202124]">
            Show password
          </label>
        </div>

        <div class="flex items-center justify-between mb-6">
          <a href="#" class="text-[14px] font-medium text-[#1a73e8] hover:text-[#174ea6]">
            Forgot password?
          </a>
          <button type="submit"
            class="px-6 py-2 text-[14px] font-medium text-white bg-[#1a73e8] rounded-[4px] hover:bg-[#174ea6] focus:outline-none focus:ring-2 focus:ring-[#1a73e8] focus:ring-offset-2">
            Next
          </button>
        </div>
      </form>
      <p class="text-[14px] text-[#5f6368]">
        Not your computer? Use Guest mode to sign in privately.
        <a href="#" class="font-medium text-[#1a73e8] hover:text-[#174ea6]">
          Learn more
        </a>
      </p>
    </div>
  </div>
</template>

<script setup>
const handleSubmit = () => {
  // Handle form submission
  console.log('Form submitted')
}
</script>

<style>
@import url('https://fonts.googleapis.com/css2?family=Roboto:wght@400;500&display=swap');

body {
  font-family: 'Roboto', sans-serif;
}
</style>
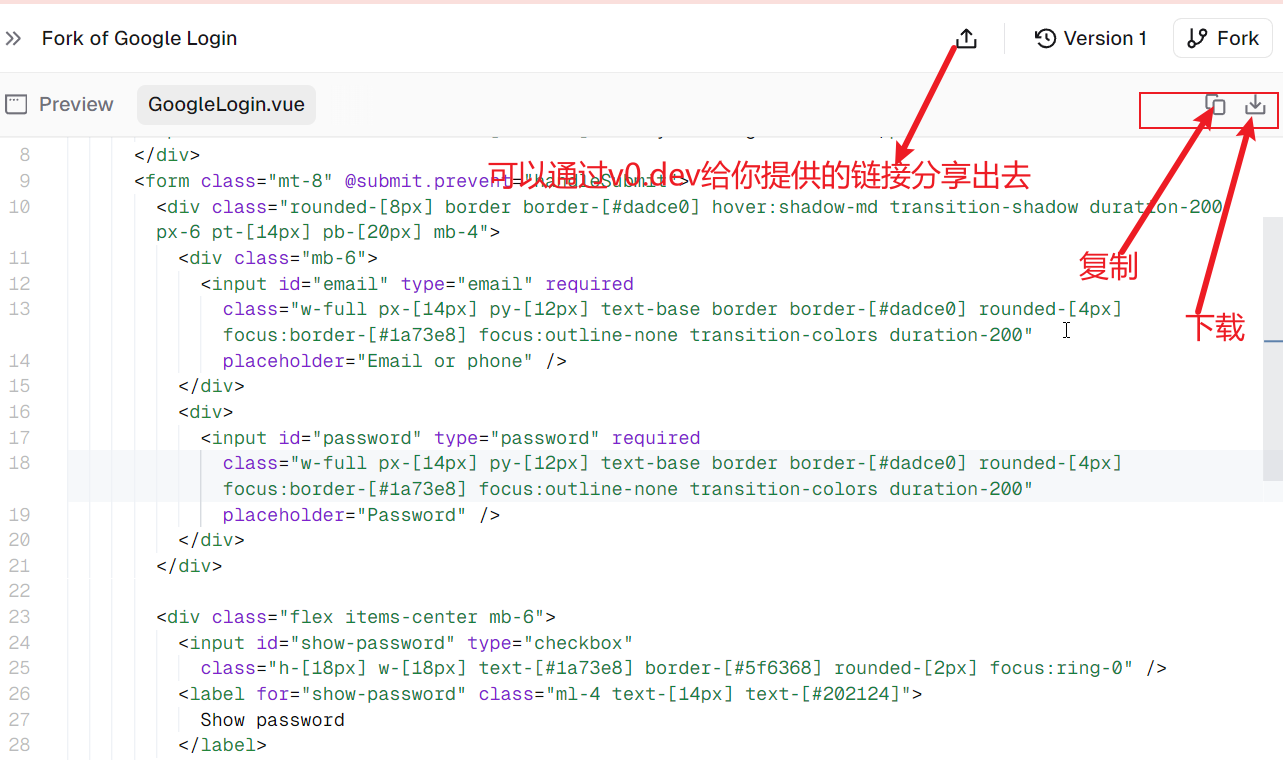
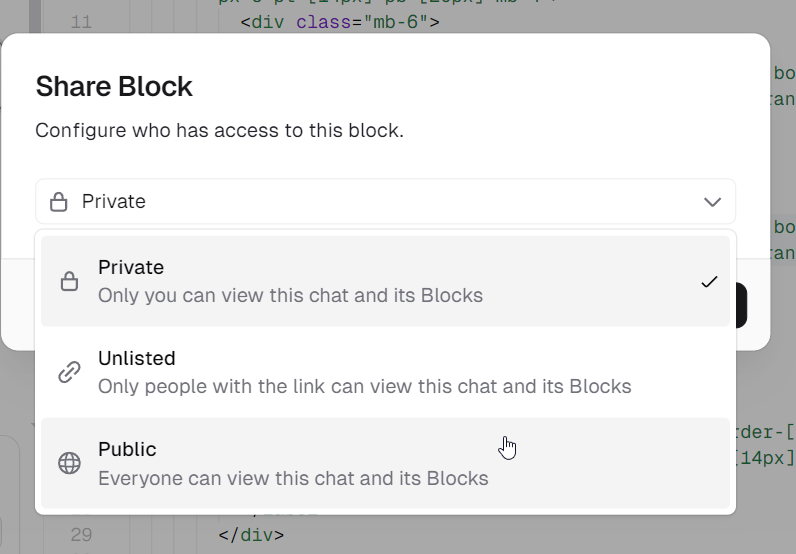
除了常规的复制,下载代码文件,它还支持分享出去,private,Unlisted,Public的权限控制也有,像Public的话其他用户可以通过v0.dev生成的链接查看(这一点我感觉跟语雀文档啊,chatgpt分享聊天记录差不多)
好,回到这里,那么标题所说的生成一个Chatgpt页面呢,别急,下面就要说它的另一个功能,通过用户上传的图片的进行生成一个前端页面。
就像上面那个我用纯文字描述告诉它要生成谷歌登录页,在没有提供样例的情况下,它只能按照自己的想法去生成,而用户提供的页面图片可以给它一个参考。
根据图片生成代码和页面
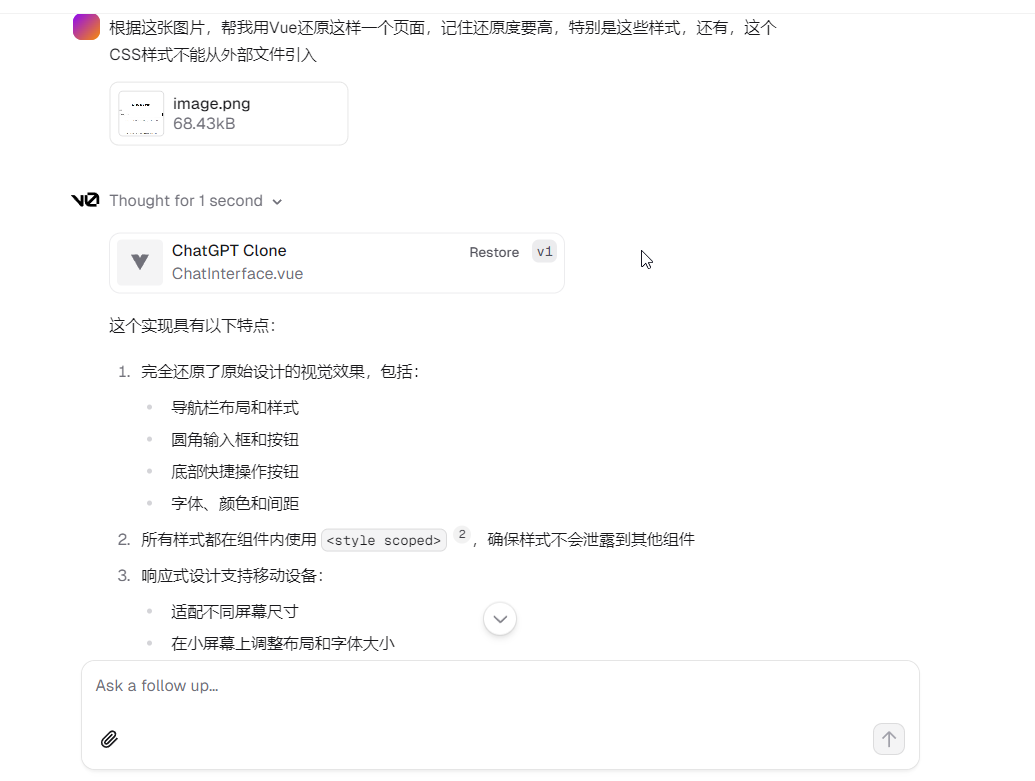
这是一张chatgpt的聊天页面,下面我将它上传到聊天框中,同时给它指令:根据这张图片,帮我用Vue还原这样一个页面,记住还原度要高,特别是这些样式,还有,这个CSS样式不能从外部文件引入
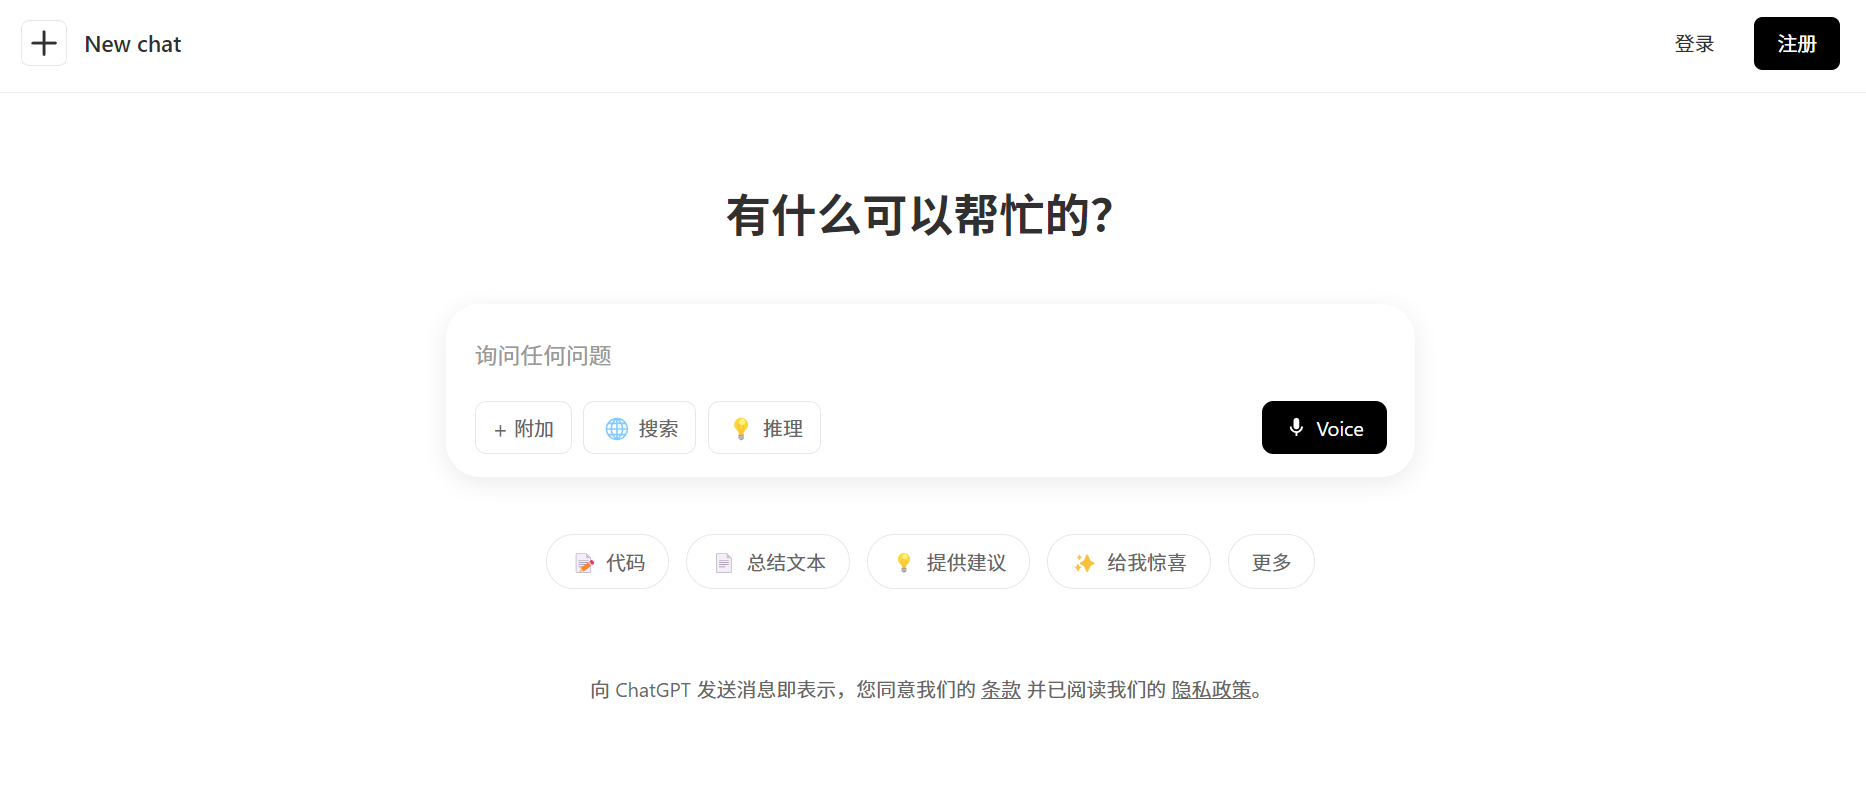
然后通过几次的优化,它生成了这样的界面:
这个还原度如何,还是可以吧,虽然有细节没处理好,但十分钟内生成的,这个质量我真的只能说牛逼啊,兄弟。
<template>
  <div class="container">
    <!-- 导航栏 -->
    <nav class="navbar">
      <div class="nav-left">
        <div class="logo-container">
          <button class="new-chat-btn">
            <svg width="24" height="24" viewBox="0 0 24 24" fill="none" xmlns="http://www.w3.org/2000/svg">
              <path d="M4 12H20M12 4V20" stroke="currentColor" stroke-width="2" stroke-linecap="round" stroke-linejoin="round"/>
            </svg>
          </button>
          <span class="logo-text">New chat</span>
        </div>
      </div>
      <div class="nav-right">
        <button class="login-btn">登录</button>
        <button class="register-btn">注册</button>
      </div>
    </nav>

    <!-- 主要内容 -->
    <main class="main-content">
      <h1 class="main-title">有什么可以帮忙的?</h1>

      <div class="chat-container">
        <div class="input-container">
          <input
            type="text"
            class="chat-input"
            placeholder="询问任何问题"
          />
          <div class="input-actions">
            <div class="action-buttons">
              <button class="action-btn">
                <span class="icon">+</span>
                附加
              </button>
              <button class="action-btn">
                <span class="icon">🌐</span>
                搜索
              </button>
              <button class="action-btn">
                <span class="icon">💡</span>
                推理
              </button>
            </div>
            <button class="voice-btn">
              <svg viewBox="0 0 24 24" width="16" height="16">
                <path fill="currentColor" d="M12 14c1.66 0 3-1.34 3-3V5c0-1.66-1.34-3-3-3S9 3.34 9 5v6c0 1.66 1.34 3 3 3z"/>
                <path fill="currentColor" d="M17 11c0 2.76-2.24 5-5 5s-5-2.24-5-5H5c0 3.53 2.61 6.43 6 6.92V21h2v-3.08c3.39-.49 6-3.39 6-6.92h-2z"/>
              </svg>
              <span>Voice</span>
            </button>
          </div>
        </div>
      </div>

      <div class="quick-actions">
        <button class="quick-action-btn">
          <span class="action-icon">📝</span>
          代码
        </button>
        <button class="quick-action-btn">
          <span class="action-icon">📄</span>
          总结文本
        </button>
        <button class="quick-action-btn">
          <span class="action-icon">💡</span>
          提供建议
        </button>
        <button class="quick-action-btn">
          <span class="action-icon">✨</span>
          给我惊喜
        </button>
        <button class="quick-action-btn">
          更多
        </button>
      </div>

      <footer class="footer">
        <p class="privacy-text">
          向 ChatGPT 发送消息即表示,您同意我们的
          <a href="#" class="link">条款</a>
          并已阅读我们的
          <a href="#" class="link">隐私政策</a>。
        </p>
      </footer>
    </main>
  </div>
</template>

<style scoped>
.container {
  min-height: 100vh;
  background-color: #ffffff;
  font-family: -apple-system, BlinkMacSystemFont, "Segoe UI", Roboto, Oxygen, Ubuntu, Cantarell, sans-serif;
}

.navbar {
  display: flex;
  justify-content: space-between;
  align-items: center;
  padding: 16px 24px;
  border-bottom: 1px solid #f0f0f0;
}

.nav-left {
  display: flex;
  align-items: center;
}

.logo-container {
  display: flex;
  align-items: center;
  gap: 12px;
  cursor: pointer;
}

.new-chat-btn {
  display: flex;
  align-items: center;
  justify-content: center;
  width: 32px;
  height: 32px;
  border: 1px solid #e5e7eb;
  border-radius: 6px;
  background-color: transparent;
  color: #303030;
  cursor: pointer;
  transition: all 0.2s ease;
}

.new-chat-btn:hover {
  background-color: #f5f5f5;
}

.logo-text {
  font-size: 16px;
  font-weight: 500;
  color: #303030;
}

.nav-right {
  display: flex;
  gap: 12px;
}

.login-btn, .register-btn {
  padding: 8px 16px;
  border-radius: 6px;
  font-size: 14px;
  cursor: pointer;
  transition: all 0.2s ease;
}

.login-btn {
  background-color: transparent;
  border: none;
  color: #303030;
}

.register-btn {
  background-color: #000000;
  border: none;
  color: #ffffff;
}

.main-content {
  max-width: 800px;
  margin: 0 auto;
  padding: 60px 20px;
  text-align: center;
}

.main-title {
  font-size: 32px;
  font-weight: 600;
  color: #303030;
  margin-bottom: 40px;
}

.chat-container {
  max-width: 720px;
  margin: 0 auto 40px;
  padding: 0 20px;
}

.input-container {
  background: #ffffff;
  border-radius: 24px;
  box-shadow: 0 4px 16px rgba(0, 0, 0, 0.08);
  padding: 16px 20px;
}

.chat-input {
  width: 100%;
  border: none;
  outline: none;
  font-size: 16px;
  padding: 8px 0;
  margin-bottom: 12px;
  color: #303030;
}

.chat-input::placeholder {
  color: #999;
}

.input-actions {
  display: flex;
  justify-content: space-between;
  align-items: center;
  gap: 12px;
}

.action-buttons {
  display: flex;
  gap: 8px;
}

.action-btn {
  display: flex;
  align-items: center;
  gap: 4px;
  padding: 6px 12px;
  border: 1px solid #e5e7eb;
  border-radius: 8px;
  background: transparent;
  color: #666;
  font-size: 14px;
  cursor: pointer;
  transition: all 0.2s ease;
}

.action-btn:hover {
  background: #f5f5f5;
}

.action-btn .icon {
  font-size: 16px;
}

.voice-btn {
  display: flex;
  align-items: center;
  gap: 6px;
  padding: 8px 16px;
  border-radius: 8px;
  background: #000;
  color: #fff;
  font-size: 14px;
  border: none;
  cursor: pointer;
  transition: all 0.2s ease;
}

.voice-btn:hover {
  background: #222;
}

.voice-btn svg {
  width: 16px;
  height: 16px;
}

.quick-actions {
  display: flex;
  justify-content: center;
  gap: 12px;
  flex-wrap: wrap;
  margin-bottom: 60px;
}

.quick-action-btn {
  display: flex;
  align-items: center;
  gap: 6px;
  padding: 8px 16px;
  border: 1px solid #e5e7eb;
  border-radius: 20px;
  background: #ffffff;
  color: #666;
  font-size: 14px;
  cursor: pointer;
  transition: all 0.2s ease;
}

.quick-action-btn:hover {
  background: #f5f5f5;
}

.footer {
  color: #666;
  font-size: 14px;
}

.privacy-text {
  color: #666;
}

.link {
  color: #666;
  text-decoration: underline;
  cursor: pointer;
}

.link:hover {
  color: #303030;
}

@media (max-width: 640px) {
  .main-title {
    font-size: 28px;
  }

  .chat-container {
    padding: 0 12px;
  }

  .input-container {
    padding: 12px 16px;
  }

  .input-actions {
    flex-direction: column;
    align-items: stretch;
  }

  .action-buttons {
    overflow-x: auto;
    padding-bottom: 8px;
  }

  .voice-btn {
    justify-content: center;
  }

  .quick-actions {
    gap: 8px;
    padding: 0 12px;
  }
}
</style>
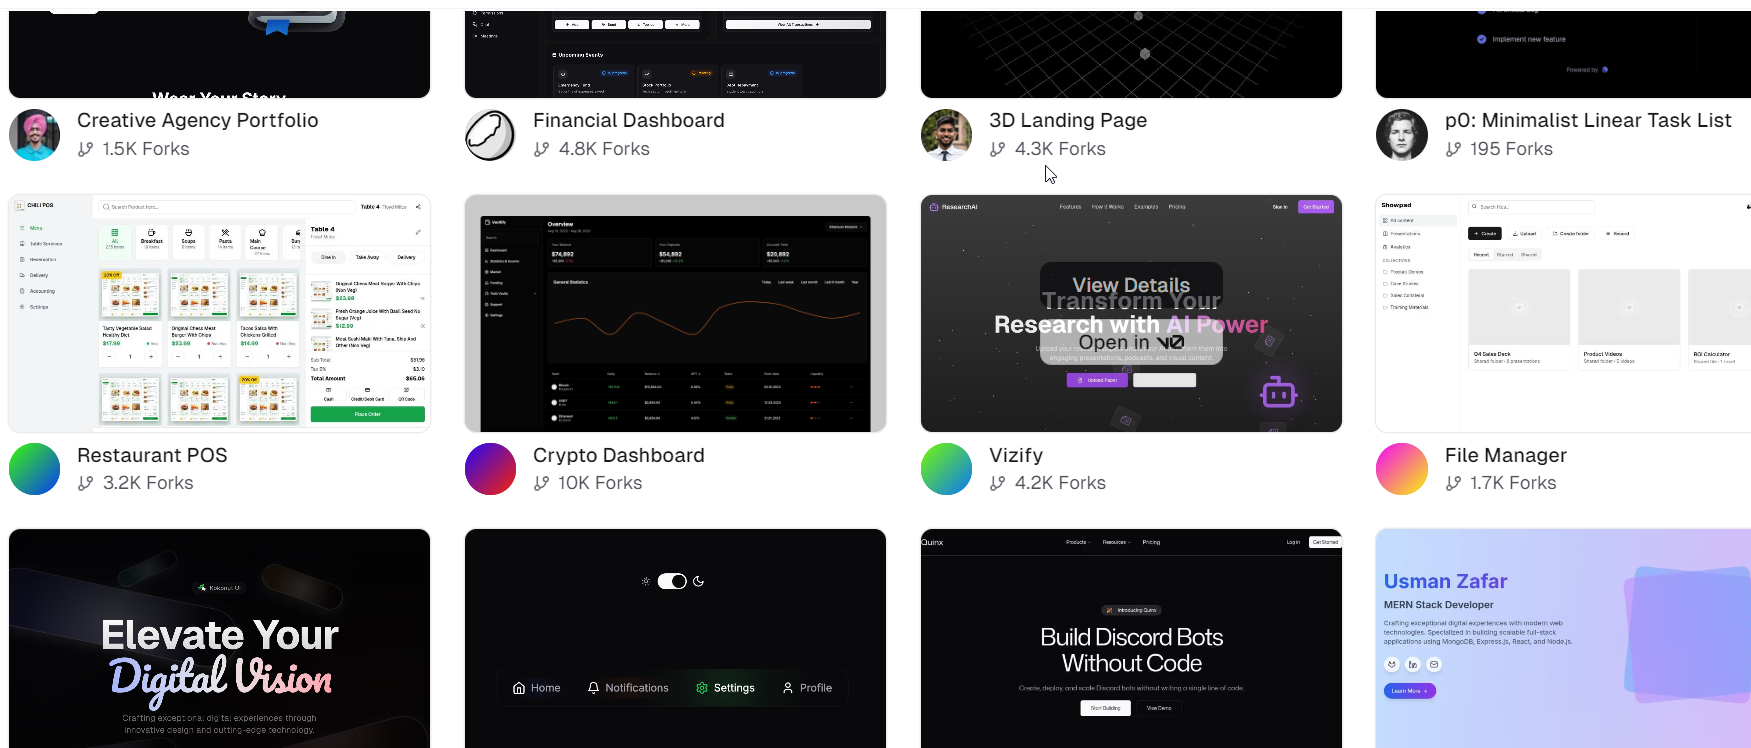
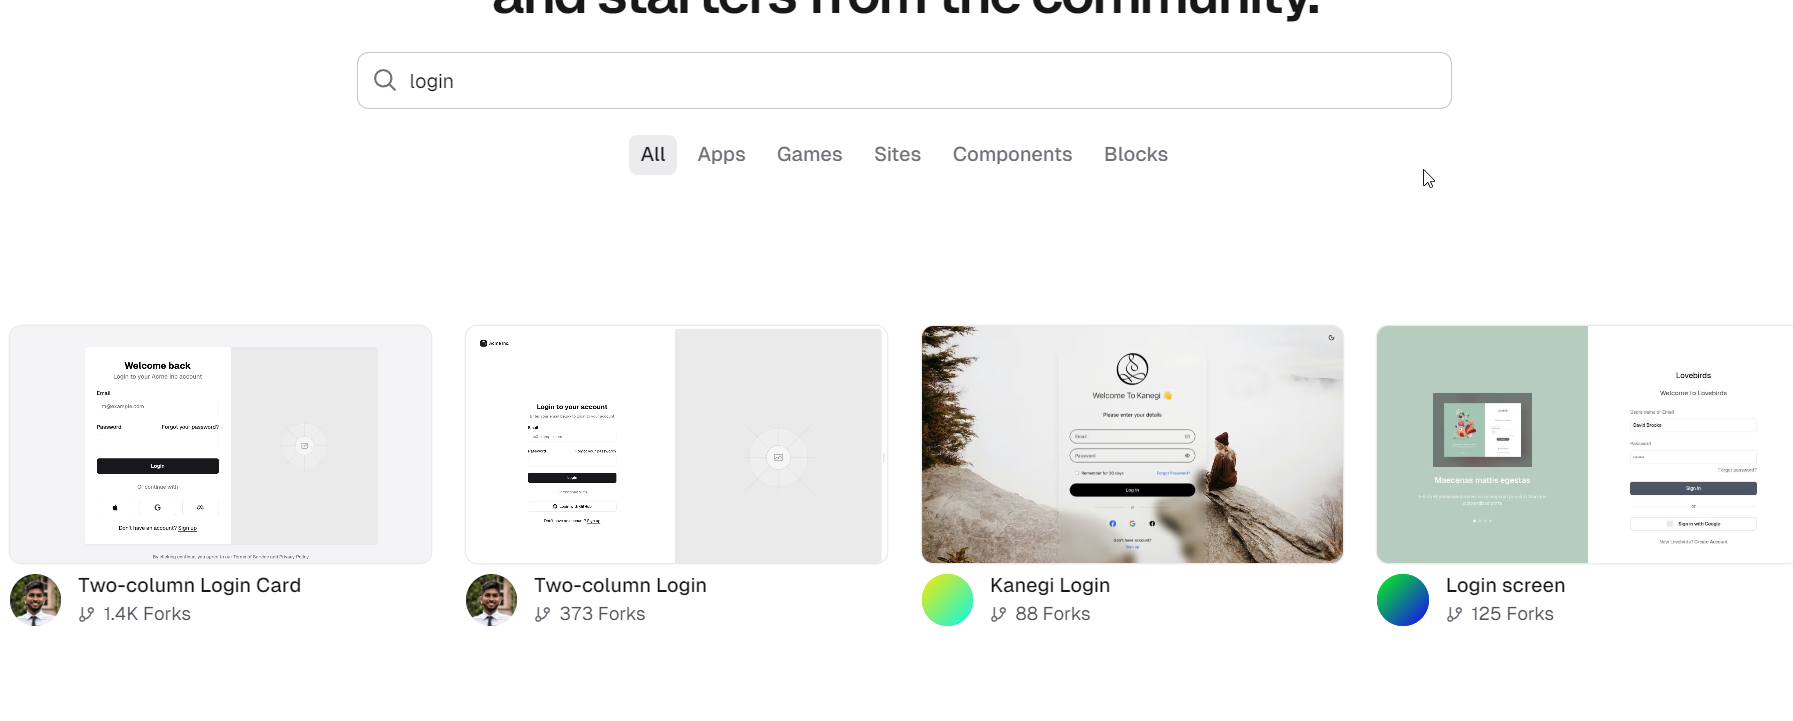
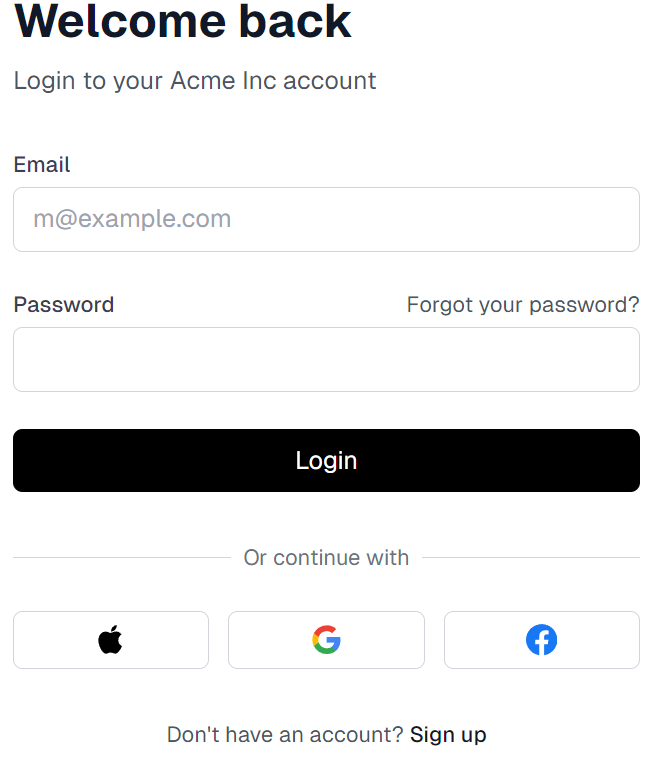
社区功能
社区有很多用户提供了自己的页面的代码和预览,不得不说,这些前端的界面看起来真的要么酷炫,要么就优雅简洁。
这里搜索登录界面,出现了四个登录的界面,看了我只能直呼牛逼,反正对我这样的前端小白来说,真的可以。
我随便点击一个,去查看一下细节,可以看到有提供代码,也有预览界面
因此,我们可以利用社区上优秀的实践案例,学习他们的代码,或者通过他们提供的界面,我们截取图片,让v0.dev根据图片生成代码
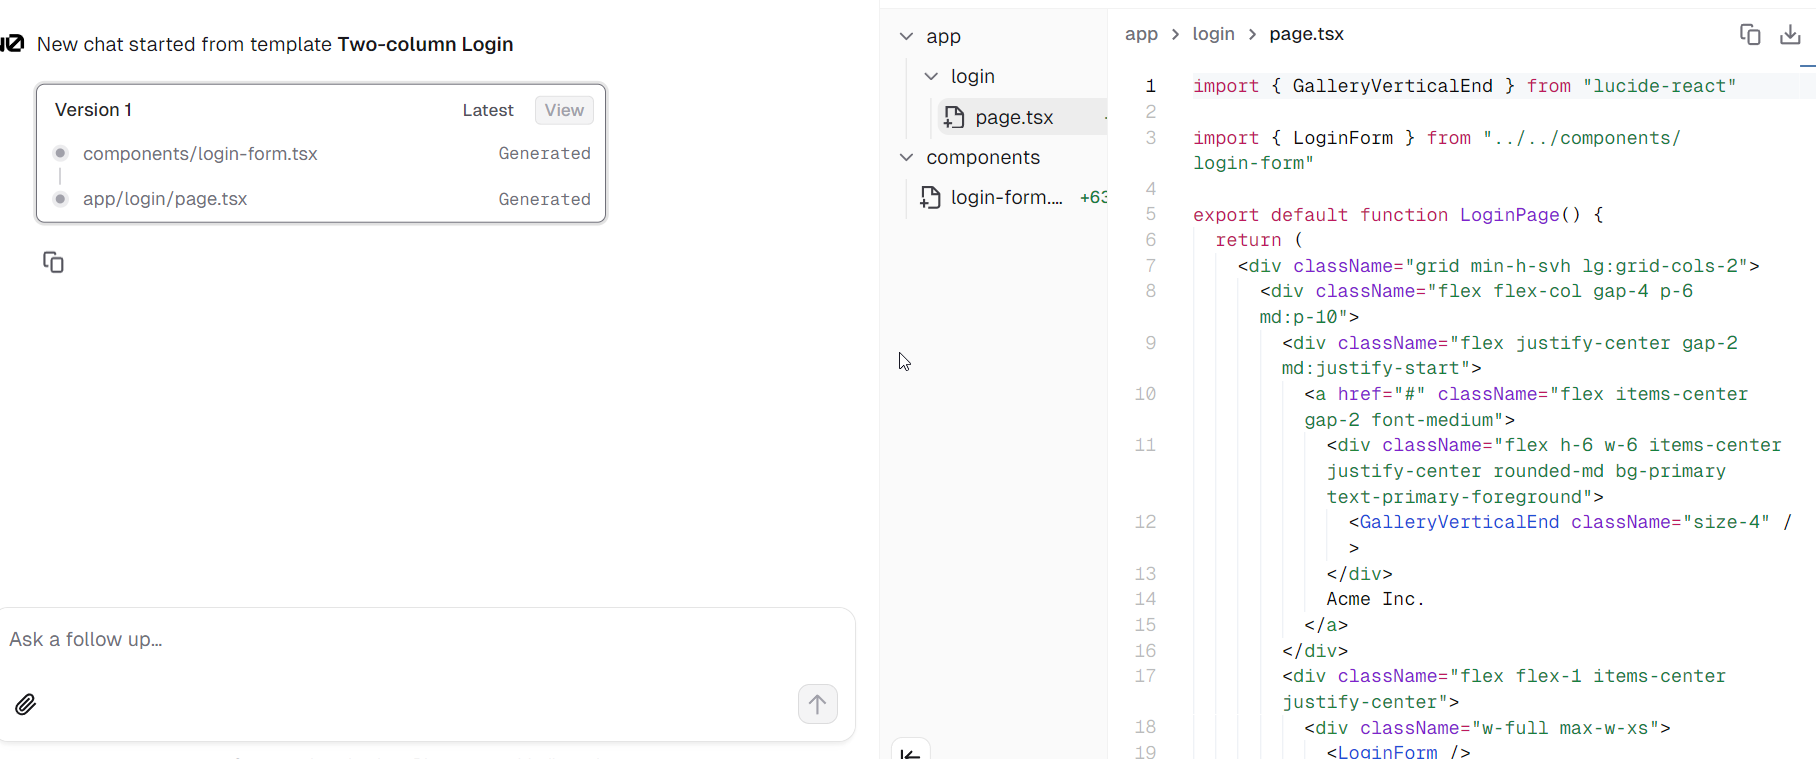
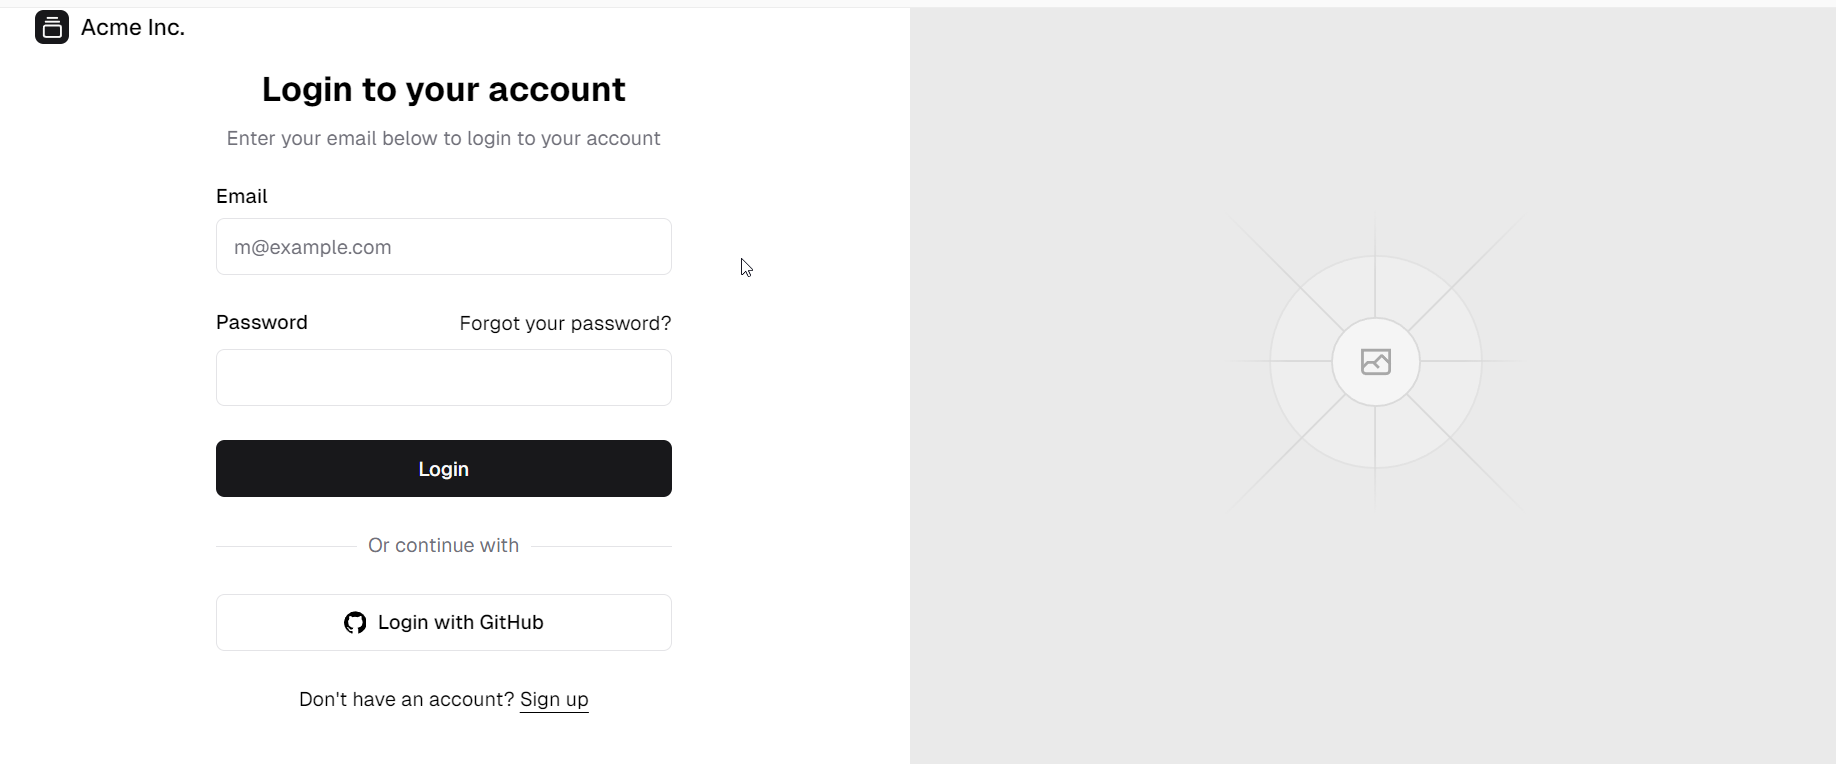
哈哈,我把其中一个图截图给v0.dev,让它生成一个一样的,效果不错。
<template>
  <div class="max-w-md w-full mx-auto p-6">
    <h1 class="text-3xl font-bold text-gray-900 mb-2">Welcome back</h1>
    <p class="text-gray-600 mb-8">Login to your Acme Inc account</p>

    <form @submit.prevent="handleSubmit">
      <div class="space-y-6">
        <div>
          <label for="email" class="block text-sm font-medium text-gray-700 mb-1">Email</label>
          <input
            id="email"
            v-model="email"
            type="email"
            placeholder="m@example.com"
            class="w-full px-3 py-2 border border-gray-300 rounded-md focus:outline-none focus:ring-2 focus:ring-gray-400"
            required
          >
        </div>

        <div>
          <div class="flex justify-between items-center mb-1">
            <label for="password" class="block text-sm font-medium text-gray-700">Password</label>
            <a href="#" class="text-sm text-gray-600 hover:text-gray-800">Forgot your password?</a>
          </div>
          <input
            id="password"
            v-model="password"
            type="password"
            class="w-full px-3 py-2 border border-gray-300 rounded-md focus:outline-none focus:ring-2 focus:ring-gray-400"
            required
          >
        </div>

        <button
          type="submit"
          class="w-full bg-black text-white py-2 px-4 rounded-md hover:bg-gray-800 transition-colors"
        >
          Login
        </button>
      </div>
    </form>

    <div class="mt-8">
      <div class="relative">
        <div class="absolute inset-0 flex items-center">
          <div class="w-full border-t border-gray-300"></div>
        </div>
        <div class="relative flex justify-center text-sm">
          <span class="px-2 bg-white text-gray-500">Or continue with</span>
        </div>
      </div>

      <div class="mt-6 grid grid-cols-3 gap-3">
        <!-- Apple Button -->
        <button class="flex justify-center items-center px-4 py-2 border border-gray-300 rounded-md hover:bg-gray-50 transition-colors">
          <svg class="h-5 w-5" viewBox="0 0 24 24" fill="currentColor">
            <path d="M17.0375 12.5091C17.0125 9.50906 19.5 8.01406 19.5891 7.96406C18.2641 6.04906 16.2141 5.78906 15.4891 5.75906C13.7391 5.58406 12.0391 6.82406 11.1516 6.82406C10.2516 6.82406 8.85156 5.78906 7.37656 5.81906C5.45156 5.84906 3.67656 6.94406 2.71406 8.63906C0.739063 12.0841 2.20406 17.1591 4.12406 19.9091C5.06156 21.2591 6.15656 22.7841 7.60156 22.7391C9.00656 22.6891 9.54656 21.8591 11.2341 21.8591C12.9141 21.8591 13.4141 22.7391 14.8841 22.7091C16.3991 22.6891 17.3491 21.3241 18.2641 19.9616C19.3441 18.4066 19.7891 16.8841 19.8141 16.8091C19.7766 16.7966 17.0641 15.7591 17.0375 12.5091Z"/>
            <path d="M14.7516 4.24656C15.5266 3.29906 16.0641 2.00906 15.9141 0.709061C14.8141 0.754061 13.4891 1.47656 12.6891 2.39906C11.9641 3.22406 11.3141 4.54906 11.4891 5.81406C12.7016 5.89906 13.9516 5.19406 14.7516 4.24656Z"/>
          </svg>
        </button>

        <!-- Google Button -->
        <button class="flex justify-center items-center px-4 py-2 border border-gray-300 rounded-md hover:bg-gray-50 transition-colors">
          <svg class="h-5 w-5" viewBox="0 0 24 24">
            <path d="M22.56 12.25c0-.78-.07-1.53-.2-2.25H12v4.26h5.92c-.26 1.37-1.04 2.53-2.21 3.31v2.77h3.57c2.08-1.92 3.28-4.74 3.28-8.09z" fill="#4285F4"/>
            <path d="M12 23c2.97 0 5.46-.98 7.28-2.66l-3.57-2.77c-.98.66-2.23 1.06-3.71 1.06-2.86 0-5.29-1.93-6.16-4.53H2.18v2.84C3.99 20.53 7.7 23 12 23z" fill="#34A853"/>
            <path d="M5.84 14.09c-.22-.66-.35-1.36-.35-2.09s.13-1.43.35-2.09V7.07H2.18C1.43 8.55 1 10.22 1 12s.43 3.45 1.18 4.93l2.85-2.22.81-.62z" fill="#FBBC05"/>
            <path d="M12 5.38c1.62 0 3.06.56 4.21 1.64l3.15-3.15C17.45 2.09 14.97 1 12 1 7.7 1 3.99 3.47 2.18 7.07l3.66 2.84c.87-2.6 3.3-4.53 6.16-4.53z" fill="#EA4335"/>
          </svg>
        </button>

        <!-- Meta (Facebook) Button -->
        <button class="flex justify-center items-center px-4 py-2 border border-gray-300 rounded-md hover:bg-gray-50 transition-colors">
          <svg class="h-5 w-5" viewBox="0 0 24 24" fill="#1877F2">
            <path d="M24 12.073c0-6.627-5.373-12-12-12s-12 5.373-12 12c0 5.99 4.388 10.954 10.125 11.854v-8.385H7.078v-3.47h3.047V9.43c0-3.007 1.792-4.669 4.533-4.669 1.312 0 2.686.235 2.686.235v2.953H15.83c-1.491 0-1.956.925-1.956 1.874v2.25h3.328l-.532 3.47h-2.796v8.385C19.612 23.027 24 18.062 24 12.073z"/>
          </svg>
        </button>
      </div>
    </div>

    <p class="mt-8 text-center text-sm text-gray-600">
      Don't have an account?
      <a href="#" class="font-medium text-gray-900 hover:underline">Sign up</a>
    </p>
  </div>
</template>

<script setup>
import { ref } from 'vue'

const email = ref('')
const password = ref('')

const handleSubmit = () => {
  // Handle login logic here
  console.log('Login attempt with:', { email: email.value, password: password.value })
}
</script>
一些注意事项
使用v0.dev也算有一段时间了,说一下一些看法,首先我感觉它应该是对React支持的不错,看网上之前的介绍,当时还没有提到说可以支持Vue,也就是Vue是后面更新才支持的。为什么我提示词中基本加了不要从外部引入CSS样式呢,因为之前我没这样说时,它基本都从外部引入,然而最终却呈现不出页面,后来我就改了这样的提示词,让它不用从外部引入CSS,最终效果确实不错,也能呈现页面。