(一)启动
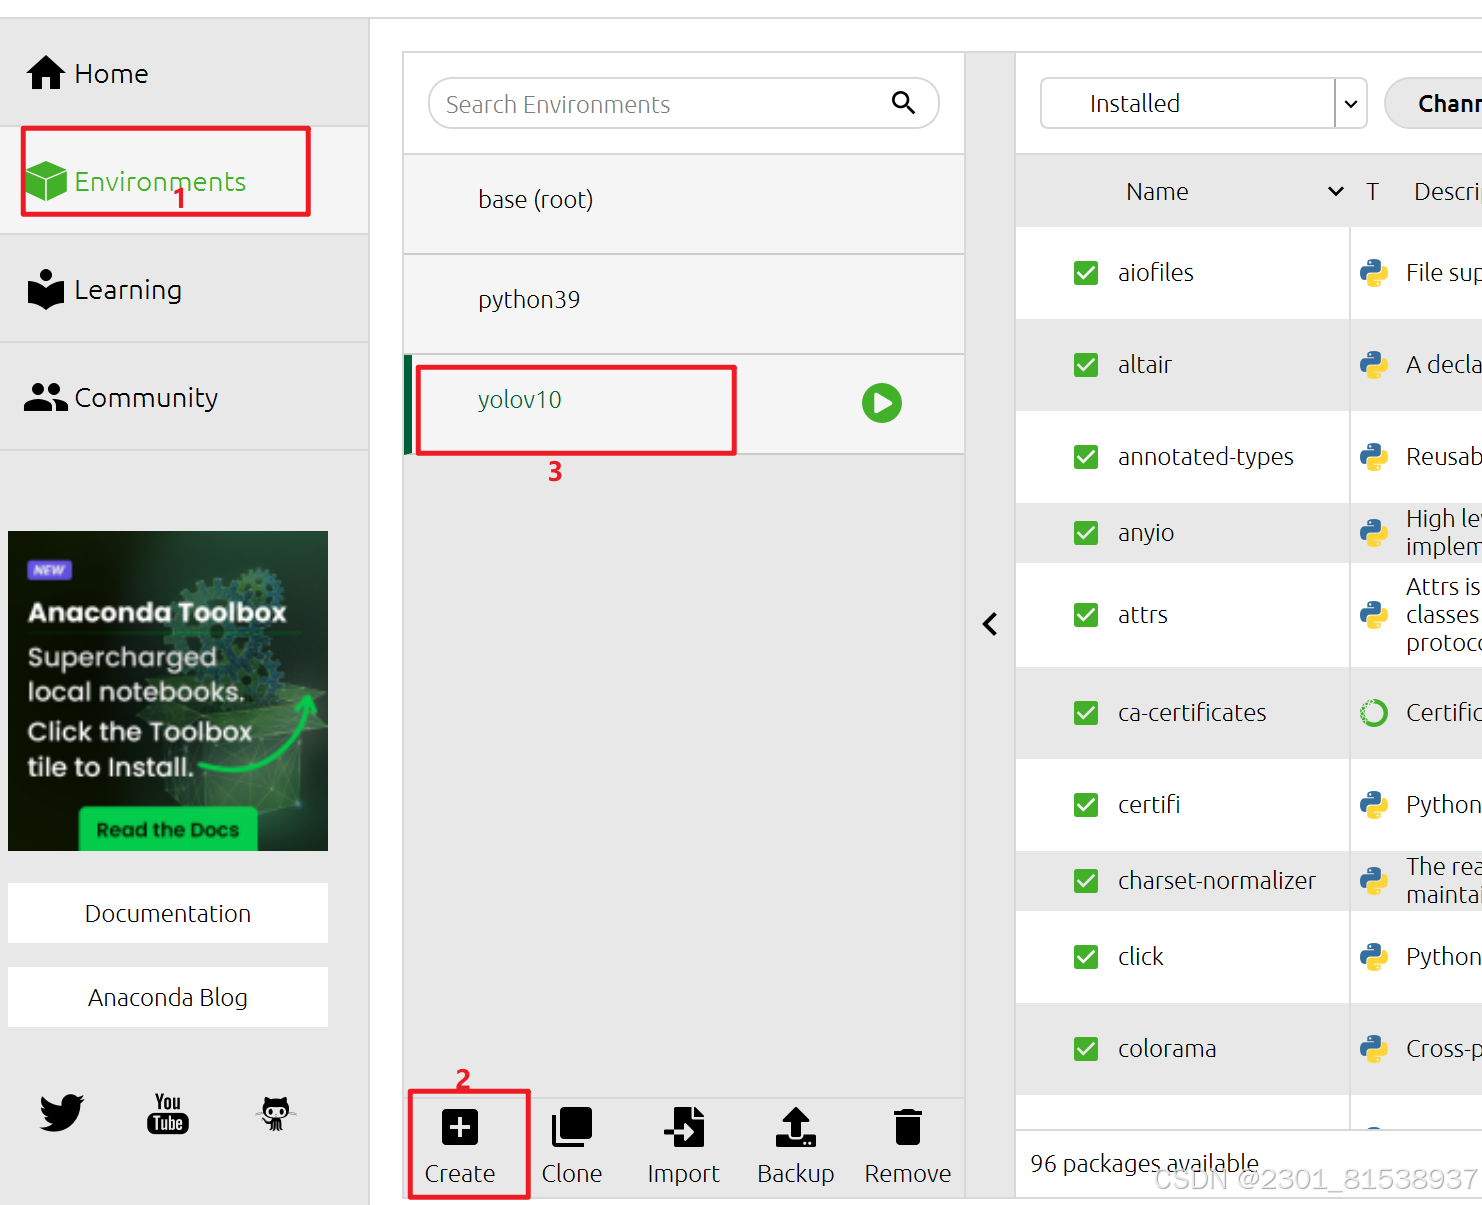
创建环境python3.9
打开此环境终端
(后面的语句操作几乎都在这个终端执行)
输入up主提供的语句:pip install -r requirements.txt
1.下载pytorch网络连接超时
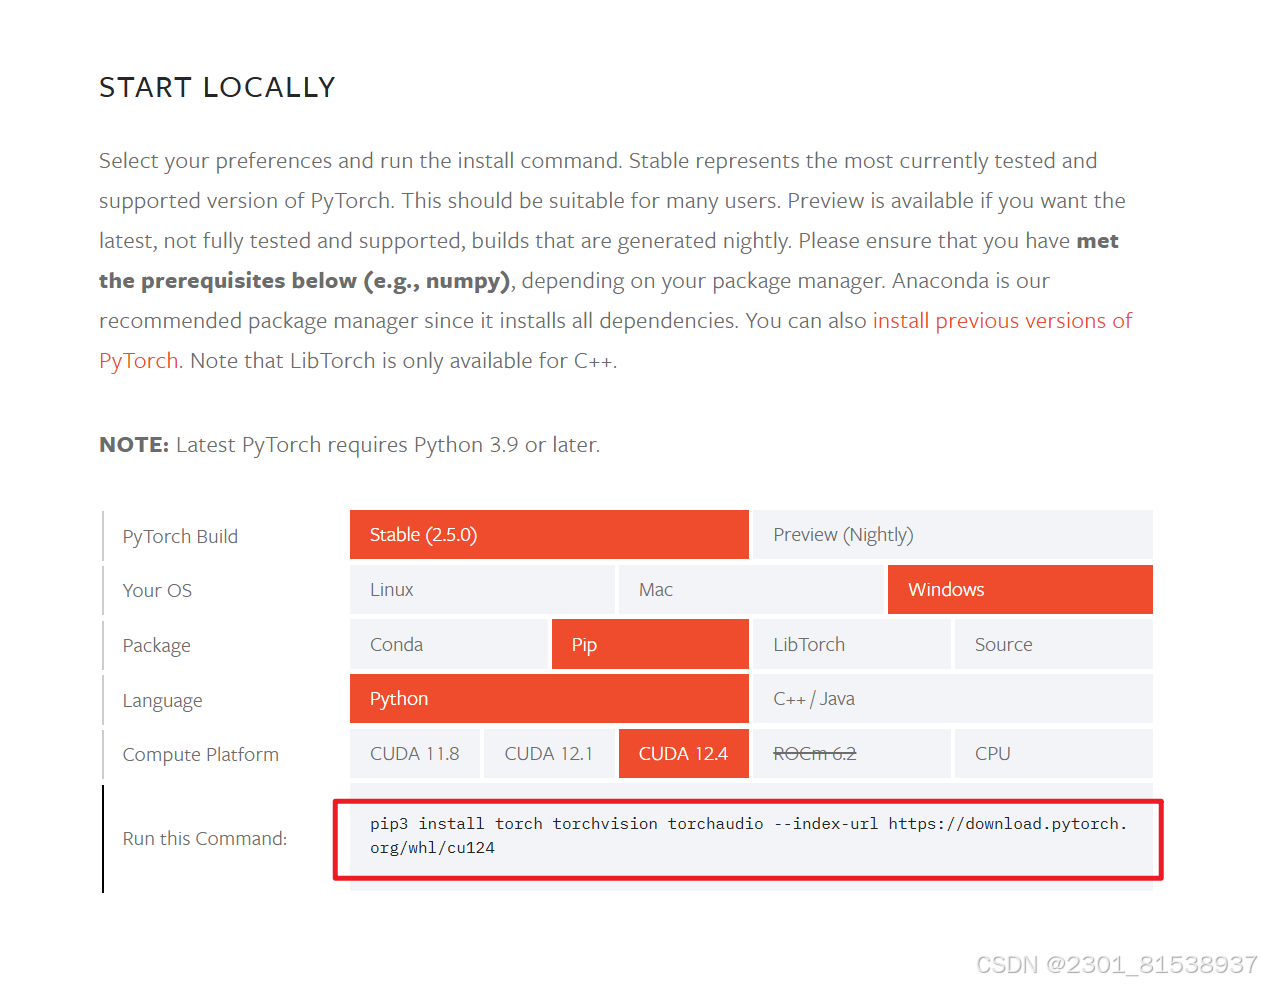
pytorch网址:
把pip后面的3去掉
在上面的网址中找到对应的版本用那个下载语句 但是我开着魔法都下载失败了说是
网络连接超时问题
于是使用清华的镜像再次下载pytorch 飞速成功
pip install torch torchvision torchaudio -f https://pypi.tuna.tsinghua.edu.cn/simple
2.NVIDIA缺失
安装 cuda12.4
配置环境变量:
C:\Program Files\NVIDIA GPU Computing Toolkit\CUDA\v12.4\bin添加到环境变量的PATH中
完成这步之后
输入nvida-smi后出现问题 大概就是我的C:\Program Files\NVIDIA Corporation这个路径下面没有NVSMI的文件夹
查询后解决: 感谢Windows NVIDIA Corporation下没有NVSMI文件夹解决方法-CSDN博客
链接:百度网盘 请输入提取码
提取码:wy6l
将NVSMI.zip解压后 放到C:\Program Files\NVIDIA Corporation\
然后再次回到你环境终端 输入nvdia-smi 发现这个电脑没有显卡
无所谓 让我们继续下一步
3.python app.py报错缺乏gradio
Traceback (most recent call last): File "D:\ai训练\yolov10\yolov10\app.py", line 1, in <module> import gradio as gr ModuleNotFoundError: No module named 'gradio'
那下载一个就是
再次 输入语句运行发现报错:
Exception in ASGI application Traceback (most recent call last): File "C:\ProgramData\anaconda3\envs\yolov10\lib\site-packages\pydantic\type_adapter.py", line 270, in _init_core_attrs self._core_schema = _getattr_no_parents(self._type, '__pydantic_core_schema__') File "C:\ProgramData\anaconda3\envs\yolov10\lib\site-packages\pydantic\type_adapter.py", line 112, in _getattr_no_parents raise AttributeError(attribute) AttributeError: __pydantic_core_schema_
ok啊依赖冲突了 降低版本
pip install pydantic==1.10.9
解决 这里的问题就ok了
4.运行了之后发现网页内容不是教程给的文件夹的内容
在yolov10中找到app.py
打开并且来到最后一行
app.launch(server_port=7861)
更改端口号为7861
原因:此前按照教程用默认端口7860自己先跑了一遍官方的
5.第4的解决并不稳定
解决:
在yolov10和bin目录同级新建一个models
把文件夹中的所有.pt文件都放进去
然后打开app.py 我流代码:
import gradio as gr
import cv2
import tempfile
from ultralytics import YOLOv10
import os# Set no_proxy environment variable for localhost
os.environ["no_proxy"] = "localhost,127.0.0.1,::1"# Directory where your models are store
MODEL_DIR = 'D:/ai_train/yolov10/yolov10/models/'# Load all available models from the directory
def get_model_list():
return [f for f in os.listdir(MODEL_DIR) if f.endswith('.pt')]def yolov10_inference(image, video, model_id, image_size, conf_threshold):
model_path = os.path.join(MODEL_DIR, model_id) # Get the full model path
model = YOLOv10(model_path) # Load the selected modelif image:
results = model.predict(source=image, imgsz=image_size, conf=conf_threshold)
annotated_image = results[0].plot()
return annotated_image[:, :, ::-1], None
else:
video_path = tempfile.mktemp(suffix=".webm")
with open(video_path, "wb") as f:
with open(video, "rb") as g:
f.write(g.read())cap = cv2.VideoCapture(video_path)
fps = cap.get(cv2.CAP_PROP_FPS)
frame_width = int(cap.get(cv2.CAP_PROP_FRAME_WIDTH))
frame_height = int(cap.get(cv2.CAP_PROP_FRAME_HEIGHT))output_video_path = tempfile.mktemp(suffix=".webm")
out = cv2.VideoWriter(output_video_path, cv2.VideoWriter_fourcc(*'vp80'), fps, (frame_width, frame_height))while cap.isOpened():
ret, frame = cap.read()
if not ret:
breakresults = model.predict(source=frame, imgsz=image_size, conf=conf_threshold)
annotated_frame = results[0].plot()
out.write(annotated_frame)cap.release()
out.release()return None, output_video_path
def yolov10_inference_for_examples(image, model_path, image_size, conf_threshold):
annotated_image, _ = yolov10_inference(image, None, model_path, image_size, conf_threshold)
return annotated_image
def app():
with gr.Blocks():
with gr.Row():
with gr.Column():
image = gr.Image(type="pil", label="Image", visible=True)
video = gr.Video(label="Video", visible=False)
input_type = gr.Radio(
choices=["Image", "Video"],
value="Image",
label="Input Type",
)
# Dynamically load models from the directory
model_id = gr.Dropdown(
label="Model",
choices=get_model_list(), # Dynamically fetch the model list
value=get_model_list()[0], # Set a default model
)
image_size = gr.Slider(
label="Image Size",
minimum=320,
maximum=1280,
step=32,
value=640,
)
conf_threshold = gr.Slider(
label="Confidence Threshold",
minimum=0.0,
maximum=1.0,
step=0.05,
value=0.25,
)
yolov10_infer = gr.Button(value="Detect Objects")with gr.Column():
output_image = gr.Image(type="numpy", label="Annotated Image", visible=True)
output_video = gr.Video(label="Annotated Video", visible=False)def update_visibility(input_type):
image = gr.update(visible=True) if input_type == "Image" else gr.update(visible=False)
video = gr.update(visible=False) if input_type == "Image" else gr.update(visible=True)
output_image = gr.update(visible=True) if input_type == "Image" else gr.update(visible(False))
output_video = gr.update(visible=False) if input_type == "Image" else gr.update(visible=True)return image, video, output_image, output_video
input_type.change(
fn=update_visibility,
inputs=[input_type],
outputs=[image, video, output_image, output_video],
)def run_inference(image, video, model_id, image_size, conf_threshold, input_type):
if input_type == "Image":
return yolov10_inference(image, None, model_id, image_size, conf_threshold)
else:
return yolov10_inference(None, video, model_id, image_size, conf_threshold)
yolov10_infer.click(
fn=run_inference,
inputs=[image, video, model_id, image_size, conf_threshold, input_type],
outputs=[output_image, output_video],
)gr.Examples(
examples=[
[
"ultralytics/assets/bus.jpg",
get_model_list()[0],
640,
0.25,
],
[
"ultralytics/assets/zidane.jpg",
get_model_list()[0],
640,
0.25,
],
],
fn=yolov10_inference_for_examples,
inputs=[
image,
model_id,
image_size,
conf_threshold,
],
outputs=[output_image],
cache_examples='lazy',
)gradio_app = gr.Blocks()
with gradio_app:
gr.HTML(
"""
<h1 style='text-align: center'>
YOLOv10: Real-Time End-to-End Object Detection
</h1>
""")
gr.HTML(
"""
<h3 style='text-align: center'>
<a href='https://arxiv.org/abs/2405.14458' target='_blank'>arXiv</a> | <a href='https://github.com/THU-MIG/yolov10' target='_blank'>github</a>
</h3>
""")
with gr.Row():
with gr.Column():
app()
if __name__ == '__main__':
gradio_app.launch(server_port=7861)
重点是第十一行
把这个路径更改为你的models的文件夹路劲
然后回到py3.9的运行终端再次输入 app..py打开网页
解决了 一切正常 let`s 学习
(二)之后的错误
1.启动摄像头报错
(yolov10) D:\ai_train\yolov10\yolov10>python yolov10-camera.py Traceback (most recent call last): File "D:\ai_train\yolov10\yolov10\yolov10-camera.py", line 2, in <module> import supervision as sv ModuleNotFoundError: No module named 'supervision'
缺少 那就安装
pip install supervision
然后 再次启动
python yolov10-camera.py
2.桌面识别图片时报错
python yolov10-paint2.py SupervisionWarnings: BoundingBoxAnnotator is deprecated: `BoundingBoxAnnotator` is deprecated and has been renamed to `BoxAnnotator`. `BoundingBoxAnnotator` will be removed in supervision-0.26.0. 找不到窗口: th(1).jpg 找不到窗口: th(1).jpg 找不到窗口: th(1).jpg
解决;
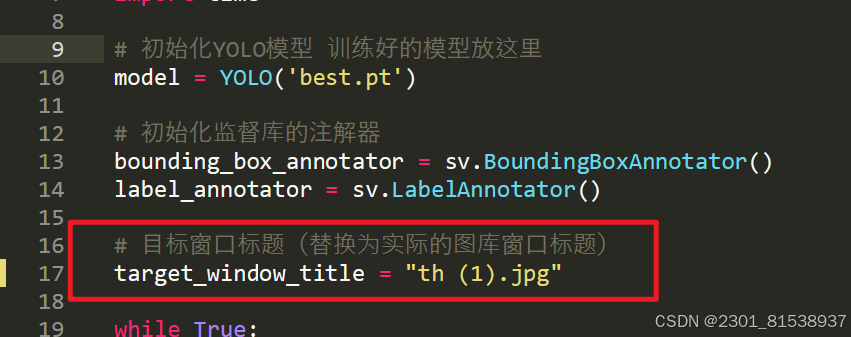
直接复制图片窗口名字到yolov10-paint2.py第十七行 我就是手打然后报错了
(三)制作自己的模型遇到的错误
1.ModuleNotFoundError: No module· named 'ultralytics'
那就安装 pip install ultralytics==8.3.0 指定版本8.3.0 因为我们的python版本是3.9
因为这个电脑没有显卡所有device=cpu
教程中device=0的意思是指定使用电脑中的第一块显卡
2.data.yaml不存在
以及
·ValueError: not enough values to unpack (expected 3, got 0)
·but got '<scalar>' in "<unicode string>", line 6, column 38: ... : [ 'class1', 'class2', 'class3','babybreath', 'sunflower']都是这个处理办法
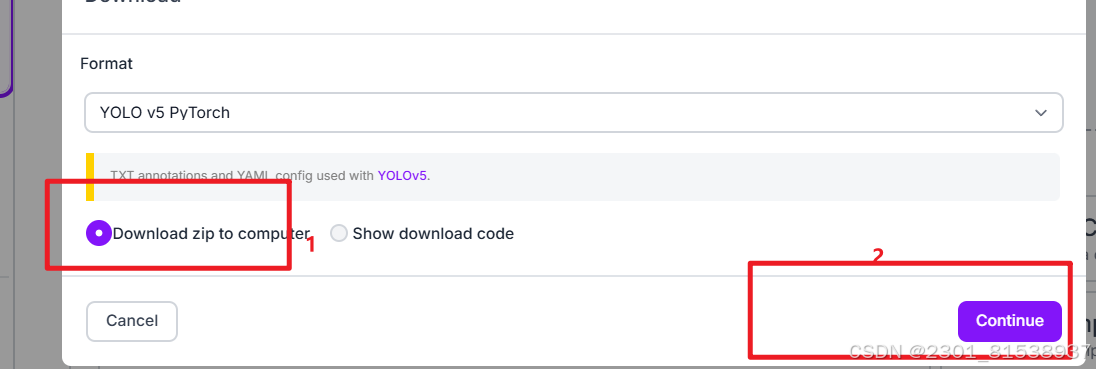
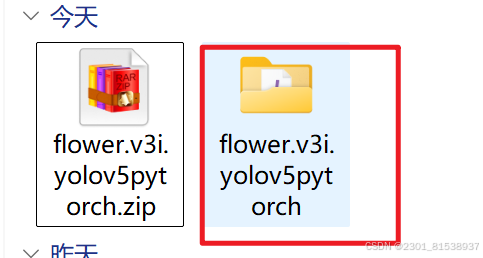
把 下载下来的压缩包
解压
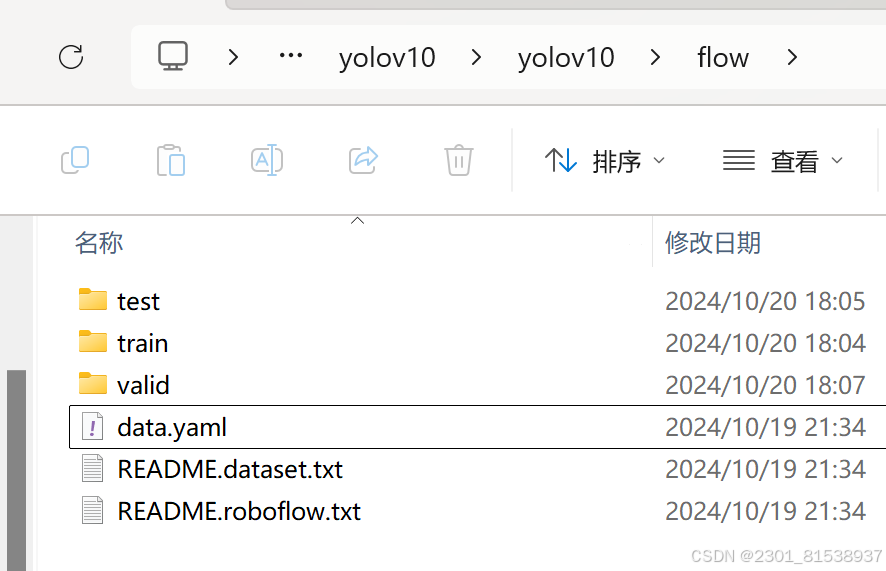
这里面的六个文件完全直接复制到你的yolov10文件下的flow文件夹
然后回到anaconda3中的python3.9环境的终端中再输入语句:
yolo val model=yolov10n.pt data=D:\ai_train\yolov10\yolov10\flow\data.yaml batch=30 device=cpu
底膜可选
尝试后 发现跑出来的模型没有best.pt 所以用这个
yolo train model=yolov10n.pt data=D:\ai_train\yolov10\yolov10\flow\data.yaml batch=30 epochs=30 device=cpu
模型训练成功
