一、背景与具体实现功能。
在传统的 AGV 小车巡线作业场景中,诸如电磁导航、地面色带导航以及磁条导航等方式较为常见,它们通常需要在 AGV 小车的行进路面上进行特殊处理,如埋设金属线、铺设色带或磁条。
然而,这种依赖地面标识的导航手段存在明一些弊端:一方面,随着使用频次的增加,色带极易出现磨损,磁条也可能发生消磁状况,一旦出现此类问题,AGV 小车的导航精准度便会大打折扣,甚至完全失效;另一方面,倘若生产流程需要调整,或是物流布局有所变动,想要对这些地面导航标识进行变更,操作难度颇高,不仅耗时费力,还可能影响正常生产秩序。
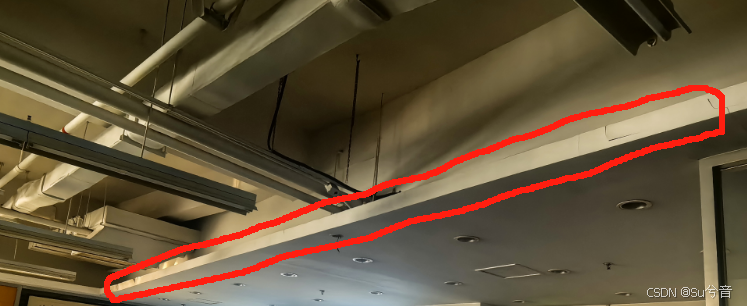
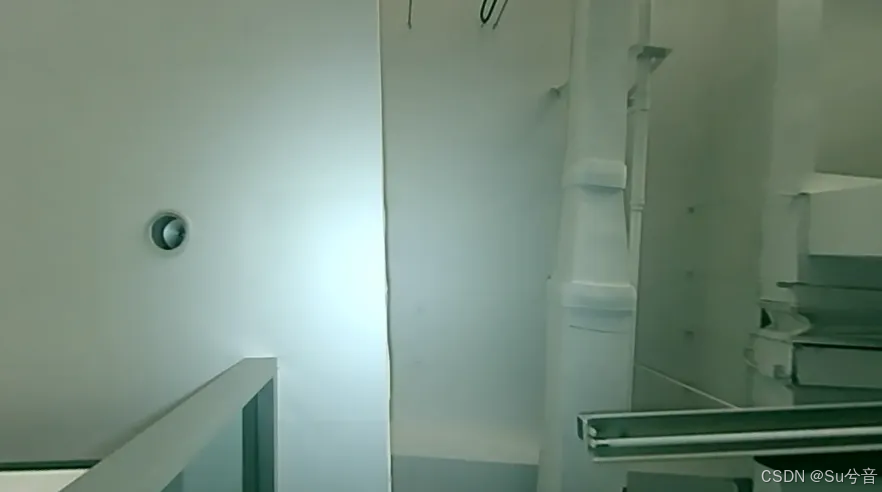
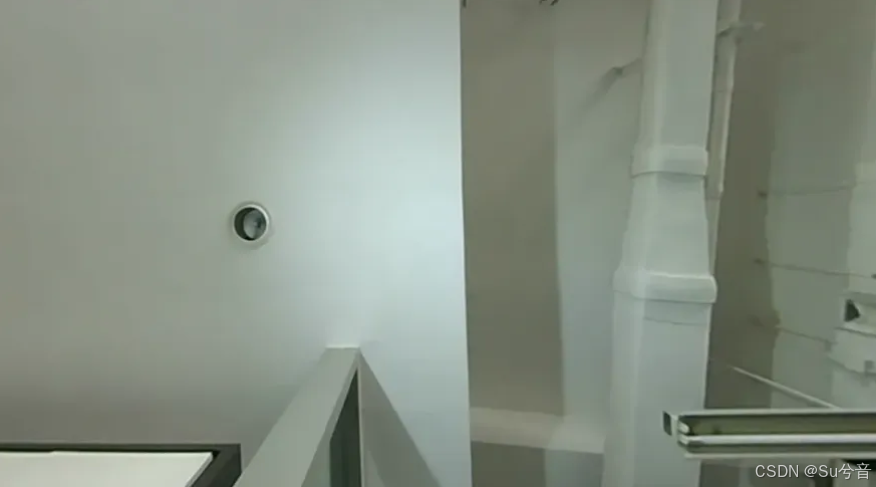
鉴于此,我们可尝试利用天花板上的固有特征来实现 AGV 小车的巡线引导,选定天花板高低不平的交界线作为潜在的巡线轨迹,期望以此作为初步尝试,让 AGV 小车开启全新的巡线模式。
(如上图所示,初步采用识别红框中的天花板高度不一的交界线作为巡线轨迹)
二、基本物料。
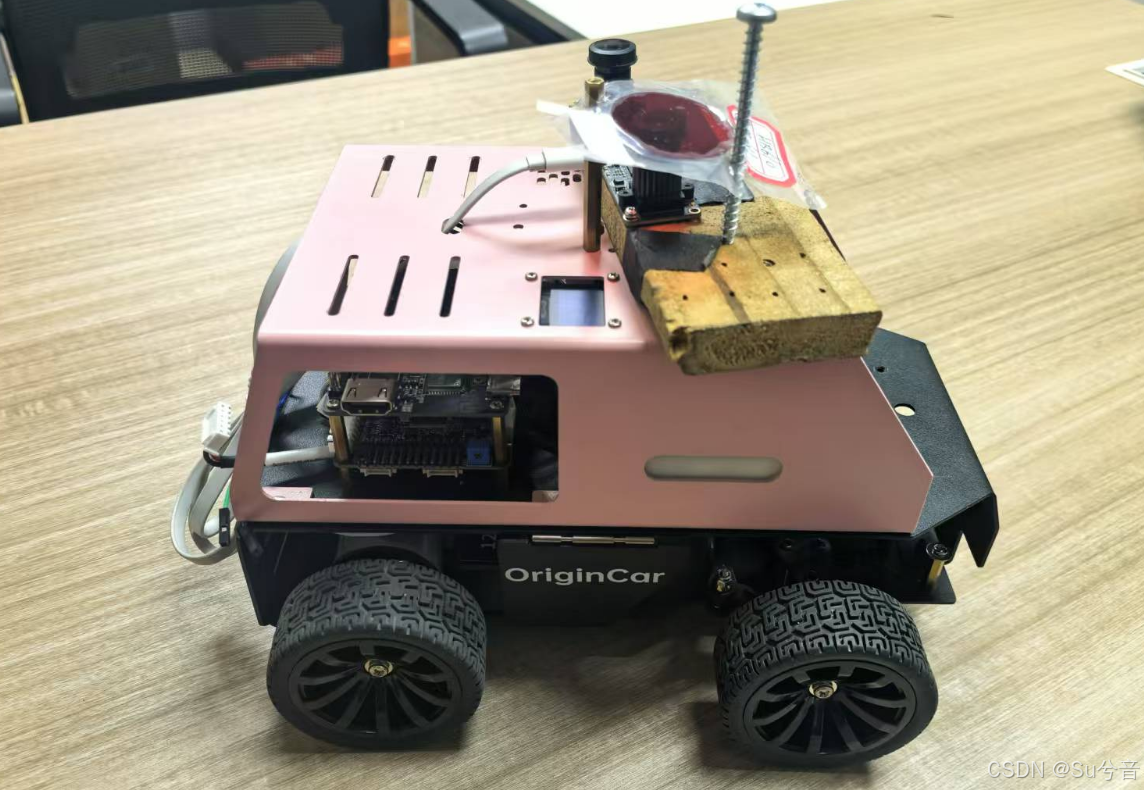
小车采用古月居的Origincar小车套件,自配双目鱼眼相机
1. 主控板:Origincar小车采用地平线RDK X3板,作为主控板;
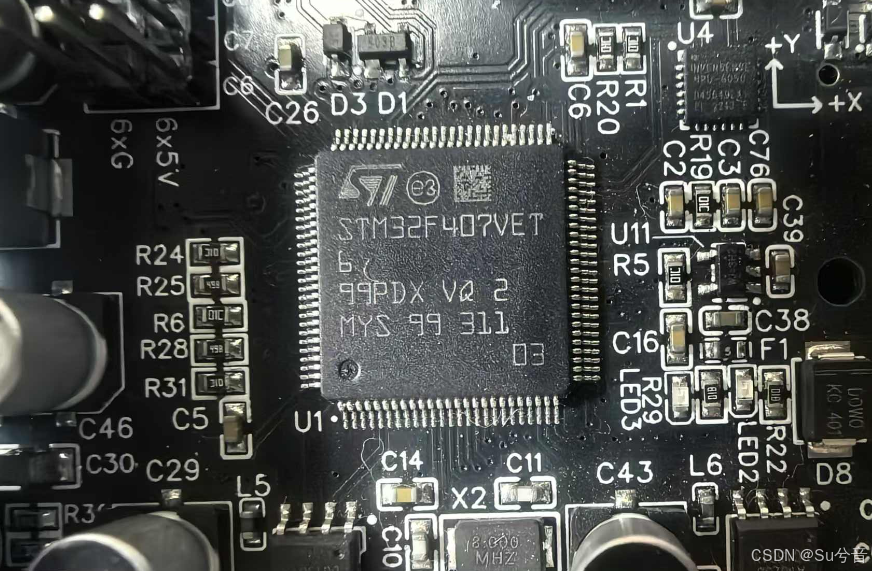
2. 运动控制板:Origincar小车采用STM32F407VET6芯片,作为运动控制板;
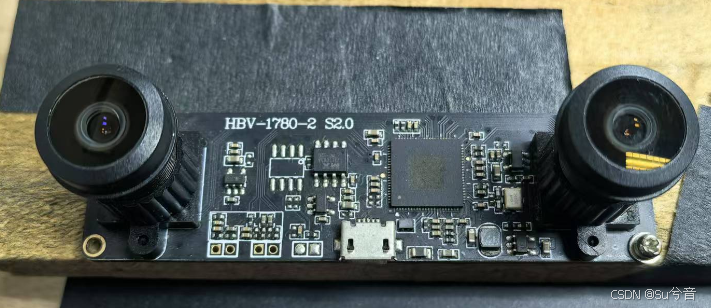
3. 相机:自配双目鱼眼相机,但巡线使用时,实际只采用一个相机采集的图像;
三、基本功能实现流程。
1. 打开相机,拍摄天花板及天花板上的边缘线;
2. 识别图像中的边缘线,并根据边缘线识别特征点,绘制出巡线轨迹;
3. 沿着新绘制的线,发布机器人的运动指令,使机器人沿着线运动。
四、流程细节。
1. 打开相机/拍摄图像/图像矫正处理:
由于使用的是鱼眼相机,则需要对图像进行校正,此处选用桶形展开校正,本代码中是对本地图像进行校正,也可以直接从相机读取图像进行校正:
首先需要使用棋盘格图片对鱼眼相机采集的图像进行校正,得到光心坐标、相机的内参与畸变参数,再根据这些内容,来进行鱼眼图像的桶型矫正;
import cv2
import numpy as np
import os

# 定义输入和输出文件夹路径
input_folder = '输入文件夹路径'
output_folder = '桶型矫正后输出文件夹路径'

# 确保输出文件夹存在
os.makedirs(output_folder, exist_ok=True)

# 获取文件夹中的所有 .bmp 文件
image_files = [f for f in os.listdir(input_folder) if f.endswith('.bmp')]

# 相机内参和畸变参数
K = np.array([[585.6065978157075, 0.0, 583.2996761313536],
              [0.0, 583.7935461839306, 336.5316008144147],
              [0.0, 0.0, 1.0]])
D = np.array([-0.17860062239081786, 0.004389935056111613, 0.023457691555598112, -0.011916211941152808])

# 定义光心坐标
cx, cy = 583.2996761313536, 336.5316008144147

# 处理每个图像文件
for image_file in image_files:
    image_path = os.path.join(input_folder, image_file)
    image = cv2.imread(image_path, cv2.IMREAD_COLOR)

    if image is None:
        print(f"Image not found or cannot be read at path: {image_path}")
        continue

    # 图像尺寸
    dim = image.shape[:2][::-1]  # (width, height)

    # 进行桶形畸变校正
    map1, map2 = cv2.fisheye.initUndistortRectifyMap(K, D, np.eye(3), K, dim, cv2.CV_16SC2)
    undistorted_image = cv2.remap(image, map1, map2, interpolation=cv2.INTER_LINEAR, borderMode=cv2.BORDER_CONSTANT)

    # 在校正前后的图像中标记光心
    marked_image = image.copy()
    marked_undistorted_image = undistorted_image.copy()
    cv2.circle(marked_image, (int(cx), int(cy)), 5, (0, 0, 255), -1)
    cv2.circle(marked_undistorted_image, (int(cx), int(cy)), 5, (0, 0, 255), -1)

    # 保存校正后的图像到本地
    output_path = os.path.join(output_folder, f"undistorted_{image_file}")
    cv2.imwrite(output_path, undistorted_image)
    print(f"Undistorted image saved to {output_path}")
2.图像处理,找出梯度最高点并进行裁剪:
以相机的光心为中心,将梯度明显的部分计算提取出来,标记梯度最高的点并裁剪;
import cv2
import numpy as np
import os

# 定义输入和输出文件夹路径
input_folder = '刚才保存的桶型矫正后输出文件夹路径'
output_folder = '新的处理后输出文件夹路径'

# 确保输出文件夹存在
os.makedirs(output_folder, exist_ok=True)

# 获取文件夹中的所有 .bmp 文件
image_files = [f for f in os.listdir(input_folder) if f.endswith('.bmp')]

# 定义光心坐标
cx, cy = 583.2996761313536, 336.5316008144147

# 定义搜索区域大小
search_radius = 50  # 可以根据需要调整搜索半径

# 处理每个图像文件
for image_file in image_files:
    image_path = os.path.join(input_folder, image_file)
    image = cv2.imread(image_path, cv2.IMREAD_GRAYSCALE)

    if image is None:
        print(f"Image not found or cannot be read at path: {image_path}")
        continue

    # 计算梯度
    grad_x = cv2.Sobel(image, cv2.CV_64F, 1, 0, ksize=3)
    grad_y = cv2.Sobel(image, cv2.CV_64F, 0, 1, ksize=3)

    # 计算梯度幅度
    grad_magnitude = np.sqrt(grad_x**2 + grad_y**2)

    # 将梯度幅度图像转换为 uint8 类型
    grad_magnitude = (grad_magnitude / grad_magnitude.max() * 255).astype(np.uint8)

    # 在光心附近的区域内找到梯度最大的点
    search_area = grad_magnitude[int(cy - search_radius):int(cy + search_radius), int(cx - search_radius):int(cx + search_radius)]
    max_grad_index = np.unravel_index(np.argmax(search_area), search_area.shape)
    max_grad_y, max_grad_x = max_grad_index[0] + int(cy - search_radius), max_grad_index[1] + int(cx - search_radius)

    # 以最大梯度点为中心裁剪一张长300宽300像素的图像
    crop_size = 300
    half_crop_size = crop_size // 2
    x_min = int(max_grad_x - half_crop_size)
    y_min = int(max_grad_y - half_crop_size)
    x_max = x_min + crop_size
    y_max = y_min + crop_size

    # 确保裁剪区域在图像范围内
    if x_min < 0 or y_min < 0 or x_max > image.shape[1] or y_max > image.shape[0]:
        print(f"Crop region out of bounds for image: {image_file}")
        continue

    cropped_image = grad_magnitude[y_min:y_max, x_min:x_max]

    # 在裁剪后的图像中标记梯度最大的点
    marked_cropped_image = cv2.cvtColor(cropped_image, cv2.COLOR_GRAY2BGR)
    cv2.circle(marked_cropped_image, (half_crop_size, half_crop_size), 5, (0, 0, 255), -1)

    # 保存标记后的裁剪图像
    base_name = os.path.splitext(image_file)[0]
    marked_cropped_output_path = os.path.join(output_folder, f'{base_name}_marked_cropped.bmp')

    cv2.imwrite(marked_cropped_output_path, marked_cropped_image)

    print(f"Marked cropped image saved to {marked_cropped_output_path}")
为保证图像处理结果更加准确清晰,相机垂直仰拍天花板,并使用一盏白光灯进行补光;
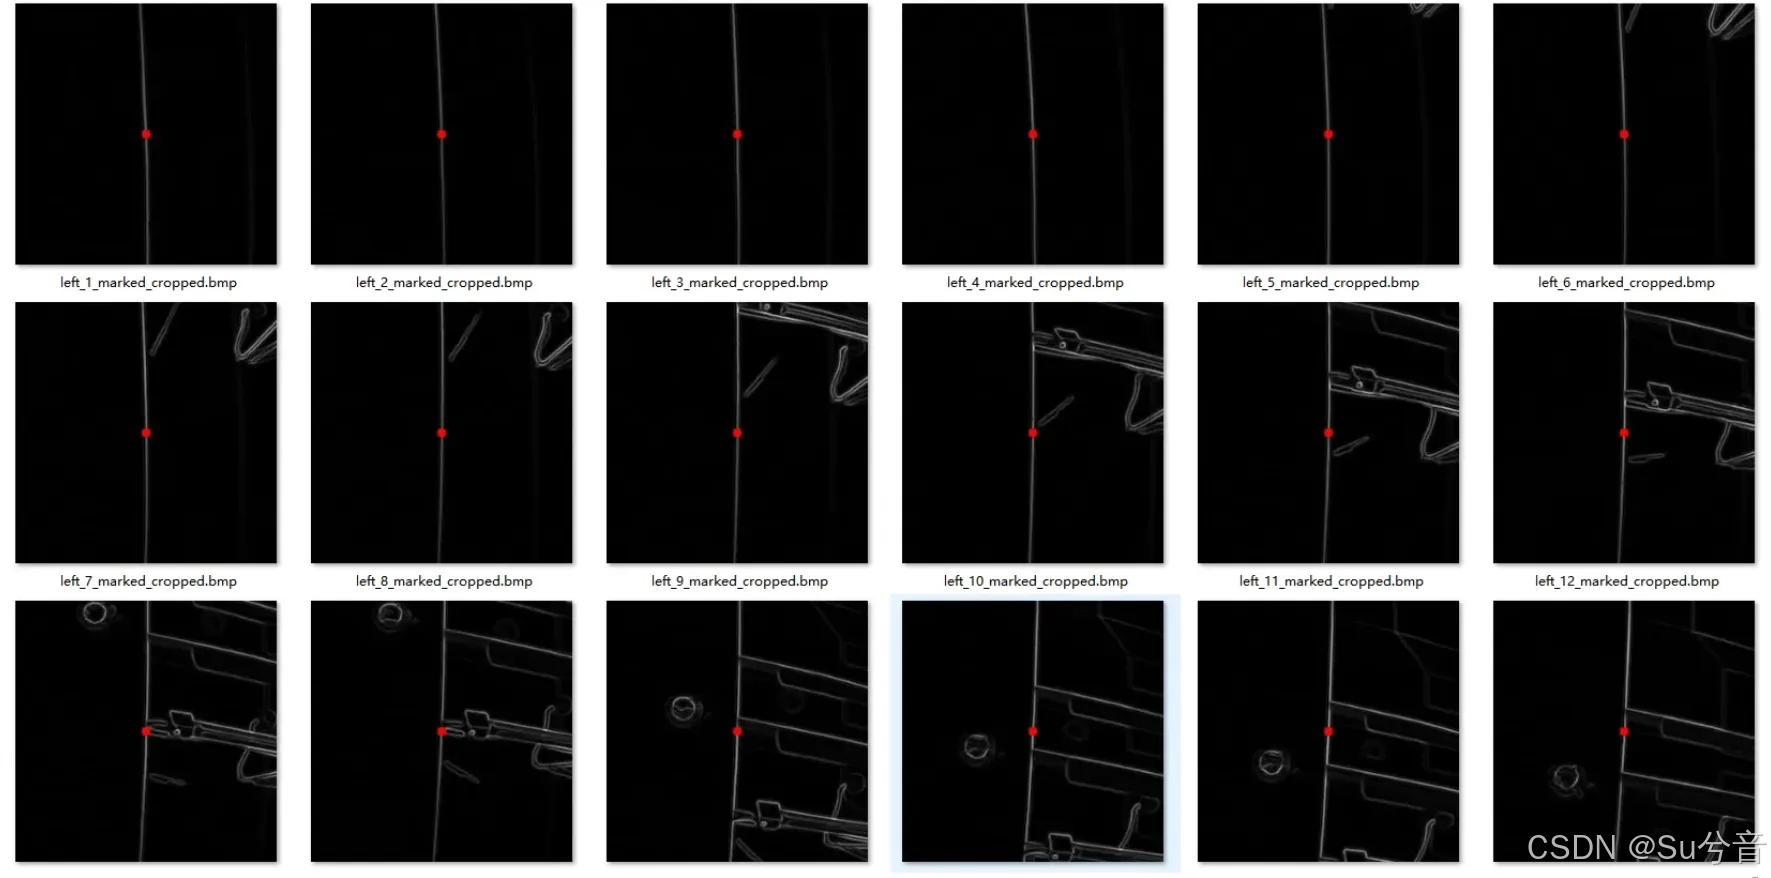
初始时白光灯垂直仰视照射天花板,发现处理后的图像存在干扰,找出的特征点并不在需要巡线的轨迹上,于是将白光灯换到了图像左侧,由左向右进行打光;
(如上两幅图,为白光灯垂直仰视照射天花板的效果与处理效果,处理后的图像中,竖直的白色线条为处理后的天花板交界线,即为需要的巡线轨迹;红色点即为所需要识别出的特征点——梯度最高点,处理后的结果可看出部分找出的特征点并不在需要巡线的轨迹上)
(如上两幅图,为白光灯由左向右进行打光的效果与处理效果,处理后的图像中,红色点的特征点——梯度最高点均在需要巡线的轨迹上)
五、整体流程整理与运动控制。
以上流程走通后,对各部分代码进行整理,小车需要进行视觉巡线,目前已经得到所获取图像中梯度最高的点,那么可以得到梯度最高的点上方每隔五行、取一行,取出的那一行梯度最高的点,进行筛选与处理,形成一条路径,可以确定机器人的前进方向和角度。
1. 图像采集与处理代码整理:
在开启摄的像头、矫正、裁剪、找出初始的梯度最大点之后,再将初始的梯度最大点上方,每隔五行、取一行的梯度最大点取出,并判断这些梯度最大点:
如果它们和初始的梯度最大点,在x方向上的差值小于一定距离,则可将他们和初始的梯度最大点进行连接,拟合出一条线,标记出此条线(标记时可将线条适当加宽),以此作为小车的巡线轨迹;
最终将处理好的图像发布到话题中,为下一步处理做准备。
import rclpy
from rclpy.node import Node
from sensor_msgs.msg import CompressedImage
from cv_bridge import CvBridge
import cv2
import numpy as np
import os
import time
import datetime


class CameraProcessNode(Node):
    def __init__(self):
        super().__init__('camera_process_node')
        self.cap = cv2.VideoCapture(0, cv2.CAP_V4L2)
        if not self.cap.isOpened():
            self.get_logger().error("Failed to open camera")
            return

        # 设置摄像头分辨率
        self.width = 1280
        self.height = 720
        self.cap.set(cv2.CAP_PROP_FRAME_WIDTH, self.width)
        self.cap.set(cv2.CAP_PROP_FRAME_HEIGHT, self.height)

        # 检查分辨率设置是否成功
        actual_width = int(self.cap.get(cv2.CAP_PROP_FRAME_WIDTH))
        actual_height = int(self.cap.get(cv2.CAP_PROP_FRAME_HEIGHT))
        self.get_logger().info(f"Set resolution to {self.width}x{self.height}, actual resolution is {actual_width}x{actual_height}")

        self.publisher = self.create_publisher(CompressedImage, 'image/compressed', 5)
        self.bridge = CvBridge()
        self.timer = self.create_timer(1.0 / 15, self.process_and_publish)

        # 相机内参和畸变参数
        self.K = np.array([[585.6065978157075, 0.0, 583.2996761313536],
                           [0.0, 583.7935461839306, 336.5316008144147],
                           [0.0, 0.0, 1.0]])
        self.D = np.array([-0.17860062239081786, 0.004389935056111613, 0.023457691555598112, -0.11916211941152808])
        self.cx, self.cy = 583.2996761313536 , 336.5316008144147
        self.search_radius = 50
        self.crop_width = 300
        self.crop_height = 200

        # 创建以当前时间戳命名的输出文件夹
        current_time = datetime.datetime.now().strftime('%Y%m%d%H%M%S')
        self.output_folder = os.path.join('图像保存的本地路径', current_time)
        os.makedirs(self.output_folder, exist_ok=True)

    def process_and_publish(self):
        ret, frame = self.cap.read()
        if ret:
            # 图像尺寸
            dim = frame.shape[:2][::-1]  # (width, height)

            # 进行桶形畸变校正
            map1, map2 = cv2.fisheye.initUndistortRectifyMap(self.K, self.D, np.eye(3), self.K, dim, cv2.CV_16SC2)
            undistorted_image = cv2.remap(frame, map1, map2, interpolation=cv2.INTER_LINEAR, borderMode=cv2.BORDER_CONSTANT)

            # 转换为灰度图
            gray_image = cv2.cvtColor(undistorted_image, cv2.COLOR_BGR2GRAY)

            # 计算梯度
            grad_x = cv2.Sobel(gray_image, cv2.CV_64F, 1, 0, ksize=3)
            grad_y = cv2.Sobel(gray_image, cv2.CV_64F, 0, 1, ksize=3)

            # 计算梯度幅度
            grad_magnitude = np.sqrt(grad_x ** 2 + grad_y ** 2)

            # 将梯度幅度图像转换为 uint8 类型
            grad_magnitude = (grad_magnitude / grad_magnitude.max() * 255).astype(np.uint8)

            # 在新的光心附近的区域内找到梯度最大的点
            search_area = grad_magnitude[int(self.cy - self.search_radius):int(self.cy + self.search_radius),
                                         int(self.cx - self.search_radius):int(self.cx + self.search_radius)]
            max_grad_index = np.unravel_index(np.argmax(search_area), search_area.shape)
            max_grad_y, max_grad_x = max_grad_index[0] + int(self.cy - self.search_radius), max_grad_index[1] + int(self.cx - self.search_radius)

            # 以最大梯度点为中心裁剪一张长100宽300像素的图像
            half_crop_width = self.crop_width // 2
            half_crop_height = self.crop_height // 2
            x_min = int(max_grad_x - half_crop_width)
            y_min = int(max_grad_y - half_crop_height)
            x_max = x_min + self.crop_width
            y_max = y_min + self.crop_height

            # 确保裁剪区域在图像范围内
            if x_min < 0 or y_min < 0 or x_max > gray_image.shape[1] or y_max > gray_image.shape[0]:
                self.get_logger().warn("Crop region out of bounds")
                return

            cropped_image = grad_magnitude[y_min:y_max, x_min:x_max]

            # 在裁剪后的图像中标记梯度最大的点
            marked_cropped_image = cv2.cvtColor(cropped_image, cv2.COLOR_GRAY2BGR)
            cv2.circle(marked_cropped_image, (half_crop_width, half_crop_height), 5, (0, 0, 255), -1)

            # 找出梯度最高的点上方每隔5行的一行梯度最高的点
            step = 5
            points = []
            for y in range(0, half_crop_height, step):
                line = cropped_image[y, :]
                max_val_index = np.argmax(line)
                points.append((max_val_index, y))

            # 以第一个梯度最高的点为基准,依次连接这些梯度最高的点
            base_point = (half_crop_width, half_crop_height)
            for point in points:
                dist = abs(point[0] - base_point[0])
                if dist <= 10:  # 如果平移距离小于等于10列,则连接这两个点
                    cv2.line(marked_cropped_image, (base_point[0], base_point[1]), (point[0], point[1]), (0, 0, 255), 30)

            # 保存处理后的图像,按顺序编号保存
            file_index = 1
            output_path = os.path.join(self.output_folder, f'processed_{file_index}.jpg')
            while os.path.exists(output_path):
                file_index += 1
                output_path = os.path.join(self.output_folder, f'processed_{file_index}.jpg')
            cv2.imwrite(output_path, marked_cropped_image)

            # 压缩图像并发布
            compressed_msg = self.bridge.cv2_to_compressed_imgmsg(marked_cropped_image, "jpeg")
            self.publisher.publish(compressed_msg)
        else:
            self.get_logger().warn("Failed to capture frame")

    def destroy_node(self):
        self.cap.release()
        self.get_logger().info("Camera released")


def main(args=None):
    rclpy.init(args=args)
    camera_node = CameraProcessNode()

    try:
        rclpy.spin(camera_node)
    except KeyboardInterrupt:
        camera_node.get_logger().info("Shutting down")
    finally:
        camera_node.destroy_node()
        rclpy.shutdown()


if __name__ == '__main__':
    main()
处理结果如下图,红色线即为小车巡线所需轨迹:
2. 运动控制部分:
订阅图像采集与处理代码中发布的话题,并对话题中的图像信息进行接收和解析,裁剪后识别图中的红色部分;
将红色部分的重心,和裁剪后整个图像的中心进行重合,来控制小车的巡线运动;
(此时线速度为固定给出,角速度根据红色部分的重心,与整个图像的中心的偏移量计算得出)
#!/usr/bin/env python3

import cv2
import numpy as np
import rclpy
import time
from rclpy.node import Node
from sensor_msgs.msg import CompressedImage
from rclpy.qos import QoSProfile
import cv_bridge
from geometry_msgs.msg import Twist
import os
import datetime

# 红色的HSV范围
col_red = (0, 100, 80, 10, 255, 255)


class Follower(Node):
    def __init__(self):
        super().__init__('follower')
        self.bridge = cv_bridge.CvBridge()
        qos = QoSProfile(depth=10)
        self.image_sub = self.create_subscription(
            CompressedImage,
            'image/compressed',
            self.image_callback,
            qos)
        self.cmd_vel_pub = self.create_publisher(Twist, 'cmd_vel', qos)
        self.twist = Twist()
        self.last_erro = 0
        self.image_count = 0

        # 创建以当前时间戳命名的输出文件夹
        current_time = datetime.datetime.now().strftime('%Y%m%d%H%M%S')
        self.save_path = os.path.join('输出图像文件夹', current_time)
        os.makedirs(self.save_path, exist_ok=True)

    def image_callback(self, msg):
        # 解压图像消息为OpenCV图像
        image = self.bridge.compressed_imgmsg_to_cv2(msg, desired_encoding='bgr8')
        h, w, d = image.shape

        # 截取图像的上半部分
        image_top_half = image[:h // 2, :]

        # 将截取的图像转换为HSV颜色空间
        hsv = cv2.cvtColor(image_top_half, cv2.COLOR_BGR2HSV)

        # 使用固定的红色HSV范围
        lowerbH, lowerbS, lowerbV = col_red[:3]
        upperbH, upperbS, upperbV = col_red[3:]

        mask = cv2.inRange(hsv, (lowerbH, lowerbS, lowerbV), (upperbH, upperbS, upperbV))
        masked = cv2.bitwise_and(image_top_half, image_top_half, mask=mask)

        # 计算mask图像的重心
        M = cv2.moments(mask)
        if M['m00'] > 0:
            cx = int(M['m10'] / M['m00'])
            cy = int(M['m01'] / M['m00'])

            # 计算目标重心与图像中心的偏移量
            erro = cx - w // 2
            d_erro = erro - self.last_erro

            # 控制机器人的线速度和角速度
            self.twist.linear.x = 0.11
            self.twist.angular.z = -(float(erro) * 0.0011 - float(d_erro) * 0.0000)
            self.last_erro = erro

            # 在图像上标记重心
            cv2.circle(image_top_half, (cx, cy), 10, (0, 255, 0), -1)
            self.get_logger().info(f"Marked center at ({cx}, {cy + h // 2})")
        else:
            self.twist.linear.x = 0.0
            self.twist.angular.z = 0.0
            self.get_logger().info("No red object detected")

        # 发布速度命令
        self.cmd_vel_pub.publish(self.twist)

        # 显示调试图像
        cv2.imshow("Adjust_hsv", mask)
        cv2.imshow("Image with Center Marked", image_top_half)

        # 保存图像,按顺序编号保存
        file_index = 1
        filename = os.path.join(self.save_path, f'center_marked_image_{file_index}.jpg')
        while os.path.exists(filename):
            file_index += 1
            filename = os.path.join(self.save_path, f'center_marked_image_{file_index}.jpg')

        cv2.imwrite(filename, image_top_half)

    def destroy_node(self):
        cv2.destroyAllWindows()
        super().destroy_node()


def main(args=None):
    rclpy.init(args=args)
    print('start patrolling')
    follower = Follower()
    while rclpy.ok():
        rclpy.spin_once(follower)
        time.sleep(0.2)

    follower.destroy_node()
    rclpy.shutdown()


if __name__ == '__main__':
    main()
处理结果如下图,红色线即为小车巡线所需轨迹,绿色为红色部分的重心:
3. 一键启动:
(1)大致逻辑:使用一条命令,就可启动小车底盘、启动处理代码、启动巡线代码;
(2)目前小车巡线功能的代码分成了多个文件,需要将这些文件进行一键启动,方便操作,则计划更改小车启动方式为:1个启动文件,使用1条命令进行启动,这条命令将同时启动图像处理,外加小车巡线节点;
以上,则需要:①总体启动代码、②图像处理代码、③小车巡线代码;其中②、③已有,差一个总体启动代码可命名为【xxxx.launch.py】;
import os
from ament_index_python.packages import get_package_share_directory
from launch import LaunchDescription
from launch.actions import DeclareLaunchArgument
from launch.substitutions import LaunchConfiguration
from launch_ros.actions import Node

def generate_launch_description():
    photo2_node = Node(
        package='功能包名',
        executable='可执行文件名1',
        name='节点名1',
        output='screen'
    )

    sport_node = Node(
        package='功能包名',
        executable='可执行文件名2',
        name='节点名2',
        output='screen'
    )

    return LaunchDescription([
        节点1,
        节点2
    ])
4. 将多个代码整合成一个代码,可不使用.launch.py文件:
#!/usr/bin/env python3

import rclpy
from rclpy.node import Node
from sensor_msgs.msg import CompressedImage
from geometry_msgs.msg import Twist
from cv_bridge import CvBridge
import cv2
import numpy as np
import os
import datetime
import time


class ImageProcessorAndFollower(Node):
    def __init__(self):
        super().__init__('image_processor_and_follower')
        self.cap = cv2.VideoCapture(0, cv2.CAP_V4L2)
        if not self.cap.isOpened():
            self.get_logger().error("Failed to open camera")
            return

        # 设置摄像头分辨率
        self.width = 1280
        self.height = 720
        self.cap.set(cv2.CAP_PROP_FRAME_WIDTH, self.width)
        self.cap.set(cv2.CAP_PROP_FRAME_HEIGHT, self.height)

        # 检查分辨率设置是否成功
        actual_width = int(self.cap.get(cv2.CAP_PROP_FRAME_WIDTH))
        actual_height = int(self.cap.get(cv2.CAP_PROP_FRAME_HEIGHT))
        self.get_logger().info(f"Set resolution to {self.width}x{self.height}, actual resolution is {actual_width}x{actual_height}")

        self.publisher = self.create_publisher(CompressedImage, 'image/compressed', 5)
        self.bridge = CvBridge()
        self.cmd_vel_pub = self.create_publisher(Twist, 'cmd_vel', 5)
        self.twist = Twist()
        self.last_error = 0
        self.image_count = 0

        # 相机内参和畸变参数
        self.K = np.array([[585.6065978157075, 0.0, 583.2996761313536],
                           [0.0, 583.7935461839306, 336.5316008144147],
                           [0.0, 0.0, 1.0]])
        self.D = np.array([-0.17860062239081786, 0.004389935056111613, 0.023457691555598112, -0.11916211941152808])
        self.cx, self.cy = 583.2996761313536 , 336.5316008144147
        self.search_radius = 50
        self.crop_width = 300
        self.crop_height = 200

        # 创建以当前时间戳命名的输出文件夹
        current_time = datetime.datetime.now().strftime('%Y%m%d%H%M%S')
        self.output_folder = os.path.join('图像输出路径', current_time)
        os.makedirs(self.output_folder, exist_ok=True)

        # 为不同类型的图像创建子文件夹
        self.processed_images_folder = os.path.join(self.output_folder, 'processed_images')
        self.center_marked_images_folder = os.path.join(self.output_folder, 'center_marked_images')
        os.makedirs(self.processed_images_folder, exist_ok=True)
        os.makedirs(self.center_marked_images_folder, exist_ok=True)

        self.timer = self.create_timer(1.0 / 15, self.process_and_follow)

    def process_and_follow(self):
        ret, frame = self.cap.read()
        if ret:
            dim = frame.shape[:2][::-1]

            # 进行桶形畸变校正
            map1, map2 = cv2.fisheye.initUndistortRectifyMap(self.K, self.D, np.eye(3), self.K, dim, cv2.CV_16SC2)
            undistorted_image = cv2.remap(frame, map1, map2, interpolation=cv2.INTER_LINEAR, borderMode=cv2.BORDER_CONSTANT)

            # 第一次处理:裁剪并标记梯度最高的点
            gray_image = cv2.cvtColor(undistorted_image, cv2.COLOR_BGR2GRAY)
            grad_x = cv2.Sobel(gray_image, cv2.CV_64F, 1, 0, ksize=3)
            grad_y = cv2.Sobel(gray_image, cv2.CV_64F, 0, 1, ksize=3)
            grad_magnitude = np.sqrt(grad_x ** 2 + grad_y ** 2)
            grad_magnitude = (grad_magnitude / grad_magnitude.max() * 255).astype(np.uint8)

            # 在新的光心附近的区域内找到梯度最大的点
            search_area = grad_magnitude[int(self.cy - self.search_radius):int(self.cy + self.search_radius),
                                         int(self.cx - self.search_radius):int(self.cx + self.search_radius)]
            max_grad_index = np.unravel_index(np.argmax(search_area), search_area.shape)
            max_grad_y, max_grad_x = max_grad_index[0] + int(self.cy - self.search_radius), max_grad_index[1] + int(self.cx - self.search_radius)

            # 裁剪
            half_crop_width = self.crop_width // 2
            half_crop_height = self.crop_height // 2
            x_min = int(max_grad_x - half_crop_width)
            y_min = int(max_grad_y - half_crop_height)
            x_max = x_min + self.crop_width
            y_max = y_min + self.crop_height

            if x_min < 0 or y_min < 0 or x_max > gray_image.shape[1] or y_max > gray_image.shape[0]:
                self.get_logger().warn("Crop region out of bounds")
                return

            cropped_image = grad_magnitude[y_min:y_max, x_min:x_max]
            marked_cropped_image = cv2.cvtColor(cropped_image, cv2.COLOR_GRAY2BGR)
            cv2.circle(marked_cropped_image, (half_crop_width, half_crop_height), 5, (0, 0, 255), -1)

            # 找出梯度最高的点上方每隔5行的一行梯度最高的点
            step = 5
            points = []
            for y in range(0, half_crop_height, step):
                line = cropped_image[y, :]
                max_val_index = np.argmax(line)
                points.append((max_val_index, y))

            # 连接这些梯度最高的点
            base_point = (half_crop_width, half_crop_height)
            for point in points:
                dist = abs(point[0] - base_point[0])
                if dist <= 10:
                    cv2.line(marked_cropped_image, (base_point[0], base_point[1]), (point[0], point[1]), (0, 0, 255), 30)

            # 保存处理后的图像
            processed_file_index = self.image_count + 1
            processed_output_path = os.path.join(self.processed_images_folder, f'processed_{processed_file_index}.jpg')
            cv2.imwrite(processed_output_path, marked_cropped_image)

            # 第二次处理:识别红色物体并计算重心
            # 使用第一次处理后的中间结果
            hsv = cv2.cvtColor(marked_cropped_image, cv2.COLOR_BGR2HSV)
            lower_red = np.array([0, 100, 80])
            upper_red = np.array([10, 255, 255])
            mask = cv2.inRange(hsv, lower_red, upper_red)
            masked = cv2.bitwise_and(marked_cropped_image, marked_cropped_image, mask=mask)

            # 计算mask图像的重心
            M = cv2.moments(mask)
            if M['m00'] > 0:
                cx = int(M['m10'] / M['m00'])
                cy = int(M['m01'] / M['m00'])
                error = cx - self.crop_width // 2
                d_error = error - self.last_error

                # 控制机器人的线速度和角速度
                self.twist.linear.x = 0.11
                self.twist.angular.z = -(float(error) * 0.0011 - float(d_error) * 0.0000)
                self.last_error = error

                # 在图像上标记重心
                cv2.circle(marked_cropped_image, (cx, cy), 10, (0, 255, 0), -1)

            else:
                self.twist.linear.x = 0.0
                self.twist.angular.z = 0.0

            # 发布速度命令
            self.cmd_vel_pub.publish(self.twist)

            # 保存带有重心标记的图像
            center_marked_file_index = self.image_count + 1
            center_marked_filename = os.path.join(self.center_marked_images_folder, f'center_marked_image_{center_marked_file_index}.jpg')
            cv2.imwrite(center_marked_filename, marked_cropped_image)

            # 压缩图像并发布
            compressed_msg = self.bridge.cv2_to_compressed_imgmsg(marked_cropped_image, "jpeg")
            self.publisher.publish(compressed_msg)

            self.image_count += 1
        else:
            self.get_logger().warn("Failed to capture frame")

    def destroy_node(self):
        self.cap.release()
        self.get_logger().info("Camera released")
        super().destroy_node()


def main(args=None):
    rclpy.init(args=args)
    node = ImageProcessorAndFollower()

    try:
        rclpy.spin(node)
    except KeyboardInterrupt:
        node.get_logger().info("Shutting down")
    finally:
        node.destroy_node()
        rclpy.shutdown()


if __name__ == '__main__':
    main()
六、其他。
1. 可能用到代码-文件重命名排序代码:
import os
import re

def rename_bmp_files(folder_path):
    # 获取文件夹中所有的文件
    files = os.listdir(folder_path)

    # 过滤出.bmp文件
    bmp_files = [file for file in files if file.endswith('.bmp')]

    # 按照文件名中的数字进行排序
    def sort_key(filename):
        match = re.search(r'\d+', filename)
        if match:
            return int(match.group())
        return 0

    bmp_files.sort(key=sort_key)

    # 重新命名文件
    for index, bmp_file in enumerate(bmp_files, start=1):
        # 提取文件名和扩展名
        filename_without_ext, ext = os.path.splitext(bmp_file)

        # 构造新的文件名
        new_filename = f"{index}{ext}"
        # 构造完整的文件路径
        old_file = os.path.join(folder_path, bmp_file)
        new_file = os.path.join(folder_path, new_filename)

        # 重命名文件
        os.rename(old_file, new_file)
        print(f"Renamed '{bmp_file}' to '{new_filename}'")

# 使用示例
# 请将'your_folder_path'替换为你的文件夹路径
folder_path = 'your_folder_path'  # 假设你的.bmp文件在这个路径
rename_bmp_files(folder_path)
2. 问题-摄像头连接虚拟机,虚拟机无法识别:
(1)首先接入摄像头,将摄像头连接入虚拟机:
(2)输入命令 ls /dev/video* 或命令 ls /dev | grep video 可列出当前所有的视频设备文件,一般默认摄像头是 video0,可根据摄像头编号修改代码中摄像头接口内容:
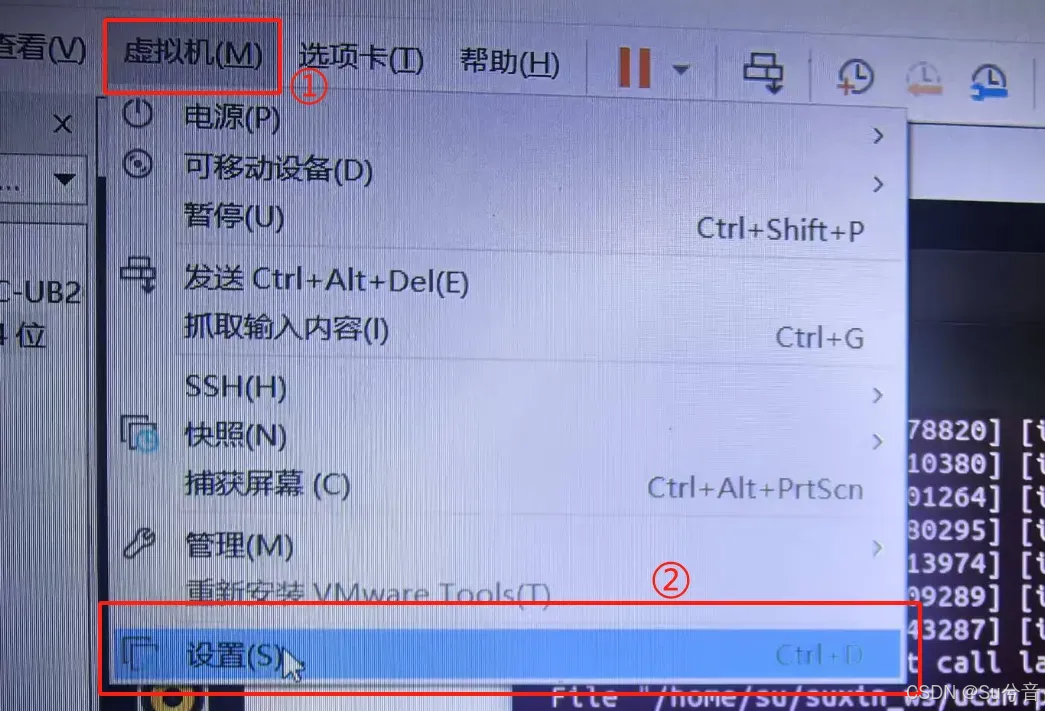
(3)打开【虚拟机→设置→USB控制器】,其中 USB2.0 和 USB3.1都可以尝试,看哪个能正常打开摄像头
