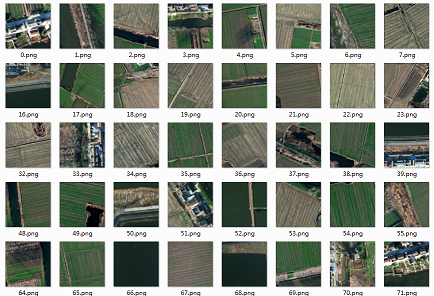
遥感数据集
1. UC Merced Land-Use Data Set
图像像素大小为256*256,总包含21类场景图像,每一类有100张,共2100张。
http://weegee.vision.ucmerced.edu/datasets/landuse.html
2. WHU-RS19 Data Set
图像像素大小为600*600,总包含19类场景图像,每一类大概50张,共1005张。
https://download.csdn.net/download/u010656161/10153410
3. SIRI-WHU Data Set
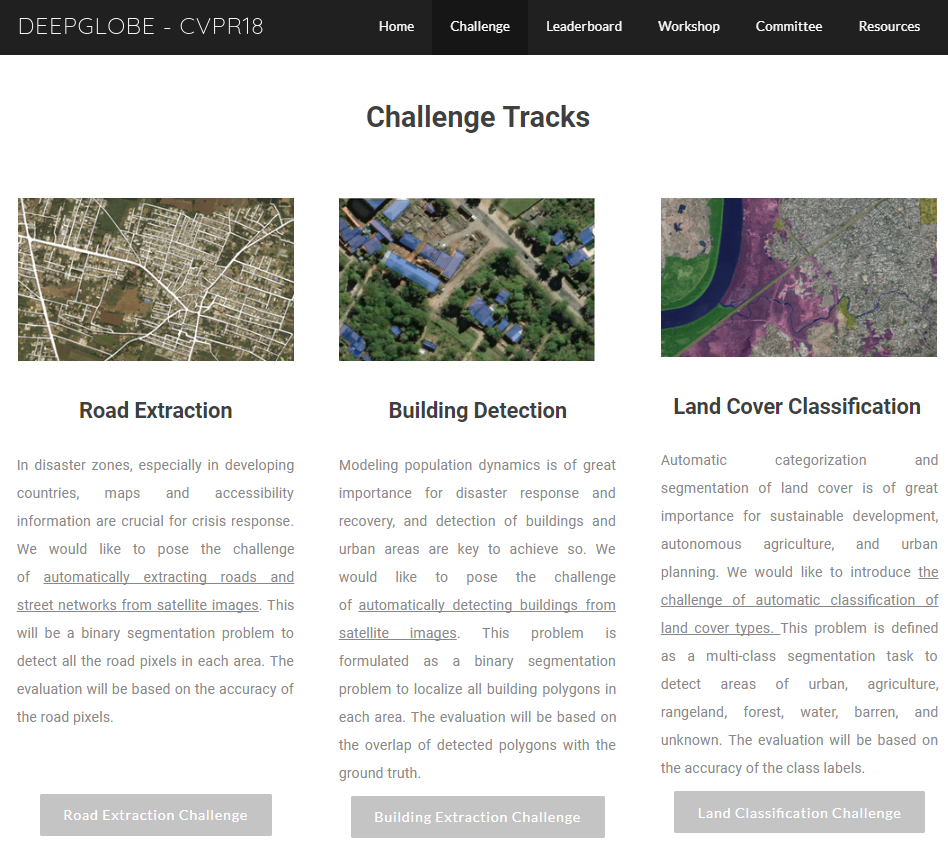
图像像素大小为200*200,总包含12类场景图像,每一类有200张,共2400张。 4. RSSCN7 Data Set 图像像素大小为400*400,总包含7类场景图像,每一类有400张,共2800张。 5. RSC11 Data Set 图像像素大小为512*512,总包含11类场景图像,每一类大概100张,共1232张。 6. NWPU-RESISC45 Data Set http://www.escience.cn/people/JunweiHan/NWPU-RESISC45.html 7. Road and Building Detection Data Set https://www.cs.toronto.edu/~vmnih/data/ 8. DOTA: A Large-scale Dataset for Object Detection in Aerial Images http://captain.whu.edu.cn/DOTAweb/index.html 9. DeepGlobe卫星图像地表解析(道路提取、建筑物检测、地标分类)挑战赛 http://deepglobe.org/challenge.html
CVPR 2018挑战赛
网址:http://deepglobe.org/leaderboard.html
基于深度学习的影像地图道路提取
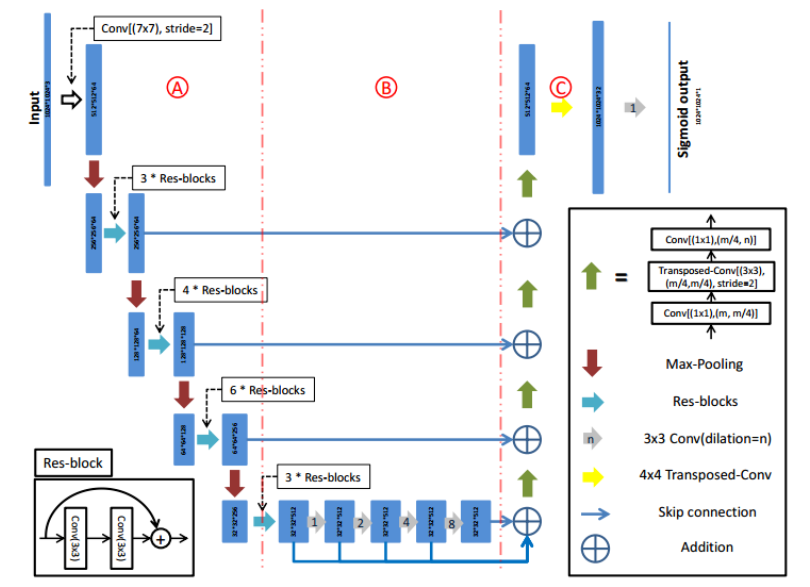
网络结构:D-LinkNet - LinkNet with Pretrained Encoder and Dilated Convolution for HighResolution Satellite Imagery Road Extraction
与Linknet的区别:增加了下图中的B部分,即扩张卷积层,通过多个卷积层信息的叠加,可以最大化地增大感受视野范围,同时利用ResNet34来替换掉18。
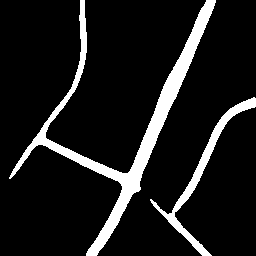
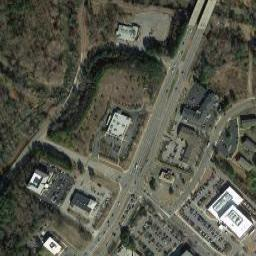
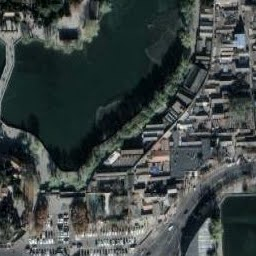
预测:由于实验需要的图片需要长与宽一致,因此在谷歌地图上找了256*256(论文声称支持1024*1024)的瓦片来进行实验,发现必须找到16级以上的瓦片才可以实现检测,可能训练数据集中需要道路的宽度具有一定的长度才可以。
基于SegNet和U-Net的遥感图像语义分割
Blog:https://blog.csdn.net/real_myth/article/details/79432456
GitHub:https://github.com/AstarLight/Satellite-Segmentation(Satellite_Image_Segmentation_BY_SegNet_UNet)
步骤:
- Segmented by SegNet
- Segmented by U-Net
- Model Emsamble:SegNet + U-Net
数据集
数据下载:https://pan.baidu.com/s/1i6oMukH(密码:yqj2)| https://pan.baidu.com/s/1FwHkvp2esvhyOx1eSZfkog(密码:fqnw)
|-test 测试图片
|-train SegNet训练集
|----label 标记图
|----src 遥感图
|-unet_buildings UNet训练集
|----label 标记图
|----src 遥感图
数据集来自CCF大数据比赛提供的数据(2015年中国南方某城市的高清遥感图像),是小数据集,里面包含了5张带标注的大尺寸RGB遥感图像(尺寸范围从3000×3000到6000×6000)
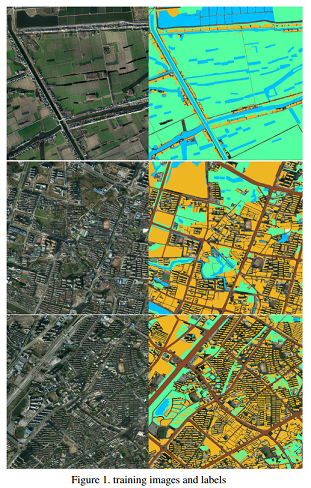
里面一共标注了4类物体:植被(标记1)、建筑(标记2)、水体(标记3)、道路(标记4)以及其他(标记0)。其中,耕地、林地、草地均归为植被类。更多数据介绍可以参看这里(https://www.datafountain.cn/#/competitions/270/data-intro)
训练图片及其标记图片可视化后的效果如下:蓝色-水体,黄色-房屋,绿色-植被,棕色-马路
问题:Label可视化 - 原始数据集里的训练集图片采用十六位的,图片浏览器显示全黑(一般图片浏览器无法显示16位图)
解决: 将深度16位的图片转为8位(比如,Matlab下:im2 = uint8(im1))
数据处理
原始图像:5张大尺寸的遥感图像(尺寸各不相同)
随机切割:随机生成x,y坐标,然后抠出该坐标下256*256的小图
# 执行切割 - UNet训练集
python ./unet/gen_dataset.py
数据增强(Keras自带的数据增广函数/):
- 原图和label图都需要旋转:90度、180度、270度
- 原图和label图都需要做沿y轴的镜像操作
- 原图做模糊操作
- 原图做光照调整操作
- 原图做增加噪声操作(高斯噪声、椒盐噪声)
# OpenCV编写的相应的增强函数
img_w = 256
img_h = 256

image_sets = ['1.png','2.png','3.png','4.png','5.png']

def gamma_transform(img, gamma):
    gamma_table = [np.power(x / 255.0, gamma) * 255.0 for x in range(256)]
    gamma_table = np.round(np.array(gamma_table)).astype(np.uint8)
    return cv2.LUT(img, gamma_table)

def random_gamma_transform(img, gamma_vari):
    log_gamma_vari = np.log(gamma_vari)
    alpha = np.random.uniform(-log_gamma_vari, log_gamma_vari)
    gamma = np.exp(alpha)
    return gamma_transform(img, gamma)


def rotate(xb,yb,angle):
    M_rotate = cv2.getRotationMatrix2D((img_w/2, img_h/2), angle, 1)
    xb = cv2.warpAffine(xb, M_rotate, (img_w, img_h))
    yb = cv2.warpAffine(yb, M_rotate, (img_w, img_h))
    return xb,yb

def blur(img):
    img = cv2.blur(img, (3, 3));
    return img

def add_noise(img):
    for i in range(200): #添加点噪声
        temp_x = np.random.randint(0,img.shape[0])
        temp_y = np.random.randint(0,img.shape[1])
        img[temp_x][temp_y] = 255
    return img


def data_augment(xb,yb):
    if np.random.random() < 0.25:
        xb,yb = rotate(xb,yb,90)
    if np.random.random() < 0.25:
        xb,yb = rotate(xb,yb,180)
    if np.random.random() < 0.25:
        xb,yb = rotate(xb,yb,270)
    if np.random.random() < 0.25:
        xb = cv2.flip(xb, 1)  # flipcode>0:沿y轴翻转
        yb = cv2.flip(yb, 1)

    if np.random.random() < 0.25:
        xb = random_gamma_transform(xb,1.0)

    if np.random.random() < 0.25:
        xb = blur(xb)

    if np.random.random() < 0.2:
        xb = add_noise(xb)

    return xb,yb

def creat_dataset(image_num = 100000, mode = 'original'):
    print('creating dataset...')
    image_each = image_num / len(image_sets)
    g_count = 0
    for i in tqdm(range(len(image_sets))):
        count = 0
        src_img = cv2.imread('./data/src/' + image_sets[i])  # 3 channels
        label_img = cv2.imread('./data/label/' + image_sets[i],cv2.IMREAD_GRAYSCALE)  # single channel
        X_height,X_width,_ = src_img.shape
        while count < image_each:
            random_width = random.randint(0, X_width - img_w - 1)
            random_height = random.randint(0, X_height - img_h - 1)
            src_roi = src_img[random_height: random_height + img_h, random_width: random_width + img_w,:]
            label_roi = label_img[random_height: random_height + img_h, random_width: random_width + img_w]
            if mode == 'augment':
                src_roi,label_roi = data_augment(src_roi,label_roi)

            visualize = np.zeros((256,256)).astype(np.uint8)
            visualize = label_roi *50

            cv2.imwrite(('./aug/train/visualize/%d.png' % g_count),visualize)
            cv2.imwrite(('./aug/train/src/%d.png' % g_count),src_roi)
            cv2.imwrite(('./aug/train/label/%d.png' % g_count),label_roi)
            count += 1
            g_count += 1
经过以上数据增强操作后,可得到了较大的训练集:100000张256*256的图片
卷积神经网络模型训练
图像语义分割任务-模型选择:FCN、U-Net、SegNet、DeepLab、RefineNet、Mask Rcnn、Hed Net
SegNet - 网络结构清晰易懂,训练快
# 执行训练 - 修改filepath为segnet训练集路径
python segnet_train.py --model segnet.h5 # --model后指定保存的模型名
网络结构定义:编码器-解码器(做语义分割时通常在末端加入CRF模块做后处理,旨在进一步精修边缘的分割结果)
def SegNet():
    model = Sequential()
    #encoder
    model.add(Conv2D(64,(3,3),strides=(1,1),input_shape=(3,img_w,img_h),padding='same',activation='relu'))
    model.add(BatchNormalization())
    model.add(Conv2D(64,(3,3),strides=(1,1),padding='same
