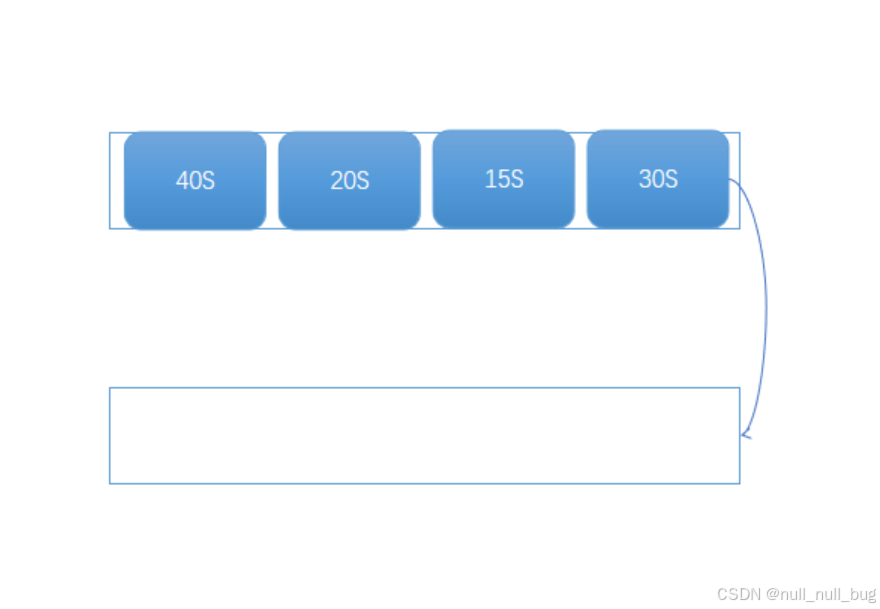
在之前的延迟场景中,消息放入延迟队列的时间都是相同的。比如京东下单后,最大等待24小时进行付款。如果超过24小时还没有付款,那么订单将会被取消。由于下单后使用固定的时间等待。直接采用延迟队列没有任何问题。那如果是会议预订系统的提前20分钟通知功能呢?比如产品经理预订一个会议订在11点,到了10点45分(提前15分钟)的时候就会通知所有参会人员做好准备。会议会在15分钟后开始。如果我们将此通知放入延迟队列。会是什么样子呢?
通过分析可以发现,如果将消息放入延迟队列,由于延迟队列是顺序消费的特性,即按照顺序一个一个的消费。以图为例,可以发现,排在队首的是延迟30秒,会被最先消费,而第一个消费完,第二个和第三个都已经过期了。这时候再通知已经没有意义了。采用延迟队列是不行的。
在RabbitMQ中,可以使用rabbitmq_delayed_message_exchange插件来实现。
这里和TTL方式有很大的不同就是TTL存放的是死信队列(deayquque),而这个插件存放的消息是在延迟交换器里(x-delayed-message-exchange)
-
生产者将消息和路由键发送至指定的延迟交换器上
-
延迟交换器将存储消息等待消息到期根据路由键绑定到自己的队列将把消息给它。
-
队列再把消息发给给监听它的消费者。
-
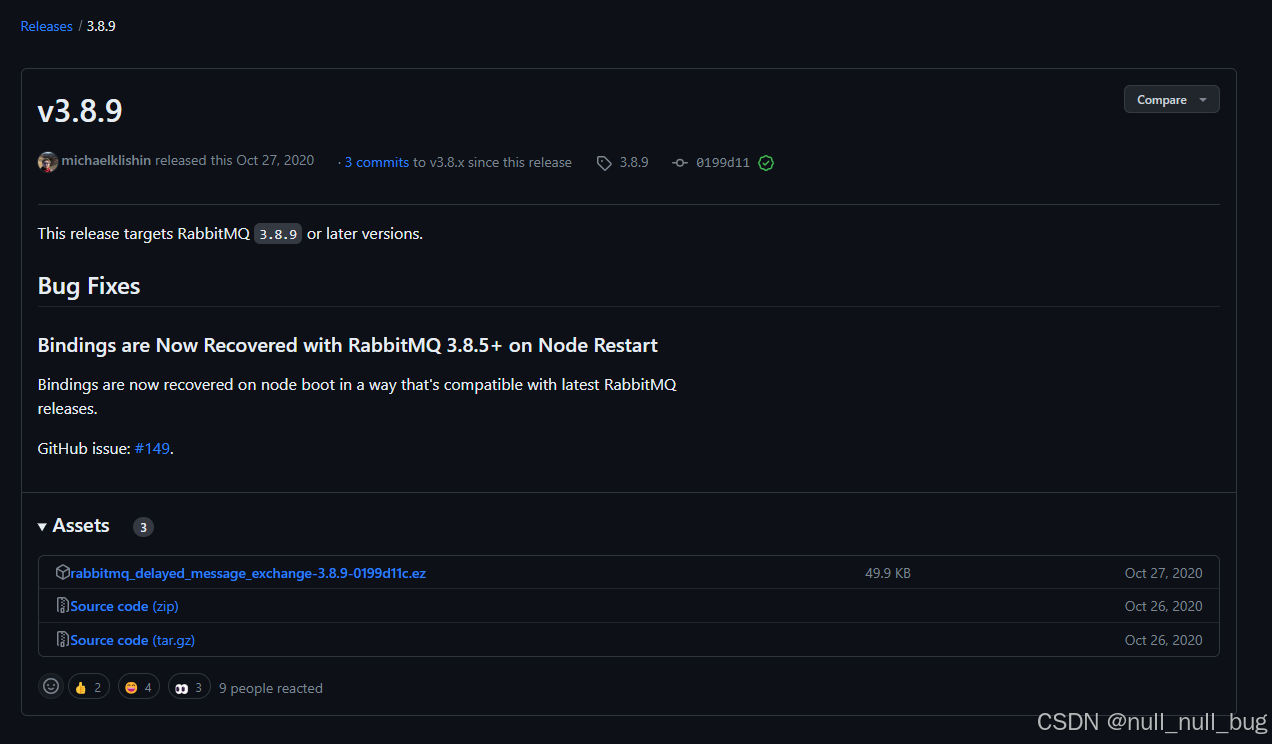
下载插件
下载地址:https://github.com/rabbitmq/rabbitmq-delayed-message-exchange/releases/tag/3.8.9
- 安装及启用插件
将插件拷贝到rabbitMQ-server的安装路径:/usr/lib/rabbitmq/lib/rabbitmq_server-3.8.5/plugins/
cd /usr/lib/rabbitmq/lib/rabbitmq_server-3.8.5/plugins/

# 检查插件
[root@nullnull-os plugins]# find . -name "*delayed*"
./rabbitmq_delayed_message_exchange-3.8.9-0199d11c.ez

# 检查插件
rabbitmq-plugins list
# 启动插件
rabbitmq-plugins enable rabbitmq_delayed_message_exchange
启用插件过程
[root@nullnull-os plugins]# find . -name "*delayed*"
./rabbitmq_delayed_message_exchange-3.8.9-0199d11c.ez
[root@nullnull-os plugins]# rabbitmq-plugins list
Listing plugins with pattern ".*" ...
 Configured: E = explicitly enabled; e = implicitly enabled
 | Status: * = running on rabbit@nullnull-os
 |/
[  ] rabbitmq_amqp1_0                  3.8.5
[  ] rabbitmq_auth_backend_cache       3.8.5
[  ] rabbitmq_auth_backend_http        3.8.5
[  ] rabbitmq_auth_backend_ldap        3.8.5
[  ] rabbitmq_auth_backend_oauth2      3.8.5
[  ] rabbitmq_auth_mechanism_ssl       3.8.5
[  ] rabbitmq_consistent_hash_exchange 3.8.5
[  ] rabbitmq_delayed_message_exchange 3.8.9.0199d11c
[  ] rabbitmq_event_exchange           3.8.5
[  ] rabbitmq_federation               3.8.5
[  ] rabbitmq_federation_management    3.8.5
[  ] rabbitmq_jms_topic_exchange       3.8.5
[E*] rabbitmq_management               3.8.5
[e*] rabbitmq_management_agent         3.8.5
[  ] rabbitmq_mqtt                     3.8.5
[  ] rabbitmq_peer_discovery_aws       3.8.5
[  ] rabbitmq_peer_discovery_common    3.8.5
[  ] rabbitmq_peer_discovery_consul    3.8.5
[  ] rabbitmq_peer_discovery_etcd      3.8.5
[  ] rabbitmq_peer_discovery_k8s       3.8.5
[  ] rabbitmq_prometheus               3.8.5
[  ] rabbitmq_random_exchange          3.8.5
[  ] rabbitmq_recent_history_exchange  3.8.5
[  ] rabbitmq_sharding                 3.8.5
[  ] rabbitmq_shovel                   3.8.5
[  ] rabbitmq_shovel_management        3.8.5
[  ] rabbitmq_stomp                    3.8.5
[  ] rabbitmq_top                      3.8.5
[E*] rabbitmq_tracing                  3.8.5
[  ] rabbitmq_trust_store              3.8.5
[e*] rabbitmq_web_dispatch             3.8.5
[  ] rabbitmq_web_mqtt                 3.8.5
[  ] rabbitmq_web_mqtt_examples        3.8.5
[  ] rabbitmq_web_stomp                3.8.5
[  ] rabbitmq_web_stomp_examples       3.8.5
[root@nullnull-os plugins]# rabbitmq-plugins enable rabbitmq_delayed_message_exchange
Enabling plugins on node rabbit@nullnull-os:
rabbitmq_delayed_message_exchange
The following plugins have been configured:
  rabbitmq_delayed_message_exchange
  rabbitmq_management
  rabbitmq_management_agent
  rabbitmq_tracing
  rabbitmq_web_dispatch
Applying plugin configuration to rabbit@nullnull-os...
The following plugins have been enabled:
  rabbitmq_delayed_message_exchange

started 1 plugins.
[root@nullnull-os plugins]#
如果在未启动的情况下安装插件,在重启后才能生效
systemctl restart rabbitmq-server
maven导入
       <dependency>
            <groupId>org.springframework.boot</groupId>
            <artifactId>spring-boot-starter-amqp</artifactId>
            <version>2.2.8.RELEASE</version>
        </dependency>
        <dependency>
            <groupId>org.springframework.boot</groupId>
            <artifactId>spring-boot-starter-web</artifactId>
            <version>2.2.8.RELEASE</version>
        </dependency>
        <dependency>
            <groupId>org.springframework.boot</groupId>
            <artifactId>spring-boot-starter-test</artifactId>
            <version>2.2.8.RELEASE</version>
            <scope>test</scope>
            <exclusions>
                <exclusion>
                    <groupId>org.junit.vintage</groupId>
                    <artifactId>junit-vintage-engine</artifactId>
                </exclusion>
            </exclusions>
        </dependency>
        <dependency>
            <groupId>org.springframework.amqp</groupId>
            <artifactId>spring-rabbit-test</artifactId>
            <version>2.2.7.RELEASE</version>
            <scope>test</scope>
        </dependency>
springBoot的配制
application.yml
spring:
  application:
    name: delayedQueue
  rabbitmq:
    host: node1
    port: 5672
    virtual-host: /
    username: root
    password: 123456
主入口
import org.springframework.boot.SpringApplication;
import org.springframework.boot.autoconfigure.SpringBootApplication;

@SpringBootApplication
public class DelayExchangeApplication {
  public static void main(String[] args) {
    SpringApplication.run(DelayExchangeApplication.class, args);
  }
}
队列配制
import org.springframework.amqp.core.Binding;
import org.springframework.amqp.core.BindingBuilder;
import org.springframework.amqp.core.CustomExchange;
import org.springframework.amqp.core.Exchange;
import org.springframework.amqp.core.ExchangeTypes;
import org.springframework.amqp.core.Queue;
import org.springframework.amqp.rabbit.annotation.RabbitListener;
import org.springframework.context.annotation.Bean;
import org.springframework.context.annotation.ComponentScan;
import org.springframework.context.annotation.Configuration;

import java.util.HashMap;
import java.util.Map;

@Configuration
@RabbitListener
@ComponentScan("com.nullnull.learn")
public class DelayConfig {

  @Bean
  public Queue queue() {
    Queue queue = new Queue("delay.qu", false, false, true, null);
    return queue;
  }

  @Bean
  public Exchange exchange() {
    Map<String, Object> argument = new HashMap<>();
    argument.put("x-delayed-type", ExchangeTypes.FANOUT);
    Exchange exchange = new CustomExchange("delay.ex", "x-delayed-message", true, false, argument);
    return exchange;
  }

  @Bean
  public Binding bind() {
    return BindingBuilder.bind(queue()).to(exchange()).with("delay.rk").noargs();
  }
}
controller代码
import org.springframework.amqp.core.AmqpTemplate;
import org.springframework.amqp.core.Message;
import org.springframework.amqp.core.MessageProperties;
import org.springframework.amqp.core.MessagePropertiesBuilder;
import org.springframework.beans.factory.annotation.Autowired;
import org.springframework.web.bind.annotation.PathVariable;
import org.springframework.web.bind.annotation.RequestMapping;
import org.springframework.web.bind.annotation.RestController;

import java.nio.charset.StandardCharsets;

@RestController
public class DelayController {

  @Autowired private AmqpTemplate template;

  @RequestMapping("/notify/{seconds}")
  public String toMeeting(@PathVariable Integer seconds) throws Exception {

    MessageProperties prop = MessagePropertiesBuilder.newInstance()
            //编码
            .setContentEncoding(StandardCharsets.UTF_8.name())
            //延迟时间
            .setHeader("x-delay", seconds * 1000)
            .build();


    byte[] meetContainer = (seconds + "秒后通知部门会议").getBytes(StandardCharsets.UTF_8);
    Message msg = new Message(meetContainer, prop);

    template.convertAndSend("delay.ex", "delay.rk", msg);
    return "已经设定好了通知";
  }
}
监听器代码
import com.rabbitmq.client.Channel;
import org.springframework.amqp.core.Message;
import org.springframework.amqp.rabbit.annotation.RabbitListener;
import org.springframework.stereotype.Component;


@Component
public class DelayListener {
  @RabbitListener(queues = "delay.qu")
  public void MeetingAlarm(Message msg, Channel channel) throws Exception {
    String alarmMsg = new String(msg.getBody(), msg.getMessageProperties().getContentEncoding());
    System.out.println("收到提醒:" + alarmMsg);
  }
}
启动测试
分钟别在浏览器中输入:
http://127.0.0.1:8080/notify/20
http://127.0.0.1:8080/notify/15
http://127.0.0.1:8080/notify/7
http://127.0.0.1:8080/notify/2
观察控制台输出:
收到提醒:2秒后通知部门会议
收到提醒:7秒后通知部门会议
收到提醒:15秒后通知部门会议
收到提醒:20秒后通知部门会议
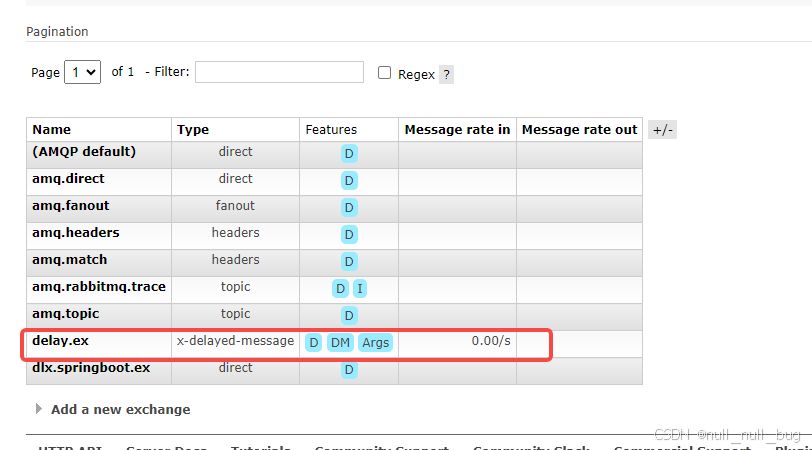
查看交换器


