文章目录
flutter 布局介绍
一、Container 布局
1.属性
| 属性 | 类型 | 说明 |
|---|---|---|
| child | Widget | 声明子组件 |
| alignment | Alignment | 控制child的对齐方式,如果container或者container父节点尺寸大于child的尺寸,这个属性设置会起作用,有很多种对齐方式。 |
| padding | EdgeInsets | decoration内部的空白区域,如果有child的话,child位于padding内部。padding与margin的不同之处在于,padding是包含在content内,而margin则是外部边界,设置点击事件的话,padding区域会响应,而margin区域不会响应。 |
| color | Color | 用来设置container背景色,如果foregroundDecoration设置的话,可能会遮盖color效果 |
| decoration | BoxDecoration | 边框、圆角、渐变、阴影、 背景图片,绘制在child后面的装饰,设置了decoration的话,就不能设置color属性,否则会报错,此时应该在decoration中进行颜色的设置。 |
| foregroundDecoration | BoxDecoration | 绘制在child前面的装饰。如果设置decoration, 此时foregroundDecoration 样式会叠加在decoration样式上边 |
| width | double | container的宽度,设置为double.infinity可以强制在宽度上撑满,不设置,则根据child和父节点两者一起布局。 |
| height | double | container的高度,设置为double.infinity可以强制在高度上撑满。 |
| constraints | BoxConstraints | maxHeight、 maxWidth、 minHeight、 minWidth 添加到child上额外的约束条件。 |
| margin | EdgeInsets | 外边距 |
| transform | Matrix4 | 动画、平移-translate、 旋转- rotation、 缩放 - scale、 斜切-skew) |
2. 示例
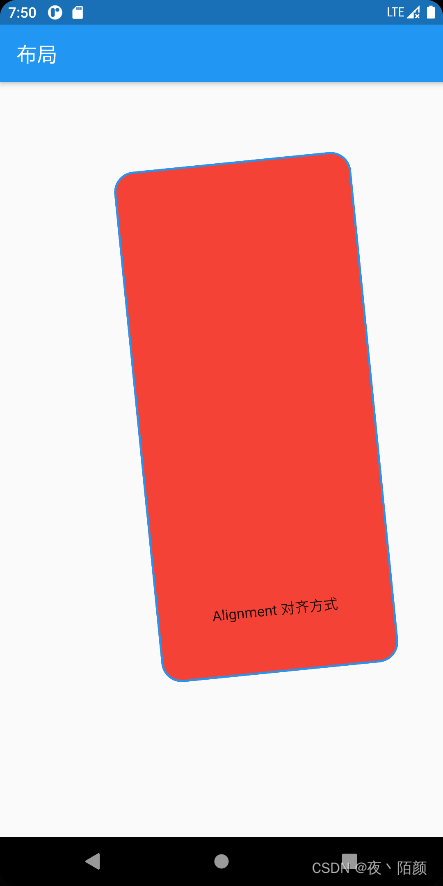
代码如下(示例):
class Body extends StatelessWidget {
  @override
  Widget build(BuildContext context) {
    return Container(
      alignment: Alignment.bottomCenter,
      padding: EdgeInsets.all(50.0),
      // color: Colors.red,
      // foregroundDecoration: BoxDecoration(
      //   color: Colors.brown,
      //   border: Border.all(color: Colors.blue, width: 2.0),
      //   borderRadius: BorderRadius.all(Radius.circular(20)),
      // ),
      decoration: BoxDecoration(
        color: Colors.red,
        border: Border.all(color: Colors.blue, width: 2.0),
        borderRadius: BorderRadius.all(Radius.circular(20)),
      ),
      child: Text('Alignment 对齐方式'),
      width: double.infinity,
      height: double.infinity,
      constraints: BoxConstraints(maxHeight: 500, maxWidth: 300),
      margin: EdgeInsets.all(100),
      transform: Matrix4.rotationZ(-0.1),
    );
  }
}
二、线性布局
1.说明
对于线性布局而言,是由主轴和纵轴之分的;
如果布局是沿水平方向,那么主轴就是指水平方向,纵轴就是垂直方向;
如果布局是沿垂直方向,那么主轴就是指垂直方向,纵轴就是水平方向;
Row和Column都继承自Flex(弹性布局)
2. 属性
| 属性 | 类型 | 说明 |
|---|---|---|
| mainAxisAlignment | MainAxisAlignment | 主轴对齐方式 |
| crossAxisAlignment | CrossAxisAlignment | 交叉轴对齐方式 |
| children | Widget | 声明子组件 |
| mainAxisSize | MainAxisSize | 表示 Row 在主轴(水平)方向占用的空间,默认是 MainAxisSize.max,表示尽可能多的占用水平方向的空间,此时无论子 widgets 实际占用多少水平空间,Row 的宽度始终等于水平方向的最大宽度。 |
| textDirection | TextDirection | 子控件排序方向 (一般不用设置,除非想反转子控件排序) |
| textBaseline | TextBaseline | 对齐文本的水平线 |
| verticalDirection | VerticalDirection | 对齐方式 |
3. 示例
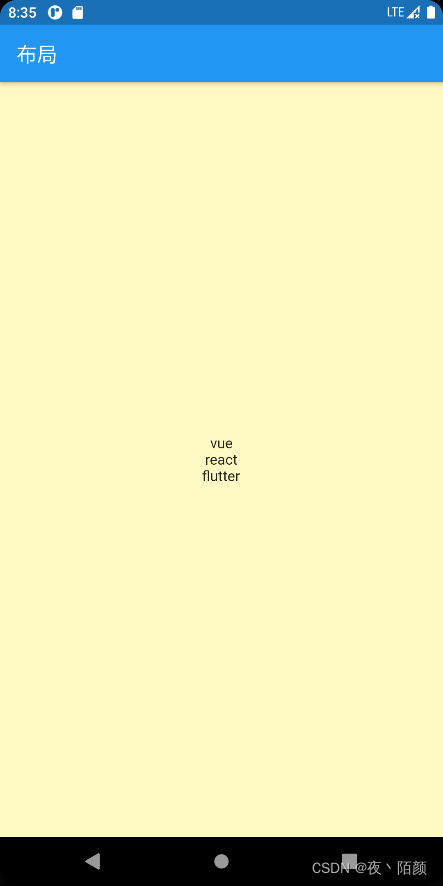
class Body extends StatelessWidget {@override
  Widget build(BuildContext context) {
    return Container(
      color: Colors.yellow[100],
      alignment: Alignment(0, 0), // 定义中心点为中间位置
      child: Column(
        mainAxisAlignment: MainAxisAlignment.center, // 垂直方向居中
        // crossAxisAlignment: CrossAxisAlignment.start, // 水平方向居中
        textDirection: TextDirection.rtl,
        textBaseline: TextBaseline.alphabetic,
        // verticalDirection: VerticalDirection.down,
        children: [
          Text('vue'),
          Text('react'),
          Text('flutter'),
        ],
      ),
    );
  }
}
三、弹性布局 Flex
1.属性
| 属性 | 类型 | 说明 |
|---|---|---|
| direction | Axis | 设置主轴方向,可设置的值为 Axis.horizontal(水平方向) 和 Axis.vertical(垂直方向),交叉轴与主轴方向垂直。 |
| mainAxisAlignment | MainAxisAlignment | 声明主轴对齐方式 |
| textDirection | TextDirection | 声明水平方向的排列顺序 |
| crossAxisAlignment | CrossAxisAlignment | 声明交叉轴对齐方式 |
| verticalDirection | VerticalDirection | 声明垂直方向的排列方式 |
| children | Widget | 声明子组件 |
2. Expanded 的使用
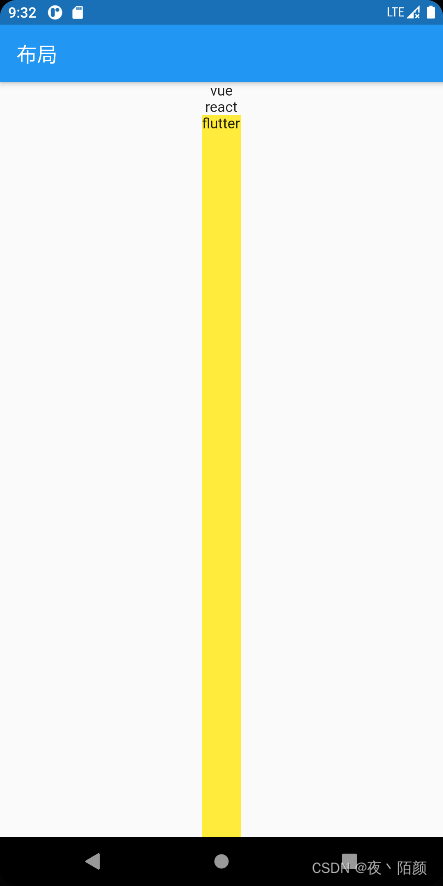
说明: 在flex 中Expanded 占剩下的全部空间
3. 示例
代码如下(示例):
class Body extends StatelessWidget {
  @override
  Widget build(BuildContext context) {
    return Container(
      width: double.infinity,
      child: Flex(
        direction: Axis.vertical,
        mainAxisAlignment: MainAxisAlignment.center,
        crossAxisAlignment: CrossAxisAlignment.center,
        verticalDirection: VerticalDirection.down,
        textDirection: TextDirection.rtl,
        children: [
          Text('vue'),
          Text('react'),
          Expanded(
            child: Container(
              color: Colors.yellow,
              child: Text('flutter'),
            )
          ),

        ],
      )
    );
  }
}
四、流式布局
1.说明
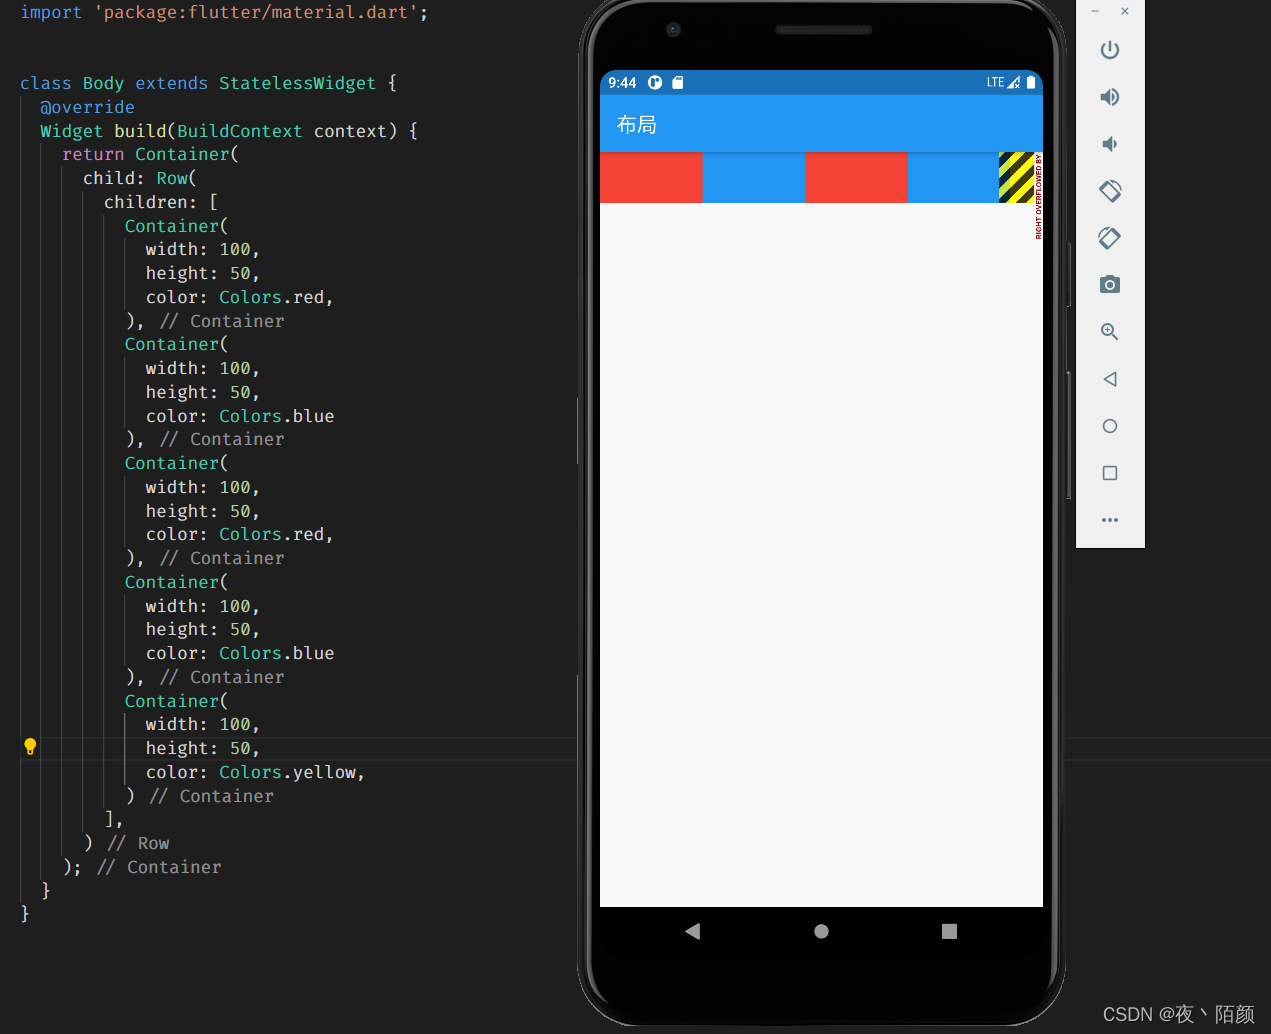
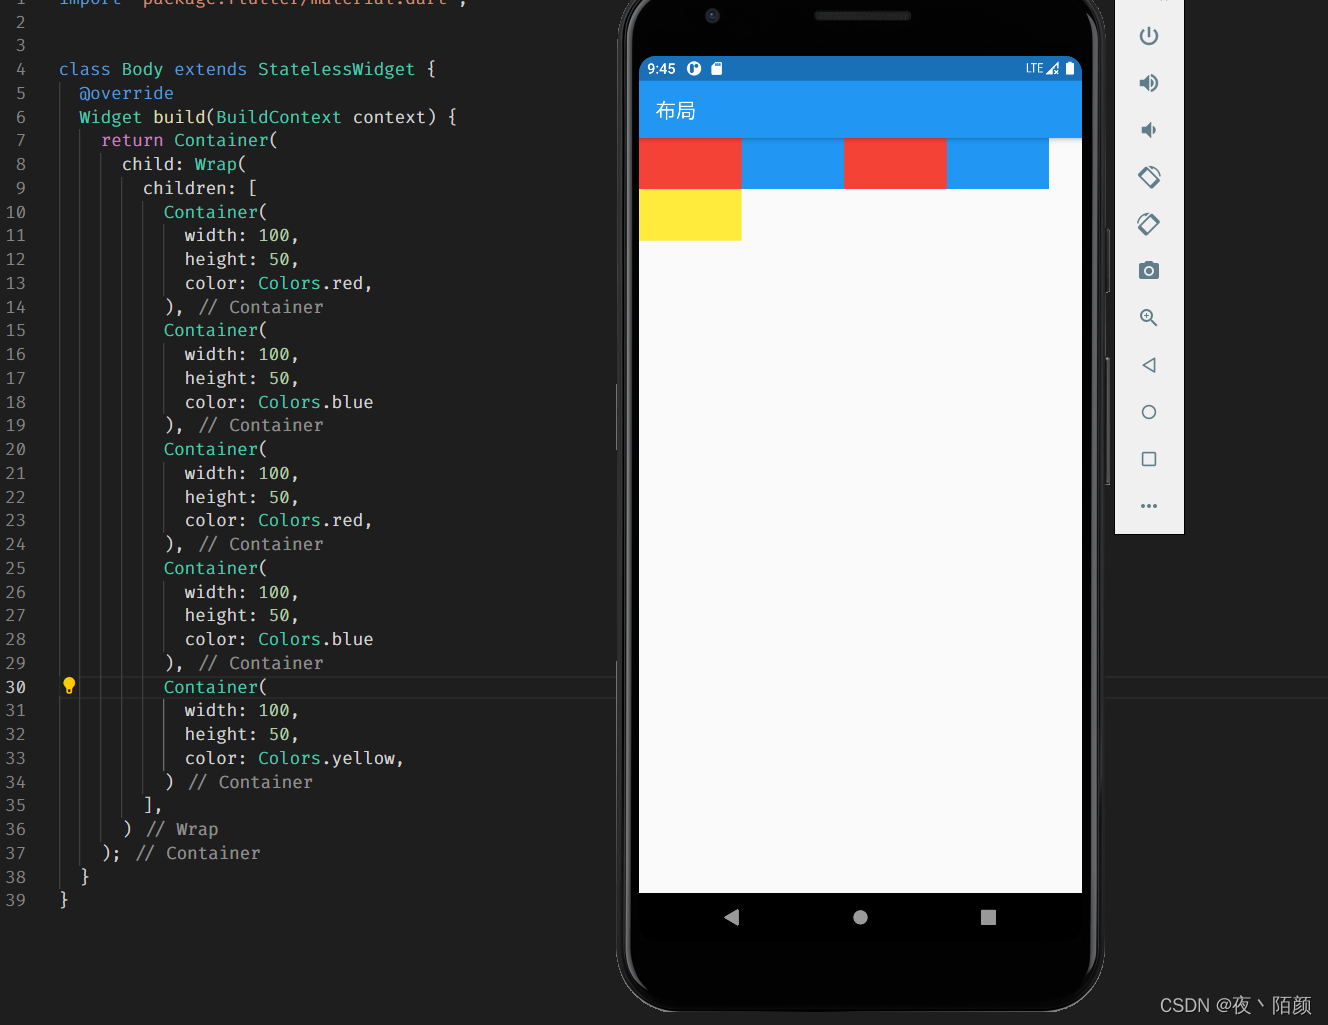
为了解决子Widgert的尺寸超出父Widget的时候会报错,可能我们需要的是自动排在下一行,才有了流式布局。
页面报错了
使用流式布局:
2. 属性
| 属性 | 类型 | 说明 |
|---|---|---|
| spacing | double | 主轴方向子组件的间距 |
| alignment | WrapAlignment | 主轴方向的对齐方式 |
| runSpacing | double | 纵轴方向子组件的间距 |
| runAlignment | WrapAlignment | 纵轴方向的对齐方式 |
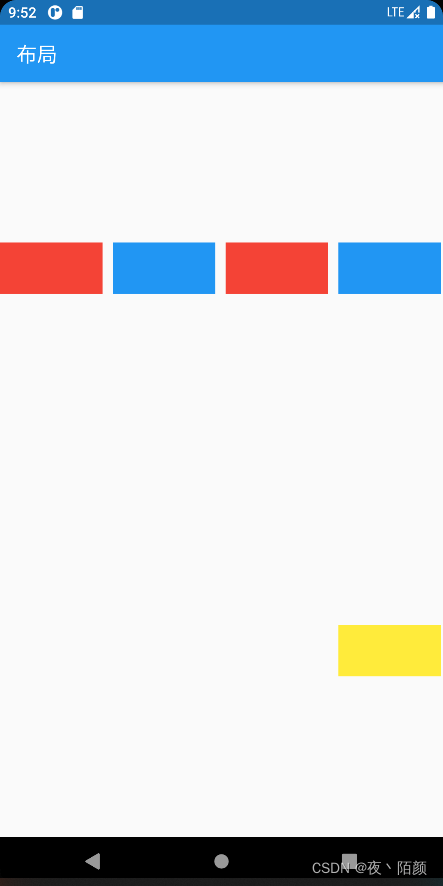
3. 示例
代码如下(示例):
class Body extends StatelessWidget {
  @override
  Widget build(BuildContext context) {
    return Container(
      height: double.infinity,
      child: Wrap(
        spacing: 10,
        runSpacing: 10,
        alignment: WrapAlignment.end,
        runAlignment: WrapAlignment.spaceAround,
        children: [
          Container(
            width: 100,
            height: 50,
            color: Colors.red,
          ),
          Container(
            width: 100,
            height: 50,
            color: Colors.blue
          ),
          Container(
            width: 100,
            height: 50,
            color: Colors.red,
          ),
          Container(
            width: 100,
            height: 50,
            color: Colors.blue
          ),
          Container(
            width: 100,
            height: 50,
            color: Colors.yellow,
          )
        ],
      )
    );
  }
}
五、层叠布局
1.说明
css 中
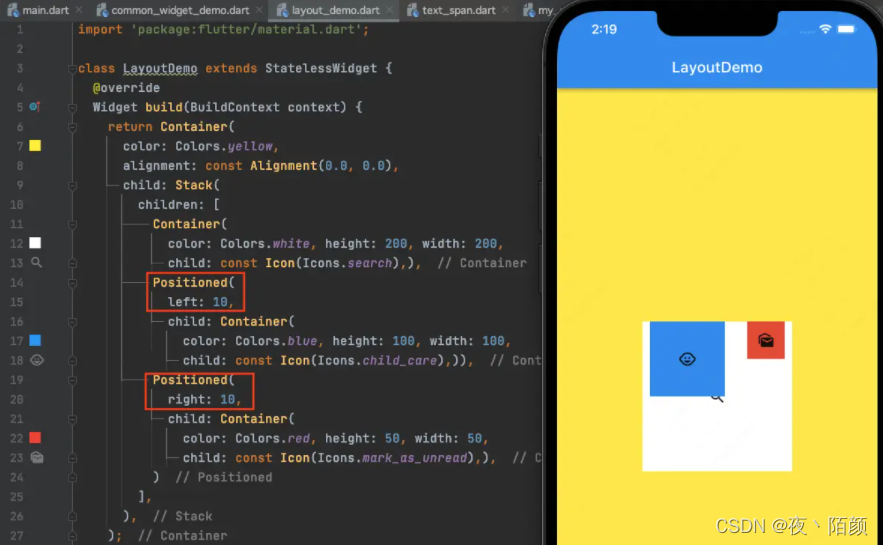
定位、定位、定位, 在Flutter中我们使用Stack和Positioned两个部件组合使用来实现绝对定位。Stack来实现足部件堆叠起来,而Positioned用来根据Stack的四个角来确定子部件的具体位置;
2. 属性
Stack
-
alignment:此参数表示如果我们没有定位子部件或者子部件只进行了部分定位时的对齐方式;
-
没有定位:没有使用Positioned进行定位;
-
部分定位:特指没有在某一个轴上定位:
- left,right为横轴;top,bottom为纵轴;只要包含某个轴上的一个定位属性,那么就算在该轴上有定位
-
-
textDirection:和Row的textDirection功能一样,都用于确定alignment对齐时的参考系;
- textDirection值为TextDirection.ltr,则alignment的start表示左边,end表示右边;也就是从左到右的顺序;
- textDirection值为TextDirection.rtl,则alignment的start表示右边,end表示左边;也就是从右到左的顺序;
-
fix:用来确定没有定位的子部件如何适应Stack的大小;
- StackFit.loose:使用子部件的大小;
- StackFit.expand:拉伸到Stack的大小;
-
overflow:用来决定如何显示超出了Stack显示区域的子部件;
- Overflow.clip:子部件超出Stack显示区域的那部分会被裁剪,或者说隐藏;
- Overflow.visible:超出显示区域的那部分不会被裁剪;
Positioned
- left:距离Stack左边的距离;
- top:距离Stack上边的距离;
- right:距离Stack右边的距离;
- bottom:距离Stack下边的距离;
- width:指定当前需要定位的部件的宽度; height:指定当前需要定位的部件的高度
3. 示例
6. Card-卡片
1. Card属性
| 属性 | 类型 | 说明 |
|---|---|---|
| child | Widget | 声明子组件 |
| color | Colors | 颜色 |
| shadowColor | Colors | 阴影色 |
| elevation | double | 阴影高度 |
| shape | RoundedRectangleBorder | 边框样式 |
| margin | EdgeInsets | 外边距 |
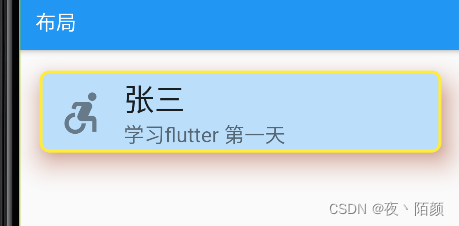
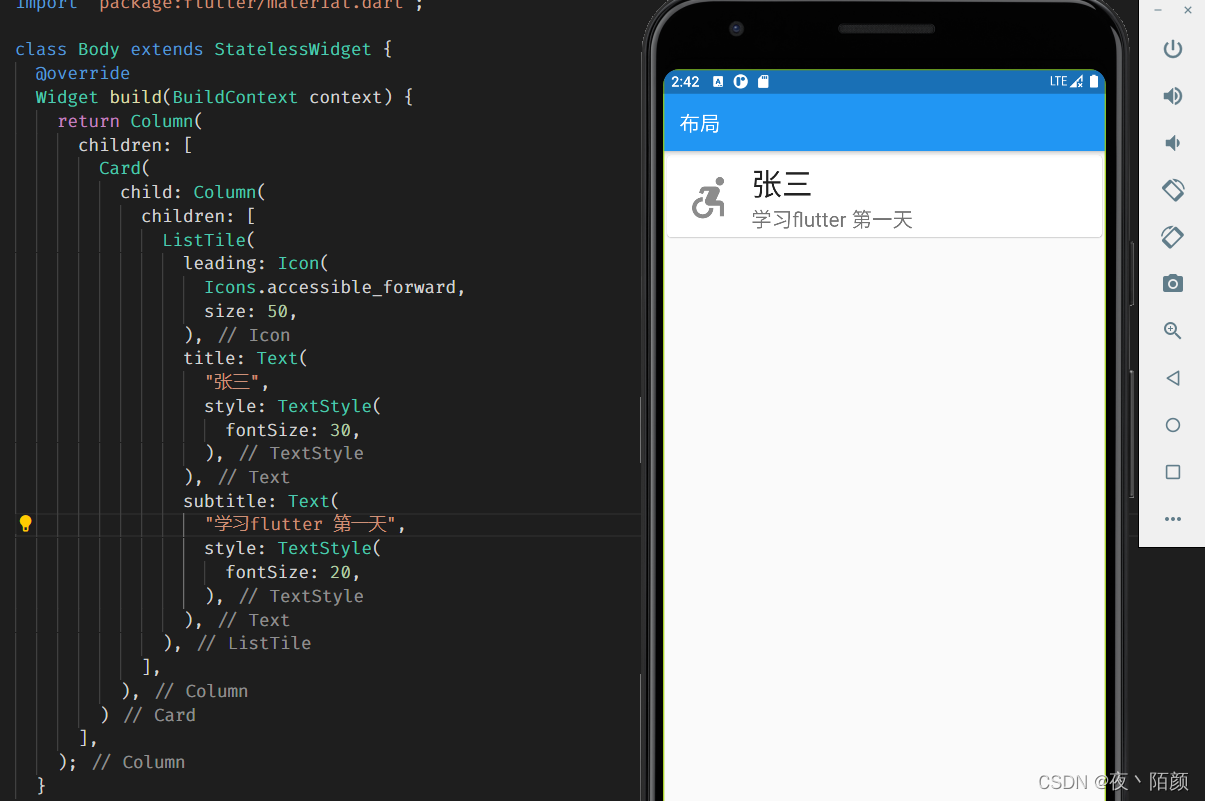
代码如下(示例):
class Body extends StatelessWidget {
  @override
  Widget build(BuildContext context) {
    return Column(
      children: [
        Card(
          margin: EdgeInsets.all(20),
          color: Colors.blue[100],
          shadowColor: Colors.deepOrangeAccent,
          elevation: 20,
          shape: RoundedRectangleBorder(
            borderRadius: BorderRadius.circular(10),
            side: BorderSide(
              color: Colors.yellow,
              width: 3,
            ),
          ),
          child: Column(
            children: [
              ListTile(
                leading: Icon(
                  Icons.accessible_forward,
                  size: 50,
                ),
                title: Text(
                  "张三",
                  style: TextStyle(
                    fontSize: 30,
                  ),
                ),
                subtitle: Text(
                  "学习flutter 第一天",
                  style: TextStyle(
                    fontSize: 20,
                  ),
                ),
              ),
            ],
          ),
        )
      ],
    );
  }
}
2.ListTile 属性
| 属性 | 类型 | 说明 |
|---|---|---|
| leading | Widget | 头部组件 |
| title | Widget | 标题 |
| subtitle | Widget | 子标题 |
