1. 背景
在Qt中加载Rviz的时候,经常会用到Rviz的一些函数,下面介绍Rviz的函数以及对应的Rviz左侧界面的参数
2. Rviz界面
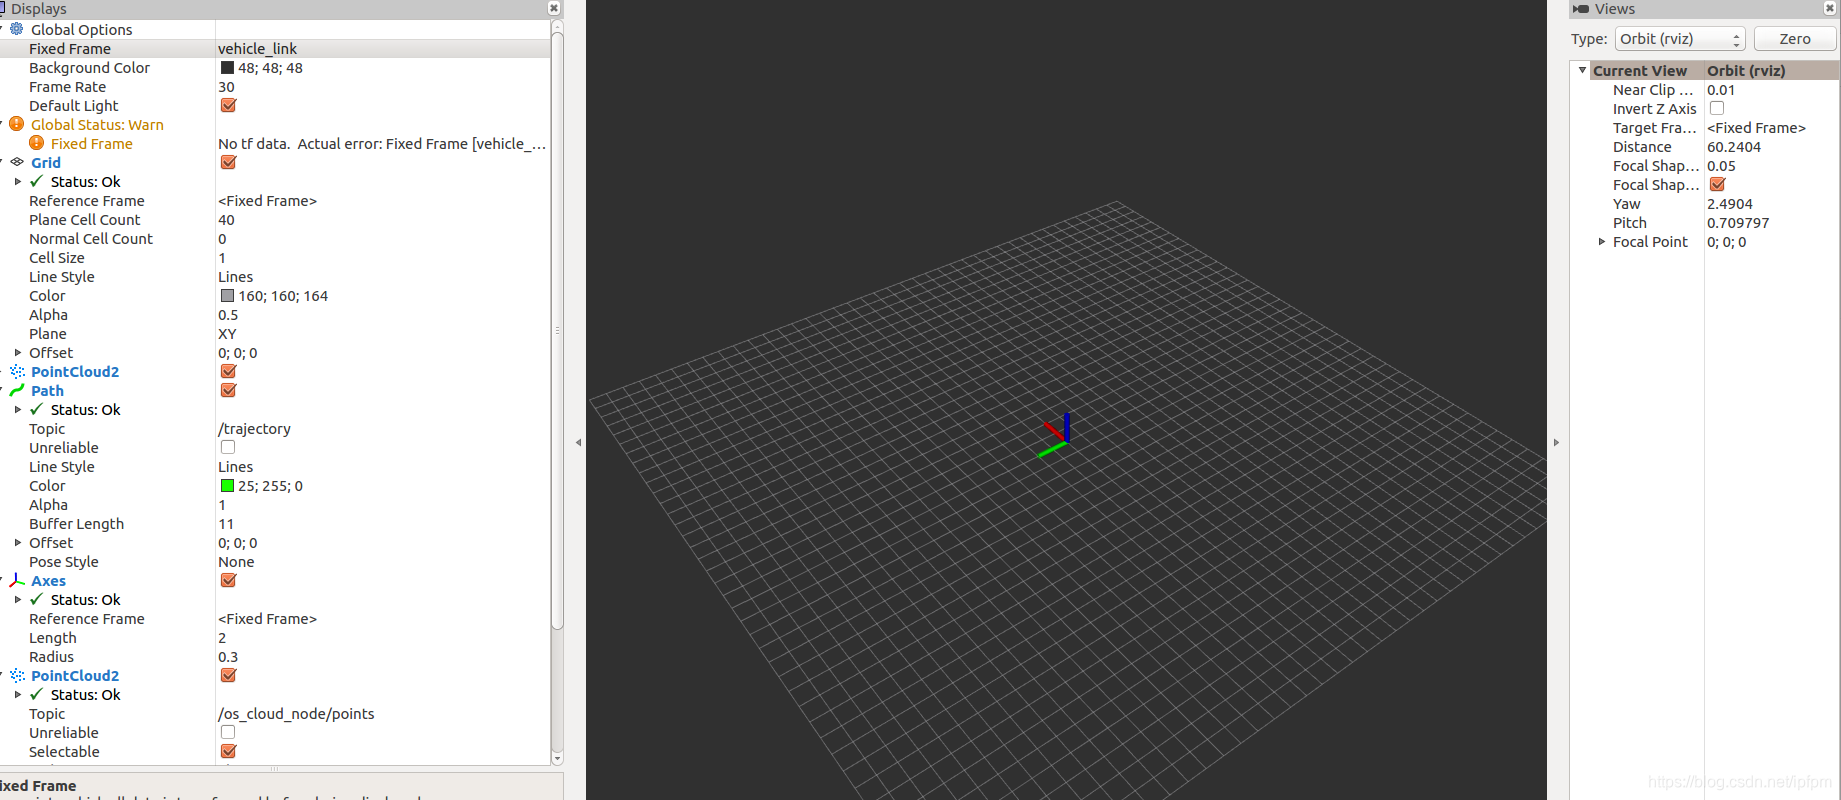
上面的rviz图形工具显示有三部分:中间显示容器 Rviz初始化、左侧图层参数设置栏 Rviz参数设置、右侧的视角栏 Rviz地图展示
3. 常见函数
3.1 头文件
在调用Rviz的相关函数的时候,需要先引用相关头文件
.h
#include <rviz/visualization_manager.h>
#include <rviz/render_panel.h>
#include <rviz/display.h>
#include <rviz/tool_manager.h>
#include<rviz/tool.h>
#include <rviz/default_plugin/view_controllers/orbit_view_controller.h>
#include <rviz/view_manager.h>
3.2 Rviz初始化
<span id="1>
创建rviz显示容器,其本质是继承QWidget类,因此可将其看成一个窗口控件,设置其显示布局
.
rviz::RenderPanel *render_panel_=new rviz::RenderPanel;
获取rviz的控制对象,该操作可以通过后续对控制对象操作进而对rviz显示容器进行操作显示
.
rviz::VisualizationManager* manager_=new rviz::VisualizationManager(render_panel_);
初始化camera ,实现放大 缩小 平移等操作
.
render_panel_->initialize(manager_->getSceneManager(),manager_);
初始化rviz控制对象
.
manager_->initialize();
manager_->removeAllDisplays();
manager_->startUpdate();
以上几步就完成了对Rviz的初始化设置,想要显示点云等具体的内容还要设置一些属性。
3.3 Rviz参数设置
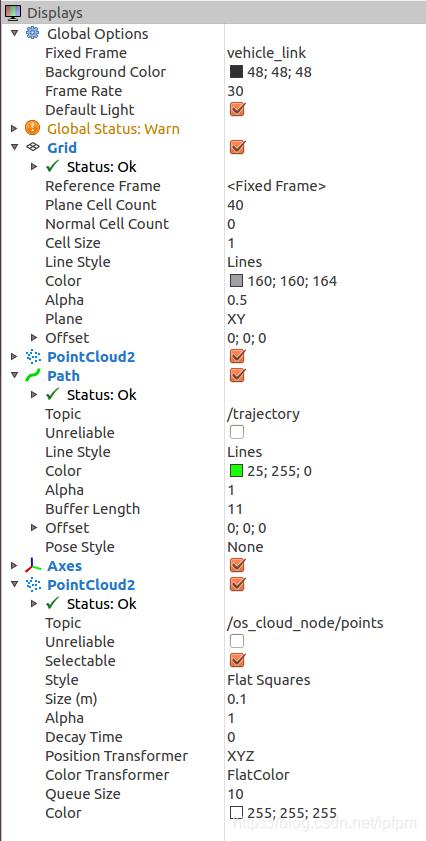
在Rviz的图形化工具中,可以看到在参数栏看到一些可配置项。
  /** @brief Set the coordinate frame we should be transforming all fixed data into.
   * @param frame The name of the frame -- must match the frame name broadcast to libTF
   * @sa getFixedFrame() */
  void setFixedFrame( const QString& frame );
设置坐标转换,例如上面对应的rviz界面可如下:
.
manager_->setFixedFrame("/vehicle_link");
  /**
   * \brief Create and add a display to this panel, by class lookup name
   * @param class_lookup_name "lookup name" of the Display subclass, for pluginlib.
   *        Should be of the form "packagename/displaynameofclass", like "rviz/Image".
   * @param name The name of this display instance shown on the GUI, like "Left arm camera".
   * @param enabled Whether to start enabled
   * @return A pointer to the new display.
   */
  Display* createDisplay( const QString& class_lookup_name, const QString& name, bool enabled );
创建图层函数,其中class_lookup_name:还可以取“rviz/PointCloud2”,“rviz/RobotModel”,"rviz/TF"等:
图层创建好之后要设置图层的各个属性值,属性值也可以根据rviz图形界面右侧来设置:
subProp( QString propertyName )->setValue(Qvariant value);
.
例如设置网格:
rviz::Display* grid_ = manager_->createDisplay( “rviz/Grid”, “adjustable grid”, true );
grid_->subProp( “Line Style” )->setValue( “Billboards” );
grid_->subProp( “Color” )->setValue(QColor(125,125,125));
3.3 Rviz地图展示
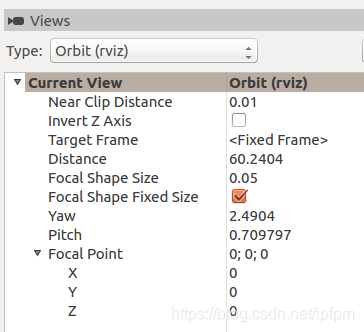
该章节可设置显示的视角,距离,偏航等等;
直接看代码:
    rviz::ViewManager* viewManager = manager_->getViewManager();
    viewManager->setRenderPanel(render_panel_);
    viewManager->setCurrentViewControllerType("rviz/ThirdPersonFollower");
    viewManager->getCurrent()->subProp("Target Frame")->setValue("/base_link");
    viewManager->getCurrent()->subProp("Near Clip Distance")->setValue("0.01");
    viewManager->getCurrent()->subProp("Focal Point")->setValue("1.90735e-06;-7.62939e-06;0");
    viewManager->getCurrent()->subProp("Focal Shape Size")->setValue("0.05");
    viewManager->getCurrent()->subProp("Focal Shape Fixed Size")->setValue("true");
    viewManager->getCurrent()->subProp("Distance")->setValue("10");
    viewManager->getCurrent()->subProp("Yaw")->setValue("1.7004");
    viewManager->getCurrent()->subProp("Pitch")->setValue("0.770398");


