本项目实现了一个基于ESP32-CAM的实时人脸识别系统,能够通过WiFi进行视频流传输,并在检测到人脸时触发开门指令。系统由两个主要部分组成:`video.py`(后端服务器)和 `ESP32-CAM.ino`(ESP32-CAM固件)。
## 2. 主要功能
### 2.1 `video.py`python源码服务器端。
from flask import Flask, request, jsonify, Response
import cv2
import numpy as np
import face_recognition
import logging
import requests
import time
import threading
import os
from werkzeug.utils import secure_filename
app = Flask(__name__)
# 配置日志
logging.basicConfig(
level=logging.INFO,
format='%(asctime)s - %(levelname)s - %(message)s'
)
# 配置
SAMPLE_DIR = './samples'
ESP32_URL = 'http://192.168.1.104/open_door'
LED_URL = 'http://192.168.1.104/toggle_flash'
FACE_THRESHOLD = 0.45 # 放宽人脸匹配阈值(原值0.55)
FRAME_INTERVAL = 0.5 # 处理帧的间隔(秒)
MIN_FACE_SIZE = 40 # 降低最小人脸尺寸(原值60)以适应更远距离
MAX_FACE_SIZE = 160 # 添加最大人脸尺寸限制
FRAME_TIMEOUT = 3.0 # 无视频流超时时间(秒)
preview_thread = None
preview_running = False
display_thread_obj = None # 重命名变量
last_flash_time = 0
last_door_time = 0
FLASH_COOLDOWN = 2.0 # 补光冷却时间(秒)
DOOR_COOLDOWN = 3.0 # 开门冷却时间(秒)
last_match_id = None # 用于跟踪最后一次匹配的人脸ID
MATCH_RESET_TIME = 5.0 # 重置匹配状态的时间(秒)
# 全局变量
last_process_time = 0
latest_frame = None
sample_encodings = None
debug_window = False # 调试窗口开关
frame_lock = threading.Lock() # 帧锁
last_frame_time = 0 # 最后接收到帧的时间
# 允许的文件扩展名
ALLOWED_EXTENSIONS = {'png', 'jpg', 'jpeg'}
IMAGES_DIR = './images'
# 确保必要的目录存在
if not os.path.exists(IMAGES_DIR):
os.makedirs(IMAGES_DIR)
logging.info(f"创建人脸图像目录: {IMAGES_DIR}")
def toggle_debug_window():
"""切换调试窗口显示状态"""
global debug_window, display_thread_obj, preview_running
try:
debug_window = not debug_window
logging.info(f"调试窗口: {'开启' if debug_window else '关闭'}")
if debug_window:
# 启动预览线程
if display_thread_obj is None or not display_thread_obj.is_alive():
preview_running = True
display_thread_obj = threading.Thread(target=display_preview, daemon=True) # 改用新的函数名
display_thread_obj.start()
else:
# 停止预览线程
preview_running = False
if display_thread_obj and display_thread_obj.is_alive():
display_thread_obj.join(timeout=1.0)
cv2.destroyAllWindows()
except Exception as e:
logging.error(f"切换调试窗口错误: {e}")
return False
return True
def display_preview():
"""显示预览线程"""
global latest_frame, last_frame_time
try:
fps_time = time.time()
while preview_running:
try:
current_time = time.time()
# 检查是否有活跃的视频流
if latest_frame is not None and current_time - last_frame_time < FRAME_TIMEOUT:
if debug_window:
with frame_lock:
frame_to_show = latest_frame.copy()
# # 计算FPS
# time_diff = current_time - fps_time
# fps = 1.0 / time_diff if time_diff > 0 else 0.0
# fps_time = current_time
# # 显示帧率和状态
# cv2.putText(frame_to_show, f"FPS: {fps:.1f}", (10, 30),
# cv2.FONT_HERSHEY_SIMPLEX, 1, (0, 255, 0), 2)
cv2.putText(frame_to_show, "Stream Active", (10, 70),
cv2.FONT_HERSHEY_SIMPLEX, 1, (0, 255, 0), 2)
# 显示图像
cv2.imshow('Debug Window', frame_to_show)
# 检查键盘输入
key = cv2.waitKey(1) & 0xFF
if key == ord('q'):
toggle_debug_window()
break
else:
# 清除缓存
with frame_lock:
if latest_frame is not None:
latest_frame = None
logging.info("视频流超时,清除缓存")
if debug_window:
# 显示等待画面
blank_frame = np.zeros((480, 640, 3), np.uint8)
cv2.putText(blank_frame, "Waiting for video stream...", (150, 240),
cv2.FONT_HERSHEY_SIMPLEX, 1, (255, 255, 255), 2)
cv2.imshow('Debug Window', blank_frame)
cv2.waitKey(1)
time.sleep(0.01) # 控制刷新率
except Exception as e:
logging.error(f"显示线程错误: {e}")
time.sleep(1)
if not debug_window: # 如果窗口被关闭,退出循环
break
except Exception as e:
logging.error(f"预览线程错误: {e}")
finally:
cv2.destroyAllWindows()
logging.info("预览线程已退出")
def load_sample_encodings():
"""加载样本特征(程序启动时加载一次)"""
global sample_encodings
try:
# 确保samples目录存在
if not os.path.exists(SAMPLE_DIR):
os.makedirs(SAMPLE_DIR)
logging.warning(f"创建样本目录: {SAMPLE_DIR}")
logging.warning("请将人脸样本图片放入samples目录")
return
# 获取所有样本图片
sample_files = [f for f in os.listdir(SAMPLE_DIR)
if f.lower().endswith(('.jpg', '.jpeg', '.png'))]
if not sample_files:
logging.warning("samples目录中没有找到图片文件")
logging.warning("请将人脸样本图片放入samples目录")
return
# 加载第一个有效的样本图片
encodings = []
for sample_file in sample_files:
try:
sample_path = os.path.join(SAMPLE_DIR, sample_file)
sample_image = face_recognition.load_image_file(sample_path)
encoding = face_recognition.face_encodings(sample_image)[0]
encodings.append(encoding)
logging.info(f"成功加载样本: {sample_file}")
except Exception as e:
logging.error(f"处理样本 {sample_file} 失败: {str(e)}")
continue
if encodings:
sample_encodings = encodings
logging.info(f"共加载 {len(encodings)} 个样本特征")
else:
logging.error("没有成功加载任何样本特征")
except Exception as e:
logging.error(f"加载样本特征失败: {e}")
sample_encodings = None
def send_open_door_command():
"""发送开门指令,带冷却时间控制"""
global last_door_time
current_time = time.time()
# 检查是否在冷却时间内
if current_time - last_door_time < DOOR_COOLDOWN:
logging.debug("开门指令冷却中...")
return False
try:
response = requests.get(ESP32_URL, timeout=2)
if response.status_code == 200:
last_door_time = current_time # 更新最后触发时间
logging.info("开门指令已发送")
return True
else:
logging.error(f"开门指令发送失败,状态码: {response.status_code}")
except Exception as e:
logging.error(f"开门指令发送失败: {e}")
return False
def trigger_flash():
"""触发补光LED,带冷却时间控制"""
global last_flash_time
current_time = time.time()
# 检查是否在冷却时间内
if current_time - last_flash_time < FLASH_COOLDOWN:
logging.debug("补光LED冷却中...")
return False
try:
response = requests.get(LED_URL, timeout=2)
if response.status_code == 200:
last_flash_time = current_time # 更新最后触发时间
logging.info("补光LED已触发")
return True
else:
logging.error(f"补光LED触发失败,状态码: {response.status_code}")
except Exception as e:
logging.error(f"补光LED触发失败: {e}")
return False
def process_frame(frame):
"""处理视频帧"""
global last_process_time, latest_frame, last_match_id
try:
# 1. 调整输入图像大小,保持较高分辨率
frame_height, frame_width = frame.shape[:2]
if frame_width > 1280: # 如果分辨率太高,适当降低
scale = 1280 / frame_width
frame = cv2.resize(frame, (0, 0), fx=scale, fy=scale)
# 2. 图像增强,提高清晰度
frame_enhanced = cv2.convertScaleAbs(frame, alpha=1.3, beta=5) # 轻微提高对比度
frame_enhanced = cv2.GaussianBlur(frame_enhanced, (3, 3), 0) # 轻微降噪
# 3. 使用更大的检测图像
small_frame = cv2.resize(frame_enhanced, (0, 0), fx=0.75, fy=0.75) # 改为3/4缩放
rgb_frame = cv2.cvtColor(small_frame, cv2.COLOR_BGR2RGB)
# 4. 优化人脸检测参数
face_locations = face_recognition.face_locations(
rgb_frame,
model="hog",
number_of_times_to_upsample=1
)
frame_with_face = frame.copy()
match_found = False
min_distance = 1.0
current_face_id = None
if face_locations:
valid_faces = []
# 5. 根据人脸大小过滤
for face_location in face_locations:
top, right, bottom, left = face_location
face_height = bottom - top
min_size = MIN_FACE_SIZE * (small_frame.shape[0] / 480)
max_size = MAX_FACE_SIZE * (small_frame.shape[0] / 480)
if min_size <= face_height <= max_size:
valid_faces.append(face_location)
if valid_faces:
face_encodings = face_recognition.face_encodings(
rgb_frame,
valid_faces,
num_jitters=3
)
for (top, right, bottom, left), face_encoding in zip(valid_faces, face_encodings):
scale = 1 / 0.75
top = int(top * scale)
right = int(right * scale)
bottom = int(bottom * scale)
left = int(left * scale)
if sample_encodings is not None:
distances = face_recognition.face_distance(sample_encodings, face_encoding)
current_min_distance = np.min(distances)
avg_distance = np.mean(distances[:3])
if current_min_distance <= FACE_THRESHOLD and avg_distance <= FACE_THRESHOLD + 0.1:
match_found = True
color = (0, 255, 0)
face_data = np.concatenate([face_encoding, [current_min_distance, avg_distance]])
current_face_id = hash(face_data.tobytes())
if current_face_id != last_match_id:
if trigger_flash():
time.sleep(0.1)
save_face_image(frame, (top, right, bottom, left), current_face_id)
if send_open_door_command():
logging.info(f"人脸匹配成功! 距离: {current_min_distance:.4f}, 平均距离: {avg_distance:.4f}")
last_match_id = current_face_id
else:
color = (0, 165, 255)
else:
color = (0, 0, 255)
cv2.rectangle(frame_with_face, (left, top), (right, bottom), color, 2)
cv2.putText(frame_with_face, f"D: {current_min_distance:.2f}",
(left, top - 10), cv2.FONT_HERSHEY_SIMPLEX, 0.6, color, 2)
# 显示帧率和状态
current_time = time.time()
fps = 1.0 / (current_time - last_process_time) # 计算FPS
last_process_time = current_time # 更新最后处理时间
cv2.putText(frame_with_face, f"FPS: {fps:.1f}", (10, 30),
cv2.FONT_HERSHEY_SIMPLEX, 1, (0, 255, 0), 2)
status_text = "Match!" if match_found else "No Match"
status_color = (0, 255, 0) if match_found else (0, 0, 255)
cv2.putText(frame_with_face, status_text, (frame.shape[1] - 200, 70),
cv2.FONT_HERSHEY_SIMPLEX, 1, status_color, 2)
return match_found, frame_with_face
except Exception as e:
logging.error(f"处理帧错误: {e}")
return False, frame
def verify_match(frame, original_encoding):
"""二次验证人脸匹配"""
try:
# 使用相同的预处理步骤
frame_enhanced = cv2.convertScaleAbs(frame, alpha=1.2, beta=10)
small_frame = cv2.resize(frame_enhanced, (0, 0), fx=0.5, fy=0.5)
rgb_frame = cv2.cvtColor(small_frame, cv2.COLOR_BGR2RGB)
# 检测人脸
face_locations = face_recognition.face_locations(rgb_frame, model="hog", number_of_times_to_upsample=2)
if face_locations:
# 获取新的人脸编码
new_encodings = face_recognition.face_encodings(rgb_frame, face_locations, num_jitters=2)
if new_encodings:
# 比较与原始编码的距离
distance = face_recognition.face_distance([original_encoding], new_encodings[0])[0]
return distance <= FACE_THRESHOLD
except Exception as e:
logging.error(f"二次验证错误: {e}")
return False
def save_face_image(frame, face_location, face_id):
"""保存识别到的人脸图像"""
top, right, bottom, left = face_location
face_image = frame[top:bottom, left:right] # 截取人脸区域
filename = os.path.join(IMAGES_DIR, f"face_{face_id}.jpg") # 生成文件名
cv2.imwrite(filename, face_image) # 保存图像
logging.info(f"保存人脸图像: {filename}")
@app.route('/video_stream', methods=['POST'])
def video_stream():
"""处理视频流"""
global last_process_time, latest_frame, last_frame_time
try:
# 控制处理频率
current_time = time.time()
if current_time - last_process_time < FRAME_INTERVAL:
return "skip\n"
last_process_time = current_time
last_frame_time = current_time
# 解码图像数据
data = request.get_data()
nparr = np.frombuffer(data, np.uint8)
frame = cv2.imdecode(nparr, cv2.IMREAD_COLOR)
if frame is None:
logging.error("无法解码图像数据")
return "error\n"
# 更新最新帧
with frame_lock:
latest_frame = frame.copy()
# 处理帧进行人脸识别
match_result, processed_frame = process_frame(frame)
# 更新处理后的帧
with frame_lock:
latest_frame = processed_frame
# 如果匹配成功,发送开门指令
if match_result:
if send_open_door_command():
logging.info("人脸识别成功,已发送开门指令")
return "open_door\n"
else:
logging.warning("人脸识别成功,但开门指令发送失败")
return "no_action\n"
except Exception as e:
logging.error(f"处理视频流错误: {e}")
return "error\n"
@app.route('/toggle_debug', methods=['GET'])
def toggle_debug():
"""切换调试窗口的HTTP端点"""
success = toggle_debug_window()
return jsonify({
'status': 'success' if success else 'error',
'debug_window': debug_window,
'message': '切换成功' if success else '切换失败'
})
@app.route('/trigger_flash', methods=['GET'])
def flash_control():
"""手动触发补光的HTTP端点"""
success = trigger_flash()
return jsonify({
'status': 'success' if success else 'error',
'message': '补光已触发' if success else '补光触发失败'
})
@app.route('/upload_sample', methods=['POST'])
def upload_sample():
"""处理样本图片上传"""
if 'sample_image' not in request.files:
return jsonify({'status': 'error', 'message': '没有文件上传'}), 400
file = request.files['sample_image']
if file.filename == '':
return jsonify({'status': 'error', 'message': '未选择文件'}), 400
if file and allowed_file(file.filename):
filename = secure_filename(file.filename)
file_path = os.path.join(SAMPLE_DIR, filename)
file.save(file_path)
# 重新加载样本特征
load_sample_encodings()
return jsonify({'status': 'success', 'message': '样本图片上传成功'}), 200
else:
return jsonify({'status': 'error', 'message': '文件类型不支持'}), 400
def allowed_file(filename):
"""检查文件扩展名是否允许"""
return '.' in filename and filename.rsplit('.', 1)[1].lower() in ALLOWED_EXTENSIONS
def generate_frames():
"""生成视频流帧"""
try:
while True:
try:
if latest_frame is not None:
with frame_lock:
frame_to_show = latest_frame.copy()
# 转换图像格式
ret, buffer = cv2.imencode('.jpg', frame_to_show)
if not ret:
continue
# 生成帧数据
frame_data = buffer.tobytes()
yield (b'--frame\r\n'
b'Content-Type: image/jpeg\r\n\r\n' + frame_data + b'\r\n')
else:
# 如果没有帧,生成空白帧
blank_frame = np.zeros((480, 640, 3), np.uint8)
cv2.putText(blank_frame, "Waiting for video...", (150, 240),
cv2.FONT_HERSHEY_SIMPLEX, 1, (255, 255, 255), 2)
ret, buffer = cv2.imencode('.jpg', blank_frame)
frame_data = buffer.tobytes()
yield (b'--frame\r\n'
b'Content-Type: image/jpeg\r\n\r\n' + frame_data + b'\r\n')
time.sleep(0.01) # 控制帧率
except Exception as e:
logging.error(f"生成帧错误: {e}")
time.sleep(1)
except GeneratorExit:
logging.info("视频流生成器正常退出")
except Exception as e:
logging.error(f"视频流生成器错误: {e}")
@app.route('/video_feed')
def video_feed():
"""视频流路由"""
try:
logging.info("新的客户端连接到视频流")
return Response(generate_frames(),
mimetype='multipart/x-mixed-replace; boundary=frame')
except Exception as e:
logging.error(f"视频流路由错误: {e}")
return "Video stream error", 500
@app.route('/')
def index():
"""网页界面"""
return '''
<html>
<head>
<title>视频流监控</title>
<style>
body {
font-family: Arial, sans-serif;
margin: 20px;
text-align: center;
}
.container {
max-width: 800px;
margin: 0 auto;
}
.video-container {
margin: 20px 0;
}
.controls {
margin: 20px 0;
}
button {
padding: 10px 20px;
margin: 0 10px;
font-size: 16px;
cursor: pointer;
}
#status {
margin: 20px 0;
padding: 10px;
border-radius: 5px;
}
</style>
</head>
<body>
<div class="container">
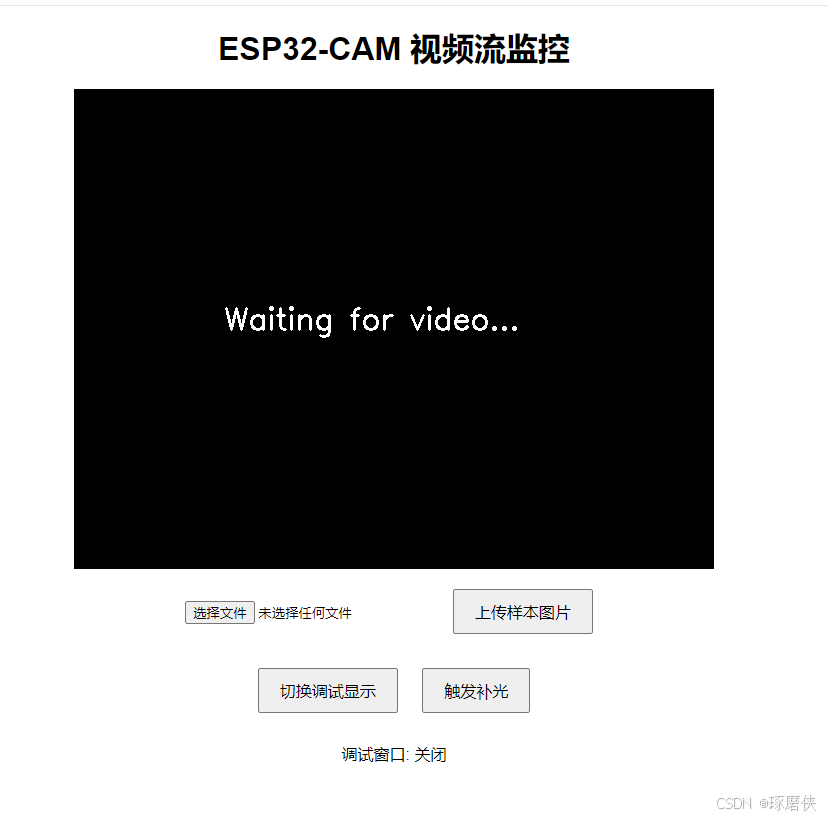
<h1>ESP32-CAM 视频流监控</h1>
<div class="video-container">
<img src="/video_feed" width="640" height="480">
</div>
<div class="controls">
<form id="uploadForm" enctype="multipart/form-data" method="POST" action="/upload_sample" onsubmit="return uploadSample(event)">
<input type="file" name="sample_image" accept="image/*" required>
<button type="submit">上传样本图片</button>
</form>
<br> <!-- 增加间隔 -->
<button onclick="toggleDebug()">切换调试显示</button>
<button onclick="triggerFlash()">触发补光</button>
</div>
<div id="status"></div>
</div>
<script>
function toggleDebug() {
fetch('/toggle_debug')
.then(response => response.json())
.then(data => {
document.getElementById('status').innerHTML =
`调试窗口: ${data.debug_window ? '开启' : '关闭'}`;
});
}
function triggerFlash() {
fetch('/trigger_flash')
.then(response => response.json())
.then(data => {
document.getElementById('status').innerHTML = data.message;
});
}
function uploadSample(event) {
event.preventDefault(); // 防止表单默认提交
const formData = new FormData(document.getElementById('uploadForm'));
fetch('/upload_sample', {
method: 'POST',
body: formData
})
.then(response => response.json())
.then(data => {
document.getElementById('status').innerHTML = data.message; // 显示消息
})
.catch(error => {
document.getElementById('status').innerHTML = '上传失败,请重试。';
console.error('上传错误:', error);
});
}
</script>
</body>
</html>
'''
if __name__ == '__main__':
try:
# 确保必要的目录存在
if not os.path.exists(SAMPLE_DIR):
os.makedirs(SAMPLE_DIR)
logging.info(f"创建样本目录: {SAMPLE_DIR}")
# 加载样本特征
load_sample_encodings()
# 检查是否成功加载了样本
if sample_encodings is None or len(sample_encodings) == 0:
logging.warning("未能加载任何样本特征,程序将继续运行但无法进行人脸匹配")
logging.warning(f"请将人脸样本图片放入目录: {os.path.abspath(SAMPLE_DIR)}")
# 启动服务器
logging.info("启动服务器...")
from waitress import serve
serve(app, host='0.0.0.0', port=5000, threads=4)
except KeyboardInterrupt:
logging.info("程序正常退出")
except Exception as e:
logging.error(f"程序异常退出: {e}")
finally:
preview_running = False # 确保线程能够退出
cv2.destroyAllWindows()- **功能**:
- 提供视频流服务,允许客户端通过HTTP请求获取实时视频流。
- 处理人脸识别,识别到人脸后发送开门指令。
- 支持样本图片上传,用于人脸匹配。
- 提供调试窗口,显示FPS和流状态。
- **实现逻辑**:
- 使用Flask框架搭建HTTP服务器,处理客户端请求。
- 使用OpenCV进行视频流处理和人脸识别。
- 通过HTTP请求与ESP32-CAM进行通信,控制LED和开门指令。
- **使用方法**:
1. 启动Flask服务器。
2. 访问 `/` 路由以查看视频流。
3. 使用 `/upload_sample` 路由上传人脸样本。
4. 使用 `/toggle_debug` 路由切换调试窗口。
### 2.2 `ESP32-CAM.ino`
- **功能**:
- 连接WiFi并与后端服务器进行通信。
- 实现视频流的捕获和发送。
- 进行运动检测,触发视频流的启动和停止。
- 控制LED以提供补光。
- 保存人脸识别成功后的人脸截图到./images目录下
#include "esp_camera.h"
#include <WiFi.h>
#include <WiFiClient.h>
#include <WebServer.h>  // 添加WebServer库

// 配置区 ============================================
const char *ssid = "你的wifi";          // WiFi名称
const char *password = "密码";    // WiFi密码
const char *serverIP = "192.168.1.101"; // 服务器IP
const int serverPort = 5000;            // 服务器端口
const int ledPin = 4;                   // LED引脚


// 摄像头配置 ========================================
#define CAMERA_MODEL_AI_THINKER
#include "camera_pins.h"

// 分辨率配置
#define LOW_RES_FRAME_SIZE FRAMESIZE_QQVGA // 低分辨率(160x120)
#define HIGH_RES_FRAME_SIZE FRAMESIZE_SVGA // 高分辨率(800x600)

// 运动检测参数
#define MOTION_THRESHOLD 5000           // 降低阈值,提高灵敏度(原值10000)
#define COOLDOWN_TIME 6000             // 减少冷却时间(原值10000)
#define CHECK_INTERVAL 30              // 缩短检测间隔(原值50)
#define DETECT_REGION_X 40             // 保持不变
#define DETECT_REGION_Y 30             // 保持不变
#define DETECT_REGION_WIDTH 80         // 保持不变
#define DETECT_REGION_HEIGHT 60        // 保持不变

WiFiClient tcpClient;
uint8_t *prevFrame = nullptr;

// 添加全局变量
bool isStreaming = false;           // 视频流状态
unsigned long lastMotionTime = 0;   // 最后检测到运动的时间
#define STREAM_TIMEOUT 5000        // 无运动后持续摄像时间(ms)10000
#define STREAM_INTERVAL 100         // 视频流帧间隔(ms)

WebServer server(80);  // 创建HTTP服务器实例,端口80

// 初始化摄像头
void setupCamera(framesize_t frameSize, pixformat_t pixelFormat, uint32_t xclkFreq) {
  esp_camera_deinit(); // 先释放摄像头资源

  camera_config_t config;
  config.ledc_channel = LEDC_CHANNEL_0;
  config.ledc_timer = LEDC_TIMER_0;
  config.pin_d0 = Y2_GPIO_NUM;
  config.pin_d1 = Y3_GPIO_NUM;
  config.pin_d2 = Y4_GPIO_NUM;
  config.pin_d3 = Y5_GPIO_NUM;
  config.pin_d4 = Y6_GPIO_NUM;
  config.pin_d5 = Y7_GPIO_NUM;
  config.pin_d6 = Y8_GPIO_NUM;
  config.pin_d7 = Y9_GPIO_NUM;
  config.pin_xclk = XCLK_GPIO_NUM;
  config.pin_pclk = PCLK_GPIO_NUM;
  config.pin_vsync = VSYNC_GPIO_NUM;
  config.pin_href = HREF_GPIO_NUM;
  config.pin_sccb_sda = SIOD_GPIO_NUM;
  config.pin_sccb_scl = SIOC_GPIO_NUM;
  config.pin_pwdn = PWDN_GPIO_NUM;
  config.pin_reset = RESET_GPIO_NUM;
  config.xclk_freq_hz = xclkFreq;
  config.frame_size = frameSize;
  config.pixel_format = pixelFormat;
  config.jpeg_quality = 10;            // JPEG质量(1-63,值越小质量越高)
  config.fb_count = 3;
  config.fb_location = CAMERA_FB_IN_PSRAM;

  esp_err_t err = esp_camera_init(&config);
  if (err != ESP_OK) {
    Serial.printf("Camera init failed: 0x%x\n", err);
    ESP.restart();
  }

  sensor_t *sensor = esp_camera_sensor_get();
  sensor->set_vflip(sensor, 1);         // 垂直翻转
  sensor->set_hmirror(sensor, 1);       // 水平镜像
}

// 初始化WiFi
void setupWiFi() {
    Serial.print("Connecting to WiFi...");
    WiFi.begin(ssid, password);
    WiFi.setSleep(false);

    int retries = 0;
    while (WiFi.status() != WL_CONNECTED && retries < 20) {
        delay(500);
        Serial.print(".");
        retries++;
    }

    if (WiFi.status() != WL_CONNECTED) {
        Serial.println("\nWiFi connection failed!");
        ESP.restart();
    }

    Serial.printf("\nWiFi Connected\nIP Address: %s\n", WiFi.localIP().toString().c_str());

    // 设置HTTP服务器路由
    server.on("/open_door", HTTP_GET, handleOpenDoor);
    server.on("/open_door", HTTP_POST, handleOpenDoor);

    // 添加补光LED控制路由
    server.on("/toggle_flash", HTTP_GET, handleToggleFlash);
    server.on("/toggle_flash", HTTP_POST, handleToggleFlash);

    server.on("/", HTTP_GET, []() {
        server.send(200, "text/plain", "ESP32-CAM Server Running");
    });

    server.onNotFound([]() {
        server.send(404, "text/plain", "Not found");
    });

    server.begin();
    Serial.println("HTTP server started");
}

// 开门处理函数
void handleOpenDoor() {
    digitalWrite(ledPin, HIGH);
    delay(200);
    digitalWrite(ledPin, LOW);

    // 发送CORS头,允许跨域请求
    server.sendHeader("Access-Control-Allow-Origin", "*");
    server.sendHeader("Access-Control-Allow-Methods", "GET, POST");
    server.send(200, "text/plain", "Door activated");

    Serial.println("Door signal received");
}

// 修改补光LED控制函数
void handleToggleFlash() {
    // 闪烁补光LED
    digitalWrite(ledPin, HIGH);
    delay(100);  // 闪烁100ms
    digitalWrite(ledPin, LOW);

    // 发送CORS头和响应
    server.sendHeader("Access-Control-Allow-Origin", "*");
    server.sendHeader("Access-Control-Allow-Methods", "GET, POST");
    server.send(200, "text/plain", "Flash triggered");

    Serial.println("Flash LED triggered");
}

// 修改发送图像函数,添加补光
void sendImage(camera_fb_t *fb) {
static int connectionAttempts = 0; // 静态变量,用于记录连接尝试次数
    if (!tcpClient.connected()) {
        tcpClient.stop();
        if (!tcpClient.connect(serverIP, serverPort)) {
            Serial.println("Connection to server failed");
            connectionAttempts++; // 增加连接尝试次数
            if (connectionAttempts >= 5) { // 如果连接失败10次
                Serial.println("Switching to low resolution mode.");
                setupCamera(LOW_RES_FRAME_SIZE, PIXFORMAT_GRAYSCALE, 5000000); // 切换到低分辨率模式
                connectionAttempts = 0; // 重置计数器
            }
            return;
        }
    } else {
        connectionAttempts = 0; // 如果连接成功,重置计数器
    }
    // 发送HTTP头
    String header = "POST /video_stream HTTP/1.1\r\n"
                   "Host: " + String(serverIP) + "\r\n"
                   "Content-Type: image/jpeg\r\n"
                   "Content-Length: " + String(fb->len) + "\r\n\r\n";

    tcpClient.print(header);
    Serial.printf("Sending image: %d bytes\n", fb->len);

    // 分块发送图像数据
    const size_t chunk_size = 4096;
    size_t remaining = fb->len;
    size_t offset = 0;

    while (remaining > 0) {
        size_t toWrite = min(chunk_size, remaining);
        size_t written = tcpClient.write(fb->buf + offset, toWrite);

        if (written > 0) {
            remaining -= written;
            offset += written;
        } else {
            Serial.println("Write failed");
            break;
        }
        delay(1);
    }

    // 处理响应
    unsigned long timeout = millis() + 1000;
    while (millis() < timeout && !tcpClient.available()) {
        delay(1);
    }

    if (tcpClient.available()) {
        String response = tcpClient.readStringUntil('\n');
        if (response.indexOf("open_door") != -1) {
            digitalWrite(ledPin, HIGH);
            delay(200);
            digitalWrite(ledPin, LOW);
        }
    }

    // 清理接收缓冲区
    while (tcpClient.available()) {
        tcpClient.read();
    }
}

// 修改运动检测函数,添加补光
bool detectMotion() {
    static unsigned long lastCheck = 0;
    static unsigned long lastTriggerTime = 0;

    if (millis() - lastCheck < CHECK_INTERVAL) return false;
    lastCheck = millis();
    camera_fb_t *fb = esp_camera_fb_get();
    if (!fb || fb->format != PIXFORMAT_GRAYSCALE) {
        if (fb) esp_camera_fb_return(fb);
        return false;
    }

    uint32_t diff = 0;
    const int step = 2;  // 减小采样步长,提高精度(原值4)
    for (int y = DETECT_REGION_Y; y < DETECT_REGION_Y + DETECT_REGION_HEIGHT; y += step) {
        for (int x = DETECT_REGION_X; x < DETECT_REGION_X + DETECT_REGION_WIDTH; x += step) {
            int index = y * fb->width + x;
            if (index < fb->len) {
                int delta = abs(fb->buf[index] - prevFrame[index]);
                if (delta > 15) diff += delta;  // 降低像素变化阈值(原值20)
            }
        }
    }

    memcpy(prevFrame, fb->buf, fb->len);
    esp_camera_fb_return(fb);

    if (diff > MOTION_THRESHOLD && (millis() - lastTriggerTime) > COOLDOWN_TIME) {
        lastTriggerTime = millis();
        return true;
    }

    return false;
}

// 获取芯片温度
float getChipTemperature() {
  return temperatureRead();
}

void setup() {
    Serial.begin(115200);

    // 设置LED引脚
    pinMode(ledPin, OUTPUT);
    digitalWrite(ledPin, LOW);

    setupCamera(LOW_RES_FRAME_SIZE, PIXFORMAT_GRAYSCALE, 10000000);
    setupWiFi();
      // 只安装一次GPIO中断服务
    if (gpio_install_isr_service(0) == ESP_OK) {
        // 安装中断服务
    }
    // 分配内存用于运动检测
    camera_fb_t *fb = esp_camera_fb_get();
    if (fb) {
        prevFrame = (uint8_t*)malloc(fb->len);
        if (!prevFrame) {
            Serial.println("Failed to allocate memory for prevFrame");
            ESP.restart();
        }
        memcpy(prevFrame, fb->buf, fb->len);
        esp_camera_fb_return(fb);
    }
}

void loop() {
    // 确保及时处理HTTP请求
    server.handleClient();

    static unsigned long lastFrameTime = 0;
    unsigned long currentTime = millis();

    // 检查WiFi连接
    if (WiFi.status() != WL_CONNECTED) {
        Serial.println("WiFi disconnected. Reconnecting...");
        WiFi.reconnect();
        delay(5000);
        return;
    }

    // 检查温度
    float temperature = getChipTemperature();
    if (temperature > 70.0) {
        Serial.println("板载温度过高,强行进入冷却。当前温度:" + String(temperature) + "°C");
        isStreaming = false;
        setupCamera(LOW_RES_FRAME_SIZE, PIXFORMAT_GRAYSCALE, 5000000);
        delay(10000);
        return;
    }

    if (!isStreaming) {
        // 低分辨率运动检测模式
        if (detectMotion()) {
            Serial.println("Motion detected, starting video stream");
            isStreaming = true;
            lastMotionTime = currentTime;
            setupCamera(HIGH_RES_FRAME_SIZE, PIXFORMAT_JPEG, 20000000);
        }
    } else {
        // 视频流模式
        if (currentTime - lastFrameTime >= STREAM_INTERVAL) {
            lastFrameTime = currentTime;

            // 在视频流模式下也检测运动
            if (detectMotion()) {
                lastMotionTime = currentTime;
            }

            // 获取并发送高清图像
            camera_fb_t *fb = esp_camera_fb_get();
            if (fb) {
                sendImage(fb);
                esp_camera_fb_return(fb);
            }

            // 检查是否需要停止视频流
            if (currentTime - lastMotionTime >= STREAM_TIMEOUT) {
                Serial.println("未检测到运动,停止视频流。  当前板载温度:"+ String(temperature) + "°C");
                isStreaming = false;
                setupCamera(LOW_RES_FRAME_SIZE, PIXFORMAT_GRAYSCALE, 10000000);
            }
        }
    }

    delay(1);  // 防止看门狗复位
}
- **实现逻辑**:
- 使用ESP32-CAM模块捕获视频帧,并通过TCP连接将图像数据发送到后端服务器。
- 通过GPIO中断检测运动,并根据运动状态切换视频流的分辨率。
- 监测板载温度,防止过热。
- 通过HTTP请求与后端服务器进行通信,控制LED和开门指令。
- 超温保护:70度,自动降频,防止过热。esp32cam最头疼的就是板子过热烫手。
- **使用方法**:
1. 将代码上传到ESP32-CAM。
2. 确保WiFi连接正常。
3. 通过运动检测触发视频流,或手动触发补光。
4. 通过后端服务器控制开门指令。
注:
# 运行后端服务器端,需先安装python环境,python3.10以上。编译器使用VScode,其它也可以
from flask import Flask, request, jsonify, Response
import cv2
import numpy as np
import face_recognition
import logging
import requests
import time
import threading
import os
from werkzeug.utils import secure_filename
所需库说明
Flask:用于创建Web应用和处理HTTP请求。
OpenCV (cv2):用于图像处理和视频流操作。
3. NumPy (np):用于处理数组和矩阵运算。
4. face_recognition:用于人脸识别功能。
logging:用于记录日志信息。
requests:用于发送HTTP请求。
7. time:用于时间相关的操作。
threading:用于多线程处理。
9. os:用于文件和目录操作。
werkzeug.utils:用于安全文件名处理。
将这些库的导入部分保留在你的项目中,以确保代码能够正常运行。
然后执行 python video.py
2025-02-07 12:36:40,358 - INFO - 启动服务器...
2025-02-07 12:36:40,394 - INFO - Serving on http://0.0.0.0:5000
浏览器地址栏输入: http://127.0.0.1:5000/
# 触发一次补光闪烁
curl http://192.168.1.104/toggle_flash 格式:【http://ESP32-CAM的IP/toggle_flash】
# 触发一次开门
curl http://192.168.1.104/open_door 格式:【http://ESP32-CAM的IP/open_door】
## 3. 总结
本项目结合了人脸识别、视频流传输和运动检测技术,提供了一个完整的智能门禁解决方案。通过合理的代码结构和模块化设计,确保了系统的可扩展性和可维护性。
python服务器端可生成exe文件,可docker镜像。需要请留言。