目录
这篇文章主要是 以代码为主,可以增加编码的信心,喜欢在代码中学习知识点,这样记忆点更好,是可以 复现的捏。
1 导入包
# torch包
import torch
import torch.nn as nn
import torch.optim as optim
from torch.utils.data import DataLoader

# torchvision包
import torchvision
import torchvision.datasets as datasets
from torchvision.transforms import ToTensor

# matplotlib包
import matplotlib.pyplot as plt

# 从helper_functions.py导入accuracy_fn函数
# 这个在我之前的文章里面有的,这里吧函数也会给出来,方便复现这里的代码
from helper_functions import accuracy_fn, print_train_time
from tqdm.auto import tqdm
# Calculate accuracy (a classification metric)
def accuracy_fn(y_true, y_pred):
    """Calculates accuracy between truth labels and predictions.

    Args:
        y_true (torch.Tensor): Truth labels for predictions.
        y_pred (torch.Tensor): Predictions to be compared to predictions.

    Returns:
        [torch.float]: Accuracy value between y_true and y_pred, e.g. 78.45
    """
    correct = torch.eq(y_true, y_pred).sum().item()
    acc = (correct / len(y_pred)) * 100
    return acc


def print_train_time(start, end, device=None):
    """Prints difference between start and end time.

    Args:
        start (float): Start time of computation (preferred in timeit format).
        end (float): End time of computation.
        device ([type], optional): Device that compute is running on. Defaults to None.

    Returns:
        float: time between start and end in seconds (higher is longer).
    """
    total_time = end - start
    print(f"\nTrain time on {device}: {total_time:.3f} seconds")
    return total_time
2 创建数据
train_data = datasets.FashionMNIST(root='data',
                                   train=True,
                                   download=True,
                                   transform=ToTensor(),
                                   target_transform=None)
test_data = datasets.FashionMNIST(root='data',
                                  train=False,
                                  download=True,
                                  transform=ToTensor(),
                                  target_transform=None)
# 查看数据
image, label = train_data[0]

print(f"Image:{image} | label:{label}\n")
print(f"Image shape:{image.shape}")
print(f"Length of train data: {len(train_data)}")
print(f"Length of test data: {len(test_data)}")
Image:tensor([[[0.0000, 0.0000, 0.0000, 0.0000, 0.0000, 0.0000, 0.0000, 0.0000,
0.0000, 0.0000, 0.0000, 0.0000, 0.0000, 0.0000, 0.0000, 0.0000,
0.0000, 0.0000, 0.0000, 0.0000, 0.0000, 0.0000, 0.0000, 0.0000,
0.0000, 0.0000, 0.0000, 0.0000],
[0.0000, 0.0000, 0.0000, 0.0000, 0.0000, 0.0000, 0.0000, 0.0000,
0.0000, 0.0000, 0.0000, 0.0000, 0.0039, 0.0000, 0.0000, 0.0510,
0.2863, 0.0000, 0.0000, 0.0039, 0.0157, 0.0000, 0.0000, 0.0000,
0.0000, 0.0039, 0.0039, 0.0000],
[0.0000, 0.0000, 0.0000, 0.0000, 0.0000, 0.0000, 0.0000, 0.0000,
0.0000, 0.0000, 0.0000, 0.0000, 0.0118, 0.0000, 0.1412, 0.5333,
0.4980, 0.2431, 0.2118, 0.0000, 0.0000, 0.0000, 0.0039, 0.0118,
0.0157, 0.0000, 0.0000, 0.0118],
[0.0000, 0.0000, 0.0000, 0.0000, 0.0000, 0.0000, 0.0000, 0.0000,
0.0000, 0.0000, 0.0000, 0.0000, 0.0235, 0.0000, 0.4000, 0.8000,
0.6902, 0.5255, 0.5647, 0.4824, 0.0902, 0.0000, 0.0000, 0.0000,
0.0000, 0.0471, 0.0392, 0.0000],
[0.0000, 0.0000, 0.0000, 0.0000, 0.0000, 0.0000, 0.0000, 0.0000,
…
Image shape:torch.Size([1, 28, 28])
Length of train data: 60000
Length of test data: 10000
Output is truncated. View as a scrollable element or open in a text editor. Adjust cell output settings…
class_names = train_data.classes
class_names
[‘T-shirt/top’,
‘Trouser’,
‘Pullover’,
‘Dress’,
‘Coat’,
‘Sandal’,
‘Shirt’,
‘Sneaker’,
‘Bag’,
‘Ankle boot’]
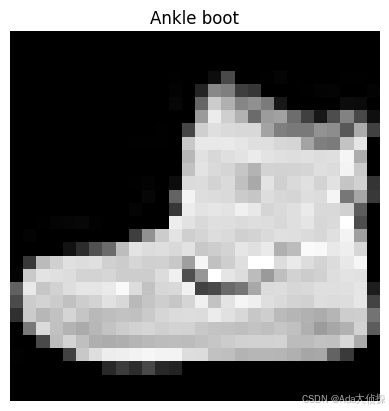
plt.imshow(image.squeeze(), cmap="gray")
plt.title(class_names[label])
plt.axis(False);
BATCH_SIZE = 32
# 创建dataloader,python的可迭代对象,这样小批量处理图形数据
train_dataloader = DataLoader(dataset=train_data,
                              batch_size=BATCH_SIZE,
                              shuffle=True)
test_dataloader = DataLoader(dataset=test_data,
                             shuffle=False,
                             batch_size=BATCH_SIZE)
3 创建卷积神经网络CNN
CNN也被称作卷积神经网络,以查找视觉数据模式而闻名
class FashionMNISTModelV2(nn.Module):
    """
    Model architecture that replicates the Tiny VGG model from CNN explainer websites.
    """
    def __init__(self, input_shape:int, hidden_units:int, output_shape:int):
        super().__init__()
        self.conv_block_1 = nn.Sequential(
            nn.Conv2d(in_channels=input_shape,
                      out_channels=hidden_units,
                      kernel_size=(3,3),
                      padding=1,
                      stride=1),
            nn.ReLU(),
            nn.Conv2d(in_channels=hidden_units,
                      out_channels=hidden_units,
                      kernel_size=(3, 3),
                      stride=1,
                      padding=1),
            nn.ReLU(),
            nn.MaxPool2d(kernel_size=(2,2))
        )
        self.conv_block_2 = nn.Sequential(
            nn.Conv2d(in_channels=hidden_units,
                      out_channels=hidden_units,
                      kernel_size=(3, 3),
                      stride=1,
                      padding=1),
            nn.ReLU(),
            nn.Conv2d(in_channels=hidden_units,
                      out_channels=hidden_units,
                      kernel_size=(3, 3),
                      stride=1,
                      padding=1),
            nn.ReLU(),
            nn.MaxPool2d(kernel_size=(2, 2))
        )
        self.classifier = nn.Sequential(
            nn.Flatten(),
            nn.Linear(in_features=hidden_units*7*7,
                      out_features=output_shape)
        )
    def forward(self, x):
        x = self.conv_block_1(x)
        # print(f"conv_block_1 shape:{x.shape}\n")
        x = self.conv_block_2(x)
        # print(f"conv_block_2 shape:{x.shape}\n")
        x = self.classifier(x)
        # print(f"classifier shape:{x.shape}\n")
        return x
这里计算线性层的输入不好计算,有一个小窍门就是在forward()中调用print方法,输出形状
3.1 实例化模型
torch.manual_seed(42)
torch.cuda.manual_seed(42)

model_2 = FashionMNISTModelV2(input_shape=1,
                              hidden_units=10,
                              output_shape=len(class_names)).to(device)
model_2.state_dict()
OrderedDict([(‘conv_block_1.0.weight’,
tensor([[[[ 0.2548, 0.2767, -0.0781],
[ 0.3062, -0.0730, 0.0673],
[-0.1623, 0.1958, 0.2938]]],
[[[-0.2445, 0.2897, 0.0624],
[ 0.2463, 0.0451, 0.1607],
[-0.0471, 0.2570, 0.0493]]],
…
[-0.0246, -0.0035, -0.0046, …, -0.0146, -0.0358, 0.0175]],
device=‘cuda:0’)),
(‘classifier.1.bias’,
tensor([ 0.0320, -0.0445, 0.0246, -0.0357, -0.0442, 0.0156, -0.0010, -0.0277,
0.0404, 0.0037], device=‘cuda:0’))])
Output is truncated. View as a scrollable element or open in a text editor. Adjust cell output settings…
rand_image_tensor = torch.randn(size=(1, 28, 28))
rand_image_tensor.shape
torch.Size([1, 28, 28])
# pass image through model
model_2(rand_image_tensor.unsqueeze(0).to(device))
tensor([[ 0.0366, -0.0940, 0.0686, -0.0485, 0.0068, 0.0290, 0.0132, 0.0084,
-0.0030, -0.0185]], device=‘cuda:0’, grad_fn=< AddmmBackward0>)
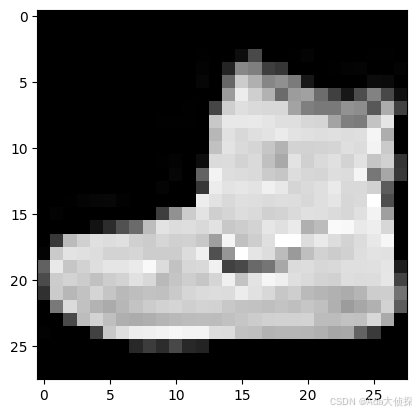
plt.imshow(image.squeeze(),cmap="gray")
3.2 学习nn.Conv2d()
torch.manual_seed(42)

# 创建a batch图片
images = torch.randn(size=(32, 3, 64, 64))
test_image = images[0]

print(f"Image batch shape:{images.shape}")
print(f"Single image shape:{test_image.shape}")
print(f"Test image:\n{test_image}")
Image batch shape:torch.Size([32, 3, 64, 64])
Single image shape:torch.Size([3, 64, 64])
Test image:
tensor([[[ 1.9269, 1.4873, 0.9007, …, 1.8446, -1.1845, 1.3835],
[ 1.4451, 0.8564, 2.2181, …, 0.3399, 0.7200, 0.4114],
[ 1.9312, 1.0119, -1.4364, …, -0.5558, 0.7043, 0.7099],
…
[ 0.8206, -0.3745, 1.2499, …, -0.0676, 0.0385, 0.6335],
[-0.5589, -0.3393, 0.2347, …, 2.1181, 2.4569, 1.3083],
[-0.4092, 1.5199, 0.2401, …, -0.2558, 0.7870, 0.9924]]])
# 创建一个单一的 conv2d 层来看看卷积层的作用
conv_layer = nn.Conv2d(in_channels=3,
                       out_channels=10,
                       kernel_size=(3, 3),
                       stride=1,
                       padding=0)

# 将数据传入卷积层
conv_output = conv_layer(test_image.unsqueeze(0))
conv_output.shape
torch.Size([1, 10, 62, 62])
test_image.unsqueeze(0).shape
torch.Size([1, 3, 64, 64])
3.3 学习nn.MaxPool2d()
test_image.shape
torch.Size([3, 64, 64])
# 输出没有压缩过维度的原始图像形状
print(f"Test image original shape:{test_image.shape}")
print(f"Test image with unsqueezed dimension:{test_image.unsqueeze(0).shape}")

# 创建一个简单的最大池化层
max_pool_layer = nn.MaxPool2d(kernel_size=(2, 2))

# 将数据传入卷积层
test_image_through_conv = conv_layer(test_image.unsqueeze(0))
print(f"Shape after going through conv_layer():{test_image_through_conv.shape}")

# 将数据传入最大池化层
test_image_through_conv_max = max_pool_layer(test_image_through_conv)
print(f"Shape after going through conv_layer() and max_pool_layer():{test_image_through_conv_max.shape}")
Test image original shape:torch.Size([3, 64, 64])
Test image with unsqueezed dimension:torch.Size([1, 3, 64, 64])
Shape after going through conv_layer():torch.Size([1, 10, 62, 62])
Shape after going through conv_layer() and max_pool_layer():torch.Size([1, 10, 31, 31])
可以看出,图片的 width 和 height 减半了
我觉得最好的调试方法,就是使用输出print方法,既能够知道输出,又能够排错.
4 损失函数、优化器、衡量指标
from helper_functions import accuracy_fn

loss_fn = nn.CrossEntropyLoss()
optimizer = optim.SGD(params=model_2.parameters(),
                      lr = 0.1)
5 训练和测试模型
使用训练函数和测试函数来测试模型
train_time_start_model_2 = timer()

epochs = 3

for epoch in tqdm(range(epochs)):
    print(f"Epoch:{epoch}\n-------")
    train_step(model=model_2,
              dataloader=train_dataloader,
              loss_fn=loss_fn,
              optimizer=optimizer,
              accuracy_fn=accuracy_fn,
              device=device)
    test_step(model=model_2,
              dataloader=test_dataloader,
              loss_fn=loss_fn,
              accuracy_fn=accuracy_fn,
              device=device)

train_time_end_model_2 = timer()

total_train_time_on_model_2 = print_train_time(start=train_time_start_model_2,
                                         end=train_time_end_model_2,
                                         device=device)
Epoch:0
Train Loss:0.6003 | Train Acc:78.23%
Test Loss:0.4187 | Test Acc:84.91%
Epoch:1
Train Loss:0.3575 | Train Acc:87.14%
Test Loss:0.3558 | Test Acc:87.08%
Epoch:2
Train Loss:0.3192 | Train Acc:88.50%
Test Loss:0.3244 | Test Acc:88.27%
Train time on cuda:26.675 seconds
# get model_2 results
model_2_results = eval_model(
    model=model_2,
    dataloader = test_dataloader,
    loss_fn=loss_fn,
    accuracy_fn=accuracy_fn,
    device=device
)
model_2_results
{‘model_name’: ‘FashionMNISTModelV2’,
‘model_loss’: 0.32437238097190857,
‘model_acc’: 88.26876996805112}
6 比较模型的结果和训练时间
import pandas as pd
compare_results = pd.DataFrame([model_0_results,
                               model_1_result,
                               model_2_results])
compare_results
# 将训练时间加到比较的项目中
compare_results["training_time"] = [total_train_time_on_model_0,
                                    total_train_time_model_1,
                                    total_train_time_on_model_2]
compare_results
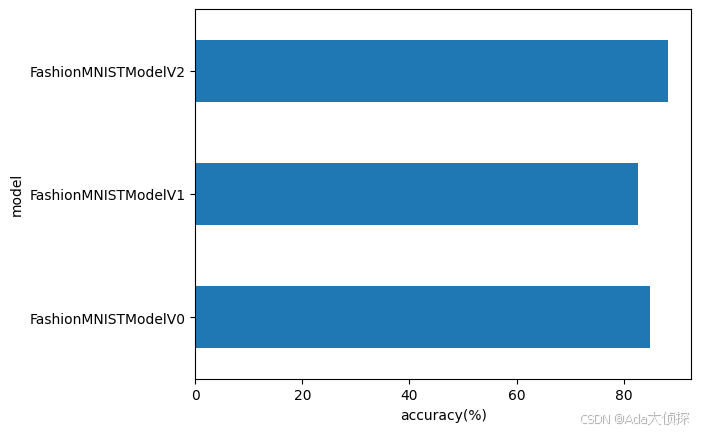
# 可视化我们的模型结果
compare_results.set_index("model_name")["model_acc"].plot(kind="barh")
plt.xlabel("accuracy(%)")
plt.ylabel("model");
7 使用最好的模型进行随机预测和评估
def make_prediction(model:nn.Module,
                    data: list,
                    device:torch.device=device):
    pred_probs=[]
    model.to(device)
    model.eval()
    with torch.inference_mode():
        for sample in data:
            # 准备sample
            sample = torch.unsqueeze(sample, dim=0).to(device)

            pred_logit = model(sample)
            pred_prob = torch.softmax(pred_logit.squeeze(), dim=0)
            pred_probs.append(pred_prob.cpu())

    # Stack the pred_probs to turn list into a tensor
    return torch.stack(pred_probs)
import random
test_samples = []
test_labels = []
for sample, label in random.sample(list(test_data), k=9):
    test_samples.append(sample)
    test_labels.append(label)

#查看第一个样本的形状
test_samples[0].shape
torch.Size([1, 28, 28])
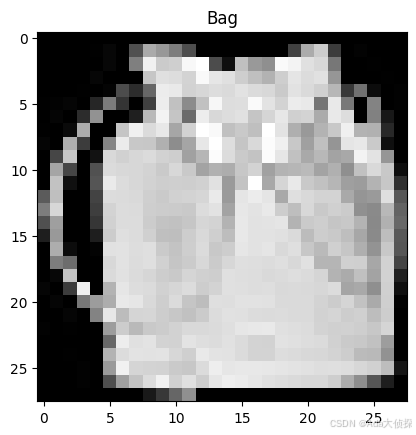
plt.imshow(test_samples[0].squeeze(0), cmap="gray")
plt.title(class_names[test_labels[0]])
# make predictions
pred_probs = make_prediction(model=model_2,
                             data=test_samples,
                             device=device)
pred_probs[:2]
tensor([[2.2480e-02, 3.1330e-04, 7.8823e-03, 6.7078e-04, 9.3113e-04, 1.6209e-05,
1.4022e-01, 1.3760e-04, 8.2640e-01, 9.4489e-04],
[1.7321e-03, 1.7052e-05, 5.9639e-04, 5.0409e-06, 1.2120e-04, 2.5130e-04,
1.3189e-03, 1.3029e-02, 9.8269e-01, 2.3639e-04]])
pred_classes = pred_probs.argmax(dim=1)
pred_classes
tensor([8, 8, 3, 3, 3, 2, 8, 1, 8])
test_labels
[8, 8, 3, 2, 0, 6, 8, 1, 8]
# plot predictions
plt.figure(figsize=(9,9))
nrows = 3
ncols = 3
for i, sample in enumerate(test_samples):
    plt.subplot(nrows, ncols, i+1)

    plt.imshow(sample.squeeze(), cmap="gray")
    pred_label = class_names[pred_classes[i]]
    truth_label = class_names[test_labels[i]]

    title_text = f"Pred:{pred_label} | Truth:{truth_label}"

    # 预测正确是绿色的title, 预测错误是红色的title
    if pred_label == truth_label:
        plt.title(title_text, fontsize=10, c="g")
    else:
        plt.title(title_text, fontsize=10, c="r")

    plt.axis(False);
8 制造混淆矩阵进一步评估
make a confusion matrix for further prediction evaluation
a confusion matrix
能够让我们视觉上更加直观的观测数据
1 在测试数据上使用我们训练好的模型
2 制作一个confusion matrixtorchmetrics.ConfusionMatrix
3 plot the confusion matrix usingmlxtend.plotting.plot_confusion_matrix()
from tqdm.auto import tqdm

# 1 在测试数据上使用我们训练好的模型
y_preds = []
model_2.eval()
with torch.inference_mode():
    for X, y in test_dataloader:
        X, y = X.to(device), y.to(device)
        y_logit = model_2(X)
        y_pred = torch.softmax(y_logit.squeeze(), dim=0).argmax(dim=1)
        y_preds.append(y_pred.cpu())

# Concatenate list of predictions into a tensor
y_pred_tensor = torch.cat(y_preds)
y_pred_tensor
tensor([9, 2, 1, …, 8, 1, 7])
len(y_pred_tensor)
10000
pip install mlxtend
import torchmetrics
import mlxtend

print(mlxtend.__version__)
0.23.1
Notes: 这里需要注意,版本要在0.19.0或者之上的
from torchmetrics import ConfusionMatrix
from mlxtend.plotting import plot_confusion_matrix

# 2 制作confusion实例,将预测和标签进行比较
confmat = ConfusionMatrix(num_classes=len(class_names),
                          task='multiclass')
confmat_tensor = confmat(preds = y_pred_tensor,
                         target = test_data.targets)

# 3 plot the confusion matrix
fig, ax = plot_confusion_matrix(
    conf_mat=confmat_tensor.numpy(), # matplotlib likes working with numpy
    class_names = class_names,
    figsize=(10, 7)
)
9 保存和加载模型参数
save and load model
9.1 保存模型参数
# save model
from pathlib import Path
MODE_PATH = Path("models")
MODE_PATH.mkdir(parents=True,
                exist_ok=True)
MODE_NAME = "03_pytorch_computer_vision.model_2.pth"
MODE_SAVE_PATH = MODE_PATH / MODE_NAME

print(f"save mode path:{MODE_SAVE_PATH}")
torch.save(obj=model_2.state_dict(),
           f=MODE_SAVE_PATH)
save mode path:models\03_pytorch_computer_vision.model_2.pth
9.2 加载模型参数
# load model
# 首先创建一个模型实例
torch.manual_seed(42)
loaded_model_2 = FashionMNISTModelV2(input_shape=1,
                                     hidden_units=10,
                                     output_shape=10)

loaded_model_2.load_state_dict(torch.load(f=MODE_SAVE_PATH))

# put the model to the target device
loaded_model_2.to(device)
FashionMNISTModelV2(
(conv_block_1): Sequential(
(0): Conv2d(1, 10, kernel_size=(3, 3), stride=(1, 1), padding=(1, 1))
(1): ReLU()
(2): Conv2d(10, 10, kernel_size=(3, 3), stride=(1, 1), padding=(1, 1))
(3): ReLU()
(4): MaxPool2d(kernel_size=(2, 2), stride=(2, 2), padding=0, dilation=1, ceil_mode=False)
)
(conv_block_2): Sequential(
(0): Conv2d(10, 10, kernel_size=(3, 3), stride=(1, 1), padding=(1, 1))
(1): ReLU()
(2): Conv2d(10, 10, kernel_size=(3, 3), stride=(1, 1), padding=(1, 1))
(3): ReLU()
(4): MaxPool2d(kernel_size=(2, 2), stride=(2, 2), padding=0, dilation=1, ceil_mode=False)
)
(classifier): Sequential(
(0): Flatten(start_dim=1, end_dim=-1)
(1): Linear(in_features=490, out_features=10, bias=True)
)
)
model_2_results
{‘model_name’: ‘FashionMNISTModelV2’,
‘model_loss’: 0.32437238097190857,
‘model_acc’: 88.26876996805112}
# make predictions
torch.manual_seed(42)
loaded_model_2_results = eval_model(model=loaded_model_2,
                                    dataloader=test_dataloader,
                                    loss_fn=loss_fn,
                                    accuracy_fn=accuracy_fn,
                                    device=device)
loaded_model_2_results
{‘model_name’: ‘FashionMNISTModelV2’,
‘model_loss’: 0.32437238097190857,
‘model_acc’: 88.26876996805112}
# Check if model results are close to each other
torch.isclose(torch.tensor(model_2_results["model_loss"]),
              torch.tensor(loaded_model_2_results["model_loss"]),
              atol=1e-02) #绝对误差
tensor(True)
OK,这一章 Computer Vision学习完了,要做练习啦,下一弹练习见咯。
BB,都看到这里呐,给我点个赞赞呐!
谢谢亲爱的BB~


