在本系列的上篇中,我们介绍了如何通过Amazon Bedrock部署并测试使用了DeepSeek模型。在接下来的下篇中小李哥将继续介绍,如何利用亚马逊的AI模型训练平台SageMaker AI中的,Amazon Sagemaker JumpStart通过脚本轻松一键式部署DeepSeek预训练模型。
使用SageMaker JumpStart部署DeepSeek-R1
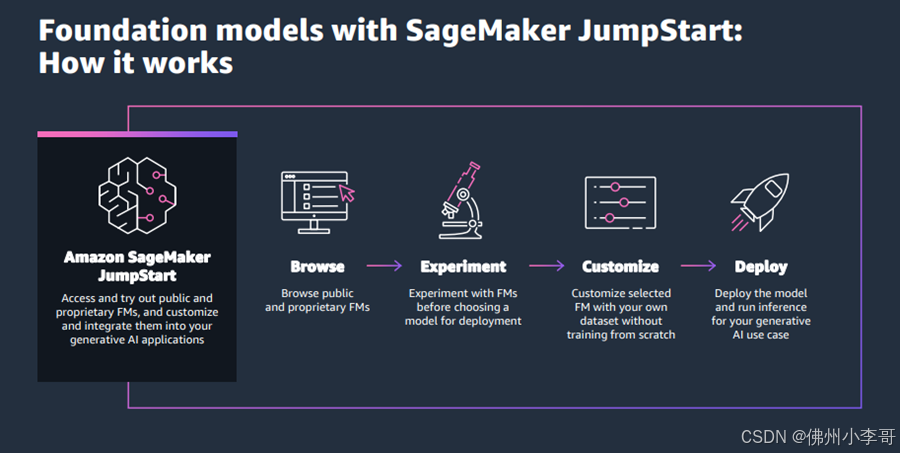
SageMaker JumpStart是一个包含基础模型(FM)、内置算法和预构建机器学习模型解决方案的便捷功能,我们只需点击几下即可完成我们想要模型的部署。通过SageMaker JumpStart,我们还可以使用自己的数据自定义预训练模型,并通过UI或SDK将其部署到生产环境中。
在亚马逊云科技上,有两种便捷的方法通过SageMaker JumpStart部署DeepSeek-R1模型:分别是使用直观的SageMaker JumpStart UI或通过SageMaker Python SDK进行编程部署。在本篇中我们就将介绍这两种方法,帮助大家选择最适合自己需求的部署方式。
通过SageMaker JumpStart UI部署DeepSeek-R1
大家需要按照以下步骤使用SageMaker JumpStart UI部署DeepSeek-R1:
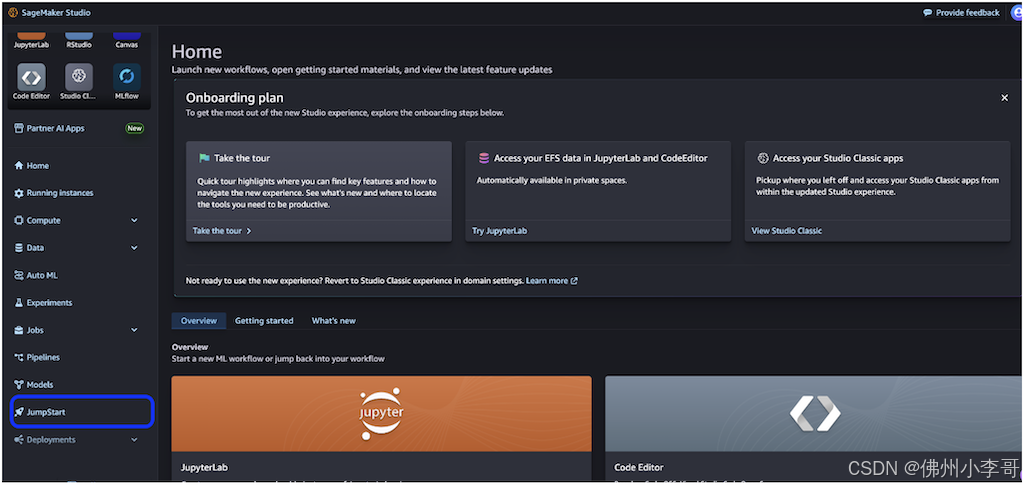
1. 在SageMaker控制台中,选择左侧导航栏的 Studio。
2. 注意首次使用SageMaker的用户,需要先创建一个域环境才能开始正常使用这个功能。
3. 在SageMaker Studio控制台中,选择左侧导航栏的JumpStart。
进入JumpStart后,主页将显示所有可用的模型,并提供供应商名称和模型功能等详细信息。
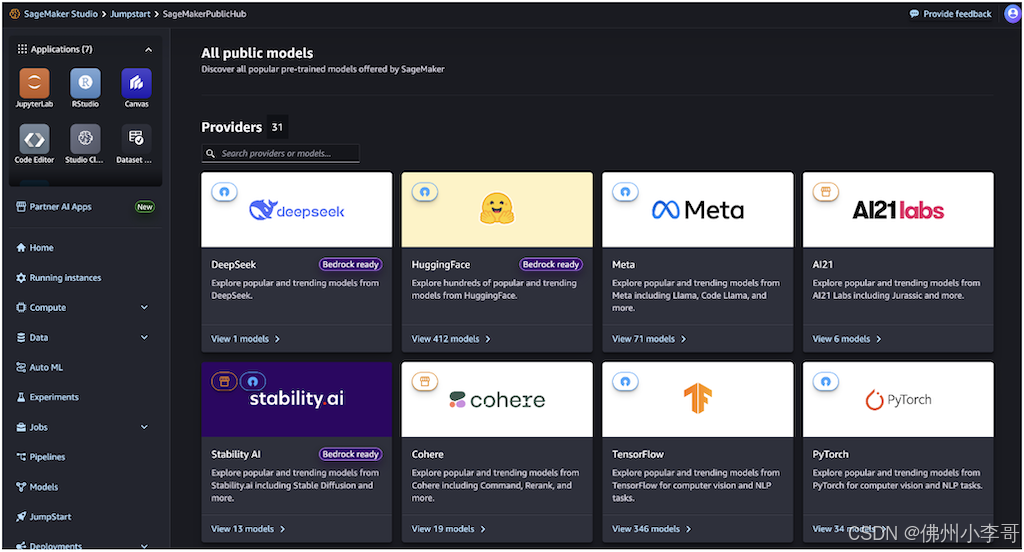
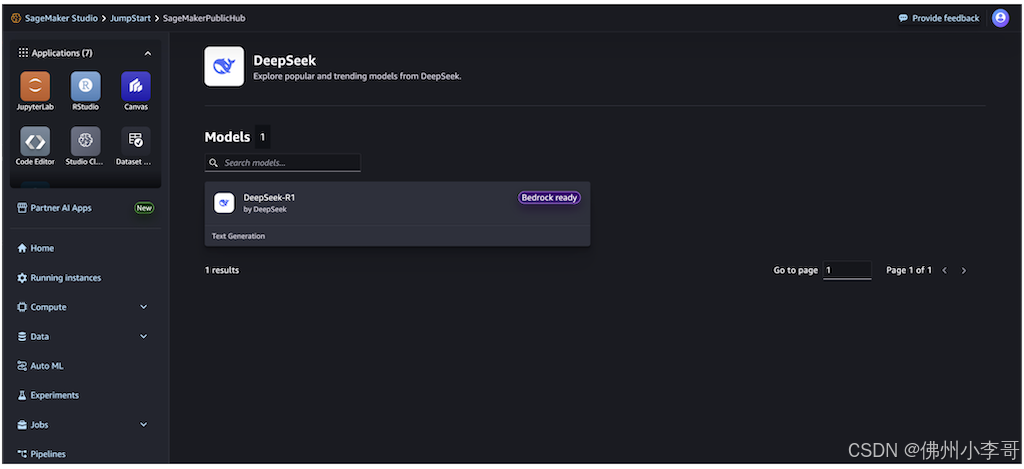
4. 接下来大家搜索DeepSeek-R1,进入后查看DeepSeek-R1模型卡。其中每个模型卡片都会显示模型关键信息,包括:
模型名称:DeepSeek-R1
供应商名称: DeepSeek
任务类别(例如文本生成)
Bedrock Ready标识,表示该模型可在Amazon Bedrock中加载使用,并可使用Amazon Bedrock API进行调用
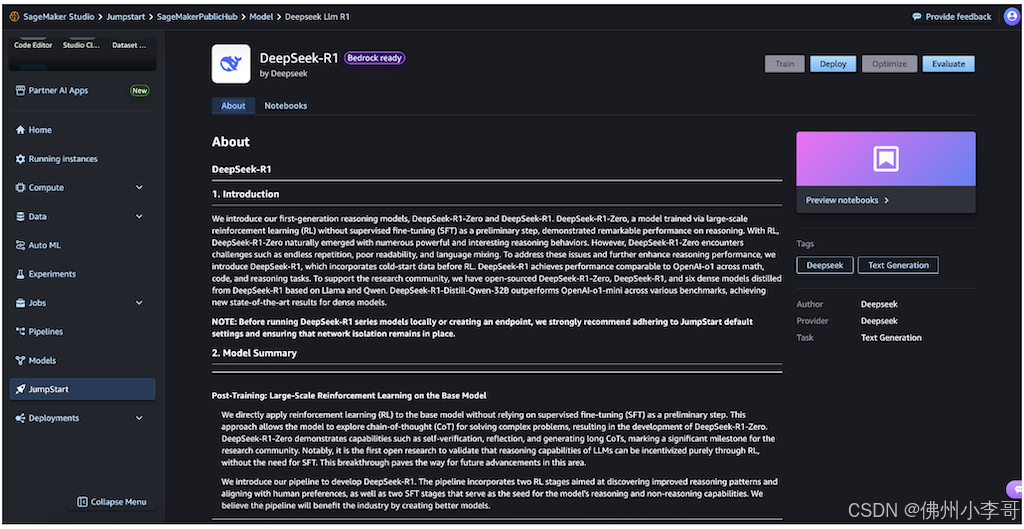
5. 接下来,我们选择模型卡片进入模型详情页面。
模型卡片详情页面包括以下信息:
- 模型名称和供应商信息
- "Deploy" 按钮,点击部署模型
- "About" 和 "Notebooks" 选项卡,点击进入可以看到详细信息
"About" 选项卡中包括重要信息:
- 模型描述
- 许可信息
- 技术规格
- 使用指南
在部署模型之前,各位开发者一定要先阅读模型详情和许可条款,以确保其与大家的使用场景兼容,同时保证大家拥有使用的授权。
6. 接下来选择Deploy继续部署。
7. 配置部署选项:选择合适的实例类型和数量对于优化成本和提升模型的推理性能至关重要。我们可以在部署后实时监控模型运行情况,并根据我们的业务需求调整这些算力设置。
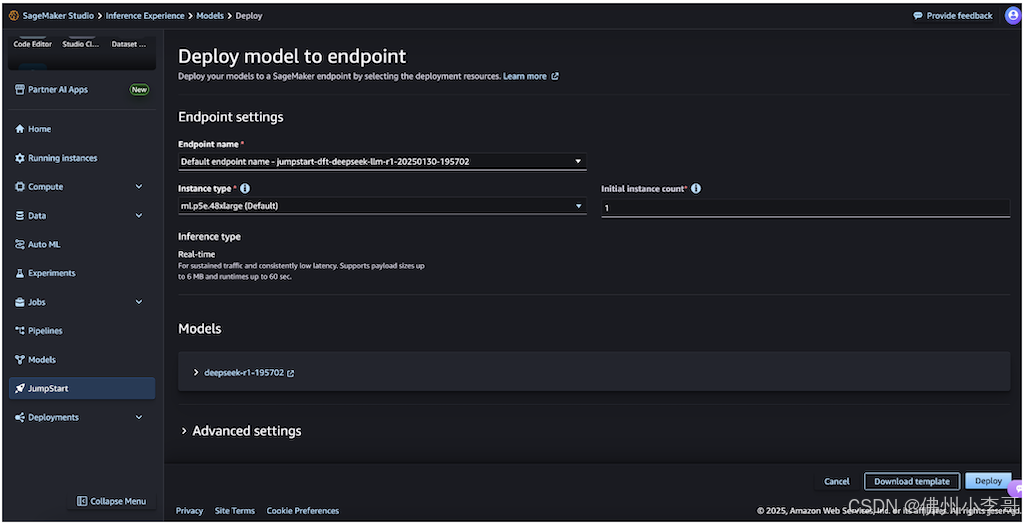
8. 填入Endpoint name,我们可以使用自动生成的名称或创建自定义名称。
9. 选择Instance type,选择实例类型(默认:ml.p5e.48xlarge)。
10. 选择Initial instance count:我们在这里输入实例数量(默认:1)。
11. 选择大模型的推理模式Inference type,SageMaker默认选择实时推理(Real-time inference),该模式对实时流量流和延迟都进行了优化。
12. 最后我们仔细检查所有配置是否正确。对于DeepSeek模型,小李哥建议遵循SageMaker JumpStart的默认设置,并确保网络隔离(network isolation) 保持启用状态,保证大模型环境不能被外界公网访问,保证数据的安全。
13. 点击Deploy就完成部署模型了,部署过程通常长袖几分钟。
当部署完成后,我们的模型端点状态将更改为InService。此时模型端点已准备好接收api推理请求调用。我们可以在SageMaker控制台的Endpoints页面中监控实时API调用情况,该页面会显示相关指标和状态信息。完成部署后,我们可以使用SageMaker SDK提供的API,通过代码调用模型,并将其集成到大家的应用程序中。
使用 SageMaker Python SDK 部署 DeepSeek-R1
要通过SageMaker Python SDK,以代码形式使用DeepSeek-R1,我们需要先安装SageMaker Python SDK - Boto3,并确保我们具备必要的AWS权限和环境变量设置。以下是一个通过API调用DeepSeek的代码示例,展示了如何以编程方式部署DeepSeek-R1并进行推理。
部署模型的代码已在亚马逊云科技GitHub仓库上线。我们可以克隆该Notebook并在SageMaker Studio中运行。
!pip install --force-reinstall --no-cache-dir sagemaker==2.235.2

from sagemaker.serve.builder.model_builder import ModelBuilder
from sagemaker.serve.builder.schema_builder import SchemaBuilder
from sagemaker.jumpstart.model import ModelAccessConfig
from sagemaker.session import Session
import logging

sagemaker_session = Session()

artifacts_bucket_name = sagemaker_session.default_bucket()
execution_role_arn = sagemaker_session.get_caller_identity_arn()

js_model_id = "deepseek-llm-r1"

gpu_instance_type = "ml.p5e.48xlarge"

response = "Hello, I'm a language model, and I'm here to help you with your English."

 sample_input = {
 "inputs": "Hello, I'm a language model,",
 "parameters": {"max_new_tokens": 128, "top_p": 0.9, "temperature": 0.6},
 }

 sample_output = [{"generated_text": response}]

 schema_builder = SchemaBuilder(sample_input, sample_output)

 model_builder = ModelBuilder(
 model=js_model_id,
 schema_builder=schema_builder,
 sagemaker_session=sagemaker_session,
 role_arn=execution_role_arn,
 log_level=logging.ERROR )

 model= model_builder.build()
 predictor = model.deploy(model_access_configs={js_model_id:ModelAccessConfig(accept_eula=True)}, accept_eula=True)


 predictor.predict(sample_input)
接下来的代码是通过代码形式调用该端点生成推理的代码段
new_input = {
    "inputs": "What is Amazon doing in Generative AI?",
    "parameters": {"max_new_tokens": 64, "top_p": 0.8, "temperature": 0.7},
}

prediction = predictor.predict(new_input)
print(prediction)
加载安全过滤器Guardrails并利用DeekSeek运行推理
与Amazon Bedrock相同,我们也可以使用ApplyGuardrail API保护我们的SageMaker JumpStart中模型的推理过程。可以通过Amazon Bedrock控制台或API创建 Guardrail,并按照以下代码示例保护推理过程:
  # Get the response from the model
    model_response = json.loads(response['Body'].read().decode())

    # Apply guardrail to output
    output_guardrail_response = bedrock_runtime.apply_guardrail(
        guardrailIdentifier=guardrail_id,
        guardrailVersion=guardrail_version,
        source='OUTPUT',
        content=[{ "text": { "text": model_response['generated_text'] }}]
    )

    # Check if output passes guardrails
    if output_guardrail_response['action'] != 'GUARDRAIL_INTERVENED':
        print(model_response['generated_text'])
    else:
        print("Output blocked: ", output_guardrail_response['outputs'][0]['text'])
else:
    print("Input blocked: ", input_guardrail_response['outputs'][0]['text'])
以上就是全部的在亚马逊云科技上部署、测试、安全地通过API调用DeekSeek-R1模型的全部步骤。欢迎大家持续关注小李哥分享的国际前沿的云平台AI解决方案,关注小李哥不要错过未来更多精彩内容。