本地和网络yum源的配置
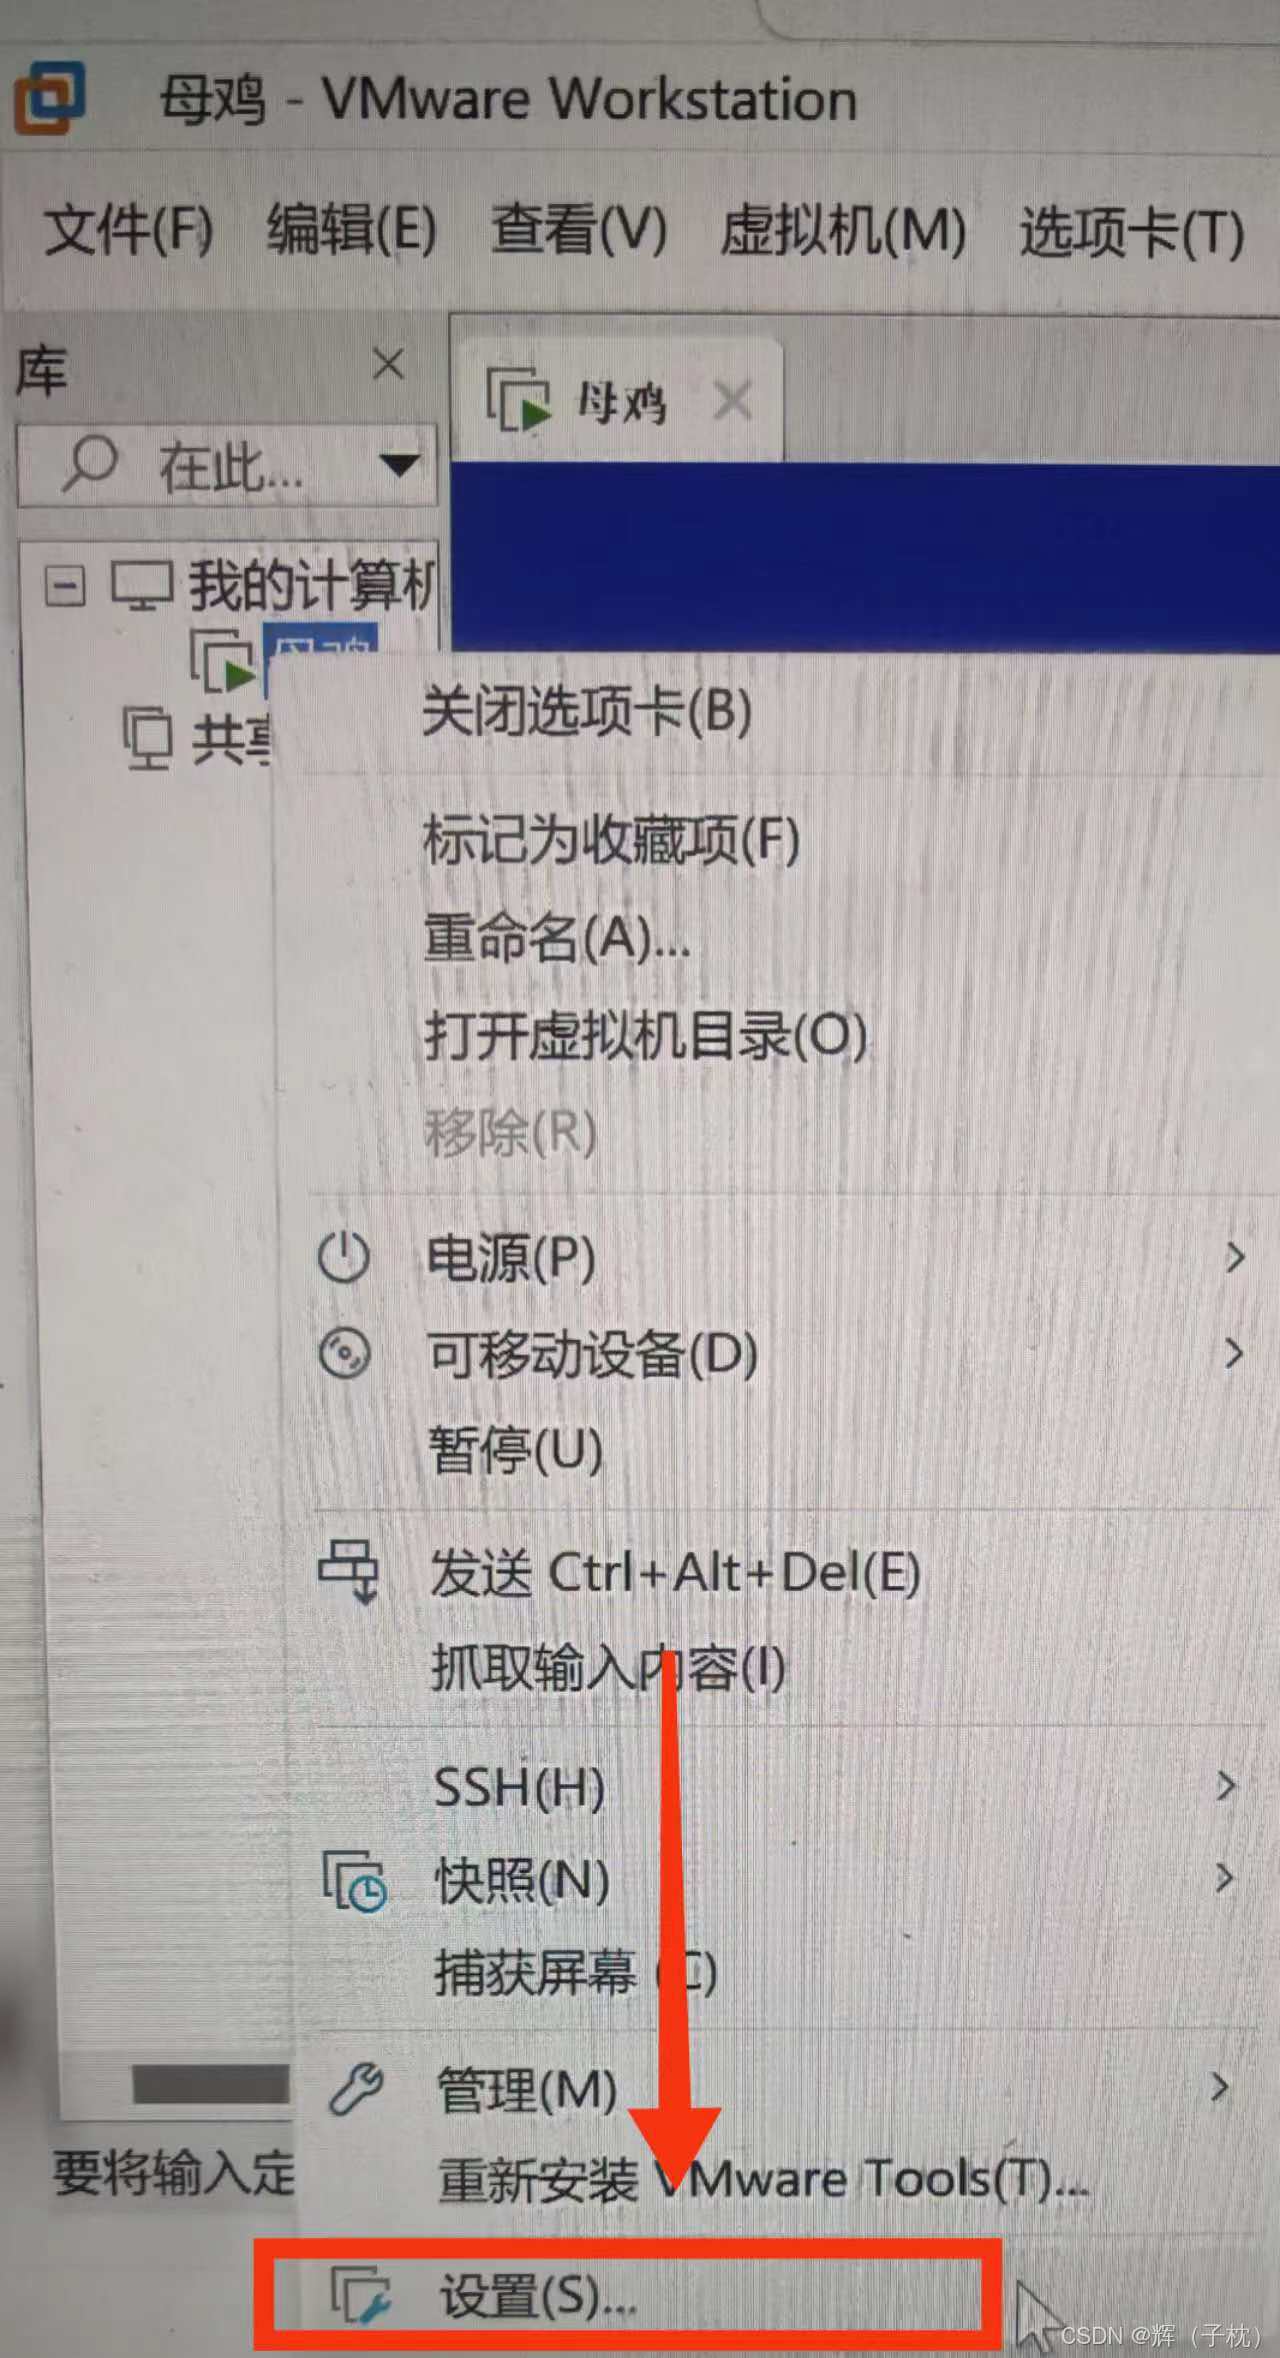
1.在vmware中装载centos7光盘镜像
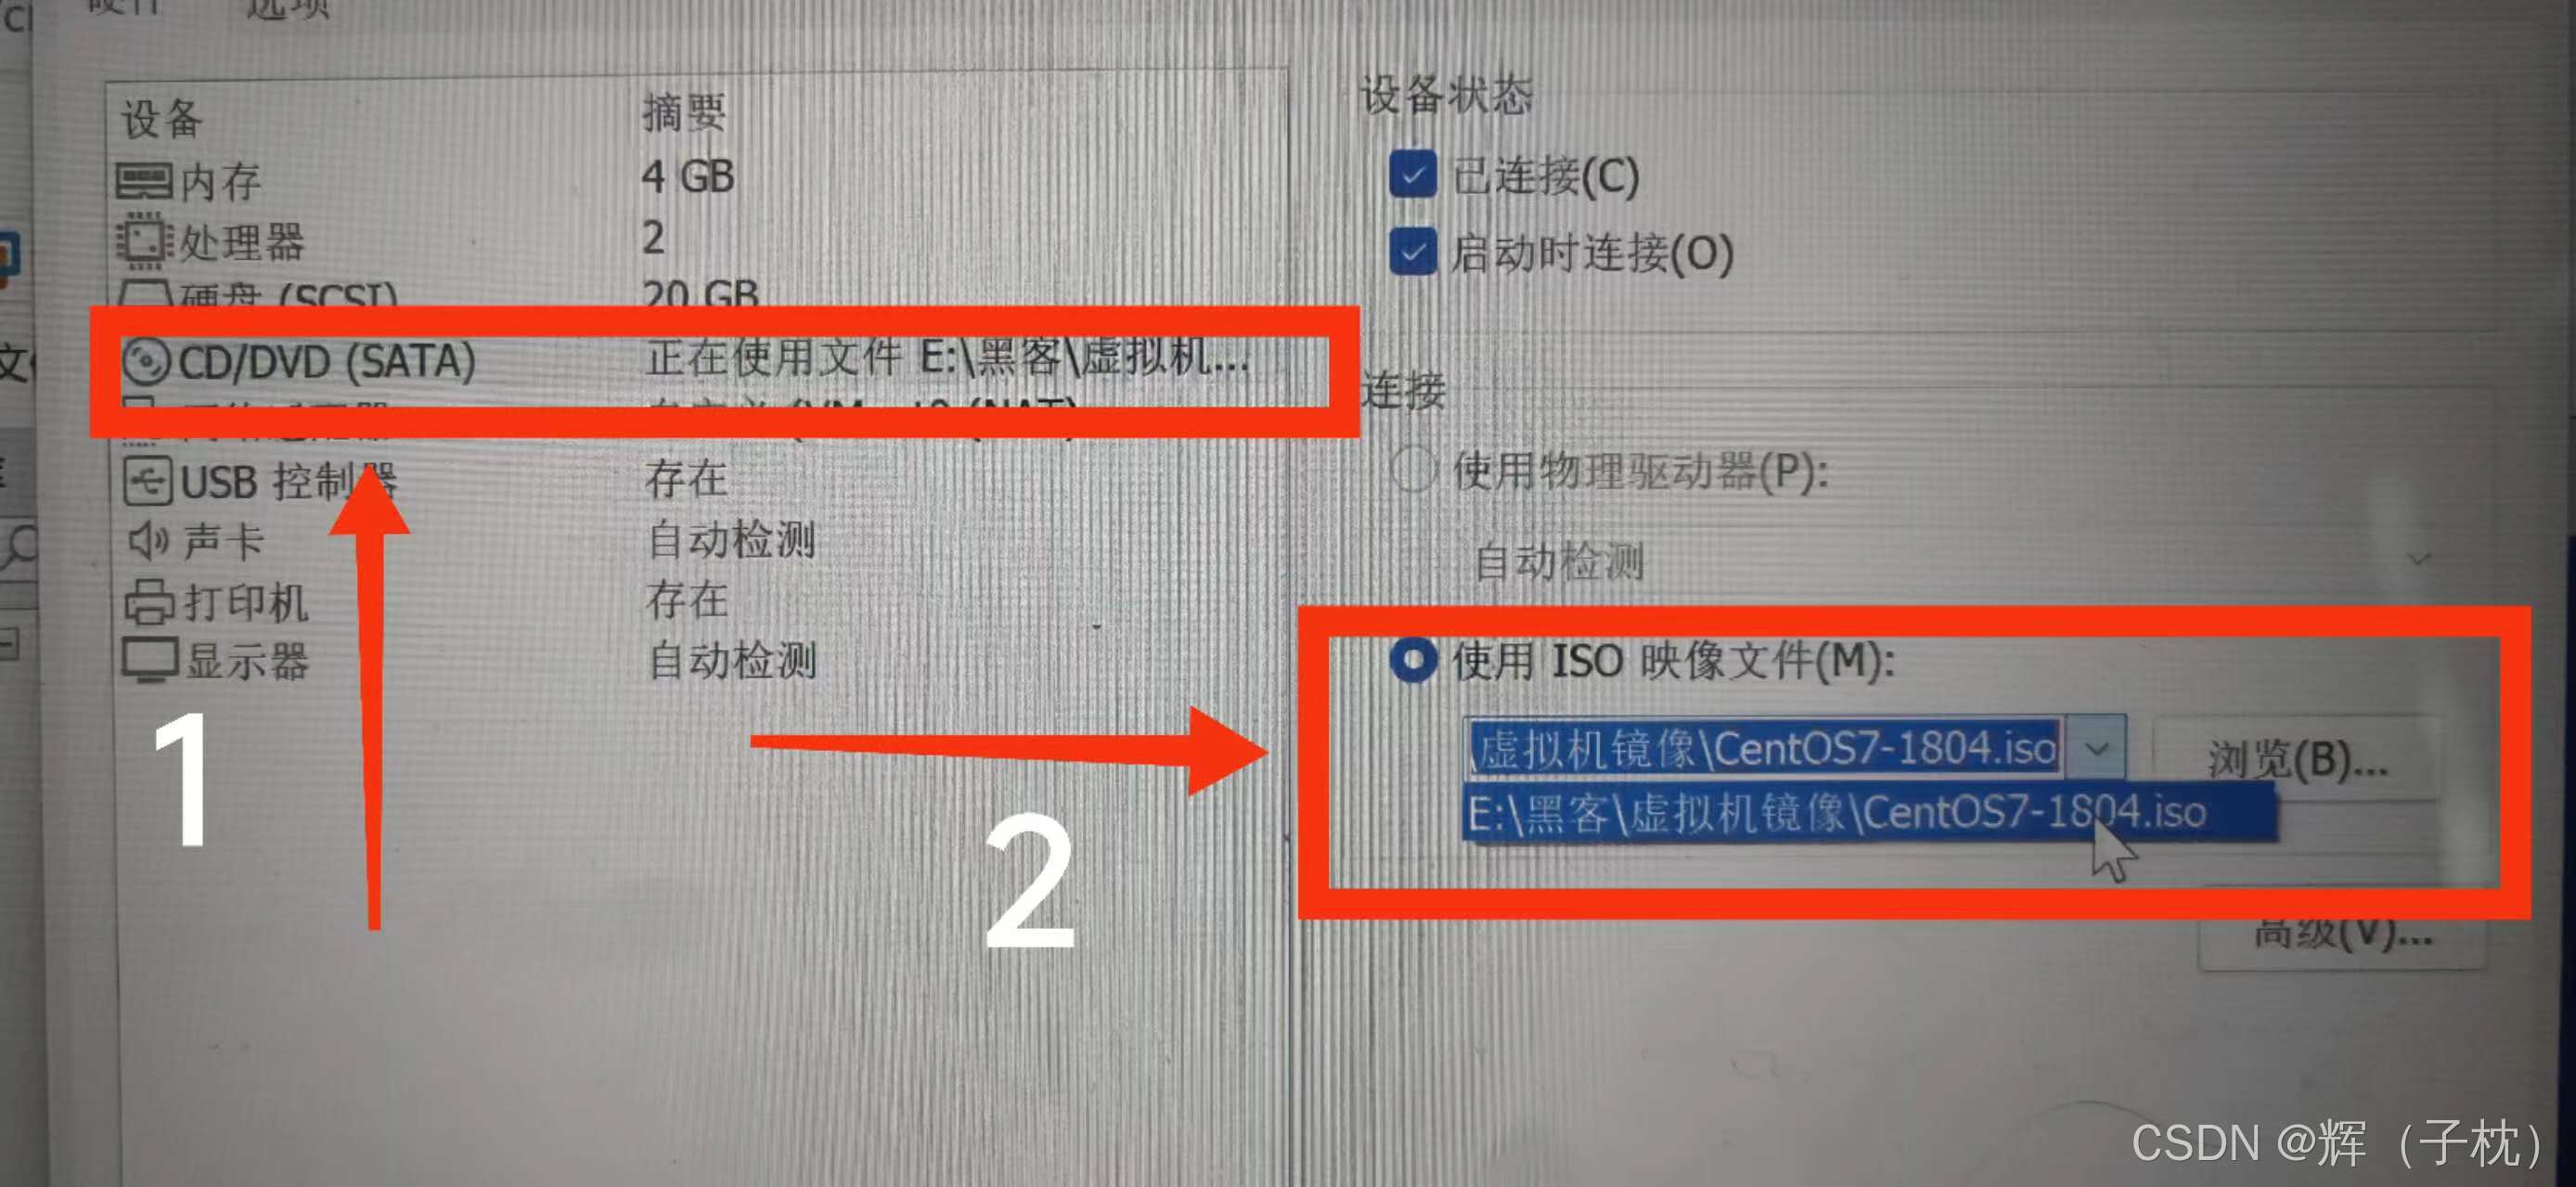
打开Vmware选择打开的虚拟机单击鼠标右键点击设置,找到CD/DVD选择镜像所在路径。
打开虚拟机把光盘挂载到指定文件下:
[root@localhost ~]# mount -o ro /dev/sr0 /mnt
查看磁盘挂载情况
[root@localhost ~]# lsblk
sr0 11:0 1 8.8G 0 rom /mnt
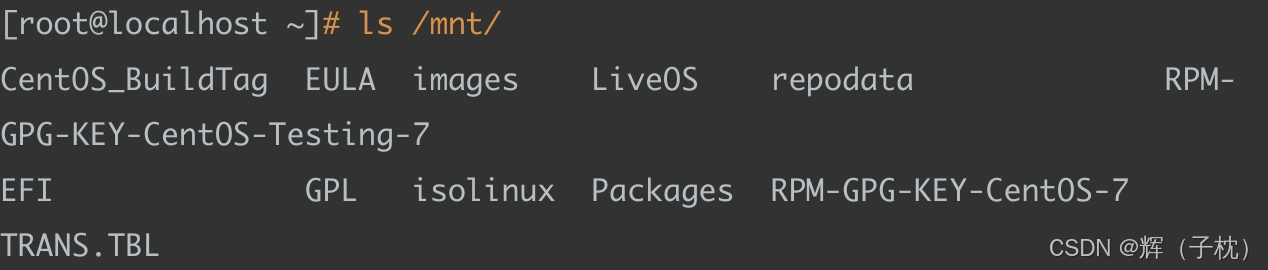
[root@localhost ~]# ls /mnt/
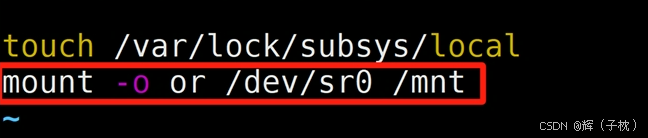
方法一:[root@localhost ~]# vim /etc/rc.local
mount -o or /dev/sr0 /mnt
方法二:[root@localhost ~]# echo 'mount -o ro /dev/sr0 /mnt' >> /etc/rc.local
[root@localhost ~]# chmod +x /etc/rc.local 添加权限方便开机自动挂载
或[root@localhost ~]# vim /etc/fstab 实现开机自动挂载
[root@localhost ~]# mount -a

2.本地Yum仓库的配置
[root@localhost ~]# rm -rf /etc/yum.repos.d/*
[root@localhost ~]# vim /etc/yum.repos.d/a.repo
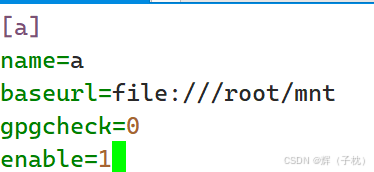
[root@localhost ~]# yum repolist
[root@localhost ~]# yum clean all
[root@localhost ~]# yum makecache[root@localhost ~]# yum list |grep python3
这里是没有的,因为这个yum仓库没有python3版本
本地源搭建成功。
3.网络Yum源的搭建
阿里Yum的搭建
之前我们已经搭建了一个yum源了,所有我们改一下之前搭建yum源的名字或压缩一下(我选择的是压缩,随后会讲到,先讲改名的,这个简单)。
[root@localhost ~]# mv /etc/yum.repos.d/a.repo /etc/yum.repos.d/a.a
[root@localhost ~]# wget -O /etc/yum.repos.d/CentOS-Base.repo https://mirrors.aliyun.com/repo/Centos-7.repo
[root@localhost ~]# yum clean all
[root@localhost ~]# yum makecache
[root@localhost ~]# yum list |grep python3 这里我们可以下载python3
腾讯云
[root@localhost ~]# rm -rf /etc/yum.repos.d/CentOS-Base.repo 删除之前的阿里yum仓库
[root@localhost ~]# wget -O /etc/yum.repos.d/CentOS-Base.repo
http://mirrors.cloud.tencent.com/repo/centos7_base.repo[root@localhost ~]# yum clean all
[root@localhost ~]# yum makecache
elep源
[root@localhost ~]# yum -y install epel-release
[root@localhost ~]# yum -y install sl 这个是小火车程序
[root@localhost ~]# sl
[root@localhost ~]# yum clean all
[root@localhost ~]# yum makecache
安装特定软件源配置nginx


进去之后向下翻可以看到安装提示,更具提示信息进行安装。
[root@localhost ~]# vim /etc/yum.repos.d/nginx.repo
[nginx-stable]
name=nginx stable repo
baseurl=http://nginx.org/packages/centos/$releasever/$basearch/
gpgcheck=1
enabled=1
gpgkey=https://nginx.org/keys/nginx_signing.key
module_hotfixes=true这里文件里面写的东西也可以去复制粘贴。
[root@localhost ~]# yum clean all
[root@localhost ~]# yum makecache
[root@localhost ~]# yum -y install nginx
[root@localhost ~]# nginx //启动服务[root@localhost ~]#curl http://192.168.4.10
[root@localhost ~]# whereis nginx //查看指令
[root@localhost ~]# nginx -s stop //停⽤nginx[root@localhost ~]# nginx
-bash: /usr/sbin/nginx: 没有那个文件或目录 停用之后就会出现这样的提示
自建yum仓库
[root@localhost ~]# yum -y install createrepo 安装createrepo制作仓库的软件
[root@localhost ~]# createrepo soft/ 把soft⽂件夹做成⼀个本地的⾃建仓 库
[root@localhost ~]# cd soft/
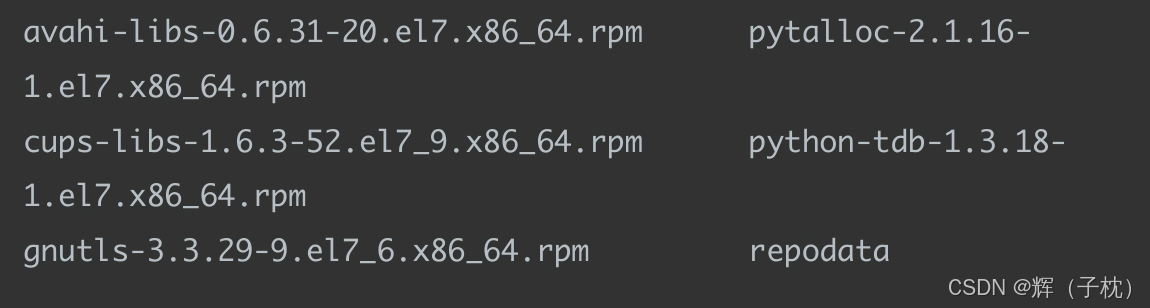
[root@localhost soft]# ls
[root@localhost ~]# vim /etc/yum.conf 在/etc/yum.repos.d/下创建 soft.repo
[main]
cachedir=/var/cache/yum/$basearch/$releasever 定义软件包缓存路径
keepcache=1 修改为1,开启缓存
debuglevel=2
logfile=/var/log/yum.log
exactarch=1
obsoletes=1
gpgcheck=1
plugins=1
installonly_limit=5
bugtracker_url=http://bugs.centos.org/set_project.php?
project_id=23&ref=http://bugs.centos.org/bug_report_page.php?
category=yum
distroverpkg=centos-release[root@localhost ~]# yum clean all
[root@localhost ~]# yum makecache
[root@localhost ~]# yum -y remove nginx.x86_64 卸载然后安装查看缓存
[root@localhost ~]# yum install nginx -y
[root@localhost ~]# find /var/cache/ -name "*tree*" -type f /var/cache/yum/x86_64/7/os/packages/tree-1.6.0-10.el7.x86_64.rpm
[root@localhost ~]# find /var/cache/ -name "*nginx*" -type f /var/cache/yum/x86_64/7/nginx-stable/packages/nginx-1.26.1 2.el7.ngx.x86_64.rp
[root@localhost ~]# yum install --downloadonly --downloaddir=./soft samba 只下载不安装
在/etc/yum.repos.d/下创建soft.repo
[root@localhost soft]# rm -rf /etc/yum.repos.d/*.repo 删除其他仓库⽂件
[root@localhost soft]# ls /etc/yum.repos.d/
repo.tar.gz
[root@localhost soft]# vim /etc/yum.repos.d/soft.repo
[soft]
name=soft
baseurl=file:///root/soft/
gpgcheck=0
enable=1
[root@localhost soft]# yum clean all
[root@localhost soft]# yum makecache
[root@localhost soft]# yum -y install samba 再次安装samba这次不需要下载