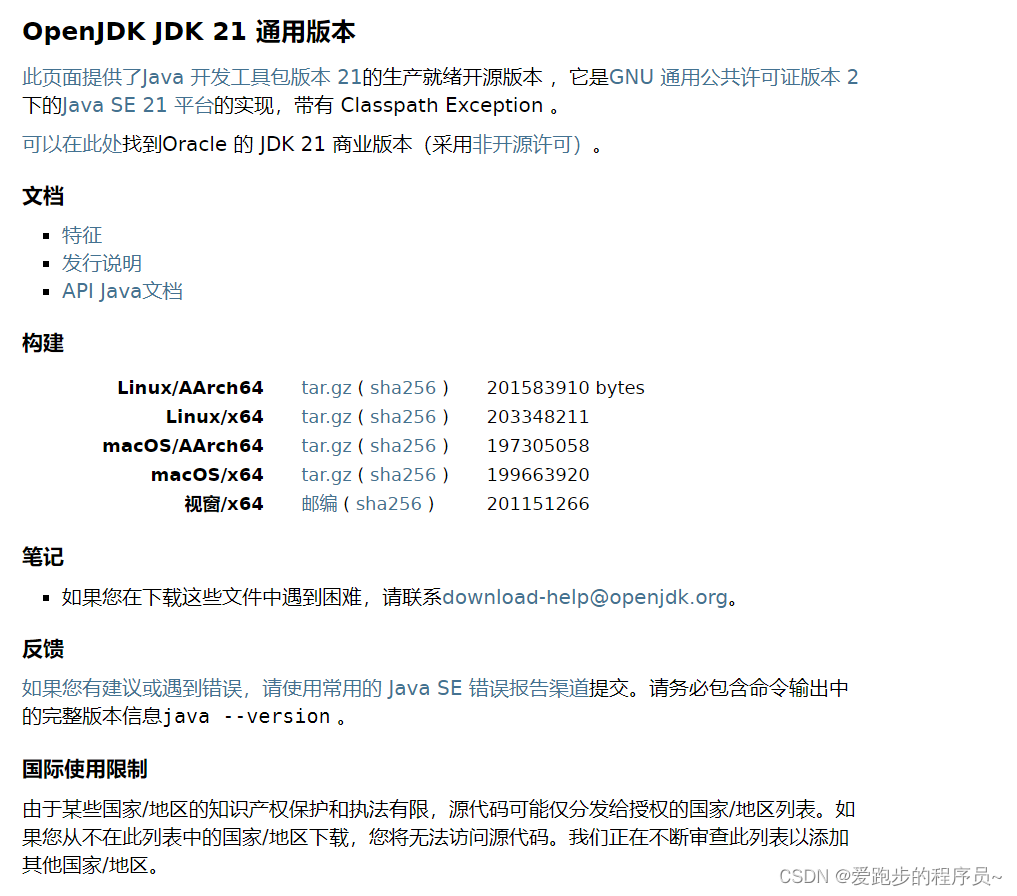
JDK 21 于 2023 年 9 月 19 日正式发布。Oracle 提供GPL 下的生产就绪二进制文件;其他供应商的二进制文件也将很快推出。
Spring Boot 3.x 版本最低支持的 JDK 版本为 JDK 17,也就是说如果你还想用 JDK8的话,那能用的最高 Spring Boot 版本为 2.7。
Dubbo 在官方说明中也已经将 JDK 17 作为推荐的版本了。其他的几乎你所能用到的一些开源框架或工具包都早已支持最起码 JDK 17 了。JDK 8 不知道还能坚持多久。
JDK21是 LTS(长期支持版),至此为止,目前有 JDK8、JDK11、JDK17和 JDK21这四个长期支持版了。相信用不了多久,JDK21就会取代JDK17的位置,因为 JDK21在 JDK17的基础上做了向上增强。
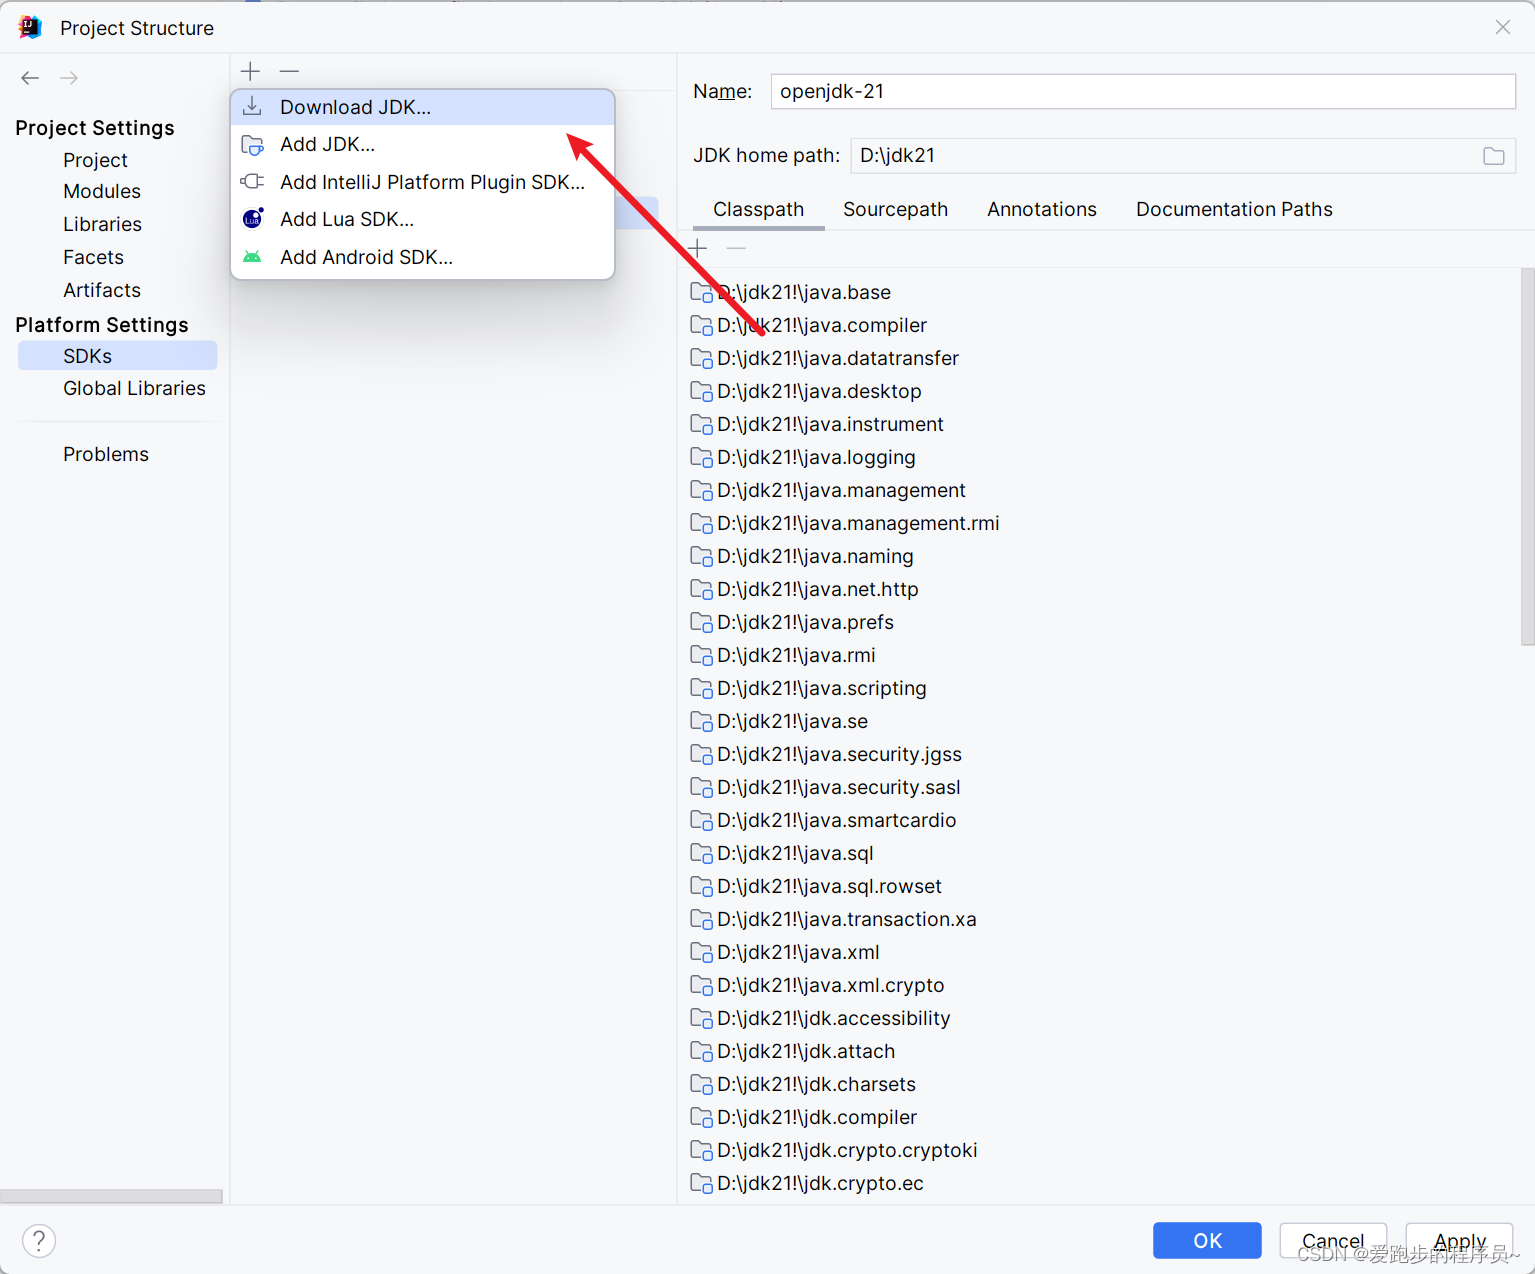
下载 JDK 21
jdk21下载链接
不管你工作上用的 JDK版本是不是 1.8,都可以下载下来尝试一下,早点熟悉、早点适应,早晚会用上的。
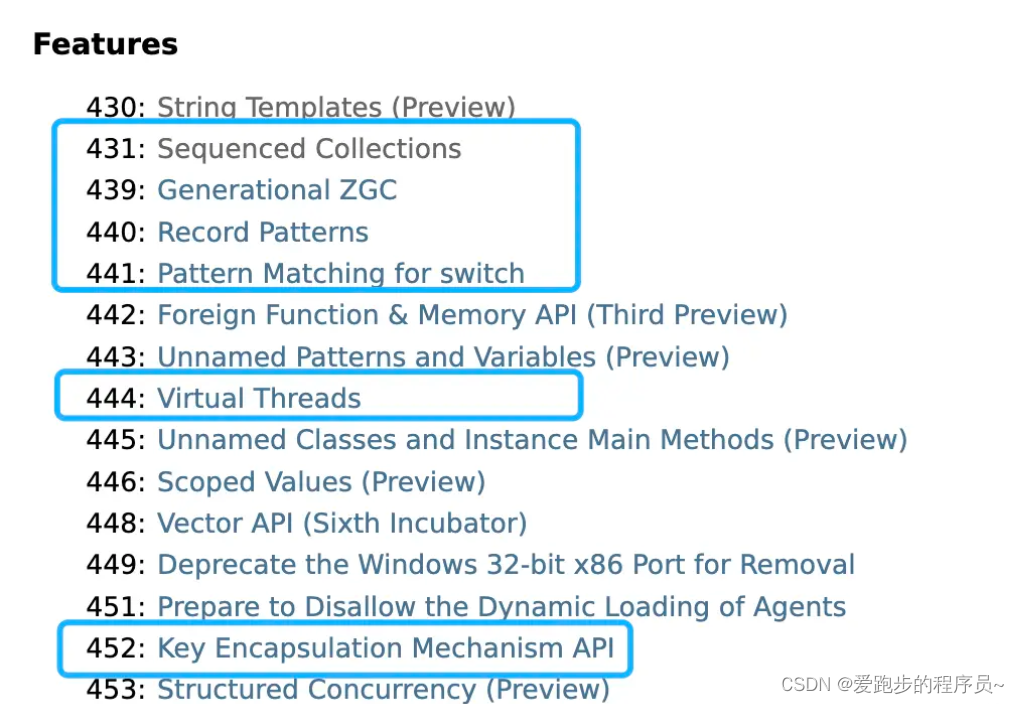
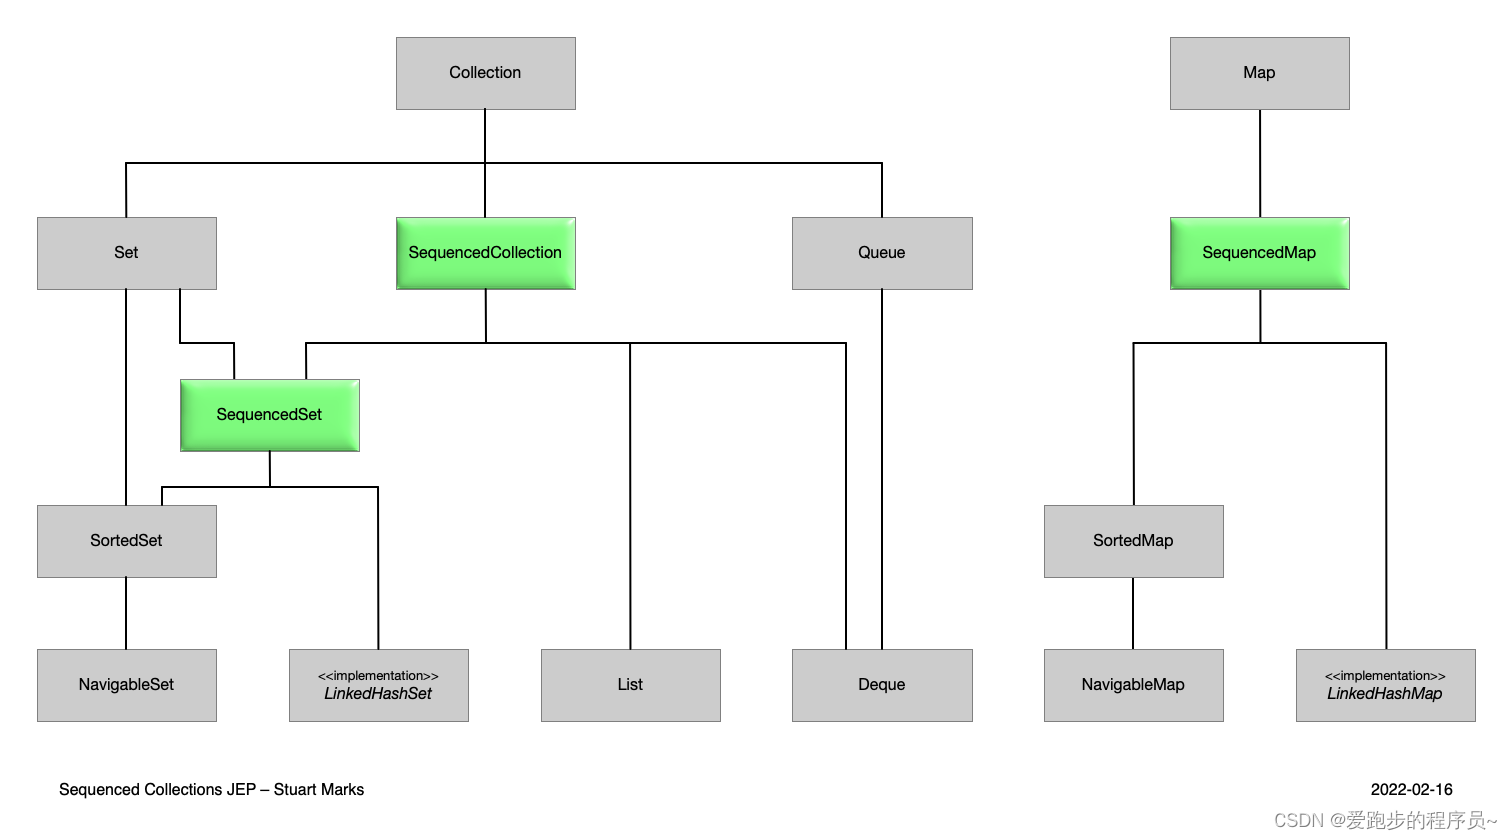
序列化集合接口
我们常用的ArrayList和LinkedList等也都实现了这个接口
//
// Source code recreated from a .class file by IntelliJ IDEA
// (powered by FernFlower decompiler)
//

package java.util;

public interface SequencedCollection<E> extends Collection<E> {
    SequencedCollection<E> reversed();

    default void addFirst(E e) {
        throw new UnsupportedOperationException();
    }

    default void addLast(E e) {
        throw new UnsupportedOperationException();
    }

    default E getFirst() {
        return this.iterator().next();
    }

    default E getLast() {
        return this.reversed().iterator().next();
    }

    default E removeFirst() {
        Iterator<E> it = this.iterator();
        E e = it.next();
        it.remove();
        return e;
    }

    default E removeLast() {
        Iterator<E> it = this.reversed().iterator();
        E e = it.next();
        it.remove();
        return e;
    }
}
更加方便获取第一个元素,最后一个元素,删除最后一个元素,从头部插入元素
List<Integer> list = List.of(1, 2, 3);
        // 翻转集合
        List<Integer> reversed = list.reversed();
        reversed.forEach(System.out::println);
        // 获取第一个元素
        Integer first = list.getFirst();
        // 获取最后一个元素
        Integer last = list.getLast();
之前获取第一个元素是 list.get(0),现在用 list.getFirst()就可以了
ZGC 增加分代
可能很多人对JVM垃圾收集机制还停留在G1上,ZGC实在JDK11中推出的,ZGC是低延迟垃圾收集器,几乎是全并发,停顿时间不超过10ms
JDK21中对ZGC的功能进行拓展,增加了分代功能,比如CMS收集器区分老年代和年轻代,可以更加频繁的收集年轻代,要使用ZGC以及分代功能,需要加入以下参数:
-XX:+UseZGC -XX:+ZGenerational
Record匹配模式
声明Record
record Person(String name, int age) {}
在JDK21之前,我们要使用instanceof判断一个对象,并取出对象字段
 // jdk21之前
       Person p = new Person("leibo", 18);
        if (p instanceof Person) {
            System.out.println("Name: " + p.name());
        }
在JDK21之后,直接将参数带着,然后自动解析出参数的具体值:
// jdk21之后
        Person p = new Person("leibo", 18);
        // 可以直接解构记录字段
        if (p instanceof Person(String name, int age)) {
            System.out.println(name);
        }
swich增强
增强的swich可以直接根据参数类型来匹配
 public static String switchObject(Object obj) {
        return switch (obj) {
            case Integer i -> String.format("int %d", i);
            case Long l -> String.format("long %d", l);
            case Double d -> String.format("double %f", d);
            case String s -> String.format("String %s", s);
            default -> obj.toString();
        };
    }
测试:
public static void main(String[] args) {
        var strObj = "字符串";
        var intObj = 1;
        var doubleObj = 8.88D;
        System.out.println(switchObject(strObj));
        System.out.println(switchObject(intObj));
        System.out.println(switchObject(doubleObj));
    }
输出结果:
虚拟线程(Virtual Threads)
虚拟线程是基于协程的线程,它们与其他语言中的协程具有相似之处,但也存在一些不同之处。
虚拟线程是依附于主线程的,如果主线程销毁了,那虚拟线程也不复存在。
相同之处:
虚拟线程和协程都是轻量级的线程,它们的创建和销毁的开销都比传统的操作系统线程要小。
虚拟线程和协程都可以通过暂停和恢复来实现线程之间的切换,从而避免了线程上下文切换的开销。
虚拟线程和协程都可以使用异步和非阻塞的方式来处理任务,提高应用程序的性能和响应速度。
不同之处:
虚拟线程是在 JVM 层面实现的,而协程则是在语言层面实现的。因此,虚拟线程的实现可以与任何支持 JVM 的语言一起使用,而协程的实现则需要特定的编程语言支持。
虚拟线程是一种基于线程的协程实现,因此它们可以使用线程相关的 API,如 ThreadLocal、Lock 和 Semaphore。而协程则不依赖于线程,通常需要使用特定的异步编程框架和 API。
虚拟线程的调度是由 JVM 管理的,而协程的调度是由编程语言或异步编程框架管理的。因此,虚拟线程可以更好地与其他线程进行协作,而协程则更适合处理异步任务。
虚拟线程例子
现在创建线程的方法:
public class SimpleThread implements Runnable{
    @Override
    public void run() {
        System.out.println("当前线程的名称" + Thread.currentThread().getName());

        try {
            Thread.sleep(1000);
        } catch (InterruptedException e) {
            throw new RuntimeException(e);
        }
    }
}
使用这个线程,启动线程
  public static void main(String[] args) {
        // 使用线程
        Thread thread = new Thread(new SimpleThread());
        thread.start();
    }
有了虚拟线程后,怎么实现呢?
Thread.ofPlatform().name("thread1").start(new SimpleThread());
下面是使用虚拟线程的几种方法
1.直接启动一个虚拟线程
Thread thread = Thread.startVirtualThread(new SimpleThread());
2.使用 ofVirtual(),builder 方式启动虚拟线程,可以设置线程的名称,优先级,异常处理等配置
Thread thread = Thread.ofVirtual()
                .name("thread2")
                .uncaughtExceptionHandler((t, e) -> {
                    System.out.println(t.getName() + e.getMessage());
                }).unstarted(new SimpleThread());
        thread.start();
3.使用Factory创建线程
 // 使用factory
        ThreadFactory factory = Thread.ofVirtual().factory();
        Thread thread = factory.newThread(new SimpleThread());
        thread.setName("thread03");
        thread.start();
4.使用Executors方式
// 使用Executors方式
        ScheduledExecutorService executorService = Executors.newSingleThreadScheduledExecutor();
        Future<?> submit = executorService.submit(new SimpleThread());
        Object o = submit.get();
结构化编程的例子
列举一个场景,假设你有三个任务要同时进行,只要任意一个返回结果,那就直接用这个结果,其他两个任务就停止。
在java8:
ExecutorService executor = Executors.newFixedThreadPool(5);

        // 创建任务列表
        List<Callable<String>> tasks = List.of(
                () -> "Task 1",
                () -> "Task 2",
                () -> "Task 3"
        );

        // 执行任务并返回 Future 对象列表
        List<Future<String>> futures = executor.invokeAll(tasks);

        // 等待任一任务完成并获取结果
        String result = executor.invokeAny(tasks);

        System.out.println("Results:");
        for (Future<String> future : futures) {
            System.out.println(future.get());
        }

        System.out.println("Result of the first completed task: " + result);

        executor.shutdown();
使用 ExecutorService的invokeAll和invokeAny实现,但是会有一些额外的工作,在拿到第一个结果后,要手动关闭另外的线程。
在JDK21中,可以使用结构化编程实现
ShutdownOnSuccess 捕获第一个结果并关闭任务范围中断未完成的线程并唤醒调用线程。适用于任意子任务的结果可以直接调用,并且无需等待其他线程完成任务的情况。它定义了获取第一个结果或在所有子任务失败时抛出异常
public static void main(String[] args) throws IOException {
  try (var scope = new StructuredTaskScope.ShutdownOnSuccess<String>()) {
    Future<String> res1 = scope.fork(() -> runTask(1));
    Future<String> res2 = scope.fork(() -> runTask(2));
    Future<String> res3 = scope.fork(() -> runTask(3));
    scope.join();
    System.out.println("scope:" + scope.result());
  } catch (ExecutionException | InterruptedException e) {
    throw new RuntimeException(e);
  }
}

public static String runTask(int i) throws InterruptedException {
  Thread.sleep(1000);
  long l = new Random().nextLong();
  String s = String.valueOf(l);
  System.out.println("第" + i + "个任务:" + s);
  return s;
}
ShutdownOnFailure执行多个任务,只要有一个失败(出现异常或其他主动抛出异常情况),就停止其他未执行完的任务,使用scope.throwIfFailed捕捉并抛出异常。如果所有任务均正常,则使用 Feture.get() 或*Feture.resultNow() 获取结果
public static void main(String[] args) throws IOException {
  try (var scope = new StructuredTaskScope.ShutdownOnFailure()) {
    Future<String> res1 = scope.fork(() -> runTaskWithException(1));
    Future<String> res2 = scope.fork(() -> runTaskWithException(2));
    Future<String> res3 = scope.fork(() -> runTaskWithException(3));
    scope.join();
    scope.throwIfFailed(Exception::new);

    String s = res1.resultNow(); //或 res1.get()
    System.out.println(s);
    String result = Stream.of(res1, res2,res3)
      .map(Future::resultNow)
      .collect(Collectors.joining());
    System.out.println("直接结果:" + result);
  } catch (Exception e) {
    e.printStackTrace();
    //throw new RuntimeException(e);
  }
}

// 有一定几率发生异常
public static String runTaskWithException(int i) throws InterruptedException {
  Thread.sleep(1000);
  long l = new Random().nextLong(3);
  if (l == 0) {
    throw new InterruptedException();
  }
  String s = String.valueOf(l);
  System.out.println("第" + i + "个任务:" + s);
  return s;
}
Scoped Values 的例子
我们肯定都用过 ThreadLocal,它是线程本地变量,只要这个线程没销毁,可以随时获取 ThredLocal 中的变量值。Scoped Values 也可以在线程内部随时获取变量,只不过它有个作用域的概念,超出作用域就会销毁
public class ScopeValueTest {

    final static ScopedValue<String> loginUser = ScopedValue.newInstance();

    public static void main(String[] args) throws InterruptedException {
        ScopedValue.where(loginUser, "lisi")
                .run(()-> {
                    new Service().login();
                });
        Thread.sleep(2000);
    }
    static class Service {
        void login() {
            System.out.println("当前用户是: " + loginUser.get());
        }

    }
}
上面的例子模拟一个用户登录的过程,使用 ScopedValue.newInstance()声明了一个 ScopedValue,用 ScopedValue.where给 ScopedValue设置值,并且使用 run 方法执行接下来要做的事儿,这样一来,ScopedValue就在 run() 的内部随时可获取了,在run方法中,模拟调用了一个service 的login方法,不用传递LoginUser这个参数,就可以直接通过LoginUser.get方法获取当前登录用户的值了。
Key Encapsulation Mechanism API
提供一套非对称加密的API。使应用程序能够使用 KEM 算法,例如 RSA 密钥封装机制 (RSA-KEM)、椭圆曲线集成加密方案 (ECIES) 以及美国国家标准与技术研究院 (NIST) 后量子加密标准化过程的候选 KEM 算法。
我们如果用 Java 8 的话,涉及到加密算法的部分几乎都是用的第三方加密,那升级了 JDK21之后,就不用使用第三方包了。
JDK帮助文档
https://docs.oracle.com/en/java/javase/21/docs/api/index.html


