文章目录
CSS3 flex弹性布局
概述
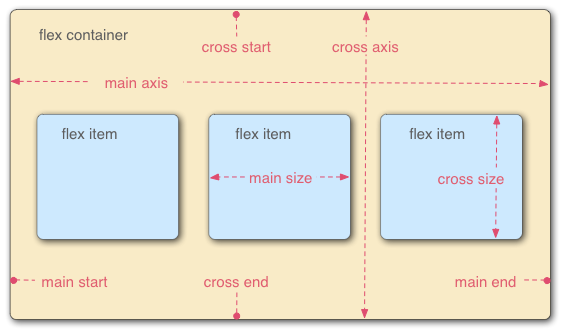
CSS3新增了一种新型的弹性盒子模型。通过弹性盒子模型,我们可以轻松地创建自适应浏览器窗口的“流动布局”以及自适应字体大小的弹性布局,使得响应式布局的实现更加容易。
此外记住一点:在使用弹性盒子模型之前,你必须为父元素定义display:flex;或display:inline-flex;,这样父元素才具有弹性盒子模型的特点。
flex属性
| 属性 | 说明 |
|---|---|
| flex-grow | 定义子元素的放大比例 |
| flex-shrink | 定义子元素的缩小比例 |
| flex-basis | 定义子元素的宽度,替代width属性 |
| flex | 复合属性,flex-grow、flex-shrink、flex-basis的简写 |
| flex-direction | 定义子元素的排列方向 |
| flex-wrap | 定义子元素是单行显示,还是多行显示 |
| flex-flow | 复合属性,flex-direction、flex-wrap |
| order | 定义子元素的排列顺序 |
| justify-content | 定义子元素在“主轴”上的对齐方式 |
| align-items | 定义子元素在“纵轴”上的对齐方式 |
使用
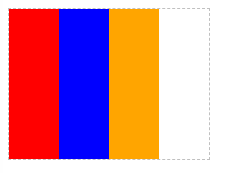
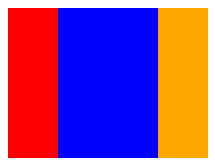
子元素宽度之和小于父元素宽度
<!DOCTYPE html>
<html>
	<head>
		<meta charset="utf-8" />
		<title></title>
		<style type="text/css">
			#wrapper {
				display: flex;
				width: 200px;
				height: 150px;
				border: 1px dashed silver;
			}

			#box1,
			#box2,
			#box3 {
				width: 50px;
			}

			#box1 {
				background: red;
			}

			#box2 {
				background: blue;
			}

			#box3 {
				background: orange;
			}
		</style>
	</head>
	<body>
		<div id="wrapper">
			<div id="box1"></div>
			<div id="box2"></div>
			<div id="box3"></div>
		</div>
	</body>
</html>
子元素宽度之和大于父元素宽度
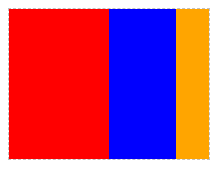
<!DOCTYPE html>
<html>
	<head>
		<meta charset="utf-8" />
		<title></title>
		<style type="text/css">
			#wrapper {
				display: flex;
				width: 200px;
				height: 150px;
				border: 1px dashed silver;
			}

			#box1,
			#box2,
			#box3 {
				width: 100px;
			}

			#box1 {
				background: red;
			}

			#box2 {
				background: blue;
			}

			#box3 {
				background: orange;
			}
		</style>
	</head>
	<body>
		<div id="wrapper">
			<div id="box1"></div>
			<div id="box2"></div>
			<div id="box3"></div>
		</div>
	</body>
</html>
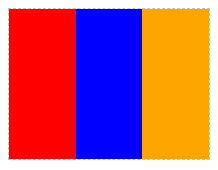
注:在这个例子中,弹性盒子(父元素)的宽度为200px,而所有子元素宽度之和为300px,此时子元素宽度之和大于父元素宽度。因此,子元素会按比例来划分宽度。这就是弹性盒子的特点。
flex-grow 放大比例
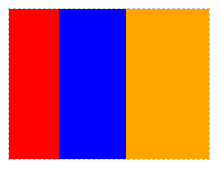
在CSS3中,我们可以使用flex-grow属性来定义弹性盒子内部子元素的放大比例。也就是当所有子元素宽度之和小于父元素的宽度时,子元素如何分配父元素的剩余空间。
默认值为 0,即不放大。当容器空间有剩余时,会按照各个项目设置的 flex-grow 值来分配剩余空间。如果一个项目的 flex-grow 设为 2,另一个项目设为 1,则前者占据的剩余空间是后者的两倍。
<!DOCTYPE html>
<html>
	<head>
		<meta charset="utf-8" />
		<title></title>
		<style type="text/css">
			#wrapper {
				display: flex;
				width: 200px;
				height: 150px;
				border: 1px dashed silver;
			}

			#box1,
			#box2,
			#box3 {
				width: 50px;
			}

			#box1 {
				background: red;
				flex-grow: 0;
			}

			#box2 {
				background: blue;
				flex-grow: 1;
			}

			#box3 {
				background: orange;
				flex-grow: 2;
			}
		</style>
	</head>
	<body>
		<div id="wrapper">
			<div id="box1"></div>
			<div id="box2"></div>
			<div id="box3"></div>
		</div>
	</body>
</html>
flex-shrink 缩小比例
在CSS3中,flex-shrink属性用于定义弹性盒子内部子元素的缩小比例。也就是当所有子元素宽度之和大于父元素的宽度时,子元素如何缩小自己的宽度。
默认值为 1,即缩小到最小值。当容器空间不足时,会按照各个项目设置的 flex-shrink 值来分配缺少的空间。与 flex-grow 对应的是,flex-shrink 数值越大的项目会被优先缩小。
<!DOCTYPE html>
<html>
	<head>
		<meta charset="utf-8" />
		<title></title>
		<style type="text/css">
			#wrapper {
				display: flex;
				width: 200px;
				height: 150px;
				border: 1px dashed silver;
			}

			#box1,
			#box2,
			#box3 {
				width: 100px;
			}

			#box1 {
				background: red;
				flex-shrink: 0;
			}

			#box2 {
				background: blue;
				flex-shrink: 1;
			}

			#box3 {
				background: orange;
				flex-shrink: 2;
			}
		</style>
	</head>
	<body>
		<div id="wrapper">
			<div id="box1"></div>
			<div id="box2"></div>
			<div id="box3"></div>
		</div>
	</body>
</html>
flex-basis 元素宽度
在CSS3中,我们可以定义弹性盒子内部的子元素在分配空间之前,该子元素所占的空间大小。浏览器会根据这个属性,计算父元素是否有多余空间。
说白了,flex-basis就是width的替代品,它们都用来定义子元素的宽度。只不过在弹性盒子中,flex-basis的语义会比width更好。
<!DOCTYPE html>
<html>
	<head>
		<meta charset="utf-8" />
		<title></title>
		<style type="text/css">
			#wrapper {
				display: flex;
				width: 200px;
				height: 150px;
				border: 1px dashed silver;
			}

			#box1,
			#box2,
			#box3 {
				flex-basis: 100px;
			}

			#box1 {
				background: red;
				flex-shrink: 0;
			}

			#box2 {
				background: blue;
				flex-shrink: 1;
			}

			#box3 {
				background: orange;
				flex-shrink: 2;
			}
		</style>
	</head>
	<body>
		<div id="wrapper">
			<div id="box1"></div>
			<div id="box2"></div>
			<div id="box3"></div>
		</div>
	</body>
</html>
flex 复合属性
flex属性的默认值为“0 1 auto”。
flex: 1;等价于flex: 1 1 auto
flex: 2等价于flex: 2 1 auto
<!DOCTYPE html>
<html>
	<head>
		<meta charset="utf-8" />
		<title></title>
		<style type="text/css">
			#wrapper {
				display: flex;
				width: 200px;
				height: 150px;
			}

			#box1 {
				background: red;
				flex: 1;
			}

			#box2 {
				background: blue;
				flex: 2;
			}

			#box3 {
				background: orange;
				flex: 1;
			}
		</style>
	</head>
	<body>
		<div id="wrapper">
			<div id="box1"></div>
			<div id="box2"></div>
			<div id="box3"></div>
		</div>
	</body>
</html>
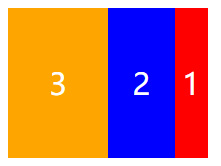
flex-direction 排列方向
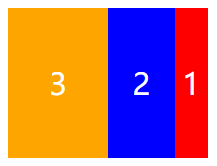
在CSS3中,我们可以使用flex-direction属性来定义弹性盒子内部“子元素”的排列方向。也就是定义子元素是横着排,还是竖着排。
flex-direction属性取值
| 属性值 | 说明 |
|---|---|
| row | 默认值,横向排列 |
| row-reverse | 横向反向排列 |
| column | 纵向排列 |
| column-reverse | 纵向反向排列 |
<!DOCTYPE html>
<html>
	<head>
		<meta charset="utf-8" />
		<title></title>
		<style type="text/css">
			#wrapper {
				display: flex;
				flex-direction: row-reverse;
				width: 200px;
				height: 150px;
			}

			#box1,
			#box2,
			#box3 {
				height: 150px;
				line-height: 150px;
				text-align: center;
				font-size: 30px;
				color: white;
			}

			#box1 {
				background: red;
				flex: 1;
			}

			#box2 {
				background: blue;
				flex: 2;
			}

			#box3 {
				background: orange;
				flex: 3;
			}
		</style>
	</head>
	<body>
		<div id="wrapper">
			<div id="box1">1</div>
			<div id="box2">2</div>
			<div id="box3">3</div>
		</div>
	</body>
</html>
flex-wrap 换行
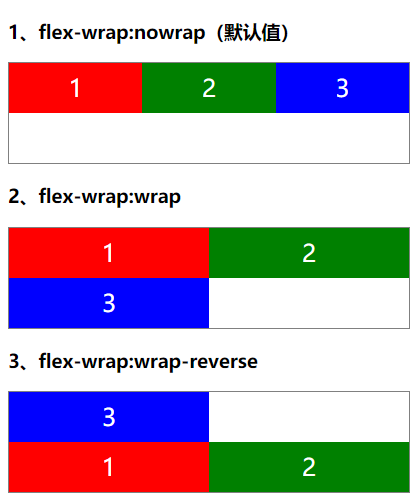
在CSS3中,我们可以使用flex-wrap属性来定义弹性盒子内部“子元素”是单行显示还是多行显示。
flex-wrap属性取值
| 属性值 | 说明 |
|---|---|
| nowrap | 默认值,单行显示 |
| wrap | 多行显示 |
| wrap-reverse | 多行显示,但是是反向 |
<!DOCTYPE html>
<html>
	<head>
		<meta charset="utf-8" />
		<title></title>
		<style type="text/css">
			/* 公用样式 */
			.wrapper1,
			.wrapper2,
			.wrapper3 {
				display: flex;
				color: white;
				font-size: 24px;
				width: 400px;
				height: 100px;
				line-height: 50px;
				border: 1px solid gray;
				text-align: center;
			}

			.wrapper1 div,
			.wrapper2 div,
			.wrapper3 div {
				height: 50%;
				width: 50%;
			}

			.red {
				background: red;
			}

			.green {
				background: green;
			}

			.blue {
				background: blue;
			}

			/* 弹性盒子样式 */
			.wrapper1 {
				flex-wrap: nowrap;
			}

			.wrapper2 {
				flex-wrap: wrap;
			}

			.wrapper3 {
				flex-wrap: wrap-reverse;
			}
		</style>
	</head>
	<body>
		<h3>1、flex-wrap:nowrap(默认值)</h3>
		<div class="wrapper1">
			<div class="red">1</div>
			<div class="green">2</div>
			<div class="blue">3</div>
		</div>
		<h3>2、flex-wrap:wrap</h3>
		<div class="wrapper2">
			<div class="red">1</div>
			<div class="green">2</div>
			<div class="blue">3</div>
		</div>
		<h3>3、flex-wrap:wrap-reverse</h3>
		<div class="wrapper3">
			<div class="red">1</div>
			<div class="green">2</div>
			<div class="blue">3</div>
		</div>
	</body>
</html>
flex-flow 复合属性
在CSS3中,我们可以使用flex-flow属性来同时设置flex-direction、flex-wrap这两个属性。说白了,flex-flow属性就是一个简写形式,就是一个“语法糖”。
<!DOCTYPE html>
<html>
	<head>
		<meta charset="utf-8" />
		<title></title>
		<style type="text/css">
			#wrapper {
				display: flex;
				flex-flow: row-reverse nowrap;
				width: 200px;
				height: 150px;
			}

			#box1,
			#box2,
			#box3 {
				height: 150px;
				line-height: 150px;
				text-align: center;
				font-size: 30px;
				color: white;
			}

			#box1 {
				background: red;
				flex: 1;
			}

			#box2 {
				background: blue;
				flex: 2;
			}

			#box3 {
				background: orange;
				flex: 3;
			}
		</style>
	</head>
	<body>
		<div id="wrapper">
			<div id="box1">1</div>
			<div id="box2">2</div>
			<div id="box3">3</div>
		</div>
	</body>
</html>
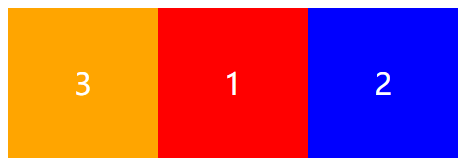
order 排列顺序
在CSS3中,我们可以使用order属性来定义弹性盒子内部“子元素”的排列顺序。
<!DOCTYPE html>
<html>
	<head>
		<meta charset="utf-8" />
		<title></title>
		<style type="text/css">
			#wrapper {
				display: flex;
			}

			#box1,
			#box2,
			#box3 {
				width: 150px;
				height: 150px;
				line-height: 150px;
				text-align: center;
				font-size: 30px;
				color: white;
			}

			#box1 {
				background: red;
				order: 2;
			}

			#box2 {
				background: blue;
				order: 3;
			}

			#box3 {
				background: orange;
				order: 1;
			}
		</style>
	</head>
	<body>
		<div id="wrapper">
			<div id="box1">1</div>
			<div id="box2">2</div>
			<div id="box3">3</div>
		</div>
	</body>
</html>
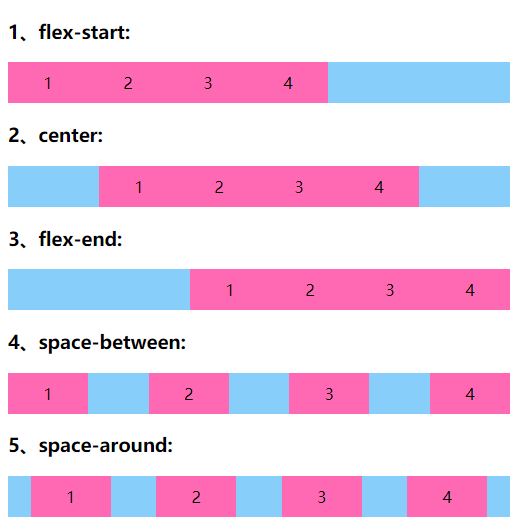
justify-content 水平对齐
在CSS3中,我们可以使用justify-content属性来定义弹性盒子内部子元素在“横轴”上的对齐方式。
justify-content属性取值
| 属性值 | 说明 |
|---|---|
| flex-start | 默认值,所有子元素在左边 |
| center | 所有子元素在中间 |
| flex-end | 所有子元素在右边 |
| space-between | 所有子元素平均分布 |
| space-around | 所有子元素平局分布,两边留有间距 |
<!DOCTYPE html>
<html>
	<head>
		<meta charset="utf-8" />
		<title></title>
		<style type="text/css">
			/*定义整体样式*/
			.flex {
				display: flex;
				flex-flow: row nowrap;
				background-color: lightskyblue;
				margin-bottom: 5px;
			}

			.item {
				width: 80px;
				padding: 10px;
				text-align: center;
				background-color: hotpink;
				box-sizing: border-box;
			}

			/*定义justify-content*/
			.start {
				justify-content: flex-start;
			}

			.center {
				justify-content: center;
			}

			.end {
				justify-content: flex-end;
			}

			.between {
				justify-content: space-between;
			}

			.around {
				justify-content: space-around;
			}
		</style>
	</head>
	<body>
		<h3>1、flex-start:</h3>
		<div class="flex start">
			<div class="item">1</div>
			<div class="item">2</div>
			<div class="item">3</div>
			<div class="item">4</div>
		</div>
		<h3>2、center:</h3>
		<div class="flex center">
			<div class="item">1</div>
			<div class="item">2</div>
			<div class="item">3</div>
			<div class="item">4</div>
		</div>
		<h3>3、flex-end:</h3>
		<div class="flex end">
			<div class="item">1</div>
			<div class="item">2</div>
			<div class="item">3</div>
			<div class="item">4</div>
		</div>
		<h3>4、space-between:</h3>
		<div class="flex between">
			<div class="item">1</div>
			<div class="item">2</div>
			<div class="item">3</div>
			<div class="item">4</div>
		</div>
		<h3>5、space-around:</h3>
		<div class="flex around">
			<div class="item">1</div>
			<div class="item">2</div>
			<div class="item">3</div>
			<div class="item">4</div>
		</div>
	</body>
</html>
align-items 垂直对齐
在CSS3中,我们可以使用align-items属性来定义弹性盒子内部子元素在“纵轴”上的对齐方式。
align-items属性取值
| 属性值 | 说明 |
|---|---|
| flex-start | 默认值,所有子元素在上边 |
| center | 所有子元素在中间 |
| flex-end | 所有子元素在下边 |
| baseline | 所以子元素在父元素的基线上 |
| stretch | 拉伸子元素适应父元素的高度 |
<!DOCTYPE html>
<html>
	<head>
		<meta charset="utf-8" />
		<title></title>
		<style type="text/css">
			.box {
				/*去除默认样式*/
				list-style-type: none;
				margin: 0;
				padding: 0;
				/*定义flex布局*/
				display: flex;
				width: 250px;
				height: 150px;
				border: 1px solid gray;
				font-size: 24px;
			}

			h3 {
				margin-bottom: 3px;
			}

			/*定义子元素样式*/
			.box li {
				margin: 5px;
				background-color: lightskyblue;
				text-align: center;
			}

			.box li:nth-child(1) {
				padding: 10px;
			}

			.box li:nth-child(2) {
				padding: 15px 10px;
			}

			.box li:nth-child(3) {
				padding: 20px 10px;
			}

			/*定义align-items*/
			#box1 {
				align-items: flex-start;
			}

			#box2 {
				align-items: center;
			}

			#box3 {
				align-items: flex-end;
			}

			#box4 {
				align-items: baseline;
			}

			#box5 {
				align-items: stretch;
			}
		</style>
	</head>
	<body>
		<h3>1、align-items:flex-start</h3>
		<ul id="box1" class="box">
			<li>a</li>
			<li>b</li>
			<li>c</li>
		</ul>
		<h3>2、align-items:center</h3>
		<ul id="box2" class="box">
			<li>a</li>
			<li>b</li>
			<li>c</li>
		</ul>
		<h3>3、align-items:flex-end</h3>
		<ul id="box3" class="box">
			<li>a</li>
			<li>b</li>
			<li>c</li>
		</ul>
		<h3>4、align-items:baseline</h3>
		<ul id="box4" class="box">
			<li>a</li>
			<li>b</li>
			<li>c</li>
		</ul>
		<h3>5、align-items:stretch</h3>
		<ul id="box5" class="box">
			<li>a</li>
			<li>b</li>
			<li>c</li>
		</ul>
	</body>
</html>
案例
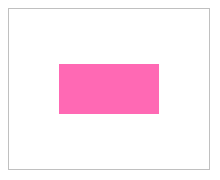
水平和垂直居中效果
<!DOCTYPE html>
<html>
	<head>
		<meta charset="utf-8" />
		<title></title>
		<style type="text/css">
			#container {
				display: flex;
				justify-content: center;
				align-items: center;
				width: 200px;
				height: 160px;
				border: 1px solid silver;
			}

			#box {
				width: 100px;
				height: 50px;
				background-color: hotpink;
			}
		</style>
	</head>
	<body>
		<div id="container">
			<div id="box"></div>
		</div>
	</body>
</html>
输入框布局
<!doctype html>
<html>
	<head>
		<meta charset="utf-8">
		<title>输入框布局</title>
		<style>
			* {
				margin: 0;
				padding: 0;
			}

			.container {
				width: 300px;
				height: 50px;
				margin: 100px auto;
				border: 1px solid #dcdcdc;
				display: flex;
			}

			.container label {
				flex: 1;
				background-color: #f5f5f5;
				font-family: "楷体";
				display: flex;
				justify-content: center;
				align-items: center;
			}

			.container label:nth-child(3) {
				flex: 0 0 60px;
			}

			.container input {
				width: 170px;
				border: none;
				outline: none;
			}
		</style>
	</head>
	<body>
		<div class="container">
			<label>姓名</label><input type="text"><label>go</label>
		</div>
	</body>
</html>
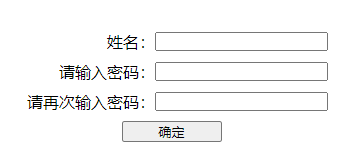
长表单布局
<!DOCTYPE html>
<html>
	<head>
		<meta charset="utf-8">
		<title>长表单布局</title>
		<style type="text/css">
			* {
				margin: 0;
				padding: 0;
			}

			.container {
				margin: 100px;
				display: flex;
				flex-direction: column;
			}

			.container div {
				display: flex;
				align-items: flex-start;
				flex: 0 0 30px;
				justify-content: center;
				align-items: center;
			}

			.container div label {
				flex: 0 0 140px;
				text-align: right;
			}

			.container div input[type="button"] {
				width: 100px;
			}
		</style>
	</head>
	<body>
		<form>
			<div class="container">
				<div>
					<label>姓名:</label>
					<input type="text">
				</div>
				<div>
					<label>请输入密码:</label>
					<input type="text">
				</div>
				<div>
					<label>请再次输入密码:</label>
					<input type="text">
				</div>
				<div>
					<input type="button" value="确定">
				</div>
			</div>
		</form>
	</body>
</html>
导航栏
<!DOCTYPE html>
<html>
	<head>
		<meta charset="utf-8" />
		<title></title>
		<style type="text/css">
			* {
				margin: 0;
				padding: 0;
			}

			ul {
				list-style: none;
			}

			a {
				text-decoration: none;
			}

			.nav {
				width: 1210px;
				height: 48px;
				line-height: 48px;
				background-color: #E8E7E3;
				margin: 50px auto;
				display: flex;
			}

			.nav li {
				flex: 1;
			}

			.nav a {
				display: block;
				color: #808080;
				text-decoration: none;
				font-size: 16px;
				text-align: center;

			}

			.nav a:hover {
				background-color: #636363;
				color: #fff;
			}
		</style>
	</head>
	<body>
		<ul class="nav">
			<li><a href="#">HTML/CSS</a></li>
			<li><a href="#">Browser Side</a></li>
			<li><a href="#">Server Side</a></li>
			<li><a href="#">Programming</a></li>
			<li><a href="#">XML</a></li>
			<li><a href="#">Web Building</a></li>
			<li><a href="#">Reference</a></li>
		</ul>
	</body>
</html>
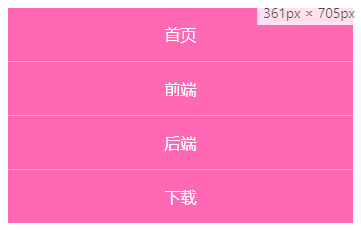
伸缩菜单
<!DOCTYPE html>
<html>
	<head>
		<meta charset="utf-8" />
		<title></title>
		<style type="text/css">
			/*定义整体样式*/
			.nav {
				/*去除默认样式*/
				list-style-type: none;
				margin: 0;
				padding: 0;
				/*定义弹性盒子*/
				display: flex;
				background-color: hotpink;
			}

			.nav a {
				/*去除默认样式*/
				text-decoration: none;
				display: block;
				padding: 16px;
				color: white;
				text-align: center;
			}

			.nav a:hover {
				background-color: lightskyblue;
			}

			/*设备大于800px时*/
			@media (min-width:800px) {

				/*所有子元素在右边*/
				.nav {
					justify-content: flex-end;
				}

				li {
					border-left: 1px solid silver;
				}
			}

			/*设备大于600px且小于800px时*/
			@media (min-width:600px) and (max-width:800px) {

				/*所有子元素平分*/
				.nav li {
					flex: 1;
				}

				li+li {
					border-left: 1px solid silver;
				}
			}

			/*设备小于600px时*/
			@media (max-width: 600px) {
				/*所有子元素纵向排列*/
				.nav {
					flex-flow: column wrap;
				}

				li+li {
					border-top: 1px solid silver;
				}
			}
		</style>
	</head>
	<body>
		<ul class="nav">
			<li><a href="#">首页</a></li>
			<li><a href="#">前端</a></li>
			<li><a href="#">后端</a></li>
			<li><a href="#">下载</a></li>
		</ul>
	</body>
</html>
