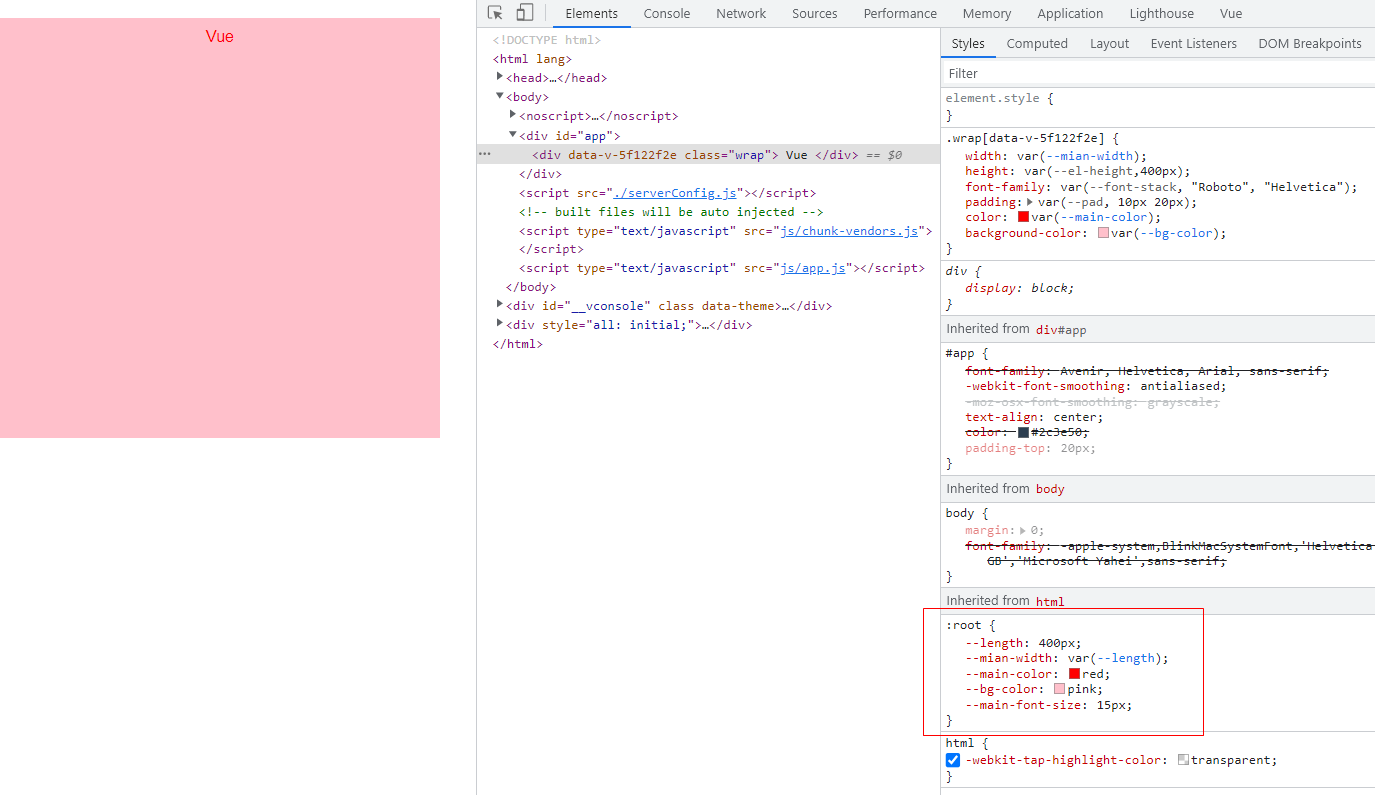
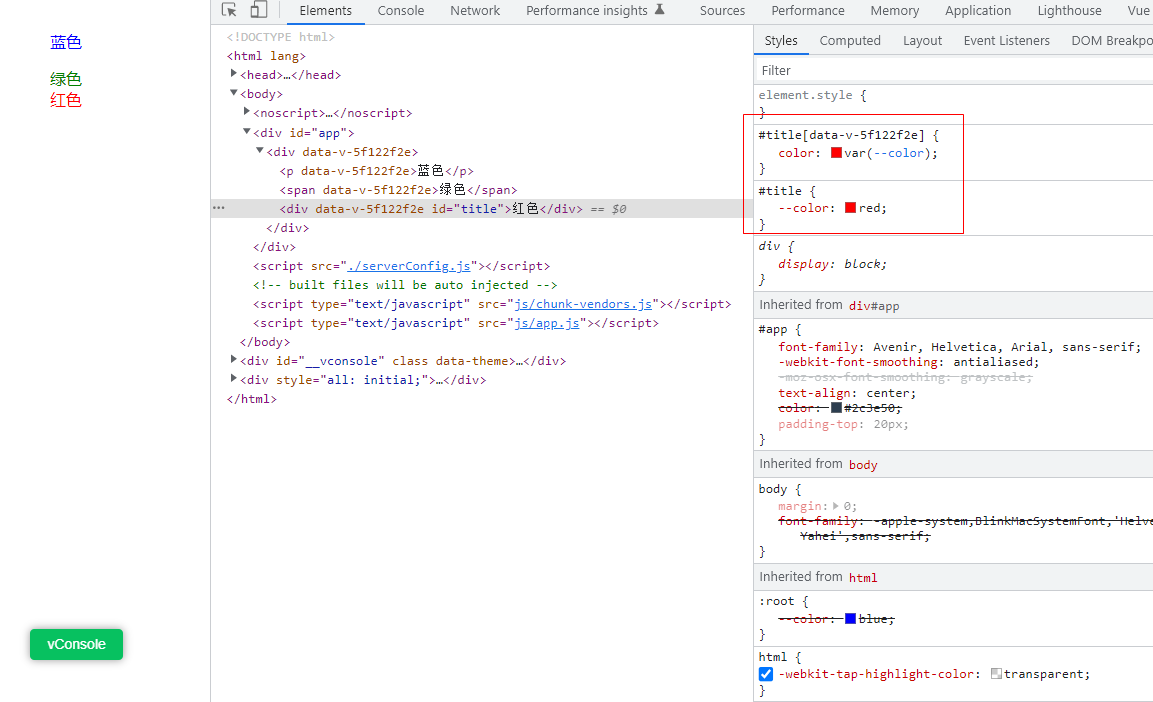
学习链接
文章目录
第一章 介绍
1、课程介绍
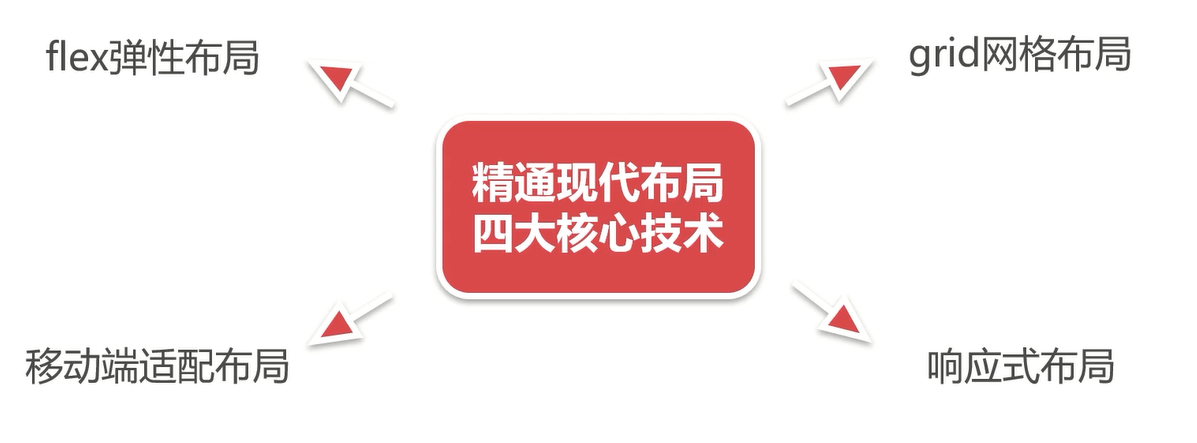
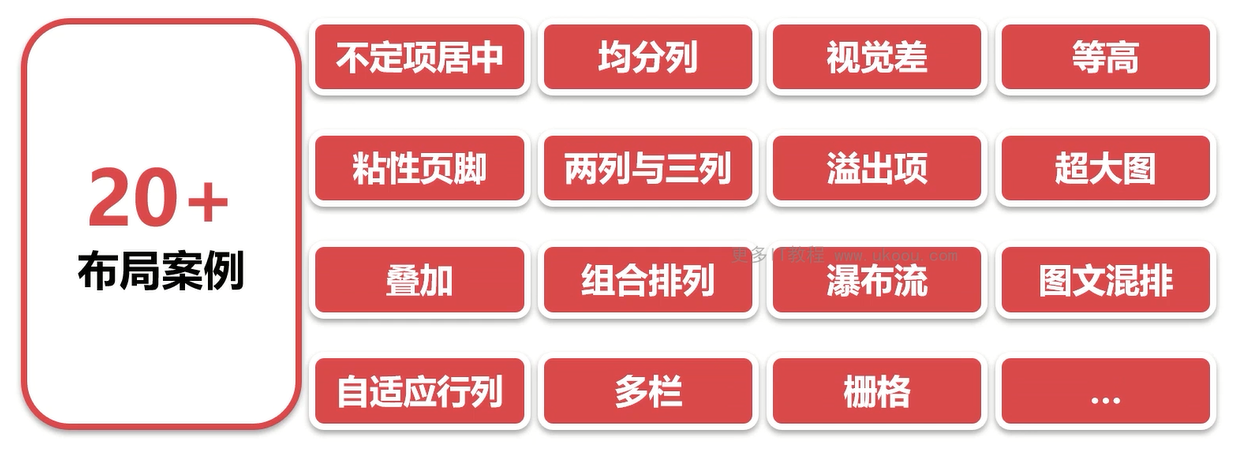
现代布局四大核心技术
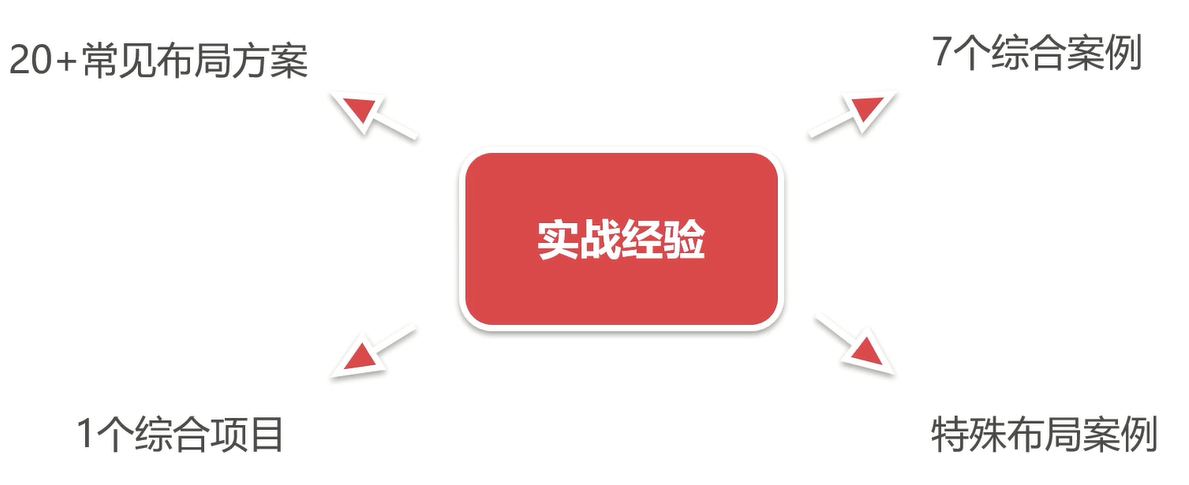
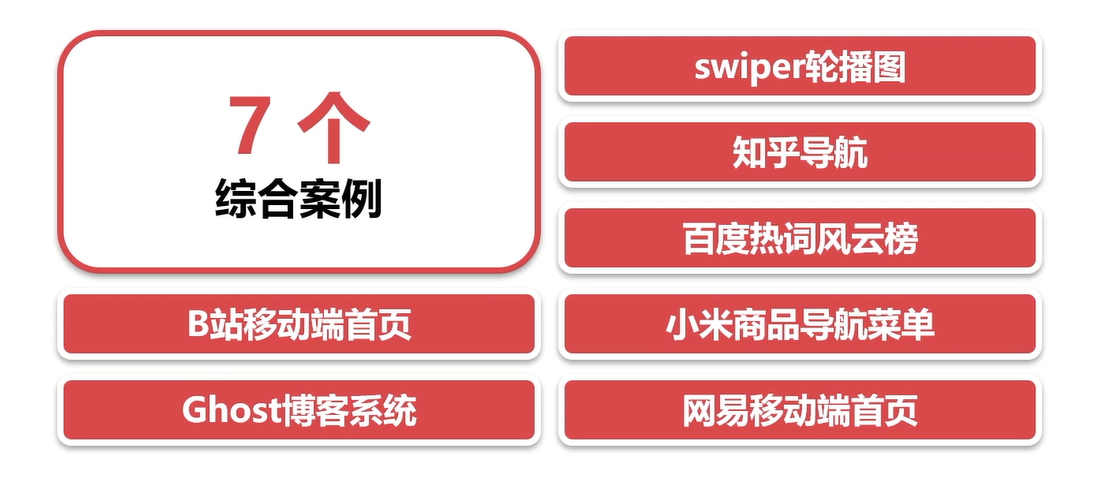
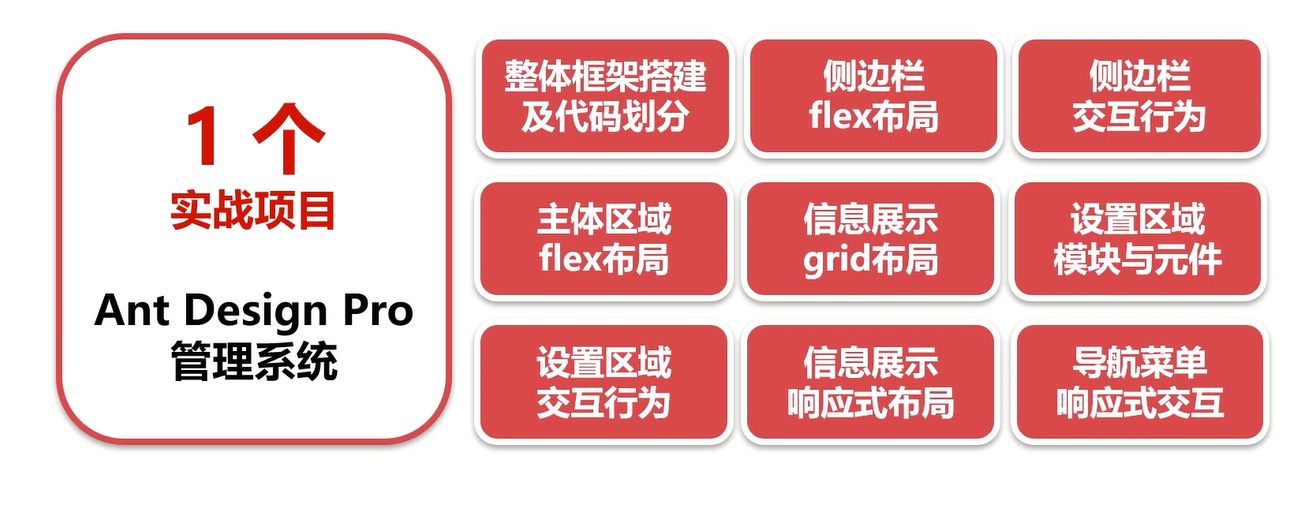
课程收获
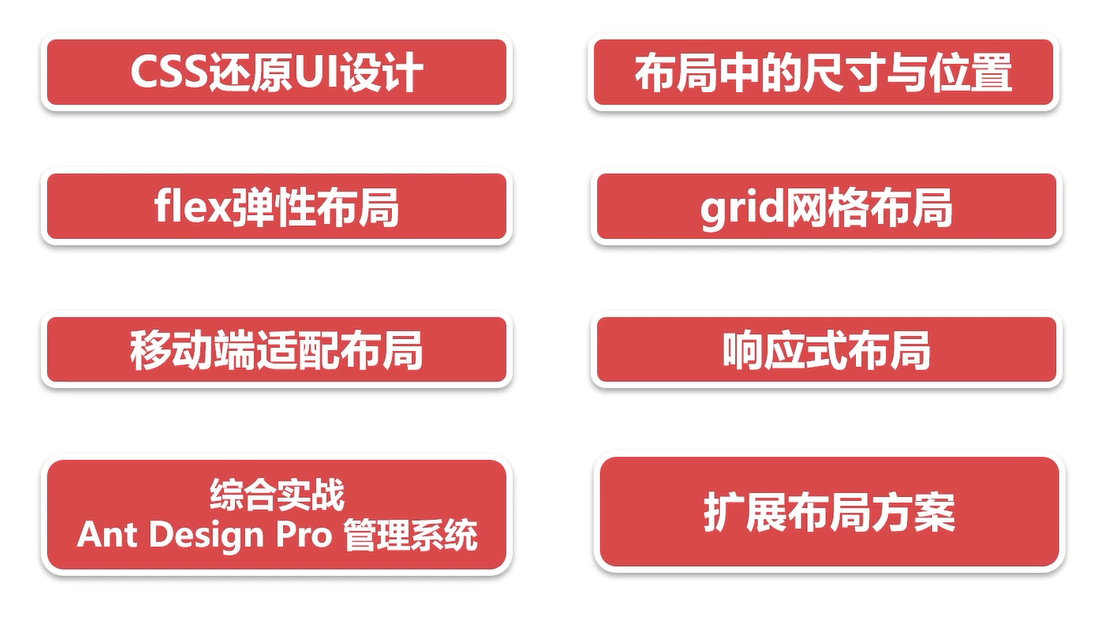
涵盖内容
2、常见布局展示及技术分析
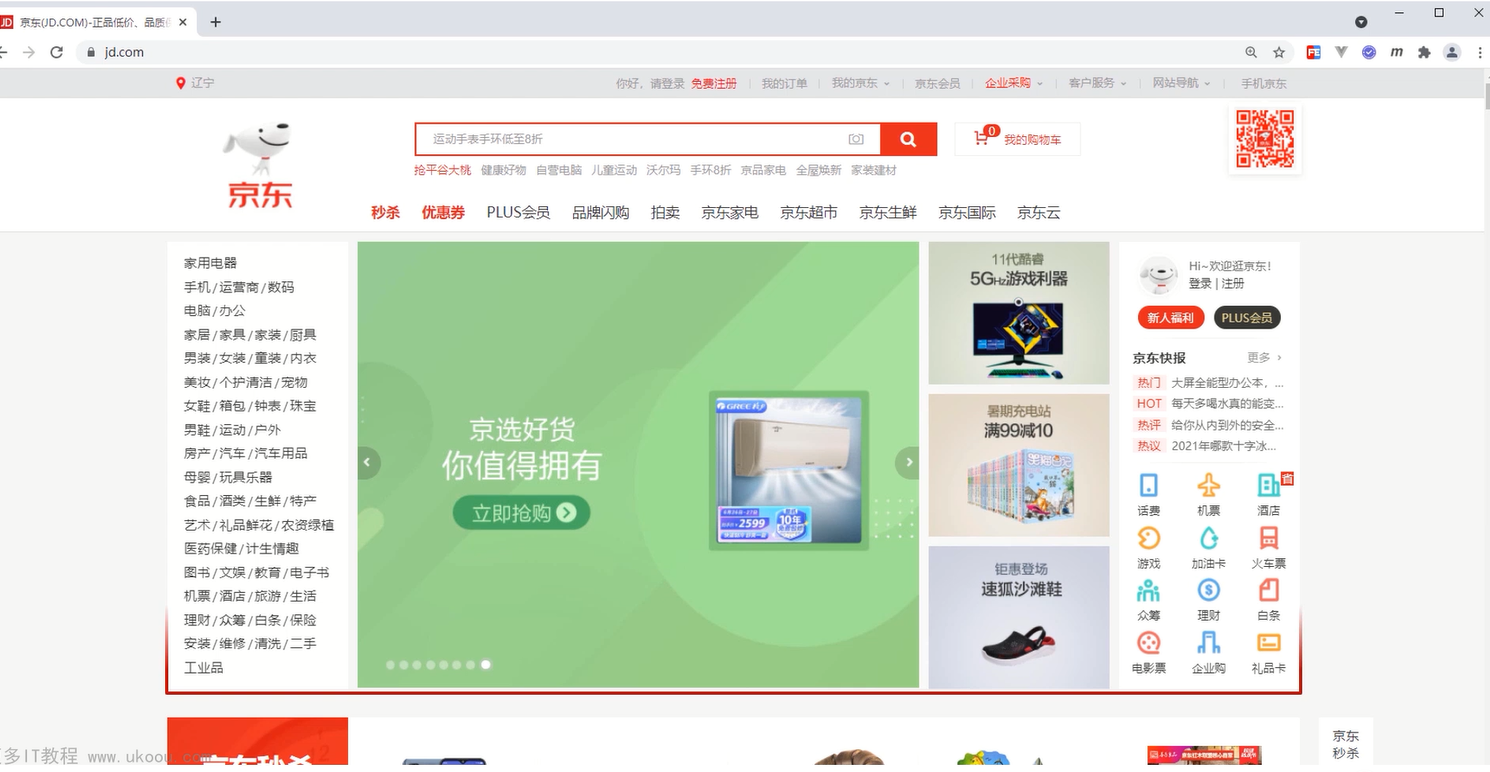
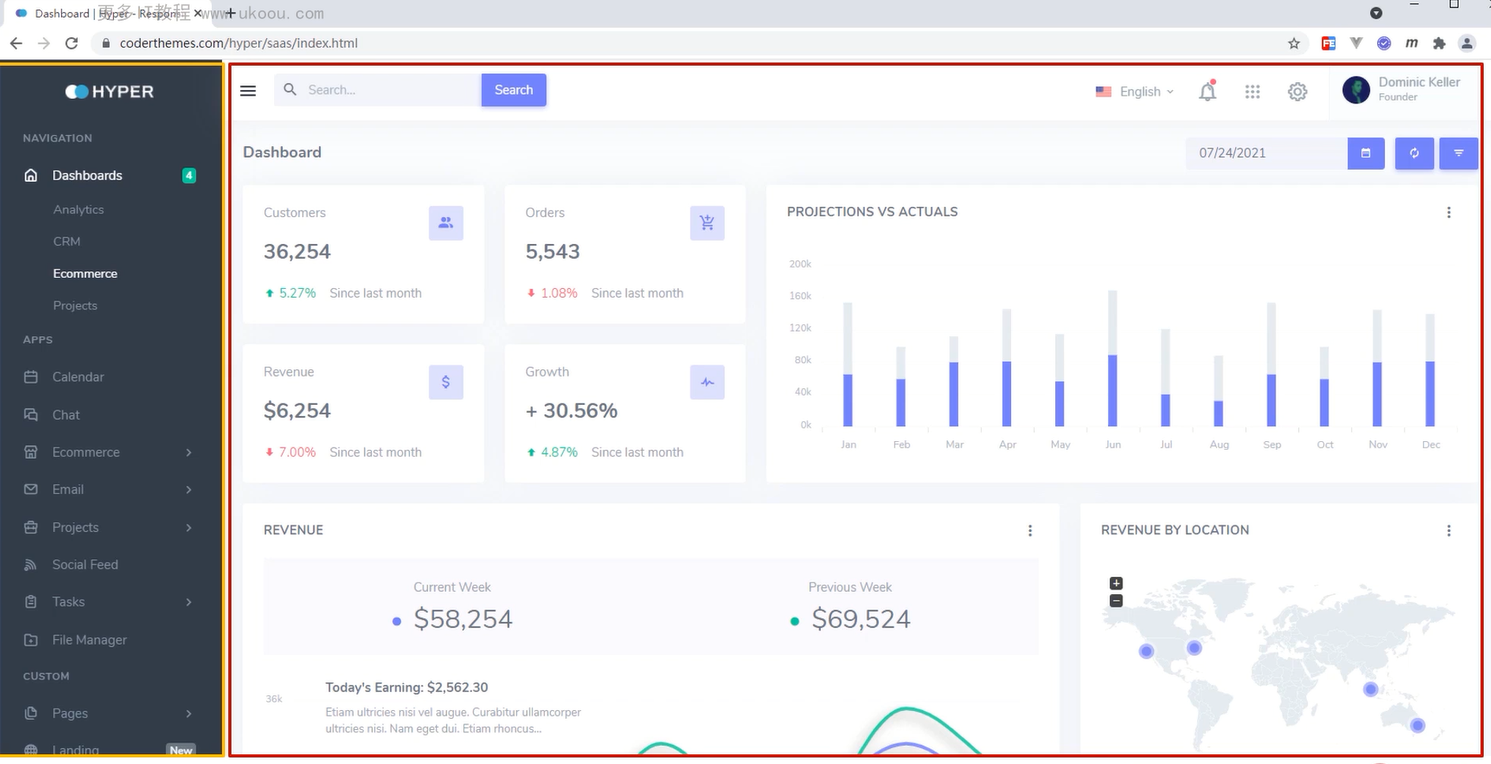
PC端-版心
flex布局 + grid布局
PC端-后台
flex布局 + grid布局
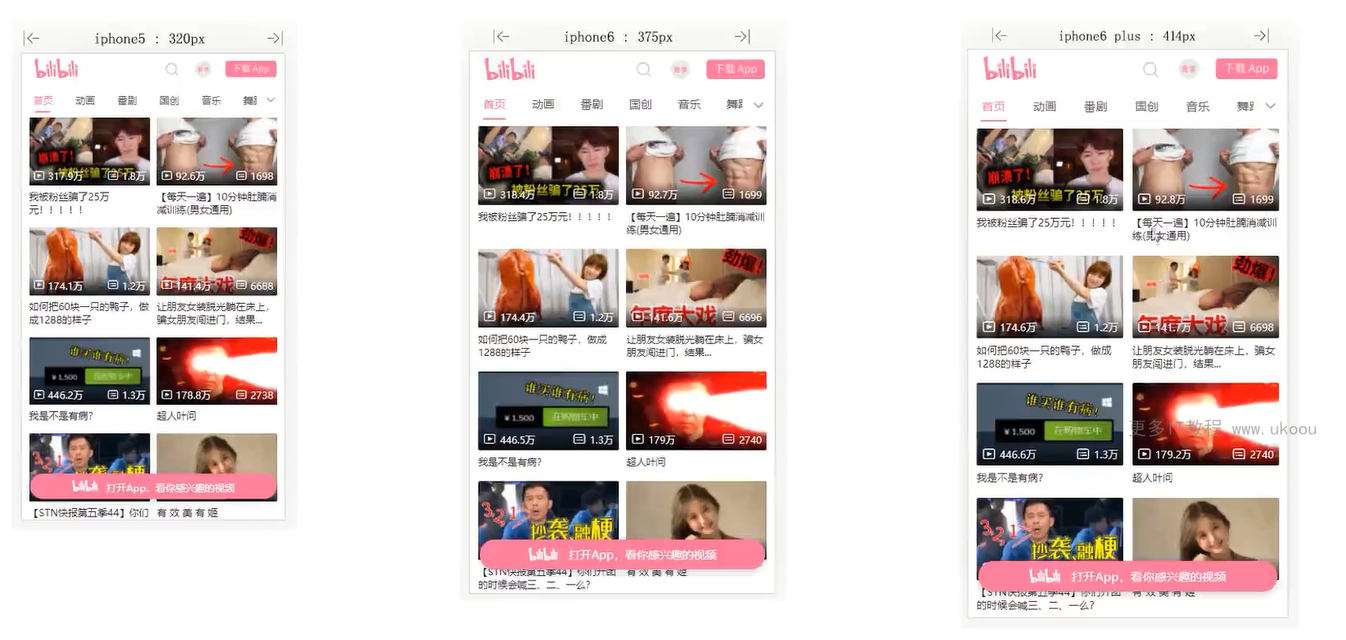
移动端
等比缩放,使用rem或vw/vh单位实现
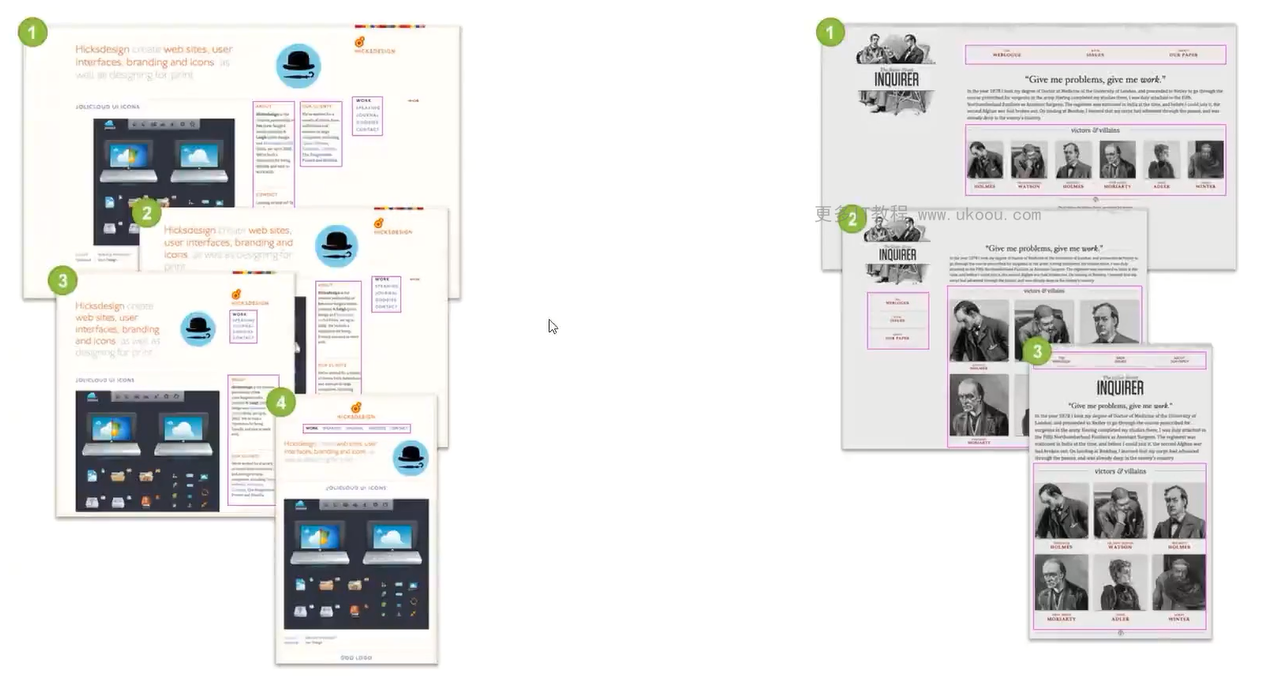
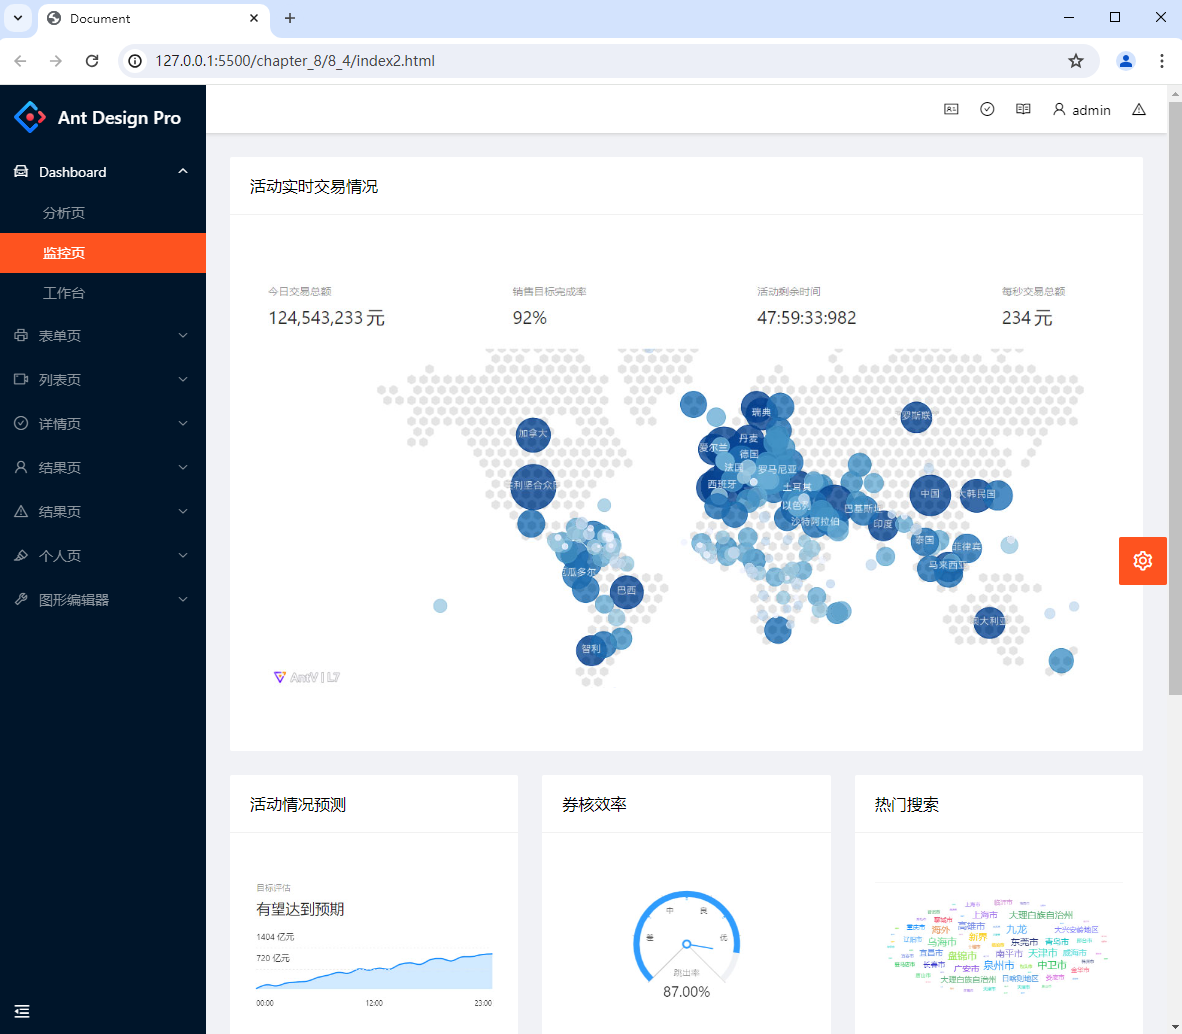
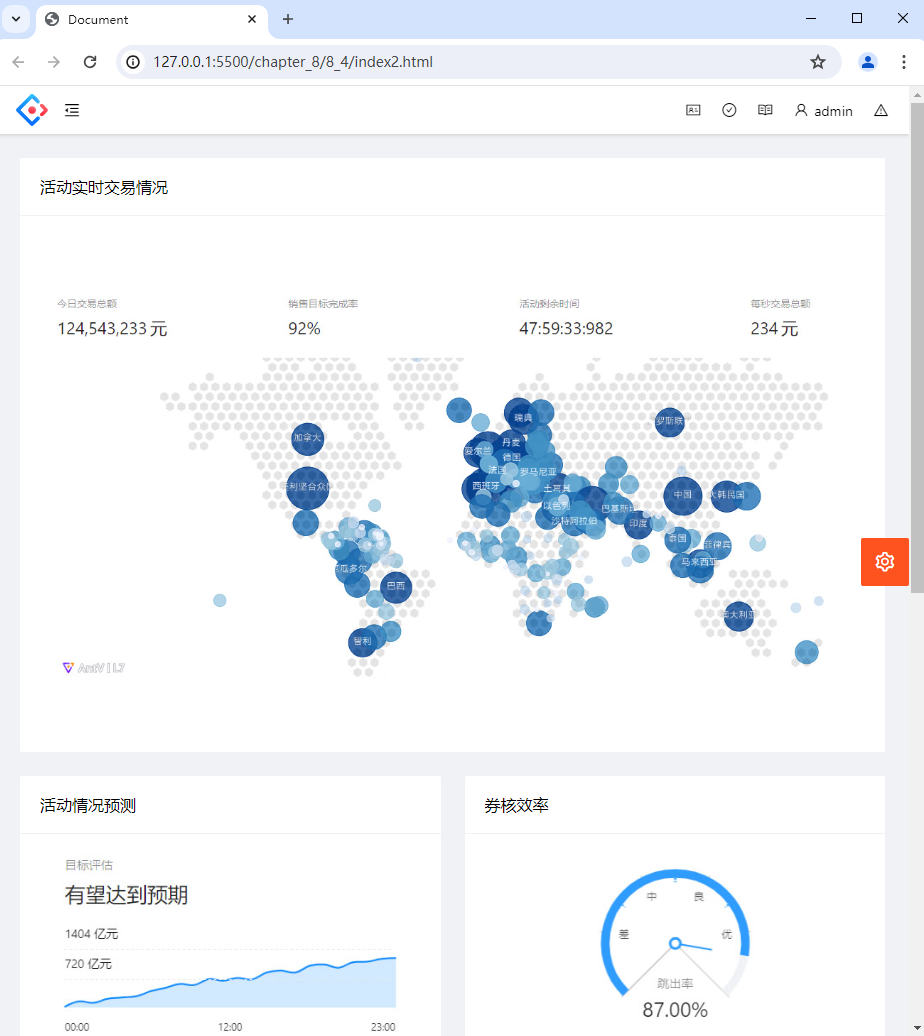
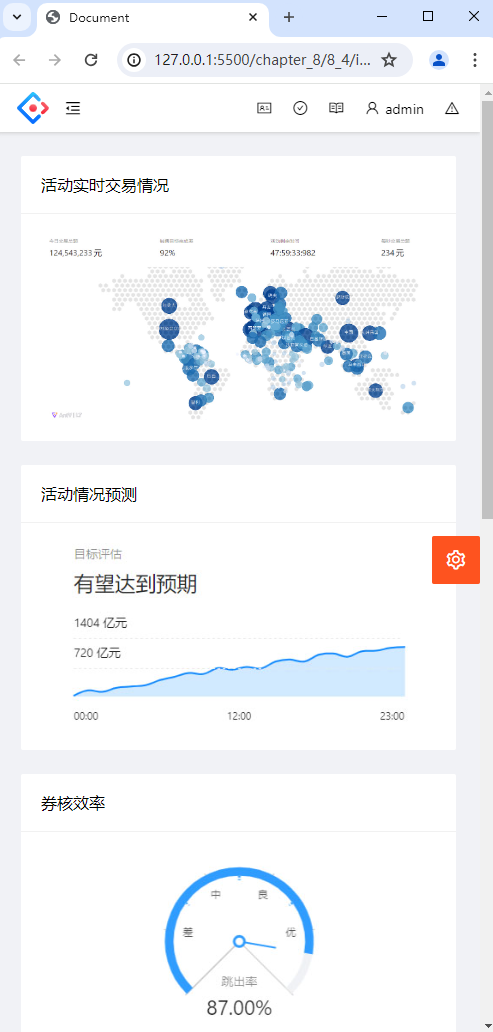
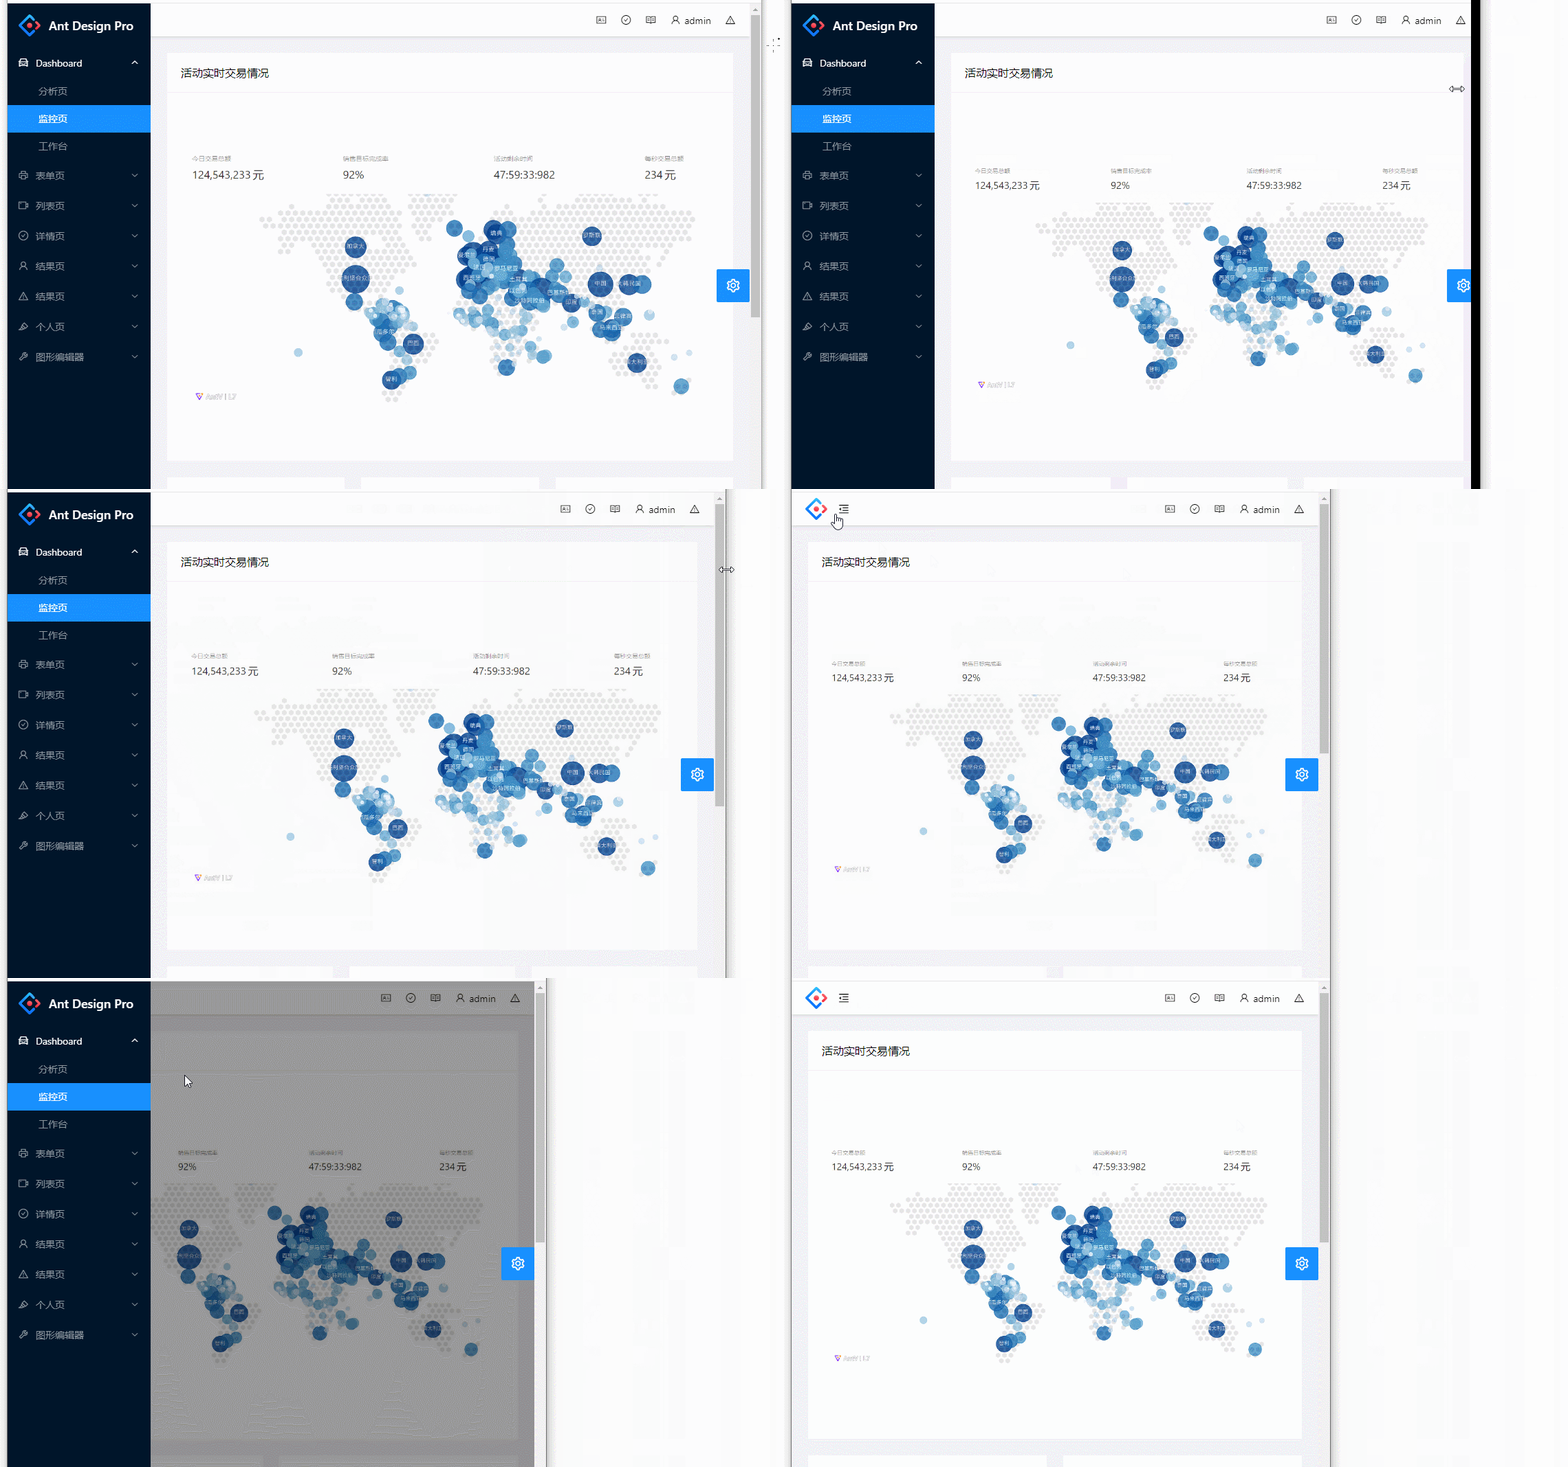
响应式
同一套代码,同时适应PC端和移动端;
使用@media媒体查询实现;
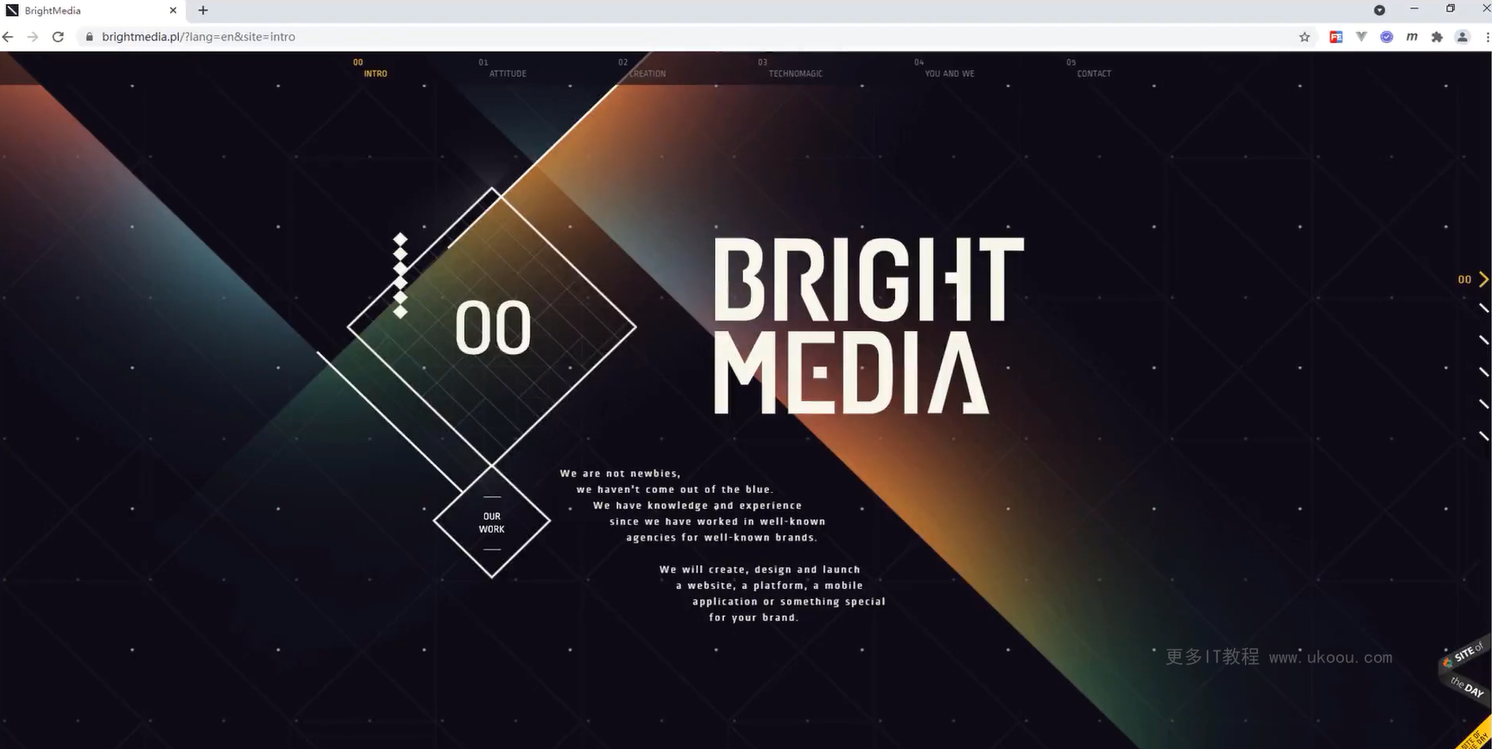
扩展
第二章 CSS还原UI设计
1、Photoshop还原ui设计
-
尺寸,文字,颜色信息的获取
-
切图操作:启动生成器,公勾选图像资源
- 首选项-增效工具-启用生成器,文件-生成-图像资源,选择图层并修改名字为icon.png,即可在psd所在文件夹生成该图层对应的图片。修改图层名为200% icon.png即可生成2倍图。
2、蓝湖App
蓝湖是一款设计图的共享平台,帮助互联网团队更好地管理设计图。自动生成设计图标注,与团队共享设计图,展示页面之间的跳转关系。蓝湖支持从Sketch、Ps、Xd一键共享、在线讨论,蓝湖已经成为新一代产品设计的工作方式
访问地址:https://lanhuapp.com/
使用方式:蓝湖官网下载ps插件,登录账号,上传,打开
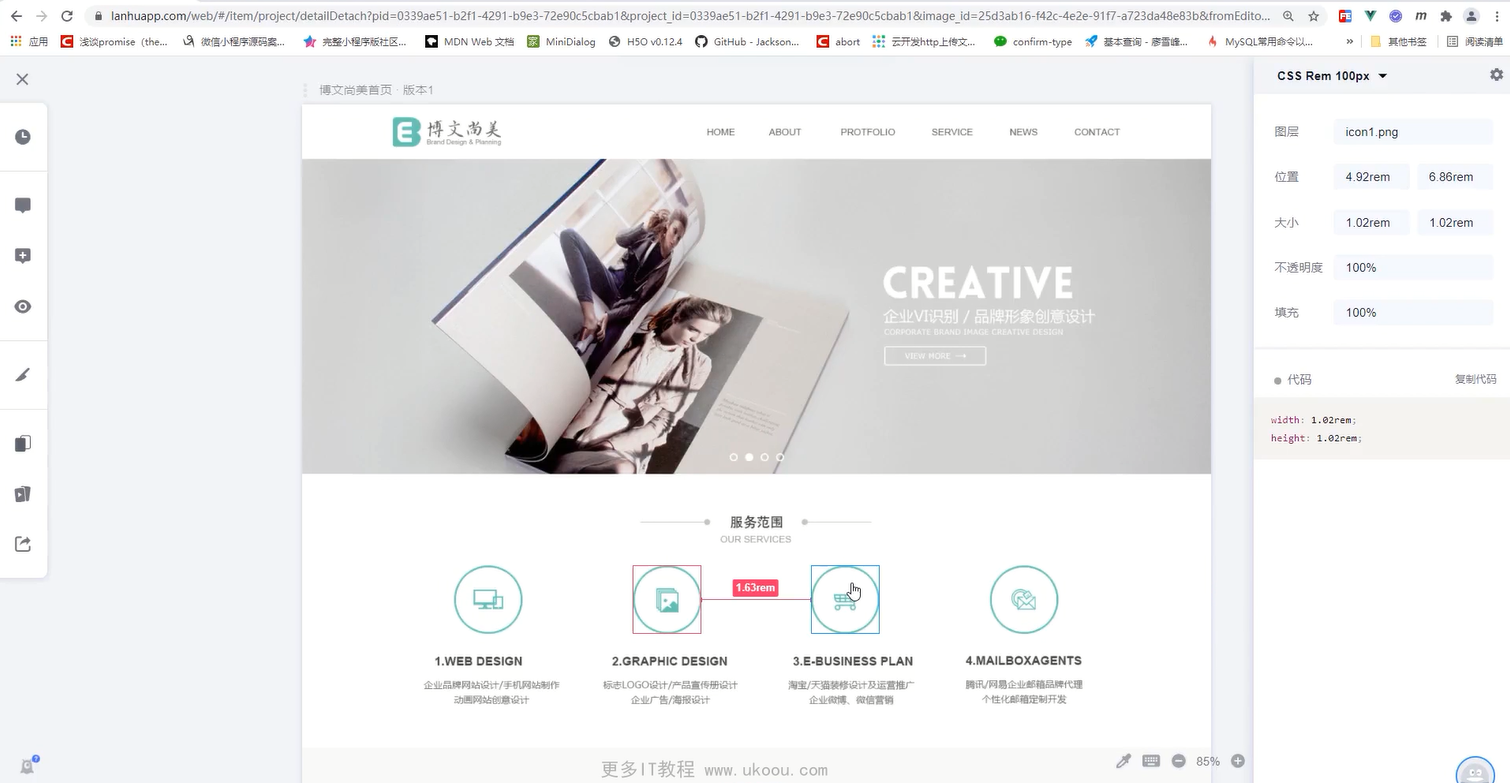
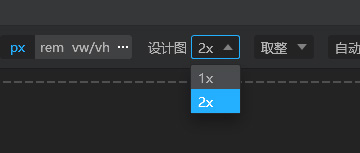
- 可以方便的进行rem与px之间单位换算
- 在ps中的扩展插件-蓝湖,标记为切图资源,重新上传到web,然后下载切图
3、PxCook自动标注工具
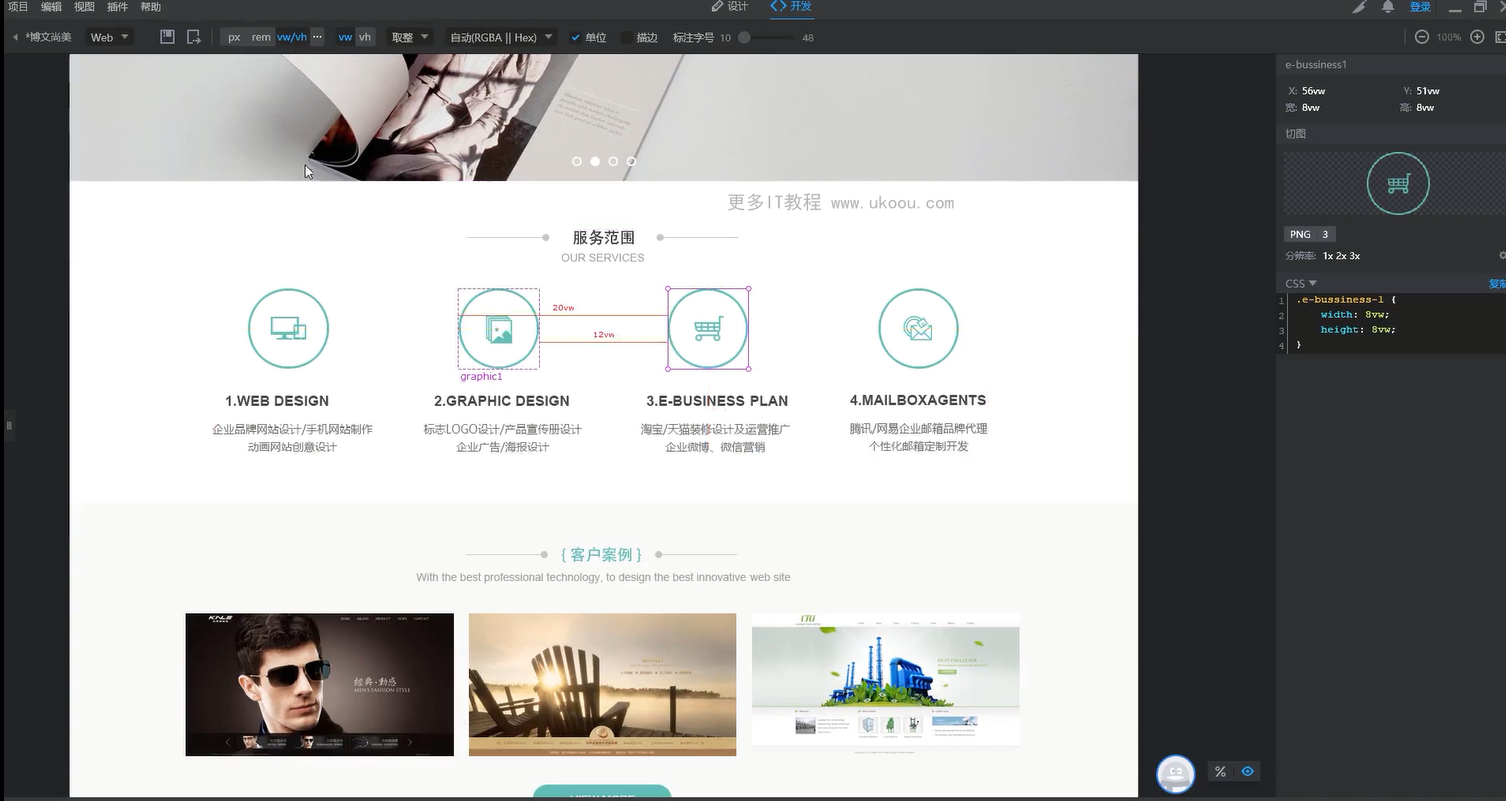
像素大厨是款适合设计师们使用的一款免费、交互流畅以及全平台支持的标注切图软件。功能多样化且非常实用,操作上也很是简单,它能够支持对Ps和Sketch设计元素尺寸、元素距离文本样式与颜色的智能标注,并且还支持智能切图
- ps安装pxcook插件
- 在ps中的扩展插件-pxcook,标记为切图,导出到pxcook
pxcook可以直接打开psd文件
4、imgcook设计稿智能平台
imgcook 专注以 Sketch、PSD、静态图片等形式的视觉稿作为输入,通过智能化技术一键生成可维护的前端代码,包含视图代码、数据字段绑定、组件代码、部分业务逻辑代码等。目前此产品是阿里巴巴前端委员会智能化小组的服务化的内外落地产品
访问地址:https://www.imgcook.com/
- 可以直接生成前端代码
第三章 布局中的尺寸和位置
长度单位与颜色分类
长度
CSS中使用的每个属性都允许拥有一个或一组值,例如:color : red 代码中,其中color为属性,red为值。在CSS中有很多属性是用来控制位置和尺寸的,所以它们的值必须是一个表示长度的数值,而数值是需要添加单位的。
CSS中有两种长度单位——绝对长度单位和相对长度单位。重要的是要知道它们之间的区别,以便理解它们控制的元素将变得有多大。
绝对长度单位
以下都是绝对长度单位——它们与其他任何东西都没有关系,通常被认为总是相同的大小。
| 单位 | 名称 |
|---|---|
| cm | 厘米 |
| mm | 毫米 |
| in | 英寸 |
| pt | 点 |
| px | 像素 |
这些绝对长度单位中,除了px像素经常使用外,其他并不常用。
相对长度单位
相对长度单位相对于其他一些东西,比如父元素的字体大小,或者视图端口的大小。使用相对单位的好处是,经过一些仔细的规划,您可以使文本或其他元素的大小与页面上的其他内容相对应。以下列出了常见相对单位。
| 单位 | 名称 |
|---|---|
| em | 在font-size中使用是相对于父元素的字体大小,在其他属性中使用是相对于自身的字体大小 |
| ex | 字符“x”的高度 |
| ch | 数字“0”的宽度 |
| rem | 根元素的字体大小 |
| lh | 元素的line-height |
| vw | 视窗宽度的1% |
| vh | 视窗高度的1% |
| vmin | 视窗较小尺寸的1% |
| vmax | 视图大尺寸的1% |
像rem和vw单位会在移动端布局中所使用,本教程的第六章中将对rem和vw单位进行详细的讲解,这里就不再赘述了。
颜色
在CSS中指定颜色的方法有很多,其中一些是最近才实现的。在CSS中,相同的颜色值可以在任何地方使用,无论您指定的是文本颜色、背景颜色还是其他颜色。
现代计算机的标准颜色系统是24位的,它允许通过不同的红、绿、蓝通道的组合显示大约1670万种不同的颜色,每个通道有256个不同的值(256 x 256 x 256 = 16,777,216)。让我们来看看在CSS中指定颜色的一些方法。
颜色关键词
可以直接在代码中使用颜色单词进行赋值,例如:color : red ,这是一种指定颜色的简单易懂的方式。
RGB颜色
在CSS中,可以使用公式rgb(red, green, blue)将颜色指定为RGB值。每个参数 (red、green 以及 blue) 定义了 0 到 255 之间的颜色强度。
要显示黑色,请将所有颜色参数设置为 0,如下所示:rgb(0, 0, 0);要显示白色,请将所有颜色参数设置为 255,如下所示:rgb(255, 255, 255)。
HEX颜色
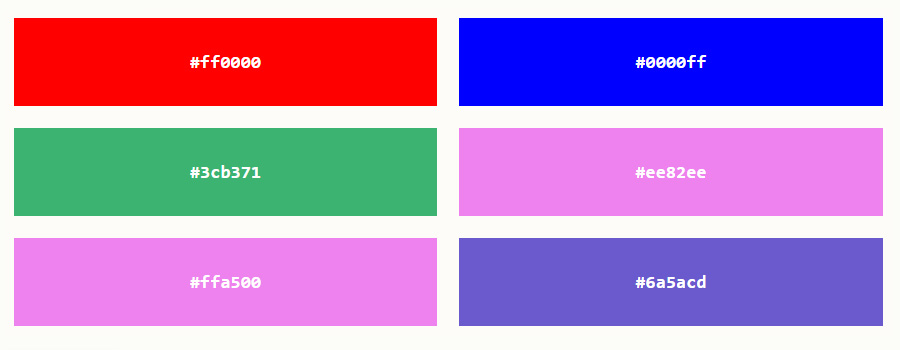
在CSS中,可以使用#rrggbb格式的十六进制值指定颜色。其中 rr(红色)、gg(绿色)和 bb(蓝色)是介于 00 和 ff 之间的十六进制值(与十进制 0-255 相同)。
HSL颜色
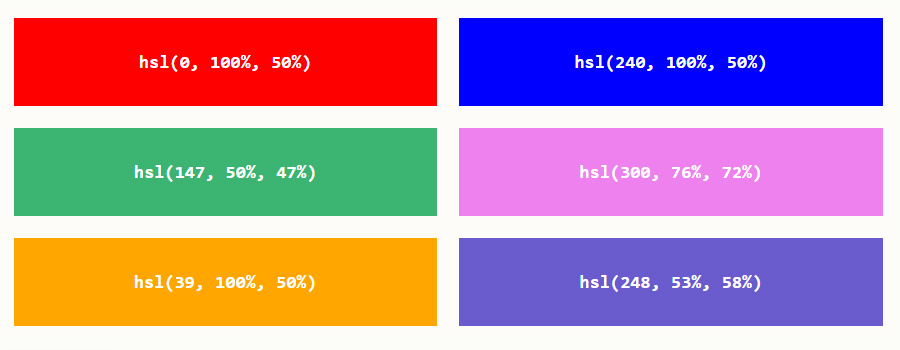
在CSS中,可以使用色相、饱和度和明度(HSL)来指定颜色,格式如下:hsla(hue, saturation, lightness)。
色相(hue)是色轮上从 0 到 360 的度数。0 是红色,120 是绿色,240 是蓝色。饱和度(saturation)是一个百分比值,0% 表示灰色阴影,而 100% 是全色。亮度(lightness)也是百分比,0% 是黑色,50% 是既不明也不暗,100%是白色。
本章当中,将通过各种软件,测量出UI设计图中的尺寸长度及颜色取值。
尺寸
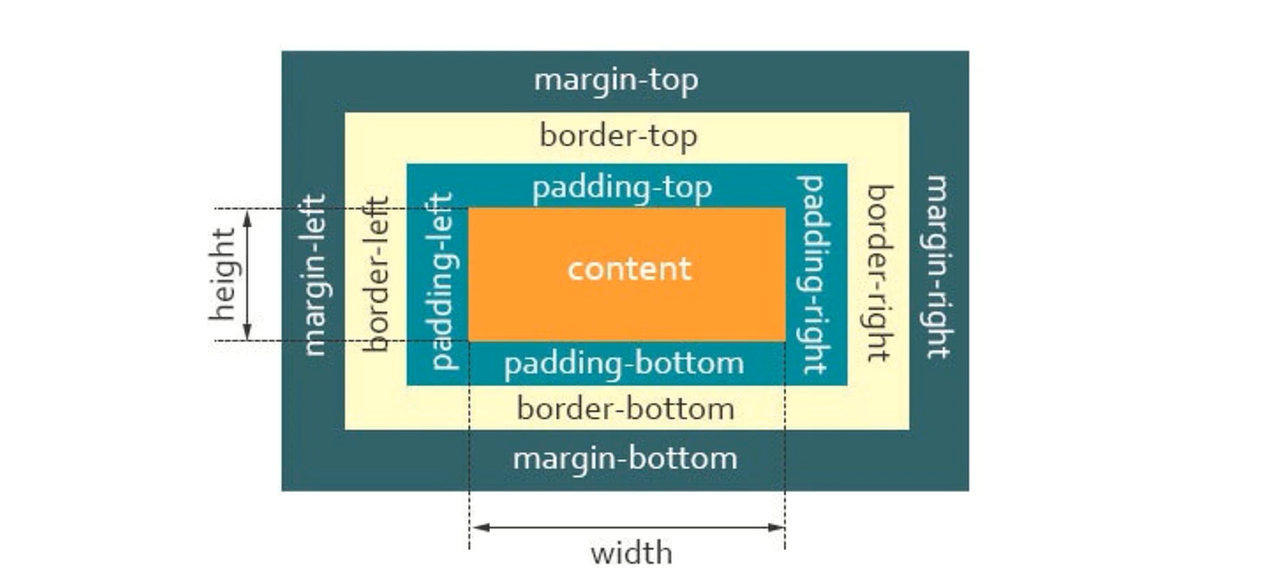
css盒模型组成
-
在 CSS 中,所有的元素都被一个个的“盒子(box)包围着理解这些“盒子”的基本原理,是我们使用CSS实现准确布局、处理元素排列的关键
-
盒子的组成:content 内容、padding 内填充、border 边框、margin 外边距
CSS盒模型的注意点
-
padding不能为负值,而margin可以为负值
- 盒子margin-left为负值时,盒子自身会向左移动;
- 盒子margin-top为负值时,盒子自身会向上移动;
- 盒子margin-right为负值时,会让相邻盒子会向左移动;
- 盒子margin-top为负值时,会让下面的盒子会向上移动;
-
背景色会平铺到非margin的区域
- border设置的颜色会盖住盒子设置的背景色
-
margin-top传递的现象及解决方案
-
margin-right、margin-left、margin-bottom没有传递的问题
-
1个div内套1个div,内部div设置margin-top,将会把外面div也向下拉
-
给外部div加上透明的border
-
给内部div使用padding代替margin-top
-
给外部div开启BFC
-
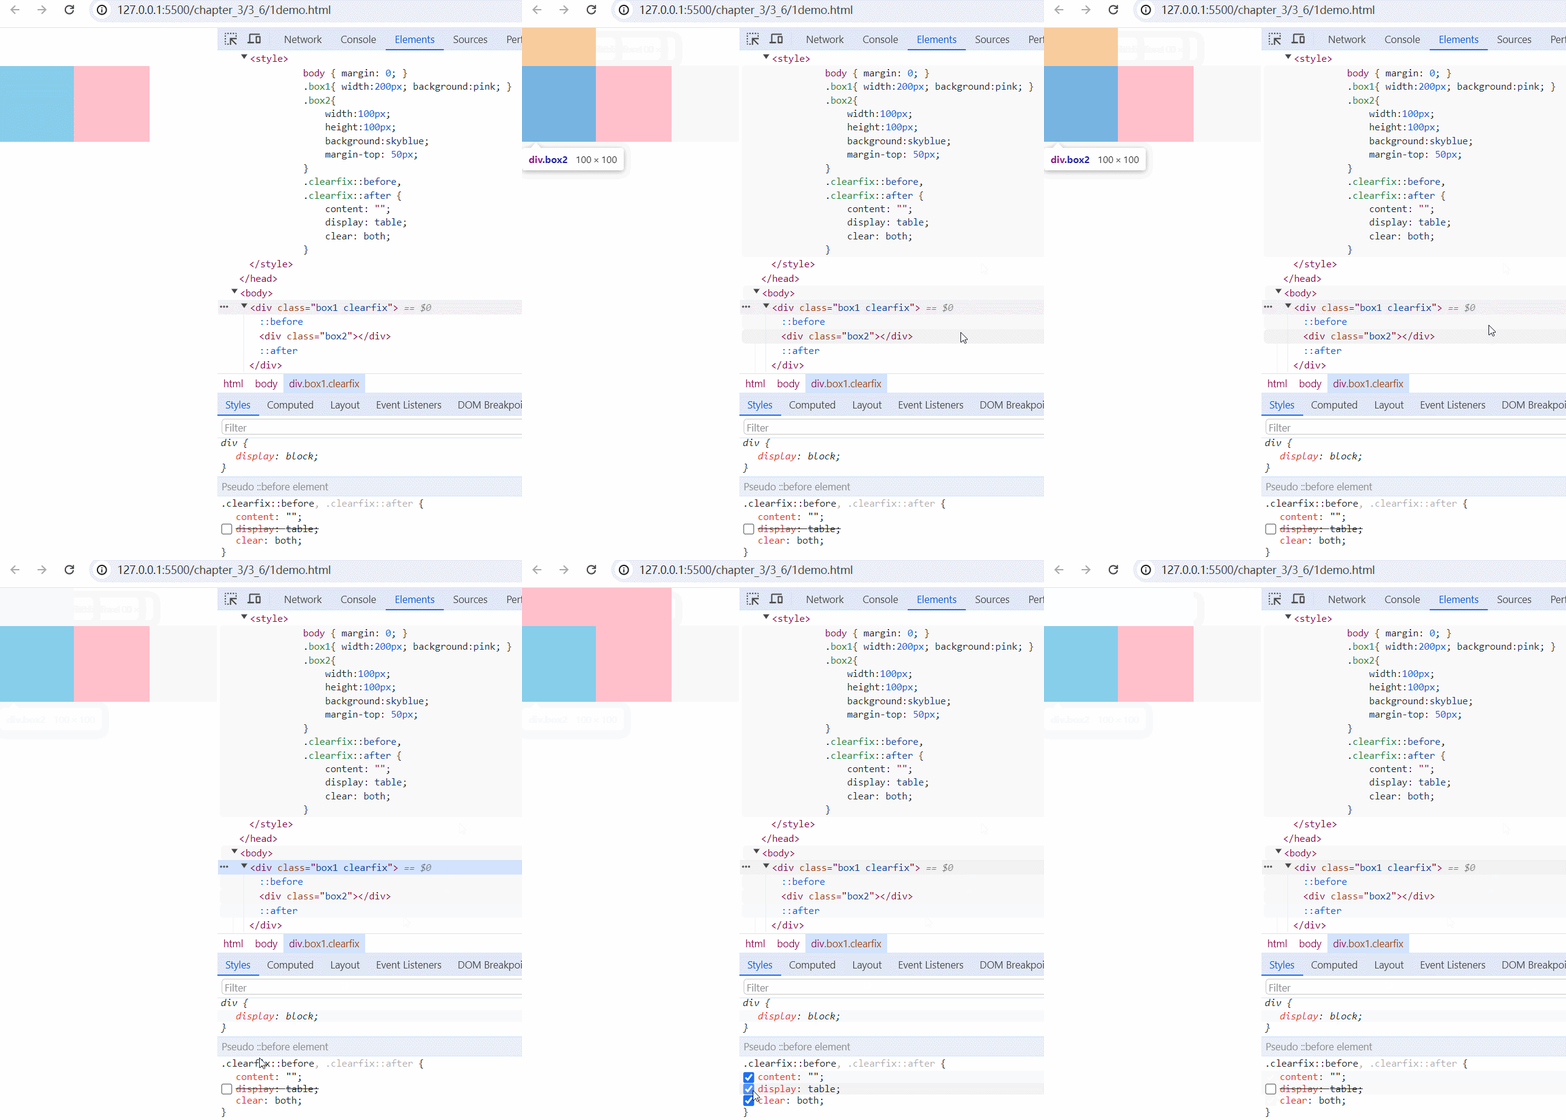
使用通用方法伪类(它可同时解决margin-top传递和浮动元素导致父容器高度塌陷)
<!DOCTYPE html>
<html lang="en">
<head>
    <meta charset="UTF-8">
    <meta http-equiv="X-UA-Compatible" content="IE=edge">
    <meta name="viewport" content="width=device-width, initial-scale=1.0">
    <title>Document</title>
    <style>
        body { margin: 0; }
        .box1{ width:200px; background:pink; }
        .box2{
            width:100px;
            height:100px;
            background:skyblue;
            margin-top: 50px;
        }
        .clearfix::before,
        .clearfix::after {
            content: "";
            display: table;
            clear: both;
        }

    </style>
</head>
<body>
    <div class="box1 clearfix">
        <div class="box2"></div>
    </div>
</body>
</html>
-
-
-
margin上下叠加的现象及解决方案
- 相邻盒子左右外边距没有这个问题
- 1个div的下方有1个div,上面div设置margin-bttom,下面div设置margin-top,那么这2个div上下边距取较大的值
块级盒子与内联盒子
- 在 CSS 中我们广泛地使用两种“盒子”块级盒子(blockbox)和 内联盒子(inline box)。这两种盒子会在页面中表现出不同的行为方式
- 块级盒子:div、p、h1…内联盒子:span、a、strong
块级盒子的特性
- 独占一行
- 支持所有样式
- 不写宽度的时候,跟父容器的宽度相同
- 所占区域是一个矩形
内联盒子的特性
-
盒子不会产生换行
-
有些样式不支持,例如:width、height等,
- 对padding-top、padding-bottom有作用但不影响位置。
- 对margint-top、margin-bottom没用
-
不写宽度的时候,宽度由内容决定
-
所占的区域不一定是矩形
- 内部文字多时,会自动折行
-
内联标签之间会有空隙
- 在写代码时,2个span标签紧紧挨着,不要换行或空格
- 设置font-size为0,再单独设置font-size
自适应盒模型的特性
自适应盒模型指的是,当盒子不设置宽度时,盒模型相关组成部分的处理方式是如何的
- 1个div内部有1个div,默认内部div会占满外部div的宽度,当内部div不设置具体宽度,而设置margin、padding、border时,宽度会自动计算
标准盒模型与怪异盒模型
-
在标准模型中,如果你给盒设置 width 和 height,实际设置的是 content box。 padding 和 border 再加上设置的宽高一起决定整个盒子的大小
- content-box:width、height->content
-
在怪异模型中,所有宽度都是可见宽度,所以内容宽度是该宽度减去边框和填充部分
- border-box :width、height -> content + padding + border
应用1:量取尺寸时不用再去计算一些值
应用2:解决一些需要设置百分比和盒模型值
- 1个div内部套1个div,内部div需要设置padding,但是div不能超过外部div。做法有
- 内部div不设置具体宽度,直接设置padding
- 内部div设置了具体宽度,同时设置border-box
- 内部div设置具体宽度为calc(100% - 2padding)
位置
浮动样式详解
当元素被浮动时,会脱离文档流,根据float的值向左或向右移动,直到它的外边界碰到父元素的内边界或另一个浮动元素的外边界为止,是CSS布局中实现左右布局的一种方式
- 文档流:文档流是元素在Web页面上的一种呈现方式,按照出现的先后顺序进行排列
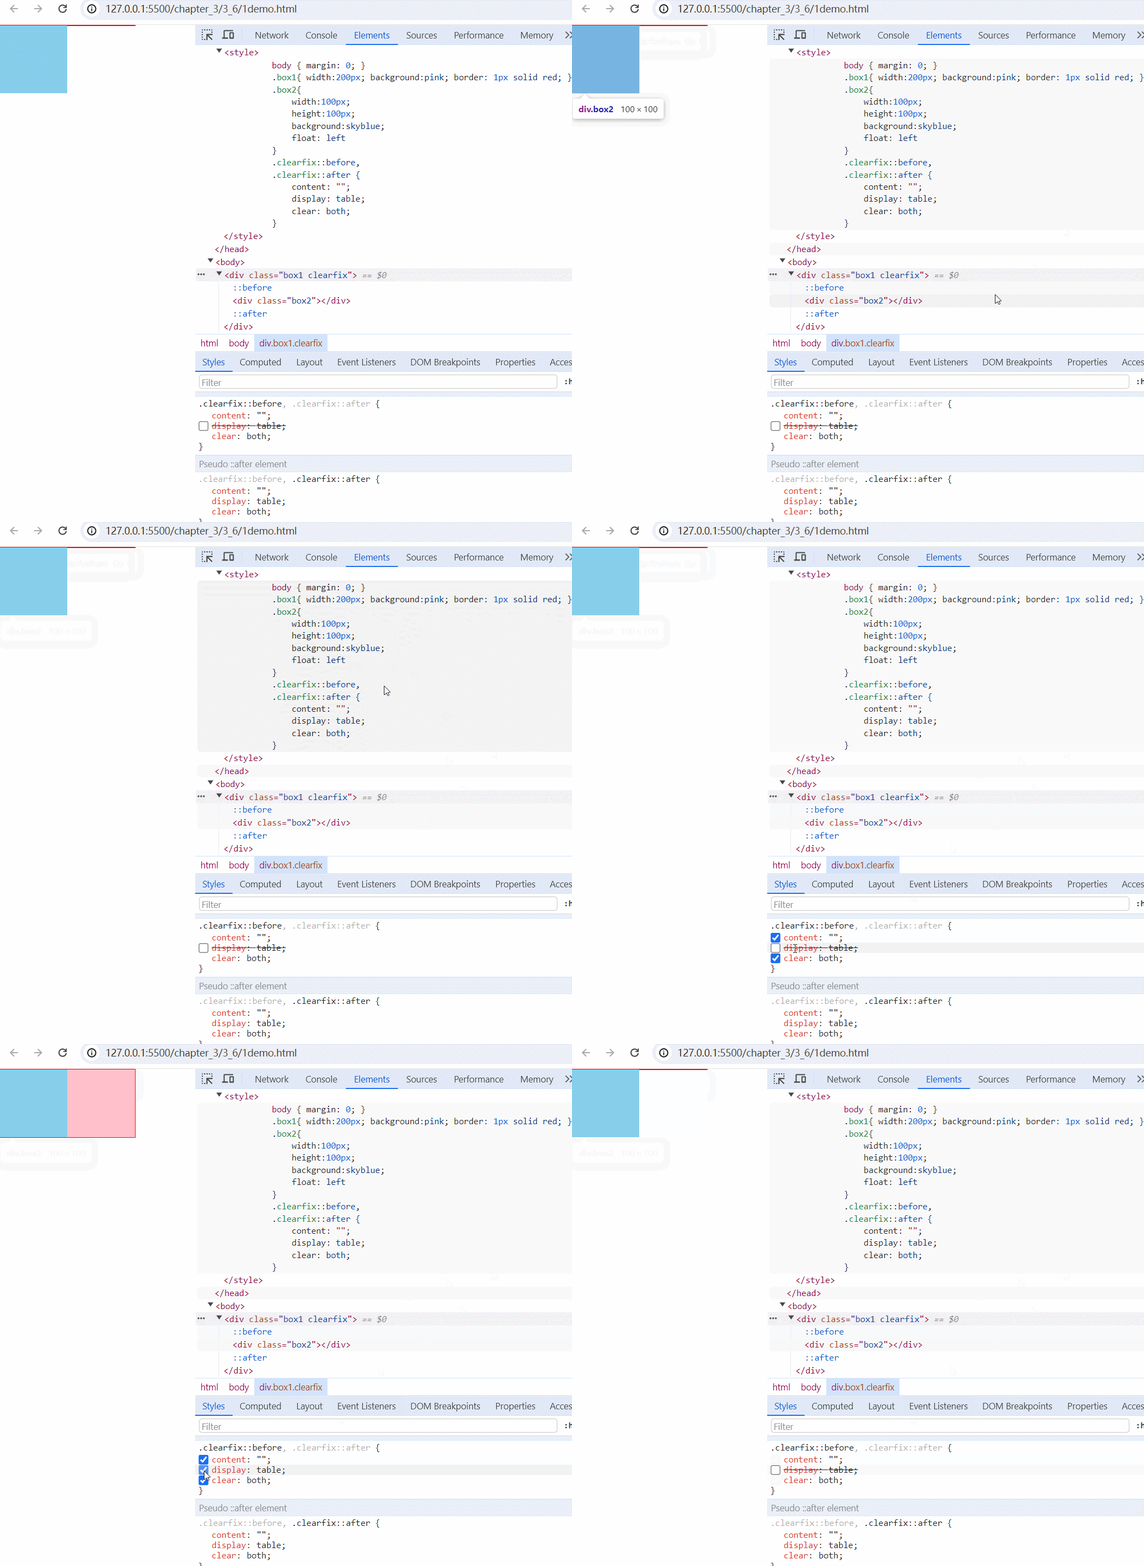
使用浮动后,父容器高度会塌陷,一般都需要清除浮动
-
clear属性
- 1个父容器div中,上下2个div,上面div开启向左浮动,下面div默认会顶上去,父容器的高度就不是上下2个div的高度之和了,而是下面div的高度。此时,下面div可以使用clear:left,清除左边浮动,就是下面div从上面div的底部开始排列,而不会顶上去了。并且此时父容器的高度也被下面清除浮动的div撑起来了,达到了等于上下div之和的效果。
- 如果上面1个div向左浮动,1个div向右浮动,则最下面的div而已使用clear:both同时清除左右浮动
-
BFC
-
空标签
<div style="clear:both;"></div> -
.clearfix:after{}
.clearfix:after { content: ''; clear: both; display: block; /* 块级盒子的clear:both才有效 */ } -
通用用法伪类
<!DOCTYPE html>
<html lang="en">
<head>
    <meta charset="UTF-8">
    <meta http-equiv="X-UA-Compatible" content="IE=edge">
    <meta name="viewport" content="width=device-width, initial-scale=1.0">
    <title>Document</title>
    <style>
        body { margin: 0; }
        .box1{ width:200px; background:pink; border: 1px solid red; }
        .box2{
            width:100px;
            height:100px;
            background:skyblue;
            float: left
        }
        .clearfix::before,
        .clearfix::after {
            content: "";
            display: table;
            clear: both;
        }
    </style>
</head>
<body>
    <div class="box1 clearfix">
        <div class="box2"></div>
    </div>
</body>
</html>
浮动特性注意点
-
只会影响后面的元素
-
文本不会被浮动元素覆盖
-
具备内联盒子特性:宽度由内容决定
-
具备块级盒子特性:支持所有样式
-
浮动放不下,会自动换行
定位样式详解
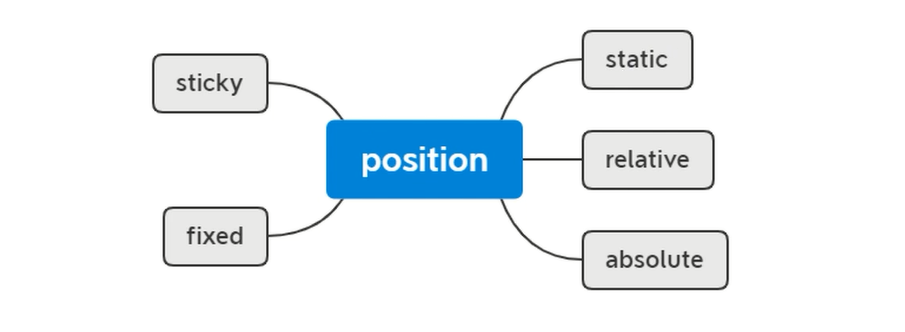
CSS position属性用于指定一个元素在文档中的定位方式,其中top,right,bottom 和left 属性则决定了该元素的最终位置
相对定位及特性
- 相对定位的元素是在文档中的正常位置偏移给定的值
- 不影响其他元素布局
- 相对于自身进行偏移
绝对定位及特性
-
绝对定位的元素脱离了文档流,绝对定位元素不占据空间
-
具备内联盒子特性:宽度由内容决定
-
具备块级盒子特性:支持所有样式
-
绝对定位元素相对于最近的非 static 祖先元素定位。当这样的祖先元素不存在时,则相对于可视区定位
固定定位及特性
- 固定定位与绝对定位相似,但是会固定在可视区中
- 具备内联盒子特性:宽度由内容决定
- 具备块级盒子特性:支持所有样式
- 固定定位元素不受祖先元素影响
黏性定位及特性
粘性定位可以被认为是相对定位和固定定位的混合。元素在跨越特定阈值前为相对定位,之后为固定定位
扩展学习:display、书写模式与逻辑属性、BFC、默认样式等
第四章 Flex布局
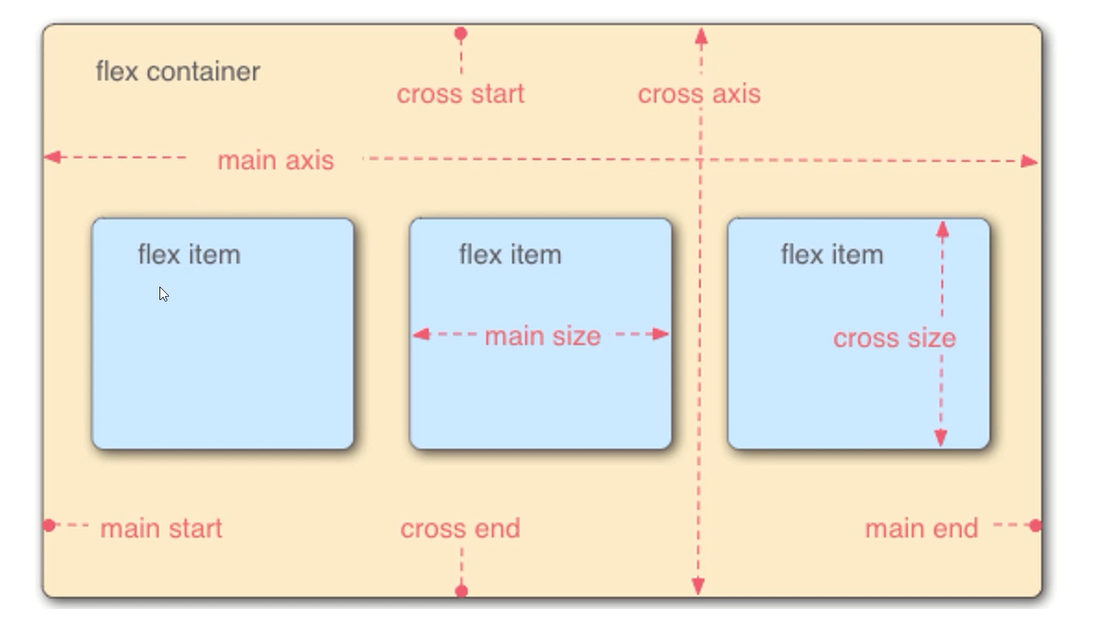
主轴与交叉轴
- 主轴默认从左往右,可以修改这个默认的方向;
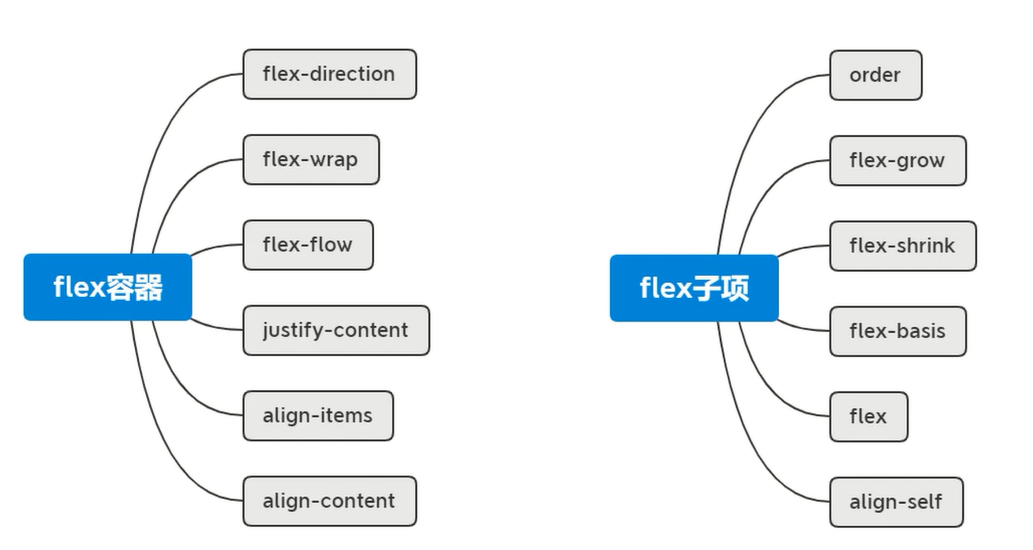
flex容器和flex子项
flex-direction:修改主轴方向,row,row-reverse,column,column-reverse
换行与缩写
flex-wrap:控制换行
flex-grow:[flex-direction,flex-wrap]
主轴对齐
jusctify-content
| 取值 | 分配空白空间 |
|---|---|
| flex-start | 元素沿着主轴起边排列 |
| flex-end | 元素沿着主轴终边排列 |
| center | 元素居中排列 |
| space-around | 空白分布到元素两侧(绝对均匀分布) |
| space-between | 空白均匀分布到元素间(两侧贴边) |
| space-evenly | 空白分布到元素的单侧(均匀分布) |
交叉轴对齐
align-content
-
必须要加上flex:wrap,这个align-content才会生效,如果没加上flex:wrap,这个align-content就不会生效。而只要加了flex:wrap,align-content的优先级高于align-items。
-
而align-items在flex:wrap或flex:nowrap都可以生效
-
align-content的flex-start、flex-end、center 是针对交叉轴方向(多行时,一起移动;单行时,align-content不生效),而align-items的flex-start、flex-end、center也是针对交叉轴方向(多行时,每个单行都有效果;单行时,仅align-items能生效哦),它们效果不一样
| 取值 | 分配空白空间 |
|---|---|
| stretch | 默认值,将元素的长度设置为相同的值(前提是元素没有设置高度) |
| flex-start | 元素沿着辅轴起边排列 |
| flex-end | 元素沿着辅轴终边排列 |
| center | 元素居中排列 |
| space-around | 空白分布到元素两侧(绝对均匀分布) |
| space-between | 空白均匀分布到元素间(两侧贴边) |
| space-evenly | 空白分布到元素的单侧(均匀分布) |
align-items
| 取值 | 弹性元素在辅轴上的对齐方式 |
|---|---|
| stretch | 默认值,将元素的长度设置为相同的值(前提是元素没有设置高度) |
| flex-start | 元素不会拉伸,沿着辅轴起边对齐 |
| flex-end | 元素不会拉伸,沿着辅轴终边对齐 |
| center | 居中对齐 |
| baseline | 基线对齐 |
居中
内联块的垂直方向上居中
<div class="box">
    测试文字测试文字测试文字测试文字测试文字测试文字测试文字测试文字测试文字测试文字测试文字测试文字测试文字测试文字测试文字测试文字
</div>
方法1:弹性居中
.box {
    width: 300px;
    height: 200px;
    background: skyblue;
    display: flex;
    align-items: center;
}
方法2:弹性居中
.box {
    width: 300px;
    height: 200px;
    background: skyblue;
    display: flex;
    flex-wrap: wrap;
    align-content: center;
}
方法3:行高居中
/* 缺点:仅针对单行文字 */
.box {
    width: 300px;
    height: 200px;
    background: skyblue;
    line-height: 200px; /* 与height相等 */
}
方法4:table-cell居中
.box {
    width: 300px;
    height: 200px;
    background: skyblue;
    display:table-cell;
    vertical-align: middle;
}
块元素的水平垂直方向上居中
<div class="box">
    <div></div>
</div>
方法1:弹性居中
.box {
    width: 300px;
    height: 200px;
    background: skyblue;
    display: flex;
    justify-content: center;
    align-items: center;
}
.box div{
    width:100px;
    height:100px;
    background:pink;
}
方法2:定位+位移居中
.box {
    width: 300px;
    height: 200px;
    background: skyblue;
    position: relative;
}
.box div{
    width:200px;
    height:50px;
    background:pink;
    position: absolute;
    left:50%; /* 用margin也可以,但是要根据width和height值来相应改动 */
    top:50%;
    transform: translate(-50%,-50%);
}
方法3:定位 + margin auto
.box {
    width: 300px;
    height: 200px;
    background: skyblue;
    position: relative;
}
.box div{
    width:200px;
    height:50px;
    background:pink;
    position: absolute;
    left:0;
    top:0;
    right:0;
    bottom:0;
    margin:auto;
}
方法4:flex + margin auto居中
.box {
    width: 300px;
    height: 200px;
    background: skyblue;
    position: relative;
    display: flex;
}
.box div{
    width:200px;
    height:50px;
    background:pink;
    margin:auto;
}
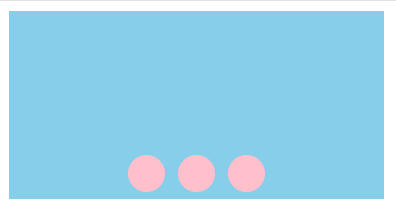
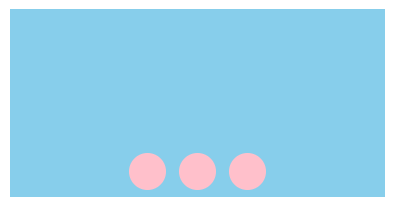
不定项居中
方法1:弹性居中
<!DOCTYPE html>
<html lang="en">
    <style>
        .box {
            width: 300px;
            height: 150px;
            background: skyblue;
            display: flex;
            justify-content: center;
            align-items: flex-end;
        }

        .box div {
            width: 30px;
            height: 30px;
            background: pink;
            border-radius: 50%;
            margin:5px; /* margin产生间隙 */
        }
    </style>

    <body>
        <div class="box">
            <div></div>
            <div></div>
            <div></div>
        </div>
    </body>

</html>
方法2:text-align居中法
<!DOCTYPE html>
<html lang="en">
    <head>
        <style>

            .box {
                width: 300px;
                height: 150px;
                background: skyblue;
                position: relative;
            }

            .box section {
                text-align: center; /* 文字居中 */
                width:100%;         /* 占满宽度 */
                position: absolute;
                bottom:0;
                font-size:0;  /* font-size设置为0,消除行内块元素之间的空隙 */
            }

            .box div {
                width: 30px;
                height: 30px;
                background: pink;
                border-radius: 50%;
                display: inline-block;
                font-size:16px; /* 恢复文字大小 */
                margin:5px;
            }
        </style>
    </head>

    <body>
        <div class="box">
            <section>
                <div></div>
                <div></div>
                <div></div>
            </section>
        </div>
    </body>

</html>
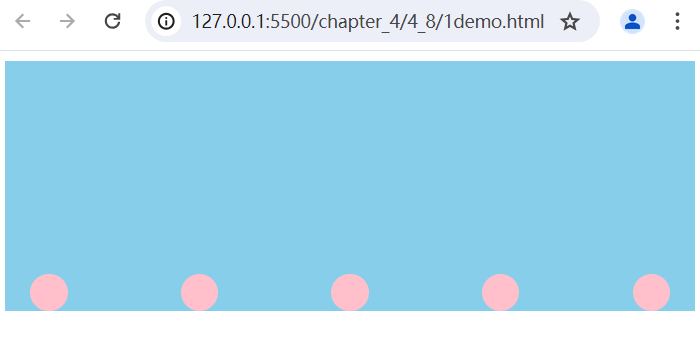
均分列布局
弹性布局
<!DOCTYPE html>
<html lang="en">
    <head>
        <style>

            .main{
                height:200px;
                background:skyblue;
                display: flex;
                justify-content: space-between;
                align-items: flex-end;
                padding:0 20px;
            }

            .main div{
                width:30px;
                height:30px;
                background:pink;
                border-radius: 50%;
            }

        </style>
    </head>

    <body>

        <div class="main">
            <div></div>
            <div></div>
            <div></div>
            <div></div>
            <div></div>
        </div>

    </body>
</html>
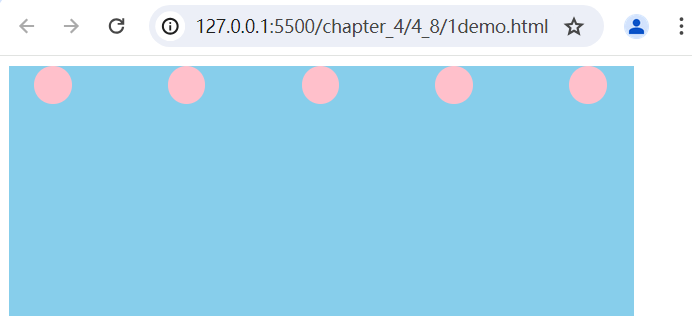
浮动 + 计算
特别麻烦,还需要计算,不支持自动调节
<!DOCTYPE html>
<html lang="en">
<head>

    <style>

        .main{
            width:500px;
            height:200px;
            background:skyblue;
            overflow: hidden;
            padding:0 20px;
            box-sizing: border-box;
        }
        .main section{
            width:600px;
        }
        .main div{
            width:30px;
            height:30px;
            background:pink;
            border-radius: 50%;
            float:left;
            margin-right:77px;
        }
    </style>

</head>

<body>

    <div class="main">
        <section>
            <div></div>
            <div></div>
            <div></div>
            <div></div>
            <div></div>
        </section>
    </div>

</body>
</html>
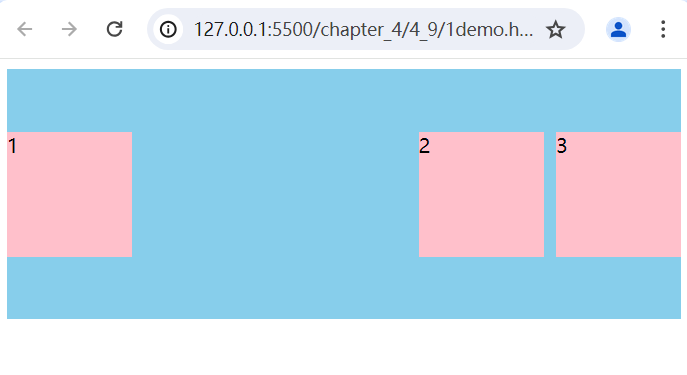
子项分组布局
方法1:flex + flex
<!DOCTYPE html>
<html lang="en">
<head>
    <style>

        .main{
            height:200px;
            background: skyblue;
            display: flex;
            justify-content: space-between;
            align-items: center;
        }

        .main div:nth-of-type(2){
            display: flex;
            margin-left:10px;
        }

        .main .box{
            width:100px;
            height:100px;
            background:pink;
        }
    </style>
</head>
<body>

    <div class="main">
        <div class="box">1</div>
        <div>
            <div class="box">2</div>
            <div class="box">3</div>
        </div>
    </div>

</body>
</html>
方法2:flex + margin auto
<!DOCTYPE html>
<html lang="en">
    <head>
        <style>
            .main{
                height:200px;
                background: skyblue;
                display: flex;
                align-items: center;
            }
            .main div{
                width:50px;
                height:100px;
                background:pink;
                margin-right:10px;
            }
            .main div:nth-of-type(3){
                margin-right: auto;
            }
            .main div:nth-of-type(6){
                margin-right: auto;
            }
        </style>
    </head>

    <body>

        <div class="main">
            <div>1</div>
            <div>2</div>
            <div>3</div>
            <div>4</div>
            <div>5</div>
            <div>6</div>
            <div>7</div>
            <div>8</div>
        </div>

    </body>

</html>
flex-grow扩展比例
默认值是0,表示不占用剩余的空白间隙扩展自己的宽度
示例1
内部只有1个子元素时
<!DOCTYPE html>
<html lang="en">
<head>
    <style>

        .main {
            width: 500px;
            height: 300px;
            background: skyblue;
            display: flex;
        }

        .main div {
            width: 100px;
            height: 100px;
            background: pink;

            /* flex-grow: 0;   默认的 */

            /* 如果比例值为1,就占满剩余的所有空间 */
            /* flex-grow: 1; */

            /* 400 * 0.5 -> 200 + 100 -> 300 */
            /* flex-grow: 0.5; */ /* 才知道原来可以写小数的,写小数不会占满所有剩余空间 */

            /* 当比例值大于等于1的时候,都会占满整个空间 */
            flex-grow : 2;
        }

    </style>
</head>

<body>

    <div class="main">
        <div>1</div>
    </div>

</body>

</html>
示例2
内部有多个子元素时
<!DOCTYPE html>
<html lang="en">
    <head>
        <style>

            .main2{
                width: 500px;
                height: 300px;
                background: skyblue;

                display: flex;
            }

            .main2 div:nth-of-type(1){
                width:200px;
                height:100px;
                background:pink;

                flex-grow: 0.2;
            }

            .main2 div:nth-of-type(2){
                width:100px;
                height:100px;
                background:pink;

                flex-grow: 0.1;
            }
        </style>
    </head>

    <body>
        <div class="main2">
            <div>1</div>
            <div>2</div>
        </div>
    </body>

</html>
flex-shrink收缩比例
默认值是1,表示flex容器空间不足时,元素的收缩比例
示例1
<!DOCTYPE html>
<html lang="en">
    <head>
        <style>

            .main{
                width:500px;
                height:200px;
                background:skyblue;
                display: flex;
            }

            .main div{
                width:600px;
                height:100px;
                background:pink;

                /* flex-shrink : 1; 自动收缩,跟容器大小相同 */

                /*  flex-shrink: 0; */

                flex-shrink: 0.5;
            }
        </style>
    </head>

    <body>

        <div class="main">
            <div>1</div>
        </div>

    </body>
</html>
示例2
<!DOCTYPE html>
<html lang="en">
<head>
    <style>

        .main2{
            width:500px;
            height:200px;
            background:skyblue;
            display: flex;
        }

        .main2 div:nth-of-type(1){
            width:300px;
            height:100px;
            background:pink;

            flex-shrink: 0.2;
        }

        .main2 div:nth-of-type(2){
            width:400px;
            height:100px;
            background:pink;

            flex-shrink: 0.1;
        }

        /* 超出父容器 200 px */
        /* 300 + 400 - 500 -> 200 */

        /* 由于flex-shrink都是1, 所以按width来等比缩减 */
        /* 300 - 3/7 * 200
           400 - 4/7 * 200 */ /* 这里计算的很准确 */

        /* 由于flex-shrink是2 * 300 和 1 * 400,
           所以按width * flex-shrink来等比缩减 */
        /* 300 - 6/10 * 200
           400 - 4/10 * 200 */ /* 这里计算的很准确 */

    </style>
</head>
<body>

    <div class="main2">
        <div>1</div>
        <div>2</div>
    </div>

</body>
</html>
flex-basis
默认值是auto,指定了flex元素在主轴方向上的初始大小
示例1
flex-basis会覆盖主轴方向上的值,比如现在主轴方向是水平,所以会覆盖width,元素的宽度为200px。如果修改主轴方向为垂直,所以会覆盖height,那么元素的高度将为200
<!DOCTYPE html>
<html lang="en">
    <head>

        <style>

            .main{
                width:500px;
                height:500px;
                background:skyblue;

                display: flex;

                flex-direction: column;
            }

            .main div{
                width:100px;
                height:100px;
                background:pink;

                flex-basis: 200px;
            }
        </style>

    </head>

    <body>

        <div class="main">
            <div></div>
        </div>

    </body>
</html>
示例2
<!DOCTYPE html>
<html lang="en">
<head>
    <style>

        .main{
            width:500px;
            height:500px;
            background:skyblue;
            display: flex;
            align-items: flex-start;
        }

        .main div{
            background:pink;

            /* 当设置为0时,   div的宽度将会保持1个最小的能容纳1个字的宽度 */
            /* 当设置为auto时,div的宽度将自适应宽度 */
            flex-basis: 100%;   /* 0% auto 200px 100% */
        }

    </style>
</head>
<body>

    <div class="main">
        <div>测试文字</div>
    </div>

</body>
</html>
flex缩写
<!DOCTYPE html>
<html lang="en">
    <head>
        <style>

            .main{
                width:500px;
                height:500px;
                background:skyblue;
                display: flex;
                align-items: flex-start;
            }

            .main div{
                background:pink;

                /* flex-grow: 1;
                   flex-shrink: 1;
                   flex-basis: 0%; */
                flex:1;

                /*  flex-grow: 0;
                    flex-shrink: 1;
                    flex-basis: 0%; */
                /*  flex:0; */

                /* flex-grow: 1;
                   flex-shrink: 1;
                   flex-basis: auto; */
                /* flex:auto; */

                /* flex-grow: 1;
                   flex-shrink: 0;
                   flex-basis: 50%; */
                /* flex:1 0 50%; */

            }
        </style>
    </head>
    <body>

        <div class="main">
            <div>测试文字</div>
        </div>

    </body>
</html>
order
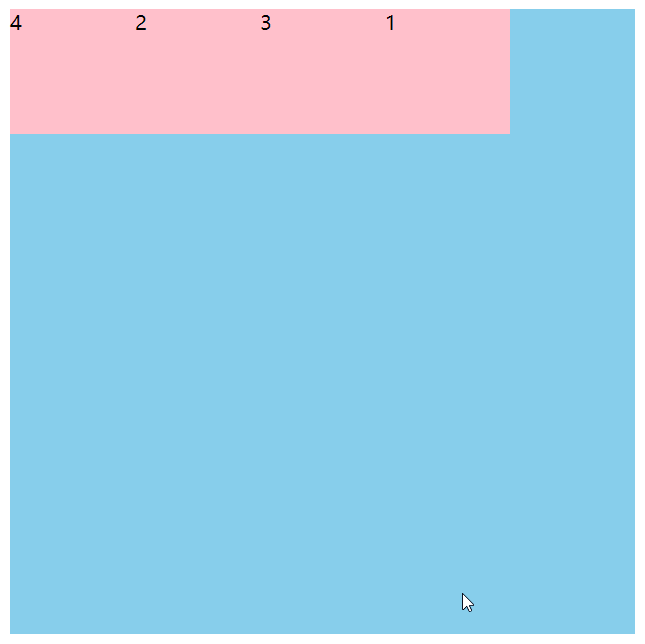
默认值是0,改变某一个flex子项的排序位置
<!DOCTYPE html>
<html lang="en">
<head>
    <style>
        .main{
            width:500px;
            height:500px;
            background:skyblue;
            display: flex;
        }
        .main div{
            width:100px;
            height:100px;
            background:pink;
        }
        .main div:nth-of-type(1){
            order:1;
        }
        .main div:nth-of-type(4){
            order:-1;
        }
    </style>
</head>
<body>
    <div class="main">
        <div>1</div>
        <div>2</div>
        <div>3</div>
        <div>4</div>
    </div>
</body>
</html>
align-self
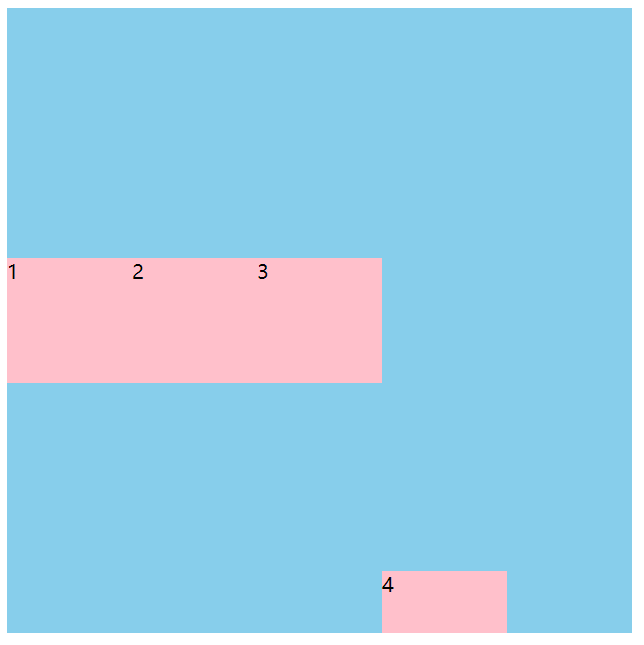
默认值是auto,控制单独某一个flex子项的垂直对齐方式
<!DOCTYPE html>
<html lang="en">
    <head>
        <style>
            .main{
                width:500px;
                height:500px;
                background:skyblue;
                display: flex;

                align-items: center;
            }
            .main div{
                width:100px;
                height:100px;
                background:pink;
            }
            .main div:nth-of-type(4){
                height:50px;

                /* align-self默认是auto,表示等于align-items的值 */
                /* align-self: auto; */
                align-self: flex-end;
            }
        </style>

    </head>

    <body>

        <div class="main">
            <div>1</div>
            <div>2</div>
            <div>3</div>
            <div>4</div>
        </div>

    </body>
</html>
等高布局
弹性布局
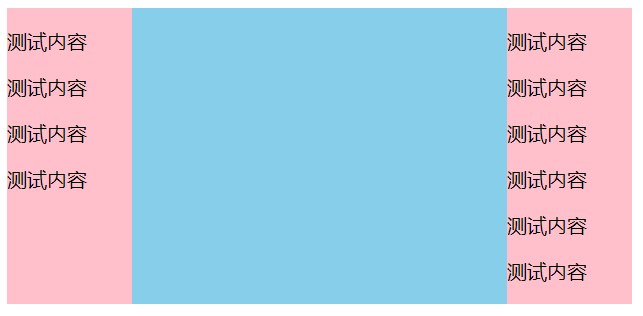
flex布局下,左右2个div,当它们都未设置高度时,默认就会以最高的弹性项等高。
<!DOCTYPE html>
<html lang="en">
    <head>
        <style>
            .main{
                width:500px;
                background:skyblue;
                display: flex;
                justify-content: space-between;
            }

            .main div{
                width:100px;
                background:pink;
            }

        </style>
    </head>
    <body>
        <div class="main">
            <div>
                <p>测试内容</p>
                <p>测试内容</p>
                <p>测试内容</p>
                <p>测试内容</p>
            </div>
            <div>
                <p>测试内容</p>
                <p>测试内容</p>
                <p>测试内容</p>
                <p>测试内容</p>
                <p>测试内容</p>
                <p>测试内容</p>
            </div>
        </div>
    </body>
</html>
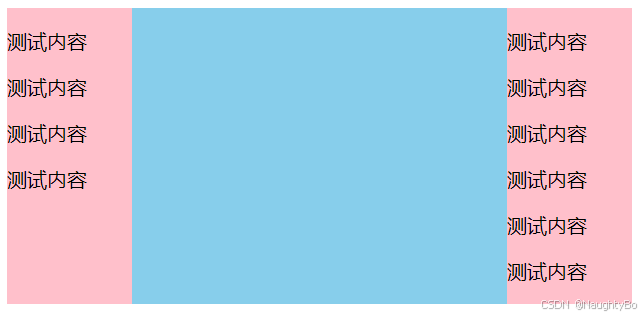
float+padding+margin
(不推荐使用)
<!DOCTYPE html>
<html lang="en">
    <head>
        <style>

            .main{
                width:500px;
                background:skyblue;
                overflow: hidden;
            }

            .main div{
                width:100px;
                background:pink;

                float:left;

                /* 设置超大padding,然后用margin-bottom抵消 */
                padding-bottom:2000px;
                margin-bottom:-2000px;
            }

            .main div:nth-of-type(2){
                float:right;
            }

        </style>
    </head>
    <body>
        <div class="main">
            <div>
                <p>测试内容</p>
                <p>测试内容</p>
                <p>测试内容</p>
                <p>测试内容</p>
            </div>
            <div>
                <p>测试内容</p>
                <p>测试内容</p>
                <p>测试内容</p>
                <p>测试内容</p>
                <p>测试内容</p>
                <p>测试内容</p>
            </div>
        </div>
    </body>
</html>
两列与三列布局
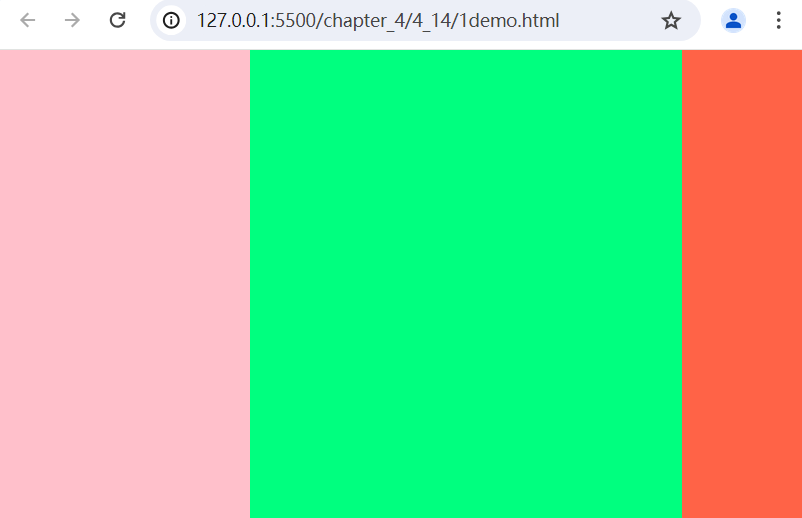
弹性布局
左右两边固定大小,中间自适应(中间部分的宽度也可以使用calc来计算,但是在弹性布局中,就没必要去算了)
<!DOCTYPE html>
<html lang="en">
    <head>
        <style>
            body{
                margin:0;
            }
            .main{
                height:100vh; /* 占满可视区高度 */
                background:skyblue;
                display: flex;
            }
            .col1{
                width:200px;
                background:pink;
            }
            .col2{
                flex-grow: 1;
                background:springgreen;
            }
            .col3{
                width:100px;
                background: tomato;
            }

        </style>
    </head>
    <body>
        <div class="main">
            <div class="col1"></div>
            <div class="col2"></div>
            <div class="col3"></div>
        </div>

    </body>
</html>
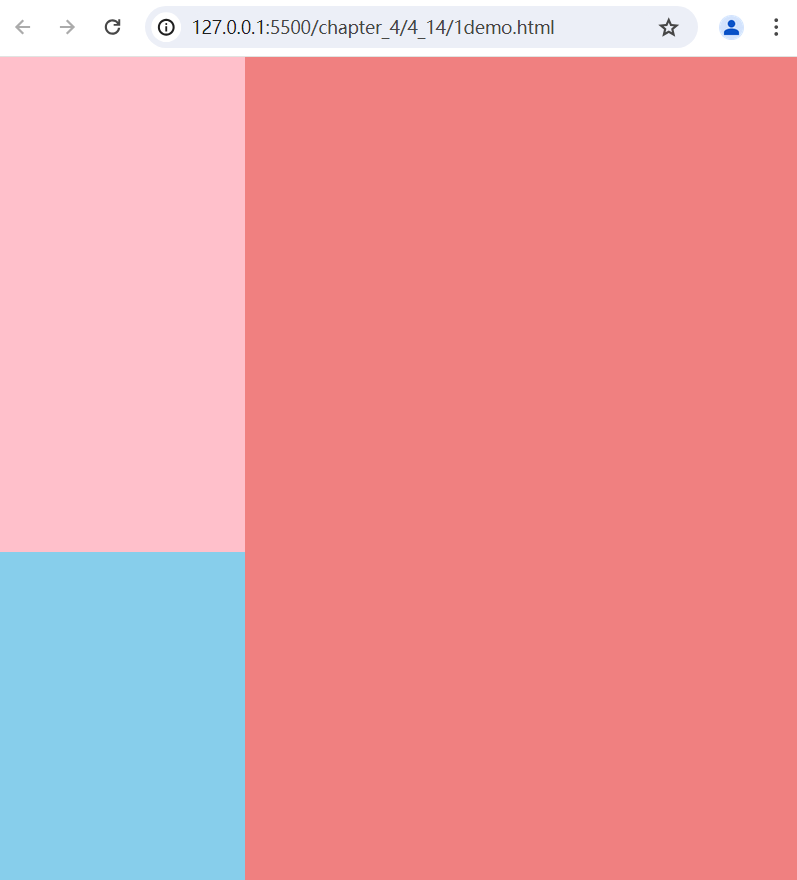
float+margin-left
左侧固定宽度浮动,右侧使用margin-left;
<!DOCTYPE html>
<html lang="en">
    <head>
        <style>
            body{
                margin:0;
            }

            .main{
                height:100vh;
                background:skyblue;
            }

            .col1{
                width:200px;
                height:60%;
                float:left;
                background:pink;
            }

            .col2{
                height:100%;
                background:lightcoral;
                margin-left:200px;
                /*  overflow: hidden; */
            }

        </style>
    </head>
    <body>

        <div class="main">
            <div class="col1"></div>
            <div class="col2"></div>
        </div>

    </body>
</html>
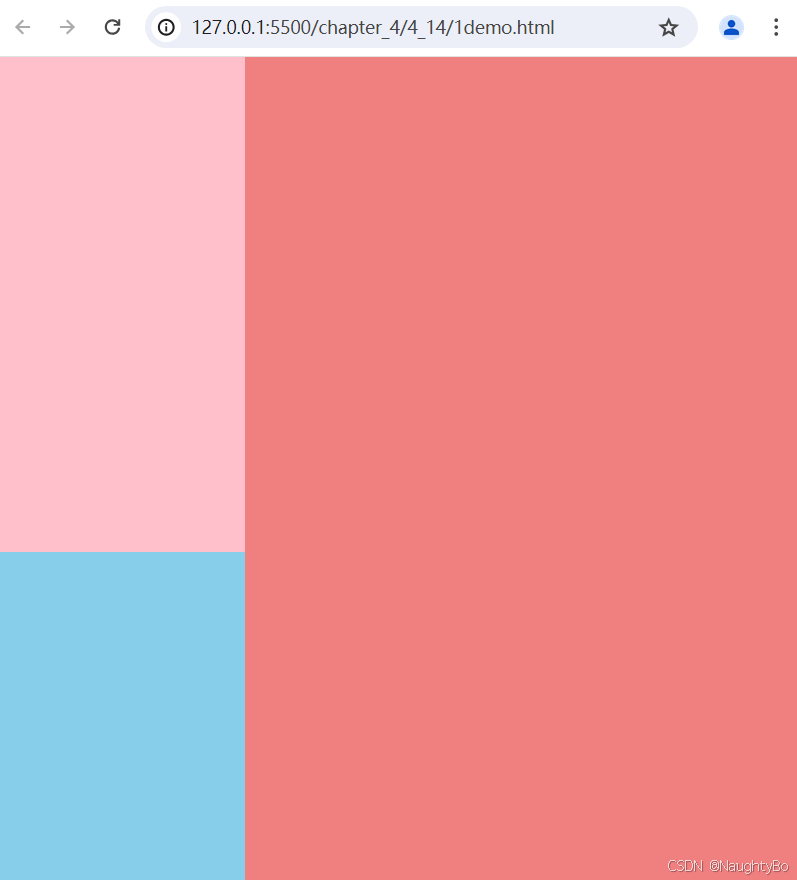
float+overflow:hidden
左侧固定宽度浮动,右侧使用overflow:hidden开启BFC;
<!DOCTYPE html>
<html lang="en">
    <head>
        <style>
            body{
                margin:0;
            }

            .main{
                height:100vh;
                background:skyblue;
            }

            .col1{
                width:200px;
                height:60%;
                float:left;
                background:pink;
            }

            .col2{
                height:100%;
                background:lightcoral;
                overflow: hidden;
            }

        </style>
    </head>
    <body>

        <div class="main">
            <div class="col1"></div>
            <div class="col2"></div>
        </div>

    </body>
</html>
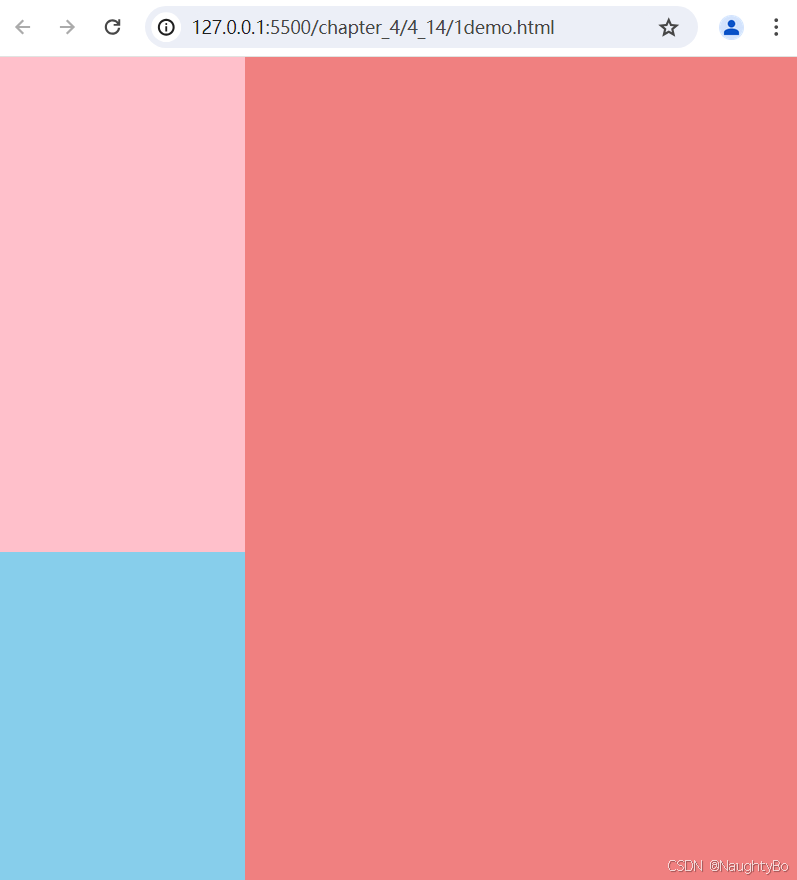
float+定位
右侧使用定位实现,其中left设置固定值,其它都设置为0
<!DOCTYPE html>
<html lang="en">
    <head>
        <style>
            body{
                margin:0;
                position: relative;
            }


            .main{
                height:100vh;
                background:skyblue;
            }
            .col1{
                width:200px;
                height:60%;
                float:left;
                background:pink;
            }
            .col2{
                height:100%;
                background:lightcoral;
                position: absolute;
                top: 0;
                right: 0;
                bottom: 0;
                left: 200px;
            }

        </style>
    </head>
    <body>

        <div class="main">
            <div class="col1"></div>
            <div class="col2"></div>
        </div>
    </body>
</html>
stickyFooter布局
弹性布局
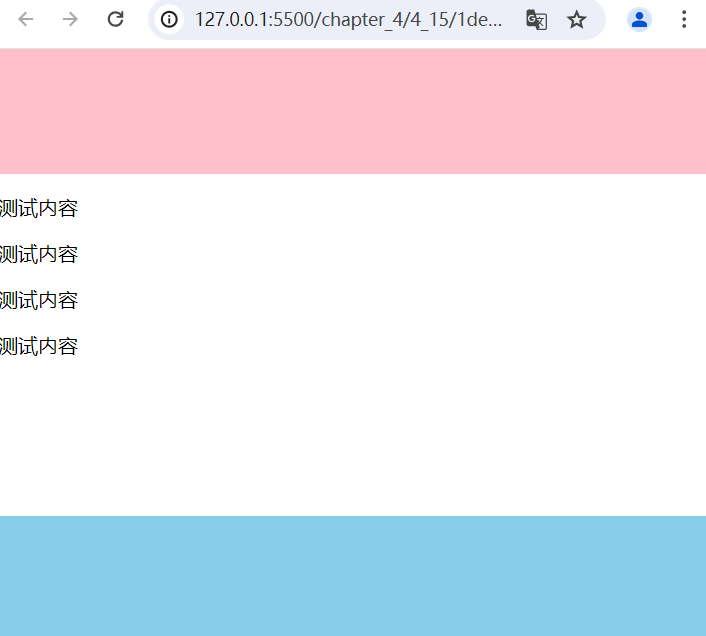
上面是页头,下面是页脚,当中间部分不够时,页脚部分要在最下面,当中间部分很多时,也要把页脚挤到最下面;
<!DOCTYPE html>
<html lang="en">
    <head>
        <meta charset="UTF-8">
        <meta http-equiv="X-UA-Compatible" content="IE=edge">
        <meta name="viewport" content="width=device-width, initial-scale=1.0">
        <title>Document</title>
        <style>
            body{
                margin:0;
            }

            .main{

                /* 设置最小高度 */
                min-height:100vh;

                display: flex;

                /* 更改主轴方向 */
                flex-direction: column;
            }

            .main .header{
                height:100px;
                background:pink;
            }

            .main .content{
                /* 中间占满剩余高度 */
                flex-grow: 1;
            }

            .main .footer{
                height:100px;
                background:skyblue;
            }
        </style>
    </head>
    <body>
        <div class="main">

            <div class="header"></div>

            <div class="content">
                <p>测试内容</p>
                <p>测试内容</p>
                <p>测试内容</p>
                <p>测试内容</p>
            </div>

            <div class="footer"></div>
        </div>
    </body>
</html>
calc+min-height
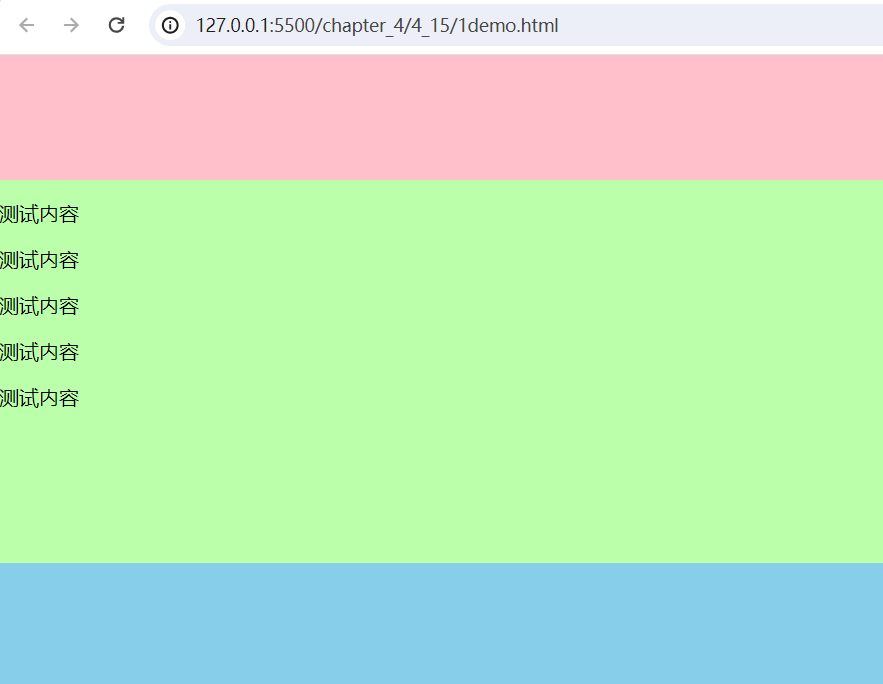
上面是页头,下面是页脚,当中间部分不够时,页脚部分要在最下面,当中间部分很多时,也要把页脚挤到最下面;
<!DOCTYPE html>
<html lang="en">
    <head>
        <style>
            body{
                margin:0;
            }

            .main .header{
                height:100px;
                background:pink;
            }

            .main .content{
                /* 设置最小高度 */
                min-height: calc(100vh - 200px);
                background-color: #bfa;
            }

            .main .footer{
                height:100px;
                background:skyblue;
            }

            /* 处理p标签的margin-top的传递,导致出现滚动条问题 */
            .clearfix::before,
            .clearfix::after {
                content: "";
                display: table;
                clear: both;
            }
        </style>
    </head>
    <body>
        <div class="main">
            <div class="header"></div>
            <div class="content clearfix">
                <p>测试内容</p>
                <p>测试内容</p>
                <p>测试内容</p>
                <p>测试内容</p>
                <p>测试内容</p>
            </div>
            <div class="footer"></div>
        </div>
    </body>
</html>
溢出项布局
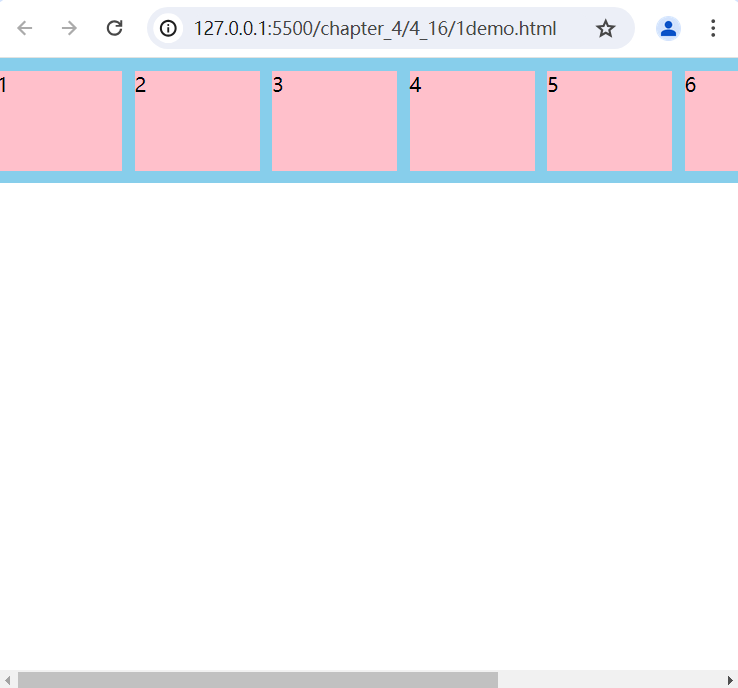
类似于这种
弹性布局
使用flex布局,默认不换行,设置弹性项不收缩
<!DOCTYPE html>
<html lang="en">
    <head>
        <style>

            body{
                margin:0;
            }

            .main{
                height:100px;
                background:skyblue;

                display: flex;
                align-items: center;
            }

            .main div{
                width:100px;
                height:80px;
                background:pink;

                margin-right:10px;

                /* 不收缩 */
                flex-shrink: 0;
            }

        </style>
    </head>
    <body>

        <div class="main">
            <div>1</div>
            <div>2</div>
            <div>3</div>
            <div>4</div>
            <div>5</div>
            <div>6</div>
            <div>7</div>
            <div>8</div>
        </div>

    </body>
</html>
float布局
利用浮动实现
<!DOCTYPE html>
<html lang="en">
    <head>
        <style>

            body{
                margin:0;
            }

            .main{
                height:100px;
                background:skyblue;
            }

            .main section{
                /* 这里宽度需要自己计算 */
                width:2000px;
            }

            .main div{
                width:100px;
                height:80px;
                background:pink;
                margin-right:10px;

                /* 浮动 */
                float:left;
            }
        </style>
    </head>
    <body>

        <div class="main">
            <section>
                <div>1</div>
                <div>2</div>
                <div>3</div>
                <div>4</div>
                <div>5</div>
                <div>6</div>
                <div>7</div>
                <div>8</div>
            </section>
        </div>

    </body>
</html>
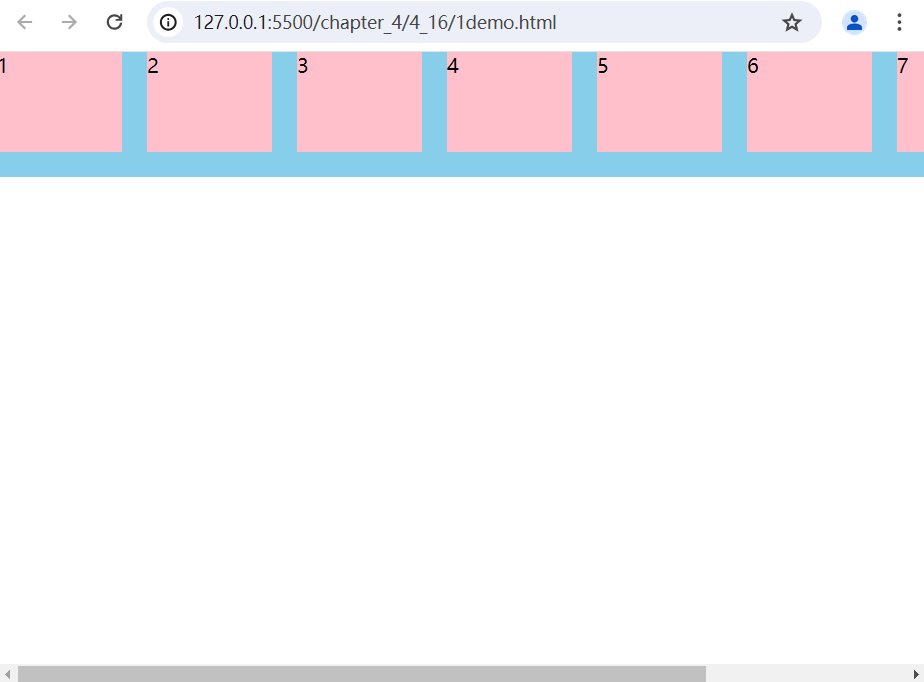
inline-block布局
<!DOCTYPE html>
<html lang="en">
    <head>
        <style>

            body{
                margin:0;
            }

            .main{
                height:100px;
                background:skyblue;

                /* 不换行 */
                white-space: nowrap;

                /* 取出行内块之间的空隙 */
                font-size: 0;
            }

            .main div{
                width:100px;
                height:80px;
                background:pink;

                display: inline-block;
                margin-right: 20px;
                font-size: 16px;
            }

        </style>
    </head>
    <body>

        <div class="main">
            <div>1</div>
            <div>2</div>
            <div>3</div>
            <div>4</div>
            <div>5</div>
            <div>6</div>
            <div>7</div>
            <div>8</div>
        </div>

    </body>
</html>
swiper轮播案例
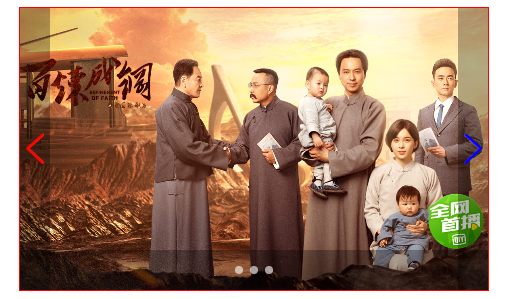
1、整个容器开启相对定位
2、底部开启绝对定位,占满宽度100%,设定高度,使用flex布局水平垂直居中
3、左右两侧开启绝对定位,占满高度100%,使用flex布局垂直居中,宽度由内容决定
(1个div内套了好几个div,外面div使用display:flexb布局后,把里面div的宽度都设置为100%,并且flex-shrink设置为0,不让它们收缩。这样子元素肯定就溢出来了。这叫溢出性布局,可以用于做轮播图。)
<!DOCTYPE html>
<html lang="en">
    <head>
        <link rel="stylesheet" href="./iconfont.css">
        <link rel="stylesheet" href="./reset.css">
        <style>

            /* 整个容器开启相对定位 */
            .swiper-container{
                position: relative;
            }
            .swiper-wrapper{
                /* 使用flex布局 */
                display: flex;
            }
            .swiper-slide{
                /* 占满父元素的宽度 */
                width:100%;
                /* 让子元素不收缩,这非常重要 */
                flex-shrink: 0;
            }
            .swiper-slide img{
                /* 图片占满父元素的宽度,高度自适应 */
                width:100%;
            }

            /* 底部开启绝对定位,占满宽度100%,设定高度,使用flex布局水平垂直居中 */
            .swiper-pagination{
                position: absolute;
                height: 28px;
                width: 100%;
                bottom:0;
                display: flex;
                justify-content: center;
                align-items: center;
            }


            .swiper-pagination-bullet{
                width:8px;
                height:8px;
                border-radius: 50%;
                background:#c6bcaf;
                margin:0 4px;
            }
            .swiper-pagination-bullet-active{
                background:white;
            }

            /* 左右两侧开启绝对定位,占满高度100%,使用flex布局水平垂直居中,宽度由内容决定 */
            .swiper-button-prev, .swiper-button-next{
                position: absolute;
                top:0;
                height:100%;
                display: flex;
                align-items: center;
            }
            .swiper-button-prev{
                left:0;
            }
            .swiper-button-next{
                right:0;
            }
            .swiper-button-prev i, .swiper-button-next i{
                font-size:44px;
                color:white;
            }
        </style>
    </head>
    <body>
        <div class="swiper-container">

            <div class="swiper-wrapper">
                <div class="swiper-slide"><img src="Swiper.png" alt=""></div>
                <div class="swiper-slide"><img src="Swiper.png" alt=""></div>
                <div class="swiper-slide"><img src="Swiper.png" alt=""></div>
            </div>

            <!-- 如果需要分页器 -->
            <div class="swiper-pagination">
                <span class="swiper-pagination-bullet
                             swiper-pagination-bullet-active"></span>
                <span class="swiper-pagination-bullet"></span>
                <span class="swiper-pagination-bullet"></span>
            </div>

            <!-- 如果需要导航按钮 -->
            <div class="swiper-button-prev">
                <i class="iconfont icon-swiperhoutui"></i>
            </div>
            <div class="swiper-button-next">
                <i class="iconfont icon-swiperqianjin"></i>
            </div>
        </div>
    </body>
</html>
reset.css
@charset "utf-8";

/* --------------------重置样式-------------------------------- */

body,
h1,
h2,
h3,
h4,
h5,
h6,
hr,
p,
blockquote,
dl,
dt,
dd,
ul,
ol,
li,
button,
input,
textarea,
th,
td {
    margin : 0;
    padding: 0
}

/*设置默认字体*/
body {
    font-size  : 14px;
    font-style : normal;
    font-family: -apple-system, BlinkMacSystemFont, segoe ui, Roboto, helvetica neue, Arial, noto sans, sans-serif, apple color emoji, segoe ui emoji, segoe ui symbol, noto color emoji;
}

/*字体太小用户体检不好,让small恢复12px*/
small {
    font-size: 12px
}

h1 {
    font-size: 18px
}

h2 {
    font-size: 16px
}

h3 {
    font-size: 14px
}

h4,
h5,
h6 {
    font-size: 100%
}

ul,
ol {
    list-style: none
}

a {
    text-decoration : none;
    background-color: transparent
}

a:hover,
a:active {
    outline-width  : 0;
    text-decoration: none
}

/*重置表格*/
table {
    border-collapse: collapse;
    border-spacing : 0
}

/*重置hr*/
hr {
    border: 0;
    height: 1px
}

/*图形图片*/
img {
    border-style: none
}

img:not([src]) {
    display: none
}

svg:not(:root) {
    overflow: hidden
}

/*下面的操作是针对于html5页面布局准备的,不支持ie6~8以及其他低版本的浏览器*/
html {
    /*禁用系统默认菜单*/
    -webkit-touch-callout   : none;
    /*关闭iphone & Android的浏览器纵向和横向模式中自动调整字体大小的功能*/
    -webkit-text-size-adjust: 100%
}

input,
textarea,
button,
a {
    /*表单或者a标签在手机点击时会出现边框或彩色的背景区域,意思是去除点击背景框*/
    -webkit-tap-highlight-color: rgba(0, 0, 0, 0)
}

/*重置html5元素的默认样式*/
article,
aside,
details,
figcaption,
figure,
footer,
header,
main,
menu,
nav,
section,
summary {
    display: block
}

audio,
canvas,
progress,
video {
    display: inline-block
}

audio:not([controls]),
video:not([controls]) {
    display: none;
    height : 0
}

progress {
    vertical-align: baseline
}

mark {
    background-color: #ff0;
    color           : #000
}

sub,
sup {
    position      : relative;
    font-size     : 75%;
    line-height   : 0;
    vertical-align: baseline
}

sub {
    bottom: -0.25em
}

sup {
    top: -0.5em
}

button,
input,
select,
textarea {
    font-size: 100%;
    outline  : 0
}

button,
input {
    overflow: visible
}

button,
select {
    text-transform: none
}

textarea {
    overflow: auto
}

button,
html [type="button"],
[type="reset"],
[type="submit"] {
    -webkit-appearance: button
}

button::-moz-focus-inner,
[type="button"]::-moz-focus-inner,
[type="reset"]::-moz-focus-inner,
[type="submit"]::-moz-focus-inner {
    border-style: none;
    padding     : 0
}

button:-moz-focusring,
[type="button"]:-moz-focusring,
[type="reset"]:-moz-focusring,
[type="submit"]:-moz-focusring {
    outline: 1px dotted ButtonText
}

[type="checkbox"],
[type="radio"] {
    box-sizing: border-box;
    padding   : 0
}

[type="number"]::-webkit-inner-spin-button,
[type="number"]::-webkit-outer-spin-button {
    height: auto
}

[type="search"] {
    -webkit-appearance: textfield;
    outline-offset    : -2px
}

[type="search"]::-webkit-search-cancel-button,
[type="search"]::-webkit-search-decoration {
    -webkit-appearance: none
}

::-webkit-input-placeholder {
    color  : inherit;
    opacity: .54
}

::-webkit-file-upload-button {
    -webkit-appearance: button;
    font              : inherit
}
实践
<!DOCTYPE html>
<html lang="en">
<head>
    <meta charset="UTF-8">
    <title>Document</title>
    <link rel="stylesheet" href="./iconfont.css">
    <style>
        body {
            margin: 0;
        }
        .container {
            width: 500px;
            height: 300px;
            margin: 10px auto;
            overflow: hidden;
            border: 1px solid red;

            position: relative;
        }
        .boxes {
            width: 100%;
            height: 100%;
            margin: auto;
            display: flex;

            transform: translateX(-1000px);
        }
        .box {
            width: 100%;
            flex-shrink: 0;
        }
        .box img {
            width: 100%;
            height: 100%;
            object-fit: cover;
        }

        .dots {
            position: absolute;
            bottom: 0;
            background-color: rgba(0, 0, 0, .3);
            height: 42px;
            width: 100%;
            display: flex;
            align-items: center;
            justify-content: center;
        }
        .dot {
            width: 8px;
            height: 8px;
            background-color: rgba(255, 255, 255, .6);
            border-radius: 50%;
            margin: 0 4px;
            cursor: pointer;
        }

        .btn {
            position: absolute;
            top: 0;
            height: 100%;
            background-color: rgba(0, 0, 0, .3);
            cursor: pointer;
            color: #fff;
            display: flex;
            align-items: center;
        }
        .btn i {
            font-size: 32px;
        }
        .btn.prev-btn {
            color: red;
            left: 0;
        }
        .btn.next-btn {
            color: blue;
            right: 0;
        }
    </style>
</head>
<body>

    <div class="container">
        <div class="boxes">
            <div class="box">
                <img src="./1.jpg" alt="">
            </div>
            <div class="box">
                <img src="./2.jpg" alt="">
            </div>
            <div class="box">
                <img src="./3.jpg" alt="">
            </div>
        </div>

        <div class="dots">
            <div class="dot"></div>
            <div class="dot"></div>
            <div class="dot"></div>
        </div>

        <div class="prev-btn btn">
            <i class="iconfont icon-swiperhoutui"></i>
        </div>
        <div class="next-btn btn">
            <i class="iconfont icon-swiperqianjin"></i>
        </div>
    </div>
</body>
</html>
知乎导航案例
分为三个阶段:
第一阶段:两端变小
第二阶段:两端不能再变小时,中间空隙变小
第三阶段:中间空隙没有了之后,input输入框变小
最后:input输入框不能再变小时,出现滚动条
<!DOCTYPE html>
<html lang="en">
    <head>
        <link rel="stylesheet" href="./iconfont.css">
        <link rel="stylesheet" href="./reset.css">
        <style>
            body{
                background:#f6f6f6;
            }
            .header-container{
                background:#ffffff;
            }
            .header-wrapper{

                /* 整体水平居中 */
                margin:0 auto;

                /* 头部高度 */
                height: 52px;

                /* 设置最小宽度(防止再小时,文字错位) */
                min-width:1000px;

                /* 设置最大宽度 */
                max-width:1156px;
                display: flex;
                align-items: center;
            }

            /* 左侧 */
            .header-logo{
                margin-right: 40px;
            }
            .header-nav{
                display: flex;
            }
            .header-nav li{
                margin-right:30px;
            }

            .header-search{
                /* 中间搜索框部分占满剩余空间 */
                flex-grow:1;

                /* 开启flex布局,并让子元素水平居中,
                   但是此时子元素是按内容展开宽度的,但是子元素可以设置flex-grow:1,占满宽度 */
                display: flex;
                justify-content: center;
            }

            .header-search-wrapper{

                /* 设置最大宽度 */
                max-width:482px;

                height:34px;

                flex-grow: 1;

                /* 开启flex布局,让 input 和 放大镜图标 垂直居中*/
                display: flex;
                align-items:center;
                justify-content: space-between;

                background:#f6f6f6;
                border-radius: 100px;
            }

            .header-search-input{

                /* 去掉输入框的边框 */
                border:none;
                /* 去掉输入框的背景色 */
                background:none;
                margin:0 20px;
            }

            .header-search-wrapper i {
                margin:0 20px;
            }

            .header-btn{
                /* 由于2个button转成块元素了,因此开启flex布局 */
                display: flex;
            }

            .header-btn-login{

                width:60px;
                height:32px;
                border:1px #0066ff solid;
                border-radius: 3px;
                color:#0066ff;

                /* 去掉按钮的背景色 */
                background:none;

                cursor: pointer;

                /* 转成块元素,因为button属于内联元素,与其它内联元素在一起,默认会有空隙 */
                display: block;
                margin-left:20px;
            }

            .header-btn-zhihu{
                width:90px;
                height:32px;
                background:#0066ff;
                color:white;

                /* 去掉按钮的边框 */
                border:none;

                border-radius: 3px;
                display: block;
                margin-left:20px;
                cursor: pointer;
            }
        </style>
    </head>
    <body>

        <div class="header-container">

            <div class="header-wrapper">

                <div class="header-logo">
                    <a href="#"><img src="./logo.png" alt=""></a>
                </div>

                <ul class="header-nav">
                    <li>首页</li>
                    <li>会员</li>
                    <li>发现</li>
                    <li>等你来答</li>
                </ul>

                <div class="header-search">
                    <div class="header-search-wrapper">
                        <input class="header-search-input" type="text" placeholder="">
                        <i class="iconfont icon-fangdajing"></i>
                    </div>
                </div>

                <div class="header-btn">
                    <button class="header-btn-login">登录</button>
                    <button class="header-btn-zhihu">加入知乎</button>
                </div>

            </div>

        </div>
    </body>
</html>
实践
分为三个阶段:
第一阶段:两端变小
第二阶段:两端不能再变小时,中间空隙变小
第三阶段:中间空隙没有了之后,input输入框变小
最后:input输入框不能再变小时,出现滚动条
要达到上面三个阶段的变化,最重要的是:开启flex布局后,给子元素添加flex-grow为1,同时设定max-width,这样这个子元素它就有了伸展的能力(占满剩余空间),又不能超过最大值。这样它的宽在容器宽度变大的过程中,就可以由小变大,但是又不会超出指定的大小。
min-width指定元素最小宽度,防止宽度再下时,避免文字错位。
过程分析:
首先,search-wrapper设置了flex-grow:1,所以占满所有剩余空间。
search-wrapper中套了1个search的div,给这个search的div设置flex-grow1,则这个search要占满search-wrapper的所有剩余空间,此时给这个search同时设置max-width,则这个search在占满剩余空间的同时又不能超出最大宽度。并且search处于search-wrapper水平居中的位置。
<!DOCTYPE html>
<html lang="en">
<head>
    <meta charset="UTF-8">
    <meta name="viewport" content="width=device-width, initial-scale=1.0">
    <title>Document</title>
    <link rel="stylesheet" href="./iconfont.css">
    <style>
        body {
            margin: 0;
            background-color: #f6f6f6;
        }
        .header-wrapper {
            background-color: #fff;
        }
        ul>li {
            list-style: none;
            padding: 0;
            margin: 0;
        }
        ul {
            margin: 0;
            padding: 0;
        }
        a {
            text-decoration: none;
            color: #000;
        }
        input,button {
            border: none;
            background: none;
            outline: none;
        }

        .header-container {
            max-width: 1156px;
            min-width: 910px;
            margin: 0 auto;
            /* background-color: #e3e3e3; */
            height: 44px;
            display: flex;
            align-items: center;
        }

        .search-wrapper {
            flex: 1;
            /* background-color: #bfa; */
            height: 34px;
            display: flex;
            align-items: center;
            justify-content: center;
        }
        .search {
            max-width: 500px;
            flex-grow: 1;
            height: 100%;
            display: flex;
            align-items: center;
            background-color: #eee;
            border-radius: 20px;
            justify-content: space-between;
        }
        .search input {
            flex-grow: 1;
            min-width: 300px;
            height: 100%;
            box-sizing: border-box;
            padding-left: 20px;
        }
        .search i {
            color: #666;
            padding: 0 16px;
        }

        .header-container .header-logo {
            margin-right: 25px;
        }

        .nav-items ul {
            display: flex;
        }

        .nav-items ul li {
            margin: 0 15px;
        }

        .nav-items ul li a{
            color: #8590a6;
        }

        .btns {
            display: flex;
        }
        .btns button{
            color: #0066ff;
            height: 32px;
            border-radius: 3px;
            display: block;
            margin-left: 20px;
        }
        .btns .btn-login {
            border: 1px solid #0066ff;
            width: 60px;
        }
        .btns .btn-join {
            background-color: #0066ff;
            width: 88px;
            color: #fff;
        }
    </style>
</head>
<body>
    <div class="header-wrapper">

        <div class="header-container">
            <div class="header-logo">
                <a href="#">
                    <img src="./zhihu.png" alt="">
                </a>
            </div>

            <div class="nav-items">
                <ul>
                    <li class="nav-item"><a href="#">首页</a></li>
                    <li class="nav-item"><a href="#">会员</a></li>
                    <li class="nav-item"><a href="#">发现</a></li>
                    <li class="nav-item"><a href="#">等你来答</a></li>
                </ul>
            </div>

            <div class="search-wrapper">
                <div class="search">
                    <input type="text" placeholder="搜索问题、回答、专栏等">
                    <i class="iconfont icon-fangdajing"></i>
                </div>
            </div>

            <div class="btns">
                <button class="btn-login">登录</button>
                <button class="btn-join">加入知乎</button>
            </div>
        </div>
    </div>

</body>
</html>
第五章 Grid布局
CSS网格是一个用于web的二维布局系统。利用网格,你可以把内容按照行与列的格式进行排版。另外,网格还能非常轻松地实现一些复杂的布局
第六章 移动端适配布局
移动端概念及UI设计稿尺寸
移动端适配概念
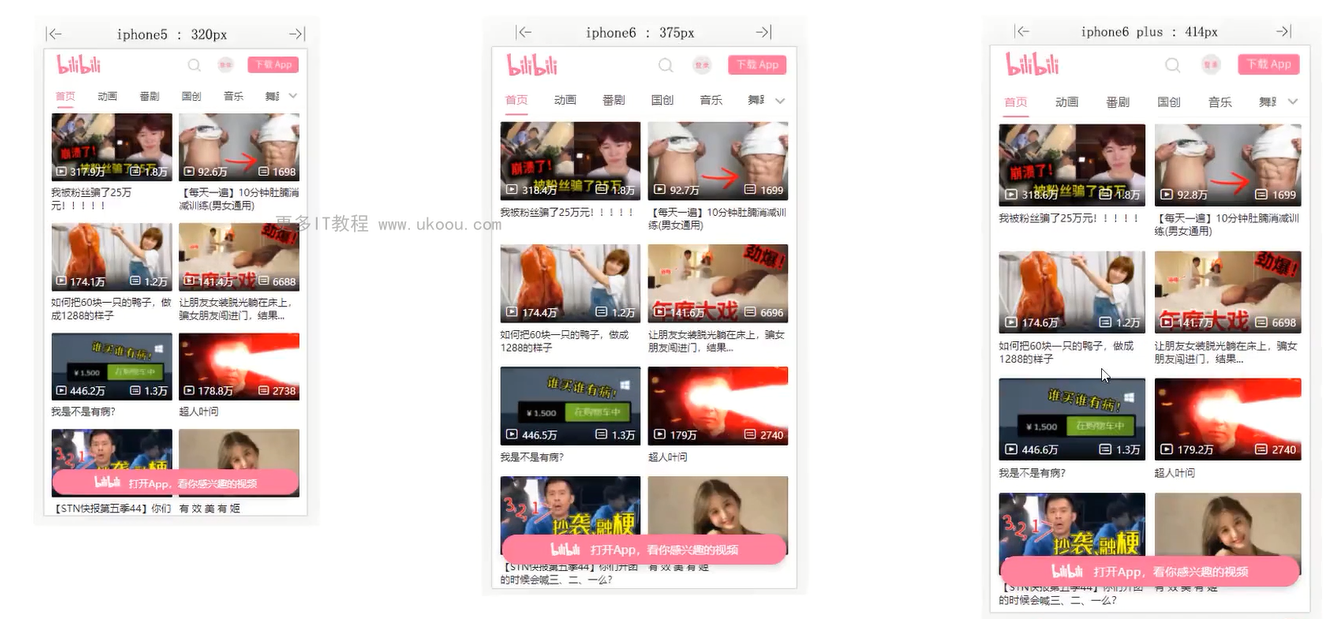
随着移动互联网的发展,移动端布局显得非常的重要。移动端布局并不复杂,主要是现实各种设备的等比适配,让所有移动端设备看起来是相同的
比如在下图中,不同设备的尺寸宽度是不同的。如果要做到在不同设备做到都显示完美的网页,使用像素这种绝对单位就不能很好的实现了,它没法在不同设备下动态发生变化。所以要做到不同设备下的等比适配就要使用到相对单位:rem 和 vw,实现在不同设备动态控制尺寸大小的功能。
逻辑像素与物理像素
逻辑像素,也叫“设备独立像素”,对于前端来说就是css中的像素,举例:iphone6下的逻辑像素为375px。
物理像素,即设备屏幕实际拥有的像素点,一个设备生产出来,他们的像素就已经确定了,举例:iphone6下的物理像素为750px。
可以发现iphone6下,其物理像素是逻辑像素的2倍,可用“设备像素比”来表示这个比值(即物理像素除以逻辑像素的值),可通过JavaScript代码window.devicePixelRatio来获取设备像素比。
那究竟逻辑像素与物理像素的关系是什么呢?这里首先先确定什么是相对单位,什么又是绝对单位。像m这种绝对单位,定义是什么:米的长度等于氪-86原子的2P10和5d1能级之间跃迁的辐射在真空中波长的1650763.73倍。查到的m的定义如上,也就是说在现实世界中,m是一个固定的长度。
px全称为pixel,像素长度,像素长度,那么就请问了,一个超大屏幕的像素和你笔记本或者手机屏幕的像素大小相同吗?也就是说1px在你手机屏幕上显示出来的长度可能为0.1mm,在露天演出的电子屏幕上长度为5cm,那么0.1mm和5cm相等吗?
感觉px好像是一个相对单位,但是如果放在网页或者设计人眼中,可能就不一定了,上面举得那个例子是物理像素,在物理像素的背景下,px确实是一个相对单位,但是在逻辑像素上就不同了,css中1px指的是逻辑像素,浏览器会将你的逻辑像素转化成物理像素,每个设备之间虽然物理像素点大小不一样,但是用了逻辑像素的单位后,显示的长度就会一样了。
在开发网页的时候,写了10px,在你的设备上,逻辑1px为真实的1.2个像素大小,实际看上去为10cm,没问题,换一个设备,逻辑1px为真实的2.4个像素大小,也就是说另外一个设备像素大小是你的设备一半,那么对于他来说10px就是24个像素了,但是实际大小仍然为10cm,所以说,在有逻辑像素的概念的前提下,px是一个绝对长度单位。(引自:知乎)
总结如下:
- 逻辑像素:CSS中的像素,绝对单位,保证不同设备下元素的尺寸是相同的(css中1px指的是逻辑像素)。
- 物理像素:设备屏幕实际拥有的像素点,相对单位,不同设备下物理像素大小不同。
viewport视口
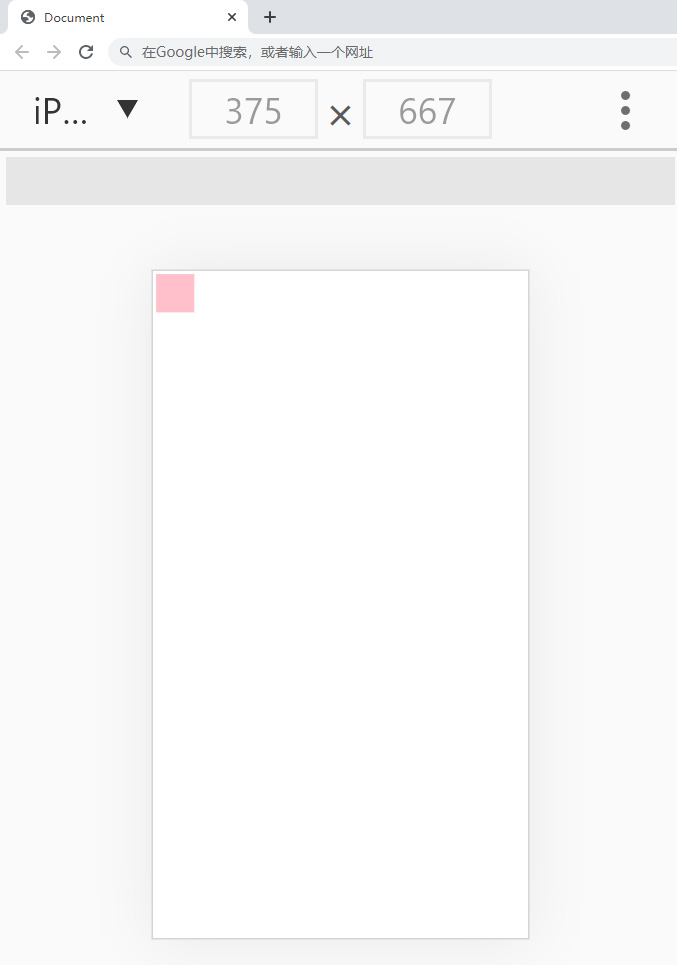
一般移动设备的浏览器都默认设置了一个viewport元标签,定义一个虚拟的布局视口(layout viewport),用于解决早期的页面在手机上显示的问题。iOS, Android 基本都将这个视口分辨率设置为 980px,所以PC上的网页基本能在手机上呈现,只不过元素看上去很小,一般默认可以通过手动缩放网页。
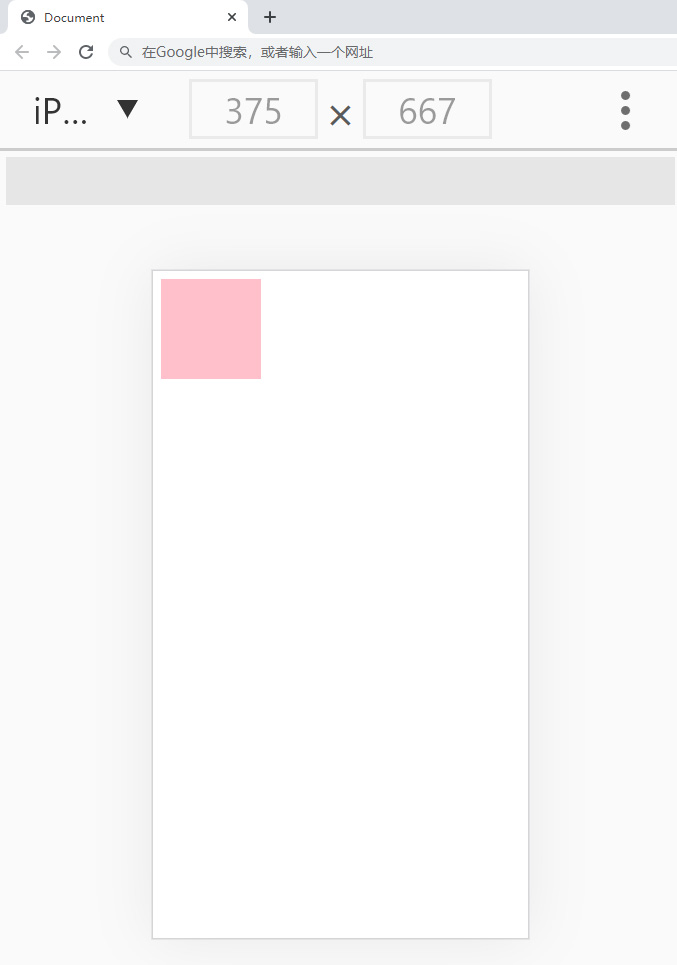
上面截图中的方块为100px,但是在iphone6设备的默认视口下显示的非常小,因为默认视口为980px。为了解决这个问题,可通过meta标签来修改视口的尺寸大小(vsCode工具初始创建HTML代码时,自动添加)。
<meta name="viewport" content="width=device-width, initial-scale=1.0">
width=device-width表示视口宽度为设备的宽,也就是逻辑像素的大小。initial-scale=1.0表示初始缩放比例为1,即正常大小。下面是设置了viewport视口后的样子。
viewport可选的值有:
| 属性 | 值 | 描述 |
|---|---|---|
| width | 正整数或devive-width | 定义视口的宽度,单位为像素 |
| height | 正整数 | 定义视口的高度,单位为像素,不常用 |
| initial-scale | 比例值 | 定义初始缩放值 |
| minimum-scale | 比例值 | 定义缩小最小比例 |
| maximum-scale | 比例值 | 定义放大最大比例 |
| user-scalable | yes/on | 定义是否允许用户手动缩放页面,默认值yes |
总结如下:
- 在移动端布局中,一定要提前设置好视口大小,即vsCode默认添加形式,
<meta name="viewport" content="width=device-width, initial-scale=1.0">,这样可以保证CSS逻辑像素不会受到缩放处理。
750px的设计稿
通常移动端UI设计稿会按照iphone6的物理像素尺寸大小进行设计,即750px。当然也可以按照逻辑像素进行设计,即375px,但是一般设计师不会这么干,主要为了设计稿更加清晰。
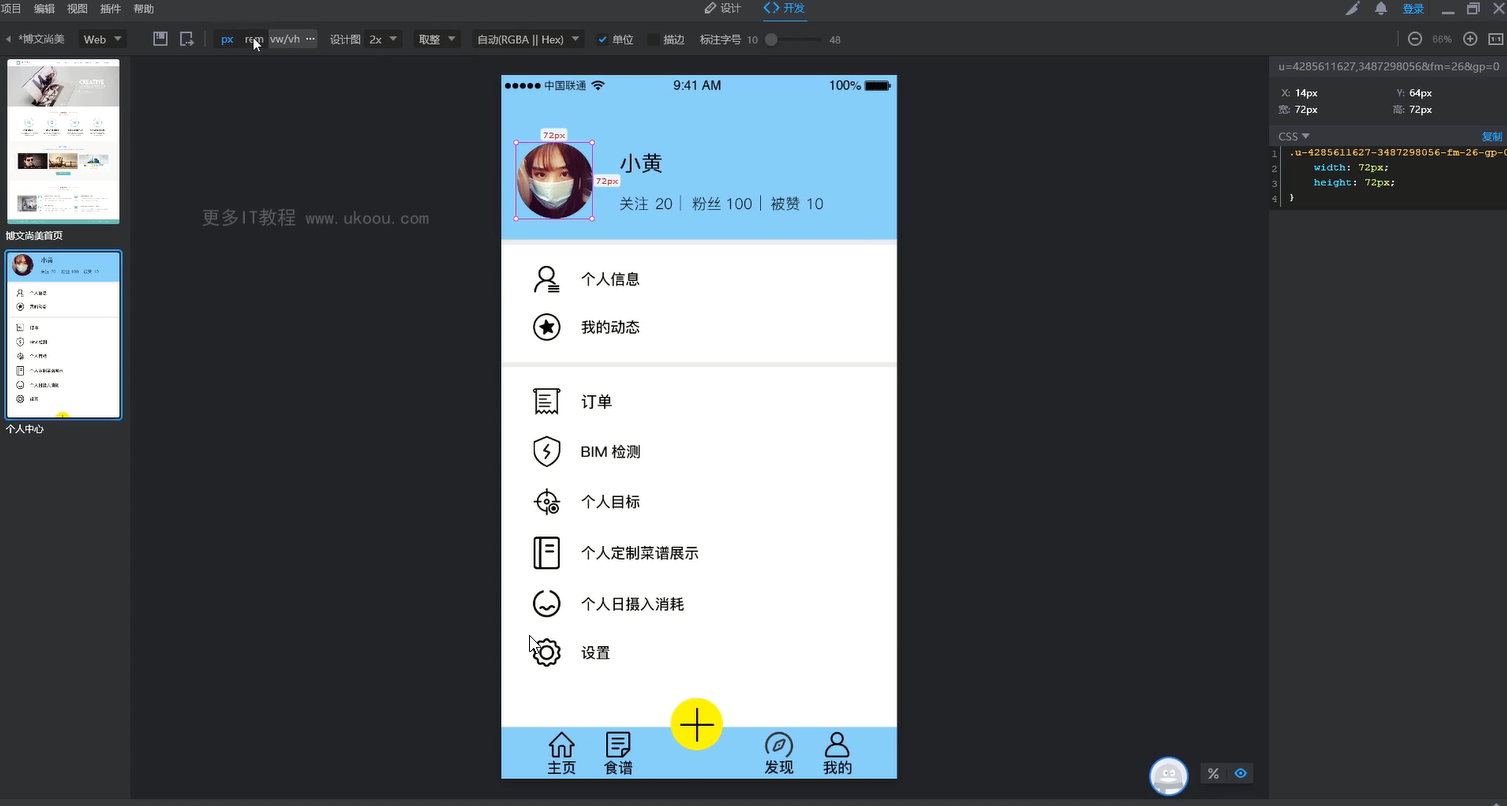
所以前端在量取尺寸的时候,需要除以2,才能适配页面中的CSS逻辑像素值。好在现代UI工具如:蓝湖、PxCook等都具备自动除以2的标注信息方式,后面视频有详细介绍。
那么如何让唯一的一种设计稿尺寸,去适配不同设备的像素呢?让页面元素能够等比进行放大缩小呢?可通过rem和vw这两种相对单位来进行实现,这也是本章的重点学习内容。
总结如下:
- 移动端UI设计稿尺寸大小为750px,即设备的物理像素,可使效果展示更加清晰。
- 移动端需要实现像素换算和设备适配,以及页面元素等比缩放布局等。
rem布局方案
移动端rem布局原理解析
em单位
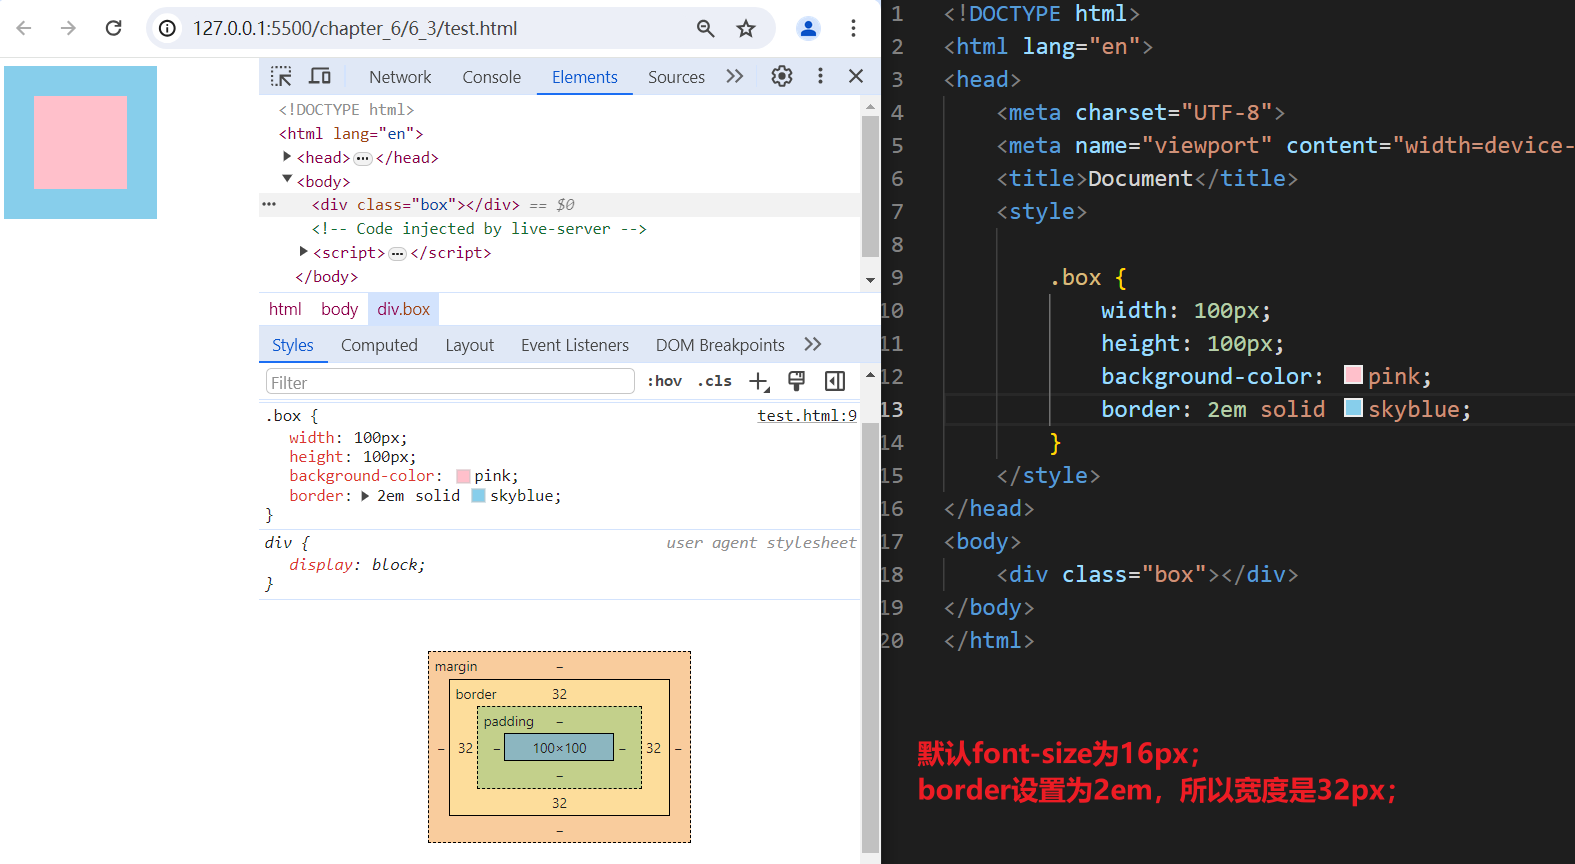
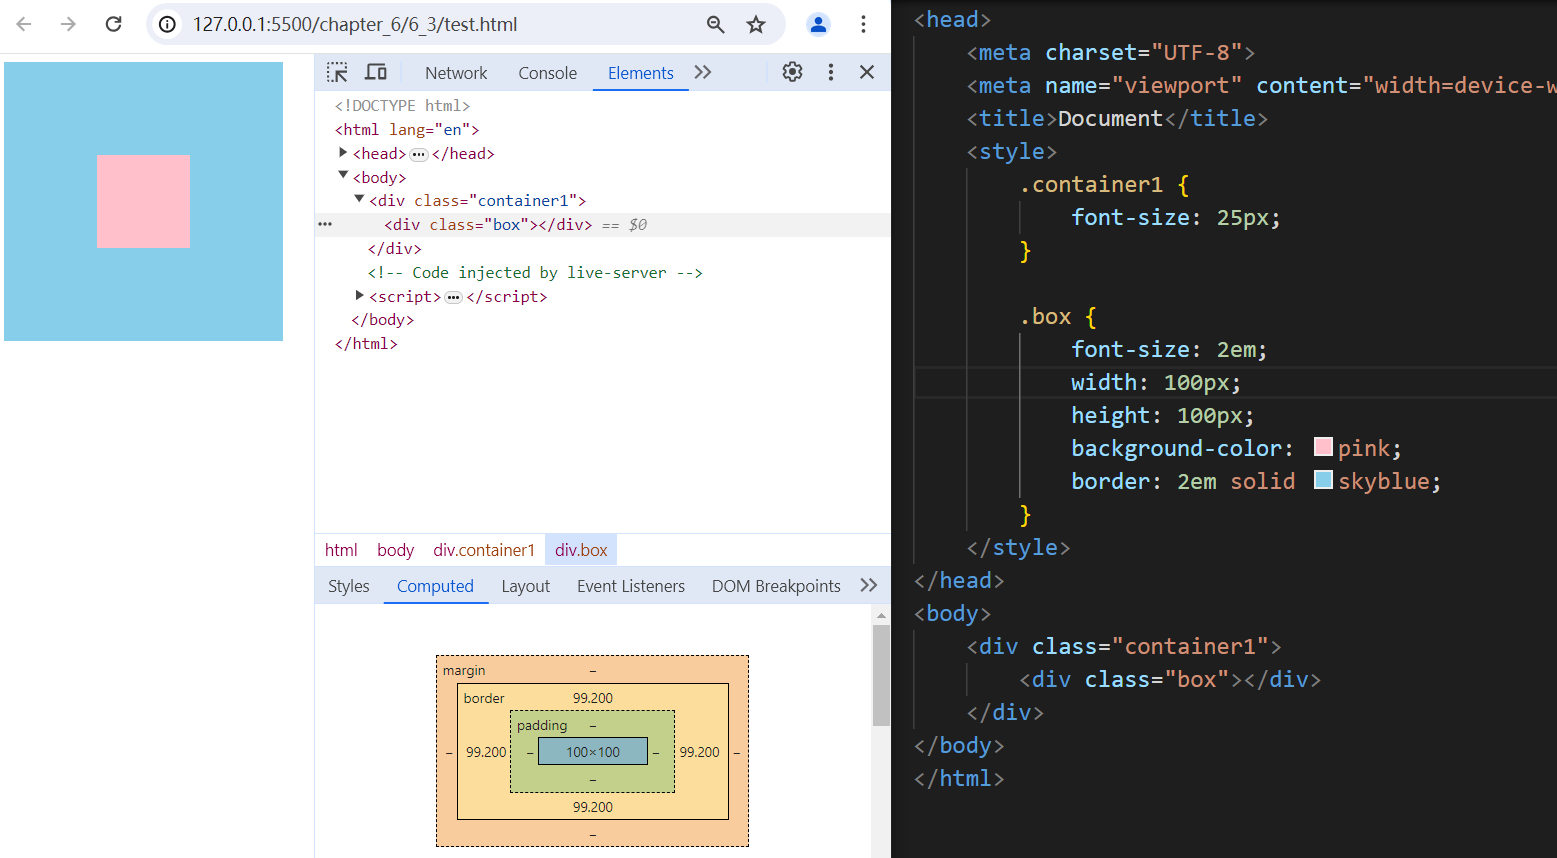
浏览器设置的默认font-size大小为16px,当边框设置为2em时,边框的大小为32px。(浏览器设置的默认字体大小为16px,可以改变)
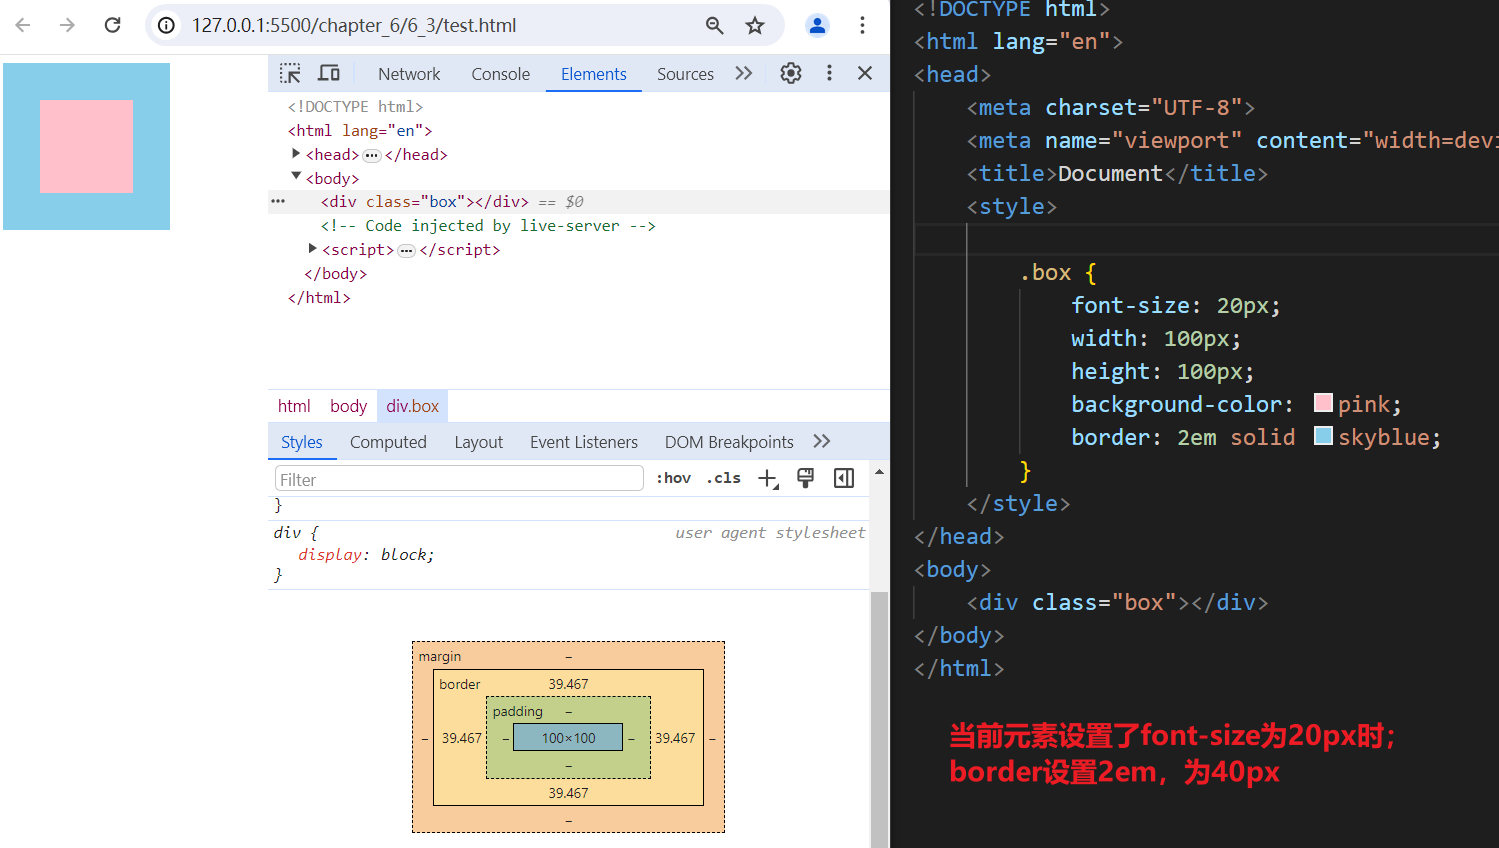
当前元素的font-size设置为20px时,当边框设置为2em时,边框的大小为40px。
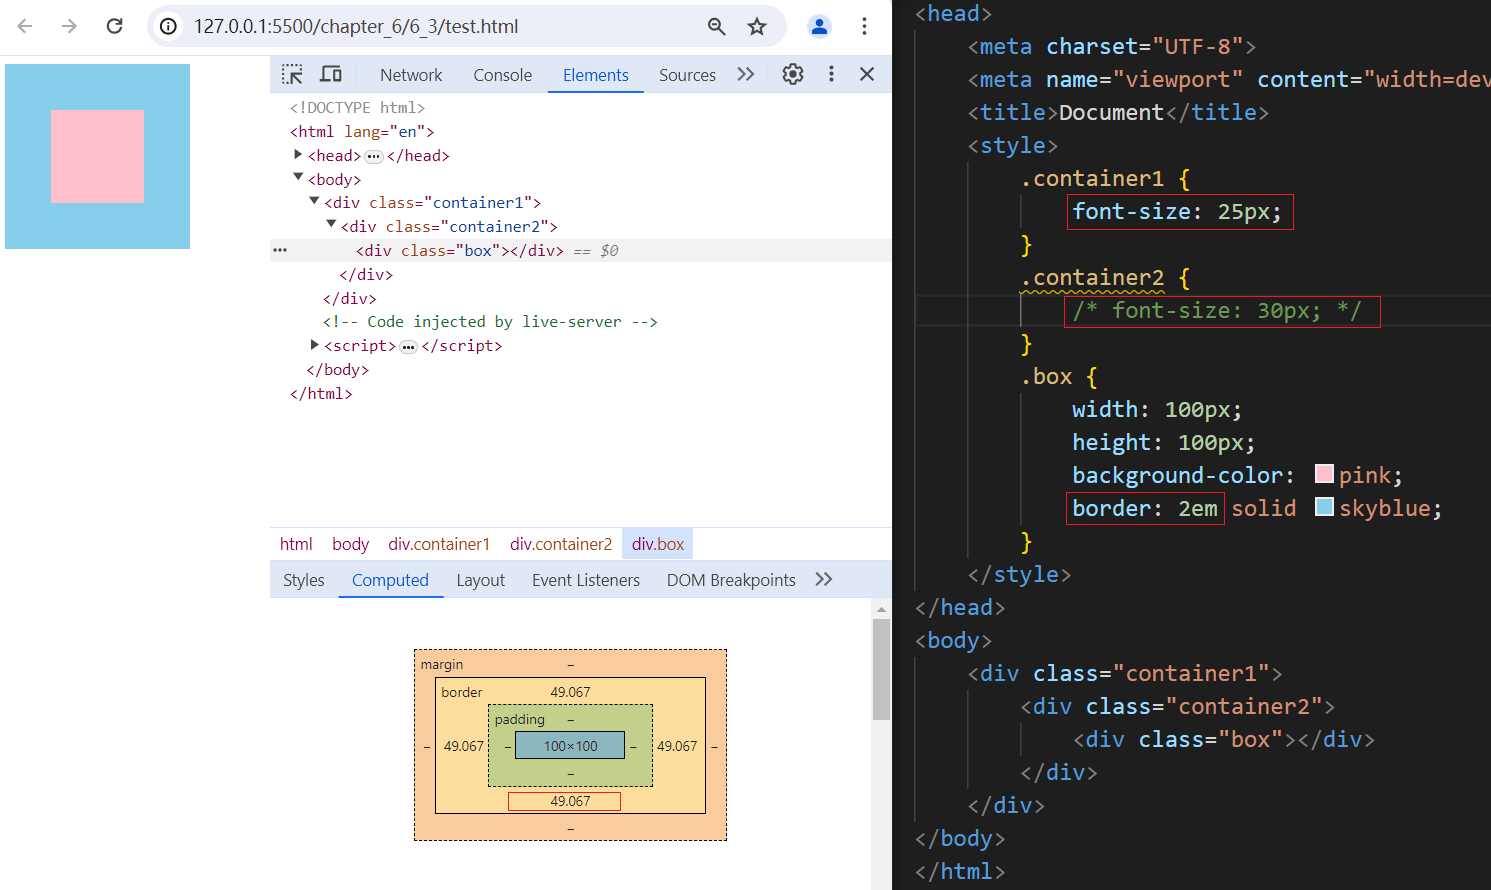
当前元素的font-size未设置时,会先从最近的元素开始继承font-size,再换算border的2em值
当font-size设置为2em时,对应的是相对其父元素font-size的大小(25px * 2 * 2 = 100 px)
rem单位
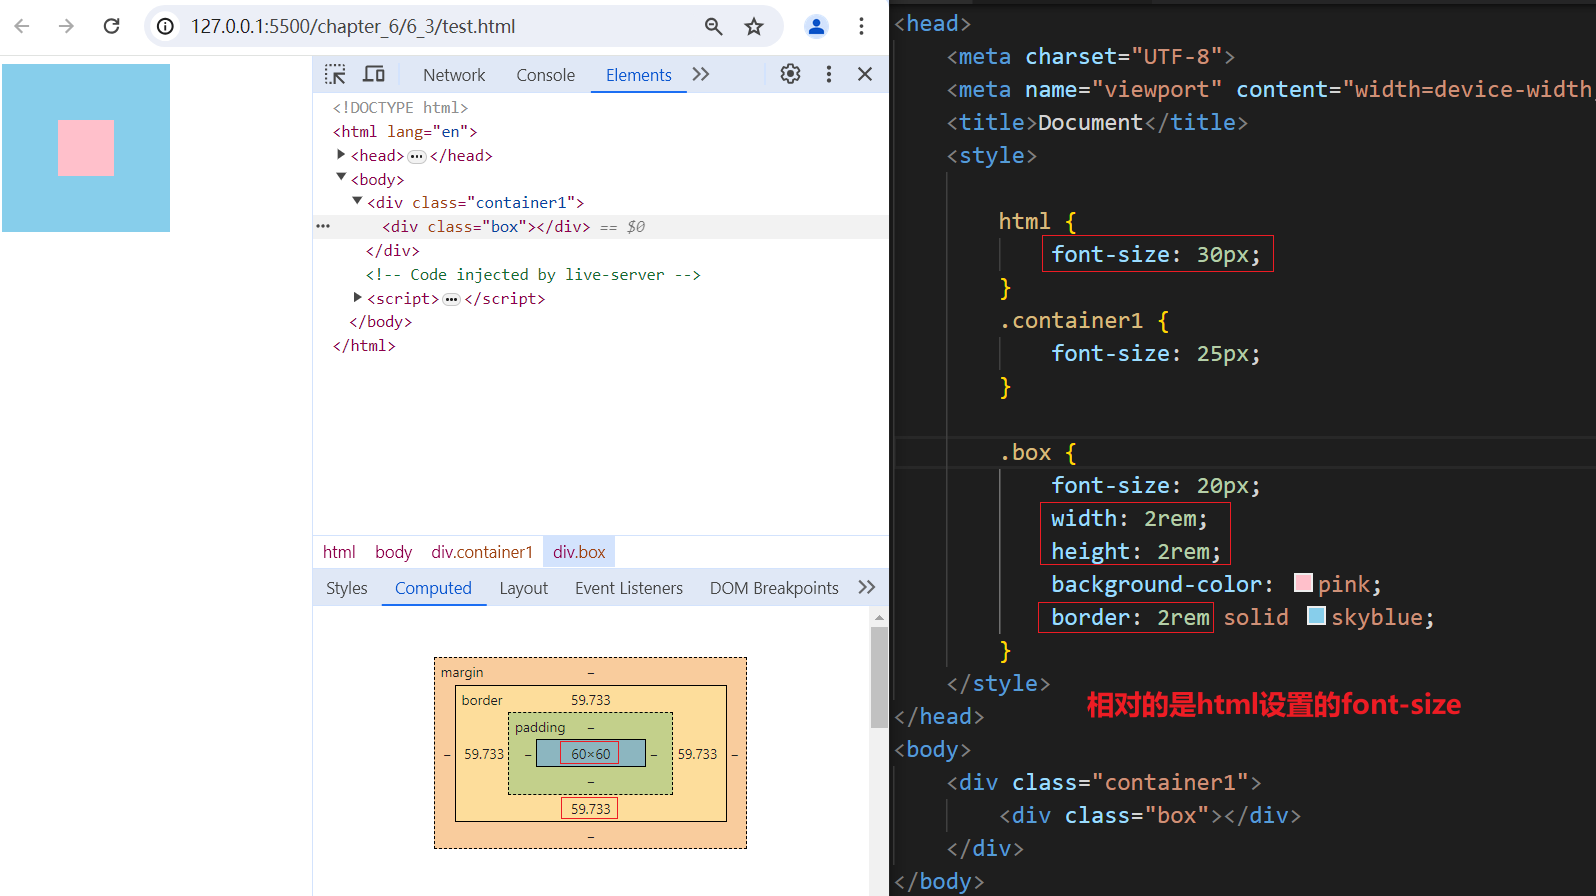
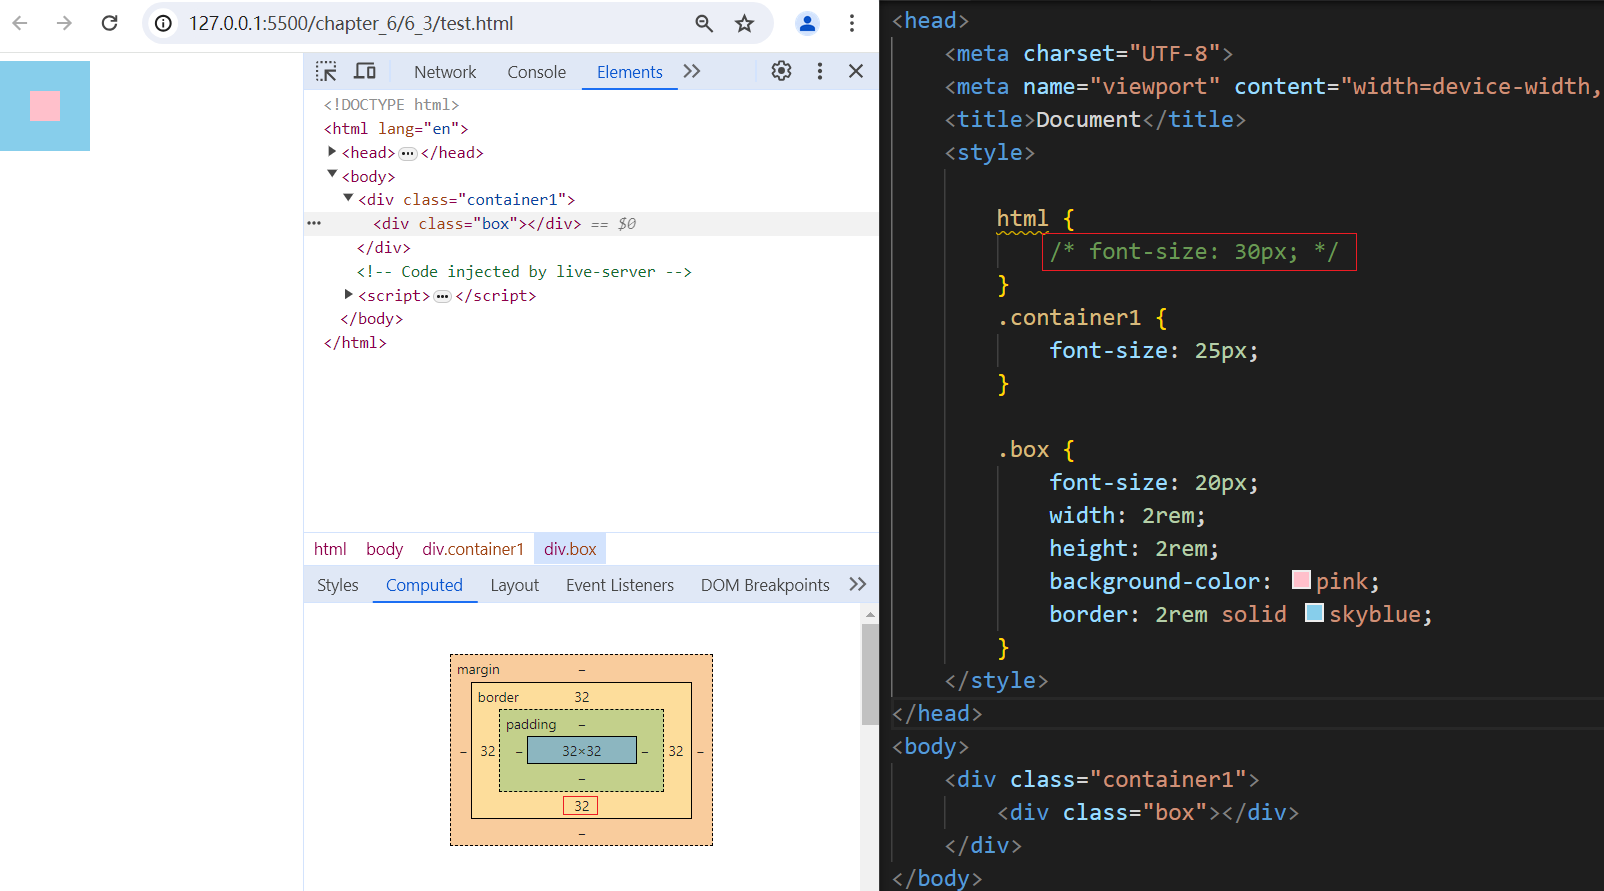
rem相对的是html元素所设置的font-size
如果html元素未设置font-size,默认为16px(可通过浏览器设置修改)
动态计算font-size
当使用rem来布局时,所有单位都写rem单位,那么只需要修改html的font-size大小,所有的单位会自动进行换算成px像素单位。
如果我们能动态修改html的font-size的大小,那么就能够让同一套代码适配不同的设备了。
举个例子:假设2个设备的宽度分别是300px(A设备)宽和600px(B设备)宽,我们写的代码假设10rem表示占满屏幕宽度,那么对于A设备来说,只需要调节html的font-size为30px就行了;对于B设备,只需要调节html的font-size为60px就行了。此时使用的是同一套代码,这套代码使用的是rem布局方式。
动态设置根元素字体大小
例如下方使用rem布局,动态设置根元素字体大小:
示例:如果是iphone6,则视口宽度是375px,
假设参照的设计图是750px,图上量的是100px,那么应该取50px,那么应该写多少rem呢?
首先10rem = 375px,所以 10 / 375 rem = 1px,所以10 / 375 rem * 50 = 50px,
所以 500 / 375 rem = 1.333rem = 50px,所以图上量的100px,应该写1.333rem长度
按上面适配好之后,写的是1.333rem,那就是 50 / 375 = 0.1333,占比宽度为0.1333
适配转换比例过程
假设现在换了平板ipad mini,它在开了理想视口的情况下:布局视口=设备横向独立像素值=768
此时设置的rootFontsize就是76.8,则1.333 * 76.8 像素
则在平板ipad mini占比宽度为 1.333 * 76.8 像素 / 768 = 0.1333,
这与上面在iphone6的占比宽度是一致的
<!DOCTYPE html>
<html lang="en">
    <head>
        <meta charset="UTF-8">

        <!-- 第一步:开启理想视口 -->
        <meta name="viewport" content="width=device-width">

        <title>Document</title>
        <style>
            * {
                margin: 0;
                padding: 0;
            }
            #demo {
                /* (未适配前的书写的代码)
                width: 100px;
                height: 100px;
                margin: 0 auto;
                margin-top: 15px;
                background-color: #a2bbee; */

                /* 第二步:换算成rem */
                width: 1.333rem;
                height: 100px; /* 假设不对高度作适配,因此可以直接写 */
                /* margin: 0 auto; */
                /* margin-top: 0.4rem; */
                background-color: #a2bbee;

                /* 对于不需要适配的情况,就不要使用rem了,而是使用px */
                /* border: 1px solid black; */

            }

            body {
                /* 假设在375px的屏幕中字体大小应当设置为16px,
                   如果不对字体作适配的话,那么在宽屏幕下16px就太小了。
                   10rem = 375px, 所以 10rem / 375 * 16 = 16px, 所以 0.4266667rem = 16px
                */
                font-size: 0.4266667rem;
            }

        </style>
    </head>
    <body>
        <div id="demo">好的,ok</div>
    </body>
    <script>
        function adapter() {

            // 获取布局视口宽度,因为开启了理想视口(因此第一步就需要开启理想视口),就会有这个等式关系:布局视口=设备横向独立像素值
            // (如果没有开启理想视口,那么默认就是980px)
            const dpWidth = document.documentElement.clientWidth // 因此这里拿到布局视口的宽度就是设备横向独立像素值
            // 计算根字体大小(这是根据比例关系计算而来)
            // 这样设置后,10rem 就是占满整个宽度
            const rootFontsize = dpWidth / 10
            // 设置根字体大小
            document.documentElement.style.fontSize = rootFontsize + 'px'
            console.log(dpWidth);

        }
        adapter()
        window.onresize = adapter

    </script>
</html>
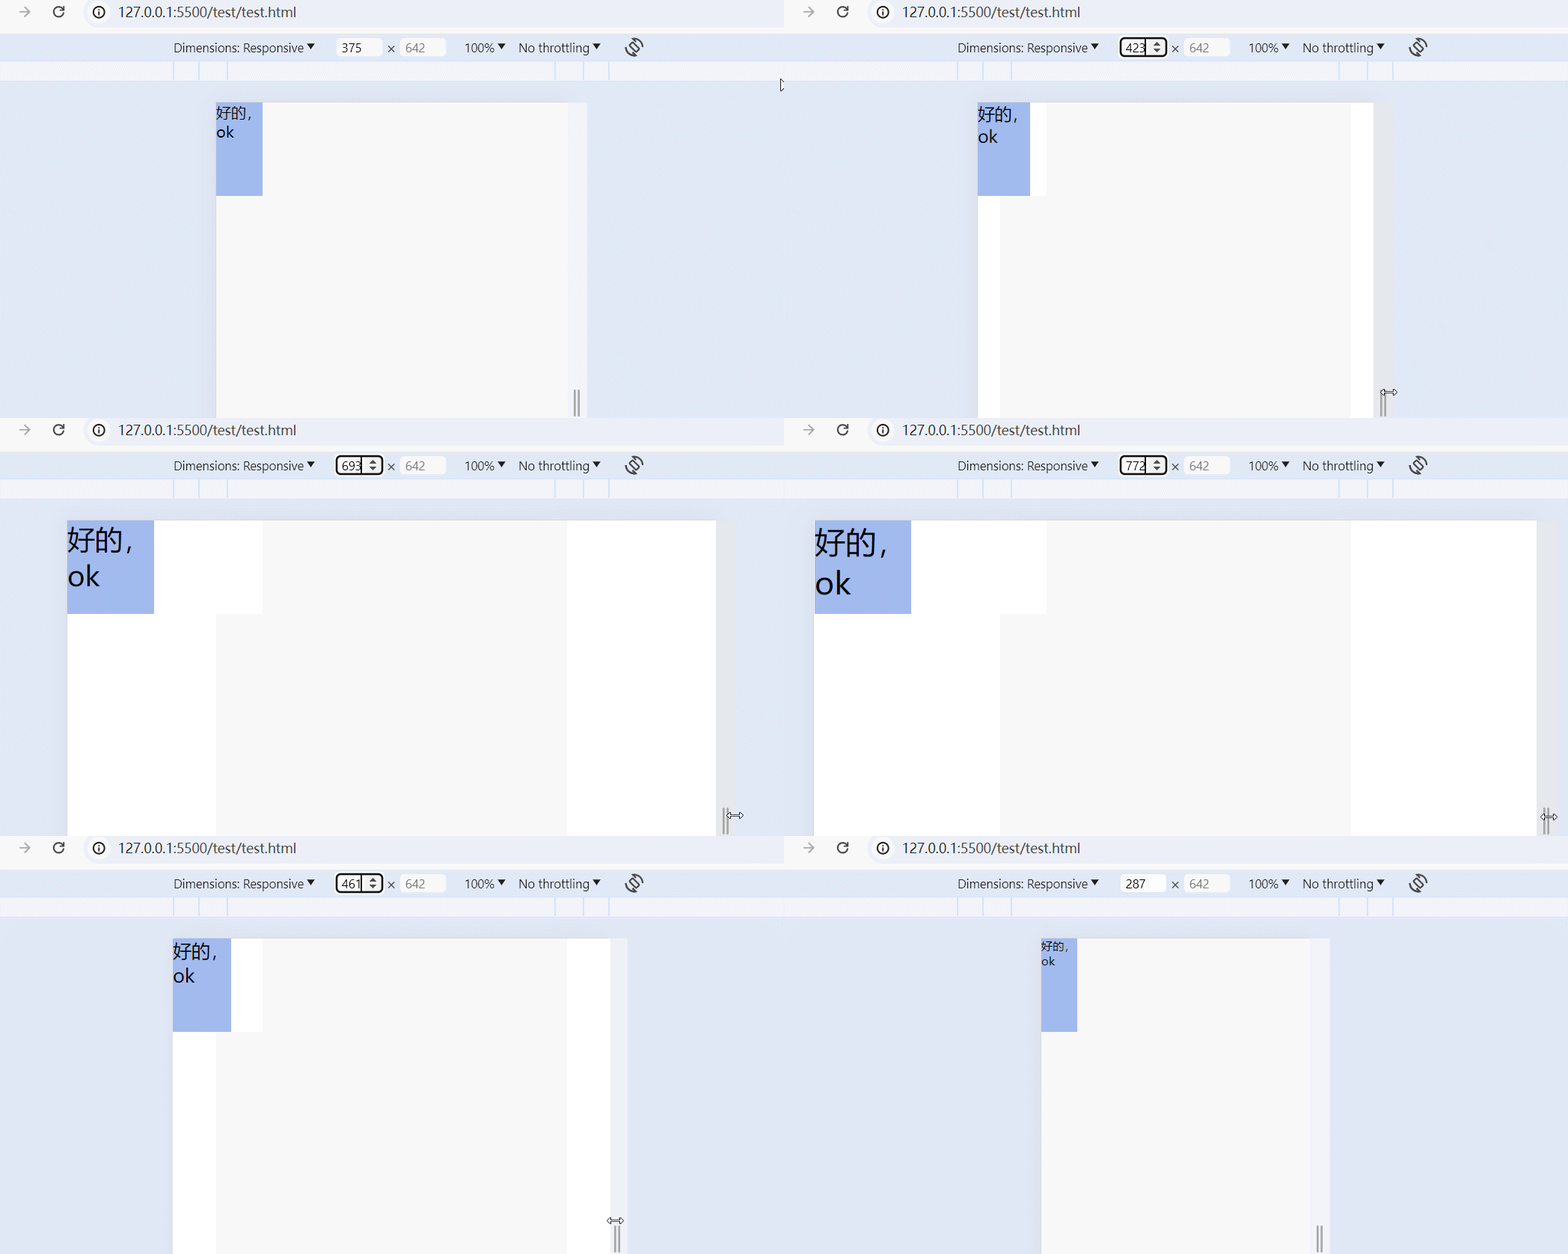
(注:只观察宽度和字体在宽度上所占的比例,因为高度未作适配)
利用vw动态设置字体大小
在iphone6中,屏幕像素宽度为375px。100vw表示设备宽度。如果在750的设计图上是200px,那么实际上应当是100px,要表示100px,则要用100vw / 375px * 100 = 26.66666vw,所以100px就等于 26.66666vw。
如果对html设置font-size为26.66667vw,而box宽和高设置为1rem(即26.66666vw),则宽和高为100px。
上面设定的结果:1rem = 100px
由于html的font-size设置为了26.66667vw,所以默认字体大小都是100px,这导致文字太大了,因此要将文字大小重置为默认的16px,就要设置为0.16rem)。
适配转换比例过程
- 假设现在换了平板ipad mini,它在开了理想视口的情况下:布局视口=设备横向独立像素值=768
- 即可推出 100vw = 768px,则根元素字体大小相当于 26.666667vw = 768px / 100 * 26.66667,又因为在当前ipad mini中,仍然有:1rem = 26.666667vw ,所以1rem = 768px / 100 * 26.66667。那么在ipad mini中,1rem占整个宽度比为:0.2666667。
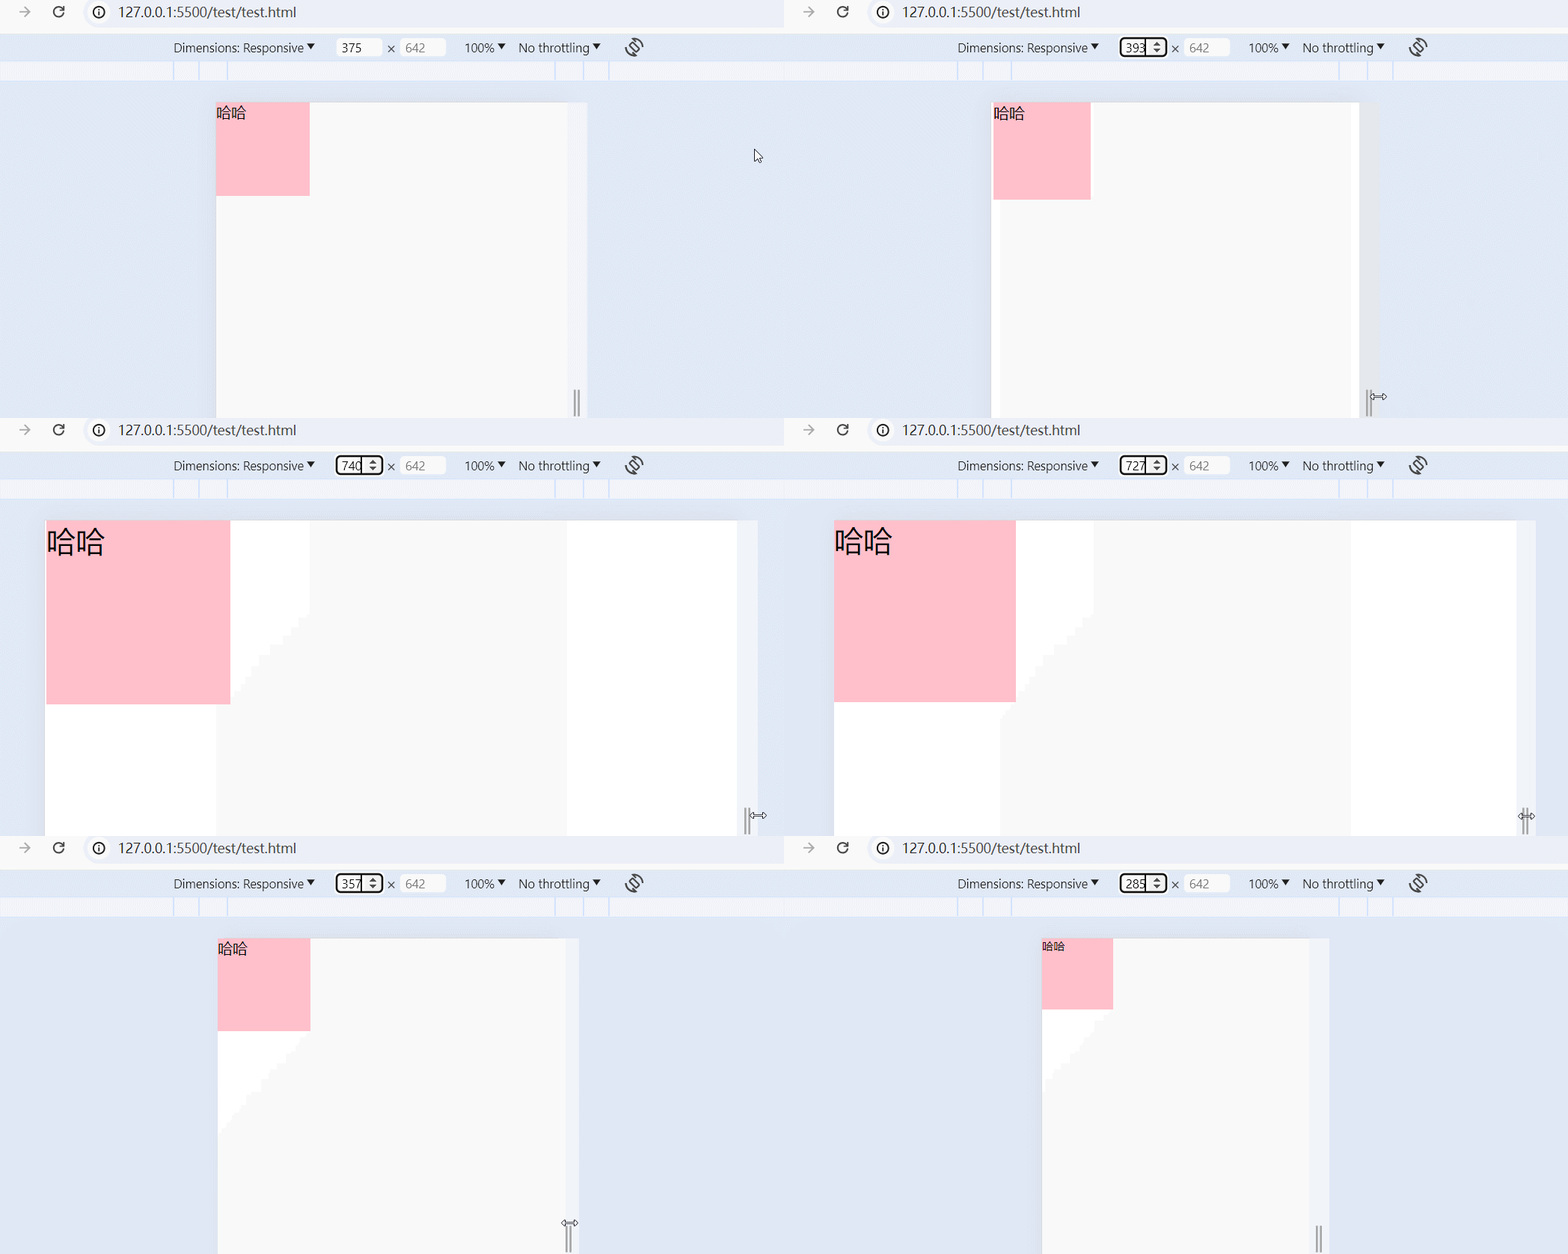
- 而原来在375px下的1rem 是 100px,它占100 / 375 = 0.2666667,这与ipad mini中的计算是一致的,也就是达到了等比例缩放的效果。
相比于上面使用动态设置根元素字体大小的方法而言,这里并不需要监听窗口大小变化,即可自动实现等比缩放。
<!DOCTYPE html>
<html lang="en">
<head>
    <meta charset="UTF-8">
    <meta http-equiv="X-UA-Compatible" content="IE=edge">
    <meta name="viewport" content="width=device-width, initial-scale=1.0">
    <title>Document</title>
    <style>
        *{
            margin:0;
            padding:0;
        }
        html{
            /* font-size: 100vw; */   /* 在iphone6 -> 375px的视口宽度 */
            font-size: 26.666667vw;   /* 在iphone6 -> 100px 对应 26.666667vw */
        }
        body{
              /* rem布局一定要在body重置font-size大小,这里重置为16px */
              font-size: 0.16rem;
        }
        .box{
            width: 1rem;   /* 页面可视区分成了100vw和100vh */
            height: 1rem;
            background: pink;
        }
    </style>
</head>
<body>
    <div class="box">哈哈</div>
</body>
</html>
(注:可以看出比例是一致的)
测量rem数值及插件使用
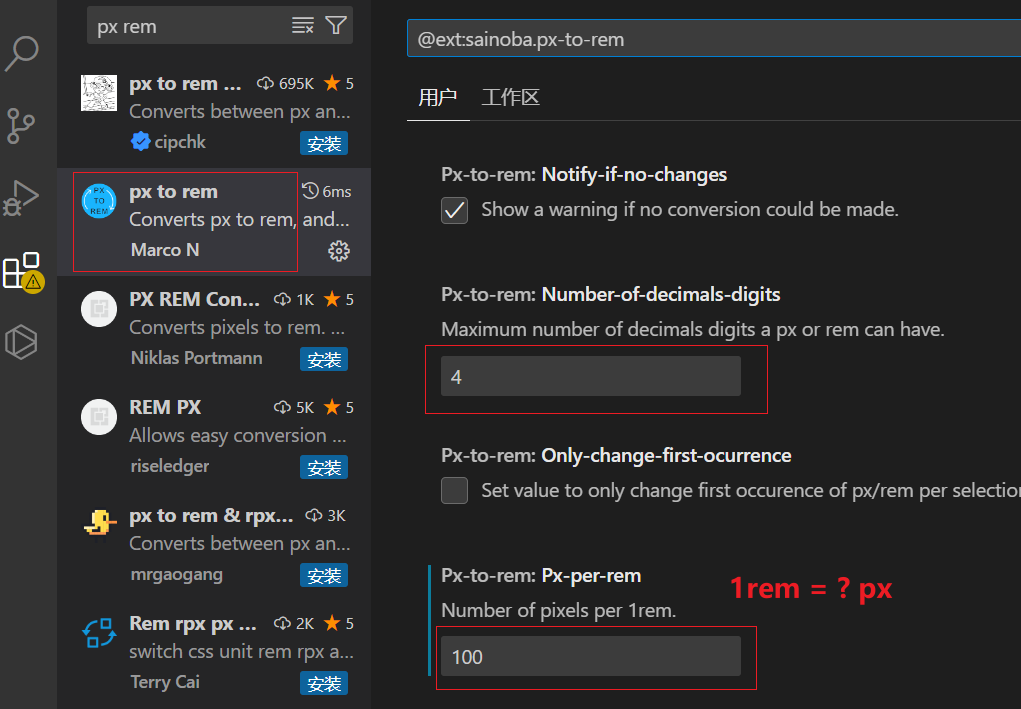
vsCode工具中的 px to rem 插件
这里使用《利用vw动态设置字体大小》中的计算逻辑。
1、安装插件
2、使用方法
<!DOCTYPE html>
<html lang="en">
<head>
    <meta charset="UTF-8">
    <meta name="viewport" content="width=device-width, initial-scale=1.0">
    <title>Document</title>
    <style>
        html {
            /* 手动加上 */
            font-size: 26.6666667vw;
        }
        body {
            /* rem布局一定要在body重置font-size大小 */
            font-size: 0.16rem;
        }
        .box {
            /*
            选中样式, alt + z 快捷键, 即可自动转换
            height: 144px;
            width: 144px;
            (注意:如果设计稿是750px来规划的话,
                   那计算在iphone6的375px宽的屏幕上时,量取的宽度应当要除以2,
                   再使用alt + z作转换)
            */
            height: 1.44rem;
            width: 1.44rem;

            background-color: red;
        }
    </style>
</head>
<body>
    <div class="box"></div>
</body>
</html>
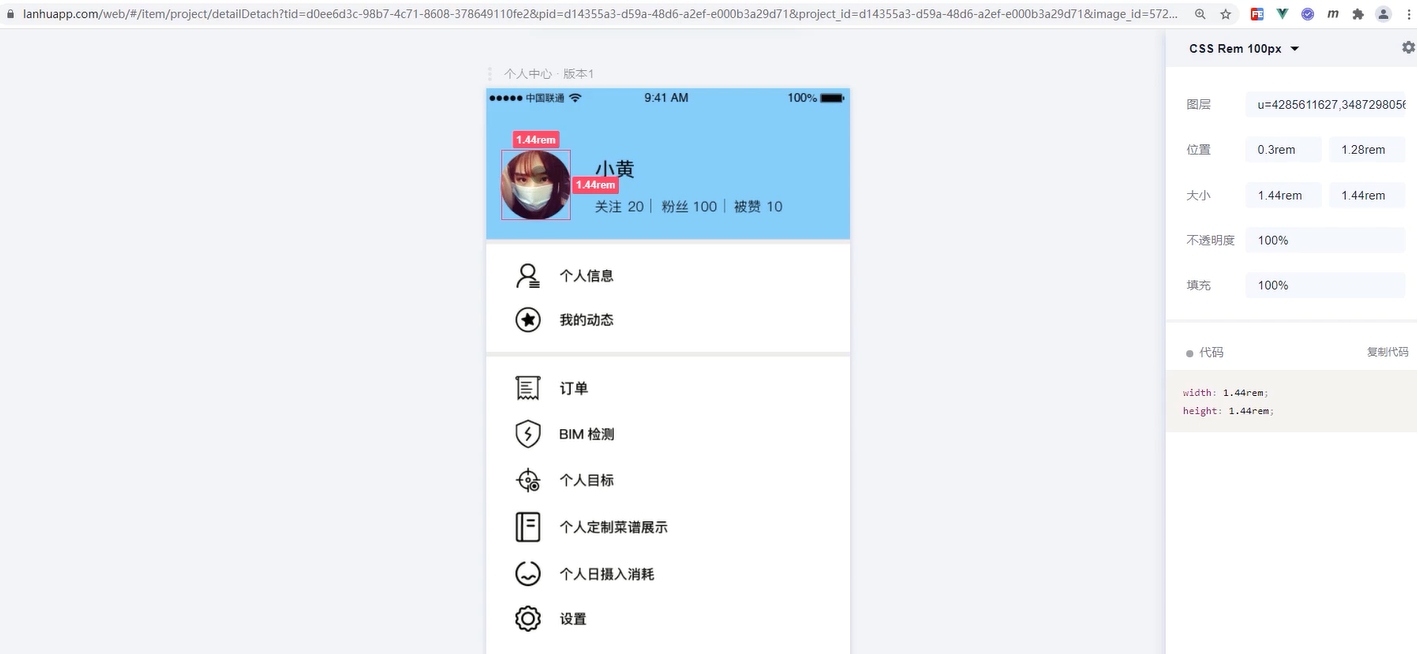
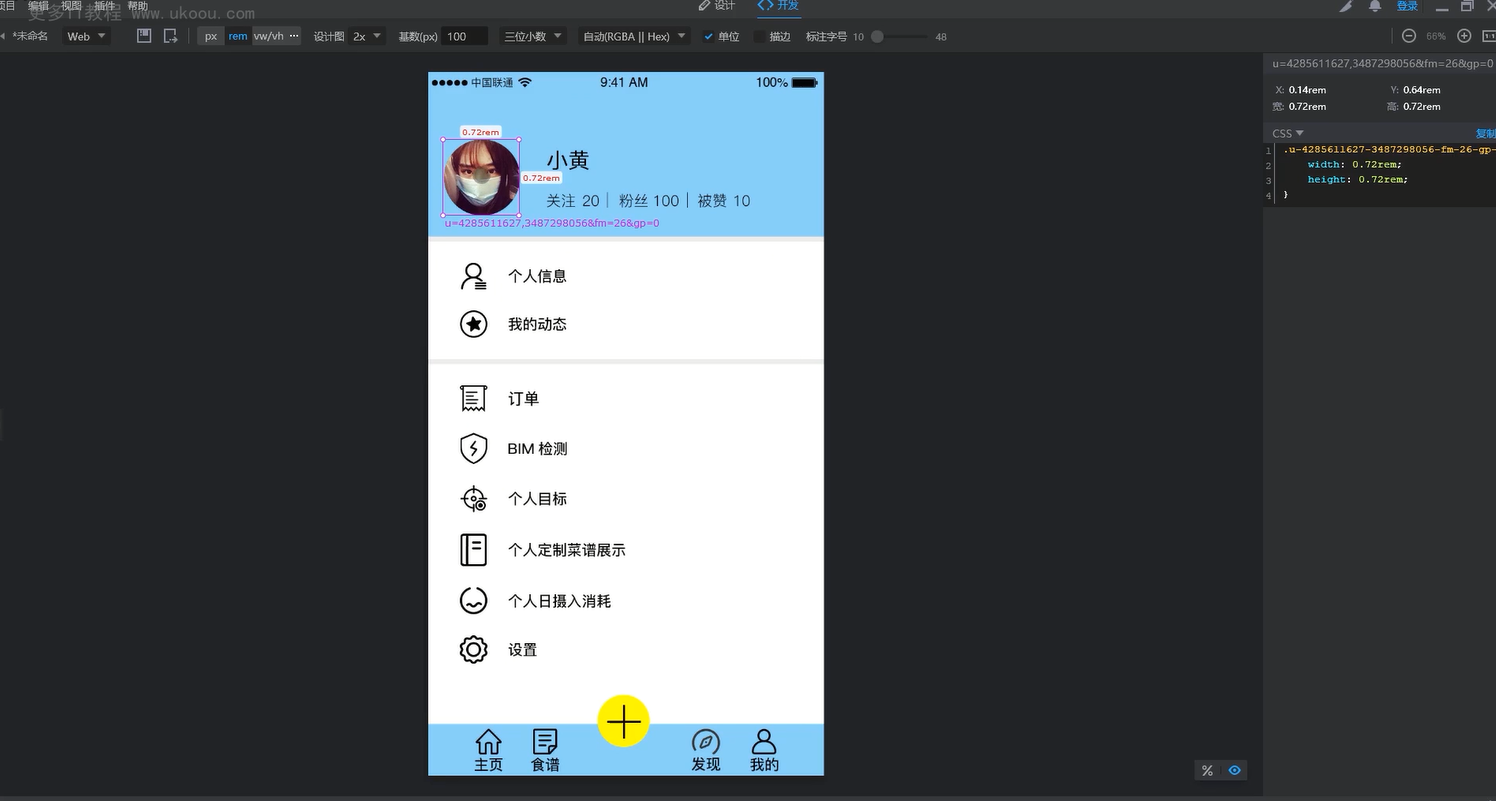
利用蓝湖、PxCook,获取rem数值
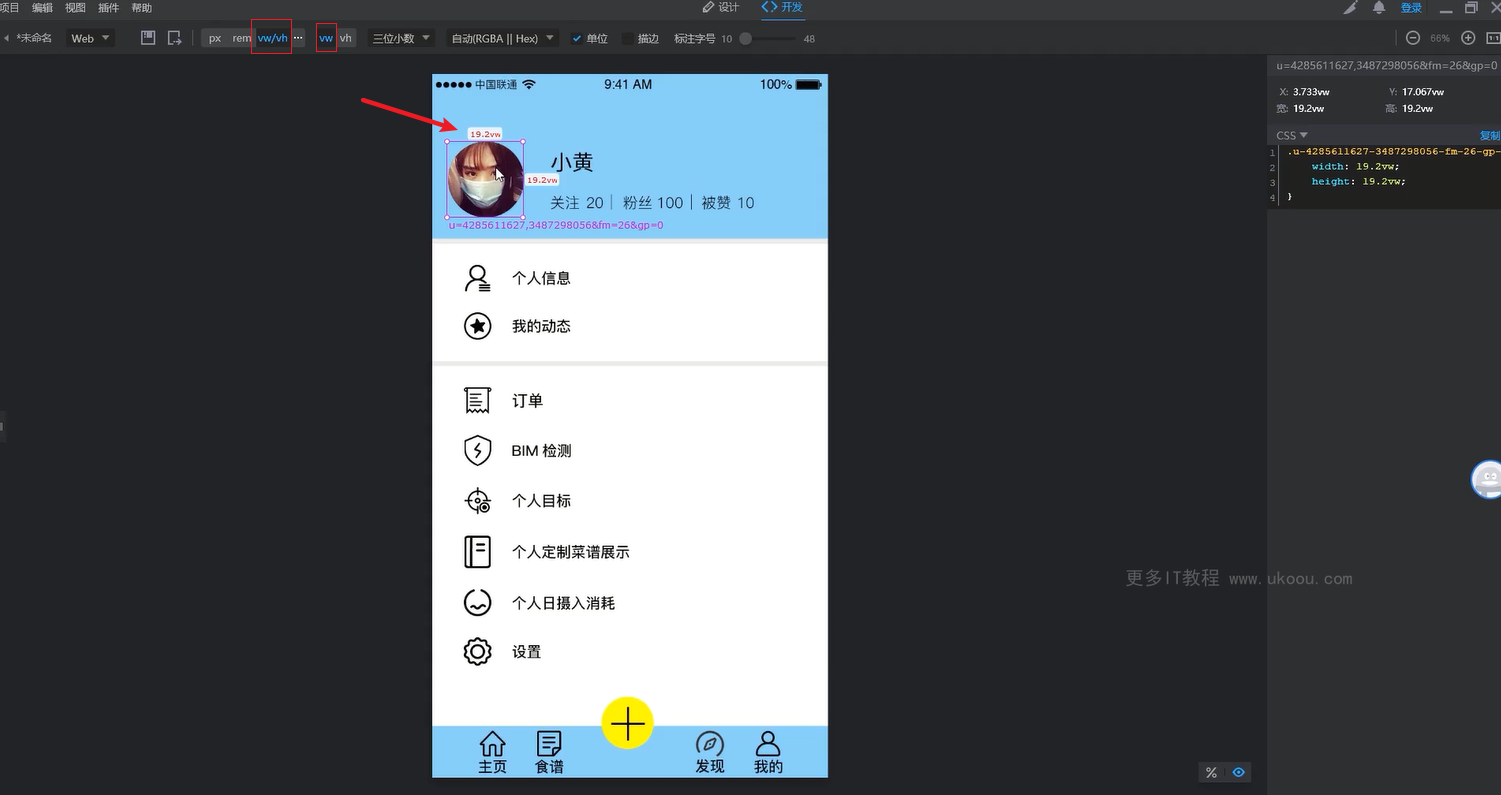
pxCook是最方便的,可以直接显示结果(直接进行rem单位的测量,pxcook可以自动做到物理像素转逻辑像素的处理)
rem综合案例:网易移动端
步骤
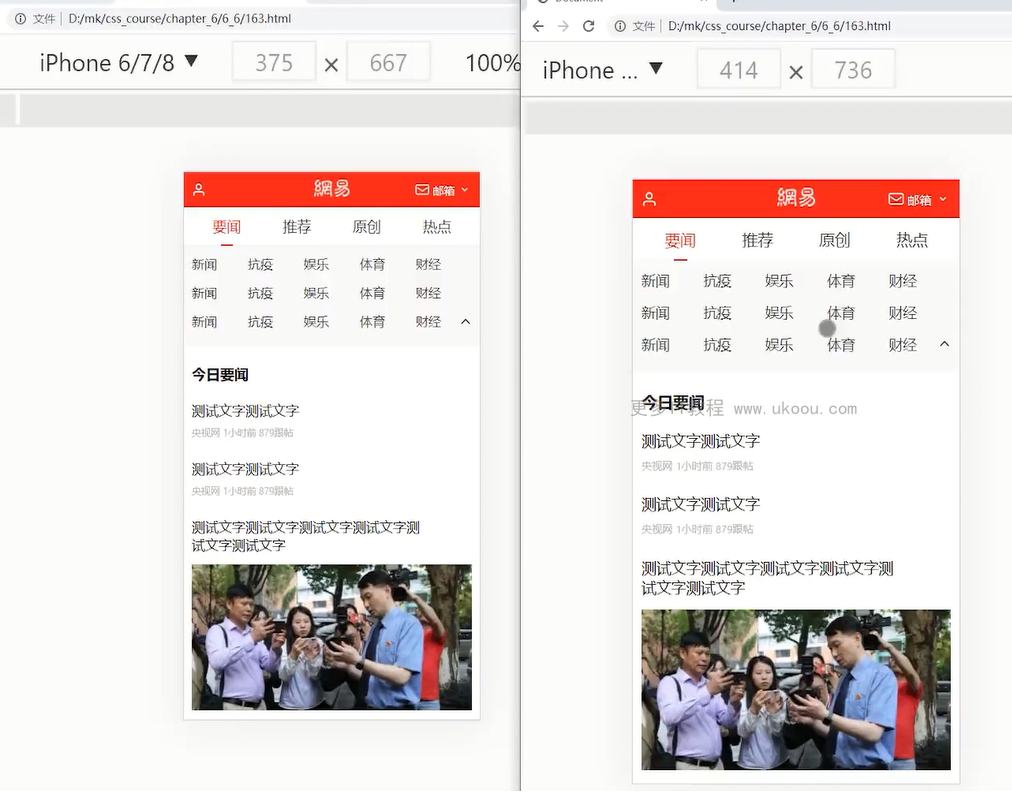
按宽750的设计稿,适配375px的屏幕宽度。所以量取的尺寸除以2,先写px单位。
设置html的font-size为:font-size: 26.666667vw;来实现1rem=100px;(理解:100vw = 375px,推导出100vw / 375 = 1px,所以100px = 100 * 100vw / 375 = 26.666667vw)
设置body的font-size为:font-size:0.16rem;来重置body字体大小;
现在为止,1rem 就代表 100px,如果750宽的设计稿的宽度量出来是100px,那么应当取50px,然后换算成rem,就是0.5rem。
这样的话,每次量完,还得自己计算下,比较繁琐。所以可以先自己使用px单位完成布局。然后使用vsCode工具的px to rem插件,全选样式,alt + z自动转换单位;
效果如下,实现了不同设备下的等比缩放。
<!DOCTYPE html>
<html lang="en">
    <head>
        <meta charset="UTF-8">
        <meta http-equiv="X-UA-Compatible" content="IE=edge">
        <meta name="viewport" content="width=device-width, initial-scale=1.0">
        <title>Document</title>
        <link rel="stylesheet" href="./iconfont/iconfont.css">
        <link rel="stylesheet" href="./css/reset.css">
        <style>
            html{
                font-size:26.666667vw;
            }
            body{
                font-size: 0.16rem;
            }
            a{
                color: #34372e;
            }
            .head{
                height: 0.43rem;
                background: #ef1b1a;
                color: white;
                display: flex;
                align-items: center;
                justify-content: space-between;
                padding: 0 0.1rem;
            }
            .head i {
                font-size: 0.18rem;
            }
            .head-user, .head-email{
                width: 25%;
                font-size: 0.14rem;
            }
            .head-email{
                text-align: right;
            }
            .head-logo{
                width: 50%;
                text-align: center;
            }
            .head-logo img{
                height: 0.21rem;
            }

            .nav{
                height: 0.46rem;
                border-bottom: 0.005rem #ededed solid;
                padding:0 0.1rem;
                display: flex;
                align-items: center;
                font-size: 0.18rem;
            }
            .nav li{
                flex-grow: 1;
                text-align: center;
                position: relative;
            }
            .nav li.active a{
                color: #ef191b;
            }
            .nav li.active::after{
                content: "";
                position: absolute;
                left:50%;
                bottom:-0.12rem;
                margin-left: -0.07rem;
                width: 0.15rem;
                height: 0.02rem;
                background: #ef191b;
            }
            .nav-sub{
                padding: 0.11rem 0.1rem 0.07rem 0.1rem;
                background: #f8f8f8;
                position: relative;
            }
            .nav-sub-list{
                display: grid;
                grid-template-columns: repeat(5, 1fr);
                grid-auto-rows: 0.35rem;
            }
            .nav-sub__closed{
                height: 0.7rem;
                overflow: hidden;
            }
            .nav-sub__closed + .nav-sub-arrow{
                transform: rotate(0);
            }
            .nav-sub-arrow{
                position: absolute;
                right: 0.1rem;
                bottom: 0.2rem;
                transform: rotate(180deg);
            }
            .news{
                padding: 0 0.1rem;
            }
            .news-title{
                font-size: 0.18rem;
                line-height: 0.66rem;
            }
            .news-item{
                margin-bottom: 0.25rem;
            }
            .news-item-title{
                width: 2.95rem;
                line-height: 0.22rem;
                font-size: 0.17rem;
                margin-bottom: 0.08rem;
                font-weight: 400;
            }
            .news-item-info{
                font-size: 0.12rem;
                color: #b3b4b6;
            }
            .news-item-img img{
                width: 100%;
                margin-top: 0.05rem;
                margin-bottom: 0.09rem;
            }

            .news2-item{
                border-top: 0.005rem #f6f7f9 solid;
                padding: 0.1rem;
                display: flex;
            }
            .news2-item-content{
                flex-grow: 1;
                margin-right: 0.15rem;
            }
            .news2-item-title{
                line-height: 0.22rem;
                font-size: 0.17rem;
                margin-bottom: 0.08rem;
                font-weight: 400;
            }
            .news2-item-info{
                font-size: 0.12rem;
                color: #b3b4b6;
                display: flex;
                justify-content: space-between;
                align-items: center;
            }
            .news2-item-img{
                width: 1.17rem;
            }
            .news2-item-img img{
                width:100%;
                height:100%;
                object-fit: cover;
            }
            .app{
                color: #fb1515;
                border:0.005rem #fbbab8 solid;
                border-radius: 1rem;
                padding:0.02rem 0.05rem;
            }
        </style>
    </head>
    <body>
        <div class="head">
            <div class="head-user">
                <i class="iconfont icon-yonghu"></i>
            </div>
            <div class="head-logo">
                <img src="./img/logo.png" alt="">
            </div>
            <div class="head-email">
                <i class="iconfont icon-youxiang"></i>
                邮箱
                <i class="iconfont icon-jiantou"></i>
            </div>
        </div>
        <ul class="nav">
            <li class="active">
                <a href="#">要闻</a>
            </li>
            <li>
                <a href="#">推荐</a>
            </li>
            <li>
                <a href="#">原创</a>
            </li>
            <li>
                <a href="#">热点</a>
            </li>
        </ul>
        <div class="nav-sub">
            <ul class="nav-sub-list">
                <li>
                    <a href="#">新闻</a>
                </li>
                <li>
                    <a href="#">抗疫</a>
                </li>
                <li>
                    <a href="#">娱乐</a>
                </li>
                <li>
                    <a href="#">体育</a>
                </li>
                <li>
                    <a href="#">财经</a>
                </li>
                <li>
                    <a href="#">新闻</a>
                </li>
                <li>
                    <a href="#">抗疫</a>
                </li>
                <li>
                    <a href="#">娱乐</a>
                </li>
                <li>
                    <a href="#">体育</a>
                </li>
                <li>
                    <a href="#">财经</a>
                </li>
                <li>
                    <a href="#">新闻</a>
                </li>
                <li>
                    <a href="#">抗疫</a>
                </li>
                <li>
                    <a href="#">娱乐</a>
                </li>
                <li>
                    <a href="#">体育</a>
                </li>
                <li>
                    <a href="#">财经</a>
                </li>
            </ul>
            <div class="nav-sub-arrow">
                <i class="iconfont icon-down-arrow"></i>
            </div>
        </div>
        <div class="news">
            <h2 class="news-title">今日要闻</h2>
            <div class="news-item">
                <h3 class="news-item-title">测试文字测试文字</h3>
                <p class="news-item-info">央视网 1小时前 879跟帖</p>
            </div>
            <div class="news-item">
                <h3 class="news-item-title">测试文字测试文字</h3>
                <p class="news-item-info">央视网 1小时前 879跟帖</p>
            </div>
            <div class="news-item">
                <h3 class="news-item-title">测试文字测试文字测试文字测试文字测试文字测试文字</h3>
                <div class="news-item-img"><img src="./img/news.jpg" alt=""></div>
                <p class="news-item-info">央视网 1小时前 879跟帖</p>
            </div>
        </div>
        <div class="news2">
            <div class="news2-item">
                <div class="news2-item-content">
                    <h3 class="news2-item-title">测试文字测试文字</h3>
                    <p class="news2-item-info">
                        <span>上游新闻 2287跟贴</span>
                        <span class="app">打开APP</span>
                    </p>
                </div>
                <div class="news2-item-img">
                    <img src="./img/news2.jpg" alt="">
                </div>
            </div>
            <div class="news2-item">
                <div class="news2-item-content">
                    <h3 class="news2-item-title">测试文字测试文字</h3>
                    <p class="news2-item-info">
                        <span>上游新闻 2287跟贴</span>
                        <span class="app">打开APP</span>
                    </p>
                </div>
                <div class="news2-item-img">
                    <img src="./img/news3.jpg" alt="">
                </div>
            </div>
        </div>
    </body>
</html>
vw布局方案
-
vw单位,它是将设备的屏幕宽度分为100份。
-
如果是在375像素的屏幕宽度下,1vw就是3.75px。
-
如果是在414像素的屏幕宽度下,1vw就是4.14px
所以除了使用rem实现等比缩放,还可以使用vw布局方式,实现等比缩放。
等比缩放的步骤是这样的
-
对于750宽的设计图,在iphone6下,开启了理想视口时,宽度为375px。对于设计图上200px的宽,应当设置为100px,它应当占比宽度为:100px / 375px = 0.266667,而100vw是表示整个宽度,所以100px换算成vw单位就是26.6667vw。
-
基于上面换算之后,得到的代码,在ipad mini中,由于宽度也是100vw,因此,占比本来就是一致的,也就实现了等比例缩放。
-
这样看来,vw就直接可以做到在不同屏幕下的等比缩放
移动端vw布局及插件使用
vsCode工具中的 px-to-vw 插件
1、使用时,需要关闭px to rem插件
2、安装px-to-vw 插件,并启用
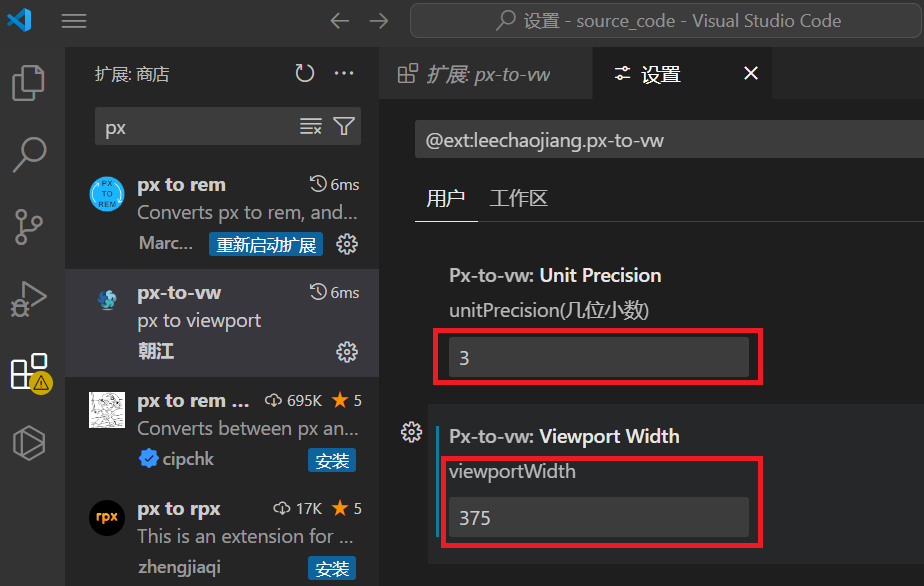
3、使用方法(将视口宽度设置为375px)
下面演示在视口宽度为375px时,对于750宽的设计图上200px的宽,该如何使用vw来表示。
由于设计图是750宽,当前视口宽度是375px,因此200px在代码中应当设置为100px。
当所有样式都设置好后,选中样式,alt + z,即可转换
<!DOCTYPE html>
<html lang="en">
    <head>

        <meta charset="UTF-8">
        <meta http-equiv="X-UA-Compatible" content="IE=edge">
        <meta name="viewport" content="width=device-width, initial-scale=1.0">

        <title>Document</title>

        <style>

            .box{

                width: 26.667vw;  /* 宽100px */
                height: 26.667vw; /* 高100px */
                background: pink;
            }

        </style>
    </head>

    <body>

        <div class="box"></div>

    </body>

</html>
pxcook
当如果有psd源文件,则可以使用你pxcook,直接查看数值。
vw综合案例:B站移动端
750宽的设计图
步骤
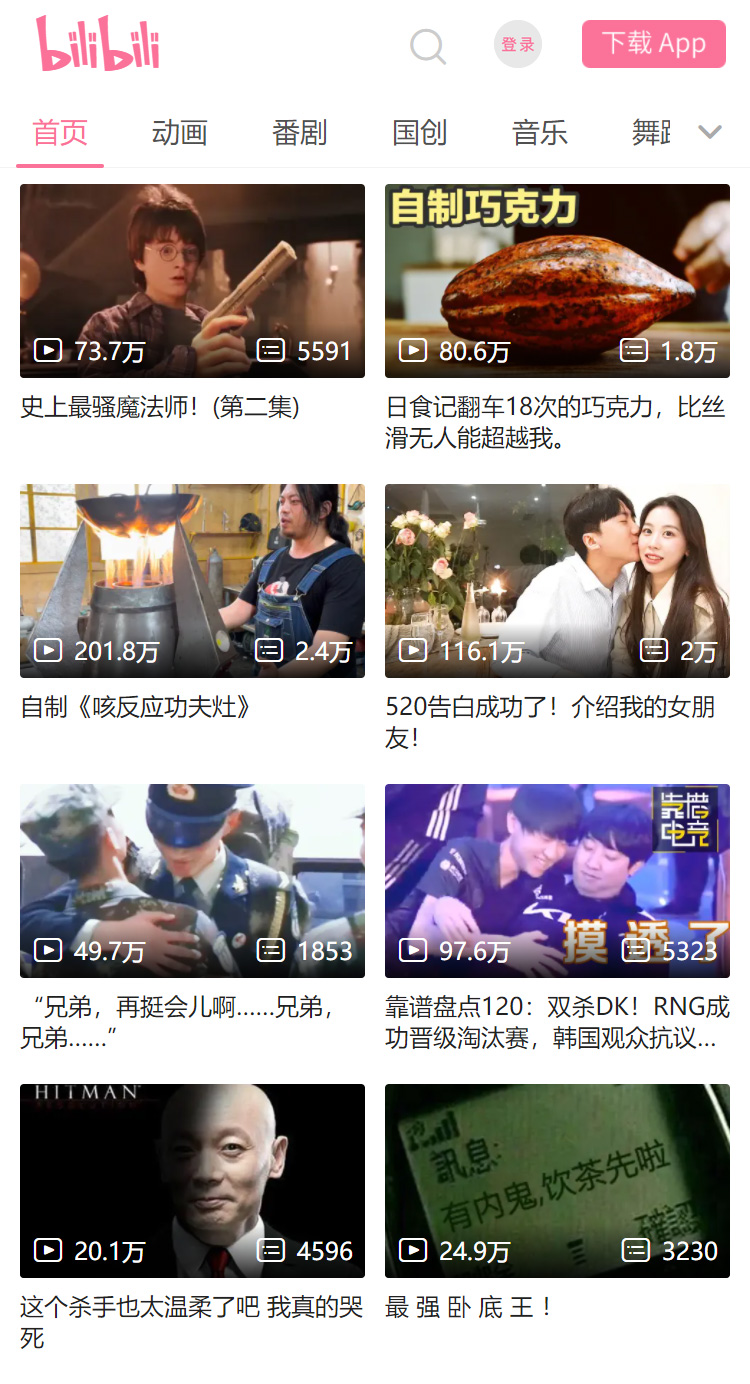
750宽的设计图上量取具体宽度,比如88px,然后宽度除以2,得到44px,这是iphone6理想视口375px宽度下的尺寸。直接写44px,全部写完之后,alt + z全部转换。
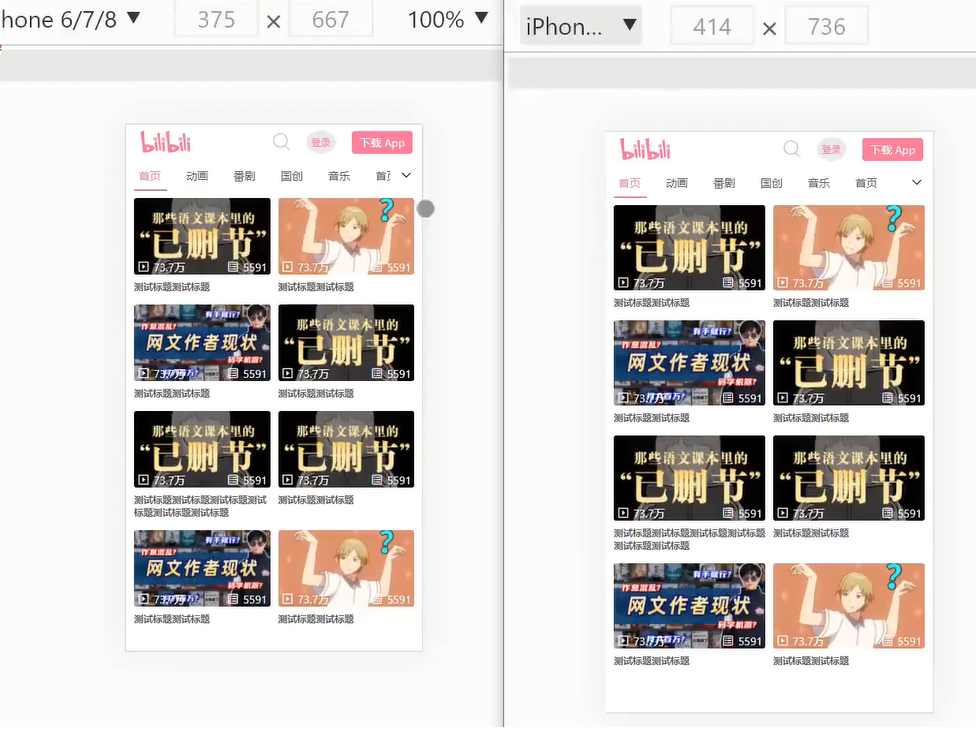
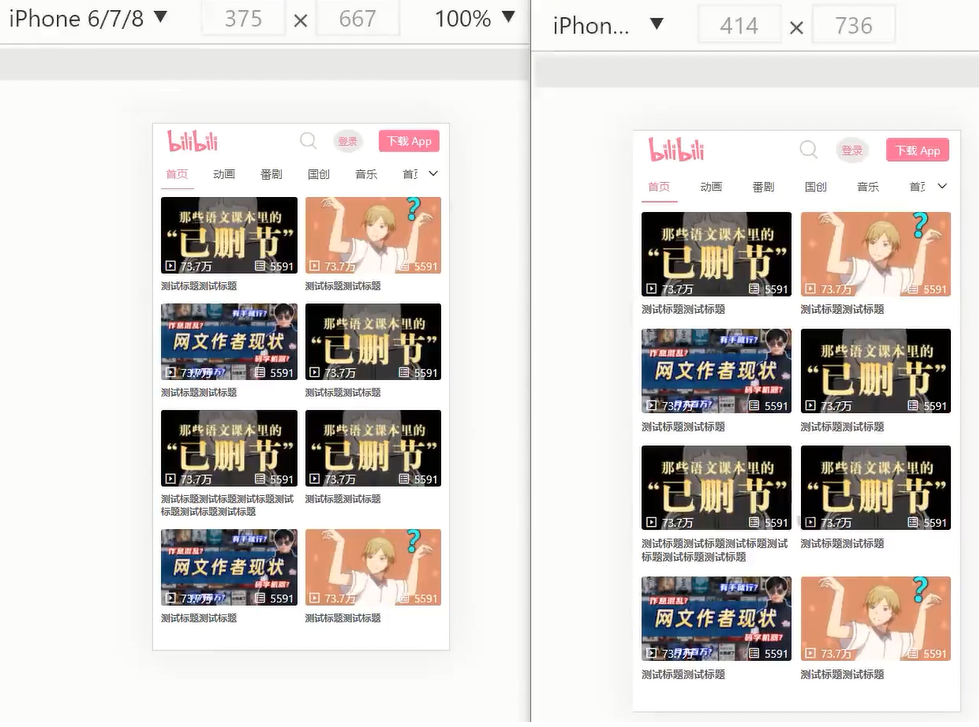
未转换前(注意到导航那里没有遮住首页这2个字)
转换后(注意到导航那里都遮住了首页这2个字,说明是等比例缩放的)
<!DOCTYPE html>
<html lang="en">
    <head>
        <meta charset="UTF-8">
        <meta http-equiv="X-UA-Compatible" content="IE=edge">
        <meta name="viewport" content="width=device-width, initial-scale=1.0">
        <title>Document</title>
        <link rel="stylesheet" href="./iconfont/iconfont.css">
        <link rel="stylesheet" href="./css/reset.css">
        <style>
            a{
                color: #4c514d;
            }
            .head{
                height: 11.733vw;
                display: flex;
                align-items: center;
                padding: 0 2.667vw;
            }
            .head-logo{
                margin-left: 2.133vw;
                margin-right: auto;
            }
            .head-logo i{
                font-size: 7.467vw;
                color: #f47296;
            }
            .head-search i{
                font-size: 5.867vw;
                color: #c9c9c9;
            }
            .head-login{
                margin-left: 5.333vw;
                background: #e8e8e8;
                font-size: 3.2vw;
                border-radius: 50%;
                padding: 1.867vw;
            }
            .head-login a{
                color: #f47296;
            }
            .head-app{
                margin-right: 0.533vw;
                margin-left: 5.333vw;
                background: #f47296;
                border-radius: 1.067vw;
                padding: 1.333vw 2.667vw;
            }
            .head-app a{
                color: #fffefc;
            }

            .nav{
                height: 10.667vw;
                border-bottom: 0.133vw solid #f3f3f3;
                padding: 0 2.667vw;
                position: relative;
            }
            .nav-list{
                height:100%;
                display: flex;
                align-items: center;
                overflow: hidden;
            }
            .nav-list li{
                width: 10.667vw;
                margin-right:5.333vw;
                flex-shrink: 0;
                text-align: center;
                position: relative;
            }
            .nav-list li.active a{
                color: #f47296;
            }
            .nav-list li.active::after{
                content: "";
                position: absolute;
                width: 11.733vw;
                height: 0.533vw;
                background: #f47296;
                bottom: -2.667vw;
                left: -0.533vw;
            }
            .nav-arrow{
                position: absolute;
                right: 0;
                top: 0;
                width: 10.667vw;
                height:100%;
                background: white;
                display: flex;
                align-items: center;
                justify-content: center;
            }

            .video{
                padding: 2.133vw 2.667vw;
                display: grid;
                grid-template-columns: 1fr 1fr;
                column-gap: 2.667vw;
            }
            .video-item-pic{
                display: grid;
            }
            .video-item-pic img{
                grid-area: 1/1/1/1;
                width:100%;
                height:100%;
                object-fit: cover;
                border-radius: 0.8vw;
            }
            .video-item-pic span{
                grid-area: 1/1/1/1;
                align-self: flex-end;
                color: white;
                display: flex;
                justify-content: space-between;
                align-items: center;
                padding: 0 0.533vw;
            }
            .video-item-pic i{
                margin-right: 1.333vw;
            }
            .video-item-title{
                margin-top: 1.867vw;
                margin-bottom: 4vw;
                font-size: 3.2vw;
                line-height: 4.267vw;
            }
        </style>
    </head>
    <body>
        <div class="head">
            <div class="head-logo">
                <i class="iconfont icon-BILIBILI_LOGO"></i>
            </div>
            <div class="head-search">
                <i class="iconfont icon-fangdajing"></i>
            </div>
            <div class="head-login">
                <a href="#">登录</a>
            </div>
            <div class="head-app">
                <a href="#">下载 App</a>
            </div>
        </div>
        <div class="nav">
            <ul class="nav-list">
                <li class="active">
                    <a href="#">首页</a>
                </li>
                <li>
                    <a href="#">动画</a>
                </li>
                <li>
                    <a href="#">番剧</a>
                </li>
                <li>
                    <a href="#">国创</a>
                </li>
                <li>
                    <a href="#">音乐</a>
                </li>
                <li>
                    <a href="#">首页</a>
                </li>
                <li>
                    <a href="#">动画</a>
                </li>
                <li>
                    <a href="#">番剧</a>
                </li>
                <li>
                    <a href="#">国创</a>
                </li>
                <li>
                    <a href="#">音乐</a>
                </li>
            </ul>
            <div class="nav-arrow">
                <i class="iconfont icon-arrow-bottom"></i>
            </div>
        </div>
        <ul class="video">
            <li class="video-item">
                <div class="video-item-pic">
                    <img src="./img/video1.jpg" alt="">
                    <span>
                        <span>
                            <i class="iconfont icon-703bofang-fangxing-xianxing"></i>
                            73.7万
                        </span>
                        <span>
                            <i class="iconfont icon-xinxi"></i>
                            5591
                        </span>
                    </span>
                </div>
                <h3 class="video-item-title">
                    <a href="#">测试标题测试标题</a>
                </h3>
            </li>
            ...
        </ul>
    </body>
</html>
第七章 响应式布局
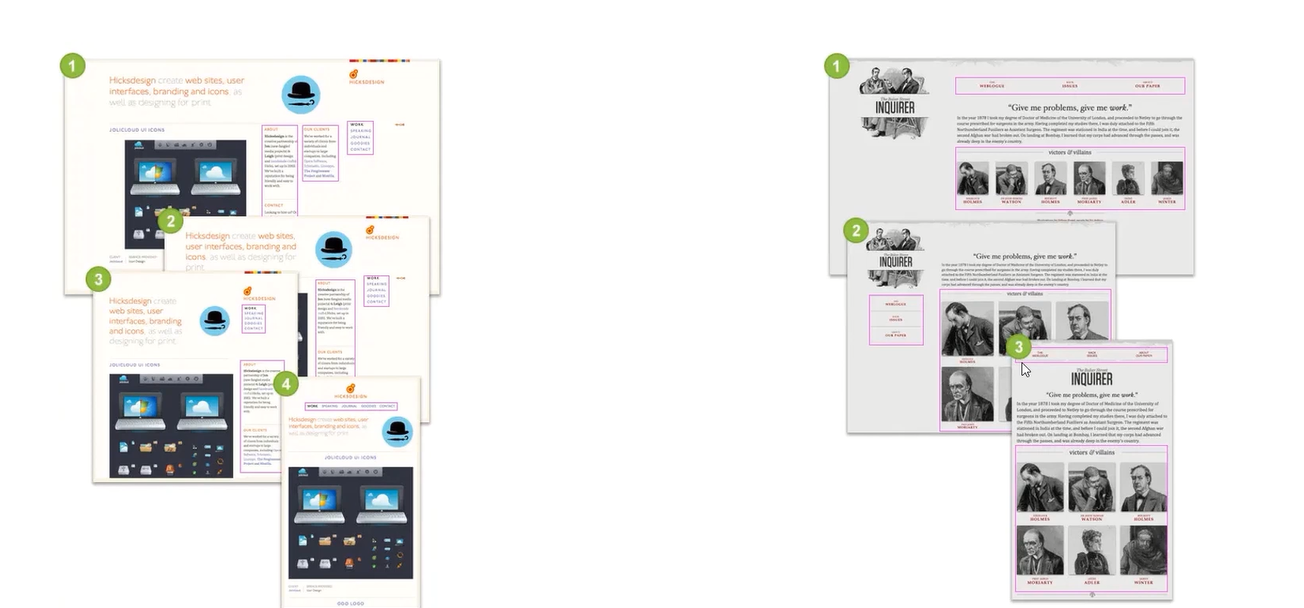
指网页能自动识别屏幕宽度、并做出相应调整的网页设计。
响应式布局可以为不同终端的用户提供更加舒适的界面和更好的用户体验
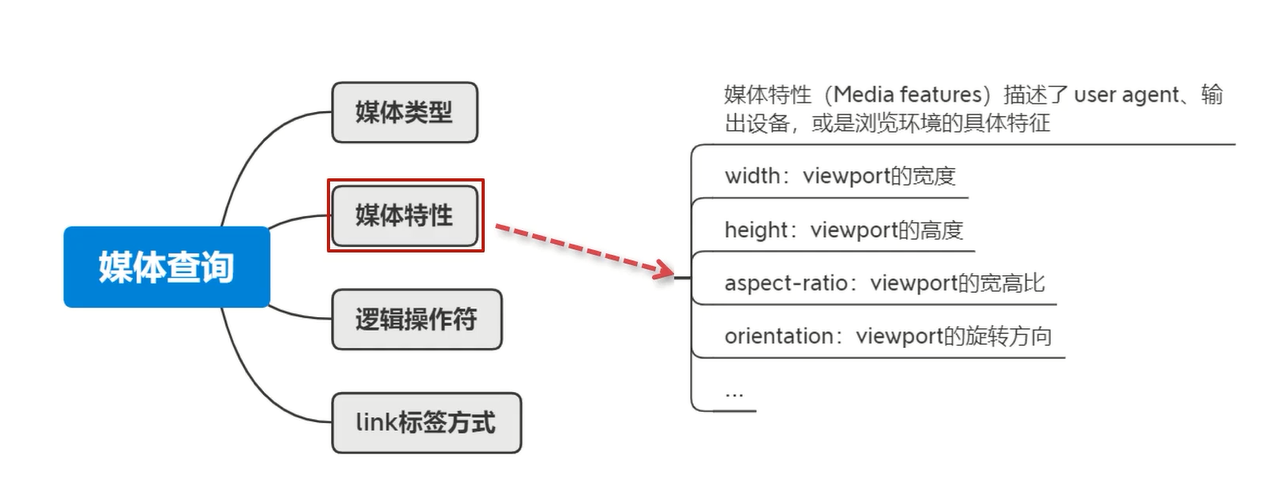
媒体查询语法详解
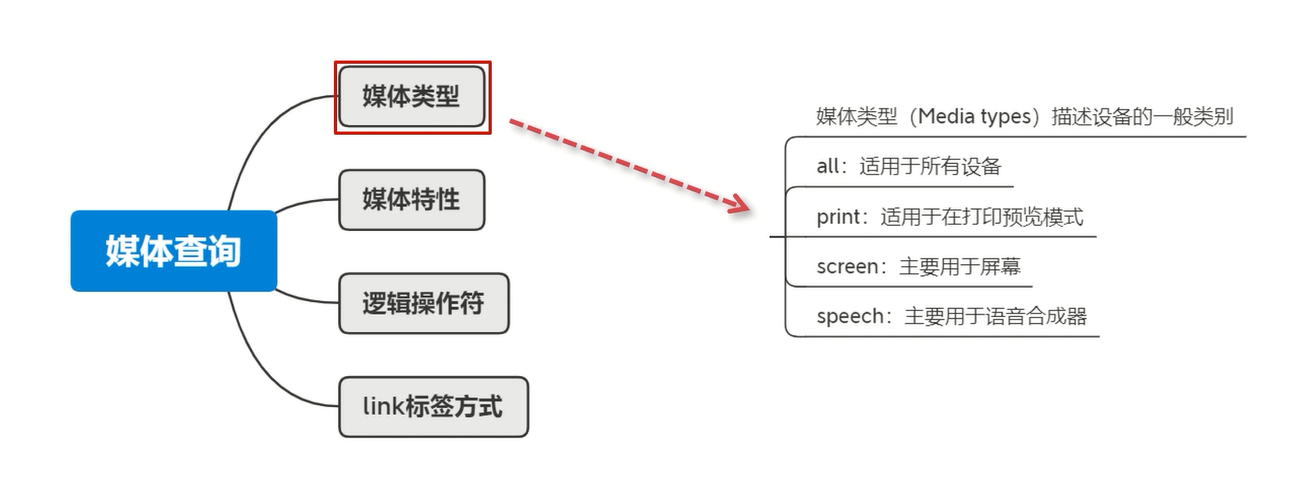
媒体类型
<!DOCTYPE html>
<html lang="en">
<head>
    <meta charset="UTF-8">
    <meta name="viewport" content="width=device-width, initial-scale=1.0">
    <title>Document</title>
    <style>
        /* 仅屏幕显示时生效 */
        @media screen {
            .box {
                font-size: 60px;
                color: red;
            }
        }

        /* 仅打印时生效 */
        @media print {
            .box {
                font-size: 120px;
                color: green;
            }
        }
    </style>
</head>
<body>
    <div class="box">
        文字
    </div>
</body>
</html>
媒体特性
<!DOCTYPE html>
<html lang="zh-CN">
    <head>
        <meta charset="UTF-8">
        <style>
            * {
                margin: 0;
                padding: 0;
            }
            h1 {
                height: 200px;
                background-color: gray;
                text-align: center;
                line-height: 200px;
                font-size: 100px;
            }

            /* 检测到视口的宽度小于等于700px时,应用如下样式 */
            @media (max-width:700px) {
                h1 {
                    background-color: orange;
                }
            }

            /* 检测到视口的宽度为800px时,应用如下样式 */
            @media (width:800px) {
                h1 {
                    background-color: green;
                }
            }

            /* 检测到视口的宽度大于等于900px时,应用如下样式 */
            @media (min-width:900px) {
                h1 {
                    background-color: deepskyblue;
                }
            }

            /* 检测到视口的高度等于800px时,应用如下样式 */
            /* @media (height:800px){
                    h1 {
                    	background-color: yellow;
                    }
                } */

            /* 检测到屏幕的宽度等于1536px时,应用如下样式 */
            /* @media (device-width:1536px) {
                    h1 {
                    	color: white;
                    }
                } */

            /* 移动端,竖屏时的样式 */
            @media (orientation: portrait) {
                h1 {
                    border-bottom: 10px solid red;
                }
            }

            /* 移动端,横屏时的样式 */
            @media (orientation: landscape) {
                h1 {
                    border-right: 10px solid blue;
                }
            }

        </style>
    </head>
    <body>
        <h1>你好啊</h1>
    </body>
</html>
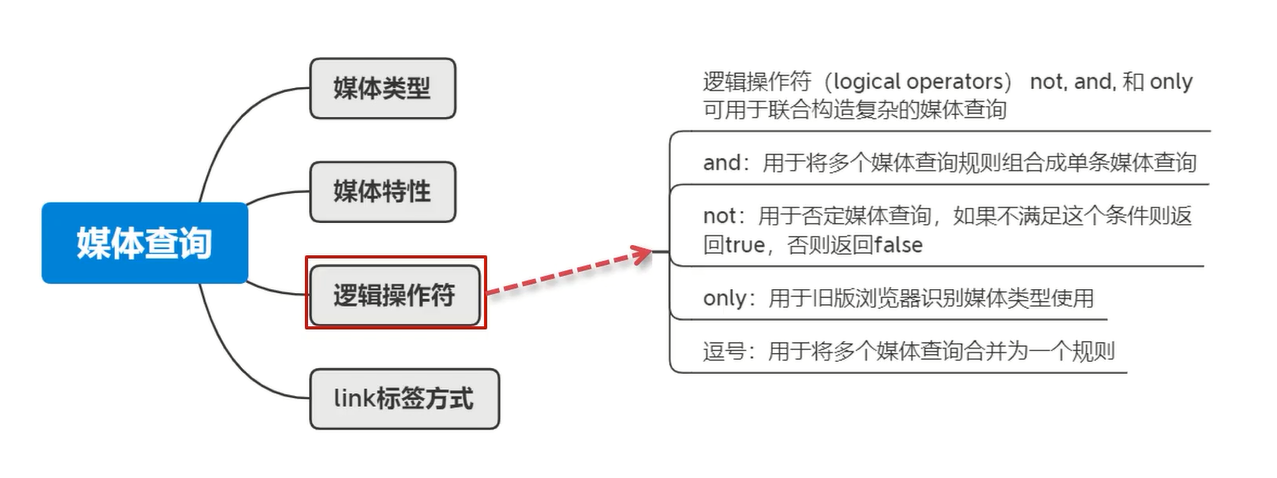
逻辑操作符
<!DOCTYPE html>
<html lang="zh-CN">
<head>
    <meta charset="UTF-8">

    <!-- 使用link标签引入样式,并且指定媒体查询的条件!!! -->
    <link rel="stylesheet" href="./a.css" media="(orientation: portrait)">

    <link rel="stylesheet" href="./b.css" media="(orientation: landscape)">

    <style>
        * {
            margin: 0;
            padding: 0;
        }
        h1 {
            height: 200px;
            background-color: gray;
            text-align: center;
            line-height: 200px;
            font-size: 100px;
        }

        /* 且运算符 */
        /* @media (min-width:700px) and (max-width:800px) {
            h1 {
                background-color: orange;
            }
        } */
        /* @media screen and (min-width:700px) and (max-width:800px) {
            h1 {
                background-color: orange;
            }
        } */

        /* 或运算符 */
        /* @media screen and (max-width:700px) or (min-width:800px) {
            h1 {
                background-color: orange;
            }
        } */

        /* 否定运算符 */
        /* @media not screen {
            h1 {
                font-size: 120px;
                color: green;
            }
        } */
        /* 当屏幕小于800px时,才生效 */
        @media not screen and (min-width:800px) {
            h1 {
                background-color: orange;
            }
        }

        /* 肯定运算符 */
        /* @media only screen and (width:800px) {
            h1 {
                background-color: orange;
            }
        } */

        /* 当屏幕在<=400像素,或者>=800像素时,应用该样式 */
        @media screen and (max-width:400px), (min-width:800px) {
            h1 {
                background-color: orange;
                color: #fff;
                font-size: 16px;
            }
        }

    </style>
</head>
<body>
    <h1>你好啊</h1>
</body>
</html>
媒体查询的编写位置及顺序
-
添加到样式表的底部,对CSS进行优先级的覆盖
- 媒体查询的样式一般写在正常样式的下方,对正常样式进行覆盖
-
移动端 ->PC端的适配原则:min-width从小到大
-
PC端 ->移动端的适配原则:max-width从大到小
理解:
- @media并不会提升所包裹的样式的优先级,位于底下的样式的优先级会覆盖上面的样式(可以通过打开F12查看到样式覆盖关系)。
- 当@media设定的条件满足时,就会剥离掉外面的@media{},使得内部的样式在当前位置生效。但它仍然受优先级的影响。
示例
<!DOCTYPE html>
<html lang="en">
<head>
    <meta charset="UTF-8">
    <meta http-equiv="X-UA-Compatible" content="IE=edge">
    <meta name="viewport" content="width=device-width, initial-scale=1.0">
    <title>Document</title>
    <style>

        /* .box{
            width:100px;
            height:100px;
            background:blue;
        }

        @media (min-width: 700px) {
            .box{
                background: pink;
            }
        } */

        /* .box{
            width:100px;
            height:100px;
            background:blue;
        }
        */
        /* 如何多条件的时候,min-width编写顺序:从小到大进行适配 */
        /* min-width方式:移动优先的原则,先编写移动端设备,然后响应式过渡到PC端 */
        /* @media (min-width: 700px) {
            .box{
                background: pink;
            }
        }

        @media (min-width: 1000px) {
            .box{
                background: green;
            }
        } */


        /* 如何从PC端响应式过渡到移动端? max-width , 从大到小区编写 */

        .box{
            width:100px;
            height:100px;
            background:blue;
        }

        @media (max-width: 1000px) {
            .box{
                background: pink;
            }
        }

        @media (max-width: 700px) {
            .box{
                background: green;
            }
        }


    </style>
</head>
<body>
    <div class="box">aaaaaa</div>
</body>
</html>
响应断点(阈值)的设定
- Extra small < 576px
- Small>576px,-sm
- Medium >768px,-md
- Large > 992px,-lg
- X-Large >1200px,-xl
- XX-Large >1400px,-xxl
示例
当屏幕大小发生变化时,加上了指定类名的元素会隐藏
<!DOCTYPE html>
<html lang="en">
    <head>
        <meta charset="UTF-8">
        <meta http-equiv="X-UA-Compatible" content="IE=edge">
        <meta name="viewport" content="width=device-width, initial-scale=1.0">
        <title>Document</title>
        <style>

            .d-none{
                display: none;
            }

            /* 当屏幕宽度 >= 576时,加上这个d-sm-none样式会隐藏 */
            @media (min-width: 576px){
                .d-sm-none{
                    display: none;
                }
            }

            /* 当屏幕宽度 >= 768时,加上这个d-sm-none样式会隐藏 */
            @media (min-width: 768px){
                .d-md-none{
                    display: none;
                }
            }

            /* 当屏幕宽度 >= 992时,加上这个d-sm-none样式会隐藏 */
            @media (min-width: 992px){
                .d-lg-none{
                    display: none;
                }
            }
            @media (min-width: 1200px){
                .d-xl-none{
                    display: none;
                }
            }
            @media (min-width: 1400px){
                .d-xxl-none{
                    display: none;
                }
            }

        </style>
    </head>
    <body>
        <div class="d-none">11111</div>
        <div class="d-sm-none">22222</div>
        <div class="d-md-none">33333</div>
        <div class="d-lg-none">44444</div>
        <div class="d-xl-none">55555</div>
        <div class="d-xxl-none">66666</div>
    </body>
</html>
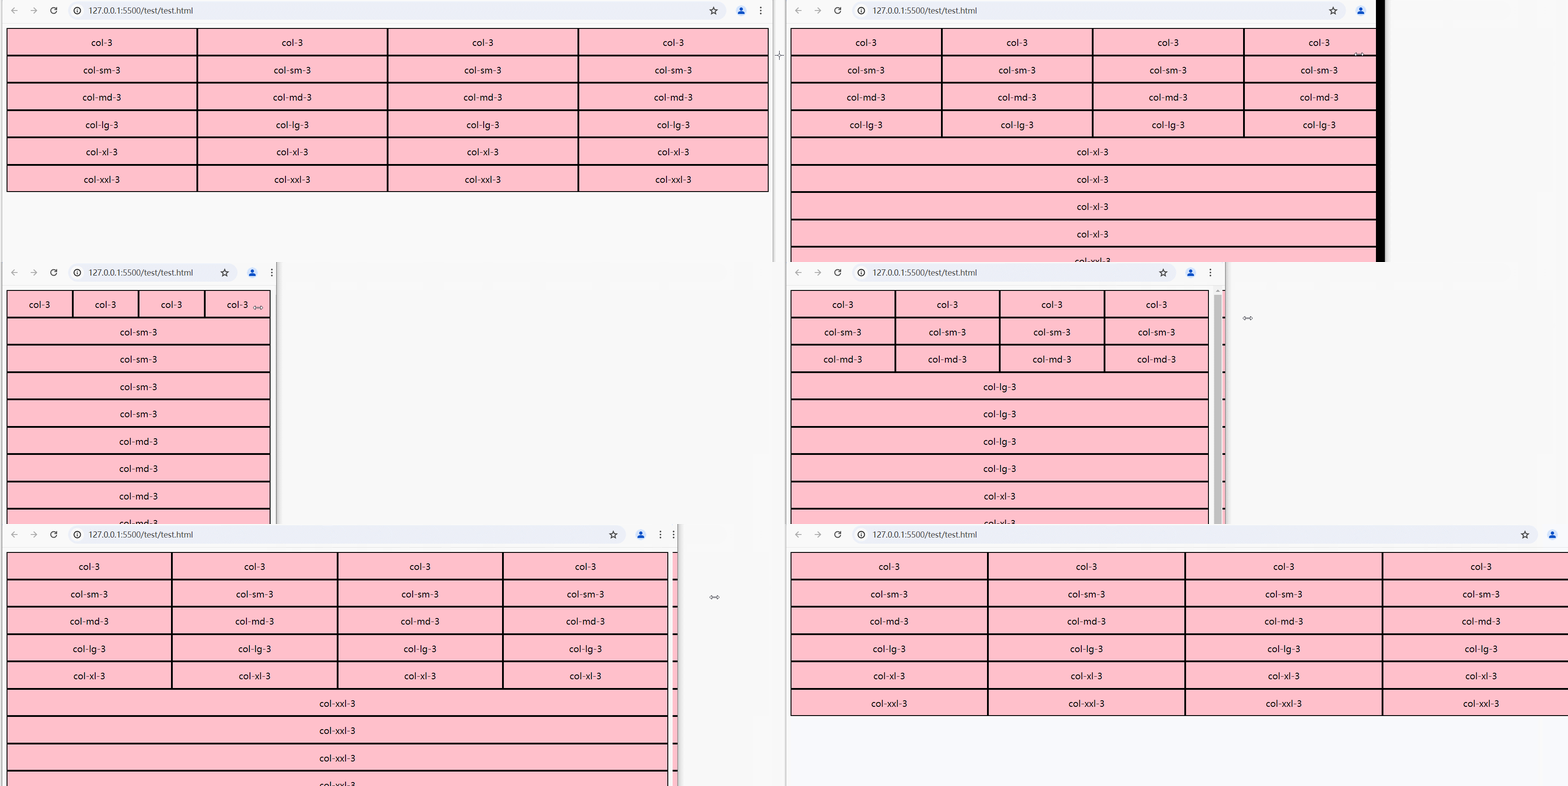
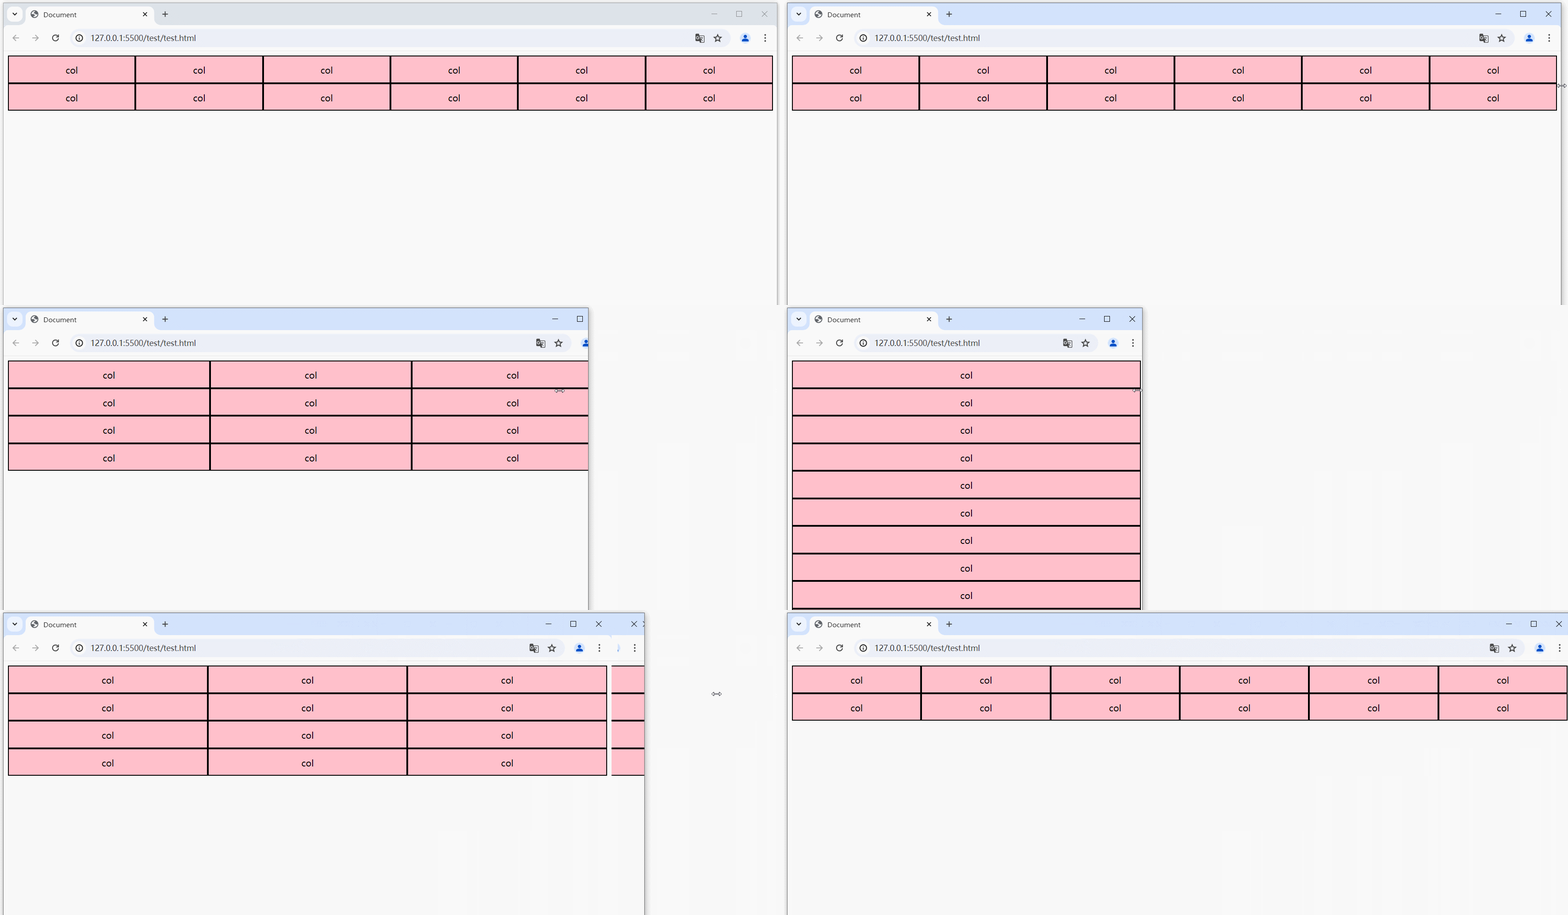
响应式栅格系统
示例1
- 默认.row div占满1行;
- 达到样式生效的条件,样式类名才会起作用;
- 没达到样式生效的条件,会使用默认的样式;
<!DOCTYPE html>
<html lang="en">
    <head>
        <meta charset="UTF-8">
        <meta name="viewport" content="width=device-width, initial-scale=1.0">
        <title>Document</title>
        <style>
            .row {
                background-color: skyblue;
                display: grid;
                grid-template-columns: repeat(12, 1fr);
                grid-template-rows: 50px;
                grid-auto-rows: 50px;
            }
            .row div {
                background-color: pink;
                border: 2px solid #000;
                text-align: center;
                line-height: 50px;

                /* 默认占满1行 */
                grid-area: auto/auto/auto/span 12;
            }

            .row .col-1 { grid-area: auto/auto/auto/span 1;}
            .row .col-2 { grid-area: auto/auto/auto/span 2;}
            .row .col-3 { grid-area: auto/auto/auto/span 3; }
            .row .col-4 { grid-area: auto/auto/auto/span 4;}
            .row .col-5 { grid-area: auto/auto/auto/span 5;}
            .row .col-6 { grid-area: auto/auto/auto/span 6;}
            .row .col-7 { grid-area: auto/auto/auto/span 7;}
            .row .col-8 { grid-area: auto/auto/auto/span 8;}
            .row .col-9 { grid-area: auto/auto/auto/span 9;}
            .row .col-10 { grid-area: auto/auto/auto/span10;}
            .row .col-11 { grid-area: auto/auto/auto/span 11;}
            .row .col-12 { grid-area: auto/auto/auto/span 12;}

            /* 达到样式生效的条件,样式类名才会起作用 */
            @media (min-width: 576px) {
                .row .col-sm-1 { grid-area: auto/auto/auto/span 1;}
                .row .col-sm-2 { grid-area: auto/auto/auto/span 2;}
                .row .col-sm-3 { grid-area: auto/auto/auto/span 3; }
                .row .col-sm-4 { grid-area: auto/auto/auto/span 4;}
                .row .col-sm-5 { grid-area: auto/auto/auto/span 5;}
                .row .col-sm-6 { grid-area: auto/auto/auto/span 6;}
                .row .col-sm-7 { grid-area: auto/auto/auto/span 7;}
                .row .col-sm-8 { grid-area: auto/auto/auto/span 8;}
                .row .col-sm-9 { grid-area: auto/auto/auto/span 9;}
                .row .col-sm-10 { grid-area: auto/auto/auto/span10;}
                .row .col-sm-11 { grid-area: auto/auto/auto/span 11;}
                .row .col-sm-12 { grid-area: auto/auto/auto/span 12;}
            }
            @media (min-width: 768px) {
                .row .col-md-1 { grid-area: auto/auto/auto/span 1;}
                .row .col-md-2 { grid-area: auto/auto/auto/span 2;}
                .row .col-md-3 { grid-area: auto/auto/auto/span 3; }
                .row .col-md-4 { grid-area: auto/auto/auto/span 4;}
                .row .col-md-5 { grid-area: auto/auto/auto/span 5;}
                .row .col-md-6 { grid-area: auto/auto/auto/span 6;}
                .row .col-md-7 { grid-area: auto/auto/auto/span 7;}
                .row .col-md-8 { grid-area: auto/auto/auto/span 8;}
                .row .col-md-9 { grid-area: auto/auto/auto/span 9;}
                .row .col-md-10 { grid-area: auto/auto/auto/span10;}
                .row .col-md-11 { grid-area: auto/auto/auto/span 11;}
                .row .col-md-12 { grid-area: auto/auto/auto/span 12;}
            }
            @media (min-width: 992px) {
                .row .col-lg-1 { grid-area: auto/auto/auto/span 1;}
                .row .col-lg-2 { grid-area: auto/auto/auto/span 2;}
                .row .col-lg-3 { grid-area: auto/auto/auto/span 3; }
                .row .col-lg-4 { grid-area: auto/auto/auto/span 4;}
                .row .col-lg-5 { grid-area: auto/auto/auto/span 5;}
                .row .col-lg-6 { grid-area: auto/auto/auto/span 6;}
                .row .col-lg-7 { grid-area: auto/auto/auto/span 7;}
                .row .col-lg-8 { grid-area: auto/auto/auto/span 8;}
                .row .col-lg-9 { grid-area: auto/auto/auto/span 9;}
                .row .col-lg-10 { grid-area: auto/auto/auto/span10;}
                .row .col-lg-11 { grid-area: auto/auto/auto/span 11;}
                .row .col-lg-12 { grid-area: auto/auto/auto/span 12;}
            }
            @media (min-width: 1200px) {
                .row .col-xl-1 { grid-area: auto/auto/auto/span 1;}
                .row .col-xl-2 { grid-area: auto/auto/auto/span 2;}
                .row .col-xl-3 { grid-area: auto/auto/auto/span 3; }
                .row .col-xl-4 { grid-area: auto/auto/auto/span 4;}
                .row .col-xl-5 { grid-area: auto/auto/auto/span 5;}
                .row .col-xl-6 { grid-area: auto/auto/auto/span 6;}
                .row .col-xl-7 { grid-area: auto/auto/auto/span 7;}
                .row .col-xl-8 { grid-area: auto/auto/auto/span 8;}
                .row .col-xl-9 { grid-area: auto/auto/auto/span 9;}
                .row .col-xl-10 { grid-area: auto/auto/auto/span10;}
                .row .col-xl-11 { grid-area: auto/auto/auto/span 11;}
                .row .col-xl-12 { grid-area: auto/auto/auto/span 12;}
            }
            @media (min-width: 1400px) {
                .row .col-xxl-1 { grid-area: auto/auto/auto/span 1;}
                .row .col-xxl-2 { grid-area: auto/auto/auto/span 2;}
                .row .col-xxl-3 { grid-area: auto/auto/auto/span 3; }
                .row .col-xxl-4 { grid-area: auto/auto/auto/span 4;}
                .row .col-xxl-5 { grid-area: auto/auto/auto/span 5;}
                .row .col-xxl-6 { grid-area: auto/auto/auto/span 6;}
                .row .col-xxl-7 { grid-area: auto/auto/auto/span 7;}
                .row .col-xxl-8 { grid-area: auto/auto/auto/span 8;}
                .row .col-xxl-9 { grid-area: auto/auto/auto/span 9;}
                .row .col-xxl-10 { grid-area: auto/auto/auto/span10;}
                .row .col-xxl-11 { grid-area: auto/auto/auto/span 11;}
                .row .col-xxl-12 { grid-area: auto/auto/auto/span 12;}
            }

        </style>
    </head>
    <body>
        <div class="row">
            <div class="div col-3">col-3</div>
            <div class="div col-3">col-3</div>
            <div class="div col-3">col-3</div>
            <div class="div col-3">col-3</div>
        </div>
        <div class="row">
            <div class="div col-sm-3">col-sm-3</div>
            <div class="div col-sm-3">col-sm-3</div>
            <div class="div col-sm-3">col-sm-3</div>
            <div class="div col-sm-3">col-sm-3</div>
        </div>
        <div class="row">
            <div class="div col-md-3">col-md-3</div>
            <div class="div col-md-3">col-md-3</div>
            <div class="div col-md-3">col-md-3</div>
            <div class="div col-md-3">col-md-3</div>
        </div>
        <div class="row">
            <div class="div col-lg-3">col-lg-3</div>
            <div class="div col-lg-3">col-lg-3</div>
            <div class="div col-lg-3">col-lg-3</div>
            <div class="div col-lg-3">col-lg-3</div>
        </div>
        <div class="row">
            <div class="div col-xl-3">col-xl-3</div>
            <div class="div col-xl-3">col-xl-3</div>
            <div class="div col-xl-3">col-xl-3</div>
            <div class="div col-xl-3">col-xl-3</div>
        </div>
        <div class="row">
            <div class="div col-xxl-3">col-xxl-3</div>
            <div class="div col-xxl-3">col-xxl-3</div>
            <div class="div col-xxl-3">col-xxl-3</div>
            <div class="div col-xxl-3">col-xxl-3</div>
        </div>
    </body>
</html>
示例2
- 给1个元素添加多个样式,添加的多个样式都有各自生效的条件;
- 当屏幕足够宽时,能容纳多个元素;
- 当屏幕窄时,只能容纳较少的元素;
<!DOCTYPE html>
<html lang="en">
    <head>
        <meta charset="UTF-8">
        <meta name="viewport" content="width=device-width, initial-scale=1.0">
        <title>Document</title>
        <style>
            .row {
                background-color: skyblue;
                display: grid;
                grid-template-columns: repeat(12, 1fr);
                grid-template-rows: 50px;
                grid-auto-rows: 50px;
            }
            .row div {
                background-color: pink;
                border: 2px solid #000;
                text-align: center;
                line-height: 50px;

                /* 默认占满1行 */
                grid-area: auto/auto/auto/span 12;
            }

            .row .col-1 { grid-area: auto/auto/auto/span 1;}
            .row .col-2 { grid-area: auto/auto/auto/span 2;}
            .row .col-3 { grid-area: auto/auto/auto/span 3; }
            .row .col-4 { grid-area: auto/auto/auto/span 4;}
            .row .col-5 { grid-area: auto/auto/auto/span 5;}
            .row .col-6 { grid-area: auto/auto/auto/span 6;}
            .row .col-7 { grid-area: auto/auto/auto/span 7;}
            .row .col-8 { grid-area: auto/auto/auto/span 8;}
            .row .col-9 { grid-area: auto/auto/auto/span 9;}
            .row .col-10 { grid-area: auto/auto/auto/span10;}
            .row .col-11 { grid-area: auto/auto/auto/span 11;}
            .row .col-12 { grid-area: auto/auto/auto/span 12;}

            @media (min-width: 576px) {
                .row .col-sm-1 { grid-area: auto/auto/auto/span 1;}
                .row .col-sm-2 { grid-area: auto/auto/auto/span 2;}
                .row .col-sm-3 { grid-area: auto/auto/auto/span 3; }
                .row .col-sm-4 { grid-area: auto/auto/auto/span 4;}
                .row .col-sm-5 { grid-area: auto/auto/auto/span 5;}
                .row .col-sm-6 { grid-area: auto/auto/auto/span 6;}
                .row .col-sm-7 { grid-area: auto/auto/auto/span 7;}
                .row .col-sm-8 { grid-area: auto/auto/auto/span 8;}
                .row .col-sm-9 { grid-area: auto/auto/auto/span 9;}
                .row .col-sm-10 { grid-area: auto/auto/auto/span10;}
                .row .col-sm-11 { grid-area: auto/auto/auto/span 11;}
                .row .col-sm-12 { grid-area: auto/auto/auto/span 12;}
            }
            @media (min-width: 768px) {
                .row .col-md-1 { grid-area: auto/auto/auto/span 1;}
                .row .col-md-2 { grid-area: auto/auto/auto/span 2;}
                .row .col-md-3 { grid-area: auto/auto/auto/span 3; }
                .row .col-md-4 { grid-area: auto/auto/auto/span 4;}
                .row .col-md-5 { grid-area: auto/auto/auto/span 5;}
                .row .col-md-6 { grid-area: auto/auto/auto/span 6;}
                .row .col-md-7 { grid-area: auto/auto/auto/span 7;}
                .row .col-md-8 { grid-area: auto/auto/auto/span 8;}
                .row .col-md-9 { grid-area: auto/auto/auto/span 9;}
                .row .col-md-10 { grid-area: auto/auto/auto/span10;}
                .row .col-md-11 { grid-area: auto/auto/auto/span 11;}
                .row .col-md-12 { grid-area: auto/auto/auto/span 12;}
            }
            @media (min-width: 992px) {
                .row .col-lg-1 { grid-area: auto/auto/auto/span 1;}
                .row .col-lg-2 { grid-area: auto/auto/auto/span 2;}
                .row .col-lg-3 { grid-area: auto/auto/auto/span 3; }
                .row .col-lg-4 { grid-area: auto/auto/auto/span 4;}
                .row .col-lg-5 { grid-area: auto/auto/auto/span 5;}
                .row .col-lg-6 { grid-area: auto/auto/auto/span 6;}
                .row .col-lg-7 { grid-area: auto/auto/auto/span 7;}
                .row .col-lg-8 { grid-area: auto/auto/auto/span 8;}
                .row .col-lg-9 { grid-area: auto/auto/auto/span 9;}
                .row .col-lg-10 { grid-area: auto/auto/auto/span10;}
                .row .col-lg-11 { grid-area: auto/auto/auto/span 11;}
                .row .col-lg-12 { grid-area: auto/auto/auto/span 12;}
            }
            @media (min-width: 1200px) {
                .row .col-xl-1 { grid-area: auto/auto/auto/span 1;}
                .row .col-xl-2 { grid-area: auto/auto/auto/span 2;}
                .row .col-xl-3 { grid-area: auto/auto/auto/span 3; }
                .row .col-xl-4 { grid-area: auto/auto/auto/span 4;}
                .row .col-xl-5 { grid-area: auto/auto/auto/span 5;}
                .row .col-xl-6 { grid-area: auto/auto/auto/span 6;}
                .row .col-xl-7 { grid-area: auto/auto/auto/span 7;}
                .row .col-xl-8 { grid-area: auto/auto/auto/span 8;}
                .row .col-xl-9 { grid-area: auto/auto/auto/span 9;}
                .row .col-xl-10 { grid-area: auto/auto/auto/span10;}
                .row .col-xl-11 { grid-area: auto/auto/auto/span 11;}
                .row .col-xl-12 { grid-area: auto/auto/auto/span 12;}
            }
            @media (min-width: 1400px) {
                .row .col-xxl-1 { grid-area: auto/auto/auto/span 1;}
                .row .col-xxl-2 { grid-area: auto/auto/auto/span 2;}
                .row .col-xxl-3 { grid-area: auto/auto/auto/span 3; }
                .row .col-xxl-4 { grid-area: auto/auto/auto/span 4;}
                .row .col-xxl-5 { grid-area: auto/auto/auto/span 5;}
                .row .col-xxl-6 { grid-area: auto/auto/auto/span 6;}
                .row .col-xxl-7 { grid-area: auto/auto/auto/span 7;}
                .row .col-xxl-8 { grid-area: auto/auto/auto/span 8;}
                .row .col-xxl-9 { grid-area: auto/auto/auto/span 9;}
                .row .col-xxl-10 { grid-area: auto/auto/auto/span10;}
                .row .col-xxl-11 { grid-area: auto/auto/auto/span 11;}
                .row .col-xxl-12 { grid-area: auto/auto/auto/span 12;}
            }

        </style>
    </head>
    <body>
        <div class="row">
            <div class="col-sm-12 col-md-6 col-lg-4 col-xl-3 col-xxl-2">col</div>
            <div class="col-sm-12 col-md-6 col-lg-4 col-xl-3 col-xxl-2">col</div>
            <div class="col-sm-12 col-md-6 col-lg-4 col-xl-3 col-xxl-2">col</div>
            <div class="col-sm-12 col-md-6 col-lg-4 col-xl-3 col-xxl-2">col</div>
            <div class="col-sm-12 col-md-6 col-lg-4 col-xl-3 col-xxl-2">col</div>
            <div class="col-sm-12 col-md-6 col-lg-4 col-xl-3 col-xxl-2">col</div>
            <div class="col-sm-12 col-md-6 col-lg-4 col-xl-3 col-xxl-2">col</div>
            <div class="col-sm-12 col-md-6 col-lg-4 col-xl-3 col-xxl-2">col</div>
            <div class="col-sm-12 col-md-6 col-lg-4 col-xl-3 col-xxl-2">col</div>
            <div class="col-sm-12 col-md-6 col-lg-4 col-xl-3 col-xxl-2">col</div>
            <div class="col-sm-12 col-md-6 col-lg-4 col-xl-3 col-xxl-2">col</div>
            <div class="col-sm-12 col-md-6 col-lg-4 col-xl-3 col-xxl-2">col</div>

        </div>
    </body>
</html>
响应式交互实现
利用 :checked 伪类
1、刚开始屏幕比较小,先让ul隐藏。input顺便也隐藏;
2、屏幕比较小,当复选框被勾选时,ul要显示;
3、当屏幕宽度变大时,ul也要显示,同时span隐藏;
<!DOCTYPE html>
<html lang="en">
    <head>
        <meta charset="UTF-8">
        <meta name="viewport" content="width=device-width, initial-scale=1.0">
        <title>Document</title>
        <style>

            /* 1、刚开始屏幕比较小,先让ul隐藏。input复选框顺便也隐藏。 */
            /* 2、屏幕比较小,当复选框被勾选时,ul要显示 */
            /* 3、当屏幕宽度变大时,ul也要显示,同时span隐藏 */
            ul {
                display: none;
            }

            input{
                display: none;
            }

            input:checked + ul {
                display: block;
            }

            @media (min-width: 768px) {
                ul {
                    display: block;
                }
                span {
                    display: none;
                }
            }
        </style>
    </head>
    <body>
        <label for="btn">
            <span>菜单按钮</span>
        </label>
        <input type="checkbox" id="btn"/>
        <ul>
            <li>首页</li>
            <li>文章</li>
            <li>教程</li>
            <li>关于</li>
        </ul>
    </body>
</html>
ghost博客示例
1、移动优先,先写移动端样式,再过渡到pc端样式。
2、高度是直接量取的尺寸,使用px单位(这样说来,在不同手机屏幕上不是等比缩放的)
3、input复选框 + css,控制菜单显示隐藏
4、写上@media断点对应的样式
@media (min-width: 576px) {}   /* sm  */
@media (min-width: 768px) {}   /* md  */
@media (min-width: 992px) {}   /* lg  */
@media (min-width: 1200px) {}  /* xl  */
@media (min-width: 1400px) {}  /* xxl */
5、文字也是直接使用的px单位
6、对于文章列表,先实现在屏幕窄的时候的样式。
7、当屏幕宽度逐渐变大时,我们希望能出现2列,并且文章的宽度占2/3。
对于文章的宽度占2/3,视频里面用的是前面提到的grid布局实现的栅格系统(直接复制过来,使用col-lg-8把main中的元素套1层,这样当屏幕宽度>=992时,一共12,它就占8,所以就站占2/3宽了。当屏幕<992时,由于col-lg-8样式不生效,因此默认就占满宽度)。(但是,这里最好还是用flex布局吧,兼容性会更好)。
并且这2列固定1个宽度,且位于版心的位置。这个固定的宽度使用变量来做,使用:root定义–container-width变量,值刚开始为100%;然后在main元素中使用var(–container-width)引用这个变量。接着,在对应@media(min-width:992px)的媒体查询中改为,修改:root定义的–container-width的值,值为940px。接着,在对应@media(min-width:992px)的媒体查询中改为,修改:root定义的–container-width的值,值为1160px。这样实现了在小屏幕上,宽度占满,而在大屏幕上占据2/3的宽度,并且不同屏幕尺寸下的版心长度也会变化。(还有要注意的是,宽度设置为100%时,是不包括父元素的padding的)
8、现在做一些声明/下载/标签云部分,需要在屏幕比较小的时候,它们都位于文章的下方。当屏幕宽度主键变大时,它们位于文章列表的右侧。很显然,应该把它们都套在col-lg-4中,当屏幕较小时,占满宽度,当屏幕变大时,占4份,即占1/3,这样文章列表和右侧边栏就处于左右两列了。
但是左右两列还有个间距,目前是通过左右两边的padding实现的,可以这样理解,左边占8份,右边占4份,然后8份其实就是1个整体,给这个整体加上左右的padding。右边也是加上左右的padding。就实现了间距了。
9、底部的实现与文章列表的实现一致,即第7步。footer-wrapper是整体的脚部,foot-wrapper包裹footer,footer的宽度随着屏幕宽度变化在 992,1200,1400断点处变宽,并且始终水平居中。
又由于footer下包裹的直接子元素div添加了col-lg-4类名,所以在屏幕>=992时,将又原来的占满宽度,而变成水平排列三份,并且在每一份的左右都添加了padding。
html
<!DOCTYPE html>
<html lang="en">
<head>
    <meta charset="UTF-8">
    <meta name="viewport" content="width=device-width, initial-scale=1.0">
    <link rel="stylesheet" href="css/reset.css">
    <link rel="stylesheet" href="iconfont/iconfont.css">
    <link rel="stylesheet" href="./css/grid.css">
    <title>Document</title>
    <style>
        :root {
            --container-width: 100%;
            --footer-width: 100%;
        }
        .column-gap {
            padding: 0 15px;
        }
        a {
            color: #505050;
        }
        button {
            outline: none;
            border: none;
        }
        body {
            background-color: #ebebeb;
        }

        /* 头部导航 */
        .header {
            height: 190px;
            background-color: #fff;
            border-bottom: 1px solid #ebebeb;
            display: flex;
            align-items: center;
            justify-content: center;

        }
        .header .header-logo {
            width: 200px;
            user-select: none;
        }
        .nav {
            padding: 0 15px;
            border-bottom: 2px solid #ebebeb;
            background-color: #fff;
        }
        .nav input {
            display: none;
        }
        .nav ul {
            display: none;
        }
        .nav input:checked + .nav-list {
            display: block;
        }
        .nav-bar {
            height: 56px;
            display: flex;
            align-items: center;
            justify-content: center;
        }
        .nav-bar i {
            cursor: pointer;
        }
        .nav-list li {
            padding: 0 21px;
            height: 56px;
            line-height: 56px;
            position: relative;
        }
        .nav-list li.active::after {
            position: absolute;
            content: '';
            bottom: 0;
            left: 0;
            height: 2px ;
            width: 100%;
            background-color: #e67e22;
        }

        /* 文章列表 */
        .main {
            padding: 35px 15px;
            box-sizing: border-box;
            width: var(--container-width);
            margin: 0 auto;
        }

        .main-article {
            padding: 35px;
            background-color: #fff;
            border-radius: 6px;
        }

        .main-article h1 {
            font-size: 35px;
            font-weight: normal;
            text-align: center;
        }

        .main-article .info {
            color: #959595;
            text-align: center;
            line-height: 30px;
            margin-bottom: 20px;
        }

        .main-article .content {
            font-size: 18px;
            line-height: 1.5;
        }

        .main-article .read-btn {
            background-color: #e67e22;
            padding: 10px 18px;
            color: #fff;
            margin: 30px 0;
            cursor: pointer;
        }

        .main-article .article-footer {
            border-top: 1px solid #ebebeb;
            padding-top: 30px;
        }

        .main-article .article-footer a {
            margin: 0 5px;
        }

        .aside > div {
            border-radius: 6px;
            padding: 35px;
            background-color: #fff;
            margin-bottom: 35px;
        }
        .aside > div > h3 {
            font-weight: normal;
            font-size: 20px;
            padding-bottom: 10px;
            position: relative;
            border-bottom: 1px solid #cccccc;
        }
        .aside > div h3 {
            margin-bottom: 20px;
        }
        .aside > div p {
            font-size: 15px;
        }

        .aside > div > h3::after {
            position: absolute;
            content: '';
            width: 100px;
            height: 1px;
            bottom: -1px;
            left: 0;
            border-bottom: 1px solid #e67e22;
        }

        .aside > div  button {
            width: 100%;
            height: 35px;
            color: #fff;
            background-color: #e67e22;
            cursor: pointer;
        }

        .aside .tag-cloud .tags a {
            border: 1px solid #ebebeb;
            display: inline-block;
            padding: 5px 10px;
            margin-right: 10px;
            margin-bottom: 10px;
        }
        .footer-wrapper {
            background-color: #202020;
            padding: 35px 0;
        }
        .footer {
            width: var(--footer-width);
            margin: 0 auto;
        }

        .footer  > div > h3 {
            font-weight: normal;
            font-size: 20px;
            padding-bottom: 10px;
            position: relative;
            color: #fcfcfd;
            border-bottom: 1px solid #7c7c7c;
        }

        .footer > div > h3::after {
            position: absolute;
            content: '';
            width: 100px;
            height: 1px;
            bottom: -1px;
            left: 0;
            border-bottom: 1px solid #e67e22;
        }

        .footer  > div h3 {
            margin-bottom: 20px;
        }

        .footer > div a {
            color: #959595;
            display: inline-block;
            margin-right: 20px;
            margin-bottom: 20px;
        }

        @media (max-width: 576px) {
            h1 {
                font-size: 32px !important;
            }
        }
        @media (min-width: 576px) {

        }
        @media (min-width: 768px) {
            .nav-bar {
                display: none;
            }
            .nav ul.nav-list {
                display: flex;
                justify-content: center;
                align-items: center;
            }
        }

        @media (min-width: 992px) {
            :root {
                --container-width: 940px;
                --footer-width: 940px;
            }
        }
        @media (min-width: 1200px) {
            :root {
                --container-width: 1160px;
                --footer-width: 1160px;
            }
        }
        @media (min-width: 1400px) {
            :root {
                --footer-width: 1360px;
            }
        }


    </style>
</head>
<body>
    <div class="header">
        <img class="header-logo" src="./img/ghost-logo.png" alt="">
    </div>
    <div class="nav">
        <div class="nav-bar">
            <label for="cbx">
                <i class="iconfont icon-zhedie"></i>
            </label>
        </div>
        <input type="checkbox" id="cbx" >
        <ul class="nav-list">
            <li class="active"><a href="#">首页</a></li>
            <li><a href="#">论坛</a></li>
            <li><a href="#">快捷手册</a></li>
            <li><a href="#">中文文档</a></li>
            <li><a href="#">关于</a></li>
        </ul>
    </div>
    <div class="main row">
        <div class="col-lg-8 column-gap">
            <div class="main-article">
                <h1 class="title">全新的 Ghost 文档上线</h1>
                <div class="info">
                    <span>作者:王赛</span> • <span>2018年11月20日</span>
                </div>
                <div class="content">
                    我们的整个 Ghost 文档 已经全新改版了!并且添加了一些新的补充,包括使用教程和功能集成。 新文档的目标是帮助更多人有效地安装并管理他们发布的内容,并且最大限度地发挥 Ghost 作为一个开源发布平台的灵活性。文档的设计和结构已经修订完毕,我们的改进包括 Ghost 安装和设
                </div>
                <button class="read-btn">阅读全文</button>
                <div class="article-footer">
                    <i class="iconfont icon-wenjianjia"></i>
                    <a href="#">Android</a>
                    <a href="#">客户端</a>
                </div>
            </div>
        </div>
        <div class="col-lg-4  column-gap">
            <div class="aside">
                <div class="statement">
                    <h3>声明</h3>
                    <p>Ghost 中文版不再继续维护,请去官方下载。</p>
                </div>
                <div class="download">
                    <h3>下载</h3>
                    <button>Ghost最新版</button>
                </div>
                <div class="tag-cloud">
                    <h3>标签云</h3>
                    <div class="tags">
                        <a href="#">客户端</a>
                        <a href="#">Android</a>
                        <a href="#">jQuery</a>
                        <a href="#">Ghost 0.7 版本</a>
                        <a href="#">开源</a>
                        <a href="#">助手函数</a>
                        <a href="#">客户端</a>
                        <a href="#">客户端</a>
                        <a href="#">Android</a>
                        <a href="#">jQuery</a>
                        <a href="#">Ghost 0.7 版本</a>
                        <a href="#">开源</a>
                        <a href="#">助手函数</a>
                        <a href="#">客户端</a>
                    </div>
                </div>
            </div>
        </div>
    </div>
    <div class="footer-wrapper">
        <div class="footer row">
            <div class="friend-links col-lg-4 column-gap">
                <h3>友链</h3>
                <div class="links">
                    <a href="#">Bootstrap中文网</a>
                    <a href="#">React</a>
                    <a href="#">Vue.js</a>
                    <a href="#">Svelte</a>
                    <a href="#">Preact</a>
                    <a href="#">Babel</a>
                    <a href="#">Webpack</a>
                    <a href="#">Rollup.js</a>
                    <a href="#">Bootstrap中文网</a>
                    <a href="#">React</a>
                    <a href="#">Vue.js</a>
                    <a href="#">Svelte</a>
                    <a href="#">Preact</a>
                    <a href="#">Babel</a>
                    <a href="#">Webpack</a>
                    <a href="#">Rollup.js</a>
                </div>
            </div>
            <div class="tag-clouds  col-lg-4 column-gap">
                <h3>友链</h3>
                <div class="tags">
                    <a href="#">客户端</a>
                    <a href="#">Android</a>
                    <a href="#">jQuery</a>
                    <a href="#">Ghost 0.7 版本</a>
                    <a href="#">开源</a>
                    <a href="#">助手函数</a>
                    <a href="#">客户端</a>
                    <a href="#">客户端</a>
                    <a href="#">Android</a>
                    <a href="#">jQuery</a>
                    <a href="#">Ghost 0.7 版本</a>
                    <a href="#">开源</a>
                    <a href="#">助手函数</a>
                    <a href="#">客户端</a>
                </div>
            </div>
            <div class="partners col-lg-4 column-gap">
                <h3>合作伙伴</h3>
                <div class="tags">
                    <a href="#">腾讯</a>
                    <a href="#">阿里巴巴</a>
                    <a href="#">百度</a>
                </div>
            </div>
        </div>
    </div>
</body>
</html>
grid.css
.row {
    /* background-color: skyblue; */
    display: grid;
    grid-template-columns: repeat(12, 1fr);
}
.row > [class*="col-"] {
    /* background-color: pink; */

    /* 默认占满1行 */
    grid-area: auto/auto/auto/span 12;
}

.row .col-1 { grid-area: auto/auto/auto/span 1;}
.row .col-2 { grid-area: auto/auto/auto/span 2;}
.row .col-3 { grid-area: auto/auto/auto/span 3; }
.row .col-4 { grid-area: auto/auto/auto/span 4;}
.row .col-5 { grid-area: auto/auto/auto/span 5;}
.row .col-6 { grid-area: auto/auto/auto/span 6;}
.row .col-7 { grid-area: auto/auto/auto/span 7;}
.row .col-8 { grid-area: auto/auto/auto/span 8;}
.row .col-9 { grid-area: auto/auto/auto/span 9;}
.row .col-10 { grid-area: auto/auto/auto/span10;}
.row .col-11 { grid-area: auto/auto/auto/span 11;}
.row .col-12 { grid-area: auto/auto/auto/span 12;}

@media (min-width: 576px) {
    .row .col-sm-1 { grid-area: auto/auto/auto/span 1;}
    .row .col-sm-2 { grid-area: auto/auto/auto/span 2;}
    .row .col-sm-3 { grid-area: auto/auto/auto/span 3; }
    .row .col-sm-4 { grid-area: auto/auto/auto/span 4;}
    .row .col-sm-5 { grid-area: auto/auto/auto/span 5;}
    .row .col-sm-6 { grid-area: auto/auto/auto/span 6;}
    .row .col-sm-7 { grid-area: auto/auto/auto/span 7;}
    .row .col-sm-8 { grid-area: auto/auto/auto/span 8;}
    .row .col-sm-9 { grid-area: auto/auto/auto/span 9;}
    .row .col-sm-10 { grid-area: auto/auto/auto/span10;}
    .row .col-sm-11 { grid-area: auto/auto/auto/span 11;}
    .row .col-sm-12 { grid-area: auto/auto/auto/span 12;}
}
@media (min-width: 768px) {
    .row .col-md-1 { grid-area: auto/auto/auto/span 1;}
    .row .col-md-2 { grid-area: auto/auto/auto/span 2;}
    .row .col-md-3 { grid-area: auto/auto/auto/span 3; }
    .row .col-md-4 { grid-area: auto/auto/auto/span 4;}
    .row .col-md-5 { grid-area: auto/auto/auto/span 5;}
    .row .col-md-6 { grid-area: auto/auto/auto/span 6;}
    .row .col-md-7 { grid-area: auto/auto/auto/span 7;}
    .row .col-md-8 { grid-area: auto/auto/auto/span 8;}
    .row .col-md-9 { grid-area: auto/auto/auto/span 9;}
    .row .col-md-10 { grid-area: auto/auto/auto/span10;}
    .row .col-md-11 { grid-area: auto/auto/auto/span 11;}
    .row .col-md-12 { grid-area: auto/auto/auto/span 12;}
}
@media (min-width: 992px) {
    .row .col-lg-1 { grid-area: auto/auto/auto/span 1;}
    .row .col-lg-2 { grid-area: auto/auto/auto/span 2;}
    .row .col-lg-3 { grid-area: auto/auto/auto/span 3; }
    .row .col-lg-4 { grid-area: auto/auto/auto/span 4;}
    .row .col-lg-5 { grid-area: auto/auto/auto/span 5;}
    .row .col-lg-6 { grid-area: auto/auto/auto/span 6;}
    .row .col-lg-7 { grid-area: auto/auto/auto/span 7;}
    .row .col-lg-8 { grid-area: auto/auto/auto/span 8;}
    .row .col-lg-9 { grid-area: auto/auto/auto/span 9;}
    .row .col-lg-10 { grid-area: auto/auto/auto/span10;}
    .row .col-lg-11 { grid-area: auto/auto/auto/span 11;}
    .row .col-lg-12 { grid-area: auto/auto/auto/span 12;}
}
@media (min-width: 1200px) {
    .row .col-xl-1 { grid-area: auto/auto/auto/span 1;}
    .row .col-xl-2 { grid-area: auto/auto/auto/span 2;}
    .row .col-xl-3 { grid-area: auto/auto/auto/span 3; }
    .row .col-xl-4 { grid-area: auto/auto/auto/span 4;}
    .row .col-xl-5 { grid-area: auto/auto/auto/span 5;}
    .row .col-xl-6 { grid-area: auto/auto/auto/span 6;}
    .row .col-xl-7 { grid-area: auto/auto/auto/span 7;}
    .row .col-xl-8 { grid-area: auto/auto/auto/span 8;}
    .row .col-xl-9 { grid-area: auto/auto/auto/span 9;}
    .row .col-xl-10 { grid-area: auto/auto/auto/span10;}
    .row .col-xl-11 { grid-area: auto/auto/auto/span 11;}
    .row .col-xl-12 { grid-area: auto/auto/auto/span 12;}
}
@media (min-width: 1400px) {
    .row .col-xxl-1 { grid-area: auto/auto/auto/span 1;}
    .row .col-xxl-2 { grid-area: auto/auto/auto/span 2;}
    .row .col-xxl-3 { grid-area: auto/auto/auto/span 3; }
    .row .col-xxl-4 { grid-area: auto/auto/auto/span 4;}
    .row .col-xxl-5 { grid-area: auto/auto/auto/span 5;}
    .row .col-xxl-6 { grid-area: auto/auto/auto/span 6;}
    .row .col-xxl-7 { grid-area: auto/auto/auto/span 7;}
    .row .col-xxl-8 { grid-area: auto/auto/auto/span 8;}
    .row .col-xxl-9 { grid-area: auto/auto/auto/span 9;}
    .row .col-xxl-10 { grid-area: auto/auto/auto/span10;}
    .row .col-xxl-11 { grid-area: auto/auto/auto/span 11;}
    .row .col-xxl-12 { grid-area: auto/auto/auto/span 12;}
}
reset.css
@charset "utf-8";

/* --------------------重置样式-------------------------------- */

body,
h1,
h2,
h3,
h4,
h5,
h6,
hr,
p,
blockquote,
dl,
dt,
dd,
ul,
ol,
li,
button,
input,
textarea,
th,
td {
    margin : 0;
    padding: 0
}

/*设置默认字体*/
body {
    font-size  : 14px;
    font-style : normal;
    font-family: -apple-system, BlinkMacSystemFont, segoe ui, Roboto, helvetica neue, Arial, noto sans, sans-serif, apple color emoji, segoe ui emoji, segoe ui symbol, noto color emoji;
}

/*字体太小用户体检不好,让small恢复12px*/
small {
    font-size: 12px
}

h1 {
    font-size: 18px
}

h2 {
    font-size: 16px
}

h3 {
    font-size: 14px
}

h4,
h5,
h6 {
    font-size: 100%
}

ul,
ol {
    list-style: none
}

a {
    text-decoration : none;
    background-color: transparent
}

a:hover,
a:active {
    outline-width  : 0;
    text-decoration: none
}

/*重置表格*/
table {
    border-collapse: collapse;
    border-spacing : 0
}

/*重置hr*/
hr {
    border: 0;
    height: 1px
}

/*图形图片*/
img {
    border-style: none
}

img:not([src]) {
    display: none
}

svg:not(:root) {
    overflow: hidden
}

/*下面的操作是针对于html5页面布局准备的,不支持ie6~8以及其他低版本的浏览器*/
html {
    /*禁用系统默认菜单*/
    -webkit-touch-callout   : none;
    /*关闭iphone & Android的浏览器纵向和横向模式中自动调整字体大小的功能*/
    -webkit-text-size-adjust: 100%
}

input,
textarea,
button,
a {
    /*表单或者a标签在手机点击时会出现边框或彩色的背景区域,意思是去除点击背景框*/
    -webkit-tap-highlight-color: rgba(0, 0, 0, 0)
}

/*重置html5元素的默认样式*/
article,
aside,
details,
figcaption,
figure,
footer,
header,
main,
menu,
nav,
section,
summary {
    display: block
}

audio,
canvas,
progress,
video {
    display: inline-block
}

audio:not([controls]),
video:not([controls]) {
    display: none;
    height : 0
}

progress {
    vertical-align: baseline
}

mark {
    background-color: #ff0;
    color           : #000
}

sub,
sup {
    position      : relative;
    font-size     : 75%;
    line-height   : 0;
    vertical-align: baseline
}

sub {
    bottom: -0.25em
}

sup {
    top: -0.5em
}

button,
input,
select,
textarea {
    font-size: 100%;
    outline  : 0
}

button,
input {
    overflow: visible
}

button,
select {
    text-transform: none
}

textarea {
    overflow: auto
}

button,
html [type="button"],
[type="reset"],
[type="submit"] {
    -webkit-appearance: button
}

button::-moz-focus-inner,
[type="button"]::-moz-focus-inner,
[type="reset"]::-moz-focus-inner,
[type="submit"]::-moz-focus-inner {
    border-style: none;
    padding     : 0
}

button:-moz-focusring,
[type="button"]:-moz-focusring,
[type="reset"]:-moz-focusring,
[type="submit"]:-moz-focusring {
    outline: 1px dotted ButtonText
}

[type="checkbox"],
[type="radio"] {
    box-sizing: border-box;
    padding   : 0
}

[type="number"]::-webkit-inner-spin-button,
[type="number"]::-webkit-outer-spin-button {
    height: auto
}

[type="search"] {
    -webkit-appearance: textfield;
    outline-offset    : -2px
}

[type="search"]::-webkit-search-cancel-button,
[type="search"]::-webkit-search-decoration {
    -webkit-appearance: none
}

::-webkit-input-placeholder {
    color  : inherit;
    opacity: .54
}

::-webkit-file-upload-button {
    -webkit-appearance: button;
    font              : inherit
}
ant-design后台管理界面示例
效果图
全部展示
侧边栏可收缩
主题色、固定内容、显示内容
显示内容:是否显示侧边栏(侧边栏的显示和隐藏)、是否显示内容头部(内容头部的显示和隐藏)
固定内容:固定侧边菜单(侧边栏是否可随滚动条上下移动,或者固定不动)、固定内容头部(内容头部是否可随滚动条上下移动,或者固定不动)
响应式变化
要点
1、引入reset.css,重置样式
2、引入iconfont.css,使用字体图标
3、display:flex能轻松实现等高布局,因此左边侧边栏,右边内容,就采用flex布局了。设置容器的min-height为100vh,则两列最小高度也最小为100vh。
4、当元素使用固定定位后,元素的宽度将由内容撑开,元素的父div使用overflow:hidden将隐藏不了fixed中的的内容,所以可以将固定定位元素的width改为inherit(不能改为100%,否则会相对于页面宽度的100%;改为inherit生效的前提,必须是建立再父容器有明确设置width的值),它将与父容器一致,然后溢出隐藏
5、使用样式类名去控制侧标栏折叠状态和固定状态,达到切换样式类名即可修改状态的目的,这点很重要。
6、侧边栏控制的g-ant-sider__wrap,设置高度为100%。当g-ant-sider__wrap是固定定位时,是可视区的高度;当g-ant-sider__wrap不是固定定位时,是父元素的高度,此时又因为整体高度min-height为100vh,并且使用的时flex布局,左侧侧边栏没有设置高度,所以左侧侧边栏最小高度也是100vh,所以就占满了整个高度;
7、display:none控制元素隐藏;display:block控制元素显示;样式类名中分别使用这2个样式,通过切换样式类名即可实现元素的显示和隐藏
8、加上&去掉 控制状态的样式类名,检查效果是否符合要求,对不符合要求的情况,进行修改
9、使用js给元素绑定点击事件,通过元素.classList.toggle(‘样式类名’)切换样式类名,来控制显示状态;通过元素.元素.className='样式类名1 样式类名2…'修改元素样式,这中方法可以直接全部覆盖原来的所有类名。
10、flex:1 + overflow:auto实现菜单过多时出现侧边栏出现滚动条
11、自定义滚动条样式,并且只在指定区域下生效
ul.m-menu::-webkit-scrollbar {
    width : 6px;
    height: 6px;
}

ul.m-menu::-webkit-scrollbar-thumb {
    background   : #51606d;
    border-radius: 3px;
}

ul.m-menu::-webkit-scrollbar-track {
    background   : #263849;
    border-radius: 3px;
}
12、侧边栏收缩时,图标变大,尽量使用transform:scale(1.5),这比变大字体大小更合适
13、侧边栏收缩时,可以做hover时,使用定位将隐藏的菜单显示出来。
14、主体部分采用flex布局,主轴方向修改为垂直,分为头部,内容区,尾部,其中内容去部分flex:1占满剩余高度,又由于最小高度就是可视区高度,这样自然就将尾部挤到了最下面,这就是粘性页脚的做法。
15、主体头部使用flex布局,flex-end靠右排列,flex布局中可以使用column-gap设置弹性项之间的间距
16、div开启flex布局后,flex弹性项目(即弹性子项)中的元素使用margin是可以扩大弹性项目(即弹性子项)空间的
17、主体内容区采用grid布局,将卡片放入对应的区域
18、背景图片放入卡片中
.m-card__bg1 {
    width: 100%;
    height: 100%;
    background-repeat: no-repeat;
    background-position: center center;
    background-size: contain;
}

.m-card__bg1 {
    background-image: url(../static/index-1.jpg);
}
19、制作右边抽屉设置,使用固定定位,设置具体宽度。使用js给设置按钮绑定点击事件,当点击设置按钮时,给整个setting所在的div加上opened类名,该类名修改right从默认的-300px改为0,这样setting抽屉就打开了。
打开的时候,需要在底部盖上一层遮罩层,这个遮罩层单独使用个div来做,使用固定定位,top:0,left:0,100vh,100vw,刚开始是display:none隐藏的,打开设置时,显示该遮罩层,并且由于该遮罩层与这个抽屉不是同一个dom,添加的类名是直接添加到setting而不是添加到mask,所以可以使用兄弟选择器“+”选择到抽屉后面的这个遮罩层dom,写上展示时display:block的样式,此时通过切换setting这个dom的样式类名控制到setting这个dom后面的遮罩层的显示和隐藏。
20、主题色修改方法
用户点击主题色的时候,需要在当前主题色中插入小图标(元素.innerHTML=‘html标签’),需要在之前选定的主题色中移除小图标(元素.innerHTML=‘’),这里用的排它思想,先全部移除,再插入。
先在:root中定义–theme-color颜色,在使用颜色的地方使用var(–theme-color),这样通过js一旦修改–theme-color,就可以统一修改主题色了。
用户点击主题色的时候,获取主题色的背景颜色getComputedStyle(this).backgroundColor,将这个背景颜色设置到document.documentElement.style.setProperty(‘–theme’, color)
21、设置中固定内容的开关使用的1个box套1个box实现,在点击开关的时候加上样式类名u-switch–closed,来控制背景色和内部小圆点的位置,实现开关的效果。
又因为要区分每个开关的具体作用,所以给每个开关再加1个类名,这个类名用于表示开关的作用,使用这个类名选择到具体的开关,区分这个开关并绑定具体要做的事情。
22、头部固定开关
当头部不是固定定位的时候,头部是占据高度的。

当打开头部固定开关,给头部添加--fixed类名,此时头部使用固定定位,但由于头部处于固定定位了,宽度将由内容决定,但是左侧起点如何与侧边栏适配呢?其实,当头部使用了固定定位后就根侧边栏无法靠弹性的关系保持紧密贴合了,所以直接就占满宽度,并且调整z-index让侧边栏压在头部上面即可。但是还是不够合理,假设头部左边也有元素的话,这不就被隐藏了吗?所以还得设置left值比较好。

当打开头部固定开关,同时,头部高度就没了,主体内容去会顶上去,所以要给内容区加1个margin-top,但由于--fixed是加在头部,而内容区与头部是兄弟关系,所以就用+号兄弟选择器选择到头部后面的内容区加上margin-top值,值为头部的高度。
23、左边菜单栏固定开关
当侧边栏不是固定定位的时候,左侧侧边栏是可以跟随页面一起滚动的

当打开菜单侧边栏固定开关,给侧边栏添加--fixed类名,此时侧边栏使用固定定位,占满可视区高度。此时发现固定定位的头部盖过了侧边栏,所以给侧边栏加上z-index,须大于头部的z-index值,并且要加上position:relative才会生效

还有就是要注意的是左侧侧边栏是否固定 与 内容区域头部是否固定 是 没有关系的。
因为flex布局决定了左右两侧分布,左侧g-ant__sider和右侧g-ant__main。固定定位是加在它们内部的元素身上,所以不会影响整体的左右布局。
24、头部显示/隐藏开关
隐藏的实现就是先定义1个hide样式类,直接使用display:none !important;通过切换这个hide类,即可让元素显示/隐藏。

当头部使用固定定位时,内容区主体部分用的时margin-top撑开的高度,但是隐藏之后,就得把这个这个margin-top干掉,让内容区域主体部分能够升上去,这里使用的方法是--fixed:not(.hide) + main{..},即让固定定位下的不是隐藏状态下的头部 后面的兄弟main 才设置margin-top。这样做比较简洁,当然也可以单独再选择一下hide后面的main,设置margin-top为0.
25、左边菜单栏显示/隐藏开关
隐藏的实现就是先定义1个hide样式类,直接使用display:none !important;通过切换这个hide类,即可让元素显示/隐藏。

当侧边栏隐藏时,是直接给侧边栏整体加上hide样式类名
26、现在需要实现主体内容去的响应式,由大屏幕逐渐缩小到小屏幕时,从1行能容纳多个图表到只能容纳1个图表。
先设置响应式断点
@media (max-width:1400px) {}

@media (max-width:1200px) { /* 当屏幕在1200以下生效 */ }

@media (max-width:992px) {  /* 当屏幕在992以下生效 */ }

@media (max-width:768px) {  /* 当屏幕在768以下生效 */}

/* 位于下方的样式如果生效,将覆盖上面的样式 */

@media (max-width:576px) {}
再在各个断点中,开启grid布局,重新设置划分区域,而各个card所设置的属于指定区域保持不变
/* 指定区域不变 */
.index-main .m-card:nth-child(1) { grid-area: a1; }
.index-main .m-card:nth-child(2) { grid-area: a2; }
.index-main .m-card:nth-child(3) { grid-area: a3; }
.index-main .m-card:nth-child(4) { grid-area: a4; }
.index-main .m-card:nth-child(5) { grid-area: a5; }
.index-main .m-card:nth-child(6) { grid-area: a6; }

/* 背景图标设置 */
.m-card__bg1,
.m-card__bg2,
.m-card__bg3,
.m-card__bg4,
.m-card__bg5,
.m-card__bg6 {
    width: 100%;
    height: 100%;
    background-repeat: no-repeat;
    background-position: center center;
    background-size: contain;
}
.m-card__bg1 {background-image: url(../static/index-1.jpg);}
.m-card__bg2 { background-image: url(../static/index-2.jpg);}
.m-card__bg3 {background-image: url(../static/index-3.jpg);}
.m-card__bg4 {background-image: url(../static/index-4.jpg);}
.m-card__bg5 {background-image: url(../static/index-5.jpg);}
.m-card__bg6 {background-image: url(../static/index-6.jpg);}

/* 网格布局 */
.index-main {
    display: grid;
    grid-template-columns: repeat(4, 1fr);
    grid-template-rows: repeat(3, 285px);
    grid-template-areas: 'a1 a1 a1 a2'
                         'a1 a1 a1 a3'
                         'a4 a4 a5 a6'
                         ;
    margin: 24px;
    gap: 24px;

}

@media (max-width:1200px) { /* 当屏幕在1200以下生效 */

    .index-main {
        display: grid;
        grid-template-columns: repeat(3, 1fr);
        grid-template-rows: repeat(4, 285px);
        grid-template-areas: 'a1 a1 a1'
                             'a1 a1 a1'
                             'a2 a3 a4'
                             'a5 a5 a6'
                             ;
    }

}

@media (max-width:992px) {  /* 当屏幕在992以下生效 */

    .index-main {
        display: grid;
        grid-template-columns: repeat(2, 1fr);
        grid-template-rows: repeat(5, 285px);
        grid-template-areas: 'a1 a1'
                             'a1 a1'
                             'a2 a3'
                             'a4 a4'
                             'a5 a6'
                             ;
    }
}

@media (max-width:768px) {  /* 当屏幕在768以下生效 */

    .index-main {
        display: grid;
        grid-template-columns: 1fr;
        grid-template-rows: repeat(6, 285px);
        grid-template-areas: 'a1'
                             'a2'
                             'a3'
                             'a4'
                             'a5'
                             'a6'
                             ;

    }

}
27、还有1个响应式效果,就是当屏幕小于992时,左侧侧边栏要隐藏,并且内容区的头部要出现1个图标和按钮(看上面的效果图),点击按钮,能够把左侧的菜单栏显示出来,并且此时有蒙层,点击蒙层时,蒙层消失并且左侧侧边栏隐藏。
这里先把图标和按钮的的html结构写到内容区头部,在初始的时候先display:none隐藏掉它,再在@media(max-width:992px)中设置display:flex,这样当屏幕小于992的时候就显示了,但此时显示的是头部的图标和按钮,现在还需要设置侧边栏隐藏,因此@media(max-width:992px)中还得加上侧边栏隐藏的样式display:none
当屏幕小于992了,并且侧边栏隐藏了,现在点击按钮,需要显示侧边栏并且显示蒙层。但是此时点击按钮时,需要判断在设置中是否隐藏了侧边栏,判断的依据是:侧边栏有没有hide这个样式,如果设置了侧边栏隐藏,那么此时点击按钮是无效的。如果没有设置侧边栏隐藏,此时点击按钮,只需要给侧边栏加上show这个公共样式,即display:block。
当屏幕小于992,点击按钮,展示左侧侧边栏,还需要在底下显示1个蒙层,这个蒙层在html的结构上就放在侧边栏的下方。并且当侧边栏有show这个样式时,才显示这个蒙层(有个与:not(…)相对的选择器:is(…)),使用了.g-ant__sider:is(.show) + u-mask{display:block}显示该蒙层。
注意这个技巧:在目标元素后面添加个蒙层的div。不直接控制蒙层的显示和隐藏,而是通过给目标元素加上类名后,通过类名 + 兄弟选择器选择到后面的蒙层,控制蒙层的显示和隐藏。有多个地方用到蒙层,就可以在每个地方都使用这样的技巧。
index.html
<!DOCTYPE html>
<html lang="en">
<head>
<meta charset="UTF-8">
<meta http-equiv="X-UA-Compatible" content="IE=edge">
<meta name="viewport" content="width=device-width, initial-scale=1.0">
<title>Document</title>
<link rel="stylesheet" href="./iconfont/iconfont.css">
<link rel="stylesheet" href="./css/global.css">
<link rel="stylesheet" href="./css/index.css">
</head>
<body>
<!-- 侧边栏 + 主体 -->
<div class="g-ant">
<!-- 侧边栏 -->
<!-- ant__sider--closed控制侧边栏折叠状态 --> <!-- 要点使用类名去控制状态 -->
<div class="g-ant__sider g-ant__sider--closed">
<!-- 1、g-ant-sider__wrap--fixed控制是否固定 2、这里设置高度为100%,固定定位时是可视区高度,不是固定定位时是父元素的高度-->
<div class="g-ant-sider__wrap g-ant-sider__wrap--fixed">
<!-- 侧边栏头部 logo + 文字 -->
<div class="g-ant-sider__head">
<a class="m-logo" href="#">
<img src="./static/logo.svg" alt="">
<h1>Ant Design Pro</h1>
</a>
</div>
<!-- 侧边栏主体 菜单模块 -->
<ul class="g-ant-sider__main">
<!-- 菜单 -->
<li class="m-menu m-menu--selected">
<!-- 菜单-目录 -->
<div class="m-menu__title">
<i class="iconfont icon-car"></i>
<span>Dashboard</span>
<i class="iconfont icon-arrowup"></i>
</div>
<!-- 菜单-子菜单 -->
<ul class="m-menu__sub">
<li>分析页</li>
<li class="m-menu__sub--selected">监控页</li>
<li>工作台</li>
</ul>
</li>
<li class="m-menu">
<div class="m-menu__title">
<i class="iconfont icon-printer"></i>
<span>表单页</span>
<i class="iconfont icon-arrowdown"></i>
</div>
<ul class="m-menu__sub">
<li>基础表单</li>
<li>分步表单</li>
<li>高级表单</li>
</ul>
</li>
<li class="m-menu">
<div class="m-menu__title">
<i class="iconfont icon-video"></i>
<span>列表页</span>
<i class="iconfont icon-arrowdown"></i>
</div>
<ul class="m-menu__sub">
<li>搜索列表</li>
<li>查询表格</li>
<li>标准列表</li>
<li>卡片列表</li>
</ul>
</li>
<li class="m-menu">
<div class="m-menu__title">
<i class="iconfont icon-check-circle"></i>
<span>详情页</span>
<i class="iconfont icon-arrowdown"></i>
</div>
<ul class="m-menu__sub">
<li>基础详情页</li>
<li>高级详情页</li>
</ul>
</li>
<li class="m-menu">
<div class="m-menu__title">
<i class="iconfont icon-user"></i>
<span>结果页</span>
<i class="iconfont icon-arrowdown"></i>
</div>
<ul class="m-menu__sub">
<li>成功页</li>
<li>失败页</li>
</ul>
</li>
<li class="m-menu">
<div class="m-menu__title">
<i class="iconfont icon-error"></i>
<span>结果页</span>
<i class="iconfont icon-arrowdown"></i>
</div>
<ul class="m-menu__sub">
<li>403</li>
<li>404</li>
<li>500</li>
</ul>
</li>
<li class="m-menu">
<div class="m-menu__title">
<i class="iconfont icon-highlight"></i>
<span>个人页</span>
<i class="iconfont icon-arrowdown"></i>
</div>
<ul class="m-menu__sub">
<li>个人中心</li>
<li>个人设置</li>
</ul>
</li>
<li class="m-menu">
<div class="m-menu__title">
<i class="iconfont icon-wrench"></i>
<span>图形编辑器</span>
<i class="iconfont icon-arrowdown"></i>
</div>
<ul class="m-menu__sub">
<li>流程编辑器</li>
<li>脑图编辑器</li>
<li>拓扑编辑器</li>
</ul>
</li>
</ul>
<!-- 侧边栏尾部 -->
<div class="g-ant-sider__foot">
<i class="iconfont icon-outdent u-bar"></i>
</div>
</div>
</div>
<!-- 蒙层,当屏幕小于992时,左侧侧边栏隐藏,此时点击头部的按钮,将显示侧边栏,并且要在底下盖上一层蒙层,这里就是这个蒙层 -->
<div class="u-mask"></div>
<!-- 主体 -->
<div class="g-ant__main">
<!-- 主体头部 -->
<div class="g-ant-main__head g-ant-main__head--fixed">
<!-- 这里主体的头部区域仅在屏幕宽度小于992时,才显示 -->
<div class="m-logo2">
<img src="./static/logo.svg" alt="">
<i class="iconfont icon-outdent u-bar"></i>
</div>
<i class="iconfont icon-idcard"></i>
<i class="iconfont icon-check-circle"></i>
<i class="iconfont icon-read"></i>
<i class="iconfont icon-user"></i>
<span>admin</span>
<i class="iconfont icon-error"></i>
</div>
<!-- 主体内容区 -->
<div class="g-ant-main__main">
<!-- 使用grid布局 -->
<div class="index-main">
<!-- 卡片 -->
<div class="m-card">
<div class="m-card__title">
活动实时交易情况
</div>
<!-- 背景图片 -->
<div class="m-card__body">
<div class="index-main__bg1"></div>
</div>
</div>
<div class="m-card">
<div class="m-card__title">
活动情况预测
</div>
<div class="m-card__body">
<div class="index-main__bg2"></div>
</div>
</div>
<div class="m-card">
<div class="m-card__title">
券核效率
</div>
<div class="m-card__body">
<div class="index-main__bg3"></div>
</div>
</div>
<div class="m-card">
<div class="m-card__title">
各品类占比
</div>
<div class="m-card__body">
<div class="index-main__bg4"></div>
</div>
</div>
<div class="m-card">
<div class="m-card__title">
热门搜索
</div>
<div class="m-card__body">
<div class="index-main__bg5"></div>
</div>
</div>
<div class="m-card">
<div class="m-card__title">
资源剩余
</div>
<div class="m-card__body">
<div class="index-main__bg6"></div>
</div>
</div>
</div>
</div>
<!-- 主体尾部 -->
<div class="g-ant-main__foot">
<p>
<a href="#">Ant Design Pro</a>
<a href="#"><i class="iconfont icon-github-fill"></i></a>
<a href="#">Ant Design</a>
</p>
<p>
<i class="iconfont icon-user"></i> 2021 Produced by Ant Group Experience Technology Department
</p>
</div>
</div>
</div>
<!-- 右边设置(抽屉) -->
<div class="m-setting">
<div class="m-setting__bar">
<i class="iconfont icon-setting"></i>
</div>
<div class="m-setting__item">
<h3>主题色</h3>
<ul class="m-setting-item__theme">
<li class="u-foxiaolan"><i class="iconfont icon-check"></i></li>
<li class="u-bomu"></li>
<li class="u-huoshan"></li>
<li class="u-rimu"></li>
<li class="u-mingqing"></li>
<li class="u-jiguanglv"></li>
<li class="u-jikelan"></li>
<li class="u-jiangzi"></li>
</ul>
</div>
<!-- 分割线 -->
<div class="u-divider"></div>
<div class="m-setting__item">
<h3>固定内容</h3>
<ul class="m-setting-item__toggle">
<li>
<span>内容头部</span>
<div class="u-switch j-head--fixed">
<div class="u-switch__handle"></div>
</div>
</li>
<li>
<span>侧边菜单</span>
<div class="u-switch j-sider--fixed">
<div class="u-switch__handle"></div>
</div>
</li>
</ul>
</div>
<div class="u-divider"></div>
<div class="m-setting__item">
<h3>显示内容</h3>
<ul class="m-setting-item__toggle">
<li>
<span>内容头部</span>
<div class="u-switch j-head--show">
<div class="u-switch__handle"></div>
</div>
</li>
<li>
<span>侧边菜单</span>
<div class="u-switch j-sider--show">
<div class="u-switch__handle"></div>
</div>
</li>
</ul>
</div>
</div>
<!-- 蒙层,当点击左侧抽屉时,展示蒙层 -->
<div class="u-mask"></div>
<script>
/* 点击菜单-目录,展开或关闭 目录 */
var menuTitles = document.querySelectorAll('.m-menu__title');
for(var i=0;i<menuTitles.length;i++){
menuTitles[i].onclick = function(){
/* 这里面获取的this就是绑定的事件的对象 */
var menu = this.parentElement;
menu.classList.toggle('m-menu--selected');
if( menu.className.includes('m-menu--selected') ){
//打开状态
var arrow = this.querySelector('[class*="icon-arrow"]');
arrow.className = 'iconfont icon-arrowup';
}
else{
//关闭状态
var arrow = this.querySelector('[class*="icon-arrow"]');
arrow.className = 'iconfont icon-arrowdown';
}
};
}
/* 点击 折叠/展开 侧边栏 */
var bar = document.querySelector('.g-ant-sider__foot .u-bar');
var sider = document.querySelector('.g-ant__sider');
var menus = document.querySelectorAll('.m-menu');
bar.onclick = function(){
/* 切换 折叠/展开 样式类名 */
sider.classList.toggle('g-ant__sider--closed');
/* 第1个目录加上 m-menu--selected类名 */
menus[0].classList.add('m-menu--selected');
/* 第1个目录下的箭头修改为向上 */
menus[0].querySelector('[class*="icon-arrow"]').className = 'iconfont icon-arrowup';
/* 将其它所有目录全部移除掉 m-menu--selected类名 */
/* 将其它所有目录下的箭头修改为向下 */
for(var i=1;i<menus.length;i++){
menus[i].classList.remove('m-menu--selected');
menus[i].querySelector('[class*="icon-arrow"]').className = 'iconfont icon-arrowdown';
}
};
/* 打开或关闭设置 抽屉 */
var setting = document.querySelector('.m-setting');
var settingBar = document.querySelector('.m-setting__bar');
/* 给设置按钮绑定点击事件 */
settingBar.onclick = function(){
/* 切换样式类,打开或关闭抽屉(该类名添加给整个setting,以方便css选择和控制后面的mask蒙层)*/
setting.classList.toggle('m-setting--open');
/* 如果包含这个 m-setting--open 类名, 则修改图标 */
if( setting.className.includes('m-setting--open') ){
var icon = this.querySelector('i');
/* 直接覆盖全部样式 */
icon.className = 'iconfont icon-close';
}
else{
var icon = this.querySelector('i');
icon.className = 'iconfont icon-setting';
}
};
/* 主题色切换 */
var themes = document.querySelectorAll('.m-setting-item__theme>li');
for(var i=0;i<themes.length;i++){
themes[i].onclick = function(){
/* 移除所有主体色中的对勾小图标 */
for(var i=0;i<themes.length;i++){
themes[i].innerHTML = '';
}
/* 添加点击的主题色的对勾小图标 */
this.innerHTML = '<i class="iconfont icon-check"></i>';
/* 修改:root(即html元素)中定义的主题色 */
var color = getComputedStyle(this).backgroundColor;
document.documentElement.style.setProperty('--theme', color);
};
}
/* 主体头部 */
var mainHead = document.querySelector('.g-ant-main__head');
var siderWrap = document.querySelector('.g-ant-sider__wrap');
/* 头部固定开关 */
var headFixed = document.querySelector('.j-head--fixed');
headFixed.onclick = function(){
/* 切换开关样式 */
this.classList.toggle('u-switch--closed');
/* 切换头部的样式类名 */
mainHead.classList.toggle('g-ant-main__head--fixed');
};
/* 左边菜单栏固定开关 */
var siderFixed = document.querySelector('.j-sider--fixed');
siderFixed.onclick = function(){
/* 切换开关样式 */
this.classList.toggle('u-switch--closed');
/* 切换侧边栏内部div的样式类名 */
siderWrap.classList.toggle('g-ant-sider__wrap--fixed');
};
/* 头部显示/隐藏开关 */
var headShow = document.querySelector('.j-head--show');
headShow.onclick = function(){
/* 切换开关样式 */
this.classList.toggle('u-switch--closed');
/* 切换内容去头部的样式类名(这里是直接添加了个公共样式的类名) */
mainHead.classList.toggle('hide');
};
/* 左边菜单栏显示/隐藏开关 */
var siderShow = document.querySelector('.j-sider--show');
siderShow.onclick = function(){
/* 切换开关样式 */
this.classList.toggle('u-switch--closed');
/* 整个侧边栏消失 */
sider.classList.toggle('hide');
};
/* 当屏幕小于992时,左侧侧边栏自动隐藏,但是内容区头部会显示1个图标和按钮,点击这个按钮时,要显示左侧侧边栏 */
var bar2 = document.querySelector('.m-logo2 .u-bar');
bar2.onclick = function(){
/* 如果在设置中,没有设置侧边栏隐藏。点击按钮时,才显示侧边栏 */
if( !sider.className.includes('hide') ){
/* show是公共显示的样式, 即display:block !important */
sider.classList.add('show');
}
};
/* 点击左侧侧边栏的蒙层,去掉show(使用兄弟选择器,选择sider后面的蒙层) */
var mask = document.querySelector('.g-ant__sider + .u-mask');
mask.onclick = function(){
/* 隐藏蒙层的同时,隐藏侧边栏 */
sider.classList.remove('show');
};
</script>
</body>
</html>
global.css
@charset "utf-8";

/* --------------------重置样式-------------------------------- */

body,
h1,
h2,
h3,
h4,
h5,
h6,
hr,
p,
blockquote,
dl,
dt,
dd,
ul,
ol,
li,
button,
input,
textarea,
th,
td {
    margin : 0;
    padding: 0
}

/*设置默认字体*/
body {
    font-size  : 14px;
    font-style : normal;
    font-family: -apple-system, BlinkMacSystemFont, segoe ui, Roboto, helvetica neue, Arial, noto sans, sans-serif, apple color emoji, segoe ui emoji, segoe ui symbol, noto color emoji;
}

/*字体太小用户体检不好,让small恢复12px*/
small {
    font-size: 12px
}

h1 {
    font-size: 18px
}

h2 {
    font-size: 16px
}

h3 {
    font-size: 14px
}

h4,
h5,
h6 {
    font-size: 100%
}

ul,
ol {
    list-style: none
}

a {
    text-decoration : none;
    background-color: transparent
}

a:hover,
a:active {
    outline-width  : 0;
    text-decoration: none
}

/*重置表格*/
table {
    border-collapse: collapse;
    border-spacing : 0
}

/*重置hr*/
hr {
    border: 0;
    height: 1px
}

/*图形图片*/
img {
    border-style: none
}

img:not([src]) {
    display: none
}

svg:not(:root) {
    overflow: hidden
}

/*下面的操作是针对于html5页面布局准备的,不支持ie6~8以及其他低版本的浏览器*/
html {
    /*禁用系统默认菜单*/
    -webkit-touch-callout   : none;
    /*关闭iphone & Android的浏览器纵向和横向模式中自动调整字体大小的功能*/
    -webkit-text-size-adjust: 100%
}

input,
textarea,
button,
a {
    /*表单或者a标签在手机点击时会出现边框或彩色的背景区域,意思是去除点击背景框*/
    -webkit-tap-highlight-color: rgba(0, 0, 0, 0)
}

/*重置html5元素的默认样式*/
article,
aside,
details,
figcaption,
figure,
footer,
header,
main,
menu,
nav,
section,
summary {
    display: block
}

audio,
canvas,
progress,
video {
    display: inline-block
}

audio:not([controls]),
video:not([controls]) {
    display: none;
    height : 0
}

progress {
    vertical-align: baseline
}

mark {
    background-color: #ff0;
    color           : #000
}

sub,
sup {
    position      : relative;
    font-size     : 75%;
    line-height   : 0;
    vertical-align: baseline
}

sub {
    bottom: -0.25em
}

sup {
    top: -0.5em
}

button,
input,
select,
textarea {
    font-size: 100%;
    outline  : 0
}

button,
input {
    overflow: visible
}

button,
select {
    text-transform: none
}

textarea {
    overflow: auto
}

button,
html [type="button"],
[type="reset"],
[type="submit"] {
    -webkit-appearance: button
}

button::-moz-focus-inner,
[type="button"]::-moz-focus-inner,
[type="reset"]::-moz-focus-inner,
[type="submit"]::-moz-focus-inner {
    border-style: none;
    padding     : 0
}

button:-moz-focusring,
[type="button"]:-moz-focusring,
[type="reset"]:-moz-focusring,
[type="submit"]:-moz-focusring {
    outline: 1px dotted ButtonText
}

[type="checkbox"],
[type="radio"] {
    box-sizing: border-box;
    padding   : 0
}

[type="number"]::-webkit-inner-spin-button,
[type="number"]::-webkit-outer-spin-button {
    height: auto
}

[type="search"] {
    -webkit-appearance: textfield;
    outline-offset    : -2px
}

[type="search"]::-webkit-search-cancel-button,
[type="search"]::-webkit-search-decoration {
    -webkit-appearance: none
}

::-webkit-input-placeholder {
    color  : inherit;
    opacity: .54
}

::-webkit-file-upload-button {
    -webkit-appearance: button;
    font              : inherit
}

/*-----------------通用方法-----------------------*/

:root {
    --theme: #1890ff;
}

.show {
    display: block !important;
}

.hide {
    display: none !important;
}

/*-----------------通用布局(g-)-----------------------*/

.g-ant {
    display: flex;
}

.g-ant__sider {
    flex-shrink: 0;
    background : #00152a;
    width      : 208px;
    min-height : 100vh;
    position: relative;
    z-index: 3;
}

.g-ant-sider__wrap {
    height        : 100%; /* 当采用固定定位时,100%高度就是可视区的高度;当不采用固定定位时,100%就是父元素高度 */
    display       : flex;
    flex-direction: column;
}

.g-ant-sider__wrap--fixed {
    position: fixed;
    left    : 0;
    top     : 0;
    width   : inherit; /* 当使用固定定位后,外部容器使用overflow:hidden将盖不住fixed的内容, 此处将width改为与父容器一致,然后溢出隐藏 */
    overflow: hidden;
}

.g-ant__sider--closed {
    width   : 48px;
    overflow: hidden;
}

.g-ant-sider__head {
    flex-shrink: 0;
}

.g-ant-sider__main {
    flex-grow: 1;
    overflow : hidden auto;
}

.g-ant-sider__main::-webkit-scrollbar {
    width : 6px;
    height: 6px;
}

.g-ant-sider__main::-webkit-scrollbar-thumb {
    background   : #51606d;
    border-radius: 3px;
}

.g-ant-sider__main::-webkit-scrollbar-track {
    background   : #263849;
    border-radius: 3px;
}

.g-ant-sider__foot {
    flex-shrink: 0;
}

.g-ant__main {
    flex-grow     : 1;
    display       : flex;
    flex-direction: column;
    background    : #f1f2f6;
}

.g-ant-main__head {
    height         : 48px;
    background     : white;
    flex-shrink    : 0;
    display        : flex;
    justify-content: flex-end;
    align-items    : center;
    box-shadow     : 0 1px 4px #ccc;
    column-gap     : 20px;
    padding        : 0 20px;
}

.g-ant-main__head--fixed {
    position: fixed;
    left    : 0;
    right   : 0;
    z-index : 2;
}

.g-ant-main__head--fixed:not(.hide) + .g-ant-main__main{
    margin-top: 48px;
}

.g-ant-main__head>span {
    margin-left: -15px;
}

.g-ant-main__main {
    flex-grow: 1;
}

.g-ant-main__foot {
    margin-top   : 70px;
    margin-bottom: 30px;
    line-height  : 30px;
    text-align   : center;
    color        : #868782;
}

.g-ant-main__foot a {
    color : inherit;
    margin: 0 20px;
}


/*-----------------通用模块(m-)-----------------------*/

.m-logo {
    display    : flex;
    align-items: center;
    padding    : 16px;
    color      : white;
}

.m-logo>img {
    width: 32px;
}

.m-logo>h1 {
    font-weight: 600;
    margin-left: 12px;
    flex-shrink: 0;
}

.m-logo2{
    display    : none;
    align-items: center;
    margin-right: auto;
}
.m-logo2>img {
    width: 32px;
}
.m-logo2>.u-bar{
    color: inherit;
}

.g-ant__sider--closed .m-logo {
    padding: 16px 8px;
}

.m-menu {
    color : #8c959e;
    cursor: pointer;
}

.m-menu__title {
    height     : 44px;
    display    : flex;
    align-items: center;
    column-gap : 10px;
    padding    : 0 15px;
}

.m-menu__title>span {
    margin-right: auto;
}

.m-menu__sub {
    display: none;
}

.m-menu__sub>li {
    padding-left: 45px;
    height      : 40px;
    line-height : 40px;
}

.m-menu--selected .m-menu__title {
    color: white;
}

.m-menu--selected .m-menu__sub {
    display: block;
}

.m-menu__sub--selected {
    background: var(--theme);
    color     : white;
}

.g-ant__sider--closed .m-menu__title {
    transform: scale(1.5);
}

.g-ant__sider--closed .m-menu__sub {
    display: none;
}


.m-card {
    width         : 100%;
    height        : 100%;
    background    : white;
    display       : flex;
    flex-direction: column;
    border-radius : 2px;
    font-size     : 16px;
}

.m-card__title {
    flex-shrink  : 0;
    height       : 57px;
    border-bottom: 1px #f1f1f1 solid;
    display      : flex;
    align-items  : center;
    padding-left : 20px;
}

.m-card__body {
    flex-grow: 1;
    padding  : 20px;
}


.m-setting {
    width     : 300px;
    height    : 100vh;
    background: white;
    position  : fixed;
    right     : -300px;
    top       : 0;
    padding   : 0 15px;
    box-sizing: border-box;
    z-index   : 10;
}

.m-setting--open {
    right: 0;
}

.m-setting--open+.u-mask {
    display: block;
}

.m-setting__bar {
    width          : 48px;
    height         : 48px;
    background     : var(--theme);
    border-radius  : 2px;
    position       : absolute;
    left           : -48px;
    top            : calc(50% - 24px);
    color          : white;
    display        : flex;
    justify-content: center;
    align-items    : center;
    cursor         : pointer;
}

.m-setting__bar>i {
    font-size: 22px;
}

.m-setting__item {
    margin: 50px 0;
}

.m-setting-item__theme {
    display        : flex;
    justify-content: space-between;
    margin         : 30px 0;
}

.m-setting-item__toggle>li {
    display        : flex;
    justify-content: space-between;
    margin         : 30px 0;
}

/*-----------------通用元件(u-)-----------------------*/

.u-bar {
    font-size: 18px;
    color    : white;
    display  : block;
    padding  : 15px;
    cursor   : pointer;
}

.u-foxiaolan,
.u-bomu,
.u-huoshan,
.u-rimu,
.u-mingqing,
.u-jiguanglv,
.u-jikelan,
.u-jiangzi {
    width        : 20px;
    height       : 20px;
    color        : white;
    border-radius: 2px;
    cursor       : pointer;
    line-height  : 20px;
    text-align   : center;
}

.u-foxiaolan {
    background: #188efc;
}

.u-bomu {
    background: #f5212d;
}

.u-huoshan {
    background: #fe531f;
}

.u-rimu {
    background: #fbae14;
}

.u-mingqing {
    background: #14c2c3;
}

.u-jiguanglv {
    background: #53c41a;
}

.u-jikelan {
    background: #2f54eb;
}

.u-jiangzi {
    background: #722ed1;
}

.u-divider {
    width     : 100%;
    height    : 1px;
    background: #f0f0f0;
    margin    : 25px 0;
}

.u-switch {
    width        : 28px;
    height       : 16px;
    border-radius: 100px;
    background   : var(--theme);
    cursor       : pointer;
}

.u-switch--closed {
    background: rgba(0, 0, 0, 0.25);
}

.u-switch--closed .u-switch__handle {
    left: 14px;
}

.u-switch__handle {
    width        : 12px;
    height       : 12px;
    background   : white;
    border-radius: 50%;
    position     : relative;
    left         : 2px;
    top          : 2px;
}

.u-mask {
    display   : none;
    width     : 100vw;
    height    : 100vh;
    background: rgba(0, 0, 0, 0.4);
    position  : fixed;
    left      : 0;
    top       : 0;
    z-index   : 5;
}

/*-----------------响应式系统-----------------------*/

@media(max-width:1400px){}
@media(max-width:1200px){}
@media(max-width:992px){

    .m-logo2{
        /* 当屏幕小于992时,就展示头部的显示侧边栏图标和按钮 */
        display: flex;
    }


    .g-ant__sider{

        /* 隐藏侧边栏 */
        display: none;

        /* 开启固定定位 */
        position: fixed;

        left:0;
        top:0;
        z-index: 6;
    }

    .g-ant__sider:is(.show) + .u-mask{
        display: block;
    }

}
@media(max-width:768px){}
@media(max-width:576px){}
index.css
.index-main {
    display              : grid;
    grid-template-columns: repeat(4, 1fr);
    grid-template-rows   : repeat(3, 285px);
    gap                  : 24px;
    margin               : 24px;
    grid-template-areas  :
        "a1 a1 a1 a2"
        "a1 a1 a1 a3"
        "a4 a4 a5 a6";
}

.index-main .m-card:nth-of-type(1) {
    grid-area: a1;
}

.index-main .m-card:nth-of-type(2) {
    grid-area: a2;
}

.index-main .m-card:nth-of-type(3) {
    grid-area: a3;
}

.index-main .m-card:nth-of-type(4) {
    grid-area: a4;
}

.index-main .m-card:nth-of-type(5) {
    grid-area: a5;
}

.index-main .m-card:nth-of-type(6) {
    grid-area: a6;
}

.index-main__bg1,
.index-main__bg2,
.index-main__bg3,
.index-main__bg4,
.index-main__bg5,
.index-main__bg6 {
    background-repeat  : no-repeat;
    background-position: center center;
    background-size    : contain;
    width              : 100%;
    height             : 100%;
}

.index-main__bg1 {
    background-image: url(../static/index-1.jpg);
}

.index-main__bg2 {
    background-image: url(../static/index-2.jpg);
}

.index-main__bg3 {
    background-image: url(../static/index-3.jpg);
}

.index-main__bg4 {
    background-image: url(../static/index-4.jpg);
}

.index-main__bg5 {
    background-image: url(../static/index-5.jpg);
}

.index-main__bg6 {
    background-image: url(../static/index-6.jpg);
}


@media(max-width:1400px) {}

@media(max-width:1200px) {
    .index-main {
        display              : grid;
        grid-template-columns: repeat(3, 1fr);
        grid-template-rows   : repeat(4, 285px);
        gap                  : 24px;
        margin               : 24px;
        grid-template-areas  :
            "a1 a1 a1"
            "a1 a1 a1"
            "a2 a3 a5"
            "a4 a4 a6";
    }
}

@media(max-width:992px) {
    .index-main {
        display              : grid;
        grid-template-columns: repeat(2, 1fr);
        grid-template-rows   : repeat(5, 285px);
        gap                  : 24px;
        margin               : 24px;
        grid-template-areas  :
            "a1 a1"
            "a1 a1"
            "a2 a3"
            "a4 a4"
            "a5 a6";
    }
}

@media(max-width:768px) {
    .index-main {
        display              : grid;
        grid-template-columns: repeat(1, 1fr);
        grid-template-rows   : repeat(6, 285px);
        gap                  : 24px;
        margin               : 24px;
        grid-template-areas  :
            "a1"
            "a2"
            "a3"
            "a4"
            "a5"
            "a6";
    }
}

@media(max-width:576px) {}
自定义变量
前言
自定义属性(有时也被称作CSS变量或者级联变量)是由CSS作者定义的,它包含的值可以在整个文档中重复使用。
由自定义属性标记设定值(比如: --main-color: black;),由 var() 函数来获取值(比如: color: var(–main-color);)
复杂的网站都会有大量的CSS代码,通常也会有许多重复的值。
举例:同样一个颜色值可能在成千上百个地方被使用到,如果这个值发生了变化,需要全局搜索并且一个一个替换。
自定义属性在某个地方存储一个值,然后在其他许多地方引用它。另一个好处是语义化的标识。
如:–main-text-color 会比 #00ff00 更易理解,尤其是这个颜色值在其他上下文中也被使用到。
自定义属性受级联的约束,并从其父级继承其值。
浏览器兼容情况:
1. 变量的声明
声明一个自定义属性,属性名需要以两个减号(–)开始,属性值则可以是任何有效的CSS值。
和其他属性一样,自定义属性也是写在规则集之内的,如下:
element {
  --main-bg-color: brown;
}
注意:规则集所指定的选择器定义了自定义属性的可见作用域。
通常的最佳实践是定义在根伪类 :root 下,这样就可以在HTML文档的任何地方访问到它了:
:root {
  --main-color: red;
  --bg-color: pink;
  --main-font-size: 15px;
}
然而这条规则不是绝对的,如果有理由去限制你的自定义属性,那么就应该限制。
注意:自定义属性名是大小写敏感的。 --my-color 和 --My-color 会被认为是两个不同的自定义属性。
2. var() 函数
读取变量
.wrap{
  color: var(--main-color);
}
使用第二个参数,表示变量的默认值。如果该变量不存在,就会使用这个默认值。
第二个参数不处理内部的逗号或空格,都视作参数的一部分。
.wrap{
  height: var(--el-height,400px);
  font-family: var(--font-stack, "Roboto", "Helvetica");
  padding:var(--pad, 10px 20px);
}
变量的声明
:root {
  --length: 400px;
  --mian-width:var(--length);
}
注意:变量值只能用作属性值,不能用作属性名。
.foo {
  --side: margin-top;
  var(--side): 20px;  /* 无效 */
}
3. 变量值的类型
如果变量值是一个字符串,可以与其他字符串拼接。
:root {
  --content: 'CSS';
}
.wrap::after{
  content:'hello' var(--content);
}
如果变量值是数值,不能与数值单位直接连用。必须使用calc()函数,将它们连接。
.wrap{
  --gap: 20;
  margin-top: var(--gap)px;  /* 无效 */
  margin-bottom: calc(var(--gap) * 1px);
}
如果变量值带有单位,就不能写成字符串。
/* 无效 */
.wrap {
  --foo: '20px';
  font-size: var(--foo);
}

/* 有效 */
.wrap {
  --foo: 20px;
  font-size: var(--foo);
}
4. 作用域
同一个 CSS 变量,可以在多个选择器内声明。读取的时候,优先级最高的声明生效。这与 CSS 的"层叠"(cascade)规则是一致的。
<style>
  :root { --color: blue; }
  span { --color: green; }
  #title { --color: red; }
</style>
<p>蓝色</p>
<span>绿色</span>
<div id="title">红色</div>

p {
  color: var(--color);
}
span{
  color: var(--color);
}
#title{
  color: var(--color) ;
}
上面代码中,三个选择器都声明了–color变量。不同元素读取这个变量的时候,会采用优先级最高的规则,因此三段文字的颜色是不一样的。
这就是说,变量的作用域就是它所在的选择器的有效范围。
由于这个原因,全局的变量通常放在根元素 :root 里面,确保任何选择器都可以读取它们。
:root {
  --main-color: #06c;
}
5. 响应式布局
CSS 是动态的,页面的任何变化,都会导致采用的规则变化。
利用这个特点,可以在响应式布局的 media 命令里面声明变量,使得不同的屏幕宽度有不同的变量值。
body {
  --primary: #7F583F;
  --secondary: #F7EFD2;
}

a {
  color: var(--primary);
  text-decoration-color: var(--secondary);
}

@media screen and (min-width: 768px) {
  body {
    --primary:  #F7EFD2;
    --secondary: #7F583F;
  }
}
6. JavaScript 操作
JavaScript 也可以检测浏览器是否支持 CSS 变量。
const isSupported =
  window.CSS &&
  window.CSS.supports &&
  window.CSS.supports('--a', 0);

if (isSupported) {
  console.log('support')
} else {
  console.log('not support')
}
JavaScript 操作 CSS 变量的写法如下:
// 设置 Dom 节点上的 CSS 变量
el.style.setProperty("--bg-color", 'yellow');
// 读取变量(好像只能读取元素通过setProperty设置的,不能读取根元素 :root 里的)
document.body.style.getPropertyValue('--primary').trim();
// 获取任意 Dom 节点上的 CSS 变量(能读取元素通过setProperty设置的和根元素 :root 里的)
getComputedStyle(el).getPropertyValue("--bg-color").trim();
// 删除变量(好像只能删除元素通过ssetProperty设置的,不能删除根元素 :root 里的)
el.style.removeProperty('--bg-color');
7. 兼容性处理
对于不支持 CSS 变量的浏览器,可以采用下面的写法。
a {
  color: #7F583F;
  color: var(--primary);
}
也可以使用 @support 命令进行检测。
@supports ( (--a: 0)) {
  /* support */
}

@supports ( not (--a: 0)) {
  /* not support */
}
