前端路由主要指url地址发生了变化,但是不用刷新整个页面去实现局部页面的无感刷新,用户感觉是在不同的两个页面,但实际上是在同一个页面。 我们需要考虑两个问题:
- 保证url地址改变了,但是页面不能刷新;
- 如何去监听url地址改变。
路由模式
-
hash
Hash 模式其实就是通过改变 URL 中 # 号后面的 hash 值来切换路由,因为在 URL 中 hash 值的改变并不会引起页面刷新,再通过 hashchange 事件来监听 hash 的改变从而控制页面组件渲染。 -
history
它提供了 pushState 和 replaceState 两个方法,使用这两个方法可以改变 URL 的路径还不会引起页面刷新,同时它也提供了一个 popstate 事件来监控路由改变,但是 popstate 事件并不像 hashchange 那样改变了就会触发,情况如下:
- 通过浏览器前进后退,首次加载时改变了 URL 会触发 popstate 事件
- js 调用 historyAPI 的 back、go、forward 等方法可以触发该事件
文件结构(hash路由讲解)
- index.js
let Vue;
class VueRouter {
  constructor(options) {
    this.$options = options;
  }
}
VueRouter.install = function(_Vue){
	Vue = _Vue
};
export default VueRouter
Vue.use(VueRouter)后首先会调用VueRouter的install方法,并且传入Vue作为参数。在这里注册了全局组件router-link和router-view。
- router-link组件
// 注册并且实现两个组件
Vue.component("router-link", {
  // 有一个必传的to值,即a标签里面的href,用于改变url
  props: {
    to: {
      required: true,
    },
  },
  render(h) {
    return h(
      "a",
      {
        attrs: { href: "#" + this.to },
      },
      // 默认插槽
      this.$slots.default
    );
  },
  });
- router-view组件
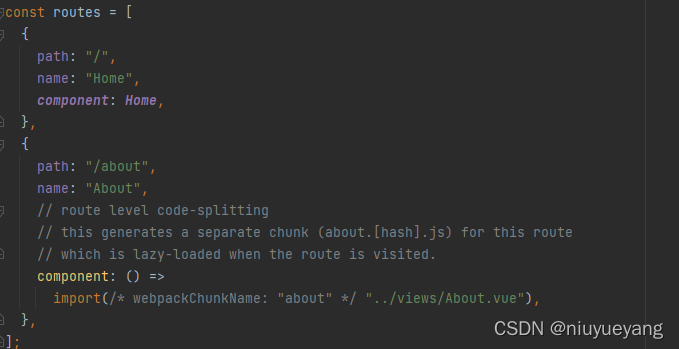
class VueRouter {
  constructor(options) {
    // 接受传入的参数
    this.$options = options;
    const initial = "/";
    // 将current变成响应式数据,
    //这样在hashchange的回掉中修改curent时,
    //用到current的router-view的render函数就会重新渲染
    Vue.util.defineReactive(this, "current", initial);
    // 监听路由变化
    window.addEventListener("hashchange", () => {
      // 获取当前url中的hash
      this.current = window.location.hash.slice(1);
    });
  }
}

VueRouter.install = function (_Vue) {
  Vue = _Vue;
  Vue.component("router-view", {
    render(h) {
      // 获取当前路由所对应的组件,然后把它渲染出来
      const { current, $options } = this.$router;
      // 所以这里我们是找出匹配到当前current路由的项,然后直接渲染组件
      const route = $options.routes.find((item) => {
        return item.path === current;
      });
      let component = route ? route.component : null;
      return h(component);
    },
  });
}
整体代码
// 我们要实现什么
// 1、插件
// 2、两个组件

// 保存vue的构造函数,避免打包将其打进去
let Vue;
class VueRouter {
  constructor(options) {
    this.$options = options;
    const initial = "/";
    Vue.util.defineReactive(this, "current", initial);
    this.current = "/";
    window.addEventListener("hashchange", () => {
      // 获取当前url中的hash
      this.current = window.location.hash.slice(1);
    });
  }
}

// 参数1在Vue.use()调用时传进来,
VueRouter.install = function (_Vue) {
  Vue = _Vue;
  console.log("options", this);

  // 全局混入
  // 目的:延迟下面的逻辑 到 router创建完毕并且附加到选项上时才执行
  Vue.mixin({
    // 在每个组件创建实例时都会执行
    beforeCreate() {
      // this.$options.router ;即new Vue时放进去的router实例
      if (this.$options.router) {
        Vue.prototype.$router = this.$options.router;
      }
    },
  });

  // 注册并且实现两个组件
  Vue.component("router-link", {
    props: {
      to: {
        required: true,
      },
    },
    render(h) {
      return h(
        "a",
        {
          attrs: { href: "#" + this.to },
        },
        this.$slots.default
      );
    },
  });
  Vue.component("router-view", {
    render(h) {
      // 获取当前路由所对应的组件,然后把它渲染出来
      const { current, $options } = this.$router;
      const route = $options.routes.find((item) => {
        return item.path === current;
      });
      let component = route ? route.component : null;

      return h(component);
    },
  });
};

export default VueRouter;
