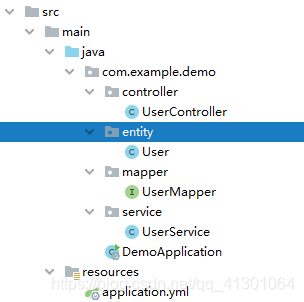
开发工具: IntelliJ IDEA 2019.3.3
使用技术: SpringBoot+mybatis+maven+mysql
测试工具: postman
项目搭建:
create table ` user ` (
id int ( 10 ) primary key auto_increment ,
username varchar ( 30 ) ,
password varchar ( 30 ) ,
gender varchar ( 10 )
)
insert into user values ( default , "zs" , "123" , "男" ) ;
insert into user values ( default , "ls" , "1234" , "女" ) ;
insert into user values ( default , "ww" , "1235" , "男" ) ;
< parent> < groupId> . springframework. boot< / groupId>
< artifactId> - boot- starter- parent< / artifactId>
< version> 2.1 .8 . RELEASE< / version>
< / parent>
< dependencies> < dependency> < groupId> . springframework. boot< / groupId>
< artifactId> - boot- starter- web< / artifactId>
< / dependency>
< ! -- springboot 整合mybatis -- >
< dependency> < groupId> . mybatis. spring. boot< / groupId>
< artifactId> - spring- boot- starter< / artifactId>
< version> 1.1 .1 < / version>
< / dependency>
< dependency> < groupId> < / groupId>
< artifactId> - connector- java< / artifactId>
< version> 5.1 .21 < / version>
< / dependency>
< dependency> < groupId> < / groupId>
< artifactId> < / artifactId>
< scope> < / scope>
< / dependency>
< / dependencies>
这里使用application.yml文件,相对于properties配置文件,yml有着天然树形结构,使得它看起来更加直观,不用重复的去写前缀,
spring:
datasource:
url: jdbc: mysql: / / localhost: 3306 / test1? useUnicode= true & characterEncoding= utf8
username: root
password: abc123
driver- class - name: com. mysql. jdbc. Driver
useUnicode=true&characterEncoding=utf8的作用:插入数据到mysql时不会出现中文乱码
可以使用Alt+Insert来生成getset方法和构造器方法
package com. example. demo. entity;
public class User {
private int id;
private String name;
private String password;
private String gender;
public User ( ) {
}
public User ( String name, String password, String gender) {
this . name = name;
this . password = password;
this . gender = gender;
}
public int getId ( ) {
return id;
}
public void setId ( int id) {
this . id = id;
}
public String getName ( ) {
return name;
}
public void setName ( String name) {
this . name = name;
}
public String getPassword ( ) {
return password;
}
public void setPassword ( String password) {
this . password = password;
}
public String getGender ( ) {
return gender;
}
public void setGender ( String gender) {
this . gender = gender;
}
@Override
public String toString ( ) {
return "User{" +
"id=" + id +
", name='" + name + '\'' +
", password='" + password + '\'' +
", gender='" + gender + '\'' +
'}' ;
}
}
这里通过注解来实现增删改查,可以不用编写对应的xml文件
package com. example. demo. mapper;
import com. example. demo. entity. User;
import org. apache. ibatis. annotations. *;
import java. util. List;
public interface UserMapper {
@Insert ( "insert into user values(default,#{name},#{password},#{gender})" )
public int insertUser ( User user) ;
@Select ( "select * from user" )
public List< User> selectAll ( ) ;
@Delete ( "delete from user where id=#{id}" )
public int deleteUser ( int id) ;
@Update ( "update user set name=#{name},password=#{password},gender=#{gender} where id=#{id}" )
public int updateUser ( User user) ;
@Select ( "select * from user where name=#{name},password=#{password}" )
public int login ( @Param ( "name" ) String name, @Param ( "password" ) String password) ;
}
package com. example. demo. service;
import com. example. demo. entity. User;
import com. example. demo. mapper. UserMapper;
import org. springframework. beans. factory. annotation. Autowired;
import org. springframework. stereotype. Service;
import java. util. List;
@Service
public class UserService {
@Autowired
private UserMapper userMapper;
public int addUser ( User user) {
return userMapper. insertUser ( user) ;
}
public List< User> findAll ( ) {
return userMapper. selectAll ( ) ;
}
public int updUser ( User user) {
return userMapper. updateUser ( user) ;
}
public int delUser ( int id) {
return userMapper. deleteUser ( id) ;
}
public int login ( String name, String password) {
return userMapper. login ( name, password) ;
}
}
做了五个简单的接口,查询全部用户,增加用户,删除用户,修改用户,用户登录
package com. example. demo. controller;
import com. example. demo. entity. User;
import com. example. demo. service. UserService;
import org. springframework. beans. factory. annotation. Autowired;
import org. springframework. web. bind. annotation. RequestMapping;
import org. springframework. web. bind. annotation. RestController;
import java. util. List;
@RestController
public class UserController {
@Autowired
private UserService userService;
@RequestMapping ( "index" )
public String index ( ) {
return "Hello world" ;
}
@RequestMapping ( "/addUser" )
public String addUser ( ) {
User user = new User ( "zs" , "123" , "男" ) ;
return userService. addUser ( user) > 0 ? "success" : "fail" ;
}
@RequestMapping ( "/findAll" )
public List< User> findAll ( ) {
return userService. findAll ( ) ;
}
@RequestMapping ( "/updUser" )
public String updUser ( int id) {
User user = new User ( "ls" , "123" , "女" ) ;
user. setId ( id) ;
return userService. updUser ( user) > 0 ? "success" : "fail" ;
}
@RequestMapping ( "/delUser" )
public String delUser ( int id) {
return userService. delUser ( id) > 0 ? "success" : "fail" ;
}
@RequestMapping ( "/login" )
public String login ( String name, String password) {
return userService. login ( name, password) > 0 ? "登录成功" : "登录失败" ;
}
}
package com. example. demo;
import org. mybatis. spring. annotation. MapperScan;
import org. springframework. boot. SpringApplication;
import org. springframework. boot. autoconfigure. SpringBootApplication;
@SpringBootApplication
@MapperScan ( "com.example.demo.mapper" )
public class DemoApplication {
public static void main ( String[ ] args) {
SpringApplication. run ( DemoApplication. class , args) ;
}
}
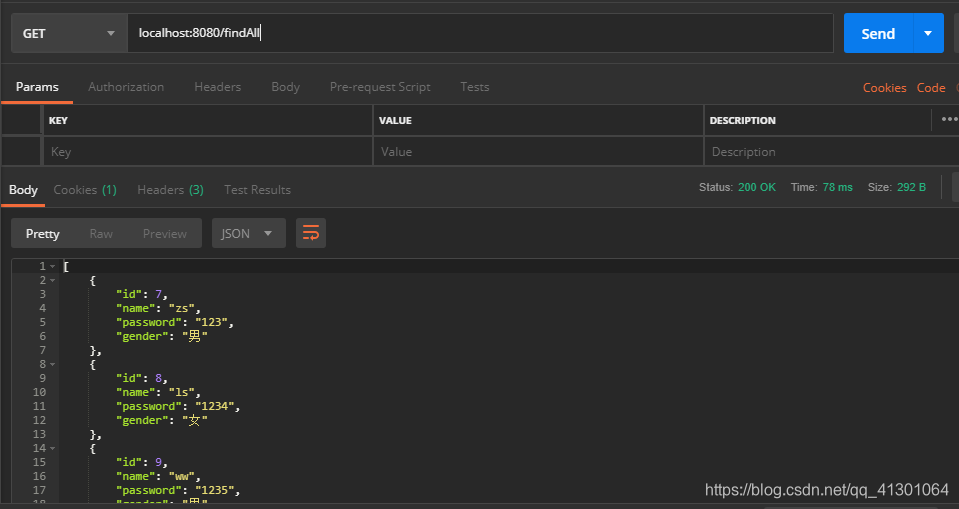
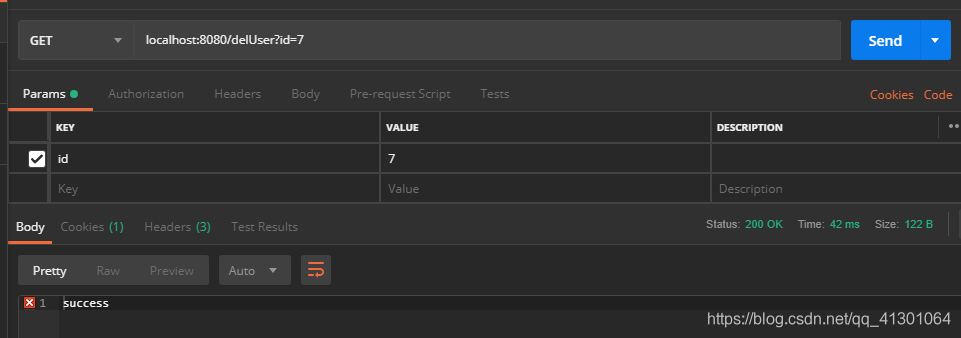
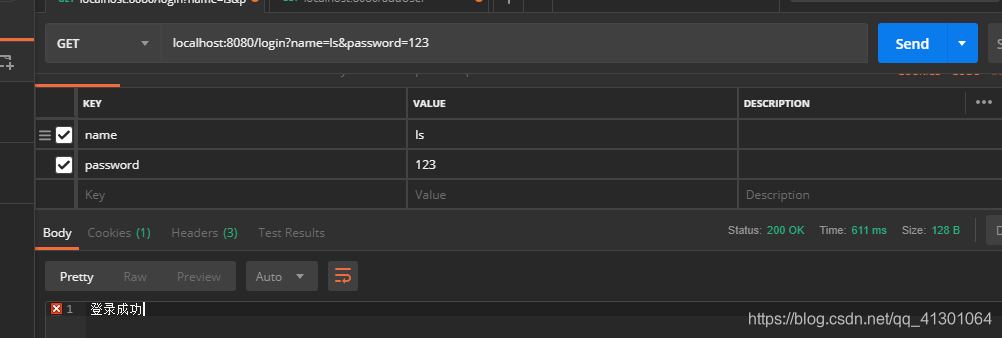
这里通过postman来测试接口
出现Hellow World表示项目部署成功,报错请检查配置以及注解是否正确
出现以下结果表示整合mybatis成功,报错请检查application.yml文件名以及文件配置信息是否不对
曾经看过这么一段话,当你的才华还不足以支撑你的野心时,你就应该静下心来好好学习,在此与各位共勉。


