我们现在看看代码,最后看一下效果:
核心代码: js
Page({

    data: {
        videoSrc: '',
        videoImg: '',                                     //视频封面,缓冲时会出现黑屏,加视频封面会提升用户体验,但是ios手机封面图会闪现,不知道怎么解决
        autoplay: true,
        touchX: 0,                                        //手指按下时x的坐标
        touchY: 0,                                        //手指按下时y的坐标
        interval: null,                                   //计时器
        time: 0,                                          //按下到松开的时间
        current: 0                                        //swiper的当前轮播图下标
    },
    //事件处理函数
  play: function (val) {
    this.setData({
      videoSrc: val.currentTarget.dataset.item.video,
      autoplay: false,
      videoImg: val.currentTarget.dataset.item.img
    })
  },
  //禁止视频的手动控制进度属性,监听手指移动去滑动轮播图(手指滑动轮播图和控制视频进度事件冲突)
  //手指开始触屏
  start: function (e) {
    //获取触摸的原始点
    this.setData({
      touchX: e.touches.length > 0 ? e.touches[0].pageX : 0,
      touchY: e.touches.length > 0 ? e.touches[0].pageY : 0
    })
    let timeNew = this.data.time
    //开始记录时间
    this.data.interval = setInterval(() => timeNew++, 100)
    this.setData({
      time: timeNew
    })
  },
  //手指结束触屏
  end: function (e) {
    let touchX = e.changedTouches.length > 0 ? e.changedTouches[0].pageX : 0
    let touchY = e.changedTouches.length > 0 ? e.changedTouches[0].pageY : 0
    let tmX = touchX - this.data.touchX
    let tmY = touchY - this.data.touchY
    if (this.data.time < 10) {
      let absX = Math.abs(tmX)
      let absY = Math.abs(tmY)
      if (absX > 2 * absY) {
        // console.log('5555')
        //滑动swiper,视频停止播放
        this.setData({
          autoplay: true,
          videoSrc: '',
          videoImg: ''
        })
        if (tmX < 0) {
          //左滑
          // console.log('左滑')
          this.setData({
            current: this.data.current == (this.data.banner_list.length - 1) ? 0 : this.data.current + 1
          })
        } else {
          //右滑
          // console.log('右滑')
          this.setData({
            current: this.data.current > 0 ? this.data.current - 1 : this.data.banner_list.length - 1
          })
        }
      }
    }
    clearInterval(this.data.interval)
    this.setData({
      time: 0
    })
  },
  handleStop: function () {
    this.setData({
      videoSrc: '',
      autoplay: true,
      videoImg: ''
    })
  },
  changeCurrent: function (e) {
    //手指滑动轮播图已经在视频播放的时候做了,这里只需要做轮播图自动滚动,但是不停的调用setData可能会出现一些未知的bug,可根据需求场景设置
    if (e.detail.source == 'autoplay') {
      this.setData({
        current: e.detail.current
      })
    }
  },
})
wxml
<!-- 轮播图 S -->
		<view style="padding:0" data-e="{{e}}" bindtouchstart="start" bindtouchend="end">
			<swiper class="detail-banner" wx:if="{{!videoSrc}}" current="{{current}}" circular="{{true}}" indicator-dots="{{true}}" autoplay="{{autoplay}}" data-e="{{e}}" bindchange="changeCurrent">
				<view wx:for="{{banner_list}}" wx:key="index">
					<swiper-item>
						<image bindtap="previewImage" src="{{item.url}}" data-src="{{item.url}}" data-index="{{index}}" style="width:100%;height:100%" mode='aspectFill' />
						<image class="playbtn" wx:if="{{item.type == 1}}" src='https://ico.dongtiyan.com/tu-93.png' bindtap="play" data-item="{{item}}" />
						<view class="nums">
							<image src="https://ico.dongtiyan.com/tu-127.png"></image>
							<view>
								<text>{{index+1}}</text>
								<text> / </text>
								<text>{{banner_list.length}}</text>
							</view>
						</view>
					</swiper-item>
				</view>
			</swiper>
			<video enable-progress-gesture="{{false}}" custom-catch="{{false}}" wx:if="{{videoSrc}}" style="width:100%;height:579rpx" autoplay="{{true}}" src="{{videoSrc}}" controls="controls" bindpause="handleStop"></video>
		</view>
		<!-- 轮播图 E -->
wxss
/* 轮播图 */

.detail-banner {
  width: 100%;
  height: 579rpx;
  background: white;
}

.detail-banner-img {
  width: 100%;
  height: 100%;
}

.nums {
  position: fixed;
  right: 0;
  bottom: 52rpx;
  width: 102rpx;
  height: 51rpx;
  color: #fff;
}

.nums image {
  width: 102rpx;
  height: 51rpx;
}

.nums view {
  position: fixed;
  margin-top: -63rpx;
  right: 24rpx;
}

.nums view text:nth-child(1) {
  font-size: 32rpx;
}

.nums view text:nth-child(2) {
  font-size: 14.94rpx;
}

.nums view text:nth-child(3) {
  font-size: 20rpx;
}
json
{
"navigationStyle": "custom",
"usingComponents": {}
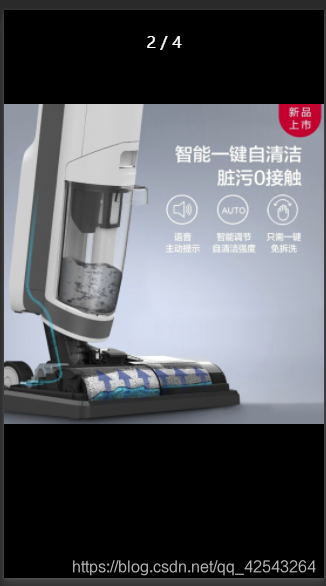
}最后来看一下效果吧

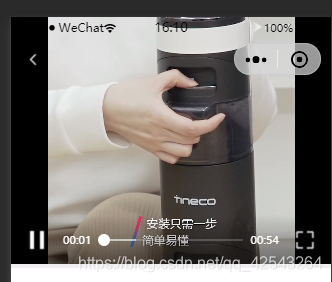
刚开始我也不知所措,在网上找个很多,尝试了很多办法,并没有找到完整功能的代码,只能靠自己结合需要的效果来实现,我来个大家分享一下完整效果实现思路,有什么更简单实用的,请下方留言, 一起学习讨论, 谢谢
数据结构:

如果对你有帮助,请关注一下博主的小程序支持一下, 在此谢谢了