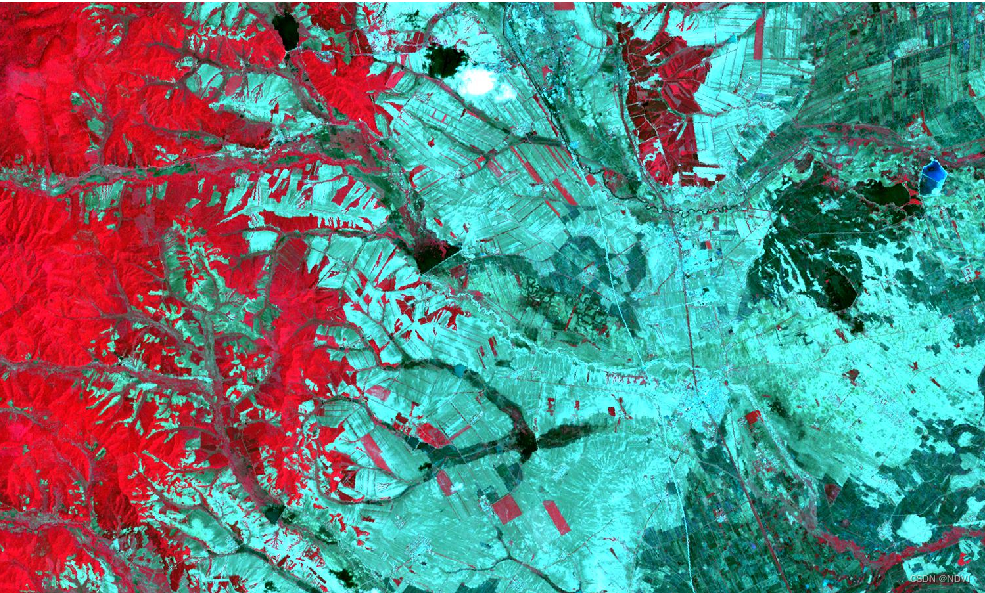
使用GDAL操作栅格数据
获取栅格影像信息
导入GDAL与gdalconst
from osgeo import gdal  # 导入GDAL
from osgeo.gdalconst import *
注册栅格数据驱动
gdal.AllRegister()  # 注册所有数据驱动
#  driver = gdal.GetDriverByName('GTiff')
#  driver.Register()  # 单独注册某一类型驱动(如GeoTiff类型)
打开栅格影像数据
filepath = r'E:\codes_lib\QGIS\GIS_Dev\gdata\geotiff_file.tif'
rds = gdal.Open(filepath)  # 打开栅格数据
读取影像元数据
# 读取影像元数据
rds.GetMetadata()
{'AREA_OR_POINT': 'Area', 'PyramidResamplingType': 'NEAREST'}
获取栅格数据信息
# 获取栅格数据信息
rds.GetDescription()
'E:\\codes_lib\\QGIS\\GIS_Dev\\gdata\\geotiff_file.tif'
读取栅格波段数目
# 获取栅格波段数
rds.RasterCount
3
获取栅格影像的行列数目
# 获取栅格影像的行列数目
img_Xsize = rds.RasterXSize
img_Ysize = rds.RasterYSize
print("影像的列数目(影像宽度)为:{} 行数目(影像高度)为:{}".format(img_Xsize,img_Ysize))
影像的列数目(影像宽度)为:1500 行数目(影像高度)为:900
获得影像的空间参考(仿射变换六参数)
# 获得影像的空间参考(仿射变换六参数)
GeoTransform = rds.GetGeoTransform()
Transform = ['左上角像元经度:','像元宽度:','X方向上旋转角度:','左上角像元纬度:','像元高度:','Y方向的旋转角度:']
for i in range(len(GeoTransform)):
    print(Transform[i],GeoTransform[i])
左上角像元经度: 1868454.913
像元宽度: 30.0
X方向上旋转角度: 0.0
左上角像元纬度: 5353126.266
像元高度: 0.0
Y方向的旋转角度: -30.0
获取影像投影信息
# 获取投影信息
rds.GetProjection()
'PROJCS["Albers_Beijing54",GEOGCS["Unknown datum based upon the Krassowsky 1940 ellipsoid",DATUM["Not_specified_based_on_Krassowsky_1940_ellipsoid",SPHEROID["Krassowsky 1940",6378245,298.3,AUTHORITY["EPSG","7024"]],AUTHORITY["EPSG","6024"]],PRIMEM["Greenwich",0],UNIT["degree",0.0174532925199433,AUTHORITY["EPSG","9122"]]],PROJECTION["Albers_Conic_Equal_Area"],PARAMETER["latitude_of_center",0],PARAMETER["longitude_of_center",105],PARAMETER["standard_parallel_1",25],PARAMETER["standard_parallel_2",47],PARAMETER["false_easting",0],PARAMETER["false_northing",0],UNIT["metre",1,AUTHORITY["EPSG","9001"]],AXIS["Easting",EAST],AXIS["Northing",NORTH]]'
获取栅格数据波段信息
rds = gdal.Open(r'E:\codes_lib\QGIS\GIS_Dev\gdata\lu75c.tif')
rds.RasterCount
1
读取栅格数据的波段
# 获取数据集的波段
band = rds.GetRasterBand(1)  # 注意波段索引开始值是1而不是0
dir(band)  # 查看波段的基本信息
['AdviseRead',
 'AsMDArray',
 'Checksum',
 'ComputeBandStats',
 'ComputeRasterMinMax',
 'ComputeStatistics',
 'CreateMaskBand',
 'DataType',
 'DeleteNoDataValue',
 'Fill',
 'FlushCache',
 'GetActualBlockSize',
 'GetBand',
 'GetBlockSize',
 'GetCategoryNames',
 'GetColorInterpretation',
 'GetColorTable',
 'GetDataCoverageStatus',
 'GetDataset',
 'GetDefaultHistogram',
 'GetDefaultRAT',
 'GetDescription',
 'GetHistogram',
 'GetMaskBand',
 'GetMaskFlags',
 'GetMaximum',
 'GetMetadata',
 'GetMetadataDomainList',
 'GetMetadataItem',
 'GetMetadata_Dict',
 'GetMetadata_List',
 'GetMinimum',
 'GetNoDataValue',
 'GetOffset',
 'GetOverview',
 'GetOverviewCount',
 'GetRasterCategoryNames',
 'GetRasterColorInterpretation',
 'GetRasterColorTable',
 'GetScale',
 'GetStatistics',
 'GetTiledVirtualMem',
 'GetTiledVirtualMemArray',
 'GetUnitType',
 'GetVirtualMem',
 'GetVirtualMemArray',
 'GetVirtualMemAuto',
 'GetVirtualMemAutoArray',
 'HasArbitraryOverviews',
 'ReadAsArray',
 'ReadBlock',
 'ReadRaster',
 'ReadRaster1',
 'SetCategoryNames',
 'SetColorInterpretation',
 'SetColorTable',
 'SetDefaultHistogram',
 'SetDefaultRAT',
 'SetDescription',
 'SetMetadata',
 'SetMetadataItem',
 'SetNoDataValue',
 'SetOffset',
 'SetRasterCategoryNames',
 'SetRasterColorInterpretation',
 'SetRasterColorTable',
 'SetScale',
 'SetStatistics',
 'SetUnitType',
 'WriteArray',
 'WriteRaster',
 'XSize',
 'YSize',
 '__class__',
 '__delattr__',
 '__dict__',
 '__dir__',
 '__doc__',
 '__eq__',
 '__format__',
 '__ge__',
 '__getattr__',
 '__getattribute__',
 '__gt__',
 '__hash__',
 '__init__',
 '__init_subclass__',
 '__le__',
 '__lt__',
 '__module__',
 '__ne__',
 '__new__',
 '__reduce__',
 '__reduce_ex__',
 '__repr__',
 '__setattr__',
 '__sizeof__',
 '__str__',
 '__subclasshook__',
 '__swig_getmethods__',
 '__swig_setmethods__',
 '__weakref__',
 '_s',
 'this']
读取波段的行列数目
band.XSize # 波段的列数目
6122
band.YSize # 波段的行数目
4669
读取波段的数值类型
band.DataType # 波段的数值类型
3
读取影像波段的无效值
print(band.GetNoDataValue()) # 获取波段无效值大小
None
读取影像波段的最大最小值
# 获取波段最大值与最小值
band.GetMaximum()
band.GetMinimum()
band.ComputeRasterMinMax()
(-1.0, 66.0)
获取栅格数据像元信息
filepath = r'E:\codes_lib\QGIS\GIS_Dev\gdata\geotiff_file.tif'
rds = gdal.Open(filepath)  # 打开栅格数据
band = rds.GetRasterBand(1)
访问栅格数据集的像素级数据
GDAL提供ReadRaster()和ReadAsArray()两个函数访问影像的像素值
ReadRaster():以二进制的形式读取影像数据
ReadAsArray():以数组的形式读取影像数据
注:两函数的参数如下:
xoff,yoff:指定读取部分影像原点位置在整张影像中相对于全图原点的位置(以像元为单位)
xsize,ysize:指定要读取部分影像的宽和高(以像元为单位)
buf_xsize,buf_ysize:对指定要读取部分影像进行缩放(均值重采样),该两参数定义了缩放后的影像宽和高
buf_type:可对读取数据进行类型转换
band_list:适用于多波段影像,可指定要读取的波段
# ReadAsArray()函数的使用
band.ReadAsArray(100,100,5,5,10,10)
array([[236, 236, 237, 237, 237, 237, 237, 237, 227, 227],
       [236, 236, 237, 237, 237, 237, 237, 237, 227, 227],
       [235, 235, 232, 232, 233, 233, 234, 234, 225, 225],
       [235, 235, 232, 232, 233, 233, 234, 234, 225, 225],
       [242, 242, 235, 235, 232, 232, 233, 233, 224, 224],
       [242, 242, 235, 235, 232, 232, 233, 233, 224, 224],
       [254, 254, 244, 244, 238, 238, 237, 237, 229, 229],
       [254, 254, 244, 244, 238, 238, 237, 237, 229, 229],
       [246, 246, 246, 246, 248, 248, 250, 250, 235, 235],
       [246, 246, 246, 246, 248, 248, 250, 250, 235, 235]], dtype=uint8)
# ReadRaster()函数的使用
band.ReadRaster(100,100,5,5,10,10)
bytearray(b'\xec\xec\xed\xed\xed\xed\xed\xed\xe3\xe3\xec\xec\xed\xed\xed\xed\xed\xed\xe3\xe3\xeb\xeb\xe8\xe8\xe9\xe9\xea\xea\xe1\xe1\xeb\xeb\xe8\xe8\xe9\xe9\xea\xea\xe1\xe1\xf2\xf2\xeb\xeb\xe8\xe8\xe9\xe9\xe0\xe0\xf2\xf2\xeb\xeb\xe8\xe8\xe9\xe9\xe0\xe0\xfe\xfe\xf4\xf4\xee\xee\xed\xed\xe5\xe5\xfe\xfe\xf4\xf4\xee\xee\xed\xed\xe5\xe5\xf6\xf6\xf6\xf6\xf8\xf8\xfa\xfa\xeb\xeb\xf6\xf6\xf6\xf6\xf8\xf8\xfa\xfa\xeb\xeb')
注意:在读取影像数据时,不要超出影像范围大小
创建与保存栅格数据集
GDAL创建数据集主要有两种方法:Create()、CreateCopy()
全部驱动类型都支持CreateCopy()方法,而只有部分驱动类型支持Create()方法,需要查看驱动元数据信息
使用CreatCopy()方法创建影像
filename_1 =  r'E:\codes_lib\QGIS\GIS_Dev\gdata\geotiff_file.tif'
filename_2 =  r'E:\codes_lib\QGIS\GIS_Dev\gdata\test\test_file.tif'
dataset_1 = gdal.Open(filename_1)
dataset_2 = driver.CreateCopy(filename_2,dataset_1,0,["INTELEAVE=PIXEL"])
CreateCoopy()函数创建的test_file.tif栅格数据:
使用Create()方法创建影像
# 使用Create()方法创建并写入一副多波段影像
filename_3 = r'E:\codes_lib\QGIS\GIS_Dev\gdata\test\test_file_2.tif'
img_wigth = dataset_1.RasterXSize
img_heigth = dataset_1.RasterYSize
datas = dataset_1.ReadAsArray(0,0,img_wigth,img_heigth)
to_img = driver.Create(filename_3,img_wigth,img_heigth,3,options=["INTELEAVE=PIXE"])
to_img.WriteRaster(0,0,img_wigth,img_heigth,datas.tobytes(),img_wigth,img_heigth,band_list=[1,2,3])
# to_img.FlushCache()
0
to_img.FlushCache()
Create()函数创建的test_file_2.tif栅格数据:
注意:并未对所创建影像进行空间投影处理
参考资料:《Python与开源GIS——数据处理、空间分析与地图制图》 卜坤老师
本文作者对有意向学习GIS开发的朋友推荐该书,如有侵权,请联系作者

