本篇博客环境基于ansible已搭建完毕:自动化运维工具Ansible的搭建
一、设置在.yml文件中Tab键为两个空格
这是.yml文件的格式要求
[devops@ansible1 ~]$ vim .vimrc
===============================================
autocmd filetype yaml setlocal ai ts=2 sw=2 et
备注: 这几个参数是Vim文本编辑器的配置参数,意思如下:
- ai:设置自动缩进,即在下一行缩进与当前行的缩进一致。
- ts:设置制表符(tab)所占的空格数,默认值是8。
- sw:设置换行缩进级别(shiftwidth),即未自动缩进时按下Tab键所插入的空格数,默认值是8。
- et:设置展开tab为对应的空格数,即不使用制表符(tab),而是使用空格符(space)来进行缩进。
这些参数用来控制缩进和Tab键的行为,以及如何在编辑器中显示空格符。例如,如果设置了et参数,那么当按下Tab键时,实际上会插入空格符,而不是制表符。
二、建立playbook.yml文件,发布剧本
1、编辑playbook.yml文件
[devops@ansible1 ansible]$ vim playbook.yml
============================================
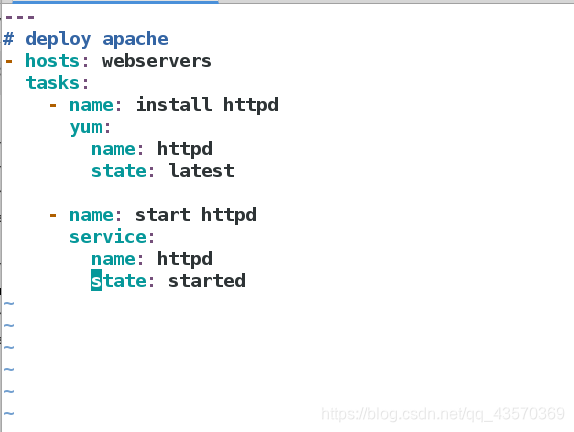
---
# deploy apache
#哪些主机
- hosts: webservers
#任务
tasks:
#下载httpd服务
- name: install httpd
yum:
name: httpd
state: latest
#启动httpd服务
- name: start httpd
service:
name: httpd
state: started
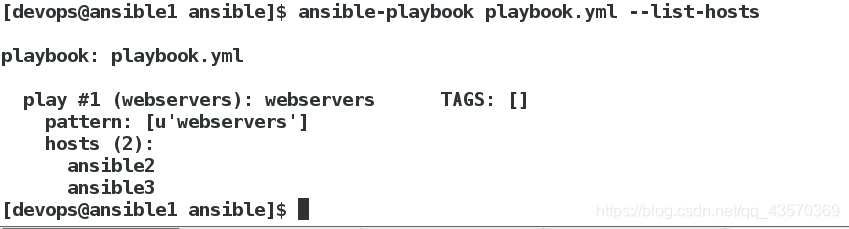
查看剧本hosts主机列表
[devops@ansible1 ansible]$ ansible-playbook playbook.yml --list-hosts
查看剧本任务列表:
[devops@ansible1 ansible]$ ansible-playbook playbook.yml --list-tasks

2、发布剧本文件
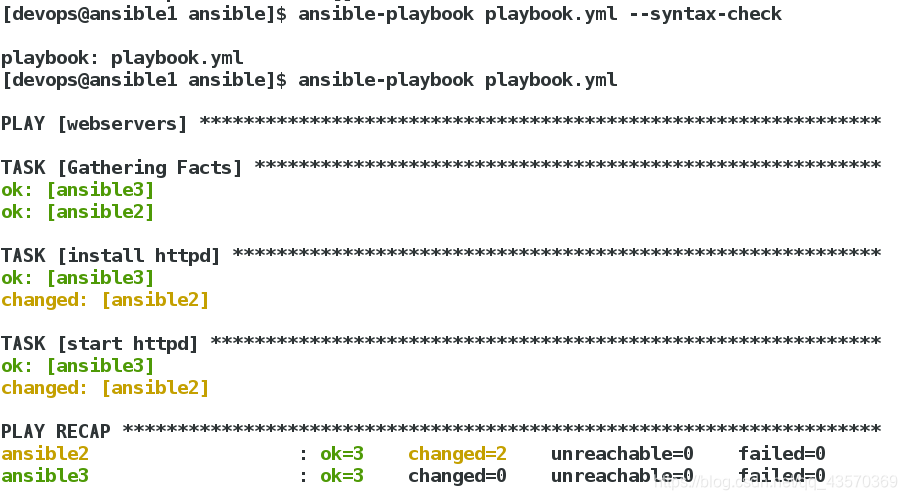
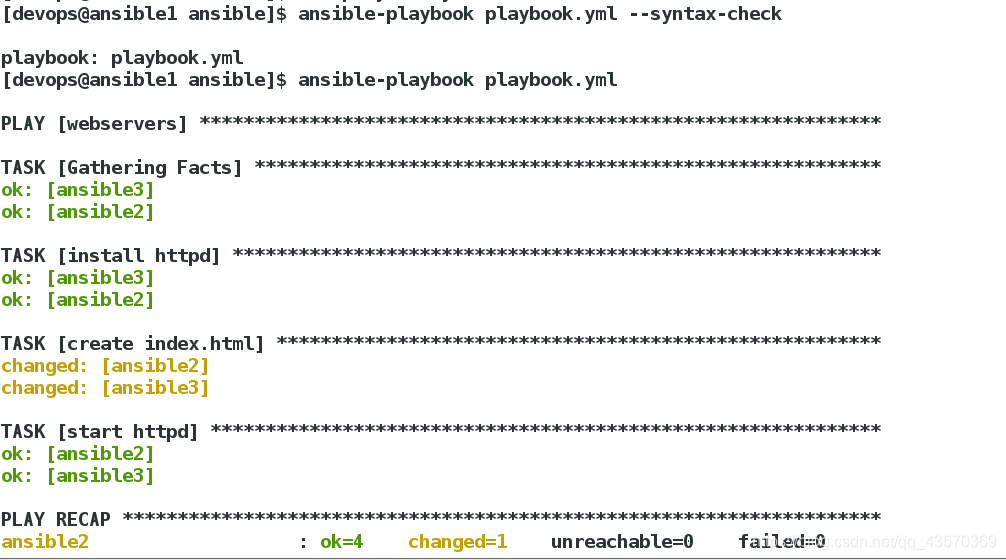
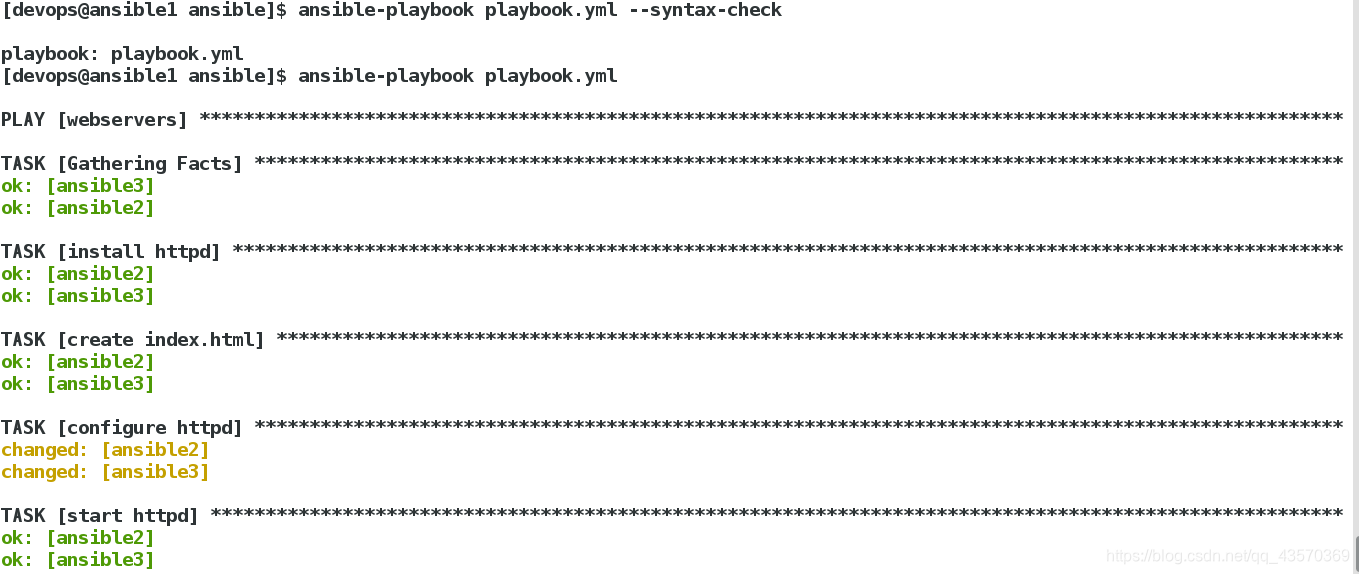
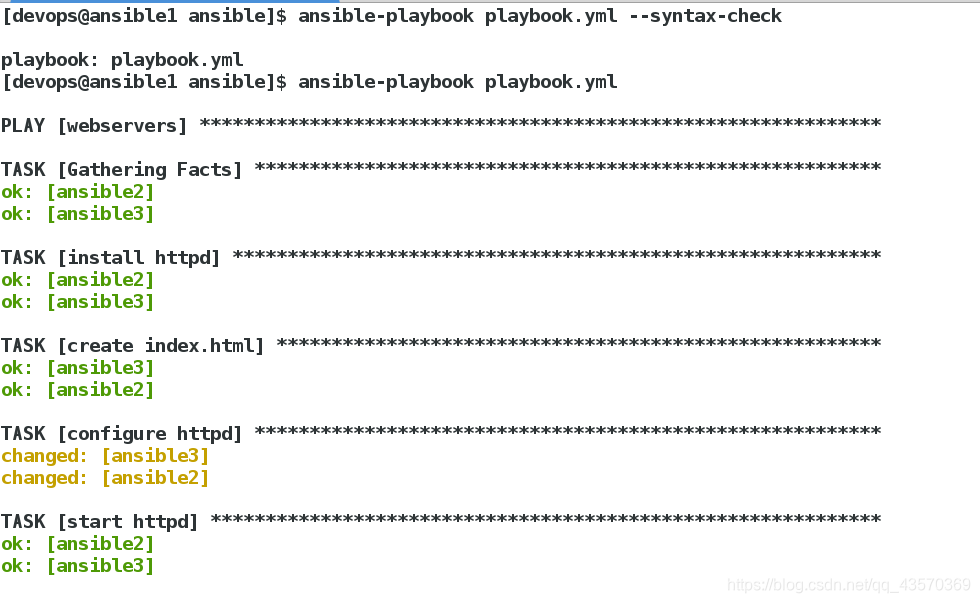
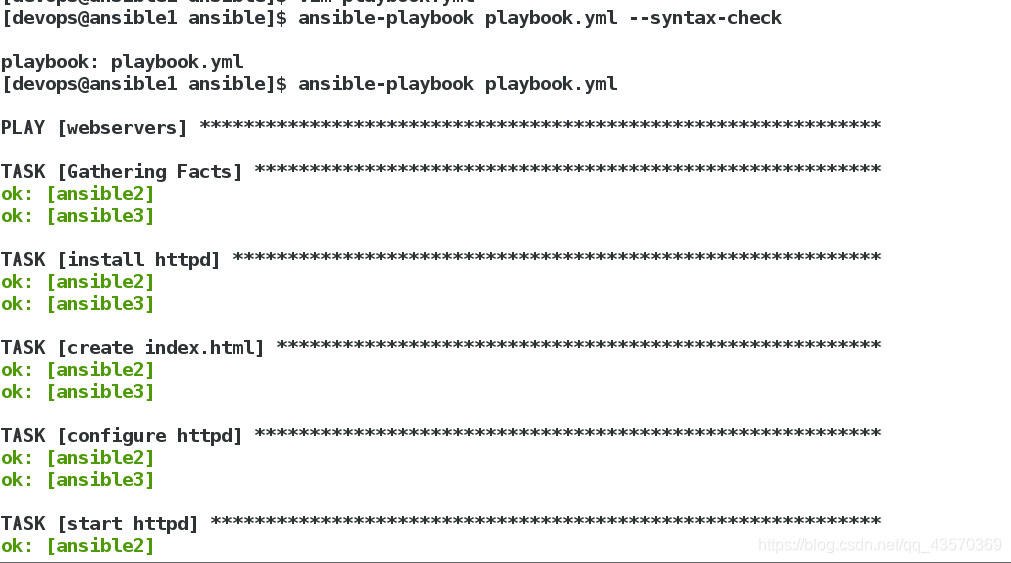
#对剧本playbook进行语法检测
[devops@ansible1 ansible]$ ansible-playbook playbook.yml --syntax-check
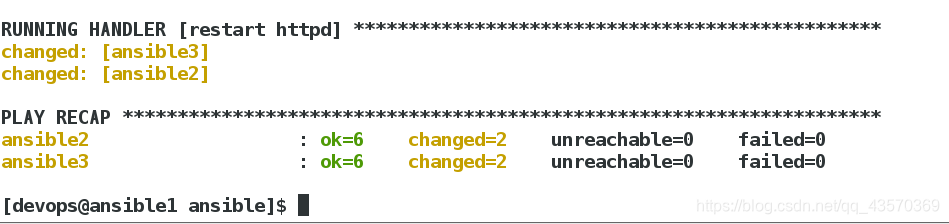
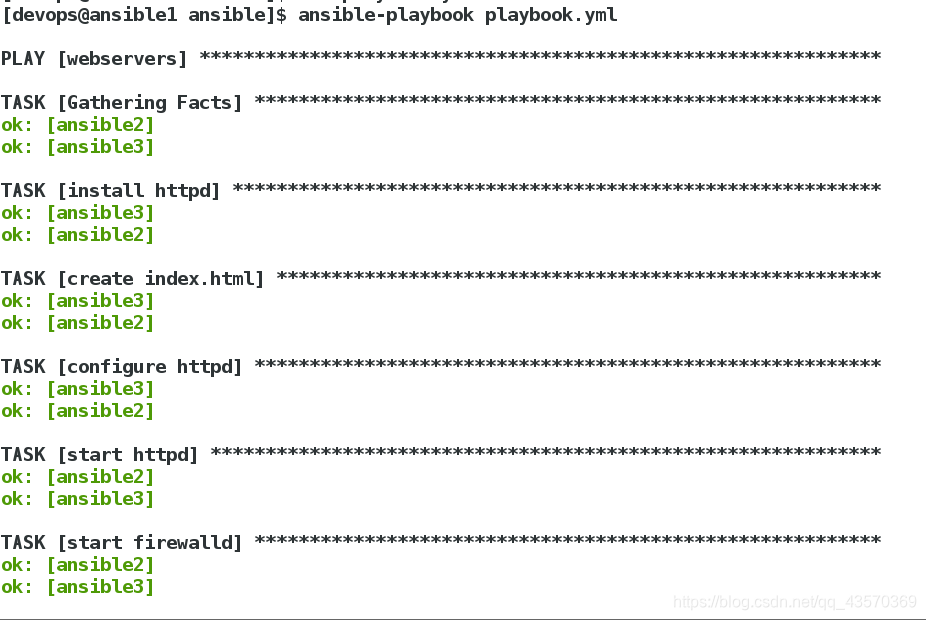
#执行剧本
[devops@ansible1 ansible]$ ansible-playbook playbook.yml
3、测试
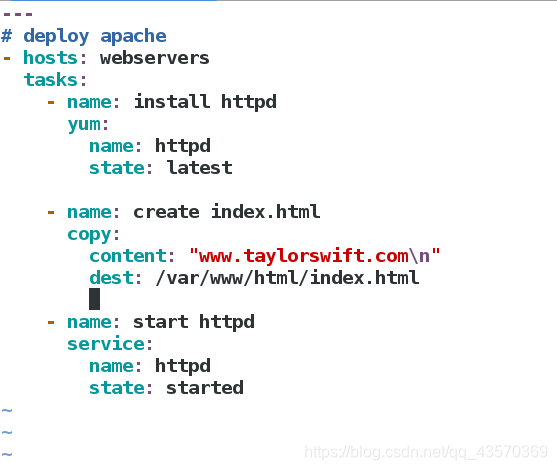
我们编辑剧本,使访问到的内容指定下来
[devops@ansible1 ansible]$ vim playbook.yml
============================================
---
# deploy apache
- hosts: webservers
  tasks:
    - name: install httpd
      yum:
        name: httpd
        state: latest

    - name: create index.html
      copy:
        content: "www.taylorswift.com\n"
        dest: /var/www/html/index.html

    - name: start httpd
      service:
        name: httpd
        state: started
发布

[devops@ansible1 ansible]$ ansible-playbook playbook.yml
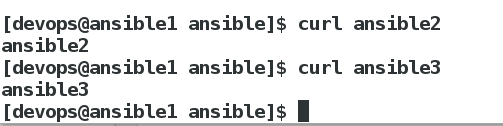
测试
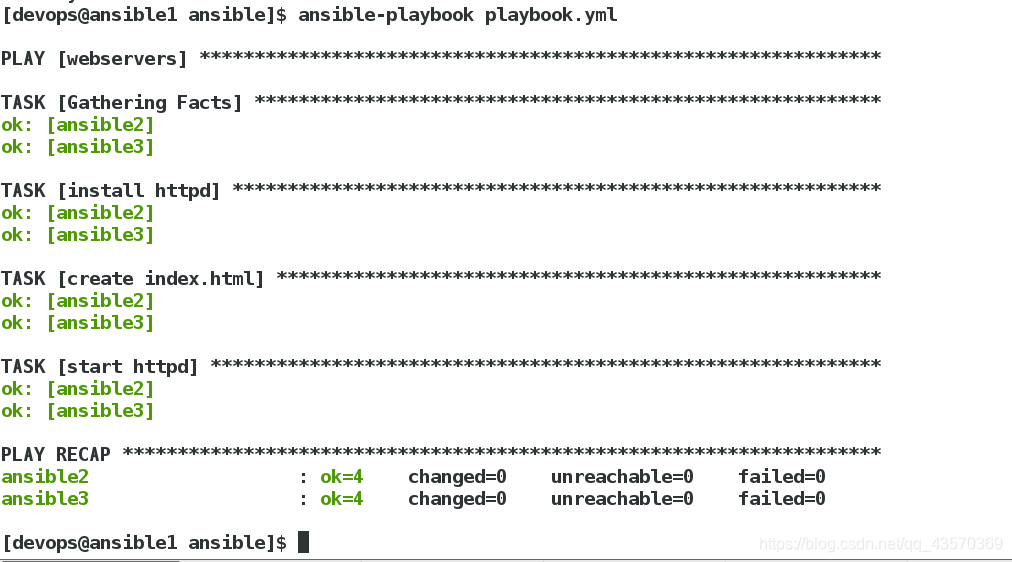
[devops@ansible1 ansible]$ curl ansible2
=========================================
[devops@ansible1 ansible]$ curl ansible3

三、添加任务
1、编写playbook.yml文件
[devops@ansible1 ansible]$ vim playbook.yml
===========================================
---
# deploy apache
- hosts: webservers
  tasks:
    - name: install httpd
      yum:
        name: httpd
        state: latest

    - name: create index.html
      copy:
        content: "www.taylorswift.com\n"
        dest: /var/www/html/index.html

    - name: configure httpd
      copy:
        src: files/httpd.conf							#将当前所在目录下的files目录中的httpd.conf文件拷贝到目标主机的指定目录中
        dest: /etc/httpd/conf/httpd.conf
        owner: root
        group: root
        mode: 644

    - name: start httpd
      service:
        name: httpd
        state: started
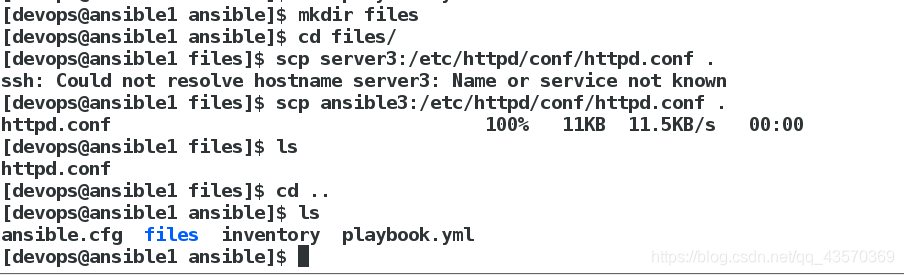
2、建立files目录及相关文件
[devops@ansible1 ansible]$ mkdir files
[devops@ansible1 ansible]$ cd files/
[devops@ansible1 files]$ scp server3:/etc/httpd/conf/httpd.conf .
ssh: Could not resolve hostname server3: Name or service not known
[devops@ansible1 files]$ scp ansible3:/etc/httpd/conf/httpd.conf .
httpd.conf                                  100%   11KB  11.5KB/s   00:00
[devops@ansible1 files]$ ls
httpd.conf
[devops@ansible1 files]$ cd ..
[devops@ansible1 ansible]$ ls
ansible.cfg  files  inventory  playbook.yml
3、语法检测、发布
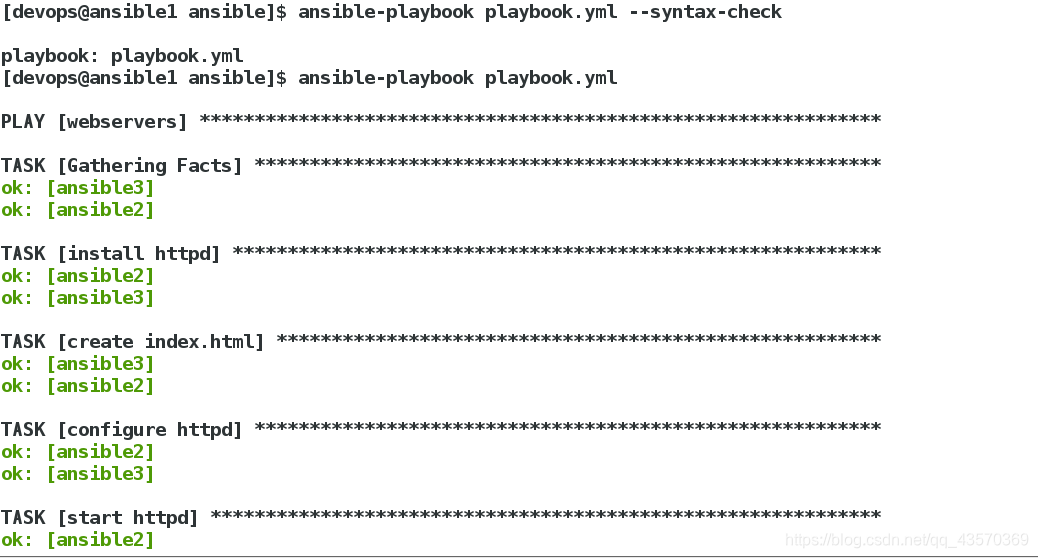
[devops@ansible1 ansible]$ ansible-playbook playbook.yml --syntax-check
[devops@ansible1 ansible]$ ansible-playbook playbook.yml
我们可以采用文件的md5码来判断是否是同样的内容:

[devops@ansible1 ansible]$ md5sum files/httpd.conf
- ansible1
- ansible2
- ansible3
设定开机自启动


[devops@ansible1 ansible]$ vim playbook.yml
==============================================
---
# deploy apache
- hosts: webservers
tasks:
- name: install httpd
yum:
name: httpd
state: latest
- name: create index.html
copy:
content: "www.taylorswift.com\n"
dest: /var/www/html/index.html
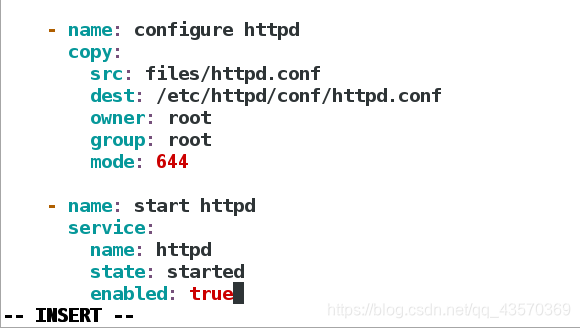
- name: configure httpd
copy:
src: files/httpd.conf
dest: /etc/httpd/conf/httpd.conf
owner: root
group: root
mode: 644
- name: start httpd
service:
name: httpd
state: started
enabled: true
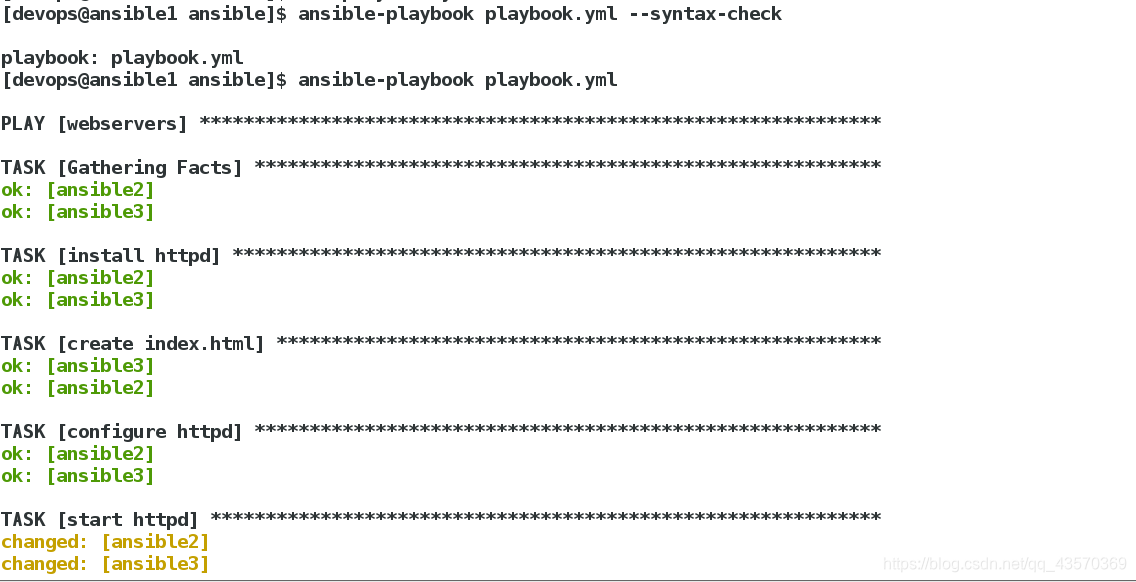
语法检查,运行
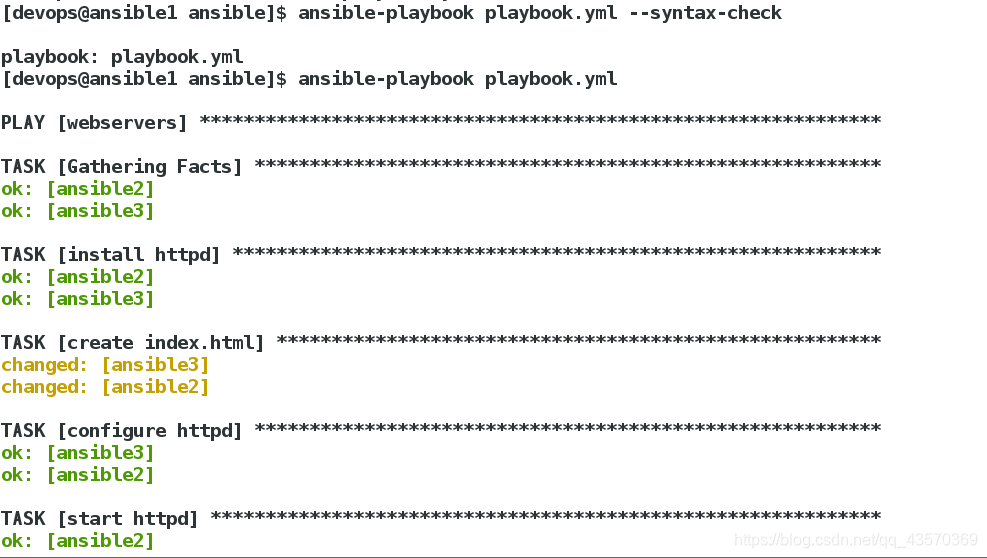
[devops@ansible1 ansible]$ ansible-playbook playbook.yml --syntax-check
[devops@ansible1 ansible]$ ansible-playbook playbook.yml


四、编写触发器,实现文件更改则重启服务,不更改则不做操作
1、编写剧本playbook
[devops@ansible1 ansible]$ vim playbook.yml
============================================
---
# deploy apache
- hosts: webservers
tasks:
- name: install httpd
yum:
name: httpd
state: latest
- name: create index.html
copy:
content: "www.taylorswift.com\n"
dest: /var/www/html/index.html
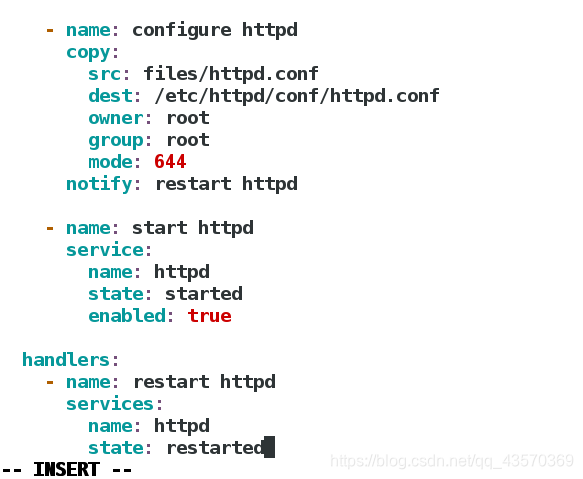
- name: configure httpd
copy:
src: files/httpd.conf
dest: /etc/httpd/conf/httpd.conf
owner: root
group: root
mode: 644
notify: restart httpd
- name: start httpd
service:
name: httpd
state: started
enabled: true
handlers:
- name: restart httpd
service:
name: httpd
state: restarted
2、更改files目录下的httpd.conf文件
[devops@ansible1 ansible]$ vim files/httpd.conf
=================================================
 42 Listen 8080

3、测试发布playbooks文件,查看更改是否生效
[devops@ansible1 ansible]$ ansible-playbook playbook.yml --syntax-check
[devops@ansible1 ansible]$ ansible-playbook playbook.yml
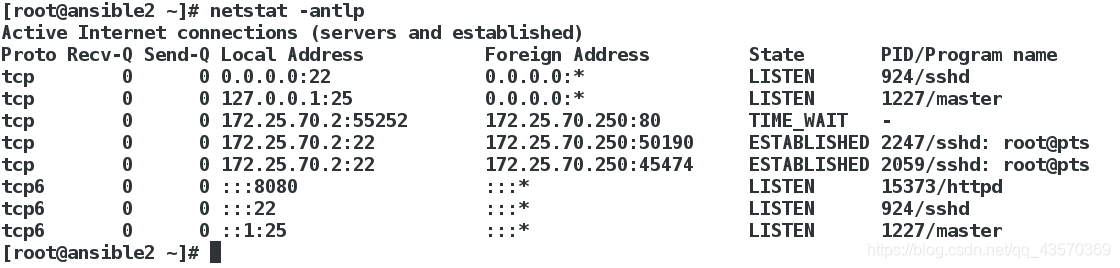
查看是否生效
[root@ansible2 ~]# netstat -antlp
===================================
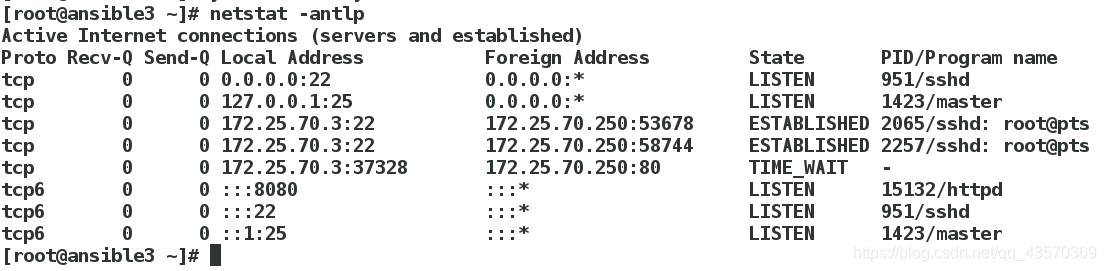
[root@ansible3 ~]# netstat -antlp
- ansible2
- ansible3
端口更改成功,记住实验后改过来
五、实现防火墙配置(生产环境中)
1、编写playbook.yml文件
[devops@ansible1 ansible]$ vim playbook.yml
============================================
---
# deploy apache
- hosts: webservers
tasks:
- name: install httpd
yum:
name: httpd
state: latest
- name: create index.html
copy:
content: "www.taylorswift.com\n"
dest: /var/www/html/index.html
- name: configure httpd
copy:
src: files/httpd.conf
dest: /etc/httpd/conf/httpd.conf
owner: root
group: root
mode: 644
notify: restart httpd
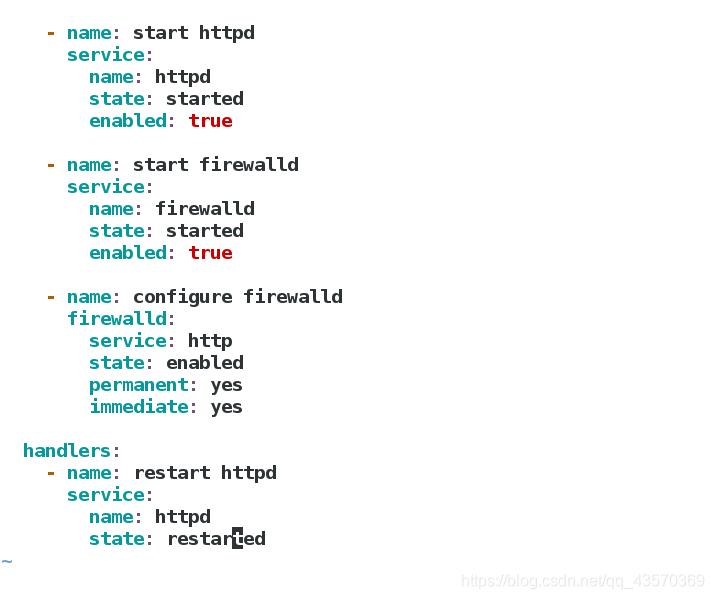
- name: start httpd
service:
name: httpd
state: started
enabled: true
- name: start firewalld
service:
name: firewalld
state: started
enabled: true
- name: configure firewalld
firewalld:
service: http
state: enabled
permanent: yes
immediate: yes
handlers:
- name: restart httpd
service:
name: httpd
state: restarted
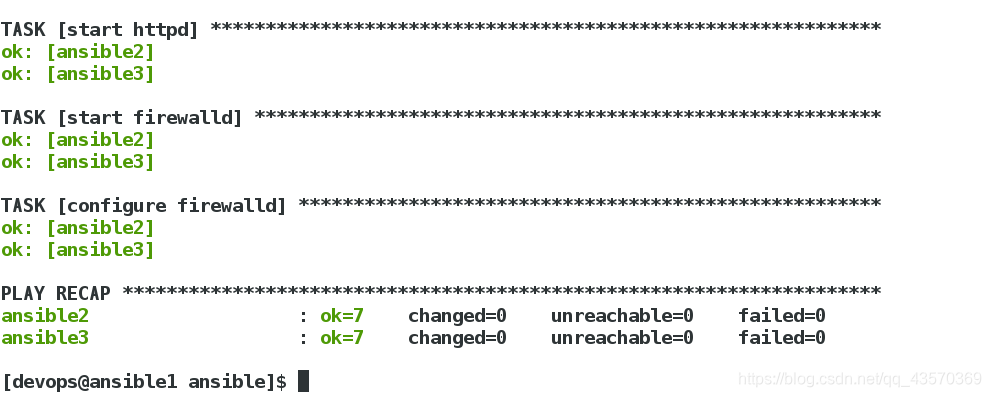
2、检测剧本是否语法正确,推送
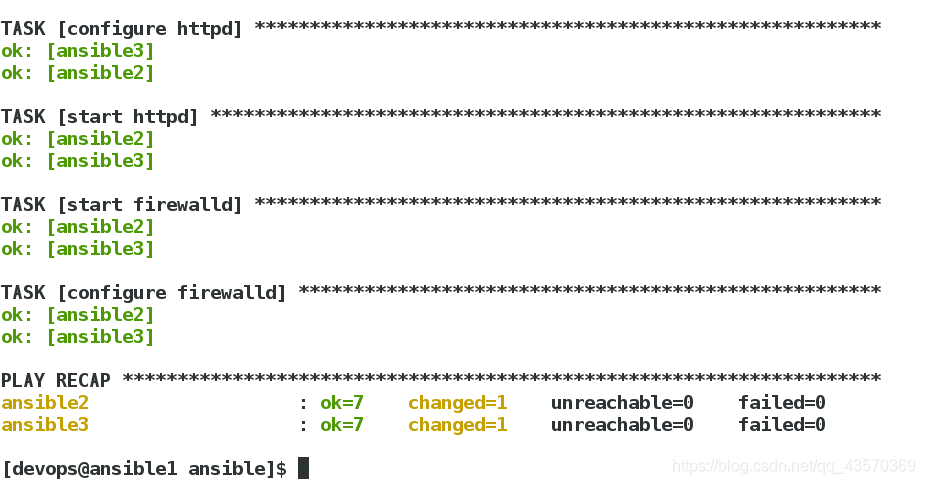
[devops@ansible1 ansible]$ ansible-playbook playbook.yml --syntax-check
[devops@ansible1 ansible]$ ansible-playbook playbook.yml

3、查看server2是否防火墙开启
[root@ansible2 ~]# systemctl status firewalld.service
[root@ansible2 ~]# firewall-cmd --list-all
防火墙已经开启,并且http已经加入防火墙的白名单中。

六、使用变量完成动态http服务部署
1、系统变量的两种表示方法
(1)表示方法
[devops@ansible1 ansible]$ vim playbook.yml
============================================
更改如下配置:
    - name: create index.html
      copy:
        content: "{{ ansible_facts['hostname'] }}\n"
        dest: /var/www/html/index.html
发布

[devops@ansible1 ansible]$ ansible-playbook playbook.yml --syntax-check
[devops@ansible1 ansible]$ ansible-playbook playbook.yml
测试:
(2)表示方法
[devops@ansible1 ansible]$ vim playbook.yml
============================================
    - name: create index.html
      copy:
        content: "{{ ansible_facts.hostname }}\n"
        dest: /var/www/html/index.html
发布:
[devops@ansible1 ansible]$ ansible-playbook playbook.yml --syntax-check
[devops@ansible1 ansible]$ ansible-playbook playbook.yml
检测:
查看本机系统变量

[devops@ansible1 ansible]$ ansible test -m setup| less
小练习:将发布内容改为 主机名 IP
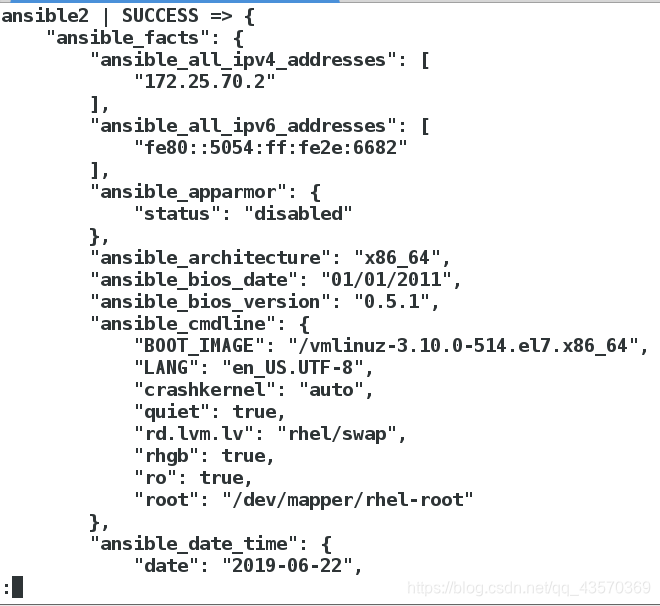
[devops@ansible1 ansible]$ ansible test -m setup -a 'filter="*ipv4*"'
ansible2 | SUCCESS => {
    "ansible_facts": {
        "ansible_all_ipv4_addresses": [
            "172.25.70.2"
        ],
        "ansible_default_ipv4": {}
    },
    "changed": false
}

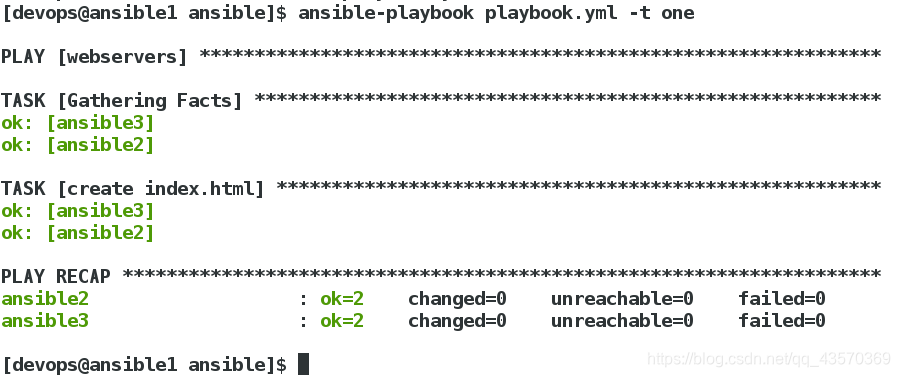
2、单独发布模板中的一个任务
[devops@ansible1 ansible]$ vim playbook.yml
    - name: create index.html
      copy:
        content: "{{ ansible_facts.hostname }} {{ ansible_facts['all_ipv4_addresses'] }} \n"
        dest: /var/www/html/index.html
      tags: one
发布时加上-t参数

3、使用template模块,编写带有变量的http配置文件
[devops@ansible1 ansible]$ vim playbook.yml
---
# deploy apache
- hosts: webservers
  vars:
    http_port: 80
  tasks:
    - name: install httpd
      yum:
        name: httpd
        state: latest

    - name: create index.html
      copy:
        content: "{{ ansible_facts.hostname }} {{ ansible_facts['all_ipv4_addresses'] }} \n"
        dest: /var/www/html/index.html
      tags: one

    - name: configure httpd
      template:
        src: files/httpd.conf.j2
        dest: /etc/httpd/conf/httpd.conf
        owner: root
        group: root
        mode: 644
      notify: restart httpd

    - name: start httpd
      service:
        name: httpd
        state: started
        enabled: true

    - name: start firewalld
      service:
        name: firewalld
        state: started
        enabled: true

    - name: configure firewalld
      firewalld:
        service: http
        state: enabled
        permanent: yes
        immediate: yes

  handlers:
    - name: restart httpd
      service:
        name: httpd
        state: restarted
将子目录下files/httpd.conf重命名为httpd.conf.j2
[devops@ansible1 ansible]$ mv files/httpd.conf files/httpd.conf.j2
编辑httpd.conf.j2文件:
[devops@ansible1 ansible]$ vim files/httpd.conf.j2
==================================================
42 Listen {{ http_port }}
4、编写yml文件,实现读取并存储系统信息
[devops@ansible1 ansible]$ mkdir templates
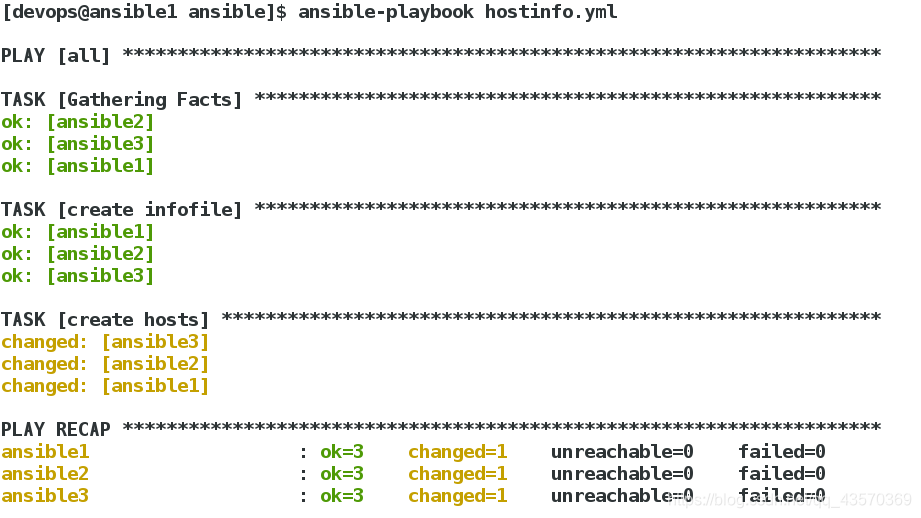
[devops@ansible1 ansible]$ vim hostinfo.yml
===========================================
---
- host: all
task:
- name: create infofile
template:
src: templates/info.j2
dest: /mnt/hostinfo
===============================================
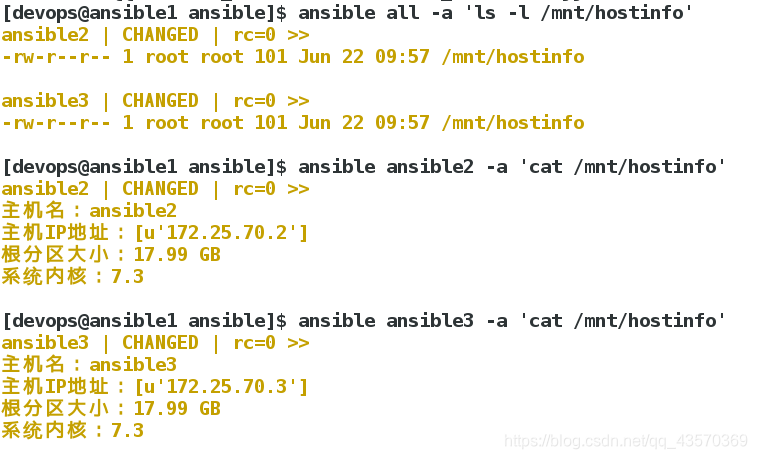
主机名:{{ ansible_facts.hostname }}
主机IP地址:{{ ansible_facts['all_ipv4_addresses'] }}
根分区大小:{{ ansible_facts['devices']['dm-0']['size'] }}
系统内核:{{ ansible_facts['distribution_version'] }}
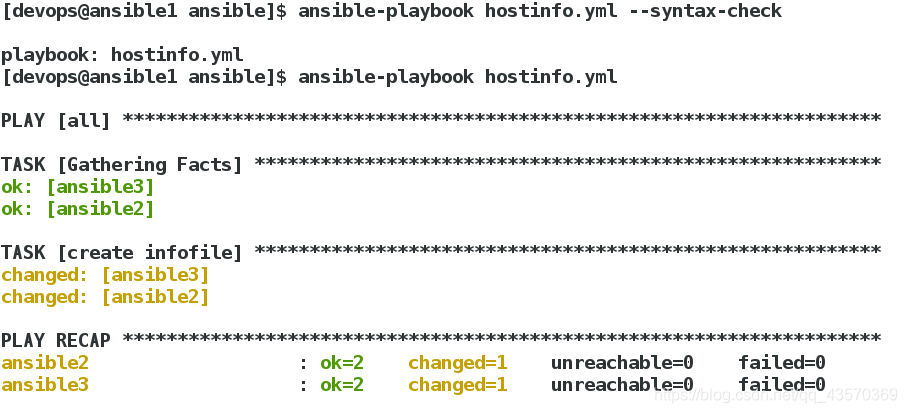
语法检测及推送:
[devops@ansible1 ansible]$ vim hostinfo.yml
[devops@ansible1 ansible]$ ansible-playbook hostinfo.yml --syntax-check

playbook: hostinfo.yml
[devops@ansible1 ansible]$ ansible-playbook hostinfo.yml
5、我们也可以实现通过各种变量,配置不同的主机配置不同的服务:
示例:
[devops@ansible1 ansible]$ vim install.yml
===========================================
---
- hosts: all
  tasks:
    - name: install httpd
      yum:
        name: httpd
        state: present
      when: ansible_facts.hostname == 'ansible2'

    - name: install mariadb
      yum:
        name: mariadb
        state: present
      when: ansible_facts.hostname == 'ansible3'
语法检测,推送:
也可以使用类似python中列表的方式,指定下载服务:
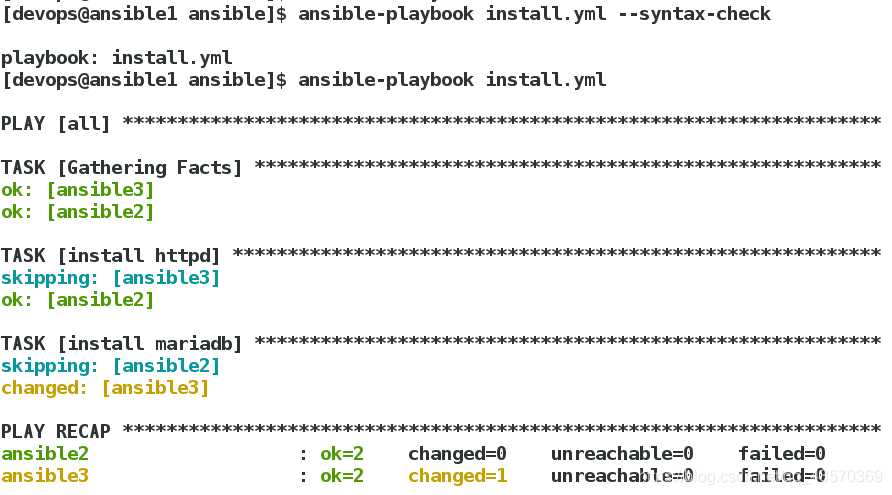
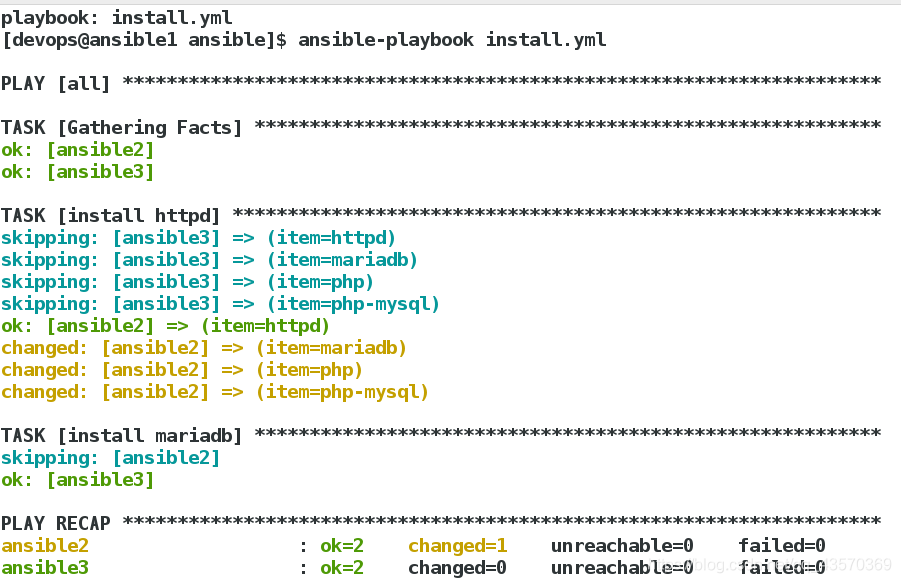
[devops@ansible1 ansible]$ vim install.yml
==============================================
---
- hosts: all
  tasks:
    - name: install httpd
      yum:
        name: '{{ item }}'
        state: present
      when: ansible_facts.hostname == 'ansible2'
      loop:
        - httpd
        - mariadb
        - php
        - php-mysql

    - name: install mariadb
      yum:
        name: mariadb
        state: present
      when: ansible_facts.hostname == 'ansible3'
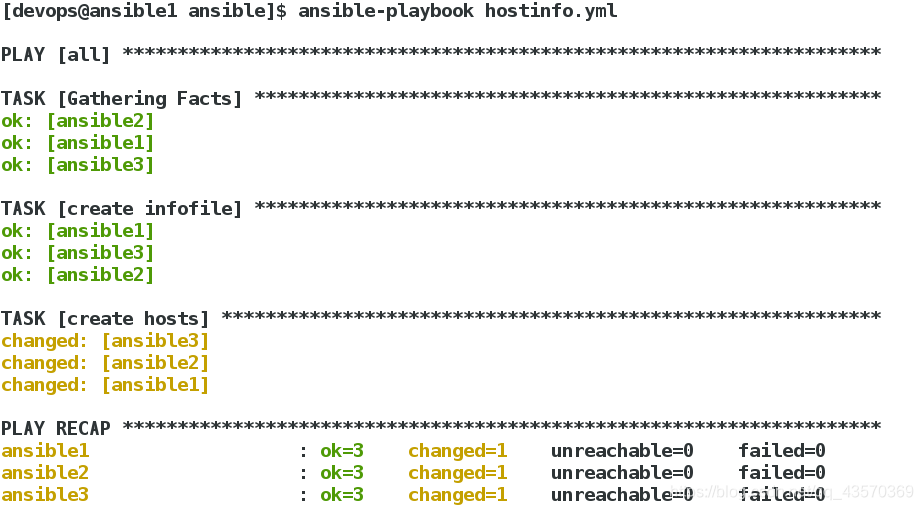
6、使用ansible快速布置每一台主机的解析
[devops@ansible1 ansible]$ vim hostinfo.yml
============================================
---
- hosts: all
  tasks:
    - name: create infofile
      template:
        src:  templates/info.j2
        dest:  /mnt/hostinfo

    - name: create hosts
      template:
        src: templates/host.j2
        dest: /etc/hosts
        owner: root
        group: root
        mode: 644
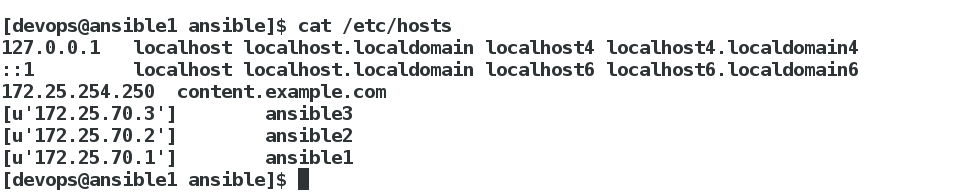
[devops@ansible1 ansible]$ vim templates/host.j2
=================================================
127.0.0.1   localhost localhost.localdomain localhost4 localhost4.localdomain4
::1         localhost localhost.localdomain localhost6 localhost6.localdomain6
172.25.254.250  content.example.com
{% for host in groups['webservers'] %}
{{ hostvars[host]['ansible_facts']['eth0']['ipv4']['address'] }}        {{ hostvars[host]['ansible_facts']['hostname'] }}
{% endfor %}
[devops@ansible1 ansible]$ vim inventory
==========================================
[test]
ansible2
ansible1
[db]
ansible3

[webservers:children]
test
db
[devops@ansible1 ansible]$ ssh-copy-id ansible1

7、批量添加用户
[devops@ansible1 ansible]$ vim adduser.yml
===========================================
---
- hosts: all
  tasks:
    - name: create users
      user:
        name: "{{ item }}"
        state: present
        password: redhat
      loop:
        - user1
        - user2
        - user3
        - user4
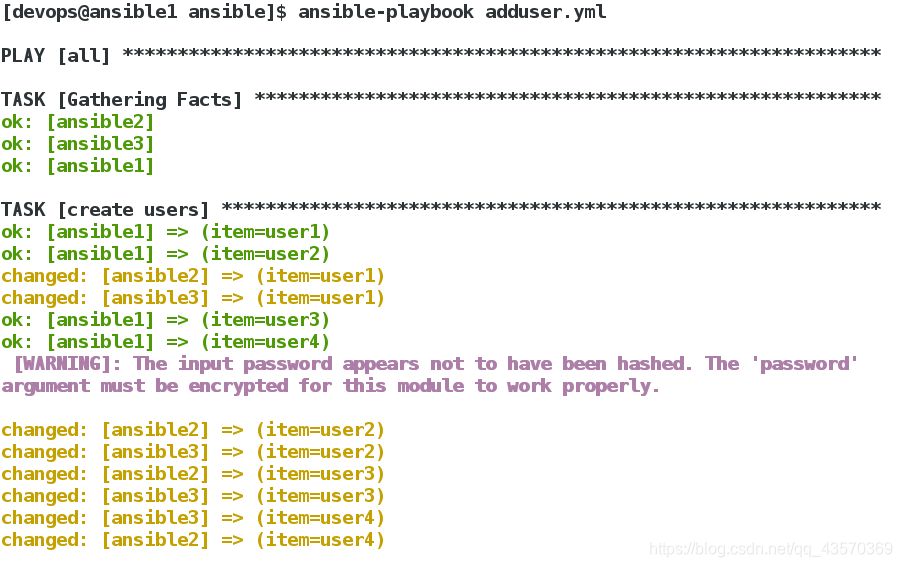
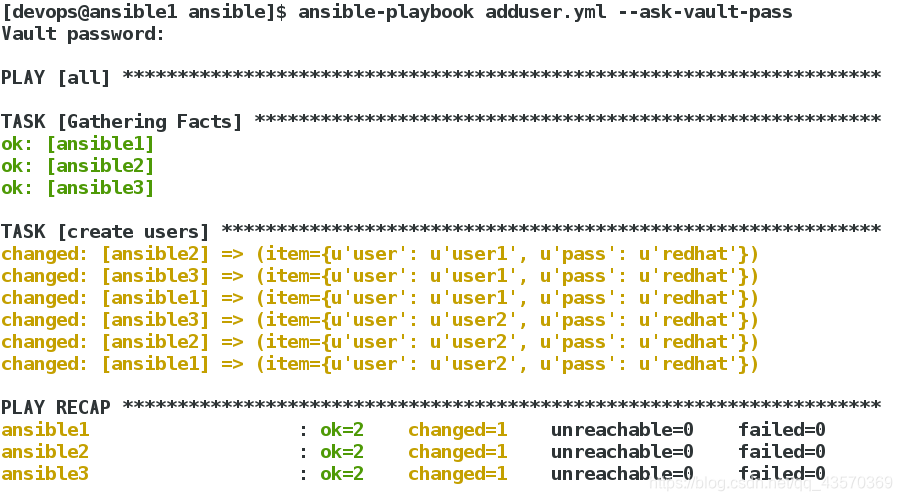
推送:
[devops@ansible1 ansible]$ ansible-playbook adduser.yml
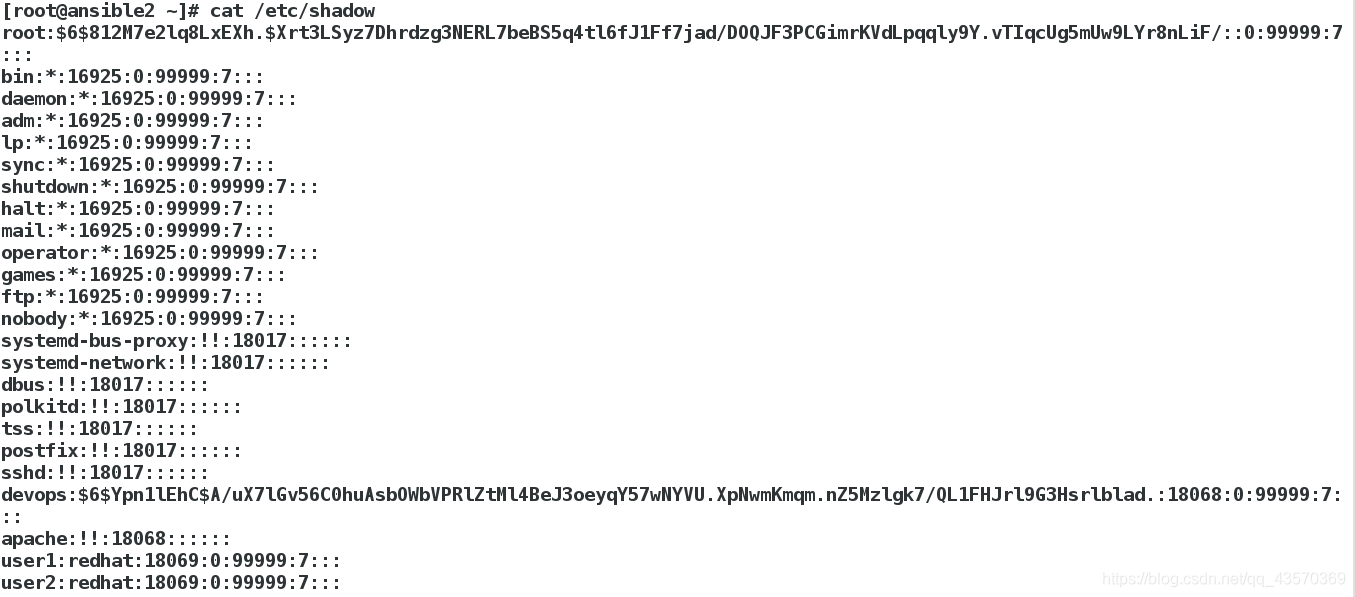
我们发现这样添加用户密码是可见的,非常不安全:

[devops@ansible1 ansible]$ pwd
/home/devops/ansible
[devops@ansible1 ansible]$ mkdir vars
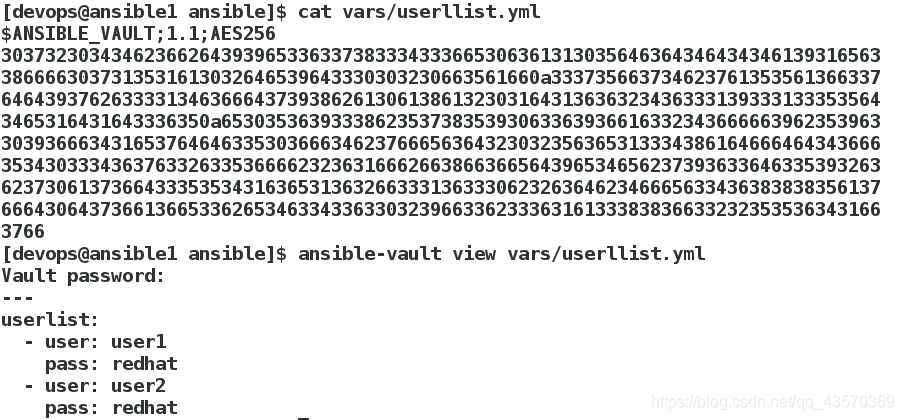
[devops@ansible1 ansible]$ vim vars/userllist.yml
[devops@ansible1 ansible]$ ansible-vault encrypt vars/userllist.yml
New Vault password:
Confirm New Vault password:
Encryption successful
加密
加密后没有密码,会显示加密字符

[devops@ansible1 ansible]$ ansible-vault view vars/userllist.yml
Vault password:
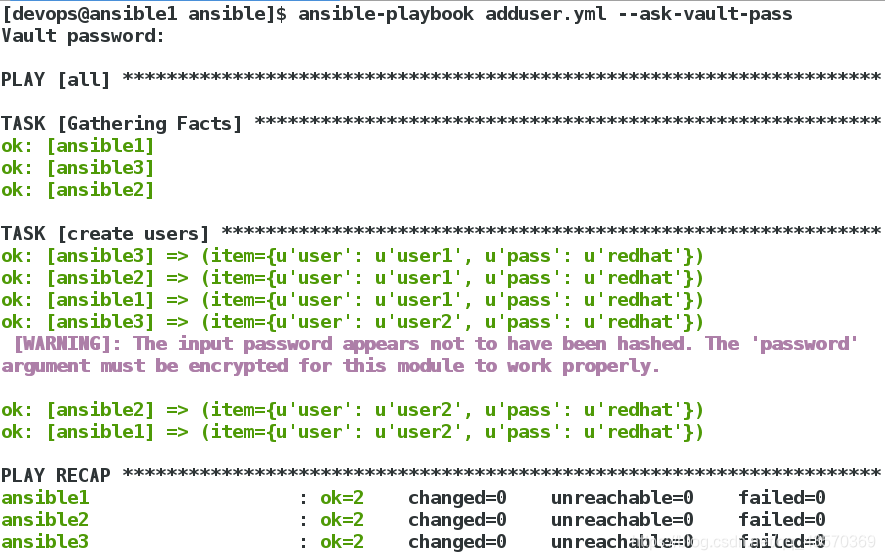
推送:
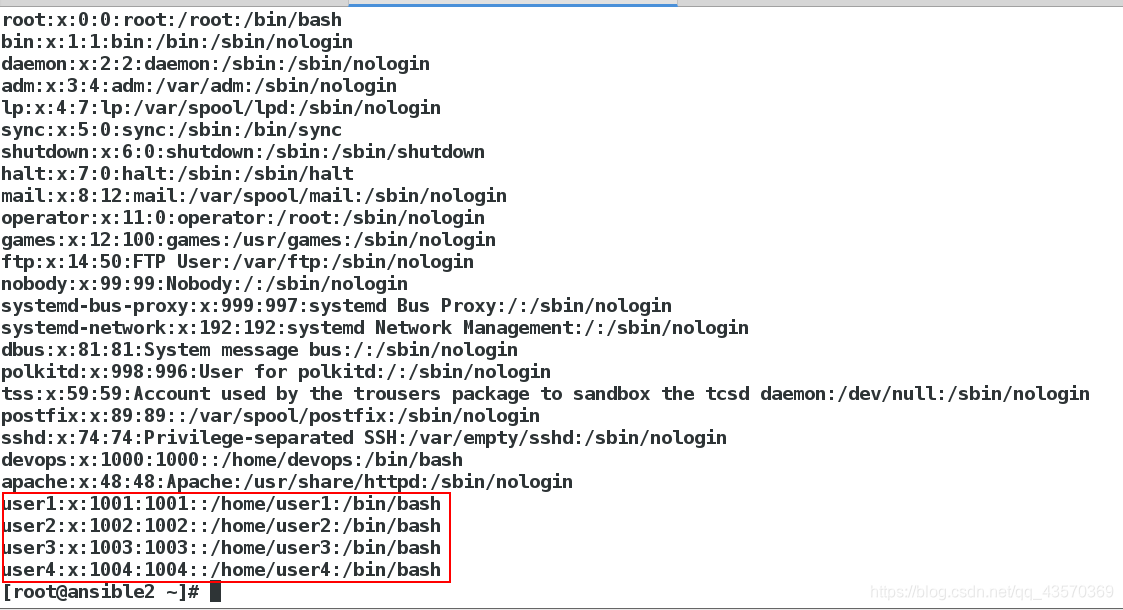
我们发现密码这里在系统上是明文的,这是不合情理的
---
- hosts: all
vars_files:
- vars/userlist.yml
tasks:
- name: create users
user:
name: "{{ item.user }}"
state: present
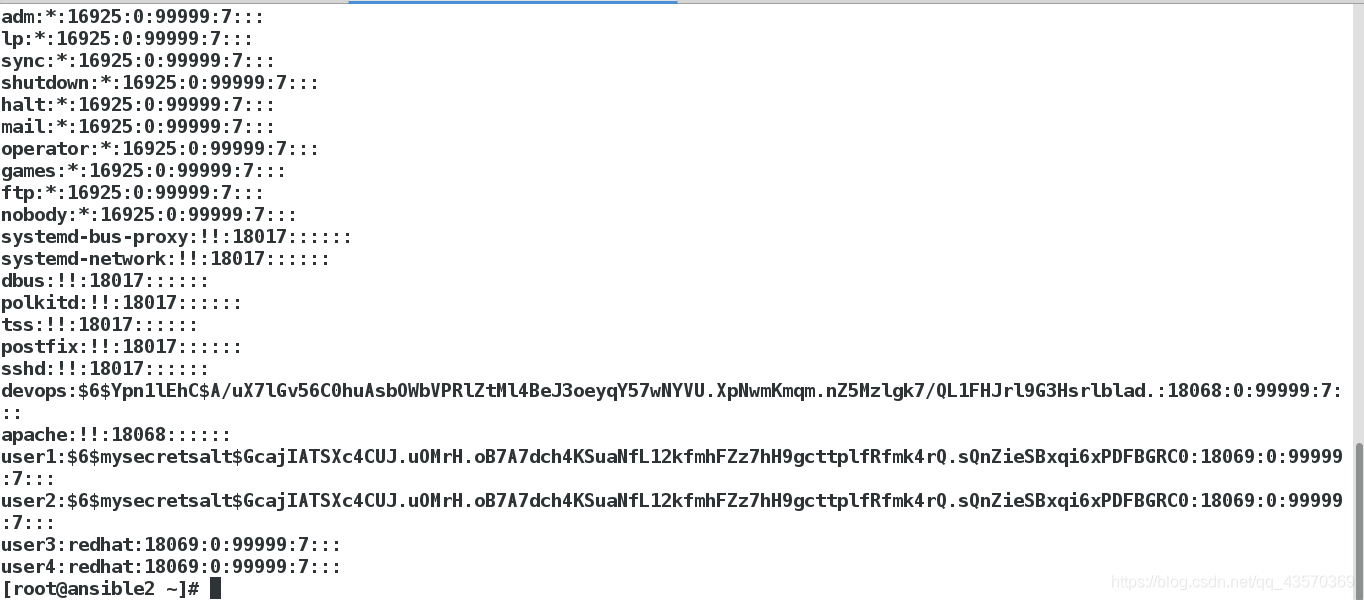
password: "{{ item.pass | password_hash('sha512','mysecretsalt') }}"
loop: "{{ userlist }}"
推送
如果我们对两个文件都加密了,那么一定要密码相同,因为推送时只会输入一次密码:
[devops@ansible1 ansible]$ ansible-vault encrypt adduser.yml
New Vault password:
Confirm New Vault password:
Encryption successful
[devops@ansible1 ansible]$ cat adduser.yml
$ANSIBLE_VAULT;1.1;AES256
37316265646263373061646630643330613961663262323866353462643532333265663165376365
6463383537336130623164303232626662643738306563650a636431666265316162363533303766
30326363346363656238666261323864366364306366616233633437653137633437646639623565
6161326633616132370a383330383231333435633932626165346561393432333737653832356263
36666137306634316430646532383731303035323139353837666334346363316266653962313465
65663532643439306565353230373862626666383537646339613462333337613230363138353161
65353065353562356332643038373933386266313335643939353062656331646638383262663633
66323739626537663532326664613432653034383537373763383030396139323965303961656632
34643239646563373531613635623437653831396436363466633335363035656163356363366463
62346462313865303566323134643936343061376163356263393135333964653934326261633635
34353465613434653631396230643732333437623263333964343165653361316433393030373937
65366461373263626565333166316331313462616533383033616336366435373633306263323536
38643061393136636330346661363132353461323139343131656634306264333763636364613931
32396635613439663564326132656333656330613434363233626537623037323161656363383361
66396430323138353833626230323936656563373532306634376139373961643434313134396261
61363665303036383433653866383766356335303663323364373061356266656138353035313439
31353235633631353331353636623632306530323839353337353434303737373339
这里发现解析文件的权限有点问题


[devops@ansible1 ansible]$ vim hostinfo.yml
===========================================
---
- hosts: all
  tasks:
    - name: create infofile
      template:
        src:  templates/info.j2
        dest:  /mnt/hostinfo

    - name: create hosts
      template:
        src: templates/host.j2
        dest: /etc/hosts
        owner: root
        group: root
        mode: 0644
推送
[devops@ansible1 ansible]$ ansible-playbook hostinfo.yml