通过Gazebo仿真和RViz仿真的学习后,本文将通过Gazebo与RViz联合仿真实现机器人在Gazebo仿真环境中运动。
目录
前言
URDF文件改写
Gazebo与RViz联合仿真
前言
机器人操作系统(ROS)提供了Gazebo与RViz两个仿真环境其各有各的用处,Gazebo多用于仿真环境的搭建如房间、马路等, RViz多用于传感器的配置如摄像头、激光雷达等。
URDF文件改写
URDF 文件是一个标准的 XML 文件,在 ROS 中预定义了一系列的标签用于描述机器人模型,主要包含以下部分:
- < robot> 根标签
- < link > 连杆标签
- < joint > 关节标签
- < gazebo > 仿真标签
其中< gazebo >仿真标签是联合仿真所必须的,接下来将参考Gazebo Sim官方文档来配置二轮差速机器人运动控制器(Controller)以改写URDF文件适用于Gazebo与RViz联合仿真。
step1.新建xacro文件
在urdf文件夹中新建文件controller.xaro并输入:【Ctrl+S保存】
<robot name="controller" xmlns:xacro="http://wiki.ros.org/xacro">
    <xacro:macro name="joint_trans" params="joint_name">
        <!-- Transmission is important to link the joints and the controller -->
        <transmission name="${joint_name}_trans">
            <type>transmission_interface/SimpleTransmission</type>
            <joint name="${joint_name}">
                <hardwareInterface>hardware_interface/VelocityJointInterface</hardwareInterface>
            </joint>
            <actuator name="${joint_name}_motor">
                <hardwareInterface>hardware_interface/VelocityJointInterface</hardwareInterface>
                <mechanicalReduction>1</mechanicalReduction>
            </actuator>
        </transmission>
    </xacro:macro>

    <xacro:joint_trans joint_name="left_wheel_joint" />
    <xacro:joint_trans joint_name="right_wheel_joint" />

    <gazebo>
        <plugin name="differential_drive_controller" filename="libgazebo_ros_diff_drive.so">
            <rosDebugLevel>Debug</rosDebugLevel>
            <publishWheelTF>true</publishWheelTF>
            <robotNamespace>/</robotNamespace>
            <publishTf>1</publishTf>
            <publishWheelJointState>true</publishWheelJointState>
            <alwaysOn>true</alwaysOn>
            <updateRate>100.0</updateRate>
            <legacyMode>true</legacyMode>
            <leftJoint>left_wheel_joint</leftJoint>
            <!--left_joint-->
            <rightJoint>right_wheel_joint</rightJoint>
            <!--right_joint-->
            <wheelSeparation>0.277</wheelSeparation>
            <!--wheel_separation-->
            <wheelDiameter>0.073</wheelDiameter>
            <!--wheel_diameter-->
            <broadcastTF>1</broadcastTF>
            <wheelTorque>30</wheelTorque>
            <wheelAcceleration>1.8</wheelAcceleration>
            <commandTopic>cmd_vel</commandTopic>
            <odometryFrame>odom</odometryFrame>
            <odometryTopic>odom</odometryTopic>
            <robotBaseFrame>base_footprint</robotBaseFrame>
            <!--
            <odometrySource>world</odometrySource>
            <publishTf>1</publishTf>
            -->
        </plugin>
    </gazebo>
</robot>

其中驱动装置关节即车体与车轮的关节标签left(right)_wheel_joint,URDF官方文档解释了<joint>关节标签的含义如下图所示,本文的left(right)_wheel_joint的Parent为车体连杆标签base_link而Child为车轮连杆标签left(right)_wheel_link,读者可细细体会:

step2.xacro转urdf
在urdf文件夹中打开集成终端,如下所示:

在集成终端中输入:
rosrun xacro xacro controller.xacro > controller.urdf
step3.合并urdf文件
将导出的controller.urdf中第七行至倒数第二行复制粘贴到irobot.urdf的倒数第二行中:

这样我们在irobot.urdf文件中添加了<gazebo>仿真标签。
Gazebo与RViz联合仿真
step1.编写gazebo.launch
<launch>
  <include
    file="$(find gazebo_ros)/launch/empty_world.launch" />
  <node
    name="spawn_model"
    pkg="gazebo_ros"
    type="spawn_model"
    args="-file $(find irobot)/urdf/irobot.urdf -urdf -model irobot"
    output="screen" />
  <node
    name="fake_joint_calibration"
    pkg="rostopic"
    type="rostopic"
    args="pub /calibrated std_msgs/Bool true" />
</launch>
step2.编写rviz.launch
<launch>
  <param
    name="robot_description"
    textfile="$(find irobot)/urdf/irobot.urdf" />
  <node
    name="joint_state_publisher_gui"
    pkg="joint_state_publisher_gui"
    type="joint_state_publisher_gui" />
  <node
    name="robot_state_publisher"
    pkg="robot_state_publisher"
    type="robot_state_publisher" />
  <node
    name="rviz"
    pkg="rviz"
    type="rviz"
    args="-d $(find irobot)/config/irobot.rviz" />
</launch>
step3.分别运行两个launch文件
终端一输入:
source ./devel/setup.bash
roslaunch irobot gazebo.launch
终端二输入:
source ./devel/setup.bash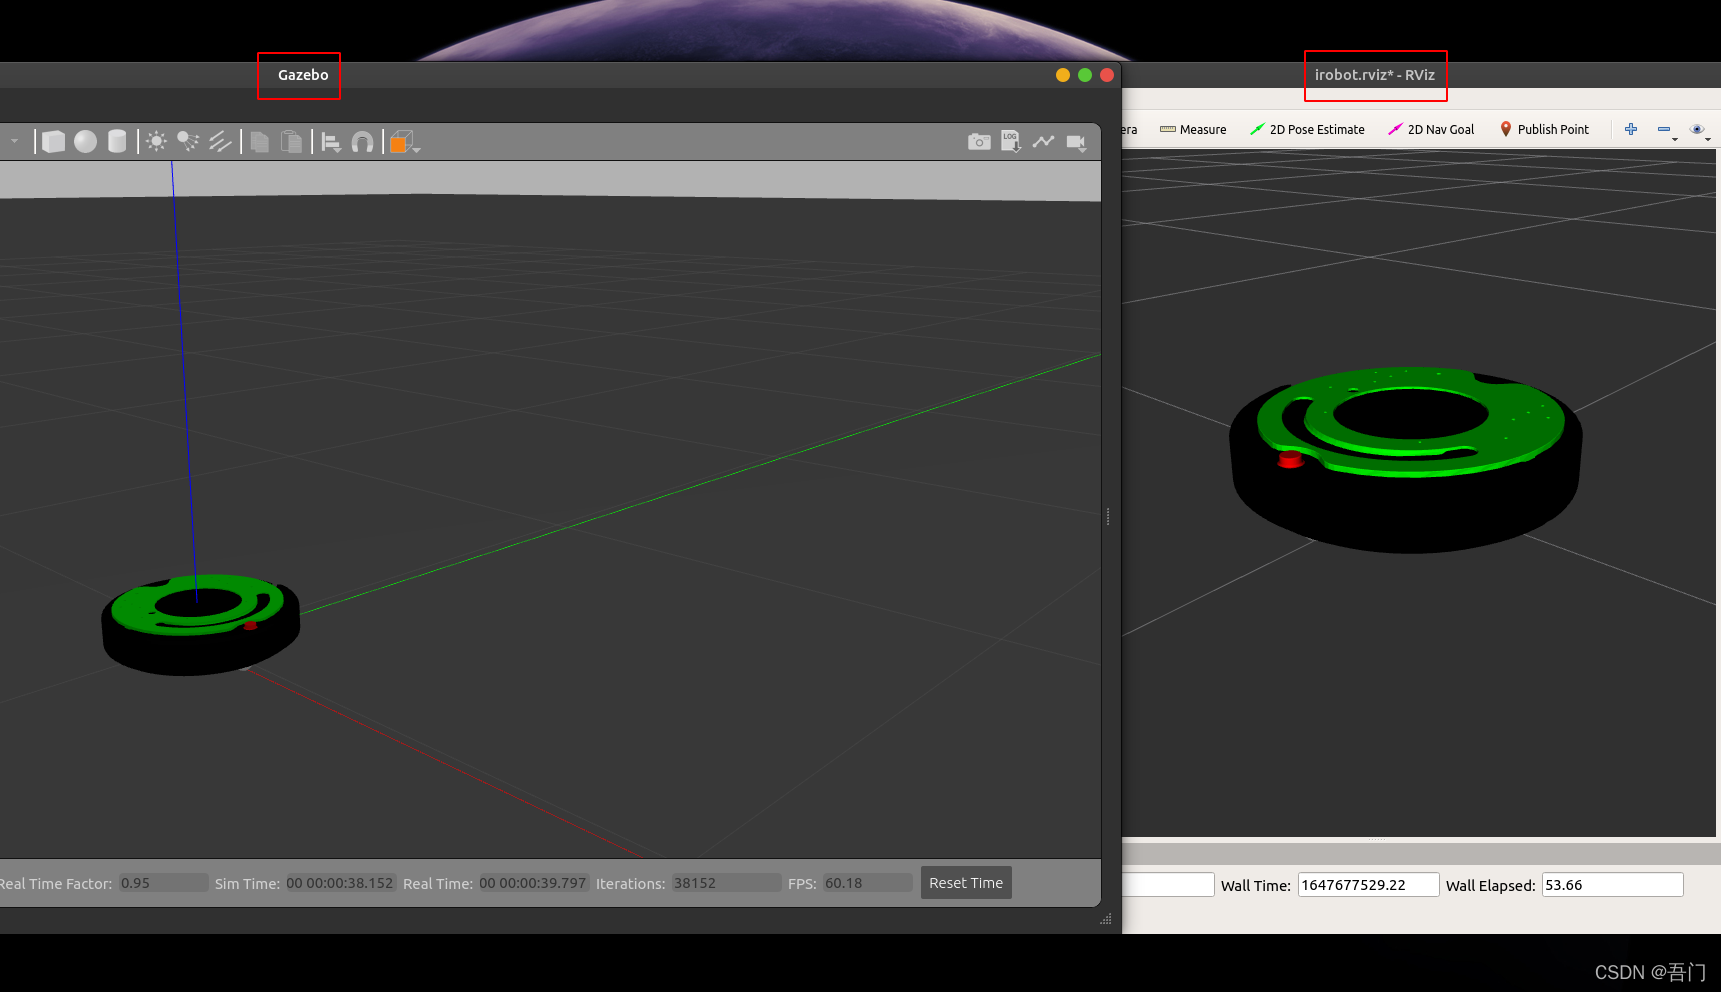
roslaunch irobot rviz.launchRViz环境配置参考ROS入门教程(五)—— RViz仿真如下所示:

最终结果如下:
step4.发布消息
按Ctrl+Alt+T打开终端输入:
rostopic pub -r 10 /cmd_vel geometry_msgs/Twist "linear:
  x: 1.0
  y: 0.0
  z: 0.0
angular:
  x: 0.0
  y: 0.0
  z: 1.0"
该代码段的旨在10HZ 的频率循环发送运动信息至订阅者,成功结果如下:
Gazebo与RViz联合仿真
文章预告:ROS入门教程(八)—— 传感器