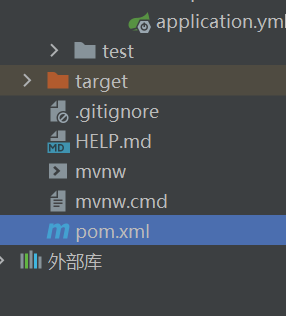
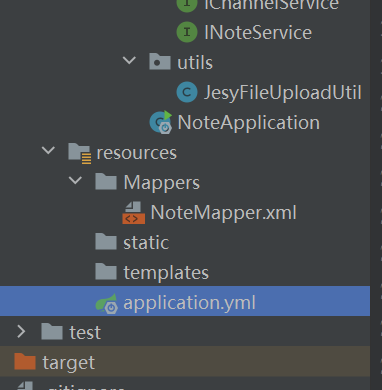
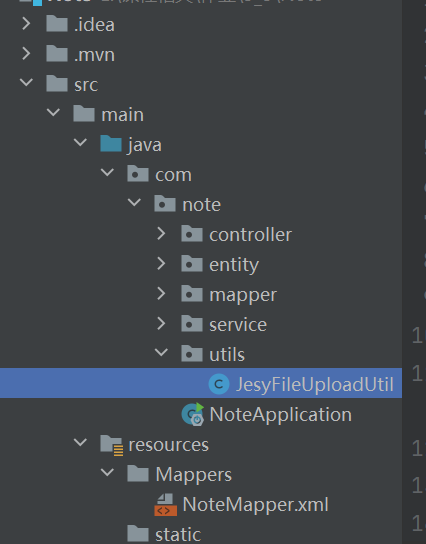
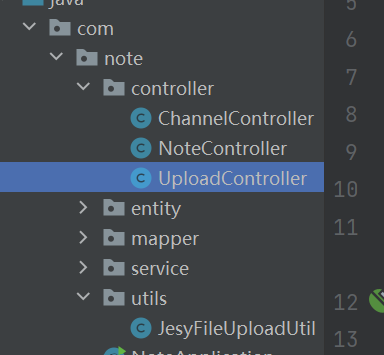
一、添加pom文件依赖

 <!-- mybatis-plus -->
        <dependency>
            <groupId>com.baomidou</groupId>
            <artifactId>mybatis-plus-boot-starter</artifactId>
            <version>3.5.1</version>
        </dependency>

        <!-- lombok -->
        <dependency>
            <groupId>org.projectlombok</groupId>
            <artifactId>lombok</artifactId> <optional>true</optional>
        </dependency>

        <!-- mysql-connector -->
        <dependency>
            <groupId>mysql</groupId>
            <artifactId>mysql-connector-java</artifactId>
            <version>8.0.32</version>
        </dependency>

        <!-- 文件上传依赖 -->
        <dependency>
            <groupId>commons-fileupload</groupId>
            <artifactId>commons-fileupload</artifactId>
            <version>1.3.1</version>
        </dependency>

        <!-- servlet依赖,用于接收多媒体文件-->
        <dependency>
            <groupId>javax.servlet</groupId>
            <artifactId>javax.servlet-api</artifactId>
            <version>3.1.0</version>
        </dependency>

        <!--jersey跨服务器上传依赖-->
        <dependency>
            <groupId>com.sun.jersey</groupId>
            <artifactId>jersey-client</artifactId>
            <version>1.19</version>
        </dependency>

        <dependency>
            <groupId>com.sun.jersey</groupId>
            <artifactId>jersey-core</artifactId>
            <version>1.19</version>
        </dependency>
二、修改配置文件

如文件扩展名补位.yml,则建议改为.yml,可使文件格式美观
server:
  port: 8080//SpringBoot内嵌tomcat端口号
spring:
  servlet:
    multipart:
      #设置单个文件的大小,-1表示不限制,单位MB
      max-file-size: 10MB
      #设置单次请求的文件总大小,-1表示不限制,单位MB
      max-request-size: 100MB
  # 配置数据源信息
  datasource:
    # 配置数据源类型
    type: com.zaxxer.hikari.HikariDataSource
    # 配置连接数据库信息
    driver-class-name: com.mysql.cj.jdbc.Driver
    url: jdbc:mysql://127.0.0.1:3306/note_manager?useUnicode=true&characterEncoding=utf8&zeroDateTimeBehavior=convertToNull&useSSL=false&serverTimezone=GMT%2B8&allowPublicKeyRetrieval=true
    username: root
    password: 123456
mybatis-plus:
  type-aliases-package: com.note.entity
  configuration:
    # 配置MyBatis日志,执行sql的时候,将sql打印到控制台
    log-impl: org.apache.ibatis.logging.stdout.StdOutImpl
  global-config:
    db-config:
      table-prefix: t_
      #新增id算法
      id-type: assign_id
  mapper-locations: classpath:mappers/*.xml
三、添加文件传输工具类

package com.note.utils;

import com.sun.jersey.api.client.Client;
import com.sun.jersey.api.client.WebResource;
import org.springframework.web.multipart.MultipartFile;
import java.io.IOException;
import java.util.Date;
import java.util.Random;

/**
 * 跨服务器文件上传工具类
 *
 * @author qin
 *
 */
public class JesyFileUploadUtil {

    /**
     * 上传文件
     *
     * @param file --文件名
     * @param serverUrl --服务器路径http://127.0.0.1:8080/ssm_image_server
     * @return
     * @throws IOException
     */
    public static String uploadFile(MultipartFile file, String serverUrl) throws IOException {
        //重新设置文件名
        String newFileName = new Date().getTime()+""; //将当前时间获得的毫秒数拼接到新的文件名上
        //随机生成一个3位的随机数
        Random r = new Random();
        for(int i=0; i<3; i++) {
            newFileName += r.nextInt(10); //生成一个0-10之间的随机整数
        }

        //获取文件的扩展名
        String orginalFilename = file.getOriginalFilename();
        String suffix = orginalFilename.substring(orginalFilename.indexOf("."));

        //创建jesy服务器,进行跨服务器上传
        Client client = Client.create();
        //把文件关联到远程服务器
        //例如:http://127.0.0.1:8080/ssm_image_server/upload/123131312321.jpg
        WebResource resource = client.resource(serverUrl+"/"+newFileName+suffix);
        //上传
        //获取文件的上传流
        resource.put(String.class, file.getBytes());

        //图片上传成功后要做的事儿
        //1、ajax回调函数做图片回显(需要图片的完整路径)
        //2、将图片的路径保存到数据库(需要图片的相对路径)
//        String fullPath = serverUrl+"/upload/"+newFileName+suffix; //全路径
        String relativePath = "/upload/"+newFileName+suffix; //相对路径

        return relativePath;
    }
}
四、添加控制层文件传输类

package com.note.controller;

import com.note.utils.JesyFileUploadUtil;
import org.springframework.web.bind.annotation.CrossOrigin;
import org.springframework.web.bind.annotation.PostMapping;
import org.springframework.web.bind.annotation.RequestMapping;
import org.springframework.web.bind.annotation.RestController;
import org.springframework.web.multipart.MultipartFile;

import java.io.IOException;

@RestController
@RequestMapping("/upload")
@CrossOrigin(origins = "*")
public class UploadController {
    @PostMapping("/file")
    public String uploadFile(MultipartFile fileName){
        String path="";
        try {
            //本地下载tomcat端口号:8060,需与SpringBoot内嵌端口号不同
            path=JesyFileUploadUtil.uploadFile(fileName,"http://localhost:8060/upload");
        } catch (IOException e) {
            e.printStackTrace();
        }
        return path;
    }
}