管理微服务配置
对于单体应用架构来说,会使用配置文件管理我们的配置,这就是之前项目中的application.properties或application.yml。如果需要在多环境下使用,传统的做法是复制这些文件命名为application-xxx.properties,并且在启动时配置spring.profiles.active={profile}来指定环境。
在微服务架构下我们可能会有很多的微服务,所以要求的不只是在各自微服务中进行配置,我们需要将所有的配置放在统一平台上进行操作,不同的环境进行不同的配置,运行期间动态调整参数等等。总之一句话,使用集中管理配置是很有必要的。
Spring Cloud Config
- 官方地址
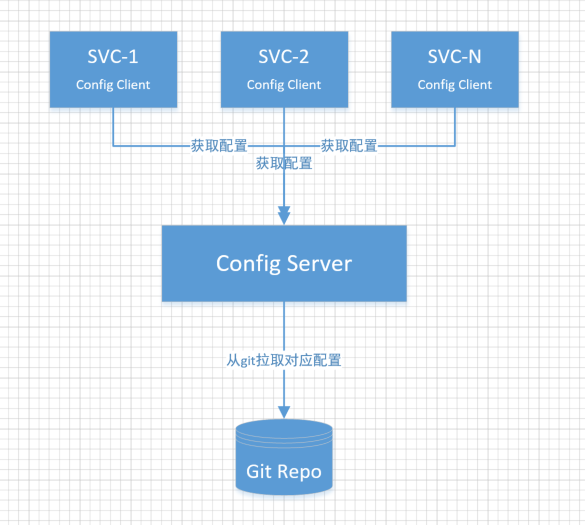
- 为分布式系统外部配置提供了服务器端和客户端的支持,它包括config server端和 config client端两部分
- Config server端是一个可以横向扩展、集中式的配置服务器,它用于集中管理应用程序各个环境下的配置,默认 使用Git存储配置内容
- Config client 是config server的客户端,用于操作存储在server中的配置属性
- 优势
- 集中管理配置
- 不同环境不同配置
- 运行期间可以动态调整
- 配置修改后可以自动更新
本章源码
架构图
引入spring cloud config步骤
可基于之前SpringCloudDemo项目改造,也可以创建为新的项目
一、在GitHub创建一个git仓库用来存放git配置
- 创建仓库名字为spring-cloud-config-repo的私有仓库
- 增加其他模块(后面config client会详细说,可先跳过)的配置文件,格式为
并将配置项粘贴到新建的文件中,如:创建zuul-dev.properties,并将原来的zuul模块中的application.properties全部配置粘贴进来{application}-{profile}.properties - {application}-{profile}.properties,{application}表示微服务的名称,{label}表示Git对应的分支,默认为master,{profile}表示配置文件的profile 访问时就 /{application}/{profile}[/{label}]或/{label}/{application}-{profile}.properties
二、 创建config server端
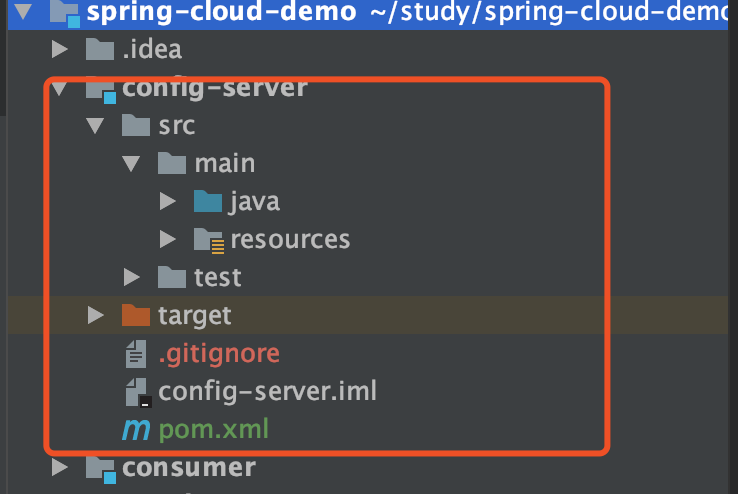
创建maven项目,可在原项目中创建Module
引入pom依赖
  <dependency>
      <groupId>org.springframework.cloud</groupId>
      <artifactId>spring-cloud-config-server</artifactId>
  </dependency>
创建启动类
  package cn.kxtop.blog.configserver;

  import org.springframework.boot.SpringApplication;
  import org.springframework.boot.autoconfigure.SpringBootApplication;
  import org.springframework.cloud.client.discovery.EnableDiscoveryClient;
  import org.springframework.cloud.config.server.EnableConfigServer;
  // 注入到Eureka中,使高可用
  @EnableDiscoveryClient
  @SpringBootApplication
  @EnableConfigServer
  public class ConfigServerApplication {

      public static void main(String[] args) {
          SpringApplication.run(ConfigServerApplication.class);
      }

  }
配置配置文件application.properties
  server.port=9999
  # 配置git仓库的地址(修改为你自己的git仓库地址)
  spring.cloud.config.server.git.uri=https://github.com/qupengkun/spring-cloud-config-repo.git
  # git仓库账号
  spring.cloud.config.server.git.username=YOU_NAME
  # git仓库秘密
  spring.cloud.config.server.git.password=YOU_PASSWORD
  #eureka,确保Spring cloud config 高可用
  eureka.client.serviceUrl.defaultZone = http://localhost:8761/eureka/
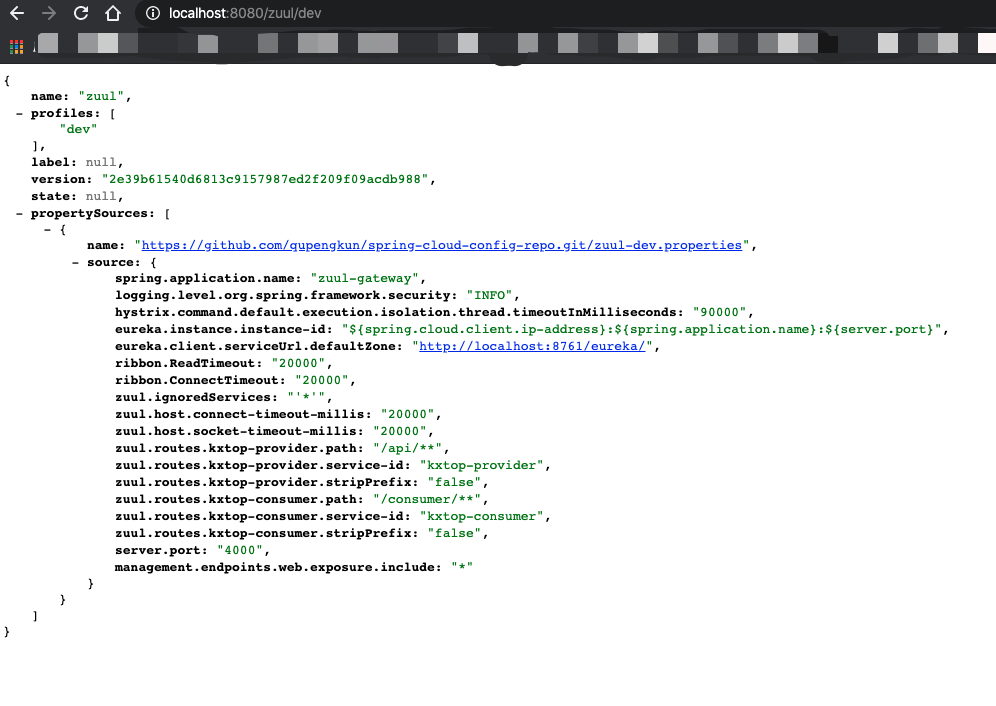
启动项目并访问测试 http请求localhost:9999/zuul/dev
三、创建config client端
- 引入依赖
<dependency> <groupId>org.springframework.cloud</groupId> <artifactId>spring-cloud-config-client</artifactId> </dependency> - 创建bootstrap.properties
#对应之前git仓库的文件名,如zuul-dev.properties spring.application.name=zuul #config server 地址 spring.cloud.config.uri=http://localhost:9999 #{profile}名(环境) spring.cloud.config.profile=dev #{label}名,git仓库分支 spring.cloud.config.label=master - 删除原来的application.properties,如没有,则不用操作直接下一步
- 启动client端可见连接到了config-server端
- 查看eureka发现已经注册到eureka中
- 测试在线参数修改 可在Controller上加注解 @RefreshScope 请求server:port/refresh手动刷新
总结及后续
以上基本演示了Spring Cloud Config的用法,还是比较简单的,我们引入了Eureka使Config Server能保证高可用,还可以增加@RefreshScope手动刷新配置文件,如果配置对安全要求较高,也可以引入JCE(Java Cryptography Extension)进行加解密操作。
其实每次都去手动刷新配置还是比较麻烦且有很大的局限性的,那么如何修改配置后自动感知并刷新呢?请关注下一章基于Spring Cloud Bus实现自动刷新配置。
持续学习,记录点滴。更多文章请访问 文章首发


