目录
一、组件化
1.1. 组件概述
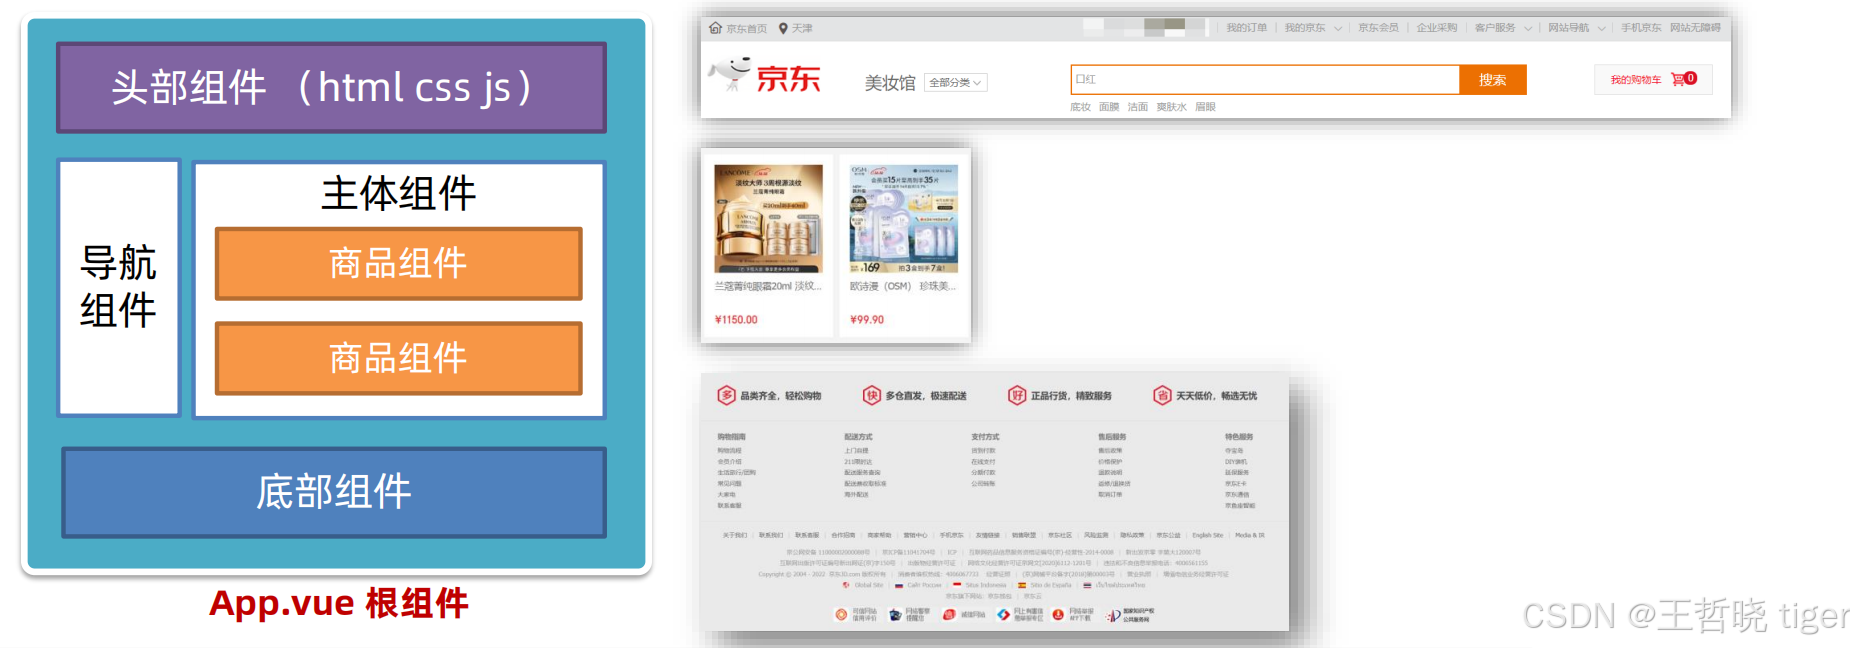
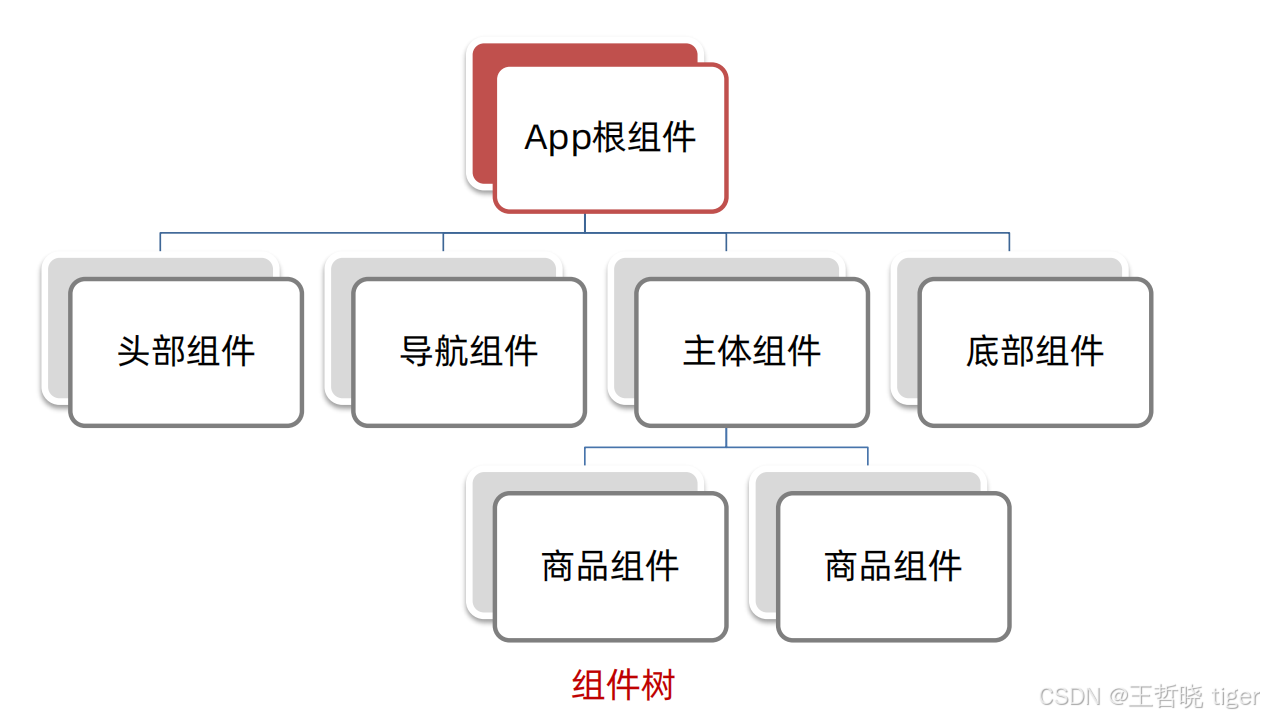
① 组件化:一个页面可以拆分成多个组件,每个组件有着自己独立的结构、样式、行为。
好处:便于维护,利于复用 → 提升开发效率。
组件分类:普通组件、根组件。
② 根组件:整个应用最上层的组件,包裹所有普通小组件
1.2. 语法高亮插件 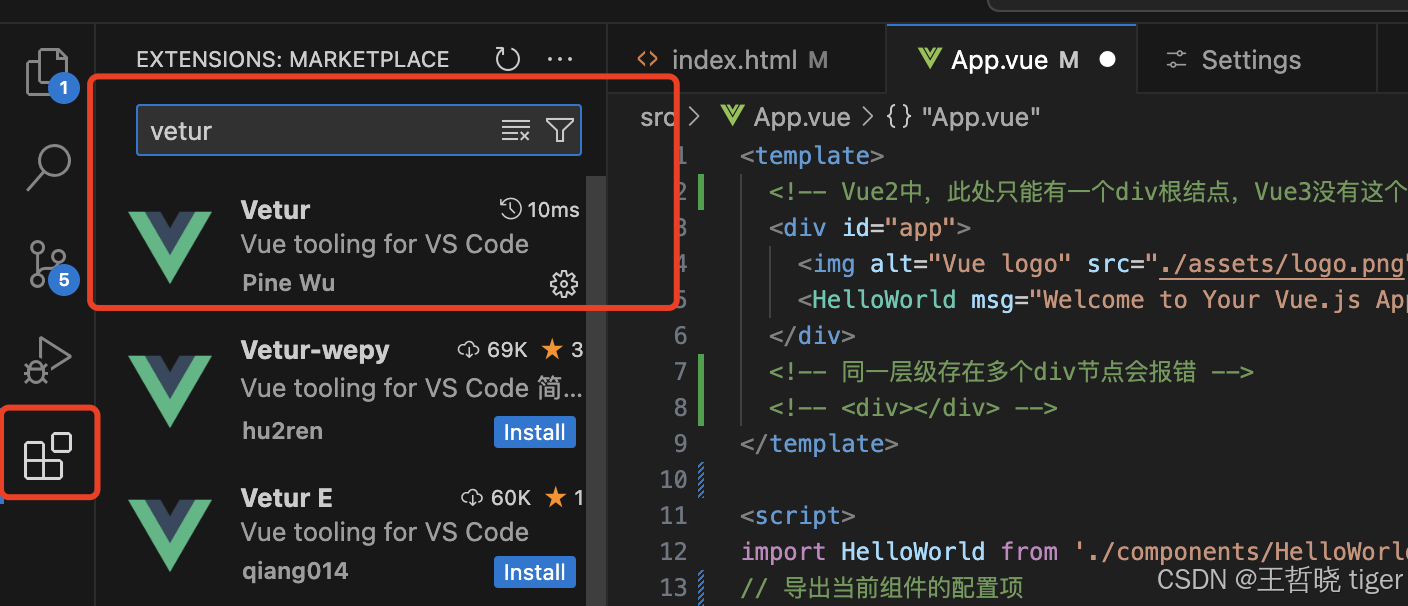
1.3. 组件内部组成
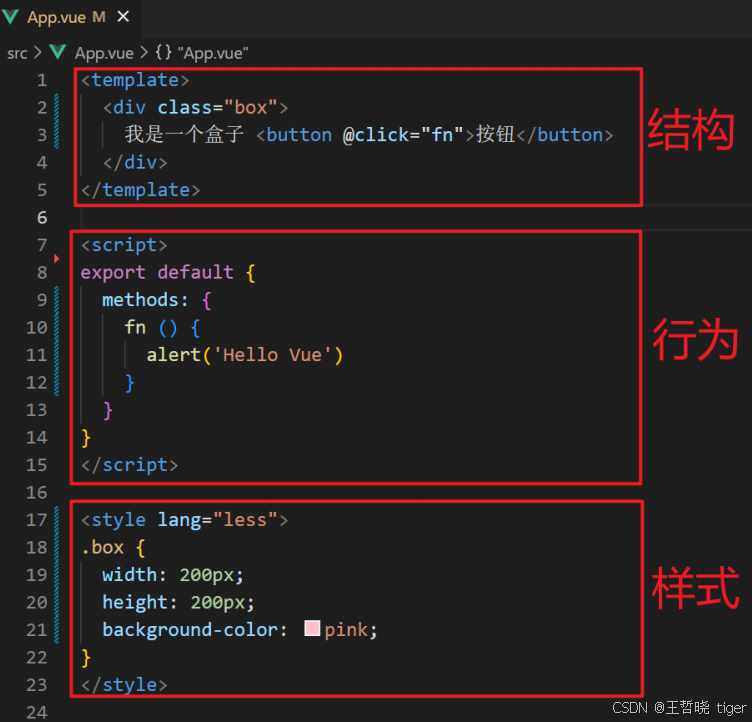
组件内部由三部分组成:
template:结构 (有且只能一个根元素)
script: js逻辑
style: 样式 (可支持less,需要装包)
1.4. 让组件支持 less
(1) style标签,lang="less" 开启less功能
(2) 装包: yarn add less less-loader(控制台执行或者系统终端上执行改命令)
<template>
  <!-- Vue2中,此处只能有一个div根结点,Vue3没有这个限制了 -->
  <div id="App">
    <div class="box"></div>
  </div>
  <!-- 同一层级存在多个div节点会报错 -->
  <!-- <div></div> -->
</template>

<script>
// 导出当前组件的配置项
// 里面可以提供 data methods computed watch 生命周期钩子等
export default {
  created () {
    console.log('我是created')
  },
  methods : {
    fn () {
      alert('你好')
    }
  }
}
</script>

<style lang="less">
/*
  让style支持less
  1. 给style加上lang="less"
  2. 安装依赖包 less less-loader
     yarn add less less-loader -D (开发依赖包)
*/
.App {
  width: 400px;
  height: 400px;
  background-color: pink;
}
.App .box {
  width: 100px;
  height: 100px;
  background-color: skyblue;
}
</style>
1.5. 组件注册的两种方式
1. 局部注册:只能在注册的组件内使用
① 创建 .vue 文件 (三个组成部分)
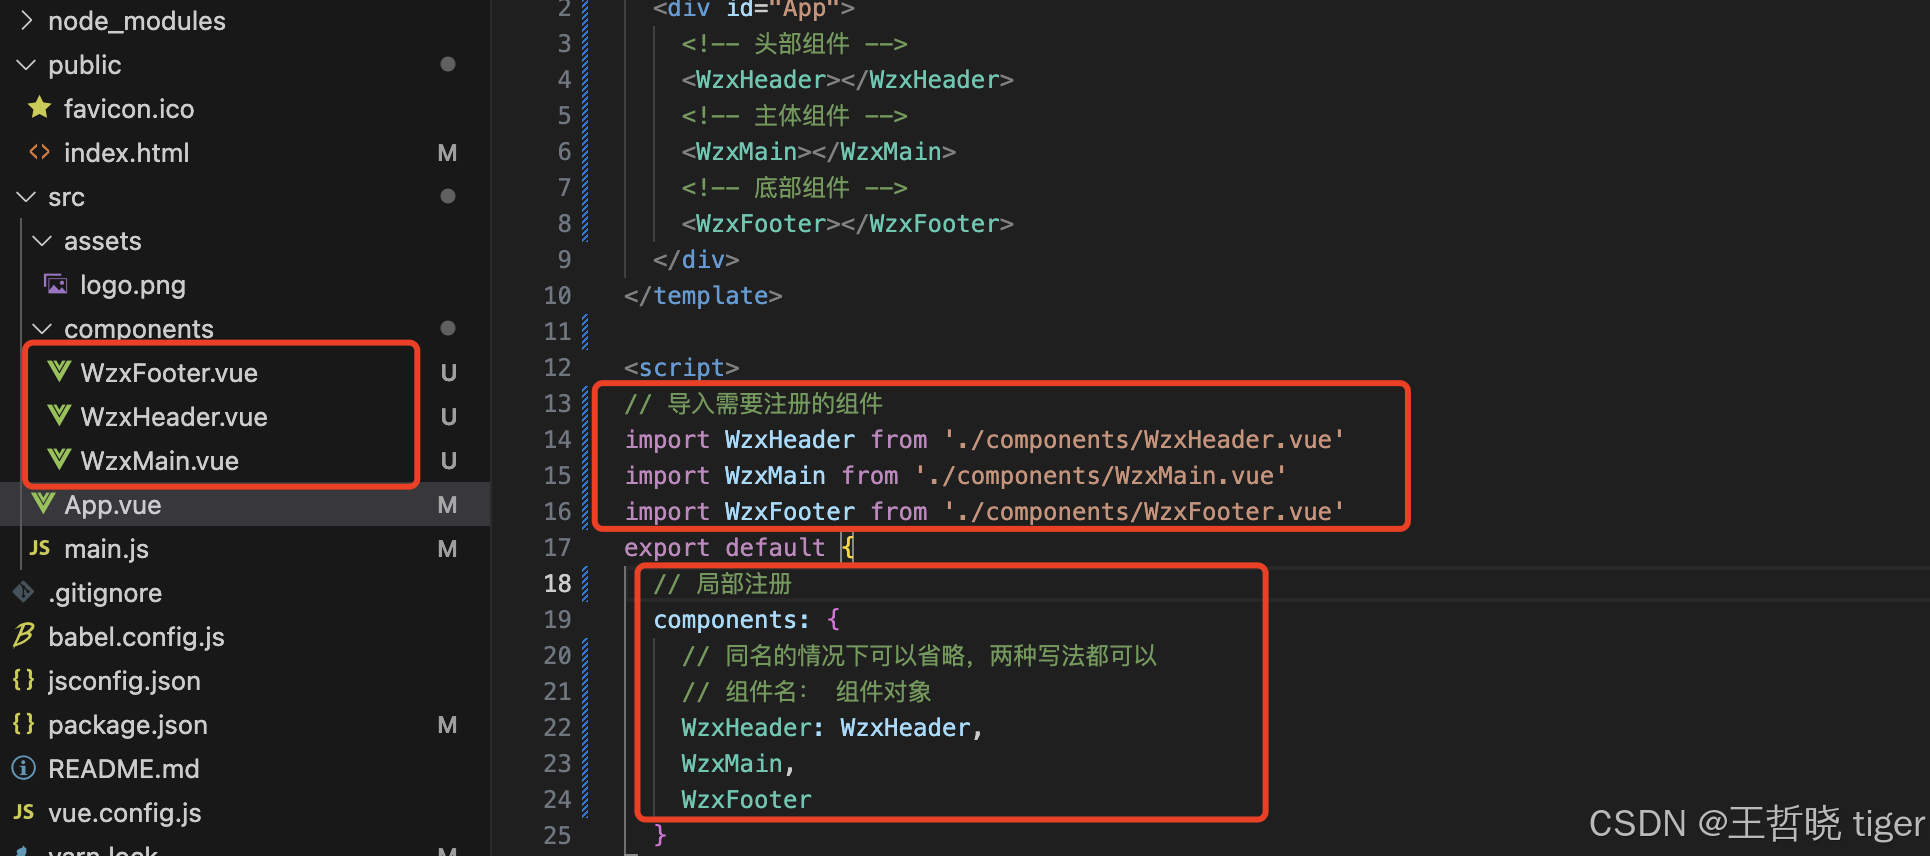
② 在使用的组件内导入并注册
2. 全局注册:所有组件内都能使用
二、局部注册
2.1. 使用描述
使用:
当成 html 标签使用 `<组件名></组件名>`
注意:
组件名规范 → 大驼峰命名法,如:WzxHeader
2.2. 脚手架工程变动的核心代码
2.2.1. 工程结构图
2.2.2. App.vue
<template>
  <div id="App">
    <!-- 头部组件 -->
    <WzxHeader></WzxHeader>
    <!-- 主体组件 -->
    <WzxMain></WzxMain>
    <!-- 底部组件 -->
    <WzxFooter></WzxFooter>
  </div>
</template>

<script>
import WzxHeader from './components/WzxHeader.vue'
import WzxMain from './components/WzxMain.vue'
import WzxFooter from './components/WzxFooter.vue'
export default {
  components: {
    // 同名的情况下可以省略,两种写法都可以
    // 组件名: 组件对象
    WzxHeader: WzxHeader,
    WzxMain,
    WzxFooter
  }
}
</script>

<style>
.App {
  width: 600px;
  height: 700px;
  background-color: #87ceeb;
  margin: 0 auto;
  padding: 20px;
}
.App .box {
  width: 100px;
  height: 100px;
  background-color: skyblue;
}
</style>
2.2.3. WzxHeader.vue
<template>
  <div class="wzx-header">
    我是wzx-header
  </div>
</template>

<script>

export default {

}
</script>

<style lang="less">
.wzx-header {
  height: 100px;
  line-height: 100px;
  text-align: center;
  font-size: 30px;
  background-color: #8064a2;
  color: white;
}
</style>
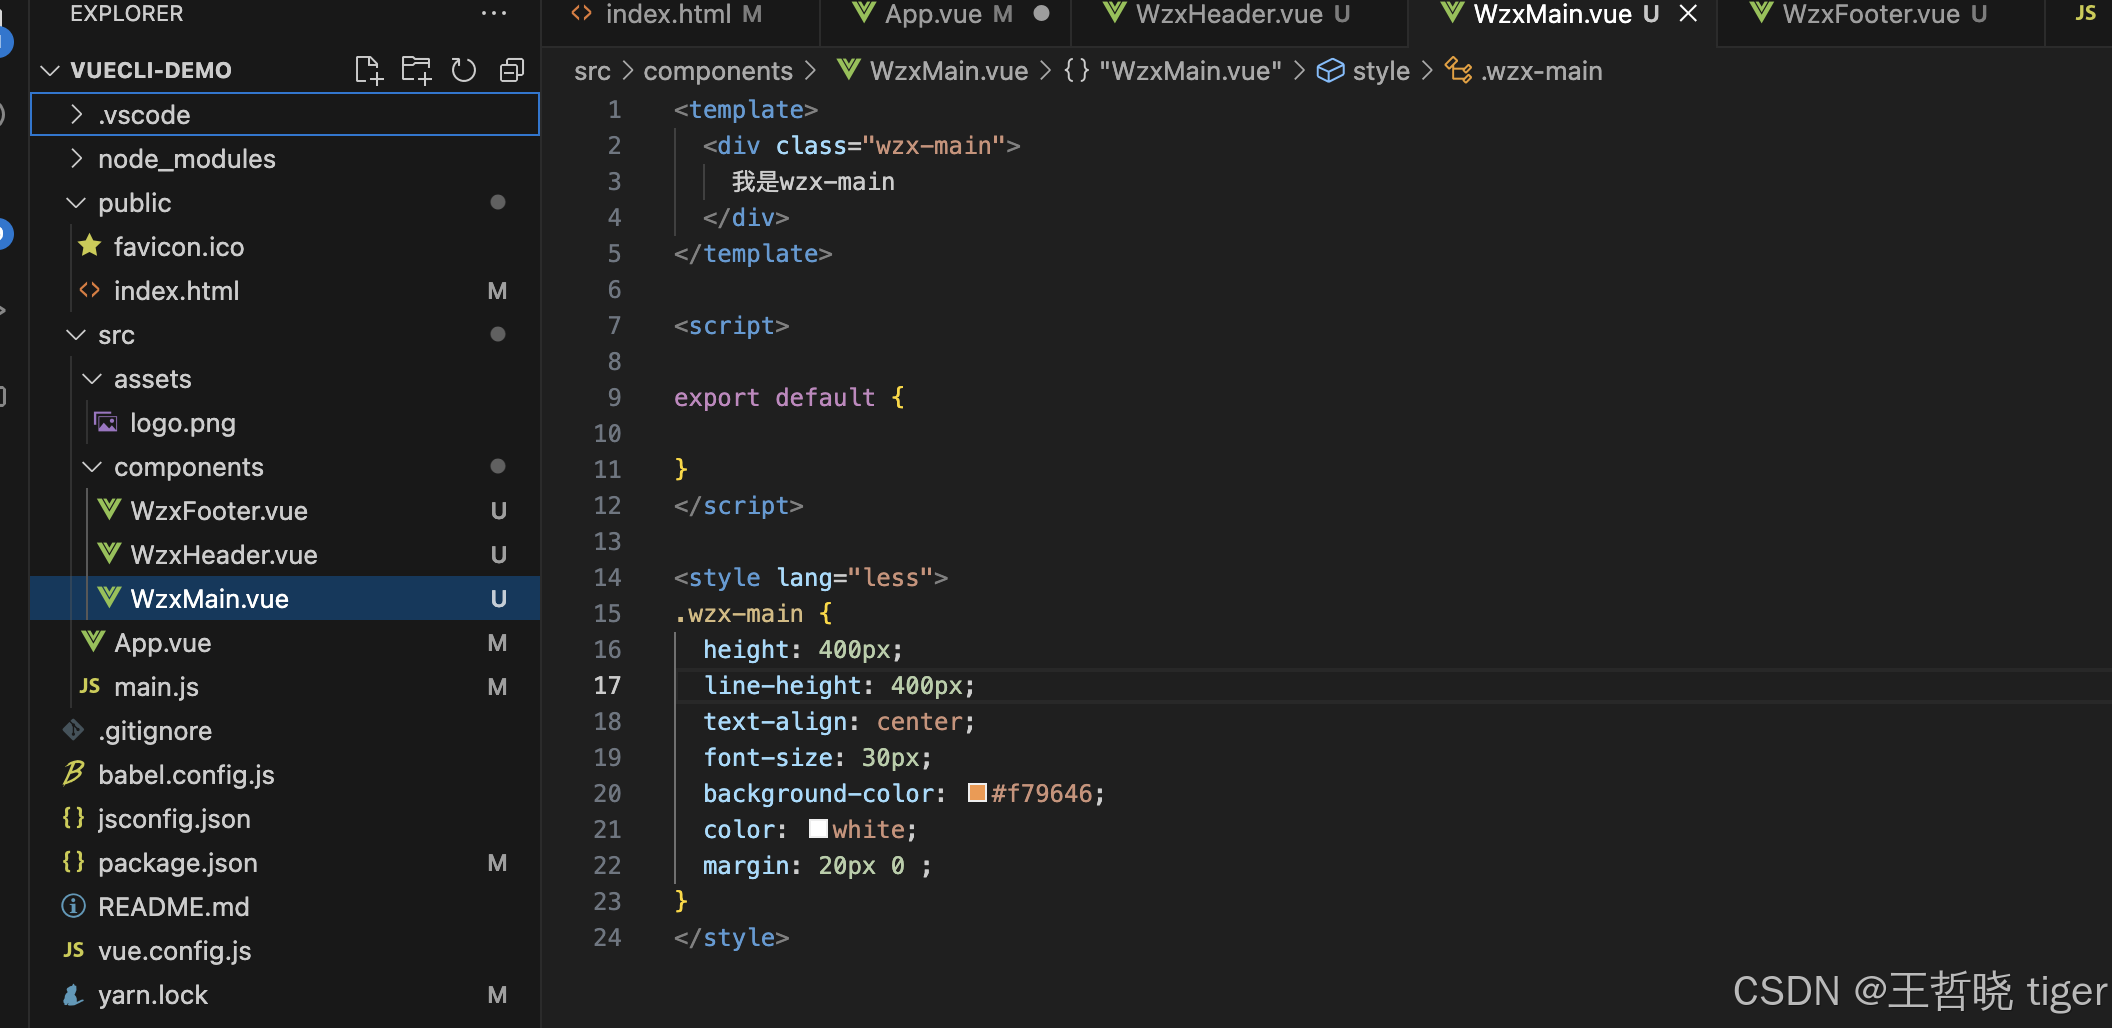
2.2.4. WzxMain.vue
<template>
  <div class="wzx-main">
    我是wzx-main
  </div>
</template>

<script>

export default {

}
</script>

<style lang="less">
.wzx-main {
  height: 400px;
  line-height: 400px;
  text-align: center;
  font-size: 30px;
  background-color: #f79646;
  color: white;
  margin: 20px 0 ;
}
</style>
2.2.5. WzxFooter.vue
<template>
  <div class="wzx-main">
    我是wzx-main
  </div>
</template>

<script>

export default {

}
</script>

<style lang="less">
.wzx-main {
  height: 400px;
  line-height: 400px;
  text-align: center;
  font-size: 30px;
  background-color: #f79646;
  color: white;
  margin: 20px 0 ;
}
</style>
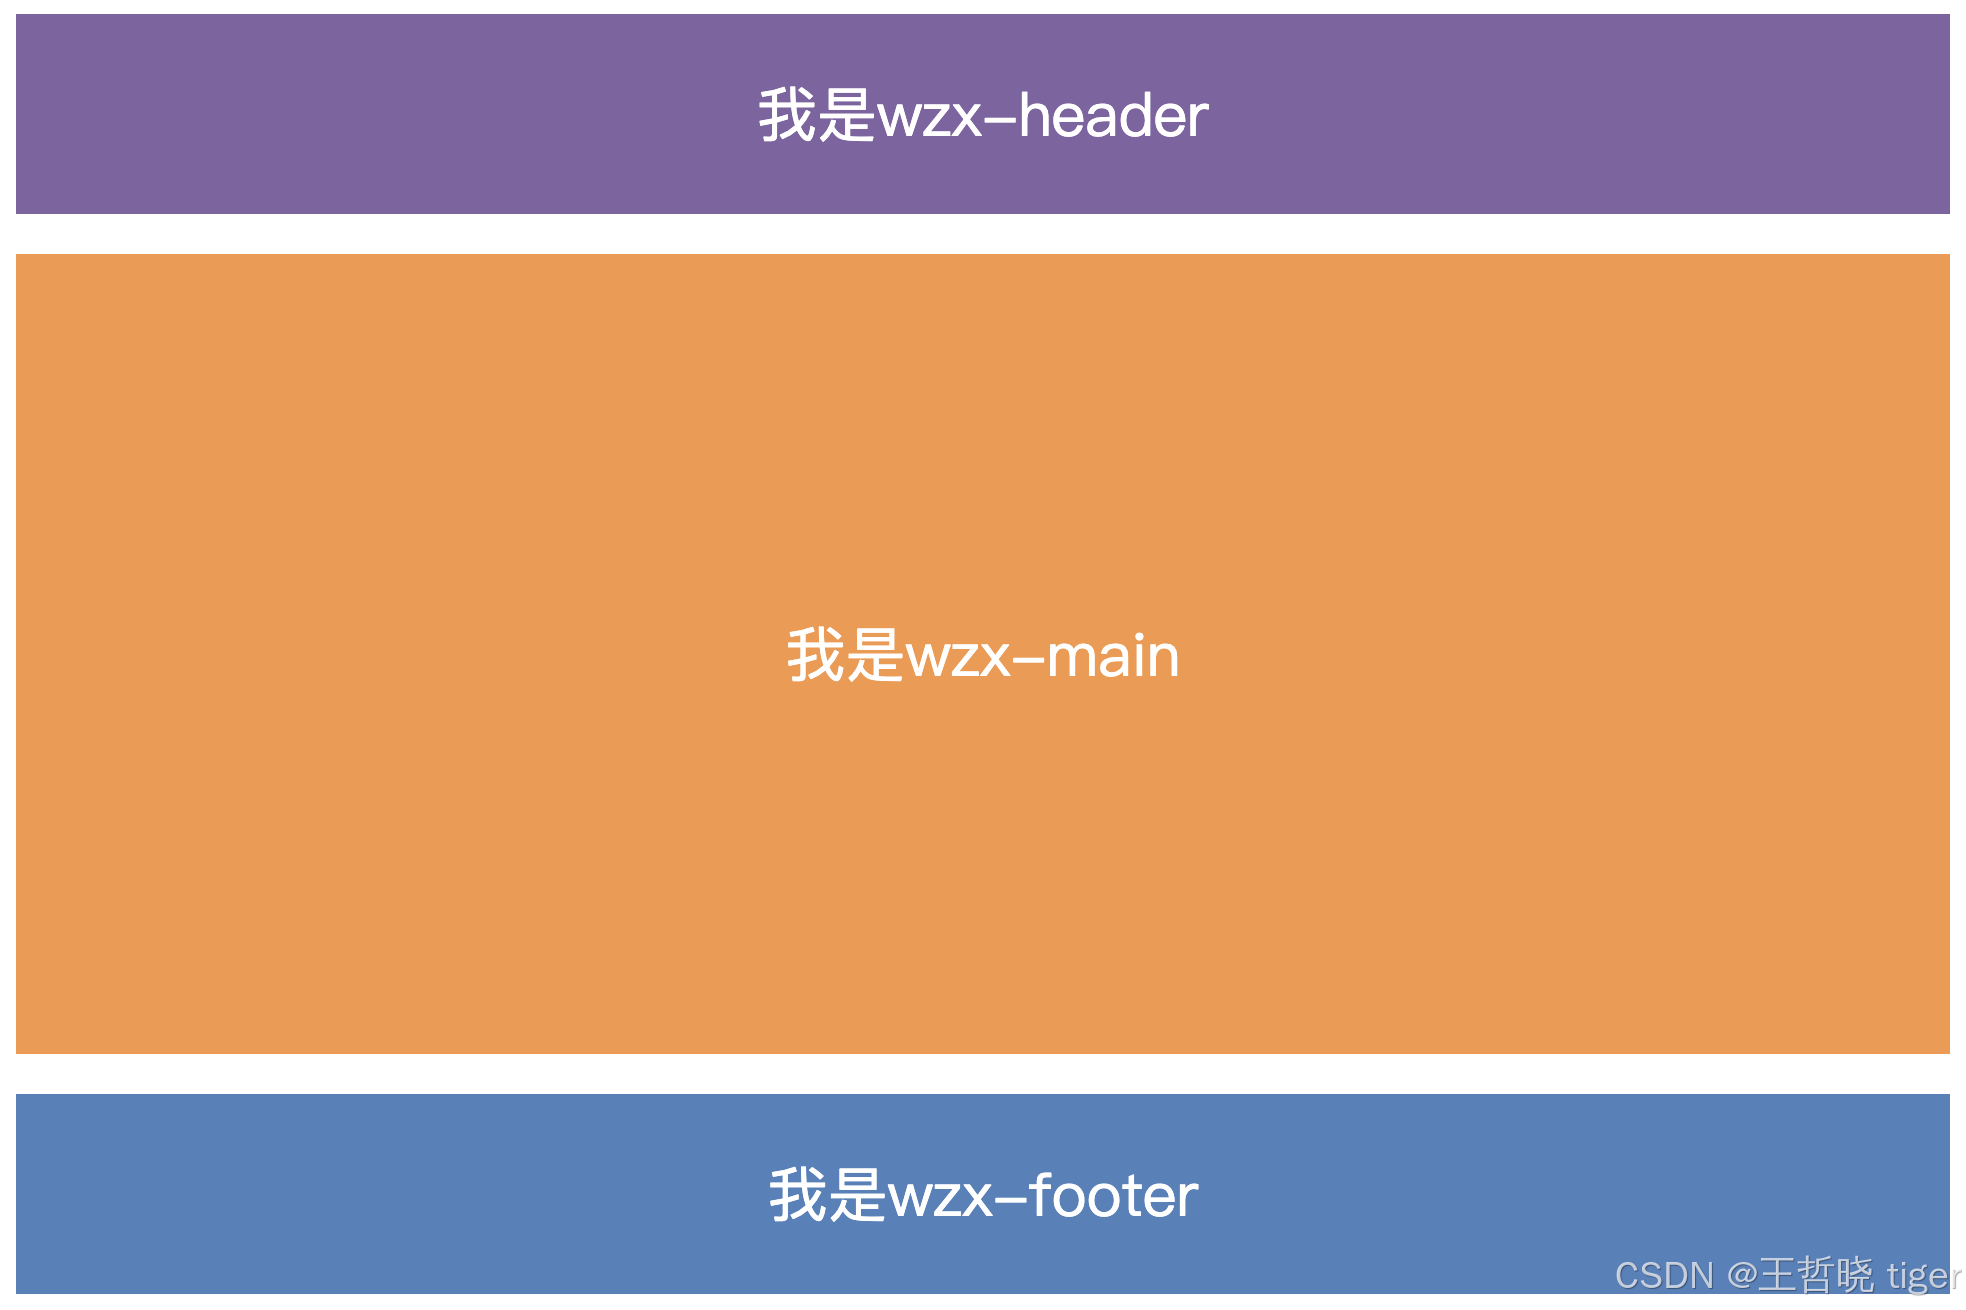
2.3. 运行效果图
三、全局注册
3.1. 使用描述
所有组件内都能使用
① 创建 .vue 文件 (三个组成部分)
② 在main.js 中进行全局注册
使用:
当成 html 标签使用 `<组件名></组件名>`
注意:
组件名规范 → 大驼峰命名法,如:WzxHeader
技巧:
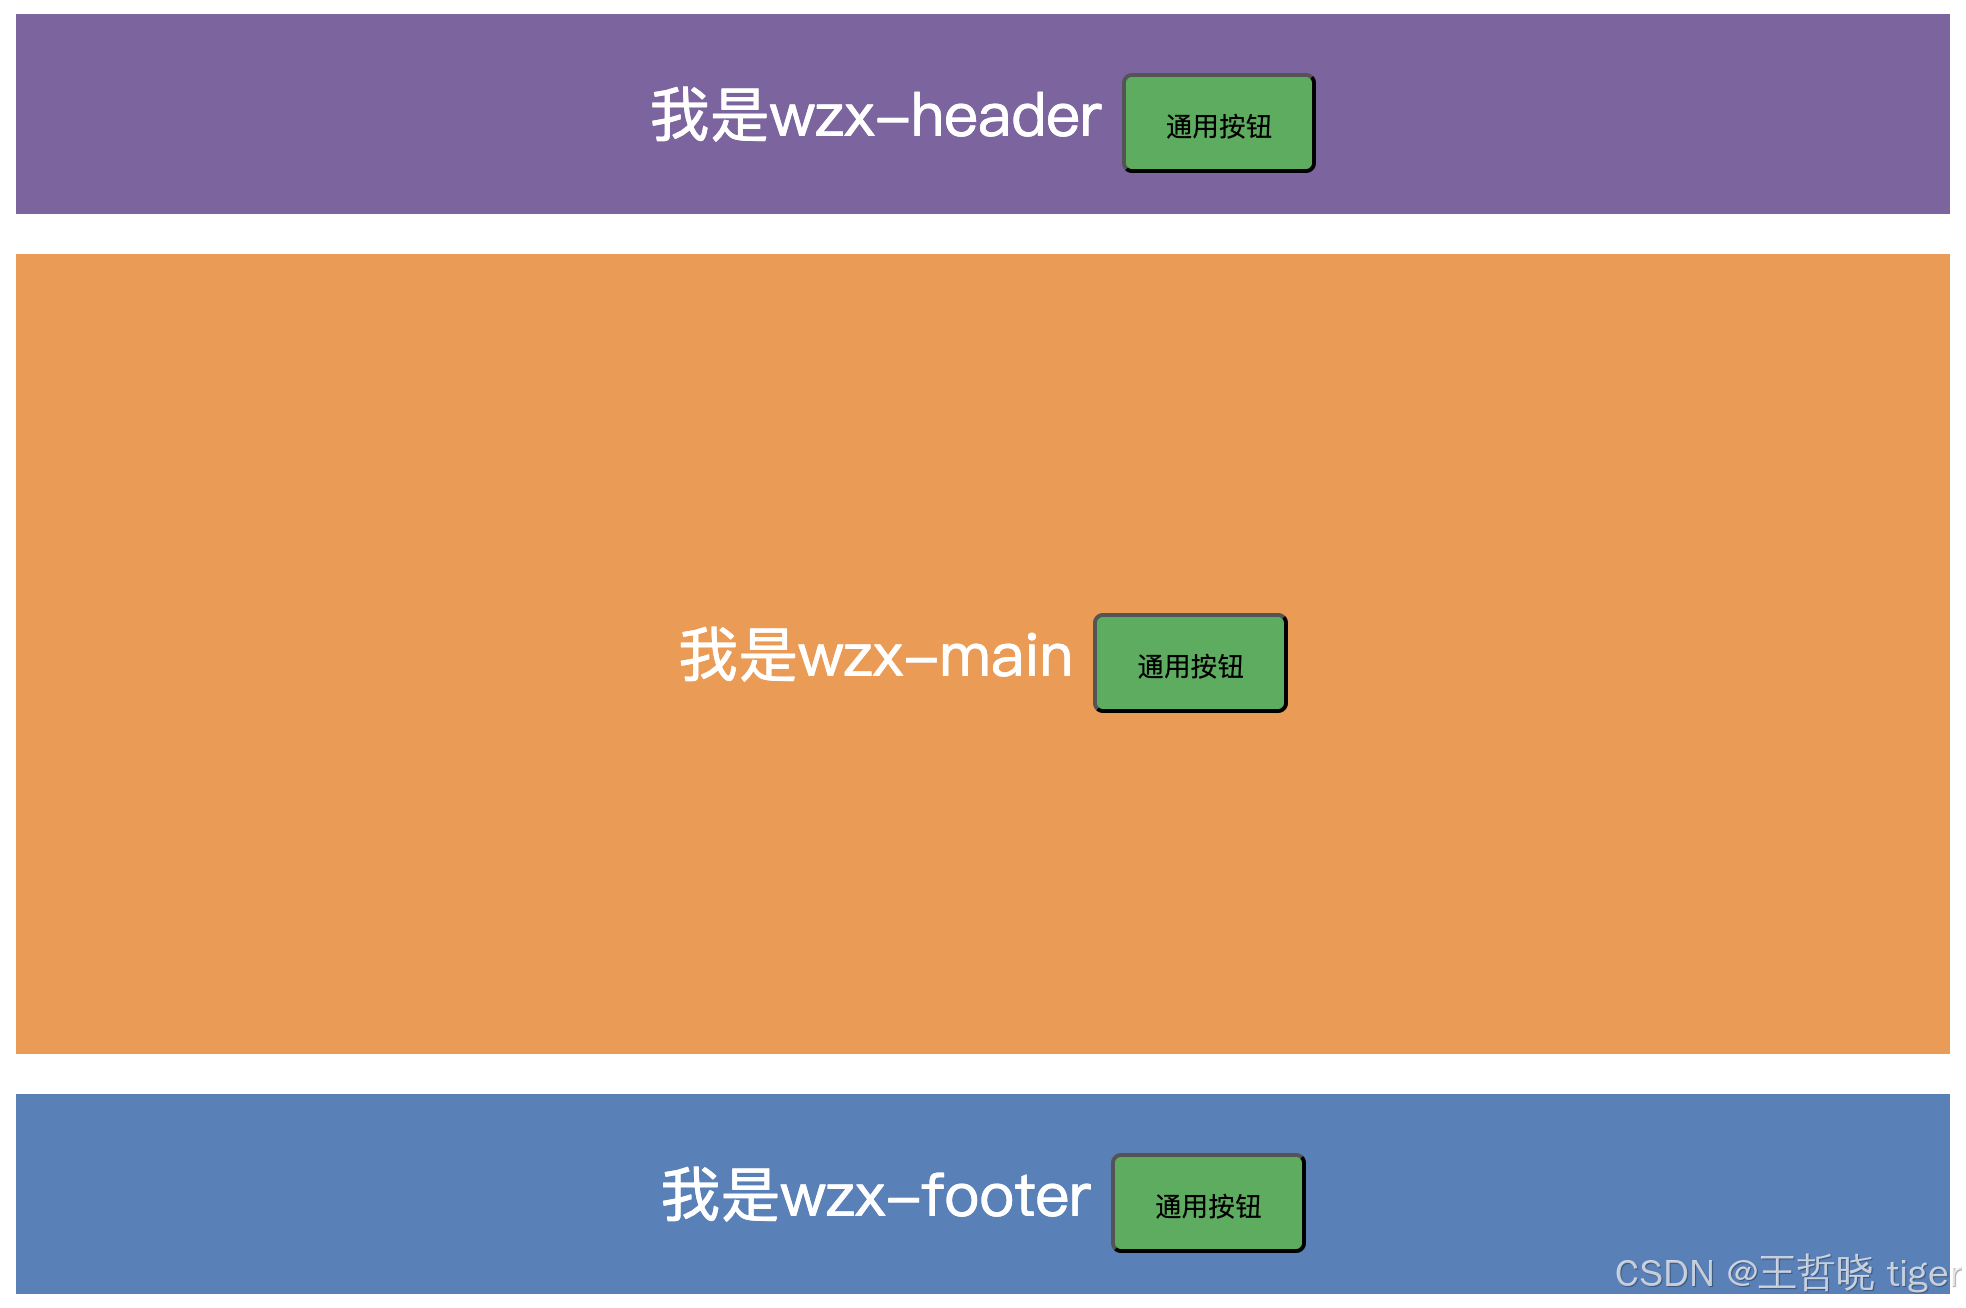
一般都用局部注册,如果发现确实是通用组件,再定义到全局。比如某个样式的按钮所有页面都在使用。
3.2. 脚手架工程变动的核心代码
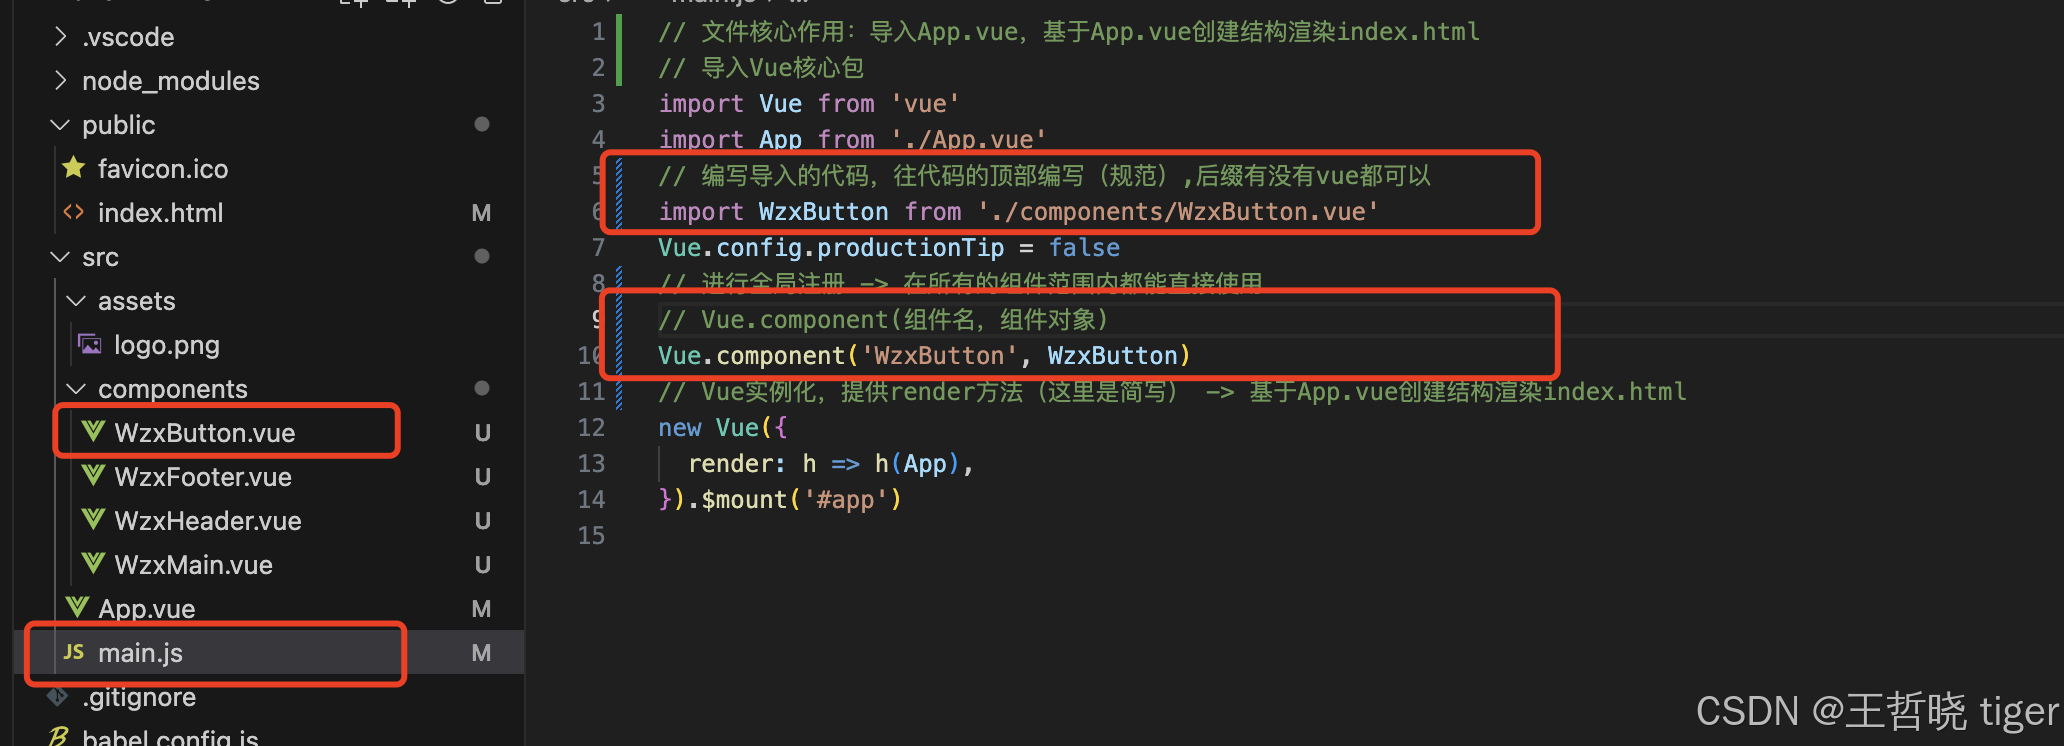
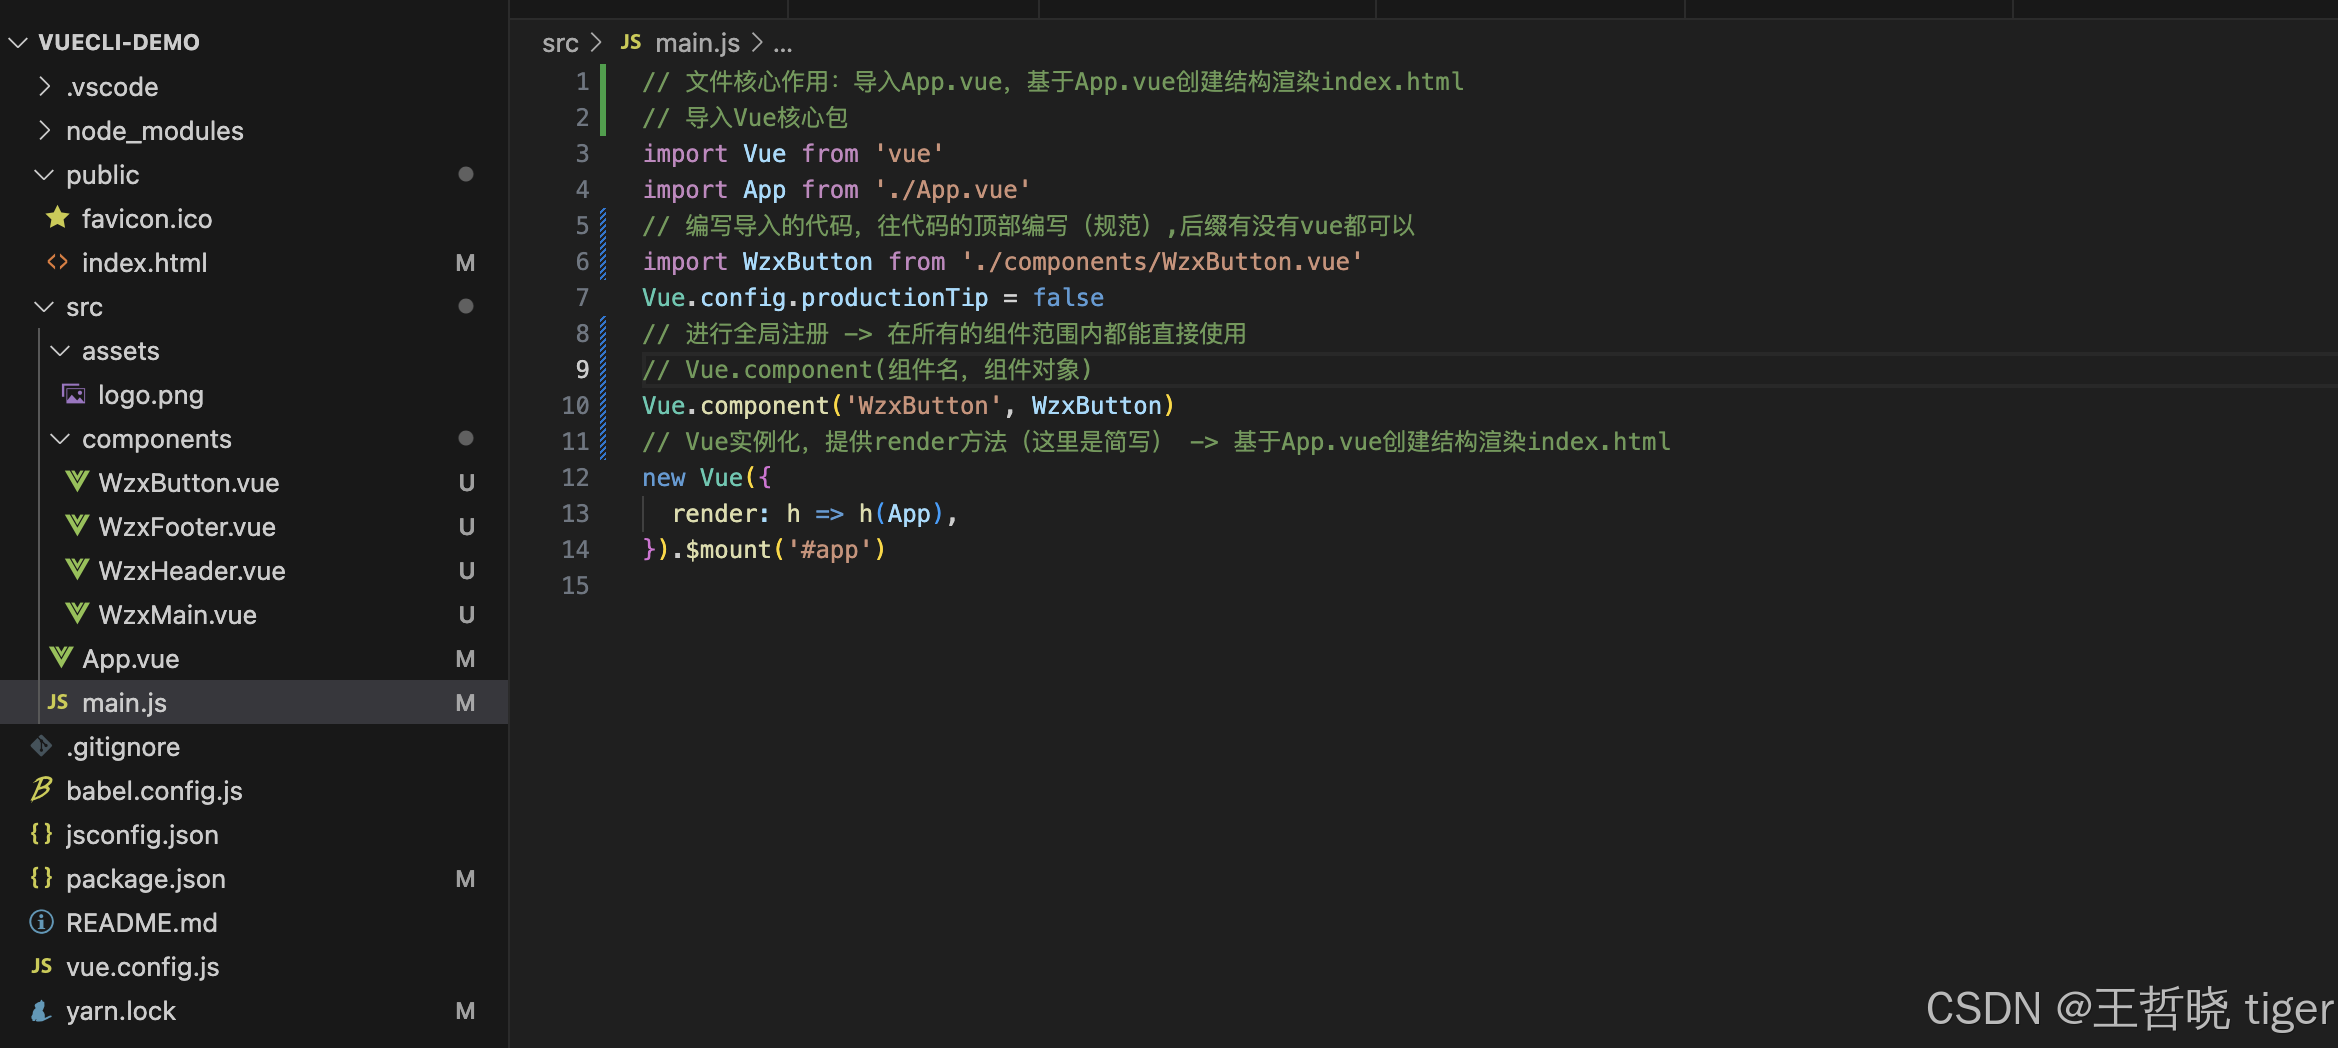
3.2.1. 工程结构图
3.2.2. main.js
<template>
  <div id="App">
    <!-- 头部组件 -->
    <WzxHeader></WzxHeader>
    <!-- 主体组件 -->
    <WzxMain></WzxMain>
    <!-- 底部组件 -->
    <WzxFooter></WzxFooter>
  </div>
</template>

<script>
// 导入需要注册的组件
import WzxHeader from './components/WzxHeader.vue'
import WzxMain from './components/WzxMain.vue'
import WzxFooter from './components/WzxFooter.vue'
export default {
  // 局部注册
  components: {
    // 同名的情况下可以省略,两种写法都可以
    // 组件名: 组件对象
    WzxHeader: WzxHeader,
    WzxMain,
    WzxFooter
  }
}
</script>

<style>
.App {
  width: 600px;
  height: 700px;
  background-color: #87ceeb;
  margin: 0 auto;
  padding: 20px;
}
.App .box {
  width: 100px;
  height: 100px;
  background-color: skyblue;
}
</style>
3.2.3. WzxButton.vue
<template>
  <button class="wzx-button">通用按钮</button>
</template>

<script>

export default {

}
</script>

<style lang="less">
.wzx-button {
  height: 50px;
  line-height: 50px;
  padding: 0 20px;
  background-color: #3bae56;
  border-radius: 5px;
}
</style>