springcloud各个组件使用demo
Eureka服务注册中心
创建三个eureka服务注册中心,分别为:
eureka-server1
spring:
  application:
    name: eureka-server1
server:
  port: 8001

eureka:
  client:
    service-url:
      defaultZone: http://localhost:8002/eureka/,http://localhost:8003/eureka/
    fetch-registry: true
    register-with-eureka: true
eureka-server2
server:
  port: 8002
spring:
  application:
    name: eureka-server2
eureka:
  client:
    service-url:
      defaultZone: http://localhost:8001/eureka/,http://localhost:8003/eureka/
    register-with-eureka: true
    fetch-registry: true
eureka-server3
server:
  port: 8003
spring:
  application:
    name: eureka-server3
eureka:
  client:
    service-url:
      defaultZone: http://localhost:8001/eureka/,http://localhost:8002/eureka/
    fetch-registry: true
    register-with-eureka: true
三个服务注册中心的pom.xml内容一样, 都如下:
<?xml version="1.0" encoding="UTF-8"?>
<project xmlns="http://maven.apache.org/POM/4.0.0"
         xmlns:xsi="http://www.w3.org/2001/XMLSchema-instance"
         xsi:schemaLocation="http://maven.apache.org/POM/4.0.0 http://maven.apache.org/xsd/maven-4.0.0.xsd">
    <parent>
        <artifactId>springboot-microservice-parent</artifactId>
        <groupId>org.example</groupId>
        <version>1.0-SNAPSHOT</version>
    </parent>
    <modelVersion>4.0.0</modelVersion>

    <artifactId>eureka-server3</artifactId>

    <dependencies>
        <dependency>
            <groupId>org.springframework.cloud</groupId>
            <artifactId>spring-cloud-starter-netflix-eureka-server</artifactId>
        </dependency>
    </dependencies>

</project>
其中父pom.xml文件内容如下:
<?xml version="1.0" encoding="UTF-8"?>
<project xmlns="http://maven.apache.org/POM/4.0.0"
         xmlns:xsi="http://www.w3.org/2001/XMLSchema-instance"
         xsi:schemaLocation="http://maven.apache.org/POM/4.0.0 http://maven.apache.org/xsd/maven-4.0.0.xsd">
    <modelVersion>4.0.0</modelVersion>

    <groupId>org.example</groupId>
    <artifactId>springboot-microservice-parent</artifactId>
    <packaging>pom</packaging>
    <version>1.0-SNAPSHOT</version>
    <modules>
        <module>eureka-server1</module>
        <module>eureka-server2</module>
        <module>eureka-server3</module>
        <module>goods</module>
        <module>goods2</module>
        <module>ribbon-client</module>
    </modules>

    <parent>
        <groupId>org.springframework.boot</groupId>
        <artifactId>spring-boot-starter-parent</artifactId>
        <version>2.5.6</version>
        <relativePath/>
    </parent>

    <dependencyManagement>
        <dependencies>
            <!--根据springboot的版本指定springCloud的版本-->
            <dependency>
                <groupId>org.springframework.cloud</groupId>
                <artifactId>spring-cloud-dependencies</artifactId>
                <version>2020.0.6</version>
                <type>pom</type>
                <scope>import</scope>
            </dependency>
        </dependencies>
    </dependencyManagement>

</project>
eureka-server1、eureka-server2、eureka-server3入口代码相同,都如下:
入口类的类名不同,其他都相同:
EurekaServer1Application.java
EurekaServer2Application.java
EurekaServer3Application.java
package com.example;

import org.springframework.boot.SpringApplication;
import org.springframework.boot.autoconfigure.SpringBootApplication;
import org.springframework.cloud.netflix.eureka.server.EnableEurekaServer;

@SpringBootApplication
@EnableEurekaServer
public class EurekaServer1Application {
    public static void main(String[] args) {
        SpringApplication.run(EurekaServer1Application.class, args);
    }
}
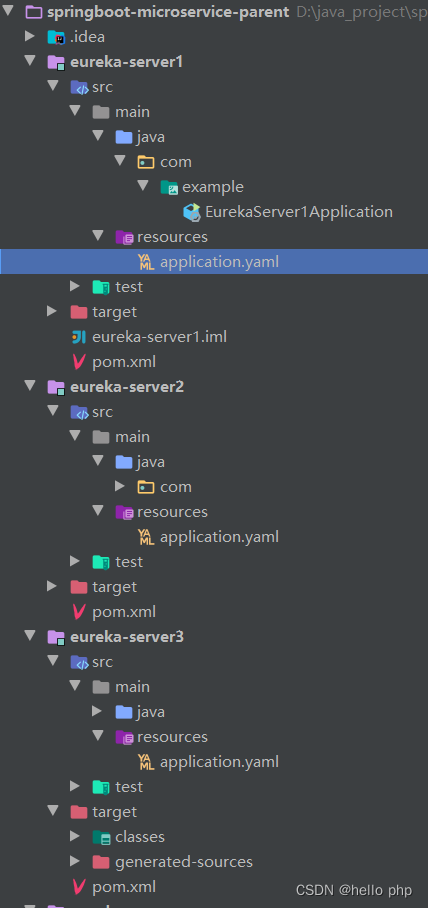
代码结构图
Eureka客户端
① goods微服务(扮演eureka客户端角色)
application.yaml
server:
  port: 9001
spring:
  application:
    name: goods-server
eureka:
  client:
    service-url:
      defaultZone: http://localhost:8001/eureka/,http://localhost:8002/eureka/,http://localhost:8003/eureka/
pom.xml
<?xml version="1.0" encoding="UTF-8"?>
<project xmlns="http://maven.apache.org/POM/4.0.0"
         xmlns:xsi="http://www.w3.org/2001/XMLSchema-instance"
         xsi:schemaLocation="http://maven.apache.org/POM/4.0.0 http://maven.apache.org/xsd/maven-4.0.0.xsd">
    <parent>
        <artifactId>springboot-microservice-parent</artifactId>
        <groupId>org.example</groupId>
        <version>1.0-SNAPSHOT</version>
    </parent>
    <modelVersion>4.0.0</modelVersion>

    <artifactId>goods</artifactId>

    <dependencies>
        <dependency>
            <groupId>org.springframework.cloud</groupId>
            <artifactId>spring-cloud-starter-netflix-eureka-client</artifactId>
        </dependency>

        <dependency>
            <groupId>org.springframework.boot</groupId>
            <artifactId>spring-boot-starter-web</artifactId>
        </dependency>

        <dependency>
            <groupId>org.springframework.boot</groupId>
            <artifactId>spring-boot-devtools</artifactId>
            <optional>true</optional>
        </dependency>
    </dependencies>


    <build>
        <plugins>
            <plugin>
                <groupId>org.springframework.boot</groupId>
                <artifactId>spring-boot-maven-plugin</artifactId>
                <configuration>
                    <fork>true</fork>
                </configuration>
            </plugin>
        </plugins>
    </build>

</project>
入口文件
GoodsApplication.java
package com.example;

import org.springframework.boot.SpringApplication;
import org.springframework.boot.autoconfigure.SpringBootApplication;
import org.springframework.cloud.netflix.eureka.EnableEurekaClient;

@SpringBootApplication
@EnableEurekaClient
public class GoodsApplication {
    public static void main(String[] args) {
        SpringApplication.run(GoodsApplication.class, args);
    }
}
测试控制器类: GetGoodsController.java
package com.example.controller;

import org.springframework.beans.factory.annotation.Value;
import org.springframework.web.bind.annotation.RequestMapping;
import org.springframework.web.bind.annotation.RestController;

@RestController
@RequestMapping("/goods")
public class GetGoodsController {

    @Value("${server.port}")
    private int port;

    @RequestMapping("/getOne")
    public String getOneGoods() {
        return "返回一条数据"+String.valueOf(port);
    }
}
②goods2微服务(扮演eureka客户端角色), 同goods微服务完全一样
goods2和goods的监听端口不同,其他都一样
goods2的
application.yaml如下:server: port: 9002 spring: application: name: goods-server eureka: client: service-url: defaultZone: http://localhost:8001/eureka/,http://localhost:8002/eureka/,http://localhost:8003/eureka/
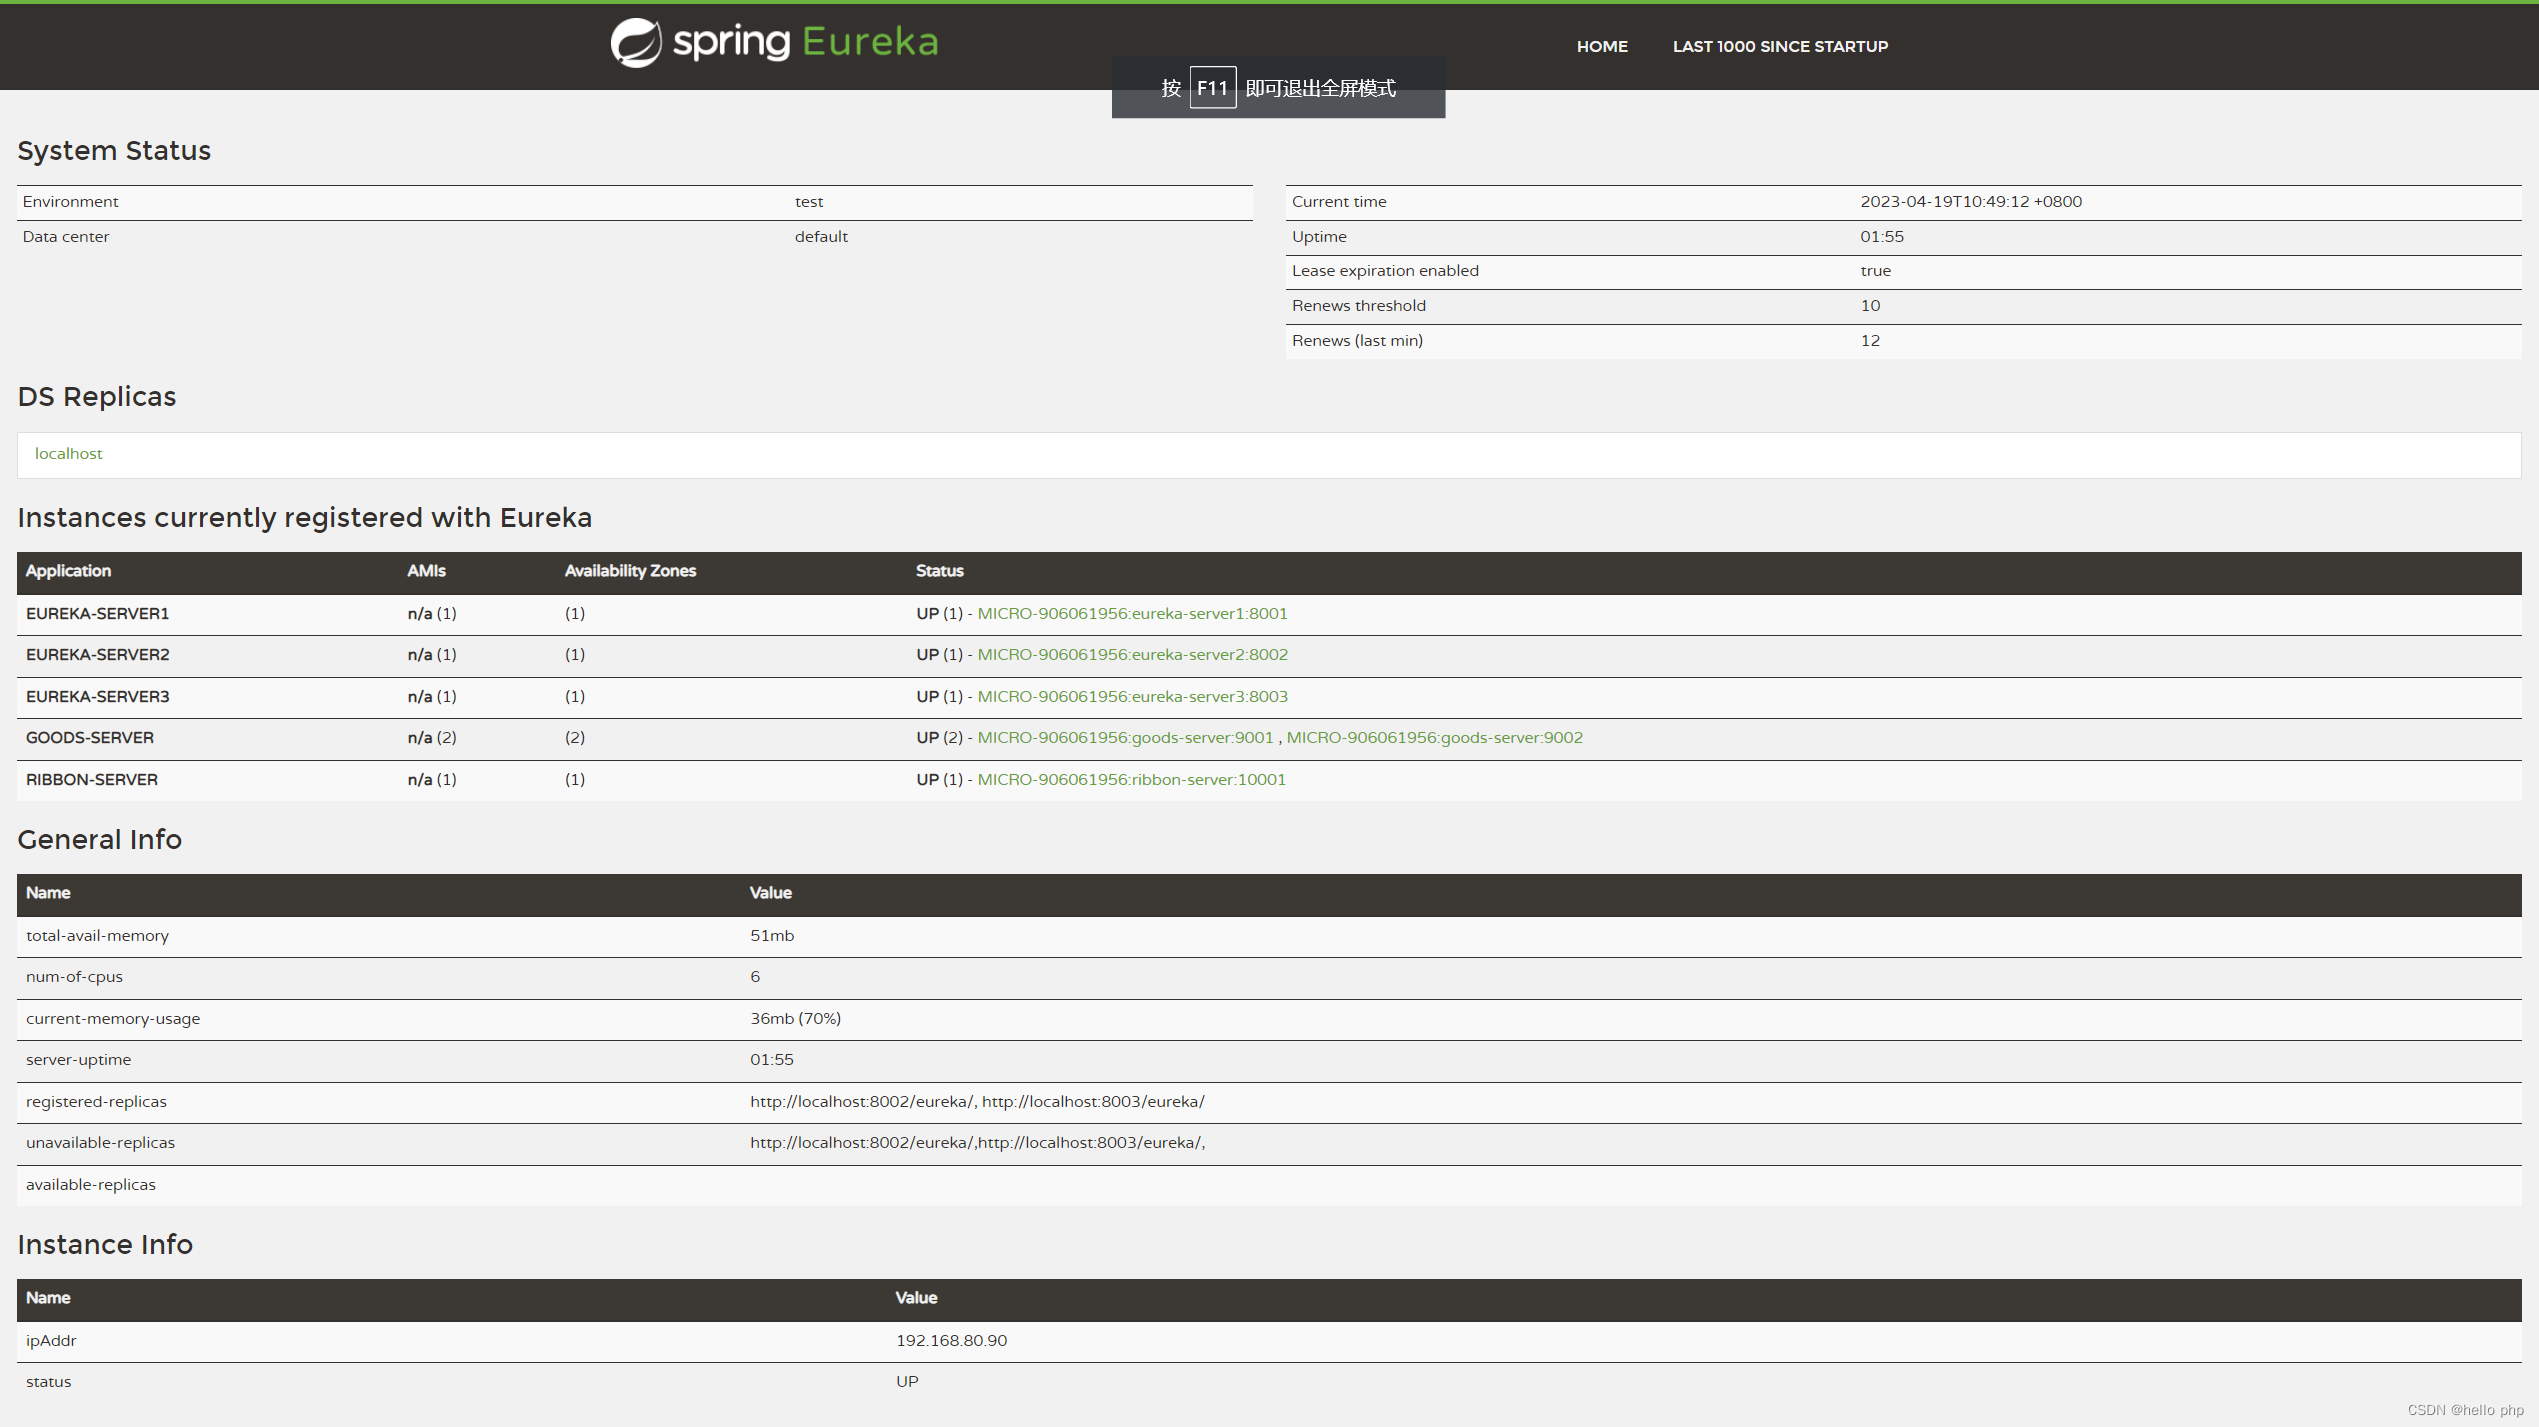
启动eureka-server1 eureka-server2 eureka-server3服务端, 再启动goods goods2客户端后, 访问 http://localhost:8001, http://localhost:80012, http://localhost:8003 如下:
可以看到, 各个微服务都已经注册到注册中心了; 其中的微服务RIBBON-SERVER是后面要演示的负载均衡调用组件
负载均衡调用组件 Ribbon
pom.xml
一定要避开一个坑: Ribbon组件和Eureka-client不要同时引入
<?xml version="1.0" encoding="UTF-8"?>
<project xmlns="http://maven.apache.org/POM/4.0.0"
         xmlns:xsi="http://www.w3.org/2001/XMLSchema-instance"
         xsi:schemaLocation="http://maven.apache.org/POM/4.0.0 http://maven.apache.org/xsd/maven-4.0.0.xsd">
    <parent>
        <artifactId>springboot-microservice-parent</artifactId>
        <groupId>org.example</groupId>
        <version>1.0-SNAPSHOT</version>
    </parent>
    <modelVersion>4.0.0</modelVersion>

    <artifactId>ribbon-client</artifactId>

    <dependencies>
        <!-- eureka-client 已经集成了loadbalanced了,不需要在引入ribbon了,否则引起会冲突,但是启动的时候也不报这个冲突的错误,这里一定要避开这个坑!!!,否则后面调试让你头大,报错一直找不到微服务GOODS-SERVER实例 -->
        <!--<dependency>
            <groupId>org.springframework.cloud</groupId>
            <artifactId>spring-cloud-starter-netflix-ribbon</artifactId>
            <version>2.2.4.RELEASE</version>
        </dependency>-->

        <dependency>
            <groupId>org.springframework.cloud</groupId>
            <artifactId>spring-cloud-starter-netflix-eureka-client</artifactId>
        </dependency>

        <dependency>
            <groupId>org.springframework.boot</groupId>
            <artifactId>spring-boot-starter-web</artifactId>
        </dependency>

        <dependency>
            <groupId>org.springframework.boot</groupId>
            <artifactId>spring-boot-devtools</artifactId>
            <optional>true</optional>
        </dependency>
    </dependencies>

    <build>
        <plugins>
            <plugin>
                <groupId>org.springframework.boot</groupId>
                <artifactId>spring-boot-maven-plugin</artifactId>
                <configuration>
                    <fork>true</fork>
                </configuration>
            </plugin>
        </plugins>
    </build>

</project>
application.yaml
server:
  port: 10001
spring:
  application:
    name: ribbon-server
eureka:
  client:
    service-url:
      defaultZone: http://localhost:8001/eureka/,http://localhost:8002/eureka/,http://localhost:8003/eureka/
微服务入口文件RibbonClientApplication.java
入口类上不要再标注@RibbonClient注解了
package com.example;

import org.springframework.boot.SpringApplication;
import org.springframework.boot.autoconfigure.SpringBootApplication;
import org.springframework.cloud.netflix.eureka.EnableEurekaClient;

@SpringBootApplication
@EnableEurekaClient
// @RibbonClient(name = "GOODS-SERVER") //eureka-client组件已经引入了loadbalance了, 不需要在导入ribbon组件了
public class RibbonClientApplication {
    public static void main(String[] args) {
        SpringApplication.run(RibbonClientApplication.class, args);
    }
}
配置文件MyRestTemplate.java
package com.example.config;

import org.springframework.cloud.client.loadbalancer.LoadBalanced;
import org.springframework.context.annotation.Bean;
import org.springframework.context.annotation.Configuration;
import org.springframework.web.client.RestTemplate;

@Configuration
public class MyRestTemplate {

    @Bean
    @LoadBalanced
    public RestTemplate restTemplate() {
        return new RestTemplate();
    }
}
控制器BalanceRequest.java
package com.example.controller;

import org.springframework.beans.factory.annotation.Autowired;
import org.springframework.cloud.client.ServiceInstance;
import org.springframework.cloud.client.discovery.DiscoveryClient;
import org.springframework.cloud.client.loadbalancer.LoadBalanced;
import org.springframework.cloud.client.loadbalancer.LoadBalancerClient;
import org.springframework.web.bind.annotation.RequestMapping;
import org.springframework.web.bind.annotation.RestController;
import org.springframework.web.client.RestTemplate;

import java.util.List;

/**
 * 测试 ribbon负载均衡远程调用
 */
@RestController
@RequestMapping("/ribbon")
public class BalanceRequest {

    @Autowired
    private DiscoveryClient discoveryClient;

    @Autowired
    private LoadBalancerClient loadBalancerClient;

    @Autowired
    private RestTemplate restTemplate;//根据类型,会导入我们自己定义的MyRestTemplate类

    @RequestMapping("getGoods")
    public String getGoods() {
        //方式一:
        // RestTemplate restTemplate = new RestTemplate();
        // String forObject = restTemplate.getForObject("http://localhost:9001/goods/getOne", String.class);
        // System.out.println(forObject);
        // return forObject;

        //方式二
        //getServices()获取所有注册在注册中心的服务
        // List<String> services = discoveryClient.getServices();
        // for (String service : services) {
        //     System.out.println(service);
        // }

        //获取某个服务id下的所有信息
        // List<ServiceInstance> instances = discoveryClient.getInstances("GOODS-SERVER");
        // for (ServiceInstance instance : instances) {
        //     System.out.println(instance.getHost());
        //     System.out.println(instance.getPort());
        //     // System.out.println(instance.getMetadata());
        //     System.out.println(instance.isSecure());
        //     System.out.println(instance.getUri().toString());
        //     System.out.println(instance.getServiceId());
        //     System.out.println(instance.getScheme());
        // }

        // RestTemplate restTemplate = new RestTemplate();
        // // String forObject = restTemplate.getForObject(instances.get(0).getUri() + "/goods/getOne", String.class);
        // String forObject = restTemplate.getForObject(instances.get(1).getUri() + "/goods/getOne", String.class);
        // return forObject;

        //方式三: 坑!! 一直报错: loadBalancerClient.choose("goods-server")返回null, 原因就是同时导入了ribbon依赖,又有eureka-client依赖; eureka-client包中已经有了ribbon核心组件中的loadbalanced了,不需要再导入ribbon了
        // System.out.println("********************");
        // System.out.println(loadBalancerClient);
        // System.out.println(loadBalancerClient.choose("goods-server"));
        // System.out.println(loadBalancerClient.choose("GOODS-SERVER"));
        // System.out.println("********************");
        //
        // ServiceInstance choose = loadBalancerClient.choose("GOODS-SERVER");
        // ServiceInstance choose2 = loadBalancerClient.choose("goods-server");
        //
        // System.out.println("++++++++++++++++++++++");
        // System.out.println(choose);
        // System.out.println(choose2);
        // System.out.println(choose.getUri().toString());
        // System.out.println(choose.getHost());
        // System.out.println(choose.getPort());
        // System.out.println("++++++++++++++++++++++");

        // ServiceInstance choose = loadBalancerClient.choose("GOODS-SERVER");
        // RestTemplate restTemplate = new RestTemplate();
        // String forObject = restTemplate.getForObject(choose.getUri() + "/goods/getOne", String.class);
        // System.out.println(forObject);
        // return forObject;

        //方式四://如果不清楚eureka-client已经内置导入了loadbalance了,而再次导入Ribbon组件的话,将一直报错:找不到服务...: No instances available for GOODS-SERVER,坑!!!
        String forObject = restTemplate.getForObject("http://goods-server/goods/getOne", String.class);
        System.out.println(forObject);
        return forObject;
    }
}
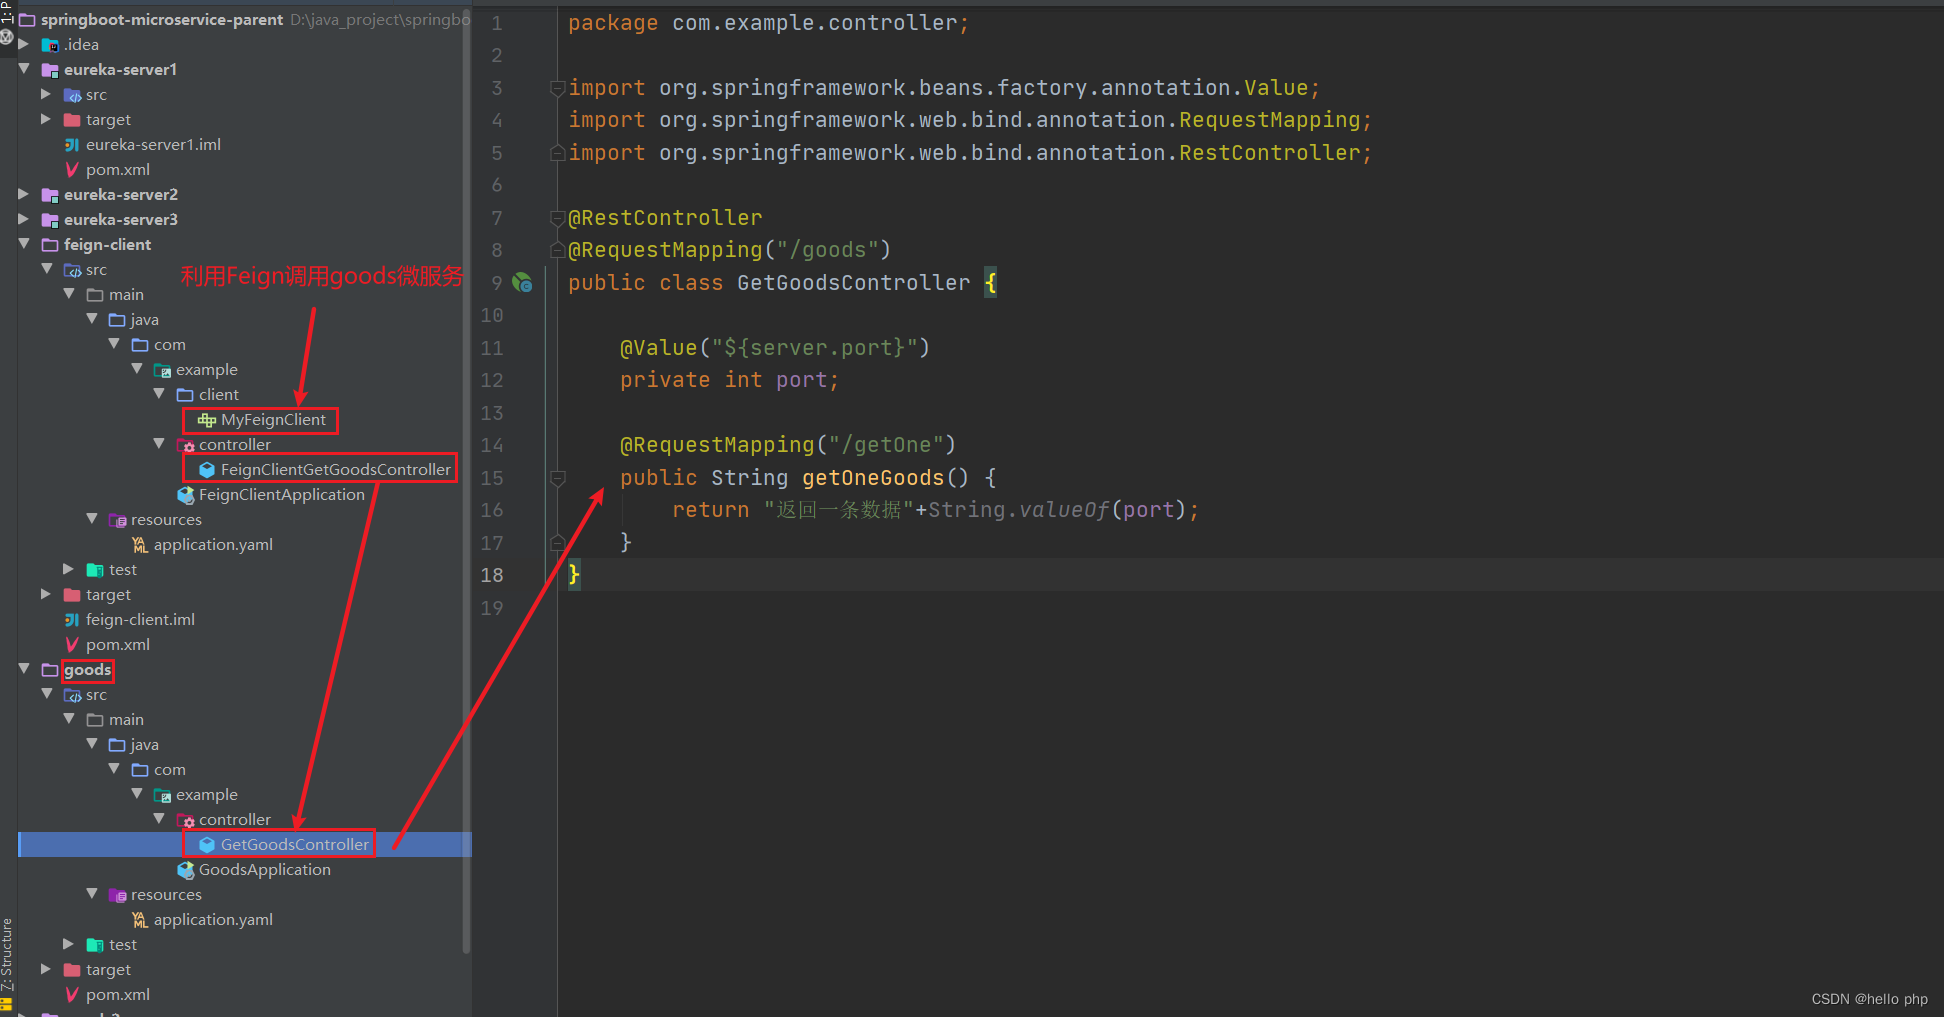
代码接口图如下:
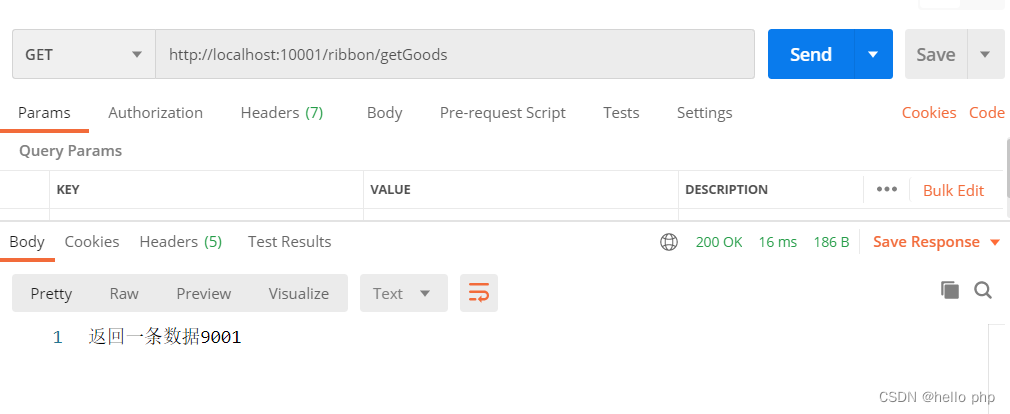
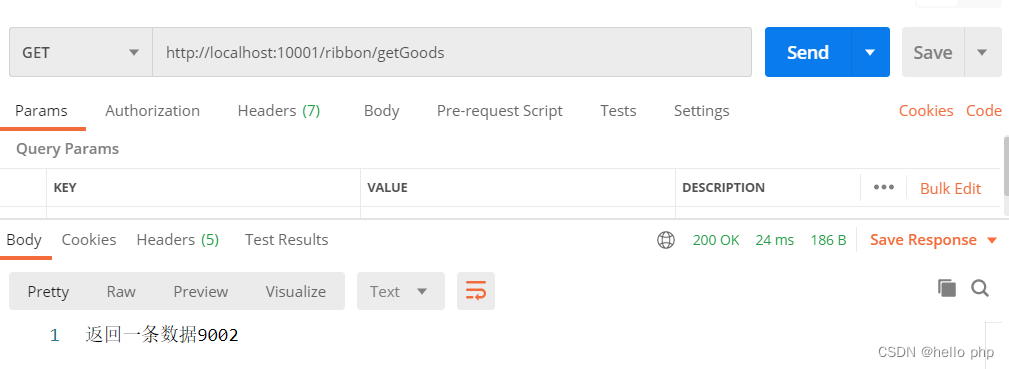
postman测试结果如下:
默认轮询的方式展示返回结果
| 第一次请求返回9001 | 再次请求返回9002 |
|---|---|
 |  |
OpenFeign远程调用组件
openFeign的详细使用, 参考: https://blog.csdn.net/zyb18507175502/article/details/126682187
这里使用 OpenFeign远程调用goods微服务
pom.xml内容如下
<?xml version="1.0" encoding="UTF-8"?>
<project xmlns="http://maven.apache.org/POM/4.0.0"
         xmlns:xsi="http://www.w3.org/2001/XMLSchema-instance"
         xsi:schemaLocation="http://maven.apache.org/POM/4.0.0 http://maven.apache.org/xsd/maven-4.0.0.xsd">
    <parent>
        <artifactId>springboot-microservice-parent</artifactId>
        <groupId>org.example</groupId>
        <version>1.0-SNAPSHOT</version>
    </parent>
    <modelVersion>4.0.0</modelVersion>

    <artifactId>feign-client</artifactId>

    <dependencies>
        <!--feign代替RestTemplate进行远程调用-->
        <dependency>
            <groupId>org.springframework.cloud</groupId>
            <artifactId>spring-cloud-starter-openfeign</artifactId>
        </dependency>

        <dependency>
            <groupId>org.springframework.cloud</groupId>
            <artifactId>spring-cloud-starter-netflix-eureka-client</artifactId>
        </dependency>

        <dependency>
            <groupId>org.springframework.boot</groupId>
            <artifactId>spring-boot-starter-web</artifactId>
        </dependency>
    </dependencies>

</project>
application.yaml内容如下
server:
  port: 11001
spring:
  application:
    name: feignclient-server
eureka:
  client:
    service-url:
      defaultZone: http://localhost:8001/eureka/,http://localhost:8002/eureka/,http://localhost:8003/eureka/
FeignClientApplication.java
package com.example;

import org.springframework.boot.SpringApplication;
import org.springframework.boot.autoconfigure.SpringBootApplication;
import org.springframework.cloud.client.discovery.EnableDiscoveryClient;
import org.springframework.cloud.openfeign.EnableFeignClients;

@SpringBootApplication
@EnableDiscoveryClient //当服务注册中心不限于eureka, 如consul,nacos等, 任何的服务注册中心都可以使用该注解标注客户端,范围更广
// @EnableEurekaClient//只能是Eureka作为服务注册中心时,使用该注解标注为客户端,范围较局限
@EnableFeignClients // 表明需要使用feign进行远程调用
public class FeignClientApplication {
    public static void main(String[] args) {
        SpringApplication.run(FeignClientApplication.class, args);
    }
}
MyFeignClient.java
package com.example.client;

import org.springframework.cloud.openfeign.FeignClient;
import org.springframework.web.bind.annotation.RequestMapping;

@FeignClient("GOODS-SERVER")
public interface MyFeignClient {

    //直接将goods或者goods2项目中的 getOneGoods()方法粘贴过来,去掉方法体就行
    //将goods微服务的类上的路径和方法上的路径合并后的最终路径写在这里
    @RequestMapping("/goods/getOne")
    String getOneGoods();
}
FeignClientGetGoodsController.java
package com.example.controller;

import com.example.client.MyFeignClient;
import org.springframework.web.bind.annotation.RequestMapping;
import org.springframework.web.bind.annotation.RestController;

import javax.annotation.Resource;

/**
 * 使用feignClient 代替RestTemplate进行远程调用
 */
@RestController
@RequestMapping("/feignClient")
public class FeignClientGetGoodsController {

    // @Autowired
    @Resource
    private MyFeignClient myFeignClient;

    @RequestMapping("/getGoods")
    public String getGoods() {

        System.out.println("请求到来!");

        String oneGoods = myFeignClient.getOneGoods();
        return oneGoods;
    }
}
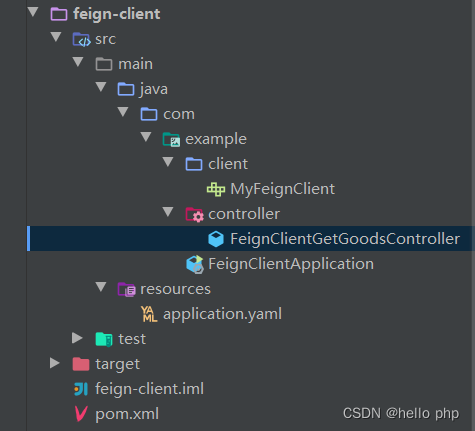
代码结构如下图:
postman调用结果如下:
http://localhost:11001/feignClient/getGoods
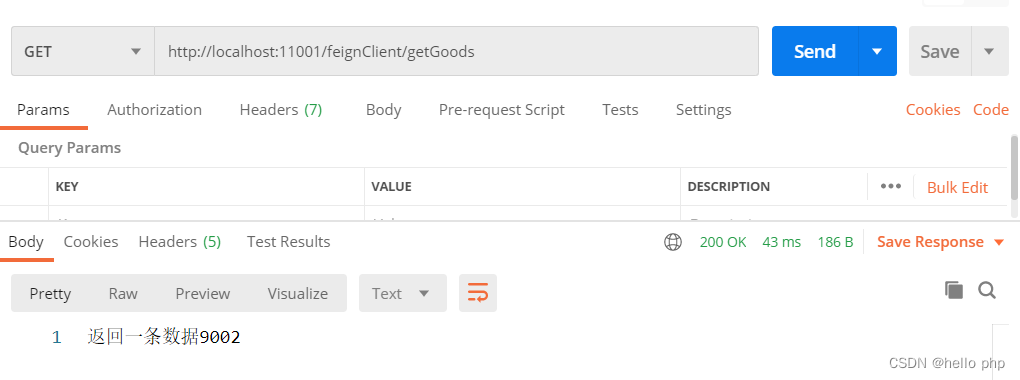 | 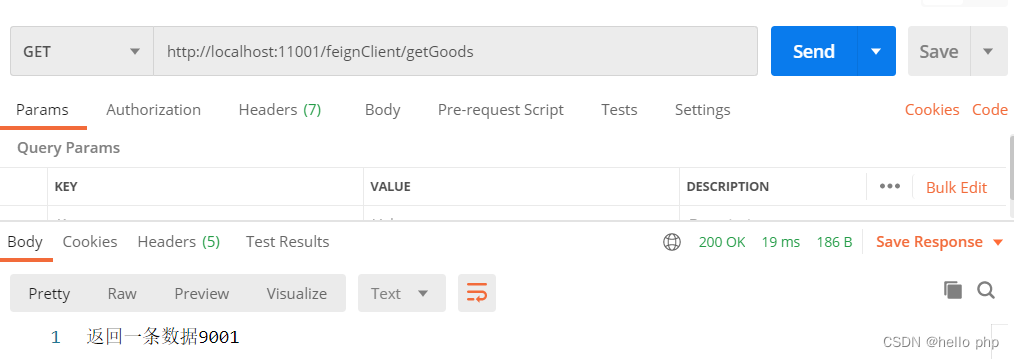 |
|---|---|
| 第一次调用返回9002 | 第二次调用9001 |
Hystrix服务熔断或降级
pom.xml
<?xml version="1.0" encoding="UTF-8"?>
<project xmlns="http://maven.apache.org/POM/4.0.0"
         xmlns:xsi="http://www.w3.org/2001/XMLSchema-instance"
         xsi:schemaLocation="http://maven.apache.org/POM/4.0.0 http://maven.apache.org/xsd/maven-4.0.0.xsd">
    <parent>
        <artifactId>springboot-microservice-parent</artifactId>
        <groupId>org.example</groupId>
        <version>1.0-SNAPSHOT</version>
    </parent>
    <modelVersion>4.0.0</modelVersion>

    <artifactId>hystrix-server</artifactId>

    <dependencies>
        <dependency>
            <groupId>org.springframework.cloud</groupId>
            <artifactId>spring-cloud-starter-netflix-eureka-client</artifactId>
        </dependency>

        <!--feign代替RestTemplate进行远程调用-->
        <dependency>
            <groupId>org.springframework.cloud</groupId>
            <artifactId>spring-cloud-starter-openfeign</artifactId>
        </dependency>

        <dependency>
            <groupId>org.springframework.boot</groupId>
            <artifactId>spring-boot-starter-web</artifactId>
        </dependency>

        <dependency>
            <groupId>org.springframework.cloud</groupId>
            <artifactId>spring-cloud-starter-netflix-hystrix</artifactId>
            <version>2.0.1.RELEASE</version>
        </dependency>
    </dependencies>
</project>
application.yaml
server:
  port: 12001
spring:
  application:
    name: hystrix-server

eureka:
  client:
    service-url:
      defaultZone: http://localhost:8001/eureka/,http://localhost:8002/eureka/,http://localhost:8003/eureka/

#开启hystrix熔断
feign:
  hystrix:
    enabled: true

hystrix:
  command:
    default:
      execution:
        isolation:
          thread:
            timeoutInMilliseconds: 1000
      circuitBreaker:
        # 10 秒访问5次都失败的话,会断开服务,不调用方法,直接进入fallback方法
        requestVolumeThreshold: 5
        # 默认是 5 秒,5秒后尝试再访问一次服务器
        sleepWindowInMilliseconds: 5000
HystrixApplication.java
package com.example;

import org.springframework.boot.SpringApplication;
import org.springframework.boot.autoconfigure.SpringBootApplication;
import org.springframework.cloud.netflix.eureka.EnableEurekaClient;
import org.springframework.cloud.netflix.hystrix.EnableHystrix;
import org.springframework.cloud.openfeign.EnableFeignClients;

@SpringBootApplication
@EnableEurekaClient
@EnableFeignClients
@EnableHystrix
public class HystrixApplication {
    public static void main(String[] args) {
        SpringApplication.run(HystrixApplication.class, args);
    }
}
MyFeignClient.java
package com.example.client;

import org.springframework.cloud.openfeign.FeignClient;
import org.springframework.web.bind.annotation.GetMapping;

@FeignClient(value = "GOODS-SERVER")
public interface MyFeignClient {
    @GetMapping("/goods/getOne")
    String getOneGoods();
}
HystrixGetGoodsController.java
package com.example.controller;

import com.example.client.MyFeignClient;
import com.netflix.hystrix.contrib.javanica.annotation.HystrixCommand;
import org.springframework.web.bind.annotation.RequestMapping;
import org.springframework.web.bind.annotation.RestController;

import javax.annotation.Resource;

/**
 * 参考: https://blog.51cto.com/u_15652665/5324217
 */

@RestController
@RequestMapping("/hystrix")
public class HystrixGetGoodsController {

    @Resource
    private MyFeignClient myFeignClient;

    @RequestMapping("/getGoods")
    @HystrixCommand(fallbackMethod = "theFallbackMethod") //服务降级或者熔断默认处理方法
    public String getGoods() {
        String oneGoods = myFeignClient.getOneGoods();
        return oneGoods;
    }

    public String theFallbackMethod() {
        System.out.println("服务熔断或者降级了...");
        return "服务熔断或者降级了...";
    }
}
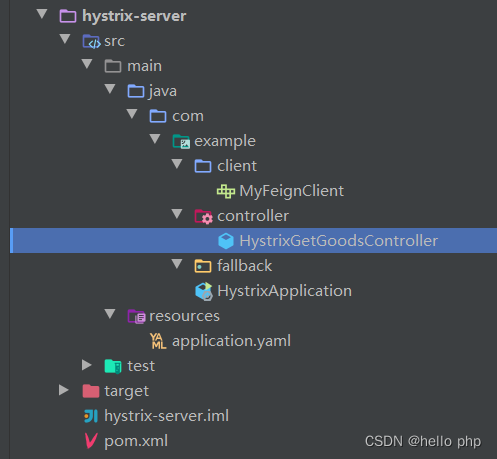
代码结构图
hystrix-server微服务代码结构图如下:
hystrix-server微服务调用
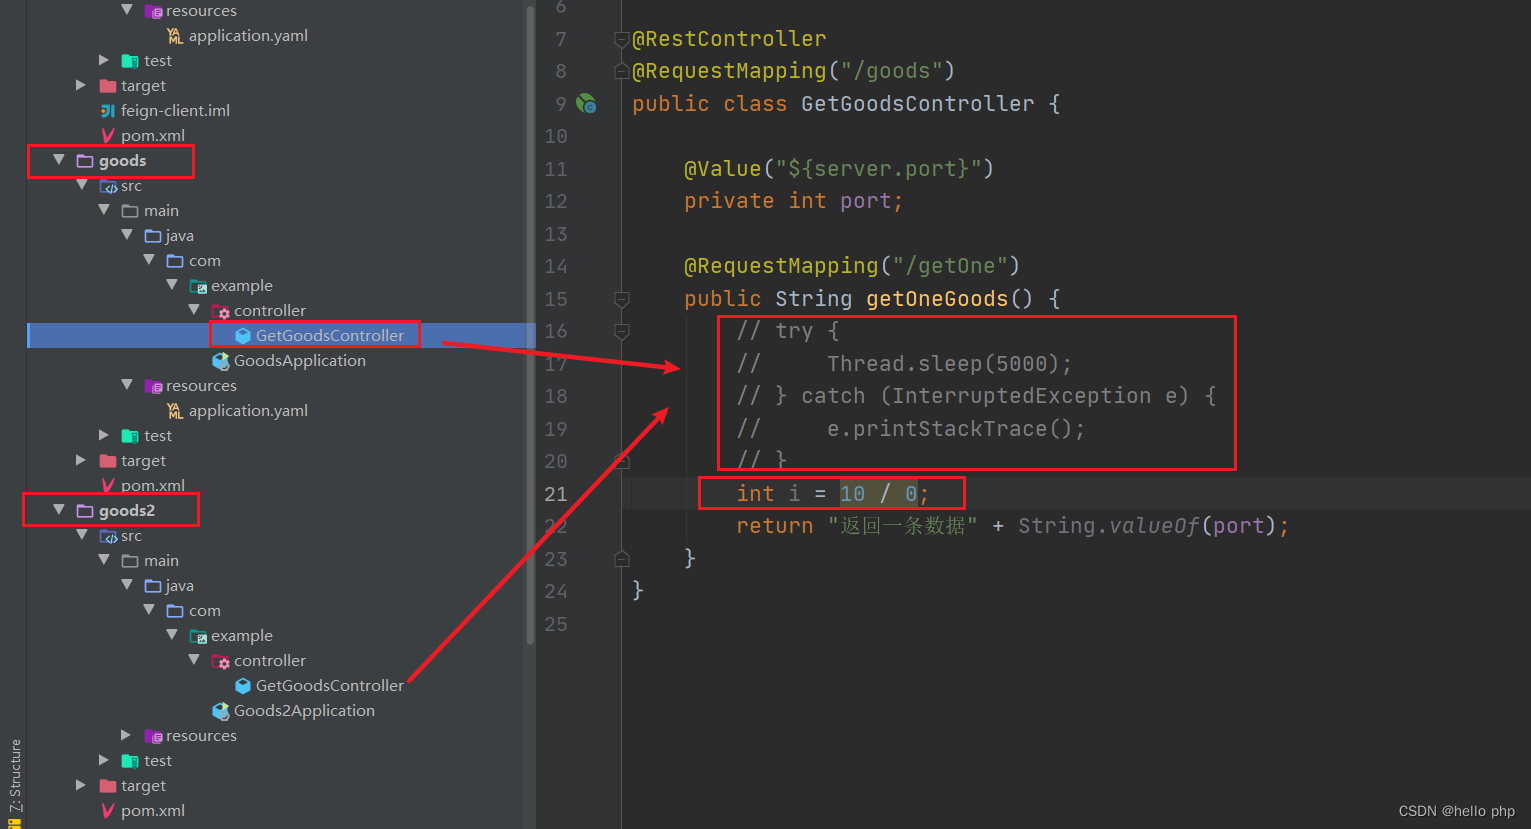
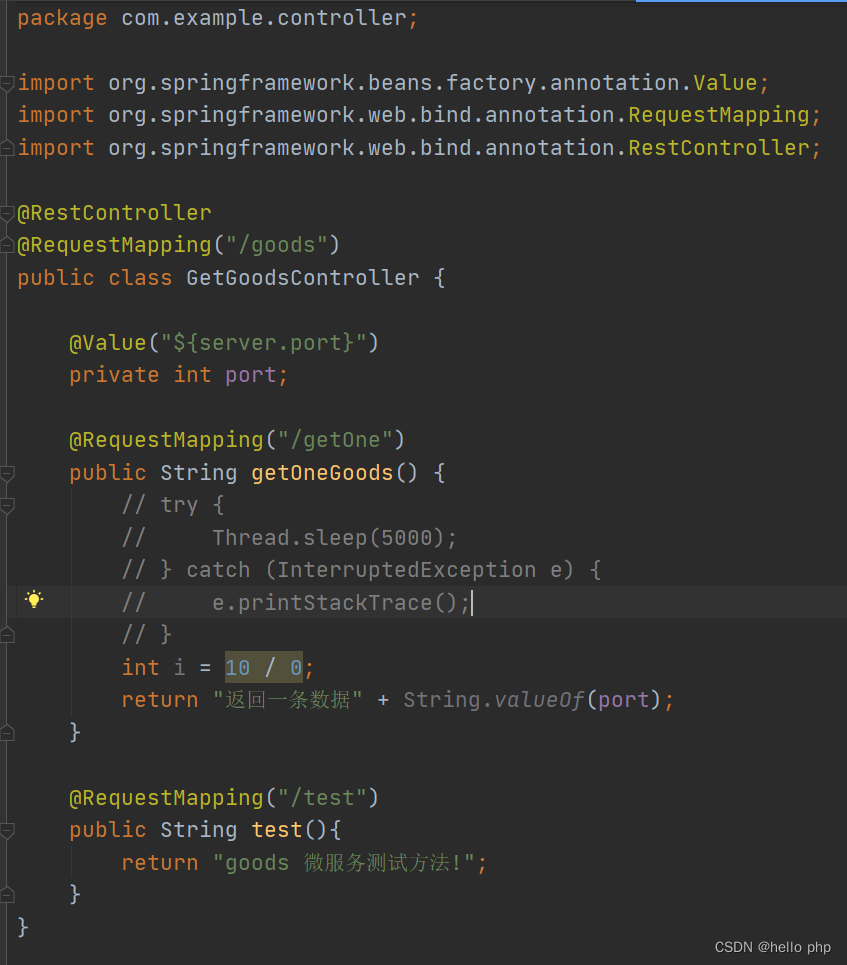
goodsgoods2微服务, 将goods和goods2微服务的代码内容调整为如下,故意抛出异常, 则会导致hystrix-server微服务服务降级和熔断
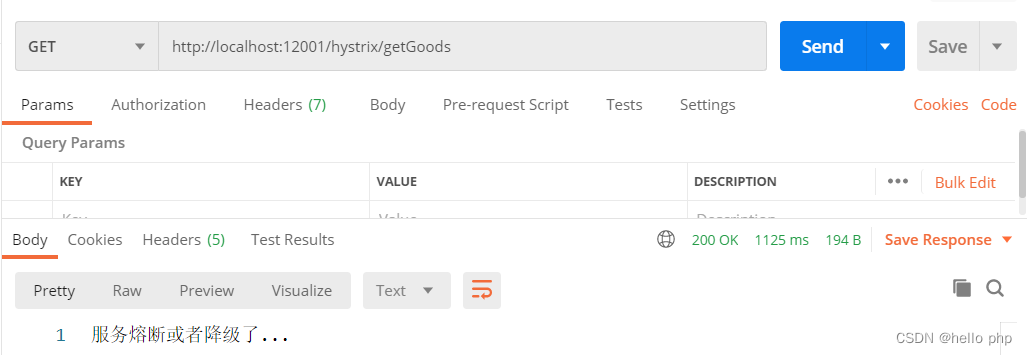
postman测试如下
还有一种是
MyFeignClient.java写成如下:package com.example.client; import org.springframework.cloud.openfeign.FeignClient; import org.springframework.web.bind.annotation.GetMapping; @FeignClient(value = "GOODS-SERVER",fallback = xxx.Class) //xxx.class为服务熔断或者降级的时候处理程序 public interface MyFeignClient { @GetMapping("/goods/getOne") String getOneGoods(); }
xxx.java@Component public interface xxx implements MyFeignClient { @GetMapping("/goods/getOne") public String getOneGoods(){ //todo,服务熔断或者降级的时候的业务处理逻辑 } }但是这种方法没有生效, 暂时还不清楚
zuul网关
pom.xml
<?xml version="1.0" encoding="UTF-8"?>
<project xmlns="http://maven.apache.org/POM/4.0.0"
         xmlns:xsi="http://www.w3.org/2001/XMLSchema-instance"
         xsi:schemaLocation="http://maven.apache.org/POM/4.0.0 http://maven.apache.org/xsd/maven-4.0.0.xsd">
    <parent>
        <artifactId>springboot-microservice-parent</artifactId>
        <groupId>org.example</groupId>
        <version>1.0-SNAPSHOT</version>
    </parent>
    <modelVersion>4.0.0</modelVersion>

    <artifactId>zuul-server</artifactId>

    <dependencies>
        <dependency>
            <groupId>org.springframework.cloud</groupId>
            <artifactId>spring-cloud-starter-netflix-eureka-client</artifactId>
        </dependency>
        <dependency>
            <groupId>org.springframework.cloud</groupId>
            <artifactId>spring-cloud-starter-netflix-zuul</artifactId>
            <version>2.2.10.RELEASE</version>
        </dependency>

        <dependency>
            <groupId>org.springframework.boot</groupId>
            <artifactId>spring-boot-devtools</artifactId>
        </dependency>
    </dependencies>

    <build>
        <plugins>
            <plugin>
                <groupId>org.springframework.boot</groupId>
                <artifactId>spring-boot-maven-plugin</artifactId>
                <configuration>
                    <fork>true</fork>
                </configuration>
            </plugin>
        </plugins>
    </build>

</project>
application.yaml
server:
  port: 13001

spring:
  application:
    name: zuul-server
eureka:
  client:
    service-url:
      defaultZone: http://localhost:8001/eureka/,http://localhost:8002/eureka/,http://localhost:8003/eureka/
zuul:
  routes:
    goods-server:
      path: /gService/**
      url: http://localhost:9001
入口文件ZuulApplication.java
package com.example;

import org.springframework.boot.SpringApplication;
import org.springframework.boot.autoconfigure.SpringBootApplication;
import org.springframework.cloud.netflix.eureka.EnableEurekaClient;
import org.springframework.cloud.netflix.zuul.EnableZuulProxy;

@SpringBootApplication
@EnableEurekaClient
@EnableZuulProxy
public class ZuulApplication {
    public static void main(String[] args) {
        SpringApplication.run(ZuulApplication.class, args);
    }
}
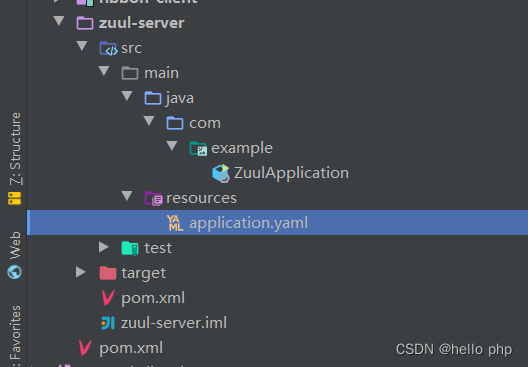
代码结构图
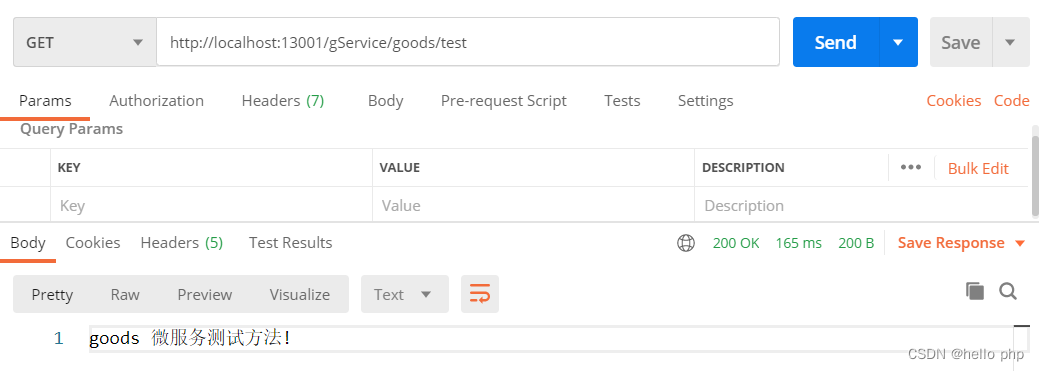
postman测试效果:
访问网关接口: http://localhost:13001/gService/goods/test 会跳转到对应的微服务(http://localhost:9001/goods/test 服务id为goods-server微服务)逻辑中
Config配置中心
server端
pom.xml
<?xml version="1.0" encoding="UTF-8"?>
<project xmlns="http://maven.apache.org/POM/4.0.0"
         xmlns:xsi="http://www.w3.org/2001/XMLSchema-instance"
         xsi:schemaLocation="http://maven.apache.org/POM/4.0.0 http://maven.apache.org/xsd/maven-4.0.0.xsd">
    <parent>
        <artifactId>springboot-microservice-parent</artifactId>
        <groupId>org.example</groupId>
        <version>1.0-SNAPSHOT</version>
    </parent>
    <modelVersion>4.0.0</modelVersion>

    <artifactId>config-server</artifactId>

    <dependencies>

        <dependency>
            <groupId>org.springframework.cloud</groupId>
            <artifactId>spring-cloud-starter-netflix-eureka-client</artifactId>
        </dependency>
        <dependency>
            <groupId>org.springframework.cloud</groupId>
            <artifactId>spring-cloud-config-server</artifactId>
        </dependency>
    </dependencies>
</project>
application.yaml
spring:
  application:
    name: config-server  # 应用名称
  cloud:
    config:
      server:
        git:
          # 配置中心仓库地址
          username: gitee用户名
          password: gitee密码
          default-label: master #配置文件分支
          uri: https://gitee.com/gitee地址

server:
  port: 14001

eureka:
  client:
    service-url:
      defaultZone: http://localhost:8001/eureka/,http://localhost:8002/eureka/,http://localhost:8003/eureka/
启动类ConfigApplication.java
package com.example;

import org.springframework.boot.SpringApplication;
import org.springframework.boot.autoconfigure.SpringBootApplication;
import org.springframework.cloud.config.server.EnableConfigServer;

@SpringBootApplication
@EnableConfigServer
public class ConfigApplication {
    public static void main(String[] args) {
        SpringApplication.run(ConfigApplication.class, args);
    }
}
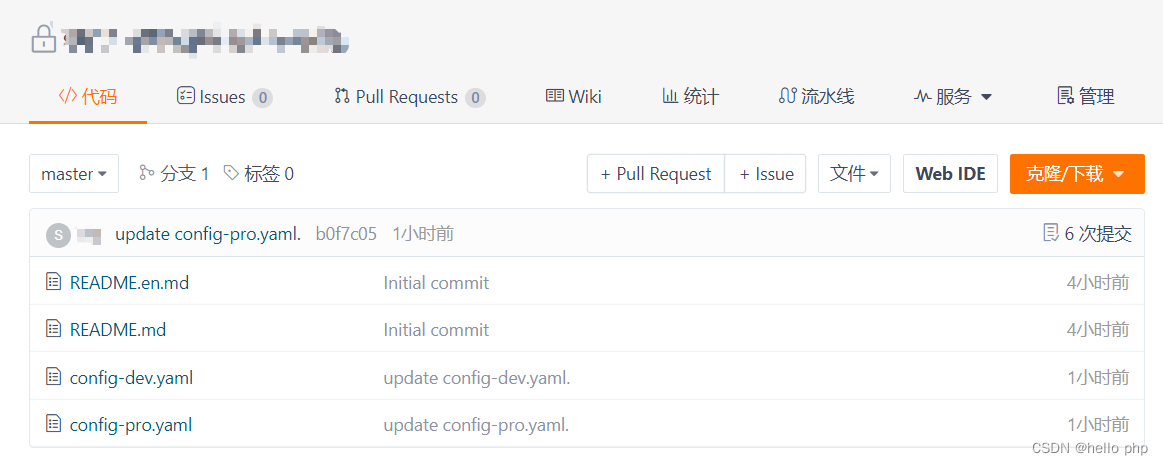
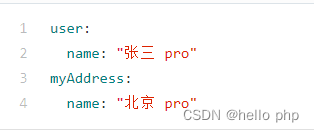
配置gitee仓库
config-dev.yaml config-pro.yaml
|
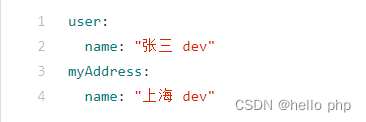
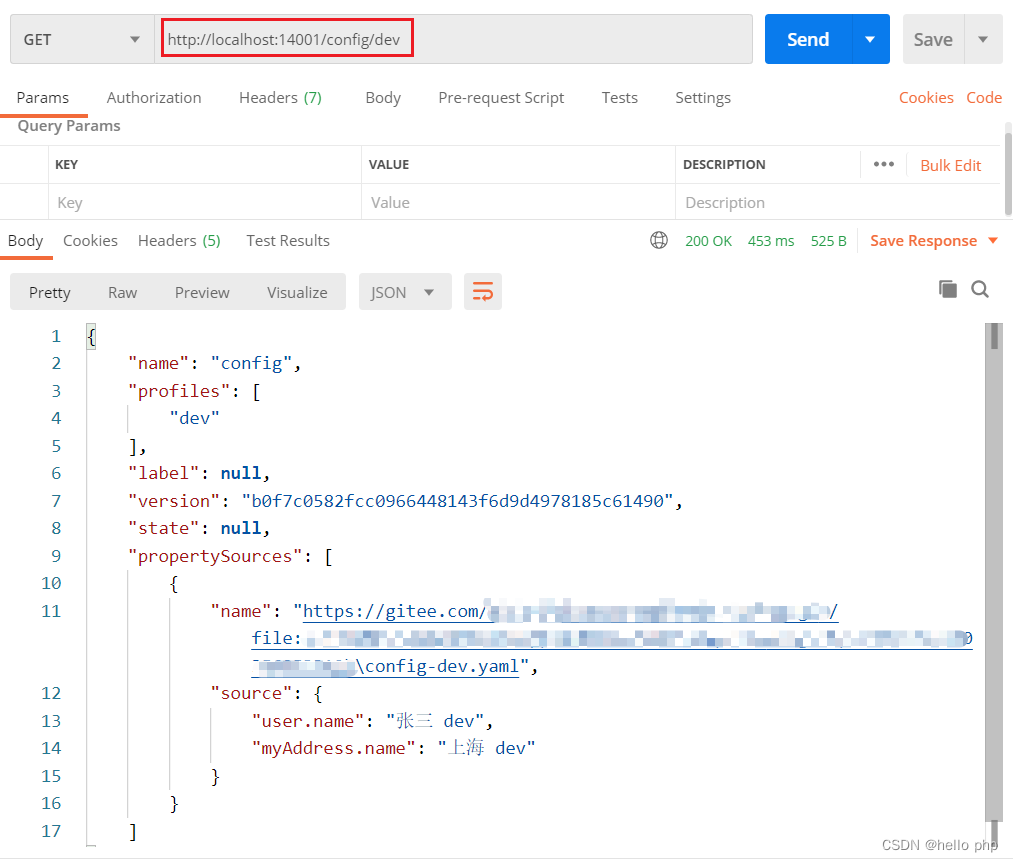
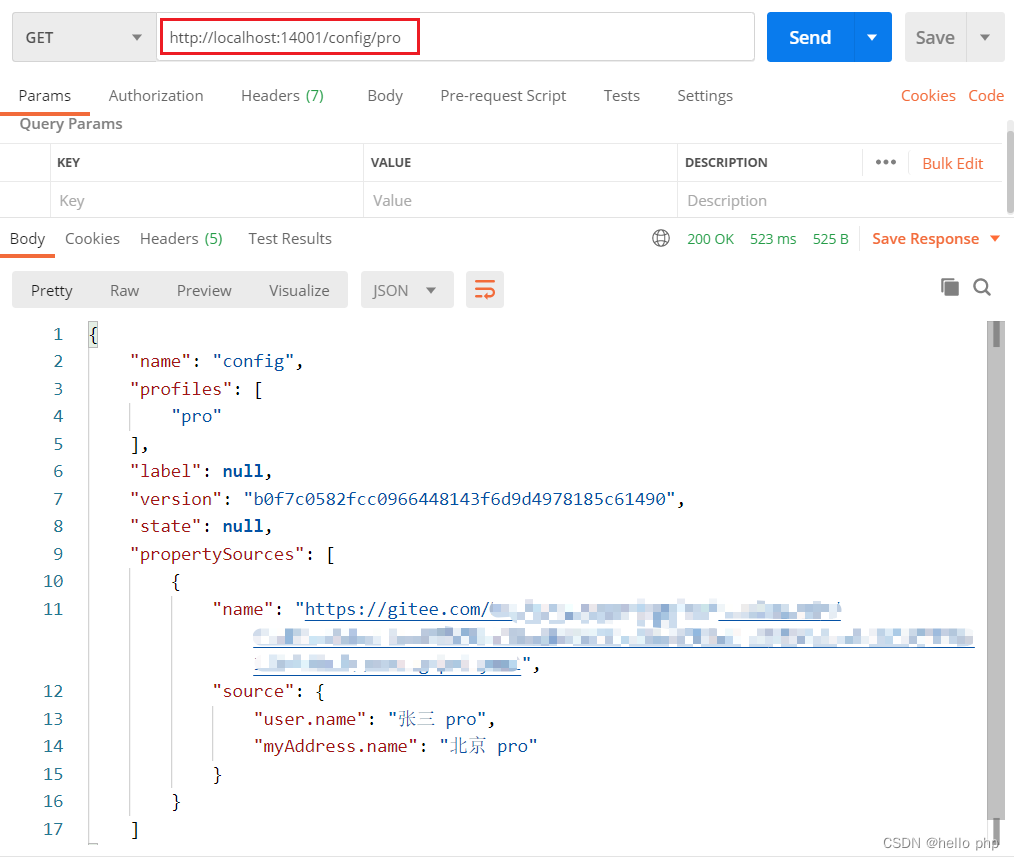
postman测试:
测试访问config-dev.yaml 测试访问config-pro.yaml
|
客户端
客户端测试一直未成功!,待完善…
consul服务注册中心
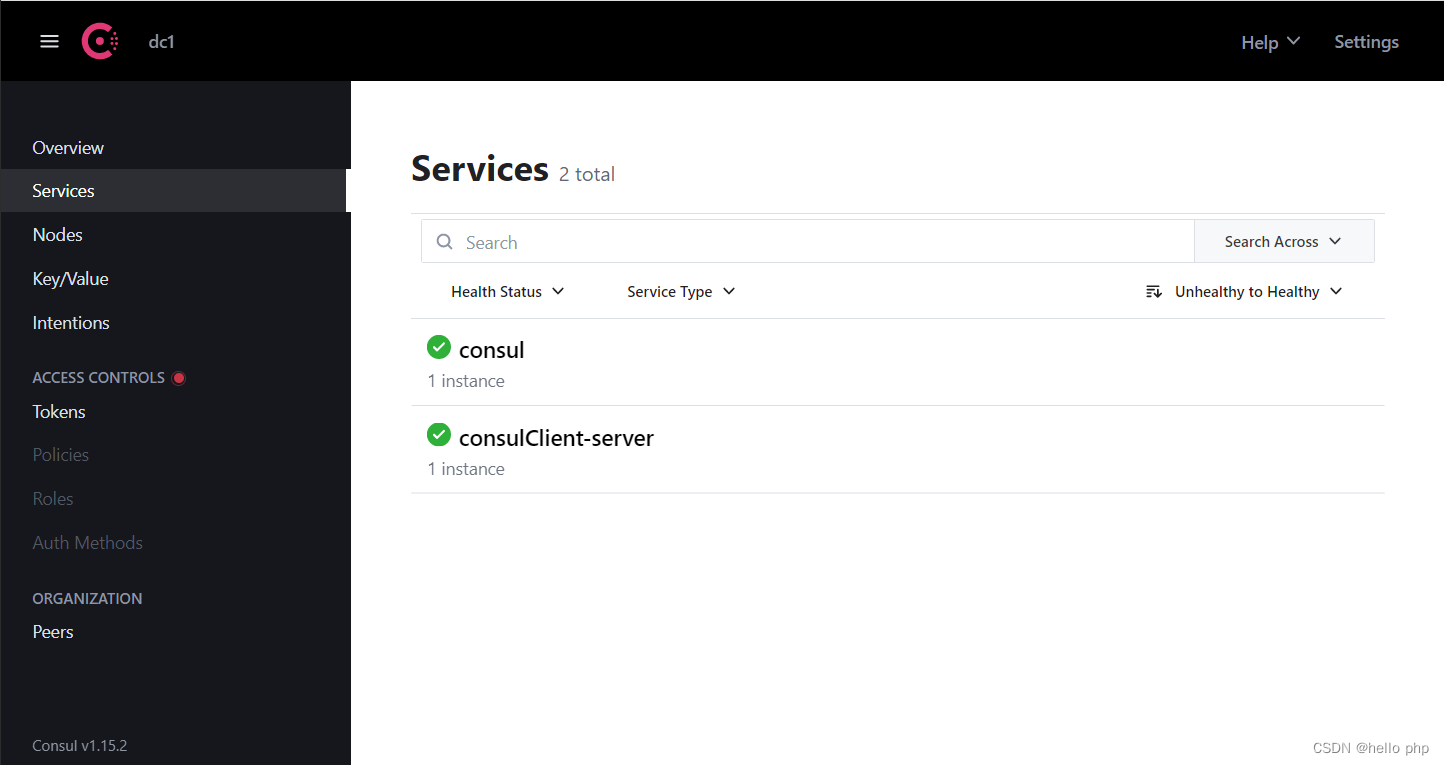
consul服务注册中心用于替代eureka服务注册中心
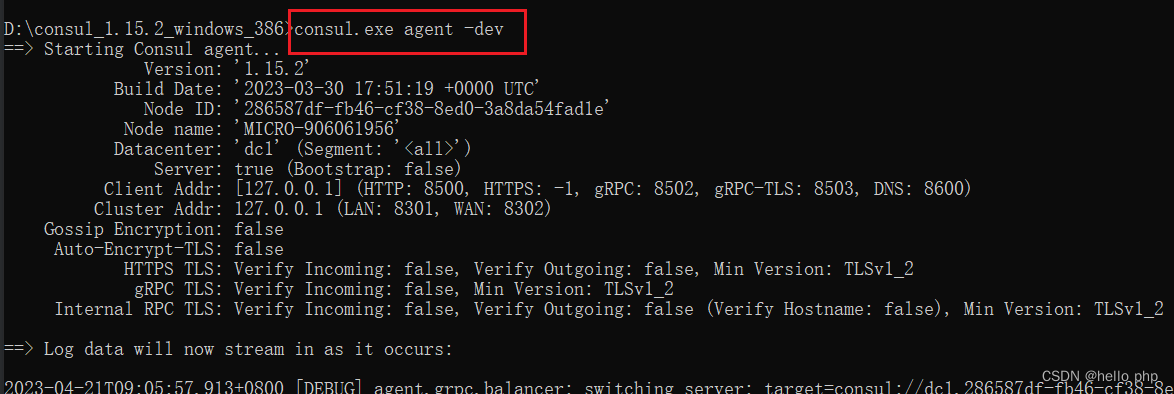
①下载consul
②命令行启动: consul.exe agent -dev
③浏览器访问 http://localhost:8500
pom.xml
<?xml version="1.0" encoding="UTF-8"?>
<project xmlns="http://maven.apache.org/POM/4.0.0"
         xmlns:xsi="http://www.w3.org/2001/XMLSchema-instance"
         xsi:schemaLocation="http://maven.apache.org/POM/4.0.0 http://maven.apache.org/xsd/maven-4.0.0.xsd">
    <parent>
        <artifactId>springboot-microservice-parent</artifactId>
        <groupId>org.example</groupId>
        <version>1.0-SNAPSHOT</version>
    </parent>
    <modelVersion>4.0.0</modelVersion>

    <artifactId>consul-client</artifactId>

    <dependencies>
        <dependency>
            <groupId>org.springframework.cloud</groupId>
            <artifactId>spring-cloud-starter-consul-discovery</artifactId>
        </dependency>

        <dependency>
            <groupId>org.springframework.cloud</groupId>
            <artifactId>spring-cloud-starter-consul-config</artifactId>
        </dependency>

        <dependency>
            <groupId>org.springframework.boot</groupId>
            <artifactId>spring-boot-starter-web</artifactId>
        </dependency>

        <dependency>
            <groupId>org.springframework.boot</groupId>
            <artifactId>spring-boot-starter-actuator</artifactId>
        </dependency>

        <dependency>
            <groupId>org.springframework.boot</groupId>
            <artifactId>spring-boot-configuration-processor</artifactId>
            <optional>true</optional>
        </dependency>

        <dependency>
            <groupId>org.springframework.boot</groupId>
            <artifactId>spring-boot-devtools</artifactId>
            <scope>runtime</scope>
            <optional>true</optional>
        </dependency>

        <dependency>
            <groupId>org.springframework.boot</groupId>
            <artifactId>spring-boot-configuration-processor</artifactId>
            <optional>true</optional>
        </dependency>

        <dependency>
            <groupId>org.springframework.cloud</groupId>
            <artifactId>spring-cloud-starter-bootstrap</artifactId>
        </dependency>


    </dependencies>

    <build>
        <plugins>
            <plugin>
                <groupId>org.springframework.boot</groupId>
                <artifactId>spring-boot-maven-plugin</artifactId>
                <configuration>
                    <fork>true</fork>
                </configuration>
            </plugin>
        </plugins>
    </build>

</project>
bootstrap.yml
spring:
  application:
    name: consulClient-server
  profiles:
    active: dev
  cloud:
    consul:
      host: localhost
      port: 8500
      config:
        enabled: true
        prefix: config
        default-context: "consulService"
        profile-separator: '-'
        format: yaml
        data-key: "serviceConfig"
        watch:
          enabled: true
          delay: 1000
      discovery:
        register: true
        instance-id: ${spring.application.name}-01
        service-name: ${spring.application.name}
        port: ${server.port}
        prefer-ip-address: true
        ip-address: ${spring.cloud.client.ip-address}

server:
  port: 16001
启动类ConsulClientApplication.java
package com.example;

import org.springframework.boot.SpringApplication;
import org.springframework.boot.autoconfigure.SpringBootApplication;
import org.springframework.cloud.client.discovery.EnableDiscoveryClient;

@SpringBootApplication
@EnableDiscoveryClient
public class ConsulClientApplication {
    public static void main(String[] args) {
        SpringApplication.run(ConsulClientApplication.class, args);
    }
}
控制器TestConsulController.java
package com.example.controller;

import com.example.config.MysqlProperties;
import org.springframework.beans.factory.annotation.Autowired;
import org.springframework.beans.factory.annotation.Value;
import org.springframework.cloud.context.config.annotation.RefreshScope;
import org.springframework.web.bind.annotation.GetMapping;
import org.springframework.web.bind.annotation.RequestMapping;
import org.springframework.web.bind.annotation.RestController;

/**
 * 参考: https://blog.csdn.net/weixin_43888891/article/details/125511542
 */
@RestController
@RequestMapping("/consulClient")
@RefreshScope
public class TestConsulController {

    @Value("${loginName}")
    private String loginName;

    @Autowired
    private MysqlProperties mysqlProperties;

    @RequestMapping("/name")
    public String getName() {
        return loginName;
    }

    @GetMapping("/mysql")
    public MysqlProperties getMysqlProperties() {
        return mysqlProperties;
    }

    @RequestMapping("/test")
    public String getInfo(){
        return "info test!!!";
    }
}
配置类MysqlProperties.java
package com.example.config;

import org.springframework.boot.context.properties.ConfigurationProperties;
import org.springframework.stereotype.Component;

@Component
@ConfigurationProperties(prefix = "mysql")
public class MysqlProperties {

    private String host;
    private Integer port;
    private String username;
    private String password;

    public MysqlProperties() {
    }

    public MysqlProperties(String host, Integer port, String username, String password) {
        this.host = host;
        this.port = port;
        this.username = username;
        this.password = password;
    }

    public String getHost() {
        return host;
    }

    public void setHost(String host) {
        this.host = host;
    }

    public Integer getPort() {
        return port;
    }

    public void setPort(Integer port) {
        this.port = port;
    }

    public String getUsername() {
        return username;
    }

    public void setUsername(String username) {
        this.username = username;
    }

    public String getPassword() {
        return password;
    }

    public void setPassword(String password) {
        this.password = password;
    }

    @Override
    public boolean equals(Object o) {
        if (this == o) return true;
        if (o == null || getClass() != o.getClass()) return false;

        MysqlProperties that = (MysqlProperties) o;

        if (host != null ? !host.equals(that.host) : that.host != null) return false;
        if (port != null ? !port.equals(that.port) : that.port != null) return false;
        if (username != null ? !username.equals(that.username) : that.username != null) return false;
        return password != null ? password.equals(that.password) : that.password == null;
    }

    @Override
    public int hashCode() {
        int result = host != null ? host.hashCode() : 0;
        result = 31 * result + (port != null ? port.hashCode() : 0);
        result = 31 * result + (username != null ? username.hashCode() : 0);
        result = 31 * result + (password != null ? password.hashCode() : 0);
        return result;
    }

    @Override
    public String toString() {
        return "MysqlProperties{" +
                "host='" + host + '\'' +
                ", port=" + port +
                ", username='" + username + '\'' +
                ", password='" + password + '\'' +
                '}';
    }
}
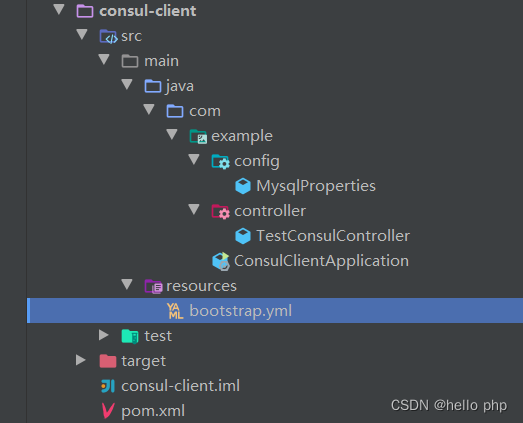
代码结构图
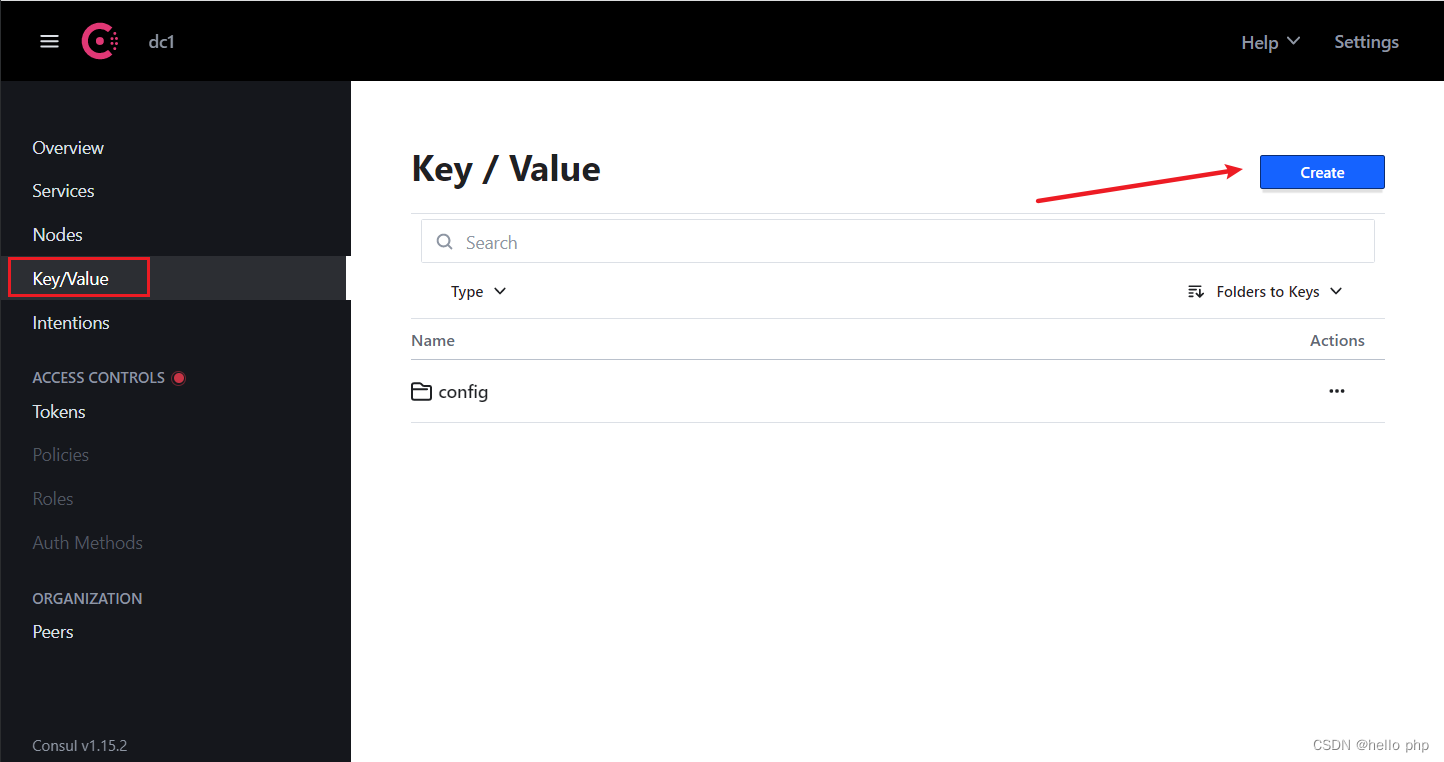
在浏览器consul服务中创建以下目录、文件
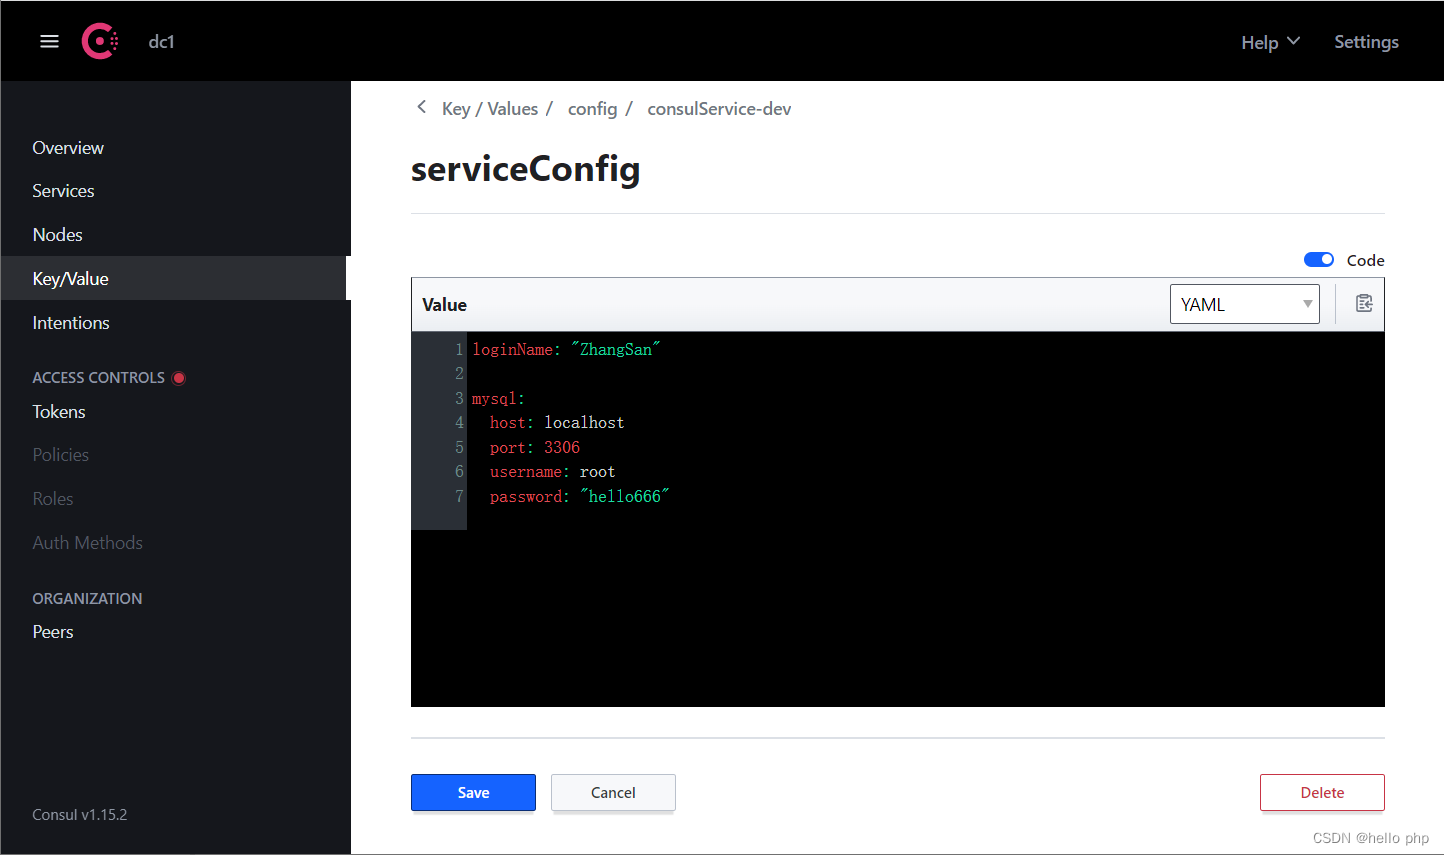
Key/Vlaue菜单下create创建config/consulService-dev/serviceConfig其中
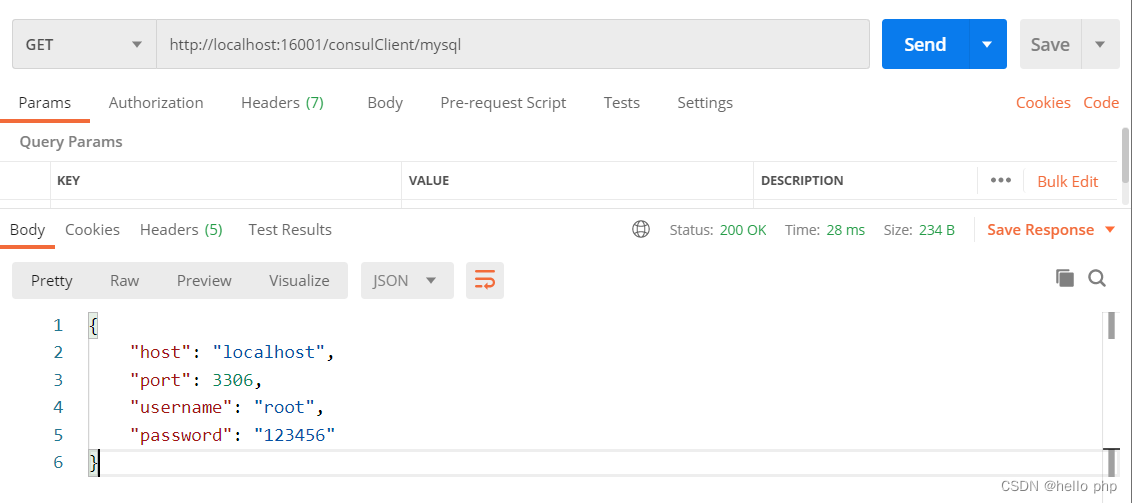
serviceConfig内容如下:loginName: "ZhangSan" mysql: host: localhost port: 3306 username: root password: 123456
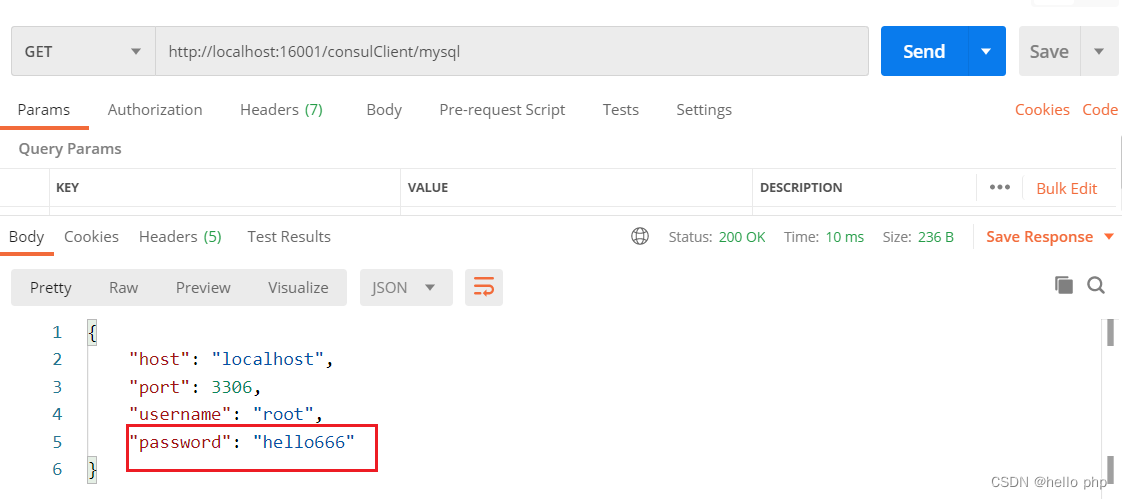
postman测试
不需要重启spring微服务, 直接在浏览器修改consul配置文件,在用postman测试,就能立刻看到修改后的数据
在浏览器consul服务中再次创建以下目录、文件
Key/Vlaue菜单下create创建config/consulService-pro/serviceConfig其中
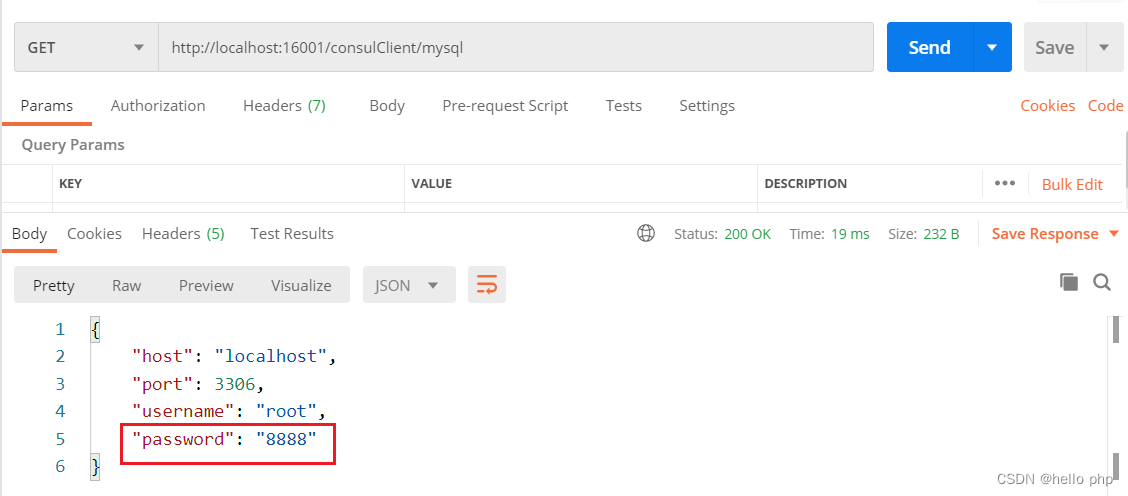
serviceConfig内容如下:loginName: "LiSi" mysql: host: localhost port: 3306 username: root password: 8888修改配置文件
bootstrap.yaml为pro环境, 再次测试spring: profiles: active: pro由于服务中添加了热加载功能, 所有不用重启服务,直接postman访问即可以看到pro下的效果:
nacos服务注册中心 与 配置中心
nacos即可以作为
服务注册中心, 又可以作为服务配置中心下载ncaos, 并命令行启动: startup.cmd
作为服务注册中心
pom.xml
<?xml version="1.0" encoding="UTF-8"?>
<project xmlns="http://maven.apache.org/POM/4.0.0"
         xmlns:xsi="http://www.w3.org/2001/XMLSchema-instance"
         xsi:schemaLocation="http://maven.apache.org/POM/4.0.0 http://maven.apache.org/xsd/maven-4.0.0.xsd">
    <parent>
        <artifactId>springboot-microservice-parent</artifactId>
        <groupId>org.example</groupId>
        <version>1.0-SNAPSHOT</version>
    </parent>
    <modelVersion>4.0.0</modelVersion>

    <artifactId>nacos-client</artifactId>

    <!--nacos服务注册中心 https://www.cnblogs.com/chwl-ljx/p/15991602.html -->

    <dependencies>
        <dependency>
            <groupId>org.springframework.boot</groupId>
            <artifactId>spring-boot-starter-web</artifactId>
        </dependency>

        <!--nacos 作为服务注册中心引入的依赖-->
        <dependency>
            <groupId>com.alibaba.cloud</groupId>
            <artifactId>spring-cloud-starter-alibaba-nacos-discovery</artifactId>
            <version>2021.0.1.0</version>
        </dependency>
    </dependencies>

    <dependencyManagement>
        <dependencies>
            <dependency>
                <groupId>com.alibaba.cloud</groupId>
                <artifactId>spring-cloud-alibaba-dependencies</artifactId>
                <version>2021.1</version>
                <type>pom</type>
                <scope>import</scope>
            </dependency>
        </dependencies>
    </dependencyManagement>
</project>
application.yaml
server:
  port: 17001

spring:
  application:
    name: nacosClient-server


  cloud:
    nacos:
      discovery:
        server-addr: localhost:8848
#        username: nacos # 默认就是nacos
#        password: nacos # 默认就是nacos
微服务启动类 NacosClientApplication.java
package com.example;

import org.springframework.boot.SpringApplication;
import org.springframework.boot.autoconfigure.SpringBootApplication;
import org.springframework.cloud.client.discovery.EnableDiscoveryClient;

@SpringBootApplication
@EnableDiscoveryClient
public class NacosClientApplication {
    public static void main(String[] args) {
        SpringApplication.run(NacosClientApplication.class, args);
    }
}
控制器测试类 TestNacosController.java
package com.example.controller;


import org.springframework.beans.factory.annotation.Value;
import org.springframework.cloud.context.config.annotation.RefreshScope;
import org.springframework.web.bind.annotation.RequestMapping;
import org.springframework.web.bind.annotation.RestController;


/**
 * nacos可以作为服务注册中心; 亦可以作为服务配置中心
 * 参考: https://blog.csdn.net/qq_71314862/article/details/129578928
 */
@RestController
@RequestMapping("/nacosClient")
public class TestNacosController {

    @RequestMapping("/test")
    public String test() {
        return "TEST!!!";
    }
}
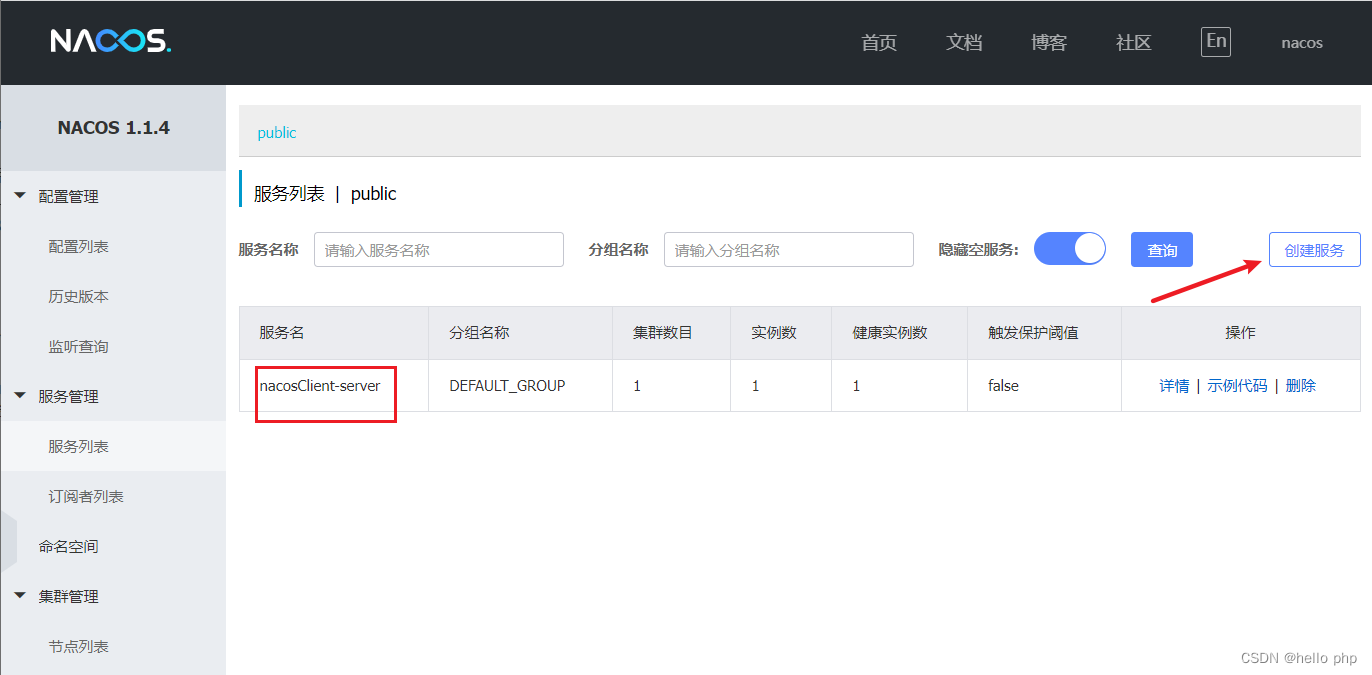
浏览器访问: http://localhost:8848/nacos/index.html, 如下:
作为服务配置中心
pom.xml中引入以下依赖
     <!--nacos 作为配置中心引入的依赖-->
        <dependency>
            <groupId>com.alibaba.cloud</groupId>
            <artifactId>spring-cloud-starter-alibaba-nacos-config</artifactId>
        </dependency>

        <!--使得bootstrap.yaml生效-->
        <dependency>
            <groupId>org.springframework.cloud</groupId>
            <artifactId>spring-cloud-starter-bootstrap</artifactId>
        </dependency>
创建bootstrap.yaml文件,内容如下:
spring:
  cloud:
    nacos:
      config:
        server-addr: localhost:8848
        prefix: nacos_demo
        file-extension: yaml
        group: DEFAULT_GROUP
#        username: nacos # 默认值就是nacos
#        password: nacos # 默认值就是nacos
控制器TestNacosController.java变成如下:
package com.example.controller;


import org.springframework.beans.factory.annotation.Value;
import org.springframework.cloud.context.config.annotation.RefreshScope;
import org.springframework.web.bind.annotation.RequestMapping;
import org.springframework.web.bind.annotation.RestController;


/**
 * nacos可以作为服务注册中心; 亦可以作为服务配置中心
 * 参考: https://blog.csdn.net/qq_71314862/article/details/129578928
 */
@RestController
@RequestMapping("/nacosClient")
@RefreshScope //该注解可以在nacos服务端修改完配置后,不用重启微服务后,自动获取修改后的配置项
public class TestNacosController {

    @Value("${myNacosName}")
    private String myNacosName;

    @RequestMapping("/getName")
    public String getName() {
        return myNacosName;
    }

    @RequestMapping("/test")
    public String test() {
        return "TEST!!!";
    }
}
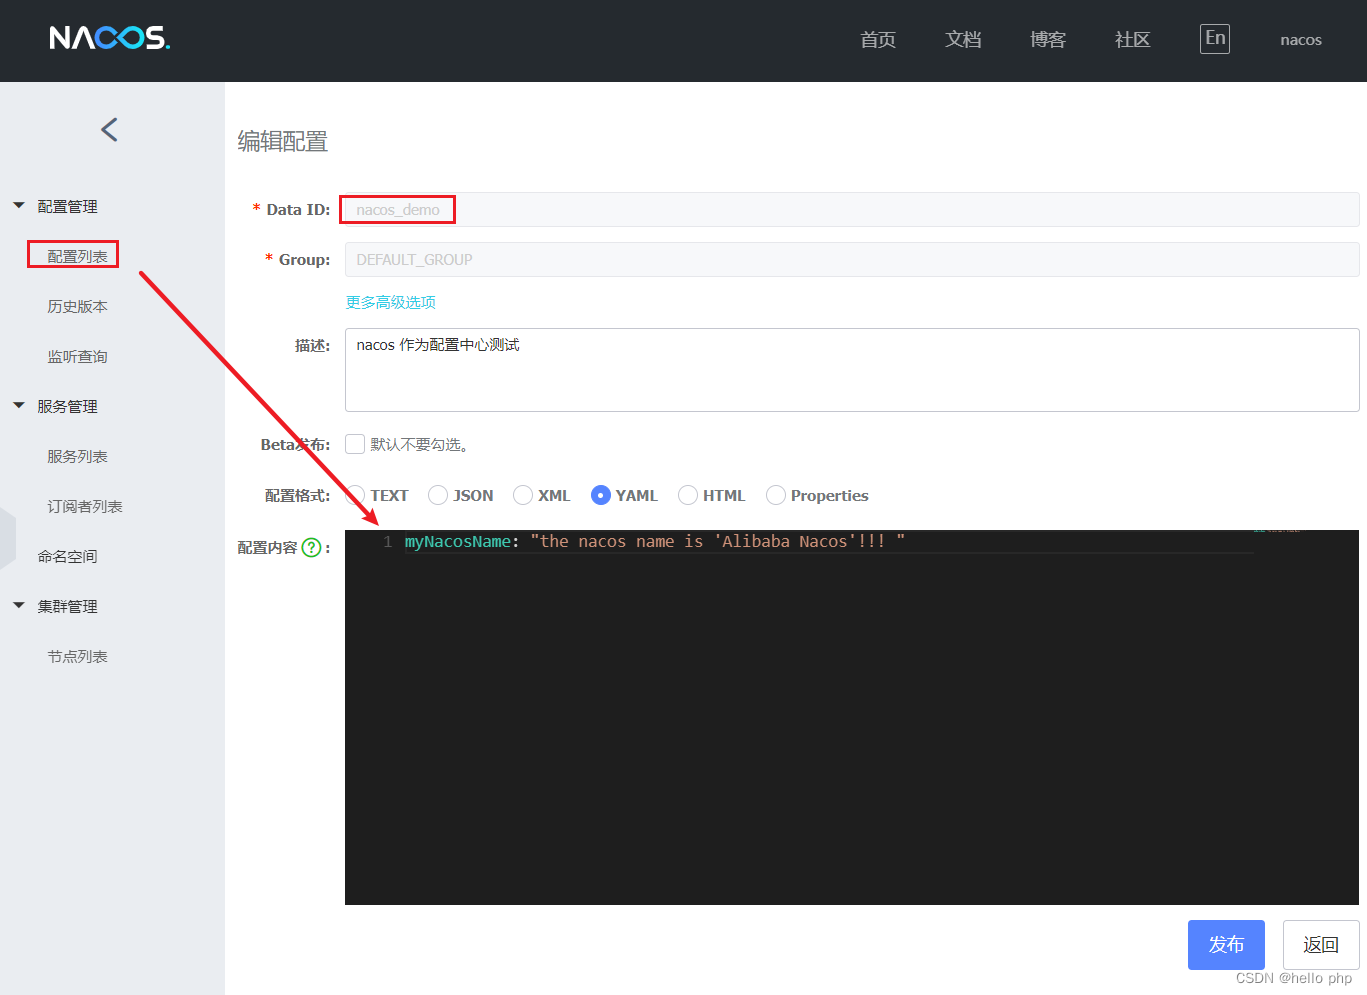
nacos服务端配置列表创建如下配置:
启动微服务, 并浏览器访问: http://localhost:17001/nacosClient/getName
当在浏览器的consul服务端界面编辑了
myNacosName的值时, 微服务无效重启,即可获取到修改后的配置文件内容
gateway网关组件
gateway组件是springcloud官方提供的网关组件(推荐使用该组件)
pom.xml
<?xml version="1.0" encoding="UTF-8"?>
<project xmlns="http://maven.apache.org/POM/4.0.0"
         xmlns:xsi="http://www.w3.org/2001/XMLSchema-instance"
         xsi:schemaLocation="http://maven.apache.org/POM/4.0.0 http://maven.apache.org/xsd/maven-4.0.0.xsd">
    <parent>
        <artifactId>springboot-microservice-parent</artifactId>
        <groupId>org.example</groupId>
        <version>1.0-SNAPSHOT</version>
    </parent>
    <modelVersion>4.0.0</modelVersion>

    <artifactId>gateway</artifactId>

    <dependencies>
        <dependency>
            <groupId>org.springframework.cloud</groupId>
            <artifactId>spring-cloud-starter-gateway</artifactId>
        </dependency>

        <dependency>
            <groupId>org.springframework.cloud</groupId>
            <artifactId>spring-cloud-starter-netflix-eureka-client</artifactId>
        </dependency>

        <dependency>
            <groupId>org.springframework.boot</groupId>
            <artifactId>spring-boot-devtools</artifactId>
            <optional>true</optional>
        </dependency>

    </dependencies>

    <build>
        <plugins>
            <plugin>
                <groupId>org.springframework.boot</groupId>
                <artifactId>spring-boot-maven-plugin</artifactId>
                <configuration>
                    <fork>true</fork>
                </configuration>
            </plugin>
        </plugins>
    </build>

</project>
application.yaml
server:
  port: 18001

spring:
  application:
    name: gateway-server

  cloud:
    # 网关配置
    gateway:
#      enabled: true
      routes:
        - id: goods-server
#          uri: http://localhost:9001
          uri: lb://goods-server # 负载均衡请求
          predicates:
            - Path=/goodsService/**
          # 坑!!!  说明:如果没有filters: -StripPrefix=1这个配置项,那么访问: http://localhost:18001/goodsService/goods/test 时,
          # 会转发到 http://localhost:9001/goodsService/goods/test, "GOODS-SERVER"这个微服务显然没有这个可用的url地址,需要截掉 "goodsService" 部分再转发
          # 加上了filters: -StripPrefix=1后,再访问 http://localhost:18001/goodsService/goods/test 时,就会转发到
          # http://localhost:9001/goods/test ,这次就可以正确访问到了!
          filters:
            - StripPrefix=1

eureka:
  client:
    service-url:
      defaultZone: http://localhost:8001/eureka/,http://localhost:8002/eureka/,http://localhost:8003/eureka/
微服务启动类 GatewayApplication.java
package com.example;

import org.springframework.boot.SpringApplication;
import org.springframework.boot.autoconfigure.SpringBootApplication;
import org.springframework.cloud.netflix.eureka.EnableEurekaClient;

@SpringBootApplication
@EnableEurekaClient
public class GatewayApplication {
    public static void main(String[] args) {
        SpringApplication.run(GatewayApplication.class, args);
    }
}
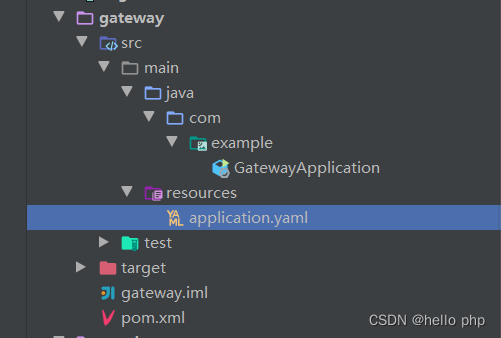
代码目录结构图
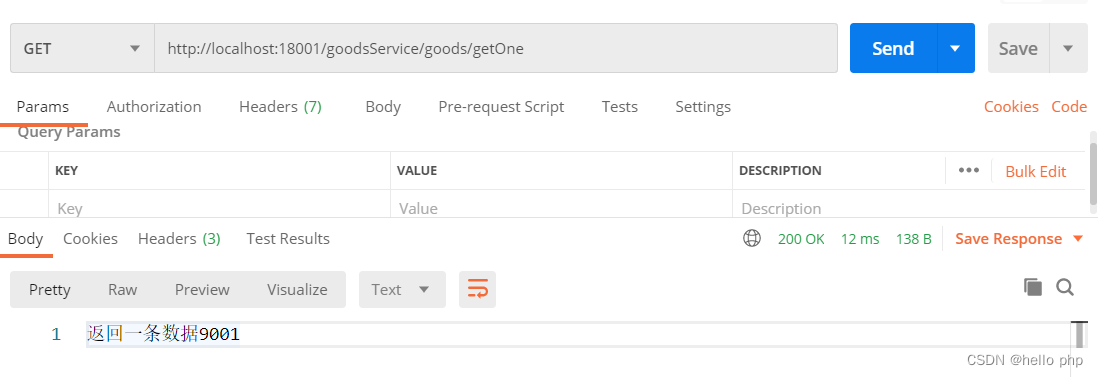
postman测试
访问网关: http://localhost:18001/goodsService/goods/getOne 访问网关: http://localhost:18001/goodsService/goods/getOne
Sentinel流量控制
阿里巴巴开源产品 Sentinel 做流量控制、服务降级等(代替Hystrix)
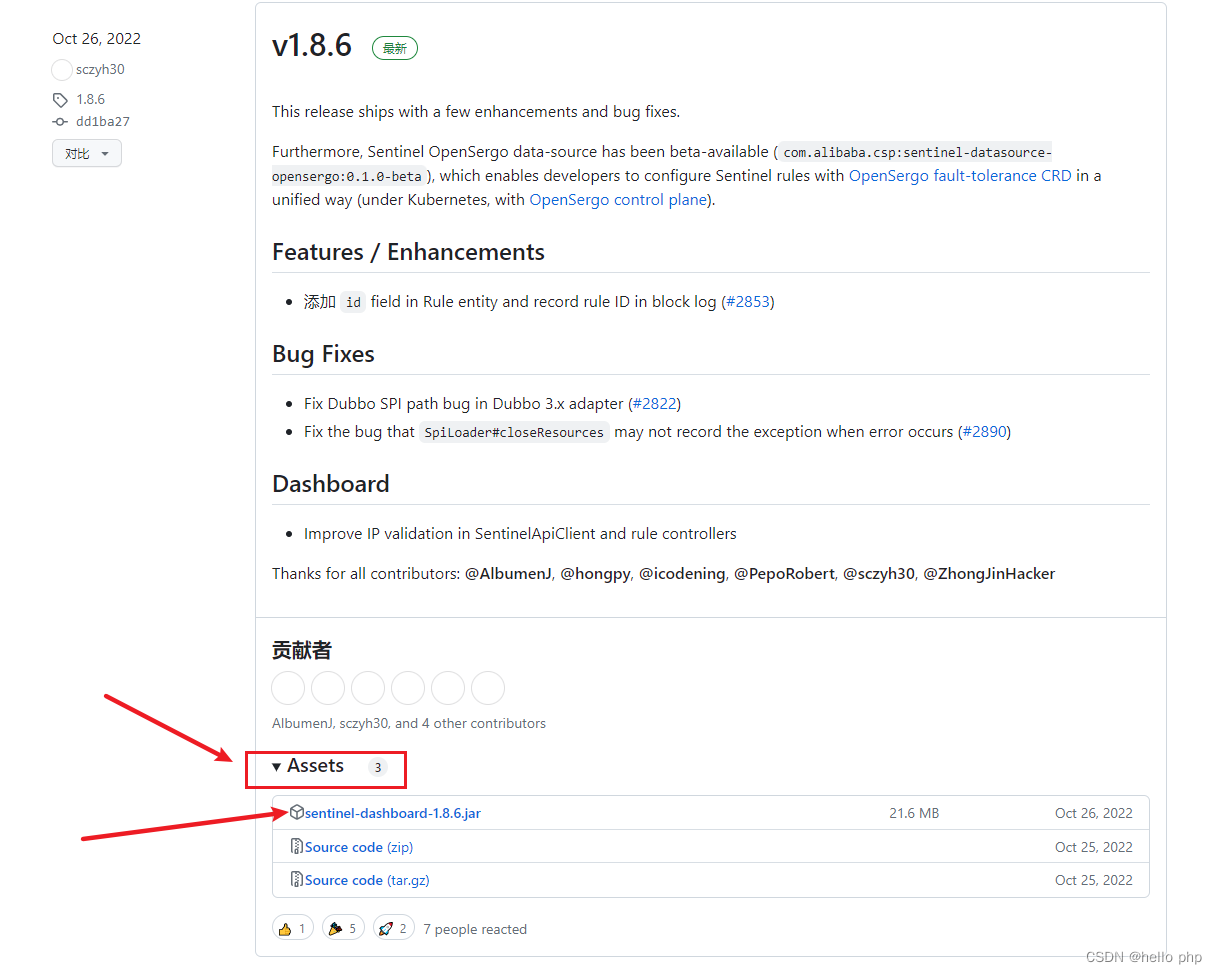
下载地址: https://github.com/alibaba/Sentinel/releases 下载对应的jar包
sentinel-dashboard-1.8.6.jar
启动服务:
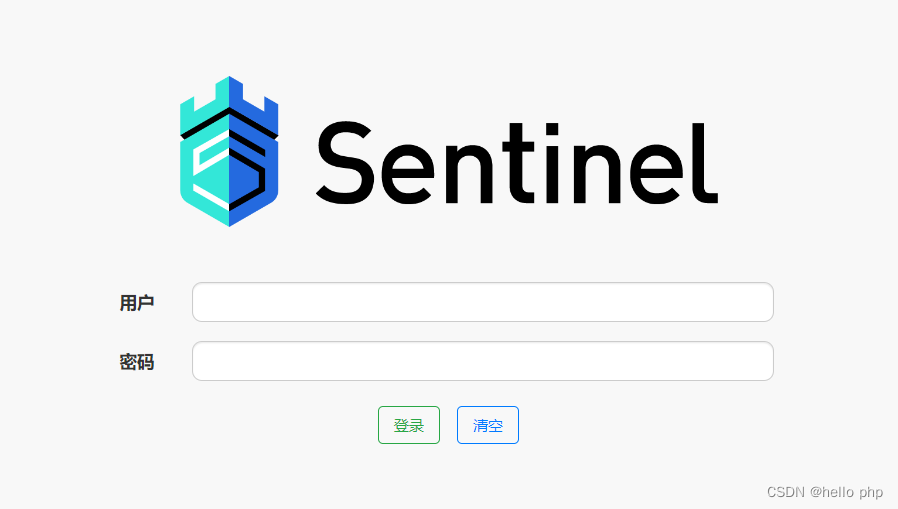
java -jar sentinel-dashboard-1.8.6.jar启动界面如下:(用户名密码都为: sentinel) http://localhost:8080
创建对应的sentinel测试微服务
sentinel-serverpom.xml
<?xml version="1.0" encoding="UTF-8"?>
<project xmlns="http://maven.apache.org/POM/4.0.0"
         xmlns:xsi="http://www.w3.org/2001/XMLSchema-instance"
         xsi:schemaLocation="http://maven.apache.org/POM/4.0.0 http://maven.apache.org/xsd/maven-4.0.0.xsd">
    <parent>
        <artifactId>springboot-microservice-parent</artifactId>
        <groupId>org.example</groupId>
        <version>1.0-SNAPSHOT</version>
    </parent>
    <modelVersion>4.0.0</modelVersion>

    <artifactId>sentinel-server</artifactId>


    <properties>
        <spring.cloud.alibaba.version>2.2.9.RELEASE</spring.cloud.alibaba.version>
    </properties>

    <dependencies>
        <dependency>
            <groupId>com.alibaba.cloud</groupId>
            <artifactId>spring-cloud-starter-alibaba-sentinel</artifactId>
        </dependency>

        <dependency>
            <groupId>org.springframework.boot</groupId>
            <artifactId>spring-boot-starter-web</artifactId>
        </dependency>
    </dependencies>

    <dependencyManagement>
        <dependencies>
            <dependency>
                <groupId>com.alibaba.cloud</groupId>
                <artifactId>spring-cloud-alibaba-dependencies</artifactId>
                <version>${spring.cloud.alibaba.version}</version>
                <type>pom</type>
                <scope>import</scope>
            </dependency>
        </dependencies>
    </dependencyManagement>


</project>
application.yaml
server:
  port: 19001

spring:
  application:
    name: sentinel-server

  cloud:
    sentinel:
      enabled: true
      transport:
        dashboard: localhost:8080 # sentinel dashboard服务端口
feign:
  sentinel:
    enabled: true
服务启动类SentinelApplication.java
package com.example;

import org.springframework.boot.SpringApplication;
import org.springframework.boot.autoconfigure.SpringBootApplication;

@SpringBootApplication
public class SentinelApplication {
    public static void main(String[] args) {
        SpringApplication.run(SentinelApplication.class, args);
    }
}
测试控制器 TestController.java
package com.example.controller;

import com.alibaba.csp.sentinel.annotation.SentinelResource;
import com.alibaba.csp.sentinel.slots.block.BlockException;
import org.springframework.web.bind.annotation.RequestMapping;
import org.springframework.web.bind.annotation.RestController;

/**
 * 参考 https://blog.csdn.net/qq_38374397/article/details/125603109
 */

@RestController
@RequestMapping("/sentinel")
public class TestController {


    @RequestMapping("/test")
    public String test() {
        return "sentinel test!!!";
    }


    @RequestMapping("/getGoods")
    public String getGoods() {
        return "goods信息列表...";
    }

    /**
     * @SentinelResource为sentine提供的注解
     */
    @RequestMapping("/getOrderNo")
    @SentinelResource(value = "getOrderNoResource", blockHandler = "getOrderNoBlockHandler", blockHandlerClass = TestController.class)
    public String getOrderNo(String name) {
        return "order number is 123456";
    }

    /**
     * 限流后续操作方法
     * 方法需要为静态方法
     */
    public static String getOrderNoBlockHandler(String name, BlockException e) {
        return "不好意思,前方拥挤,请您稍后再试";
    }
}
启动测试服务
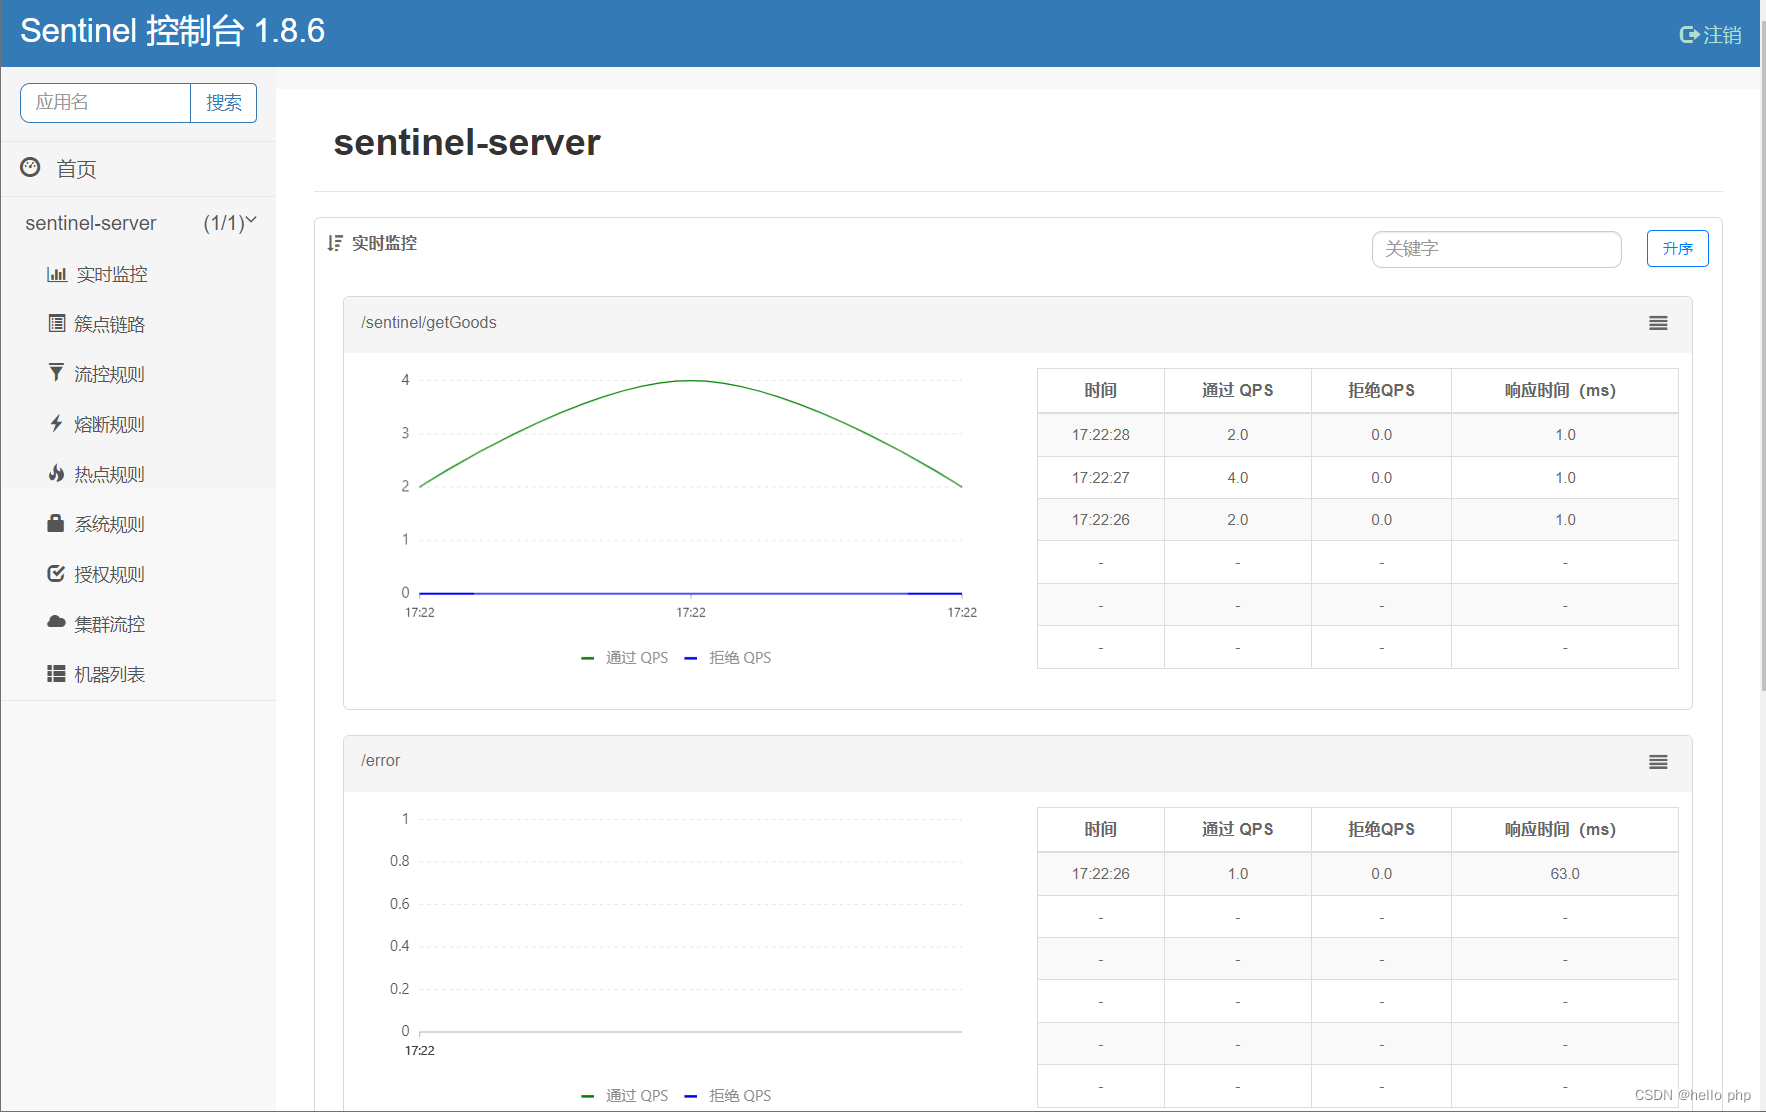
sentinel-server后,先访问几次接口, 再在浏览器端就可以看到如下界面:
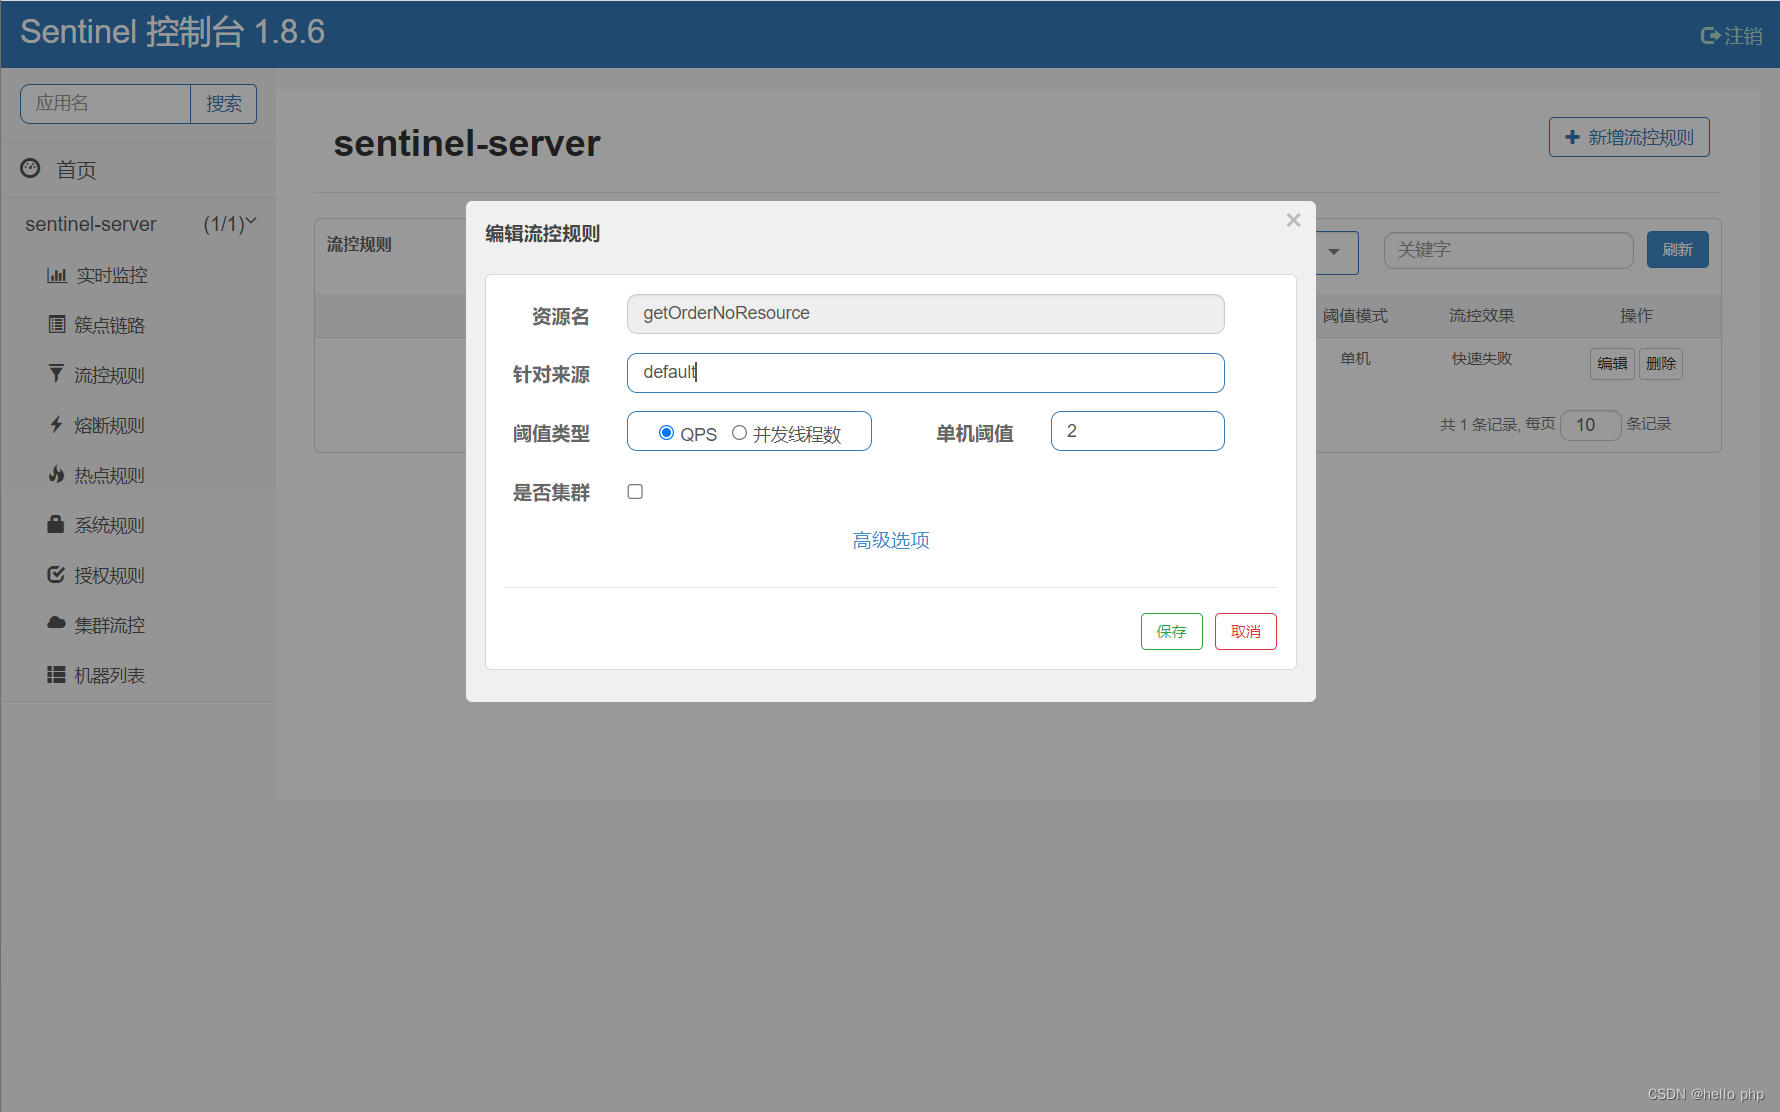
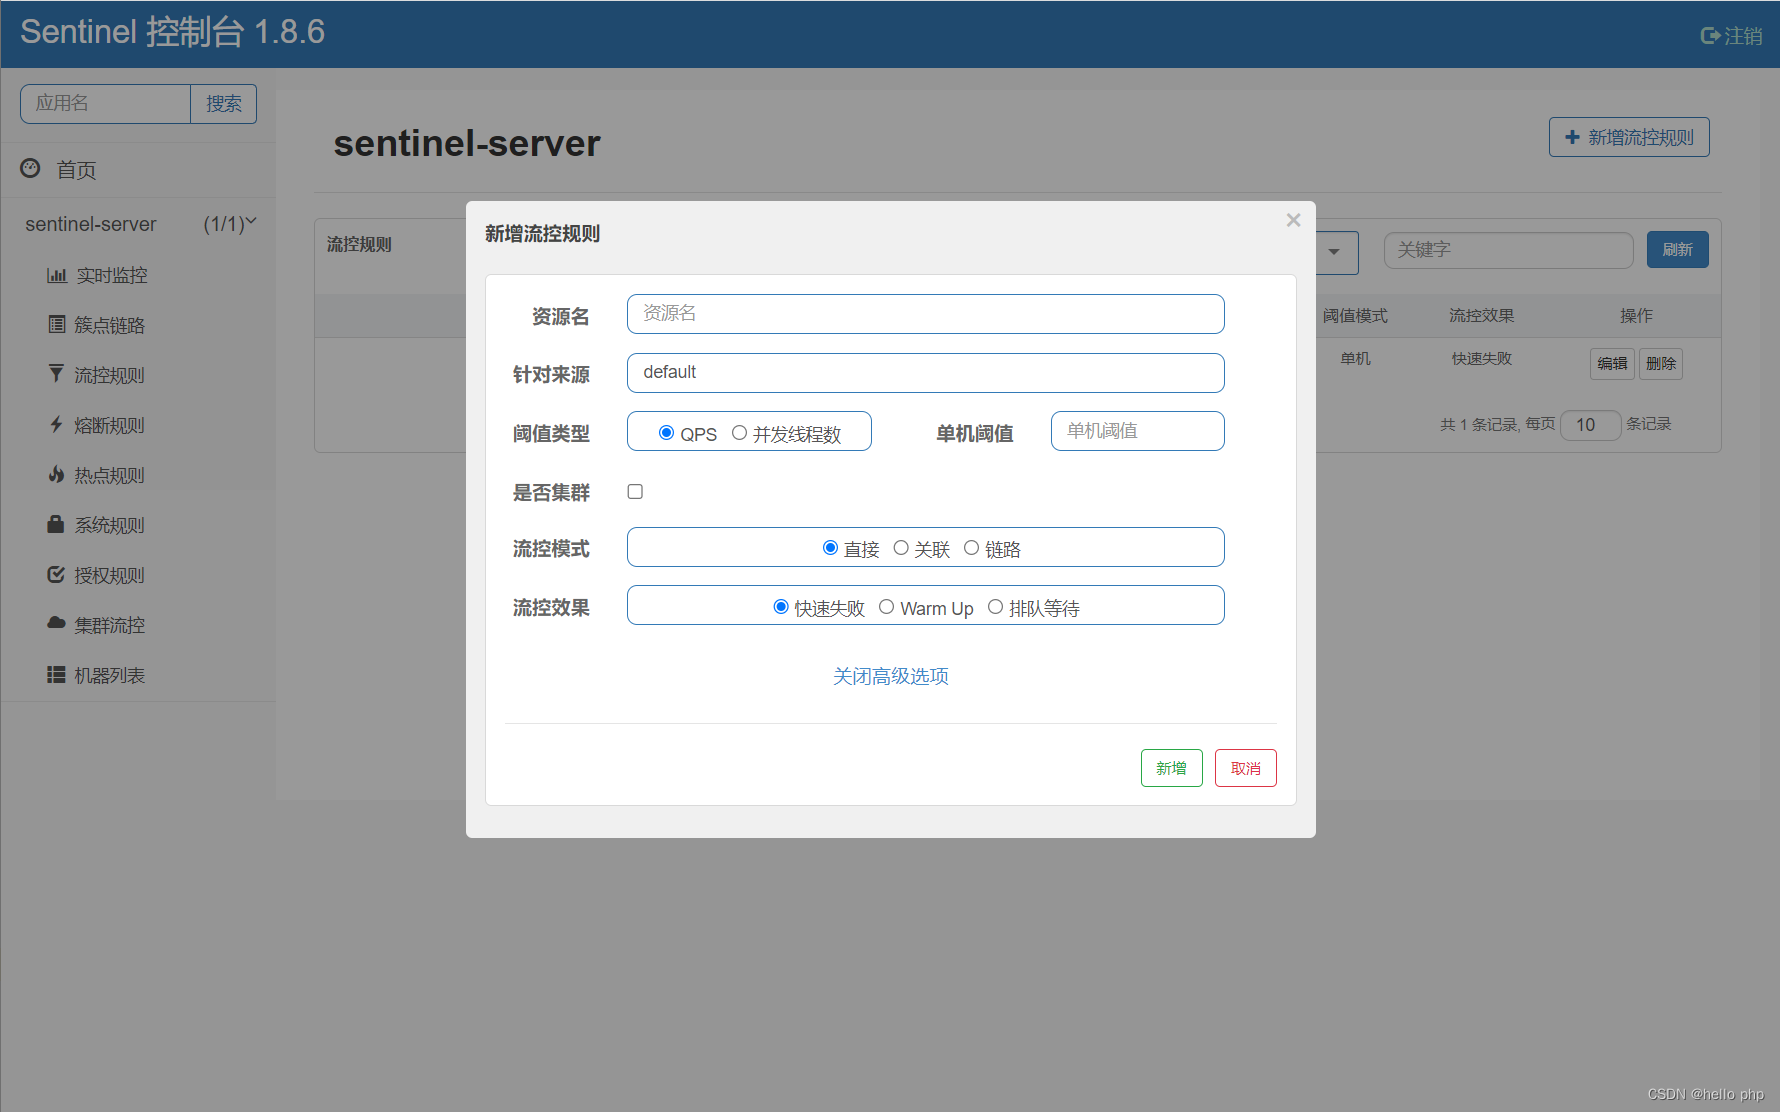
配置左侧的菜单中的
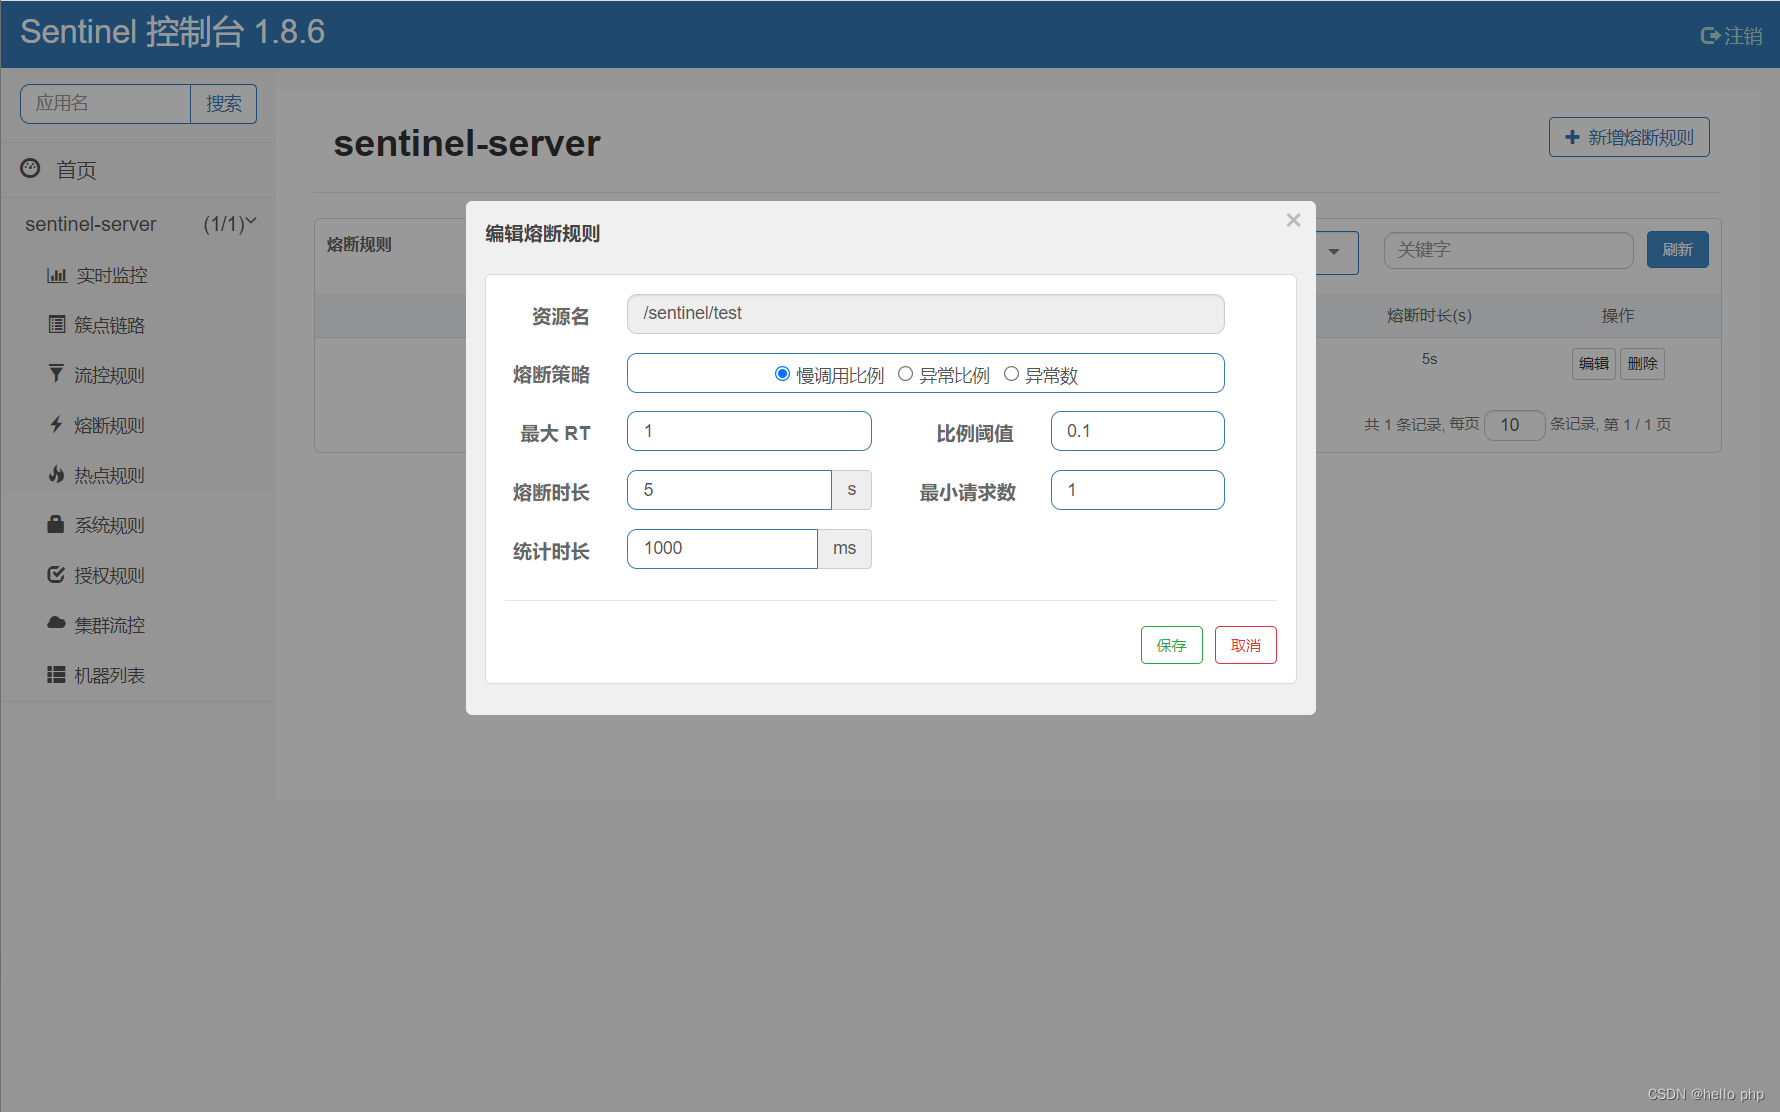
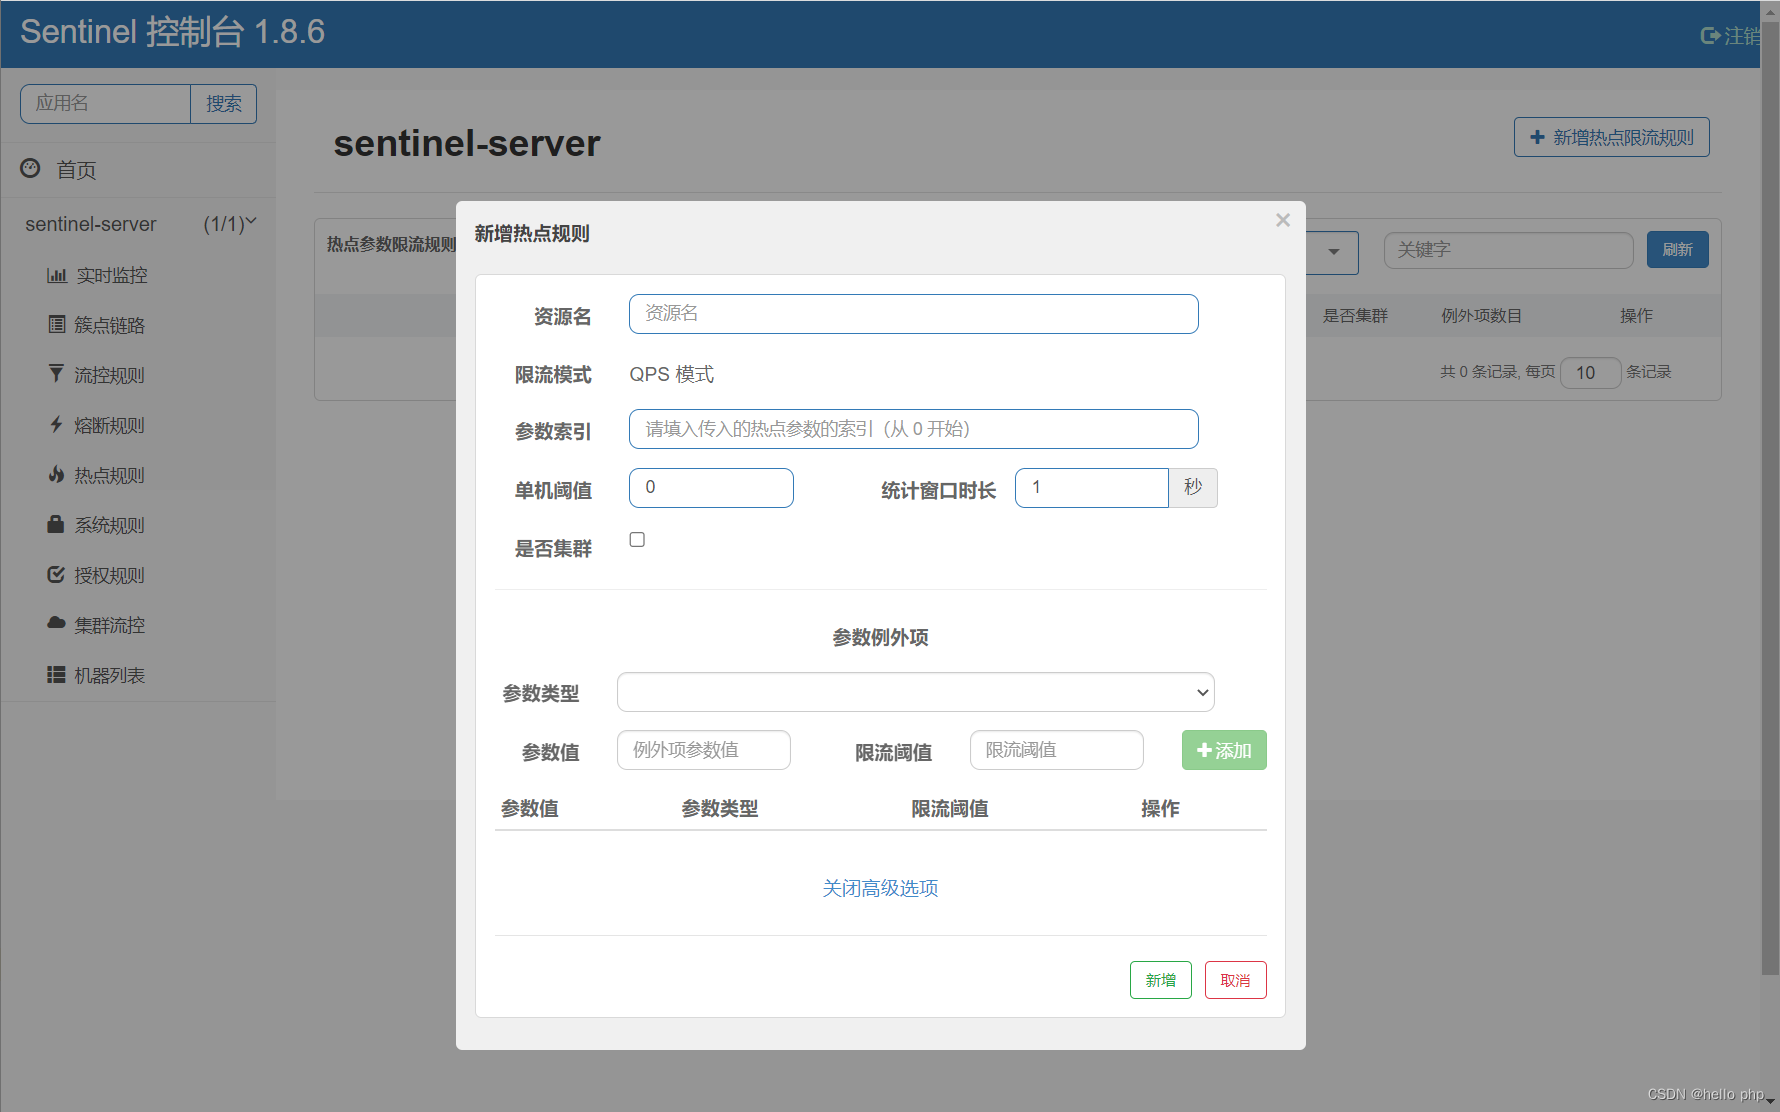
①流控规则②熔断规则③热点规则等
就可以启动对应的流控、熔断效果
 |  |
|---|
