目录
本篇主要简单概述了组件的数据传递、组件插槽、组件生命周期、切换组件以及如何组件传递数据。
组件数据传递
组件之间的数据传递:props和自定义事件 两种方式
Props:父传子
自定义事件:子传父
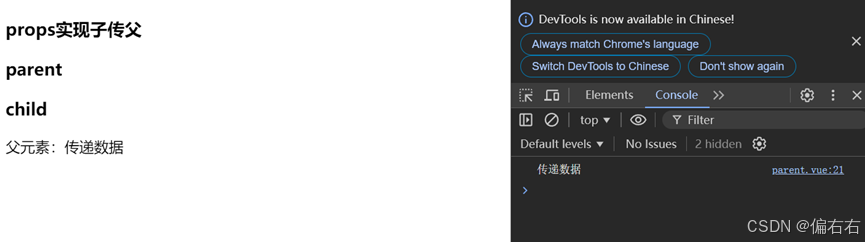
除了上述两种方式外,props也可以实现子传父。
原理就是父组件传一个含参函数给子组件,子组件接收时传入参数,返回给父组件。父组件可以在函数中接受,并将它赋值给自身属性。
示例:父组件传一个含参函数给子组件。
<template>
    <h3>props实现子传父</h3>
    <h3>parent</h3>
    <Child :onEvent="dataFn"/>
    <p>父元素:{{message}}</p>
</template>

<script >
import Child from './child.vue';
    export default{
        components:{
            Child
        },
        data(){
            return{
                message:""
            }
        },
        methods:{
            dataFn(data){
                console.log(data);
                this.message=data
            }
    }
}
</script>
子组件接收时传入一个参数返回给父组件。
<template>
    <h3>child</h3>
    <p>{{onEvent("传递数据")}}</p>
</template>

<script >
    export default{
        data(){
            return{

            }
        },
        props:{
            onEvent:Function
        }
}
</script>
运行结果如下:
插槽组件slots
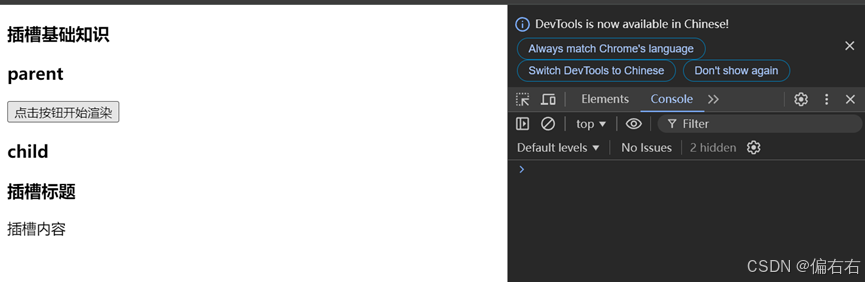
我们已经了解到组件能够接受任意类型的JavaScript值作为props,但组件要如何接受模板内容呢?在某些场合,我们可能想要为子组件传递一些模块片段,让子组件在它们的组件中渲染这些片段。(模板片段就是div等等,这些标签。)父组件将视图传入子组件。
示例
父组件中,在子组件标签对里面夹杂模板内容。
<template>
    <h3>插槽基础知识</h3>
    <h3>parent</h3>
    <button @click="change">点击按钮开始渲染</button>
    <Child v-if="yon">
        <div>
            <h3>插槽标题</h3>
            <p>插槽内容</p>
        </div>
    </Child>

</template>

<script >
import Child from './child.vue';
    export default{
        components:{
            Child
        },
        data(){
            return{
                yon:false
            }
        },
        methods:{
            change(){
                this.yon=this.yon?false:true;
        }
    }
}
</script>
在子组件中用<slot></slot>接受父组件传过来的模板内容。
<template>
    <h3>child</h3>
    <slot></slot>
</template>

<script >
    export default{
        data(){
            return{

            }
        },

}
</script>
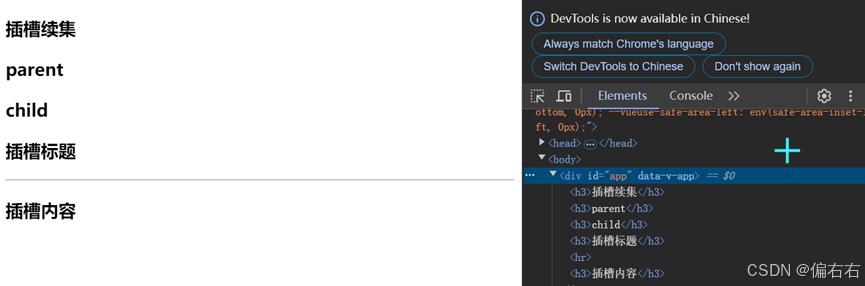
运行结果如下
插槽solts(续集)
渲染作用域
插槽内容可以访问到父组件的数据作用域,因为插槽内容本身是在父组件模块中定义的。
示例
在传给子组件的模块中,夹杂父组件的数据内容。
<template>
    <h3>插槽续集</h3>
    <h3>parent</h3>
    <Child>
        <div>
            <h3>{{head}}</h3>
        </div>
    </Child>

</template>

<script >
import Child from './child.vue';
    export default{
        components:{
            Child
        },
        data(){
            return{
                head:'插槽标题'
            }
        },
}
</script>
子组件接收
<template>
    <h3>child</h3>
    <slot></slot>
</template>

<script >
    export default{
        data(){
            return{

            }
        },

}
</script>
运行结果如下:仍然成功在子组件中显示父组件的数据内容。

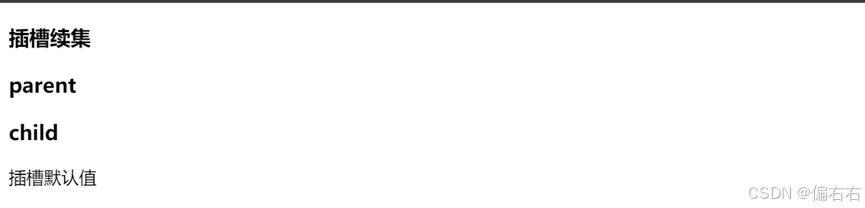
默认内容
如果使用标签对时,父组件并没有传给子组件任何模块内容, 那么子组件在接收时可以使用默认值来代替显示。<slot>默认值</slot>
示例:
注释掉子组件标签内的模块内容 ,子组件的slot标签语法改变。
<template>
    <h3>插槽续集</h3>
    <h3>parent</h3>
    <Child>
        <!-- <div>
            <h3>{{head}}</h3>
        </div> -->
    </Child>

</template>


<template>
    <h3>child</h3>
    <slot>插槽默认值</slot>
</template>
运行结果:显示默认值。
具名插槽
我们在给子组件传递模板内容时,也可以将传过去的内容具体细化为不同版块。具体实现是给每个板块起一个具体的名字。语法:#name 或 v-slot:name
<template>
    <h3>插槽续集</h3>
    <h3>parent</h3>
    <Child>
        <template v-slot:header>
            <h3>{{head}}</h3>
        </template>
        <template #main>
            <h3>{{main}}</h3>
        </template>
    </Child>

</template>

<script >
import Child from './child.vue';
    export default{
        components:{
            Child
        },
        data(){
            return{
                head:'插槽标题',
                main:'插槽内容'
            }
        },
}
</script>
子组件中语法为: <slot name="">插槽默认值</slot>
<template>
    <h3>child</h3>
    <slot name="header">插槽默认值</slot>
    <hr/>
    <slot name="main">插槽默认值</slot>
</template>

<script >
    export default{
        data(){
            return{

            }
        },

}
</script>
v-slot有对应的简写#,因此 <template v-slot:header> 可以简写成 <template #header>意思是将这部分模板片段传入子组件的header插槽中。
插槽slots(再续集)插槽中的数据传递

| 特性 | Vue 2 | Vue 3+ |
|---|---|---|
| 默认插槽作用域接收 | <template slot-scope=""> | <template v-slot=""> |
| 具名插槽作用域接收 | <template slot="name" slot-scope=""> | <template #name=""> |
示例:
默认插槽作用域接收
<template>
    <h3>插槽slots再续集</h3>
    <h3>parent</h3>
    <Child>
        <template v-slot="slotProps">
            <h3>{{head}}-{{slotProps.msg}}</h3>
        </template>
    </Child>
</template>

<script >
import Child from './child.vue';
    export default{
        components:{
            Child
        },
        data(){
            return{
                head:'插槽标题',
                main:'插槽内容'
            }
        },
}
</script>
动态属性绑定,子组件将自身的数据内容传给了父组件。
<template>
    <h3>child</h3>
    <slot :msg="message" >插槽默认值</slot>
</template>

<script >
    export default{
        data(){
            return{
                message:"插槽test text"
            }
        },

}
</script>
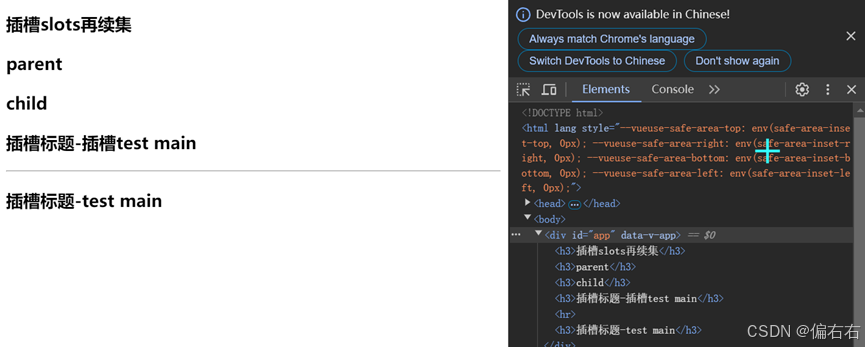
具名插槽如何传递
示例:
默认插槽作用域接收
<template>
    <h3>插槽slots再续集</h3>
    <h3>parent</h3>
    <Child>
        <template #header="sloptProps">
            <h3>{{head}}-{{sloptProps.msg}}</h3>
        </template>
        <template #main="sloptProps">
            <h3>{{head}}-{{sloptProps.demo}}</h3>
        </template>
    </Child>

</template>

<script >
import Child from './child.vue';
    export default{
        components:{
            Child
        },
        data(){
            return{
                head:'插槽标题',
                main:'插槽内容'
            }
        },
}
</script>
<template>
    <h3>child</h3>
    <slot name="header"  :msg="message" >插槽默认值</slot>
    <hr/>
    <slot name="main"  :demo="tset" >插槽默认值</slot>
</template>

<script >
    export default{
        data(){
            return{
                message:"插槽test main",
                tset:"test main"
            }
        },

}
</script>
组件生命周期
每个Vue组件实例在创建时都需要经历一系列初始化步骤,比如设置好数据侦听,编译模板,挂载示例到DOM,以及在数据改变时更新dom。在此过程中,他也会运行被称为生命周期钩子的函数,让开发者有机会在特定阶段运行自己的代码。
示例:
<template>
    <h3>组件的生命周期</h3>
    <button @click="change">修改执行操作</button>
    <p>{{message}}</p>

</template>

<script>
/**
 * 生命周期函数:
 * 创建期间:beforeCreate create
 * 挂载期间:beforeMount mounted
 * 跟新期间:beforeUpdate updated
 * 销毁期间:beforeUnmount unmounted
 */
export default{
    beforeCreate(){
        console.log("组件创建之前");
    },
    created(){
        console.log("组件创建之后");
    },
    beforeMount(){
        console.log("组件渲染之前");
    },
    mounted(){
        console.log("组件渲染之后");
    },
    beforeUpdate(){
        console.log("组件更新之前");
        alert("确认修改吗")
    },
    updated(){
        console.log("组件更新之后");
    },
    beforeunMount(){
        console.log("组件销毁之前");
    },
    unmounted(){
        console.log("组件销毁之后")
    },data(){
        return{
            message:'修改前'
        }
    },methods:{
        change(){
            this.message="修改后";
        }
    }

}

</script>
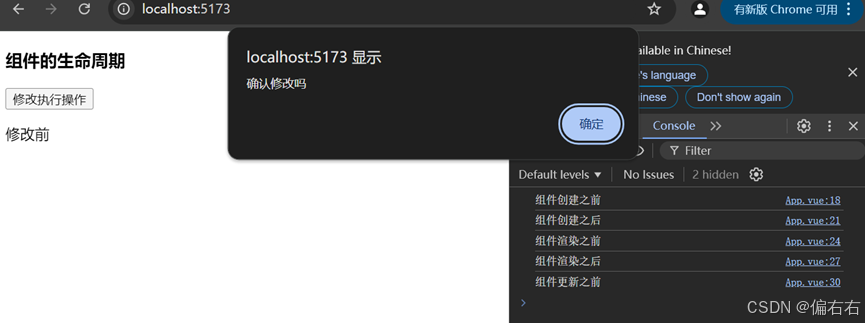
运行效果如下:刷新页面时,钩子函数自动执行,点击按钮修改dom时触发钩子函数中的弹窗。
组件引用时,各组件生命周期的执行前后顺序。
运行结果:先创建父组件,在创建并渲染子组件,子组件渲染完毕后,父组件才算渲染完毕。

生命周期应用
通过ref获取元素DOM结构
<template>
    <h3>组件生命周期的应用</h3>
    <p ref="name">生命周期</p>
</template>
<script>
export default{
    beforeMount(){
        console.log("组件渲染之前");
        console.log(this.$refs.name);
    },
    mounted(){
        console.log("组件渲染之后");
        console.log(this.$refs.name);
    }
}
</script>
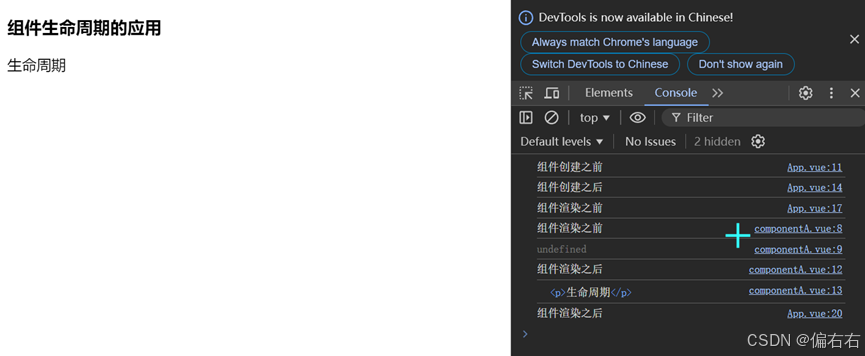
运行结果:在dom没被渲染之前无法获取,因此,我们在获取dom元素时的时机,一定是在组件被渲染之后。
模拟网络请求请求渲染数据
先渲染,再获取数据。不举例子了。
动态组件
有时候需要多个组件来回切换,比如Tab界面。
语法:<component :is="组件名"></component>
<template>
    <component :is="tapComponent"></component>
    <button @click="tapCom">切换事件</button>
</template>
<script >
import componentA from './components/组件切换/ComponentA.vue';
import componentB from './components/组件切换/ComponentB.vue';
export default{
  components: { componentA ,componentB},
    data(){
    return{
        tapComponent:"componentA"
        }
    },
    methods:{
        tapCom(){
            this.tapComponent=this.tapComponent=="componentB"?"componentA":"componentB"
        }
    }
}

</script>
运行结果:点击切换事件按钮时,组件B将变成组件A。

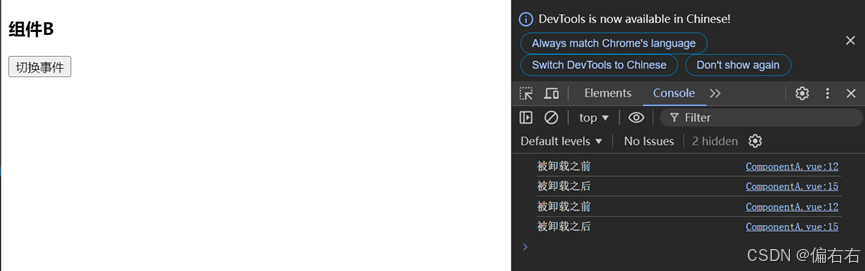
组件保持存活
当使用<component :is=”…” 来在多个组件间切换时,被切换掉的组件会被卸载。我们可以通过<keep-alive>组件强制被切换掉的组件仍然保持“存活”的状态。
示例:
当我们从组件componentA切换为componentB组件时,组件A组件会被卸载掉。
<template>
    <h3>组件A</h3>
</template>
<script>
    export default{
        data(){
            return{

            }
        },
        beforeUnmount(){
            console.log("被卸载之前");
        },
        unmounted(){
            console.log("被卸载之后");
        }
    }
</script>
运行结果如下:
使用<keep-alive>标签包裹可以解决这个问题
示例:
在根组件中,使用标签包裹住要显示的标签。
<template>
    <keep-alive>
        <component :is="tapComponent"></component>
    </keep-alive>

    <hr/>
    <button @click="tapCom">切换事件</button>
</template>
<script >
import componentA from './components/组件切换/ComponentA.vue';
import componentB from './components/组件切换/ComponentB.vue';
export default{
  components: { componentA ,componentB},
    data(){
    return{
        tapComponent:"componentA"
        }
    },
    methods:{
        tapCom(){
            this.tapComponent=this.tapComponent=="componentB"?"componentA":"componentB"
        }
    }
}

</script>
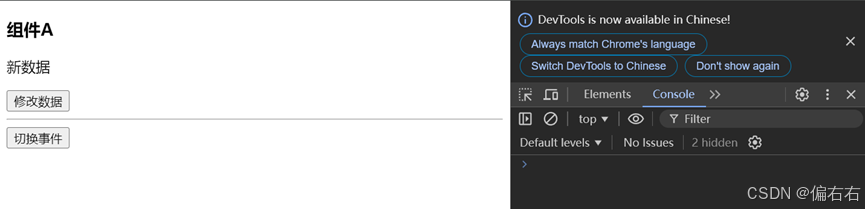
在组件A中显示数据内容,观察在反复切换组件之后,root组件是否能记录下修改后的数据。
<template>
    <h3>组件A</h3>
    <p>{{message}}</p>
    <button @click="updateHandle">修改数据</button>
</template>
<script>
    export default{
        data(){
            return{
                message:"老数据"
            }
        },
        beforeUnmount(){
            console.log("被卸载之前");
        },
        unmounted(){
            console.log("被卸载之后");
        },
        methods:{
            updateHandle(){
                this.message="新数据"
            }
        }
    }
</script>
运行结果:给人的的感觉应该是被缓存下来了。 组件A不会被重新创建,因此修改的内容也不会丢失。
异步组件
在大型项目中,我们可能需要拆分应用为更小的块,并仅在需要时在从服务器加载相关组件。Vue提供了defineAsyncComponent方法来实现此功能。
没使用该方法之前,当初始化页面时,A和B组件同时被加载完毕,切换组件时,没有新的网络请求产生。
示例:
页面打开时,root组件的所有关联子组件都会被加载出来,这样特别消耗服务器资源。
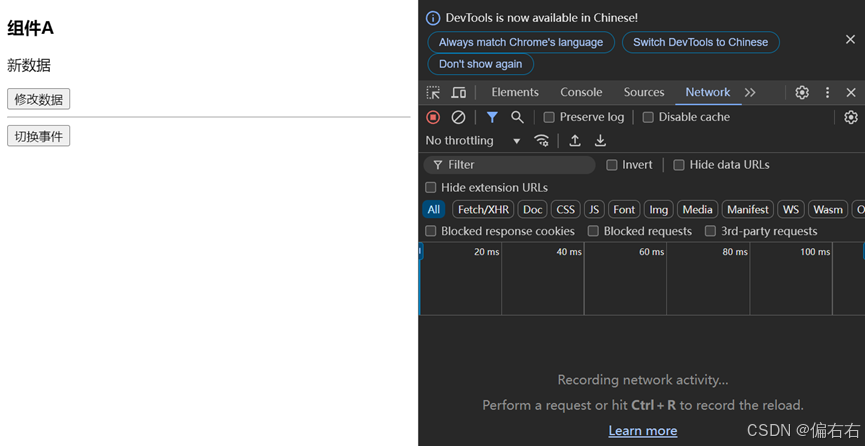
在引入组件时,将组件改为异步加载。
<template>
    <keep-alive>
        <component :is="tapComponent"></component>
    </keep-alive>

    <hr/>
    <button @click="tapCom">切换事件</button>
</template>
<script >
import {defineAsyncComponent} from "vue"
import componentA from './components/组件切换/ComponentA.vue';
// import componentB from './components/组件切换/ComponentB.vue';
//异步加载组件
const ComponentB = defineAsyncComponent(()=>
    import("./components/组件切换/ComponentB.vue")
)
export default{
  components: { componentA ,ComponentB},
    data(){
    return{
        tapComponent:"componentA"
        }
    },
    methods:{
        tapCom(){
            this.tapComponent=this.tapComponent=="componentB"?"componentA":"componentB"
        }
    }
}

</script>
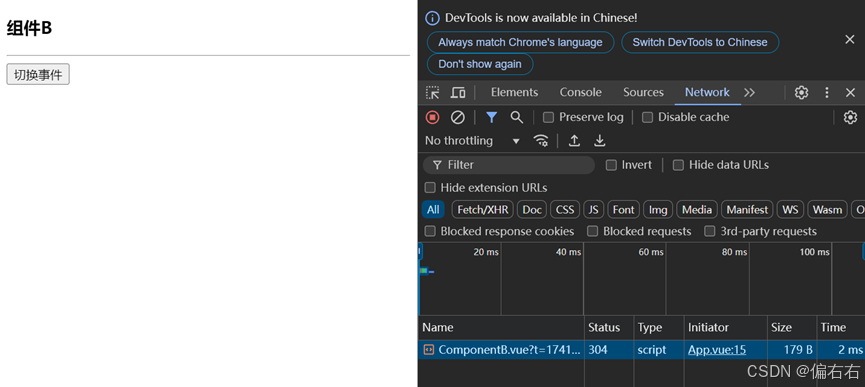
运行结果: 只有在切换到组件B时,B组件才会被加载,浏览器才会向服务器发送网络请求。
依赖注入
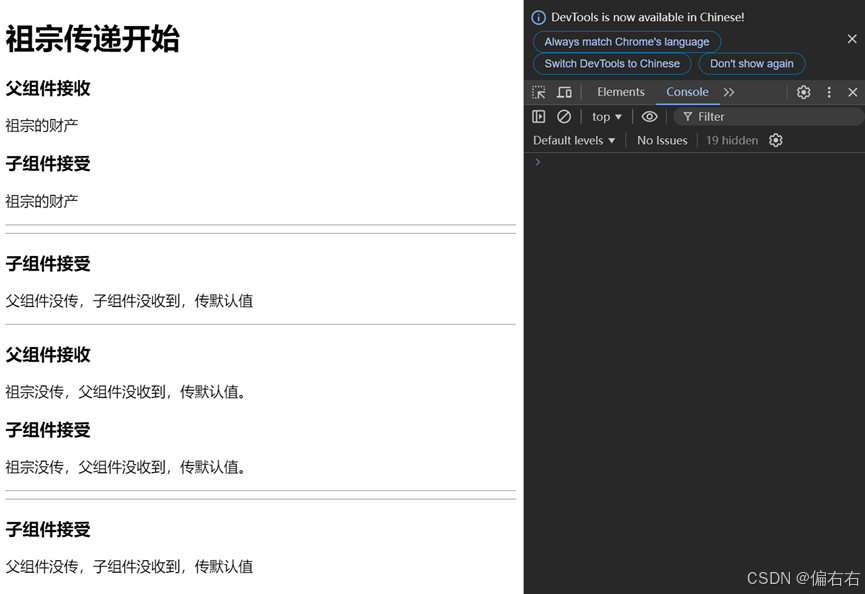
逐级透传

实现原理:用props逐级向下传递
示例:
根组件
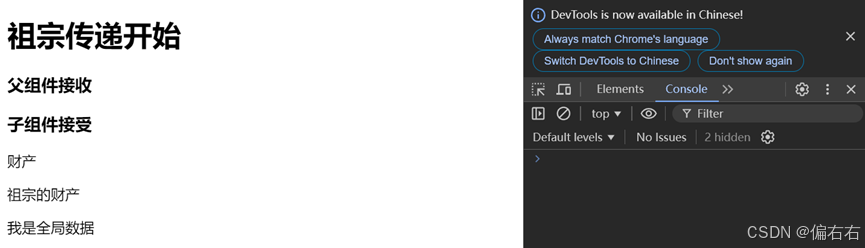
<template>
    <h1>祖宗传递开始</h1>
    <parent :prop1="test"/>
    <hr/>
    <parent/>
</template>
<script >
import parent from './components/组件之间的关系/parent.vue';
export default{
  components: {parent},
    data(){
    return{
        test:"祖宗的财产"
        }
    }
}

</script>
父组件
<template>
    <h3>父组件接收</h3>
    <p>{{prop1}}</p>
    <Child :prop2="prop1"/>
    <hr/>
    <hr/>
    <Child/>

</template>

<script >
import Child from './child.vue';
    export default{
        components:{
            Child
        },
        data(){
            return{
            }
        },
        props:{
            prop1:{
                type:String,
                default :"祖宗没传,父组件没收到,传默认值。"
            }
        }
}
</script>
子组件
<template>
    <h3>子组件接受</h3>
    <p>{{prop2}}</p>
</template>

<script >
    export default{
        data(){
            return{

            }
        },
        props:{
            prop2:{
                type:String,
                default:"父组件没传,子组件没收到,传默认值"
            }
        }
}
</script>
运行效果:
跨组件传递数据
Provide和inject可以帮助我们解决这一个问题。一个父组件相对于其所有的后代组件,会作为依赖提供项。任何后代的组件树,无论层级多深,都可以注入由父组件提供给整条链路的依赖。

注意:provide和inject只能由上到下的传递,不能反向传递。
除了在一个组件中提供依赖,我们还可以在整个应用层面提供依赖。

import { createApp } from 'vue'
import App from './App.vue'

// createApp(App).mount('#app')
const app= createApp(App)
app.provide("gobalbData","我是全局数据")

app.mount('#app')
运行效果: