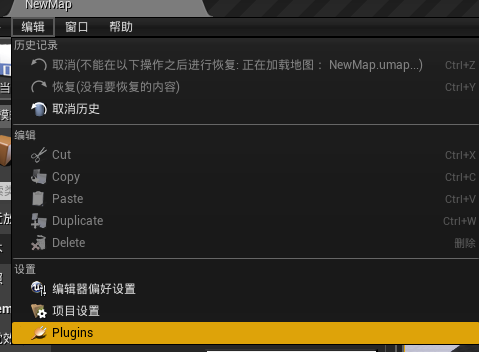
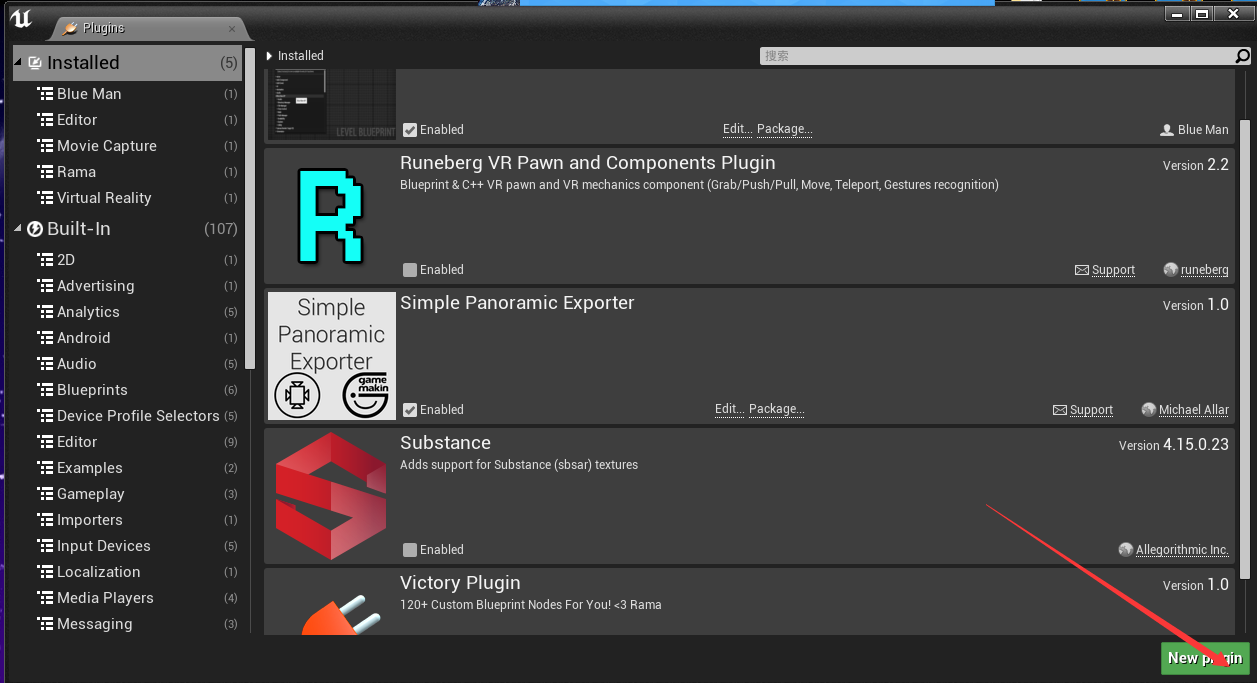
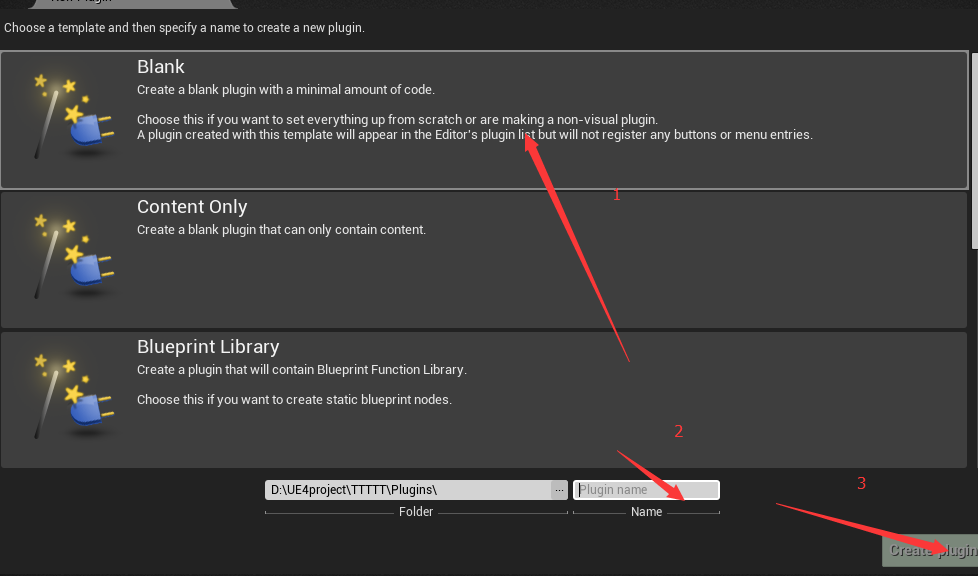
事先说明各个版本的插件写法还是有点区别的我的是基于4.15版本的。
第一种:普通的插件
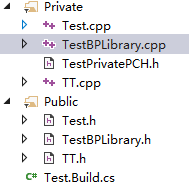
然后添加一个CPP放在插件的Private下,命名为:插件名+PricatePCH.h文件 这里的插件名为Test,以下以Test为示例讲解:
包含Test的.h文件
#include "Test.h"把#include “Test.h” 替换成#include "TestPrivatePCH.h" 这样一部分就好了
然后新建自己的代码.h放入Public文件夹里,.cpp放进Private里 这里以TestBPLibrary为例
接下来就和普通的Actor C++代码差不多写法了,只要记得在cpp里添加PCH.h就可以了
.h
// Copyright 1998-2016 Epic Games, Inc. All Rights Reserved.

#pragma once

#include "Engine.h"
#include "TestBPLibrary.generated.h"

/*
*	Function library class.
*	Each function in it is expected to be static and represents blueprint node that can be called in any blueprint.
*
*	When declaring function you can define metadata for the node. Key function specifiers will be BlueprintPure and BlueprintCallable.
*	BlueprintPure - means the function does not affect the owning object in any way and thus creates a node without Exec pins.
*	BlueprintCallable - makes a function which can be executed in Blueprints - Thus it has Exec pins.
*	DisplayName - full name of the node, shown when you mouse over the node and in the blueprint drop down menu.
*				Its lets you name the node using characters not allowed in C++ function names.
*	CompactNodeTitle - the word(s) that appear on the node.
*	Keywords -	the list of keywords that helps you to find node when you search for it using Blueprint drop-down menu.
*				Good example is "Print String" node which you can find also by using keyword "log".
*	Category -	the category your node will be under in the Blueprint drop-down menu.
*
*	For more info on custom blueprint nodes visit documentation:
*	https://wiki.unrealengine.com/Custom_Blueprint_Node_Creation
*/
UCLASS()
class UTestBPLibrary : public UBlueprintFunctionLibrary
{
	GENERATED_UCLASS_BODY()

	UFUNCTION(BlueprintCallable, meta = (DisplayName = "Execute Sample function nimei ", Keywords = "Test sample test testing"), Category = "TestPlugins")
	static float TestSampleFunction(float Param);

	UFUNCTION(BlueprintCallable, Category = "TestPlugins") //测试
		static	int32 Ttest(int32 a);
};
// Copyright 1998-2016 Epic Games, Inc. All Rights Reserved.

#include "TestPrivatePCH.h"
#include "TestBPLibrary.h"

UTestBPLibrary::UTestBPLibrary(const FObjectInitializer& ObjectInitializer)
: Super(ObjectInitializer)
{

}

float UTestBPLibrary::TestSampleFunction(float Param)
{
	return -1;
}

int32 UTestBPLibrary::Ttest(int32 a) //测试
{
	return -1;
}
第二种:基于Object的插件
手先找到引擎目录下例如:D:\Epic Games\UE_4.15\Engine\Plugins\Developer 下面的UObjectPlugin,复制整个文件夹到插件目录下,需要在插件Bulid.cs下"Engine"

然后老样子添加PCH.h文件
#include "IUObjectPlugin.h"

#include "GameFramework/Actor.h"//这行看你要做什么Object 这里做的是Actor
#include "Engine.h"
#include "CoreUObject.h"把IUObjectPlugin.h的#include "CoreMinimal.h"和"Modules/ModuleInterface.h"注释掉
把UObjectPlugin.cpp的全部注释掉并加上#include "UObjectPluginPrivatePCH.h"
把MyPluginObject.cpp加上#include "UObjectPluginPrivatePCH.h"和#include "ObjectTools.h"
下面同样添加自己的代码 这里我命名为ZZActor
.h
#pragma once


#include "GameFramework/Actor.h"
#include "ZZActor.generated.h"


UCLASS()
class AZZActor : public AActor
{
	GENERATED_BODY()


public:
	// Sets default values for this actor's properties
	AZZActor();


	UFUNCTION(BlueprintCallable, Category = "objectPlugins") //测试
		int32 testzz(int32 a);


};
#include "UObjectPluginPrivatePCH.h"
#include "ZZActor.h"

AZZActor::AZZActor():Super()
{
}

int32 AZZActor::testzz(int32 a) //测试
{
	return -1;


}
然后就可以在项目里新建蓝图看到了
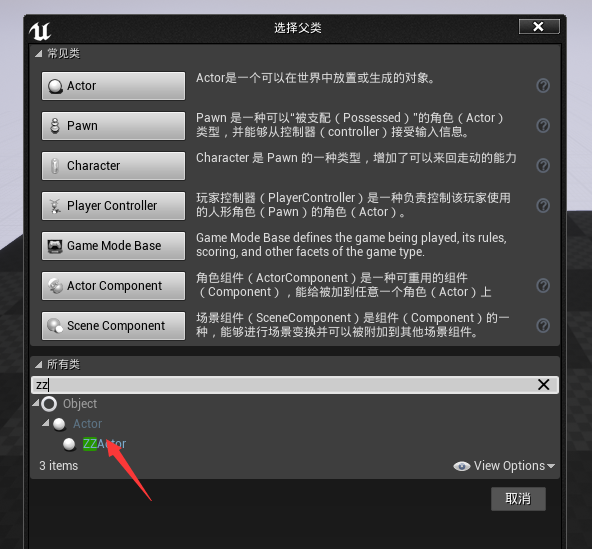
PS(新版的插件)改成类似
public BBB(ReadOnlyTargetRules Target) : base(Target)
	{
		PCHUsage = ModuleRules.PCHUsageMode.UseExplicitOrSharedPCHs;

		PublicIncludePaths.AddRange(
			new string[] {
				"BBB/Public"
				// ... add public include paths required here ...
			}
			);
}
