小小白由于操作不当导致原本的manifold2-G系统炸了,重新配置一台新的妙算,同时给原来的恢复出厂设置,配置环境查资料麻烦的要死,特在此记录第二次配置环境的踩坑过程,以备不时之需,同时文章若有不足之处也希望大佬们可以多多讨论交流。
一、换源
妙算2-G的架构是aarch64,不像普通的intel32位64位,他的源也不能像其他的ubuntu一样直接查找更换,解决方法也很简单,在国内源链接的Ubuntu后面加上-ports即可,例如:
deb http://mirrors.aliyun.com/ubuntu-ports/ xenial main
deb-src http://mirrors.aliyun.com/ubuntu-ports/ xenial main

deb http://mirrors.aliyun.com/ubuntu-ports/ xenial-updates main
deb-src http://mirrors.aliyun.com/ubuntu-ports/ xenial-updates main

deb http://mirrors.aliyun.com/ubuntu-ports/ xenial universe
deb-src http://mirrors.aliyun.com/ubuntu-ports/ xenial universe
deb http://mirrors.aliyun.com/ubuntu-ports/ xenial-updates universe
deb-src http://mirrors.aliyun.com/ubuntu-ports/ xenial-updates universe

deb http://mirrors.aliyun.com/ubuntu-ports/ xenial-security main
deb-src http://mirrors.aliyun.com/ubuntu-ports/ xenial-security main
deb http://mirrors.aliyun.com/ubuntu-ports/ xenial-security universe
deb-src http://mirrors.aliyun.com/ubuntu-ports/ xenial-security universe
亲测效果和中科大公开的对应源效果一样,
Ubuntu Ports 源使用帮助oss.ustc.edu.cn有一样的报错。。。
W: The repository 'http://ppa.launchpad.net/bzindovic/suitesparse-bugfix-1319687/ubuntu xenial Release' does not have a Release file.
N: Data from such a repository can't be authenticated and is therefore potentially dangerous to use.
N: See apt-secure(8) manpage for repository creation and user configuration details.
W: An error occurred during the signature verification. The repository is not updated and the previous index files will be used. GPG error: http://packages.ros.org/ros/ubuntu xenial InRelease: The following signatures couldn't be verified because the public key is not available: NO_PUBKEY F42ED6FBAB17C654
W: Failed to fetch http://packages.ros.org/ros/ubuntu/dists/xenial/InRelease  The following signatures couldn't be verified because the public key is not available: NO_PUBKEY F42ED6FBAB17C654
E: Failed to fetch http://ppa.launchpad.net/bzindovic/suitesparse-bugfix-1319687/ubuntu/dists/xenial/main/binary-arm64/Packages  404  Not Found [IP: 91.189.95.85 80]
W: Some index files failed to download. They have been ignored, or old ones used instead.
既然有问题那就解决问题
第一个问题:The repository ...... does not have a Release file.
查了很多资料,最直接有效的就是删除相关文件
sources.list.d放的是第三方软件的源,删除不会对系统有影响
cd /etc/sources.list.d
ls
sudo rm bzindovic-ubuntu-suitesparse-bugfix-1319687-xenial.list
sudo rm bzindovic-ubuntu-suitesparse-bugfix-1319687-xenial.list.save(这个文件存在就删除,没有的话不用管)
之后重新sudo apt-get update一下,发现只剩三条警告
W: An error occurred during the signature verification. The repository is not updated and the previous index files will be used. GPG error: http://packages.ros.org/ros/ubuntu xenial InRelease: The following signatures couldn't be verified because the public key is not available: NO_PUBKEY F42ED6FBAB17C654
W: Failed to fetch http://packages.ros.org/ros/ubuntu/dists/xenial/InRelease  The following signatures couldn't be verified because the public key is not available: NO_PUBKEY F42ED6FBAB17C654
W: Some index files failed to download. They have been ignored, or old ones used instead.
可以明显看出的是前两条警告的原因都是因为公钥缺失“because the public key is not available: NO_PUBKEY F42ED6FBAB17C654”,那就把公钥添加进去:
sudo apt-key adv --keyserver keyserver.ubuntu.com --recv-keys F42ED6FBAB17C654之后重新sudo apt-get update一下,错误和警告都没了之后执行update的好哥们upgrade
sudo apt-get upgrade执行时发现很多下载很慢,本人执行耗时近两个小时最后还出现了六个连接失败或者超时的错误:Failed to fetch......Connection time out/Connection failed。这些源基本上是第三方软件的源,如果知道它暂时没用的话可以直接去/etc/apt/sources.list.d里面删除对应文件,本人小白不清楚,能下载尽量下载。
查了很多资料,发现设置妥当DNS服务器即可
sudo gedit /etc/resolv.conf把原本的注释掉更换为8.8.8.8
#nameserver 127.0.1.1
nameserver 8.8.8.8
然后重启网络服务:
sudo etc/init.d/networking restart重新upgrade:sudo apt-get upgrade
之前连不上的很多很快就下载了,最后一个跟g++有关的还是很慢但不至于连不上,我也不敢删,等了半个小时后全部下载安装完了,别忘了sudo apt autoremove清楚多余文件,有更好方法的欢迎一起讨论。
换完源第一件事当然是换中文输入法啦(亲测好评)
ubuntu 16.04中文输入法安装blog.csdn.net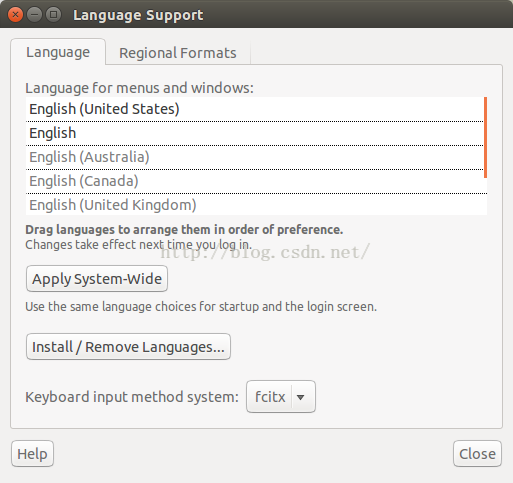
二、安装qt
支持此架构的qt很少,很难通过源码指定版本安装,所以直接从源安装默认可用的qt
sudo apt-get install qt4-dev-tools #开发包
sudo apt-get install qtcreator #IDE
sudo apt-get install qt4-qtconfig #配置工具
之后输入 sudo qtcreator 即可打开IDE, 配置问题就不再赘述了。
三、安装openCV
本次安装的是openCV-3.4.1,其依赖环境妙算2-G中基本存在,只额外安装了libx264-dev和cmake-curses-gui
sudo apt-get install libx264-dev cmake-curses-gui首先从官网中(http://opencv.org/releases/)下载对应源码,选择sources文件。
#将下载好的源码移到想要解压安装的文件夹里
mv ~/Downloads/opencv-3.4.1.zip ~/installSpace/
#执行解压命令
unzip opencv-3.4.1.zip
cd进入到解压好的文件夹(opencv-3.4.1)里,创建编译文件夹build 并进入
mkdir build
cd build
接下来是配置编译,编译参数详情可自行网上查阅这两个参数是必须的“-D BUILD_TESTS=OFF -D BUILD_PERF_TESTS=OFF”否则可能会出现"recipe for target 'all' failed"错误。
#配置编译
cmake -D CMAKE_BUILD_TYPE=RELEASE -D CMAKE_INSTALL_PREFIX=/usr/local -D WITH_TBB=ON -D WITH_V4L=ON -D WITH_QT=ON -D BUILD_TESTS=OFF -D BUILD_PERF_TESTS=OFF ..
进行make编译,此处妙算的线程数有6个,所以我们使用5个线程尽可能缩短编译时间
make -j5 执行安装命令
sudo make install执行完毕后OpenCV编译过程就结束了
接下来配置OpenCV的编译环境
首先将OpenCV的库添加到路径, 从而可以让系统找到
sudo echo '/usr/local/lib ' >> /etc/ld.so.conf.d/opencv.conf执行如下命令使得刚才的配置路径生效
sudo ldconfig 配置bash
sudo gedit /etc/bash.bashrc在最末尾添加
PKG_CONFIG_PATH=$PKG_CONFIG_PATH:/usr/local/lib/pkgconfig
export PKG_CONFIG_PATH
保存,执行如下命令使得配置生效
source /etc/bash.bashrc如果颜色变白强迫症很难受,执行下面命令
source ~/.bashrc至此,opencv3.4.1就安装完了
做个小测试
cd到opencv-3.4.0/smaples/cpp/example_cmake目录下
我们可以看到这个目录里官方已经给出了一个cmake的example我们可以拿来测试下
按顺序执行
cmake .
make
./opencv_example
由于manifold2-G没有自带相机,终端会出现一个没有相机的提示,界面则显示“hello opencv”
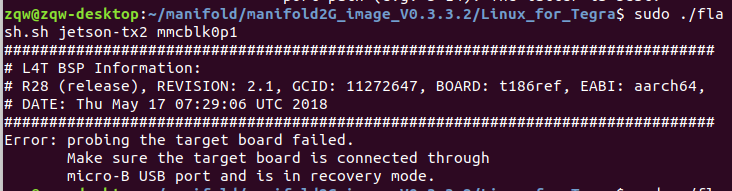
四、恢复出厂设置
这个过程查的资料很少但很好用,就不多做整理了。(恢复出厂设置亲测好评,自制镜像没试过)
manifold2-G刷机(镜像备份与恢复出厂设置)_天启的博客-CSDN博客blog.csdn.net