小程序之云开发轮播图数据和购物下单流程
小程序之云开发轮播图数据
1、加载轮播图数据
2、需求:请求访问量前三的数据 count、限制为三个、排序:降序
3、代码如下:
//index.js
const app = getApp()
// 获取数据库
const db = wx.cloud.database()
// 获取集合
const goods_col = db.collection('good')
// 引入异步操作
import { ml_showLoading, ml_hideLoading,ml_showToast,ml_hideToast } from '../../utils/asyncWX'

Page({
  data: {
    goods:[], // 列表数据
    _page:0,
    hasMore:true, // 是否有更多数据可加载
    swiper:[],
  },

  onLoad: function() {
    this.loadSwiperData()
    this.loadListData()
  },
  // 加载轮播图数据
  // 需求:前三名访问量 count 限制3个、排序:降序
  async loadSwiperData(){
    let res = await goods_col.orderBy('count','desc').limit(3).get()
    console.log("轮播图数据",res);
    this.setData({
      swiper:res.data
    })
  },

 })
注意以上是有数据的情况下实现,仅作为参考
跳转到详情页
1、在商品外面套一个 navigator导航组件 url = "/pages/detail/detail?id={{item._id}"
2、在detail.js 里面根据商品id 获取是哪个商品的详情信息
3、获取该id 的商品数据信息 goods_col.doc(id).get()
4、需求:累加访问量
// pages/detail/detail.js
const db = wx.cloud.database()
const goods_col = db.collection('good')

Page({
  data:{
    shopData:{}
  },
  onLoad(options){
    let {id} = options
    console.log(id);
    this.loadDetailData(id)
  },
  // 加载详情数据 传入id来 查询哪一条数据
  async loadDetailData(id){
    let res = await goods_col.doc(id).get()
    console.log("商品信息=",res);
    this.setData({
      shopData:res.data
    })
  }
})
点击下单情况
1、把该商品加入到购物车里面、点击事件 catchtap:不允许冒泡
2、加入购物车逻辑如下:
2.1、拿到点击要添加入购物车的商品
2.2、判断该商品是否已在购物车里面
2.3、如果不在,把该商品添加到里面。并且新加一个字段 num=1
2.4、如果在,把该商品已经添加到里面。修改该商品num值累加
// 下单 加入购物车
  async addCart(e){
    // 1、拿到该商品
    let {item} = e.currentTarget.dataset
    console.log('item',item);
    // 2、判断该商品在不在购物车里面
    // 根据_id 从购物车里面获取数据 ,看能不能获取到
    try {
      let res = await cart_col.doc(item._id).get()
      console.log('cart数据库存在此值=',res);
      // 有值 把商品的num ++
      await cart_col.doc(item._id).update({
        data:{
          num:db.command.inc(1)
        }
      })
      wx.showToast({
        title: '下单成功',
      })
    } catch (error) {
      console.log('数据库不存在此值=',error);
      // 没有值 把商品添加到购物车中
      await cart_col.add({
        data:{
          _id:item._id,
          count:item.count,
          name:item.name,
          num:1
        },
        // success:function(res){
        //   console.log(res);
        // }
      })
      wx.showToast({
        title: '下单成功',
      })
    }
  },
设置tabitem右上角的数字
// 修改tabbar 右上角的数字
  async setTabBar(){
    let total = 0
    let res =  await cart_col.get()
    res.data.forEach(v => {
      total += v.num
    })
    wx.setTabBarBadge({
      index: 1,
      // 注意这里是字符串
      text: total + '',
    })
  },
注意要设置 添加购物车时调用 此方法
进入购物车页面不显示购物车数量
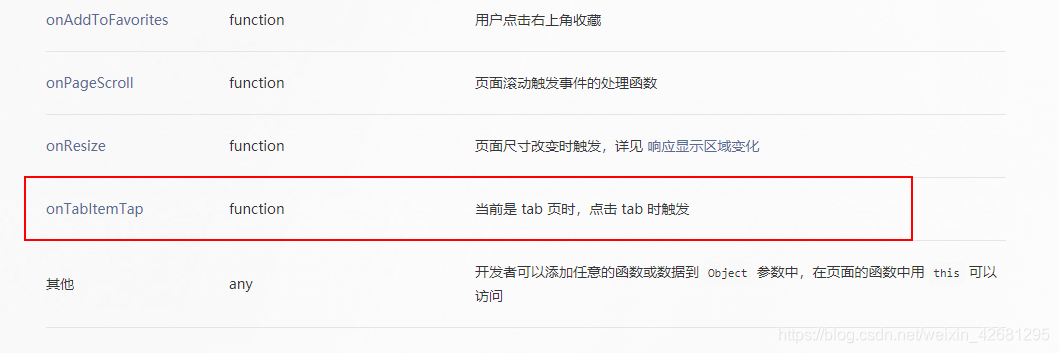
点击 当前页面对应的tab 钩子函数
 /**
   * 点击 当前页面对应的tab 钩子函数
   *
   * */
  onTabItemTap(){
    wx.setTabBarBadge({
      index: 1,
      text: '',
    })
  }
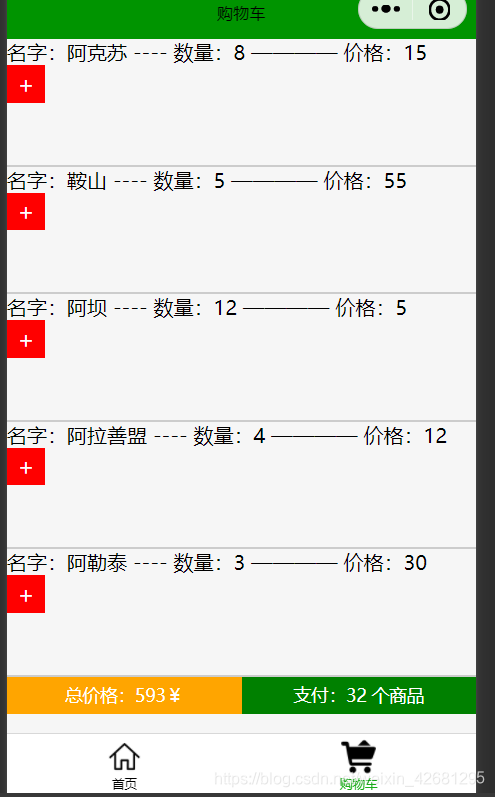
购物车模块
// miniprogram/pages/cart/cart.js
const db = wx.cloud.database()
const carts_col = db.collection('cart')
Page({

  /**
   * 页面的初始数据
   */
  data: {
    carts:[], // 购物车数据
    totalCount:0, // 总数量
    totalPrice:0, // 总价格
  },

  /**
   * 生命周期函数--监听页面加载
   */
  onLoad: function (options) {
    this.loadCartData()
  },
  async loadCartData(){
    let res = await carts_col.get()
    console.log(res);
    this.setData({
      carts:res.data
    })
    // 统计总价格和总数量
    this.setCart(res.data)

  },
  setCart(carts){
    let totalCount = 0
    let totalPrice = 0
    carts.forEach(v=>{
      totalCount += v.num
      totalPrice +=v.num*v.count
    })
    this.setData({
      totalCount:totalCount,
      totalPrice:totalPrice,
    })
  },
  // 点击加 1
  async addCount(e){
    // 1、获取id
    let id = e.currentTarget.dataset.id
    console.log(id);
    // 2、修改num
    let res = await carts_col.doc(id).update({
      data:{
        num:db.command.inc(1)
      }
    })
    // 3、+1成功后 再次重新刷新
    // this.loadCartData()
    // 3.1、+1成功后,修改当前data里面的carts数据
    let newCart = this.data.carts
    console.log(newCart);
    let goods = newCart.find(v=>{
      return v._id == id
    })
    console.log(goods);
    goods.num +=1
    this.setData({
      carts: newCart
    })
    // 4、再次统计
    this.setCart(newCart)
  },
  /**
   * 点击 当前页面对应的tab 钩子函数
   *
   * */
  onTabItemTap(){
    wx.setTabBarBadge({
      index: 1,
      text: '',
    })
  }
})
<!--miniprogram/pages/cart/cart.wxml-->
<view wx:for="{{carts}}" wx:key="_id" class="cart-item">
名字:{{item.name}} ---- 数量:{{item.num}} ———— 价格:{{item.count}}
<view class="add-btn" catchtap="addCount" data-id="{{item._id}}">+</view>
</view>

<view class="pay">
  <text class="price-btn">总价格:{{totalPrice}}¥</text>
  <text class="pay-btn">支付:{{totalCount}} 个商品</text>
</view>
/* miniprogram/pages/cart/cart.wxss */
.cart-item{
  width: 100%;
  height: 100px;
  border-bottom: 2px solid #ccc;
}
.add-btn{
  width: 30px;
  height: 30px;
  display: flex;
  justify-content: center;
  align-items: center;
  font-size: 18px;
  color: #fff;
  background: red;
}
.pay{
  display: flex;
}
.price-btn{
  width: 50%;
  height: 30px;
  background: orange;
  font-size: 14px;
  color: #fff;
  line-height: 30px;
  text-align: center;
}
.pay-btn{
  width: 50%;
  height: 30px;
  background: green;
  font-size: 14px;
  color: #fff;
  line-height: 30px;
  text-align: center;
}

