Vue项目打包到Spring Boot,并部署到Tomcat
经过几天的调试,终于将Vue+Spring Boot的前后端分离项目,整合后成功部署到服务器。本文章来记录一下这几天遇到的问题。
整合后发布到Tomcat遇到的主要问题
- 访问项目路径404
- 发布到tomcat后css、js等资源文件404问题
- 访问项目路径为空白页
一、Vue项目打包到Spring Boot
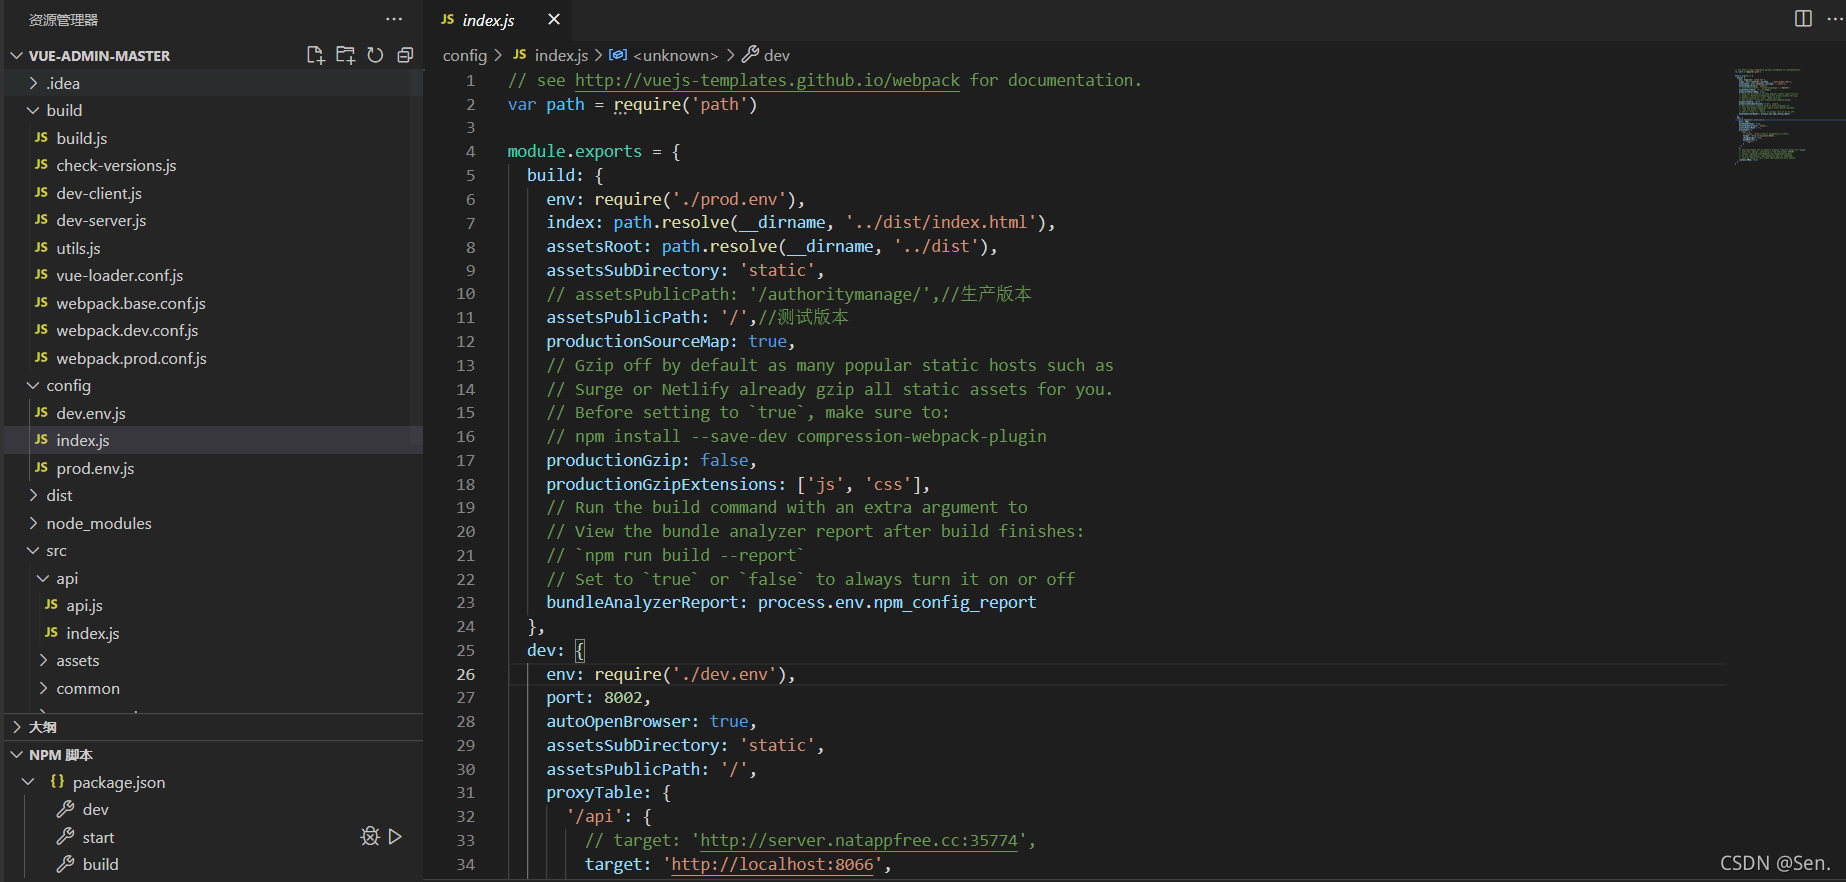
首先是conf目录下的index.js文件中build相关,这里配置build项目时文件的生成位置以及index.html中引用的静态文件路径。
代码如下:
build: {
    env: require('./prod.env'),
    index: path.resolve(__dirname, '../dist/index.html'),
    assetsRoot: path.resolve(__dirname, '../dist'),
    assetsSubDirectory: 'static',
    // assetsPublicPath: '/authoritymanage/',//生产版本
    assetsPublicPath: '/',//测试版本
    productionSourceMap: true,
    productionGzip: false,
    productionGzipExtensions: ['js', 'css'],
    bundleAnalyzerReport: process.env.npm_config_report
  },
方便理解,举个栗子
如以下配置:
index: path.resolve(__dirname, ‘…/dist/index.html’),// Paths
assetsRoot: path.resolve(__dirname, ‘…/dist’),
assetsSubDirectory: ‘static’,
assetsPublicPath: ‘./xx’,
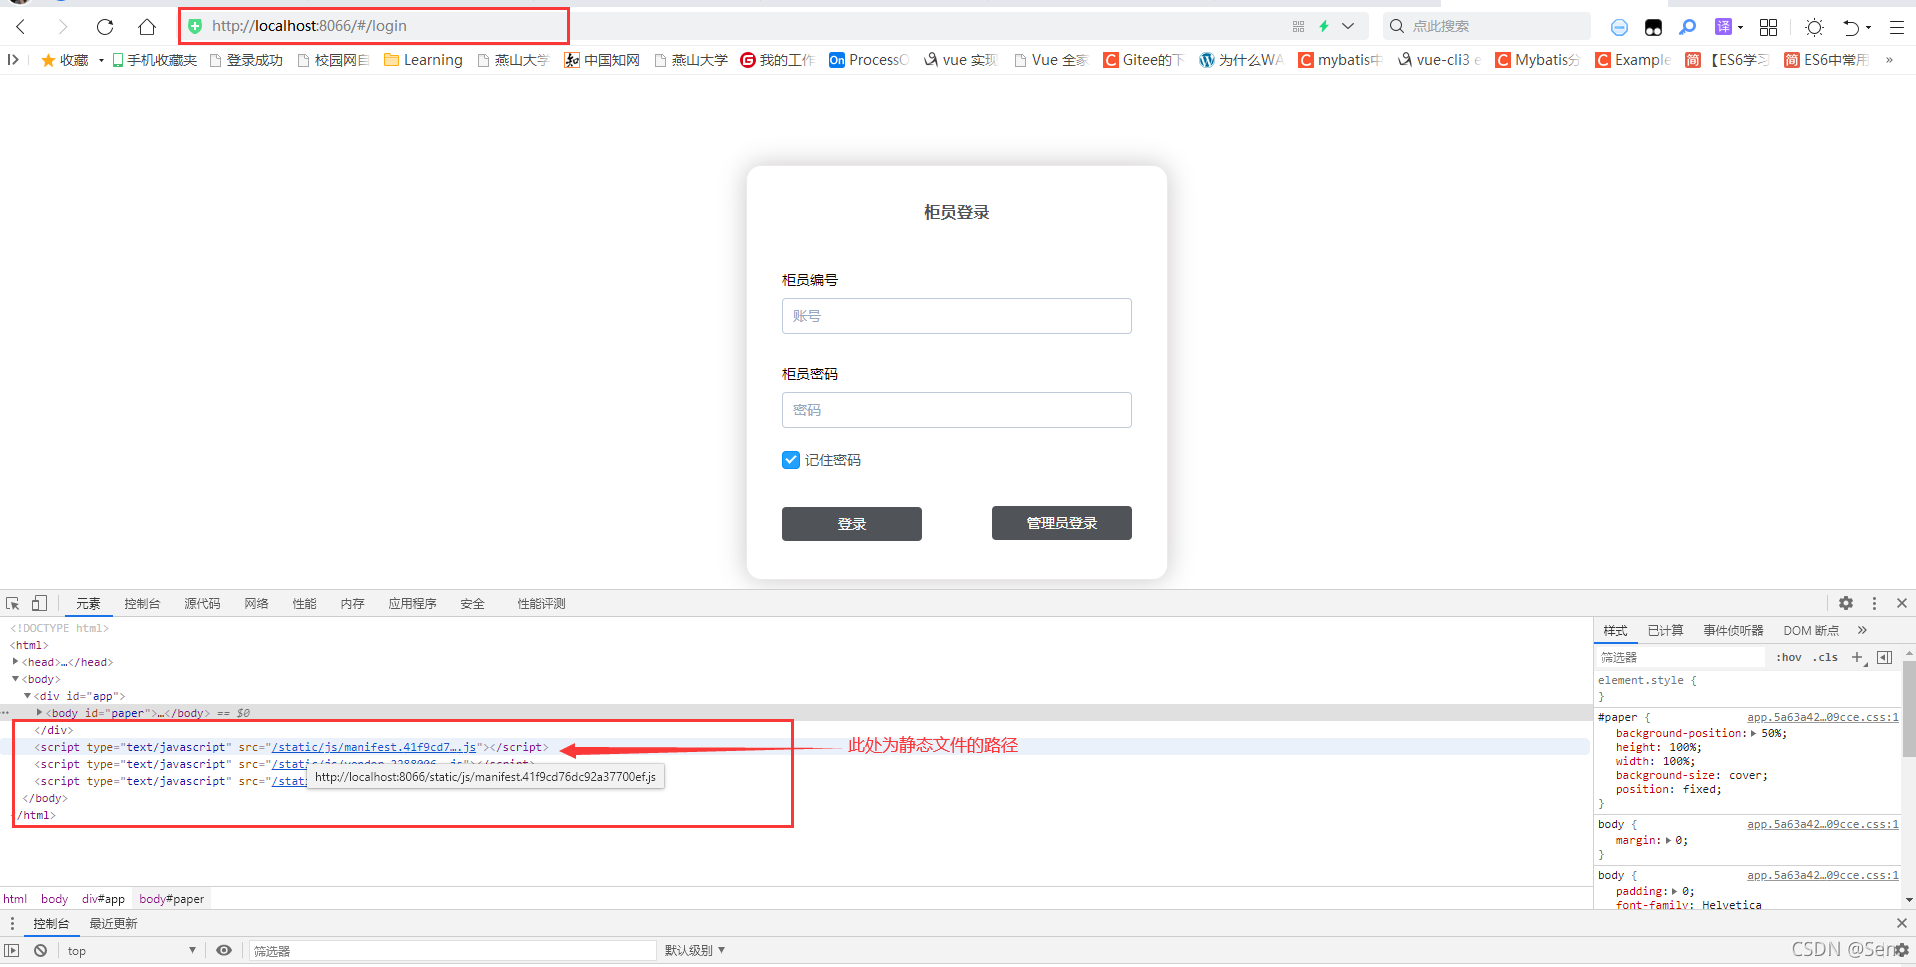
打包后为:<script type="text/javascript" src="./xx/static/js/manifest.js"></script> <script type="text/javascript" src="./xx/static/js/vendor.js"></script> <script type="text/javascript" src="./xx/static/js/app.js"></script>参数官方解释:
index: 模板
assetRoot: 打包后文件要存放的路径
assetsSubDirectory: 除了 index.html 之外的静态资源要存放的路径,
assetsPublicPath: 代表打包后,index.html里面引用资源的的相对地址作者关于参数的理解:
assetsRoot : 打包文件生成的文件位置,在当前目录的上一级 的 dist目录下输出资源文件
assetsSubDirectory: 把所有的静态资源打包到 dist下的 static文件夹下
assetsPublicPath :代表生成的index.html文件,里面引入资源时,路径前面要加上 ./xx/,即assetsPublicPath的值
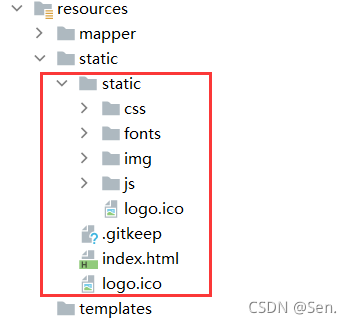
最后将dist文件夹下的全部内容复制到springboot项目的resources->static文件夹下,即可成功运行整合后的springboot项目!
如下图项目成功运行!
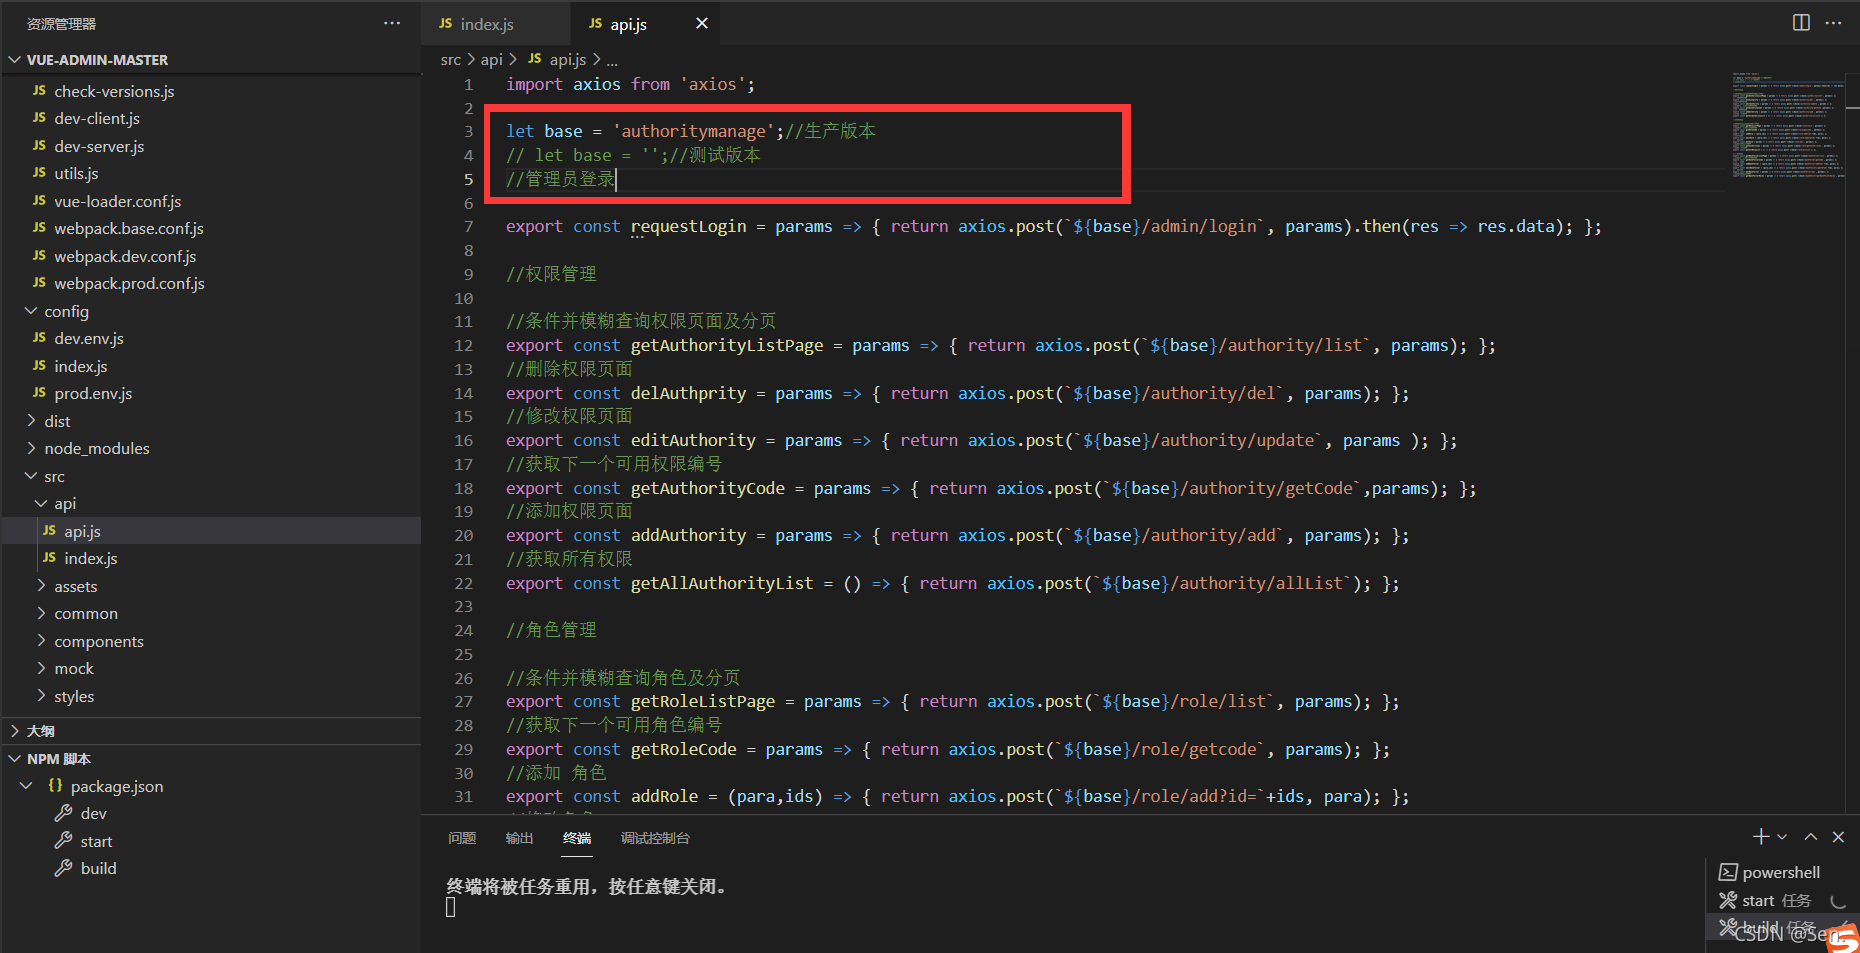
关于请求API需要根据你的需求去调整,比如需要加上你的项目名称等等
二、将整合后的项目发布到Tomcat
发布到tomcat,vue中的配置文件还要进一步修改,主要为一下几点
- index.html文件中的资源文件如css文件的访问路径
- 路由路径
- 请求路径
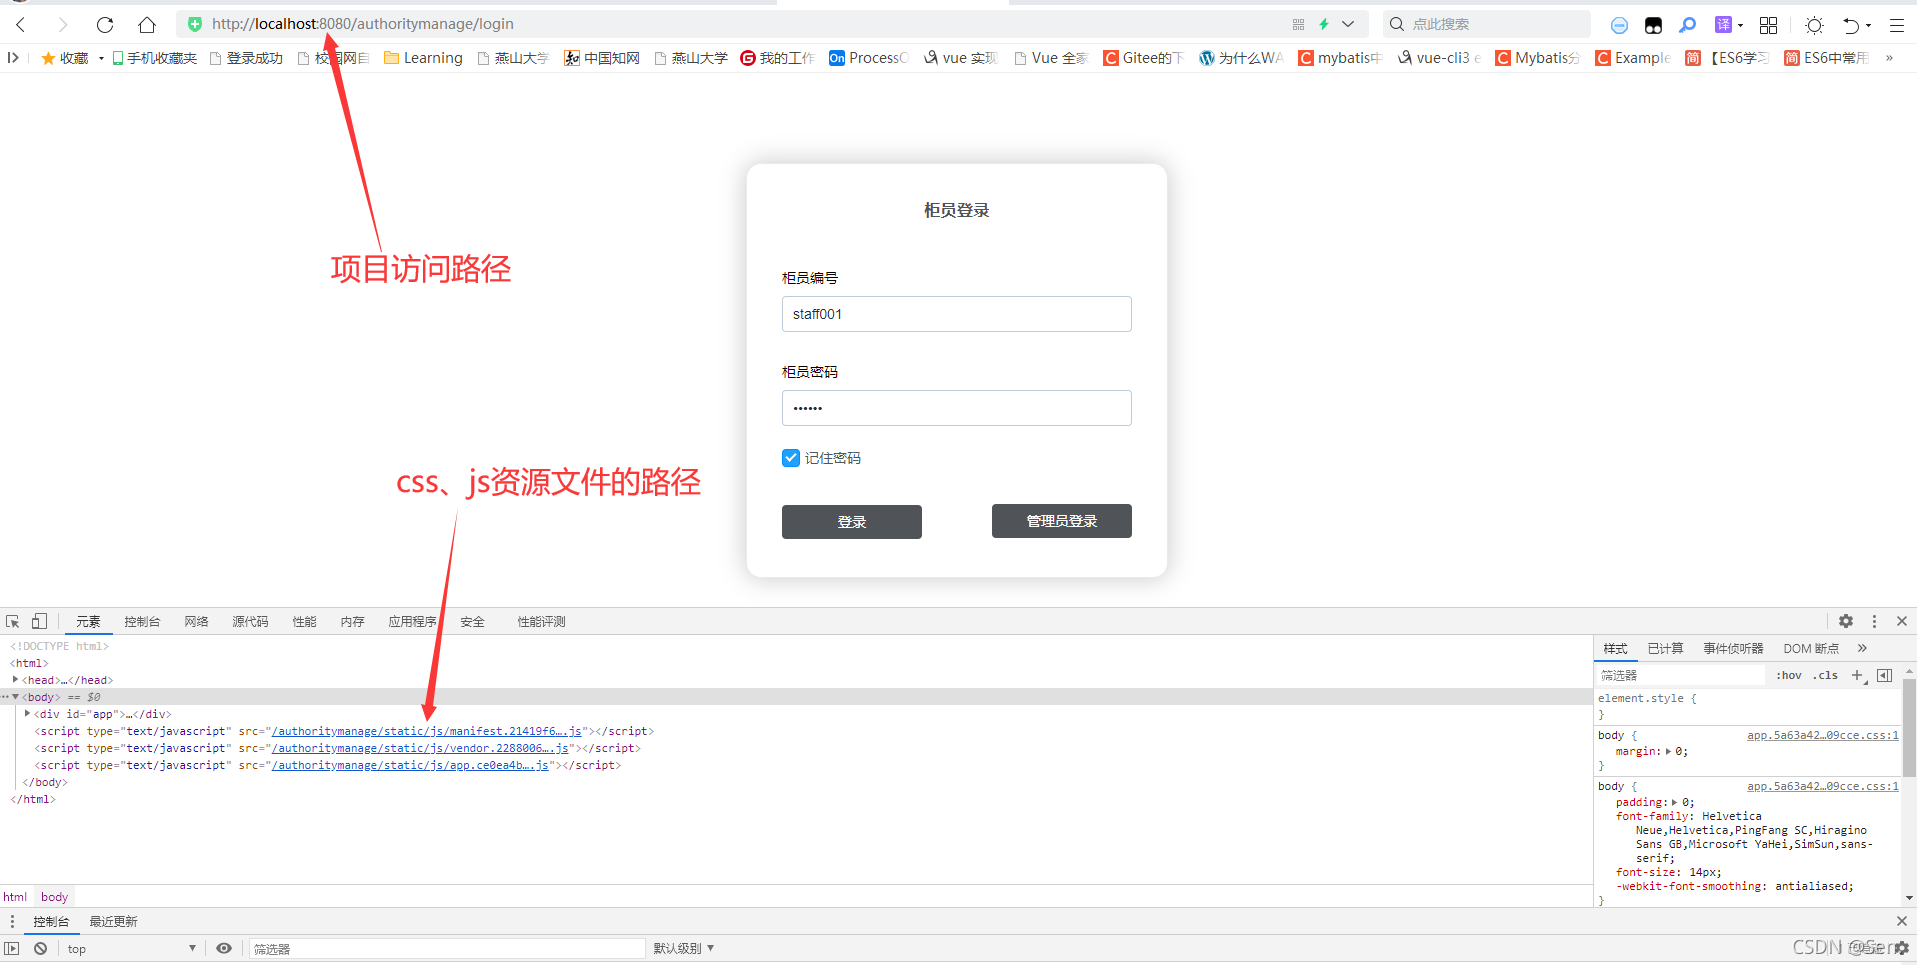
由于需要配置到tomcat,而tomcat项目的访问路径为http://localhost:8080/你的项目名称/xx,相较于之前的我们上一步的路径多了项目名称,所以需要修改静态文件如css及js、请求api、以及路由的访问路径。
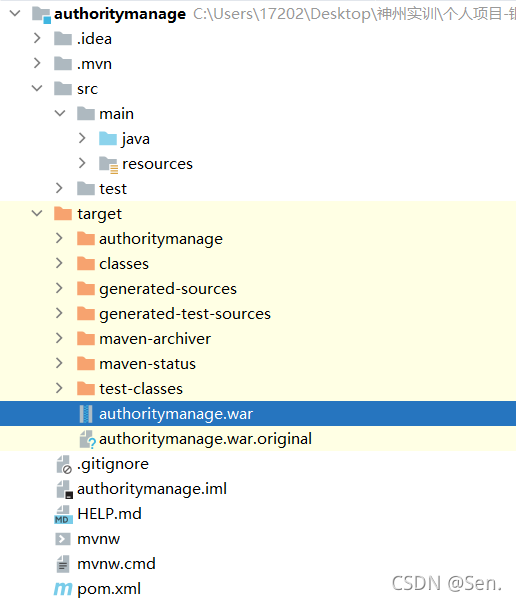
这里的项目名称就是你打包项目后的war包的名称,如我的war包为authoritymanage.war,那么我的项目访问路径就是http://localhost:8080/authoritymanage
另外,由于springboot是内嵌tomcat,需要修改一下pom文件。
1. 首先是index.html中静态资源的访问路径——解决css、js等资源文件404问题
仍然修改/config/index.js文件,在module.exports中找到build子模块,这里需要对assetsPublicPath进行修改。
assetsPublicPath: 代表打包后,index.html里面引用资源的的相对地址,代表生成的index.html文件,里面引入资源时,路径前面要加上 ./xx/,即assetsPublicPath的值,具体作用查看上边的例子
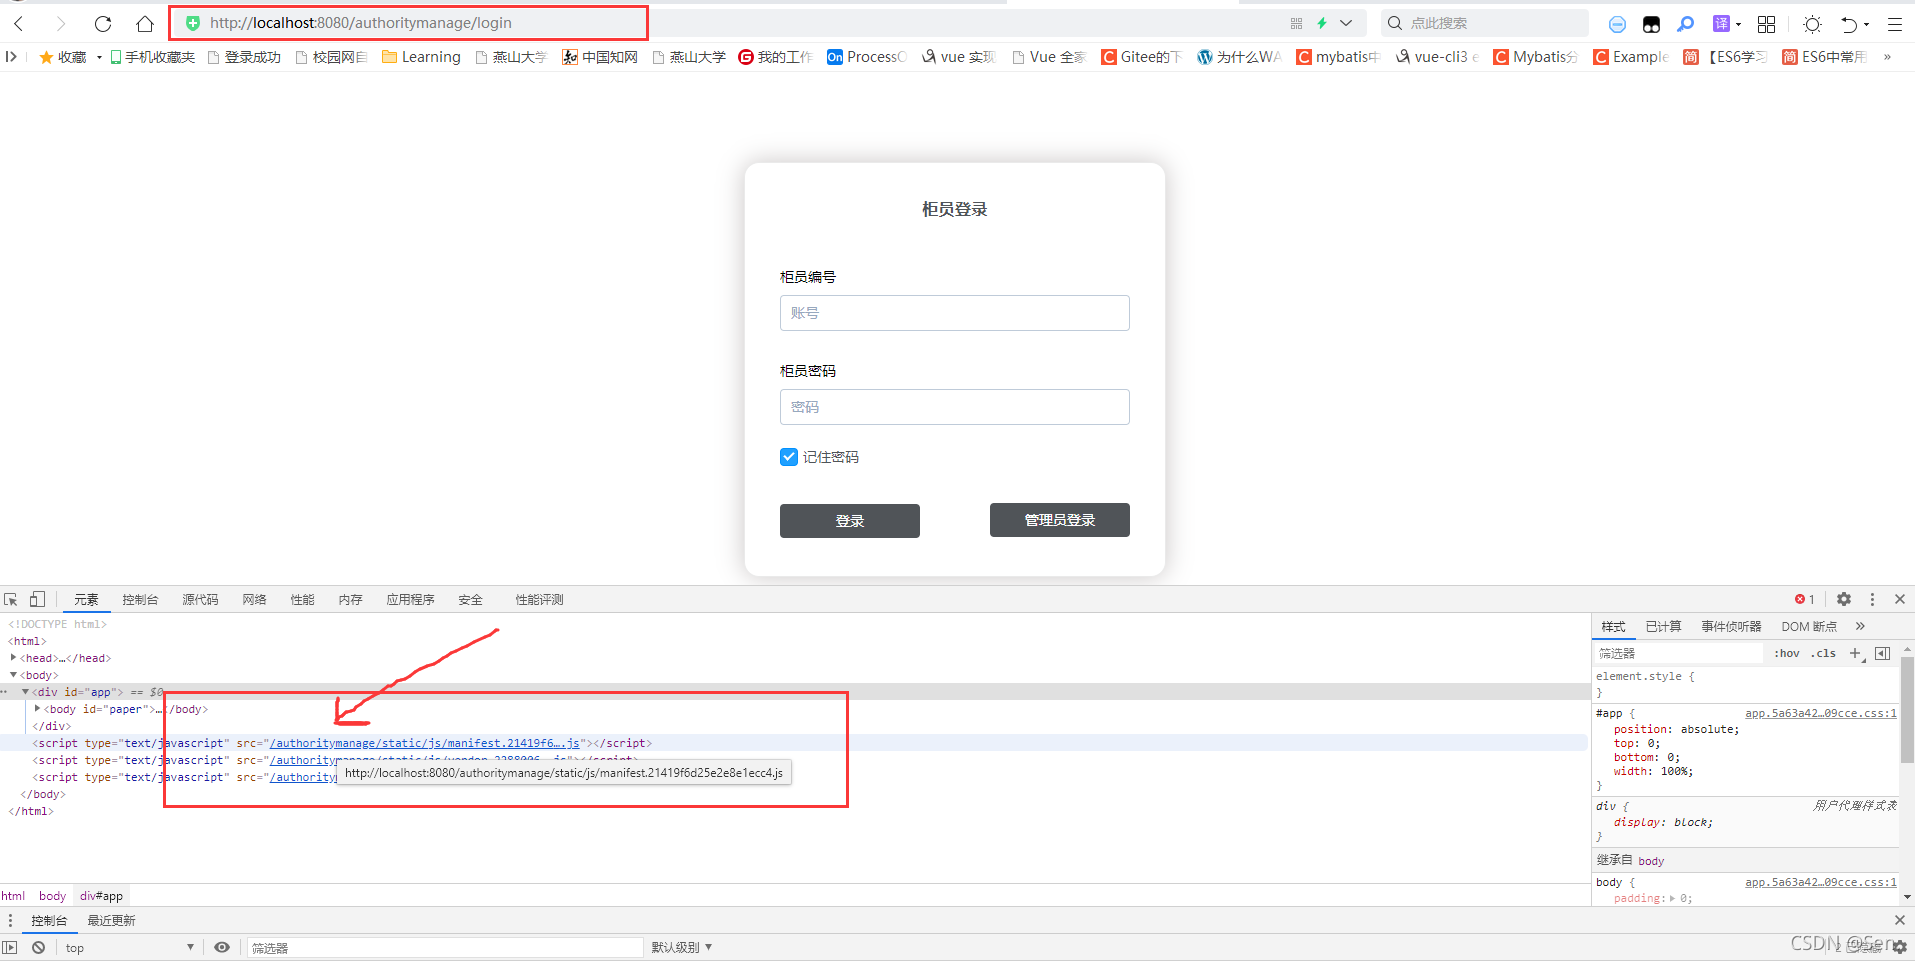
由于上面说到tomcat中的访问中添加了项目名称,所以需要将assetsPublicPath修改为"你的项目名称",如下代码,注意我的项目名称为authoritymanage
build: {
    env: require('./prod.env'),
    index: path.resolve(__dirname, '../dist/index.html'),
    assetsRoot: path.resolve(__dirname, '../dist'),
    assetsSubDirectory: 'static',
    assetsPublicPath: '/authoritymanage/',//生产版本
    // assetsPublicPath: '/',//测试版本
    productionSourceMap: true,
    productionGzip: false,
    productionGzipExtensions: ['js', 'css'],
    bundleAnalyzerReport: process.env.npm_config_report
  },
此处我遇到的问题为css、js等静态文件访问不到404问题,修改后成功解决问题。
2. 路由路径修改——解决空白页问题
在解决css、js文件等404问题后,我又遇到了空白页问题,查阅资料后,发现是路由无法解析,同样的原因,即路径加上了项目名称,所以我们的路由前面也应该加上项目名称才可正常访问路由。
添加项目名称后,即可正常访问路由,空白页问题解决。
3. 请求路径
同样tomcat中路径添加了项目名称,所以我们的请求api前面也需要加上项目名称。
这里根据个人情况修改,总之请求api前要加上你的项目名称,不添加会造成请求不到后端。
4. springboot相关修改——解决项目路径404问题
由于springboot内嵌tomcat,需要在打包时去掉。
修改pom文件,排除web启动器中的tomcat,防止和tomcat服务器起冲突,并添加servlet的api依赖
		<dependency>
            <groupId>org.springframework.boot</groupId>
            <artifactId>spring-boot-starter-web</artifactId>
            <!--忽略内嵌tomcat,打包部署到tomcat。注*本地运行的时候要把这一段忽略引入个注释掉,要不然项目启动不了-->
            <!--  排除Tomcat的干扰用于打war 包   -->
            <exclusions>
                <exclusion>
                    <groupId>org.springframework.boot</groupId>
                    <artifactId>spring-boot-starter-tomcat</artifactId>
                </exclusion>
            </exclusions>
        </dependency>
        <!--servlet的api依赖-->
        <dependency>
        <groupId>javax.servlet</groupId>
        <artifactId>javax.servlet-api</artifactId>
        <version>3.1.0</version>
        <scope>provided</scope>
        </dependency>
最后需要修改启动类,启动类直接继承:SpringBootServletInitializer,重写方法:configure
import org.mybatis.spring.annotation.MapperScan;
import org.springframework.boot.SpringApplication;
import org.springframework.boot.autoconfigure.SpringBootApplication;
import org.springframework.boot.builder.SpringApplicationBuilder;
import org.springframework.boot.web.servlet.support.SpringBootServletInitializer;
import org.springframework.transaction.annotation.EnableTransactionManagement;

@SpringBootApplication
@EnableTransactionManagement
@MapperScan("com.authoritymanage.mapper")
public class AuthoritymanageApplication extends SpringBootServletInitializer {
    @Override
    protected SpringApplicationBuilder configure(SpringApplicationBuilder builder) {
        // 注意这里要指向原先用main方法执行的Application启动类
        return builder.sources(AuthoritymanageApplication.class);
    }
    public static void main(String[] args) {
        SpringApplication.run(AuthoritymanageApplication.class, args);
    }
}
5. maven打包,并将生成的war包放置到tomcat的webapps文件夹下
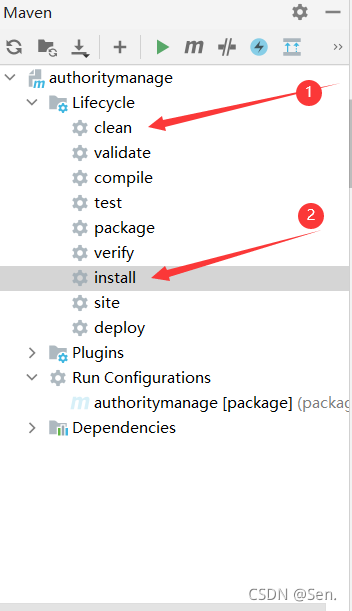
做到这一步我们即将要成功了,利用idea中maven将项目打包。
最后一步,将生成的war包,即上图的authoritymanage.war放置到tomcat的webapps文件夹下。运行tomcat服务器,项目成功运行!
欢迎大家指正错误
有问题可以在评论区留言哦!!
