前言
上一篇简单了解了一下 Elasticsearch 的发展史,特性和使用场景,为了方便接下来的数据测试,本篇内容先开始安装 Elasticsearch。
一、Linux 安装
1、下载安装包
⑴、选择需要的安装包
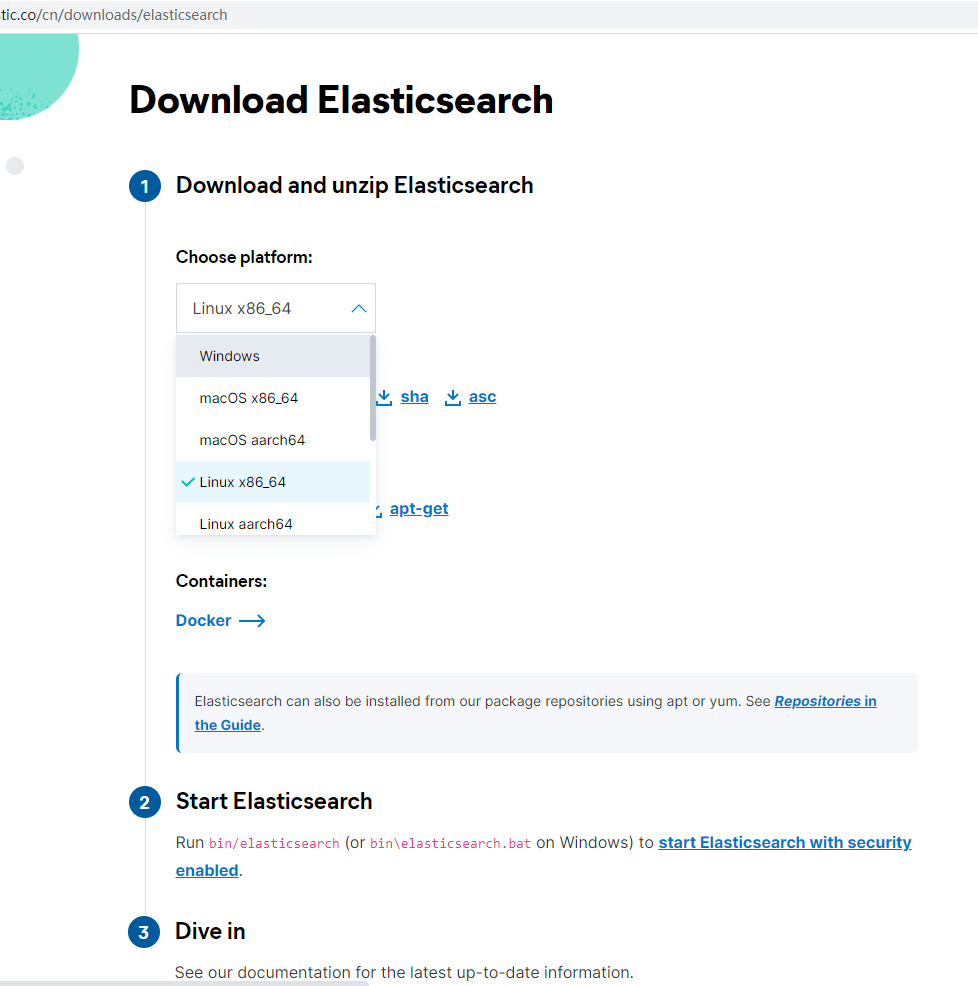
进入 官网 选择自己需要版本,我这里选择 Linux x86_64:
登录服务器查看系 Linux 内核版本:
a[root@VM-0-12-centos ~]# arch
x86_64
[root@VM-0-12-centos ~]# uname -a
Linux VM-0-12-centos 3.10.0-1160.71.1.el7.x86_64 #1 SMP Tue Jun 28 15:37:28 UTC 2022 x86_64 x86_64 x86_64 GNU/Linux
⑵、下载解压到安装目录
进入 /usr/local/ 目录,这个目录是我的安装目录,根据自己的习惯选择,下载安装包并解压:
[root@VM-0-12-centos ~]# cd /usr/local/
[root@VM-0-12-centos local]# wget https://artifacts.elastic.co/downloads/elasticsearch/elasticsearch-8.6.1-linux-x86_64.tar.gz
--2023-02-14 09:45:52--  https://artifacts.elastic.co/downloads/elasticsearch/elasticsearch-8.6.1-linux-x86_64.tar.gz
Resolving artifacts.elastic.co (artifacts.elastic.co)... 34.120.127.130, 2600:1901:0:1d7::
Connecting to artifacts.elastic.co (artifacts.elastic.co)|34.120.127.130|:443... connected.
HTTP request sent, awaiting response... 200 OK
Length: 581763080 (555M) [application/x-gzip]
Saving to: ‘elasticsearch-8.6.1-linux-x86_64.tar.gz’

100%[=====================================================================>] 581,763,080 12.2MB/s   in 46s

2023-02-14 09:46:38 (12.2 MB/s) - ‘elasticsearch-8.6.1-linux-x86_64.tar.gz’ saved [581763080/581763080]

[root@VM-0-12-centos local]# tar -zvxf elasticsearch-8.6.1-linux-x86_64.tar.gz
[root@VM-0-12-centos local]# rm -f elasticsearch-8.6.1-linux-x86_64.tar.gz
[root@VM-0-12-centos local]# ll -a
total 80
drwxr-xr-x. 20 root  root  4096 Feb 14 14:11 .
drwxr-xr-x. 13 root  root  4096 Aug  8  2018 ..
drwxr-xr-x.  2 root  root  4096 Dec 21 16:33 bin
drwxr-xr-x   9 root  root  4096 Jan 25 05:47 elasticsearch-8.6.1
drwxr-xr-x.  2 root  root  4096 Apr 11  2018 etc
drwxr-xr-x   6 root  root  4096 Dec 21 16:21 freetype
drwxr-xr-x.  2 root  root  4096 Apr 11  2018 games
drwxr-xr-x.  3 root  root  4096 Dec 21 16:23 include
drwxr-xr-x.  4 root  root  4096 Dec 21 16:23 lib
drwxr-xr-x.  2 root  root  4096 Apr 11  2018 lib64
drwxr-xr-x.  2 root  root  4096 Apr 11  2018 libexec
drwxr-xr-x   3 root  root  4096 Dec 21 16:20 man
drwxr-xr-x  10 mysql mysql 4096 Dec 21 16:22 mysql
drwxr-xr-x  11 root  root  4096 Dec 22 10:40 mysql-master-slave
drwxr-xr-x  11 root  root  4096 Dec 21 16:37 nginx
drwxr-xr-x  10 root  root  4096 Dec 21 16:33 php
drwxr-xr-x  17 root  root  4096 Dec 21 16:07 qcloud
drwxr-xr-x.  2 root  root  4096 Apr 11  2018 sbin
drwxr-xr-x.  8 root  root  4096 Dec 21 16:20 share
drwxr-xr-x.  2 root  root  4096 Apr 11  2018 src
[root@VM-0-12-centos local]#
2、查看解压后目录结构
[root@VM-0-12-centos local]# cd elasticsearch-8.6.1/
[root@VM-0-12-centos elasticsearch-8.6.1]# ll -X
total 2224
drwxr-xr-x  2 root root    4096 Jan 25 05:47 bin
drwxr-xr-x  3 root root    4096 Feb 14 14:06 config
drwxr-xr-x  8 root root    4096 Jan 25 05:47 jdk
drwxr-xr-x  5 root root    4096 Jan 25 05:47 lib
drwxr-xr-x  2 root root    4096 Jan 25 05:43 logs
drwxr-xr-x 69 root root    4096 Jan 25 05:47 modules
drwxr-xr-x  2 root root    4096 Jan 25 05:43 plugins
-rw-r--r--  1 root root    8106 Jan 25 05:34 README.asciidoc
-rw-r--r--  1 root root    3860 Jan 25 05:34 LICENSE.txt
-rw-r--r--  1 root root 2235851 Jan 25 05:43 NOTICE.txt
以下为 Elasticsearch 目录及主要配置文件介绍:
| 目录|文件 | 描述 |
|---|---|
bin/ | 二进制脚本包含启动节点的elasticsearch |
| |-- elasticsearch | elasticsearch的启动命令,Linux下加”-d”参数以服务的形式后台运行。 |
| |-- … | |
config/ | 配置文件目录(elasticsearch、log、jvm、role、user) |
| |-- elasticsearch.yml | 配置文件中可进行端口、是否允许外部访问、端口等的设置。 |
| |-- jvm.options | jvm 配置文件 |
| |-- log4j2.properties | 日志配置文件 |
| |-- … | |
data/ | 在节点上申请的每个index/shard的数据文件的位置,可容纳多个位置 |
jdk/ | jdk包(7.0版本以后自带jdk环境,如果已经配置了jdk,会优先使用外部 jdk 环境) |
lib/ | 引用的相关类库的存放目录,elasticsearch.jar本身也放于该目录 |
logs/ | 日志文件位置 |
modules/ | 功能模块的存放目录,如aggs、reindex、geoip、xpack、eval。。。 |
plugins/ | 插件文件位置。每个插件将包含在一个子目录中 |
| README.asciidoc | readme文档 |
| LICENSE.txt | 证书 |
| NOTICE.txt | 通知 |
注意事项:
- es依赖jdk环境,现在7.0以后的es压缩包中自带有jdk。
- 若已提前安装了jdk环境,则es启动时,会优先找linux中的jdk。若此时jdk的版本不一致,就会造成jdk不能正常运行。
- 所以,若Linux服务本来没有配置jdk,则会直接使用es目录下默认的jdk,反而不会报错。
3、启动 Elasticsearch
⑴、正常启动流程
- 1、创建用户
elastic,专门用于管理 Elasticsearch。[root@VM-0-12-centos elasticsearch-8.6.1]# useradd elastic [root@VM-0-12-centos elasticsearch-8.6.1]# chown -R elastic:elastic /usr/local/elasticsearch-8.6.1/ - 2、修改配置文件
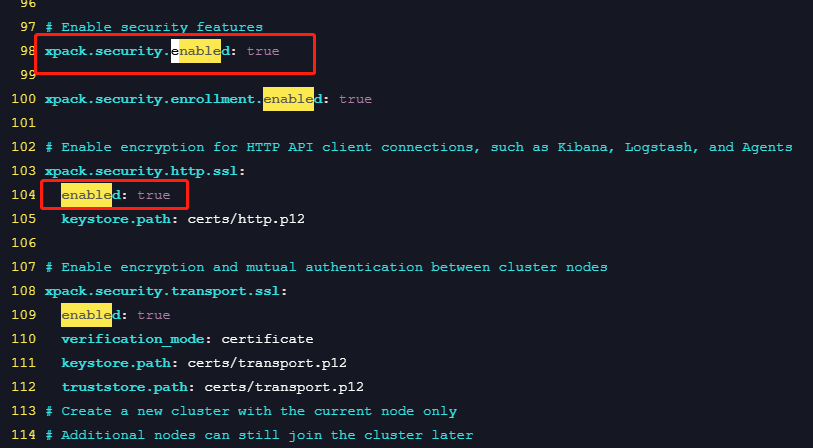
elasticsearch.yml,这里为了验证是否安装成功,关闭安全认证:xpack.security.enabled和xpack.security.http.ssl: enabled都改为false,否则无法直接通过浏览器访问 9200端口,后正式应用的时候在启用。# Enable security features xpack.security.enabled: false # Enable encryption for HTTP API client connections, such as Kibana, Logstash, and Agents xpack.security.http.ssl: enabled: false keystore.path: certs/http.p12 - 3、切换到
elastic用户,后台启动 Elasticsearch,浏览器访问 9200端口:http://你的IP:9200/;Linux 记得在安全组配置9200端口允许访问。[root@VM-0-12-centos elasticsearch-8.6.1]# su elastic [elastic@VM-0-12-centos elasticsearch-8.6.1]$ ./bin/elasticsearch -d - 4、第一次启动成功,有些信息需要保存
- 如下代码中蓝色提示行下的生成的密码和密钥:
- ES为 用户elastic 生成的密码可以通过
bin/elasticsearch-reset-password -u elastic重置,例:kT62lzIOXGu6NRWwNw0Q - CA证书的密钥信息,保存即可:e879957d366063beb27b20852f7bcf403801213732e9ccfcfefae06a6f1053fe
- 为 Kibana 生成一个注册令牌
- ES为 用户elastic 生成的密码可以通过
━━━━━━━━━━━━━━━━━━━━━━━━━━━━━━━━━━━━━━━━━━━━━━━━━━━━━━━━━━━━━━━━━━━━━━━━━━━━━━━━━━━━━━━━━━━━━━━━━━━━━━━━━━━━━━━━━━━━━━━━━━━━━━━━━━━━━━━━━━━━━━━━━━━━━━━━━━━━━━━━━━━━━━━━━━━━━━━━━━━━━━━━━━━━━━━━━━━━━━━━━━━━━━━━━━━━━━━━━━━━━━━━━━ ✅ Elasticsearch security features have been automatically configured! ✅ Authentication is enabled and cluster connections are encrypted. ℹ️ Password for the elastic user (reset with `bin/elasticsearch-reset-password -u elastic`): kT62lzIOXGu6NRWwNw0Q ℹ️ HTTP CA certificate SHA-256 fingerprint: e879957d366063beb27b20852f7bcf403801213732e9ccfcfefae06a6f1053fe ℹ️ Configure Kibana to use this cluster: • Run Kibana and click the configuration link in the terminal when Kibana starts. • Copy the following enrollment token and paste it into Kibana in your browser (valid for the next 30 minutes): eyJ2ZXIiOiI4LjYuMSIsImFkciI6WyIxNzIuMTcuMC4xMjo5MjAwIl0sImZnciI6ImU4Nzk5NTdkMzY2MDYzYmViMjdiMjA4NTJmN2JjZjQwMzgwMTIxMzczMmU5Y2NmY2ZlZmFlMDZhNmYxMDUzZmUiLCJrZXkiOiJxQ2pLV0lZQjRtVFF3ZXU1a2RiWDowZFdqY1BwYVJfT1U5VUxKSGFpNmFRIn0= ℹ️ Configure other nodes to join this cluster: • On this node: ⁃ Create an enrollment token with `bin/elasticsearch-create-enrollment-token -s node`. ⁃ Uncomment the transport.host setting at the end of config/elasticsearch.yml. ⁃ Restart Elasticsearch. • On other nodes: ⁃ Start Elasticsearch with `bin/elasticsearch --enrollment-token <token>`, using the enrollment token that you generated. ━━━━━━━━━━━━━━━━━━━━━━━━━━━━━━━━━━━━━━━━━━━━━━━━━━━━━━━━━━━━━━━━━━━━━━━━━━━━━━━━━━━━━━━━━━━━━━━━━━━━━━━━━━━━━━━━━━━━━━━━━━━━━━━━━━━━━━━━━━━━━━━━━━━━━━━━━━━━━━━━━━━━━━━━━━━━━━━━━━━━━━━━━━━━━━━━━━━━━━━━━━━━━━━━━━━━━━━━━━━━━━━━━━ - 如下代码中蓝色提示行下的生成的密码和密钥:
⑵、启动过程遇到的问题
①、启动报错
运行 bin/ 目录下的 elasticsearch 脚本,启动 elasticsearch:
[root@VM-0-12-centos elasticsearch-8.6.1]# ./bin/elasticsearch
[2023-02-14T17:44:22,531][ERROR][o.e.b.Elasticsearch ] [VM-0-12-centos] fatal exception while booting Elasticsearchjava.lang.RuntimeException: can not run elasticsearch as root
at org.elasticsearch.server@8.6.1/org.elasticsearch.bootstrap.Elasticsearch.initializeNatives(Elasticsearch.java:260)
at org.elasticsearch.server@8.6.1/org.elasticsearch.bootstrap.Elasticsearch.initPhase2(Elasticsearch.java:166)
at org.elasticsearch.server@8.6.1/org.elasticsearch.bootstrap.Elasticsearch.main(Elasticsearch.java:66)
See logs for more details.
ERROR: Elasticsearch did not exit normally - check the logs at /usr/local/elasticsearch-8.6.1/logs/elasticsearch.log
ERROR: Elasticsearch exited unexpectedly
[root@VM-0-12-centos elasticsearch-8.6.1]#
报错了,提示 can not run elasticsearch as root,不能使用root用户启动会报错。
②、创建运行 Elasticsearch 的用户,启动成功,但无法访问
[root@VM-0-12-centos elasticsearch-8.6.1]# useradd elastic
[root@VM-0-12-centos elasticsearch-8.6.1]# chown -R elastic:elastic /usr/local/elasticsearch-8.6.1/
[root@VM-0-12-centos elasticsearch-8.6.1]# su elastic
[elastic@VM-0-12-centos elasticsearch-8.6.1]$ ./bin/elasticsearch
启动成功,这时候我们试着访问你的 9200端口 :http://你的IP:9200/ ,失败。
并且启动台那边也报错了 http client did not trust this server's certificate,如下:
[2023-02-14T18:04:06,931][WARN ][o.e.x.s.t.n.SecurityNetty4HttpServerTransport] [VM-0-12-centos] received plaintext http traffic on an https channel, closing connection Netty4HttpChannel{localAddress=/172.17.0.12:9200, remoteAddress=/218.81.82.139:2348}
[2023-02-14T18:06:25,213][WARN ][o.e.x.s.t.n.SecurityNetty4HttpServerTransport] [VM-0-12-centos] http client did not trust this server's certificate, closing connection Netty4HttpChannel{localAddress=/172.17.0.12:9200, remoteAddress=/218.81.82.139:2349}
[2023-02-14T18:06:25,214][WARN ][o.e.x.s.t.n.SecurityNetty4HttpServerTransport] [VM-0-12-centos] http client did not trust this server's certificate, closing connection Netty4HttpChannel{localAddress=/172.17.0.12:9200, remoteAddress=/218.81.82.139:2350}
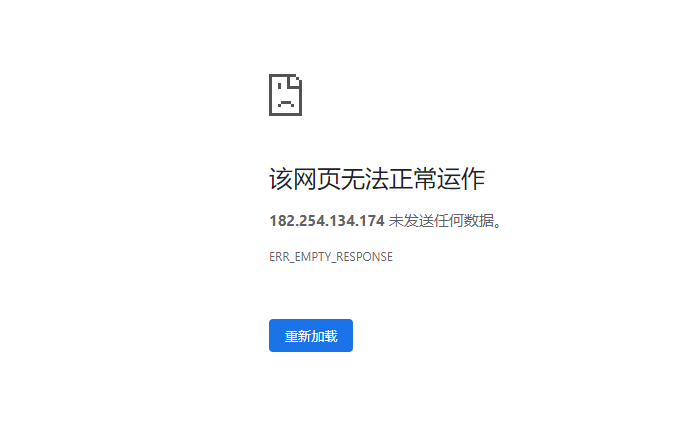
原因是因为 Elasticsearch 默认开启了安全认证,虽然启动台启动成功,但访问 9200 端口失败。
解决办法:找到config/目录下面的elasticsearch.yml配置文件,把安全认证开关从原先的true都改成false,实现免密登录访问即可,修改这两处都为false后,重新启动:
③、停止Elasticsearch,修改配置文件重新启动
新开一个SSH连接,停止Elasticsearch:
[root@VM-0-12-centos ~]# ps -ef | grep elastic
root 26132 24103 0 18:23 pts/4 00:00:00 su elastic
elastic 26133 26132 0 18:23 pts/4 00:00:00 bash
elastic 26178 26133 2 18:23 pts/4 00:00:02 /usr/local/elasticsearch-8.6.1/jdk/bin/java -Xms4m -Xmx64m -XX:+UseSerialGC -Dcli.name=server -Dcli.script=./bin/elasticsearch -Dcli.libs=lib/tools/server-cli -Des.path.home=/usr/local/elasticsearch-8.6.1 -Des.path.conf=/usr/local/elasticsearch-8.6.1/config -Des.distribution.type=tar -cp /usr/local/elasticsearch-8.6.1/lib/ *:/usr/local/elasticsearch-8.6.1/lib/cli-launcher/ * org.elasticsearch.launcher.CliToolLauncher
elastic 26246 26178 31 18:23 pts/4 00:00:31 /usr/local/elasticsearch-8.6.1/jdk/bin/java -Des.networkaddress.cache.ttl=60 -Des.networkaddress.cache.negative.ttl=10 -Djava.security.manager=allow -XX:+AlwaysPreTouch -Xss1m -Djava.awt.headless=true -Dfile.encoding=UTF-8 -Djna.nosys=true -XX:-OmitStackTraceInFastThrow -Dio.netty.noUnsafe=true -Dio.netty.noKeySetOptimization=true -Dio.netty.recycler.maxCapacityPerThread=0 -Dlog4j.shutdownHookEnabled=false -Dlog4j2.disable.jmx=true -Dlog4j2.formatMsgNoLookups=true -Djava.locale.providers=SPI,COMPAT --add-opens=java.base/java.io=ALL-UNNAMED -XX:+UseG1GC -Djava.io.tmpdir=/tmp/elasticsearch-2471405775610397709 -XX:+HeapDumpOnOutOfMemoryError -XX:+ExitOnOutOfMemoryError -XX:HeapDumpPath=data -XX:ErrorFile=logs/hs_err_pid%p.log -Xlog:gc*,gc+age=trace,safepoint:file=logs/gc.log:utctime,pid,tags:filecount=32,filesize=64m -Xms999m -Xmx999m -XX:MaxDirectMemorySize=524288000 -XX:G1HeapRegionSize=4m -XX:InitiatingHeapOccupancyPercent=30 -XX:G1ReservePercent=15 -Des.distribution.type=tar --module-path /usr/local/elasticsearch-8.6.1/lib --add-modules=jdk.net -m org.elasticsearch.server/org.elasticsearch.bootstrap.Elasticsearch
elastic 26275 26246 0 18:23 pts/4 00:00:00 /usr/local/elasticsearch-8.6.1/modules/x-pack-ml/platform/linux-x86_64/bin/controller
root 26681 26605 0 18:24 pts/5 00:00:00 grep --color=auto elastic
[root@VM-0-12-centos ~]# kill -9 26133
[root@VM-0-12-centos ~]# kill -9 26178
修改配置文件 elasticsearch.yml,把这两处改为 false:
# Enable security features
xpack.security.enabled: false
xpack.security.enrollment.enabled: true
# Enable encryption for HTTP API client connections, such as Kibana, Logstash, and Agents
xpack.security.http.ssl:
enabled: false
keystore.path: certs/http.p12
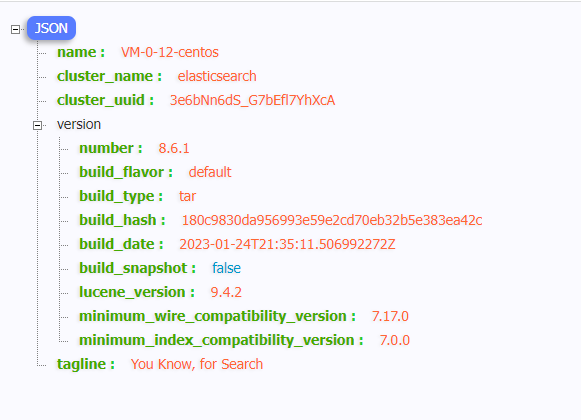
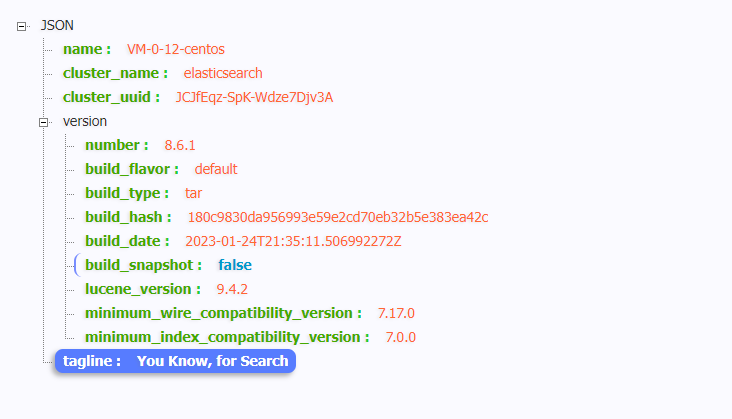
重新启动 Elasticsearch,访问 9200 端口成功。
或者curl 访问:
[root@VM-0-12-centos ~]# curl localhost:9200/
{
"name" : "VM-0-12-centos",
"cluster_name" : "elasticsearch",
"cluster_uuid" : "3e6bNn6dS_G7bEfl7YhXcA",
"version" : {
"number" : "8.6.1",
"build_flavor" : "default",
"build_type" : "tar",
"build_hash" : "180c9830da956993e59e2cd70eb32b5e383ea42c",
"build_date" : "2023-01-24T21:35:11.506992272Z",
"build_snapshot" : false,
"lucene_version" : "9.4.2",
"minimum_wire_compatibility_version" : "7.17.0",
"minimum_index_compatibility_version" : "7.0.0"
},
"tagline" : "You Know, for Search"
}
[root@VM-0-12-centos ~]#
④、JDK 问题
这里安装了一下 JDK,但是 Elasticsearch8.6 仍会自动选择自己内置的JDK。如果其他版本优先选择系统环境变量中的JDK可以参考这篇博客 Elasticsearch JDK选择。
[elastic@VM-0-12-centos elasticsearch-8.6.1]$ ps -ef | grep elastic
root 20695 17356 0 13:40 pts/3 00:00:00 su elastic
elastic 20697 20695 0 13:40 pts/3 00:00:00 bash
elastic 21252 1 93 13:41 pts/3 00:00:30 /usr/local/elasticsearch-8.6.1/jdk/bin/java -Des.networkaddress.cache.ttl=60 -Des.networkaddress.cache.negative.ttl=10 -Djava.security.manager=allow -XX:+AlwaysPreTouch -Xss1m -Djava.awt.headless=true -Dfile.encoding=UTF-8 -Djna.nosys=true -XX:-OmitStackTraceInFastThrow -Dio.netty.noUnsafe=true -Dio.netty.noKeySetOptimization=true -Dio.netty.recycler.maxCapacityPerThread=0 -Dlog4j.shutdownHookEnabled=false -Dlog4j2.disable.jmx=true -Dlog4j2.formatMsgNoLookups=true -Djava.locale.providers=SPI,COMPAT --add-opens=java.base/java.io=ALL-UNNAMED -XX:+UseG1GC -Djava.io.tmpdir=/tmp/elasticsearch-16881426132015000451 -XX:+HeapDumpOnOutOfMemoryError -XX:+ExitOnOutOfMemoryError -XX:HeapDumpPath=data -XX:ErrorFile=logs/hs_err_pid%p.log -Xlog:gc*,gc+age=trace,safepoint:file=logs/gc.log:utctime,pid,tags:filecount=32,filesize=64m -Xms999m -Xmx999m -XX:MaxDirectMemorySize=524288000 -XX:G1HeapRegionSize=4m -XX:InitiatingHeapOccupancyPercent=30 -XX:G1ReservePercent=15 -Des.distribution.type=tar --module-path /usr/local/elasticsearch-8.6.1/lib --add-modules=jdk.net -m org.elasticsearch.server/org.elasticsearch.bootstrap.Elasticsearch
elastic 21280 21252 0 13:41 pts/3 00:00:00 /usr/local/elasticsearch-8.6.1/modules/x-pack-ml/platform/linux-x86_64/bin/controller
elastic 21434 20697 0 13:42 pts/3 00:00:00 ps -ef
elastic 21435 20697 0 13:42 pts/3 00:00:00 grep --color=auto elastic
[elastic@VM-0-12-centos elasticsearch-8.6.1]$ java -version
java version "17.0.6" 2023-01-17 LTS
Java(TM) SE Runtime Environment (build 17.0.6+9-LTS-190)
Java HotSpot(TM) 64-Bit Server VM (build 17.0.6+9-LTS-190, mixed mode, sharing)
[elastic@VM-0-12-centos elasticsearch-8.6.1]$
二、Windows 安装
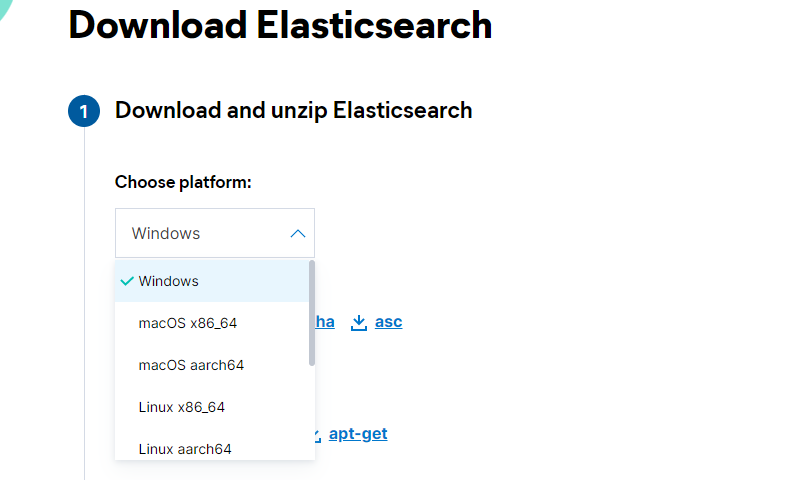
1、下载安装包
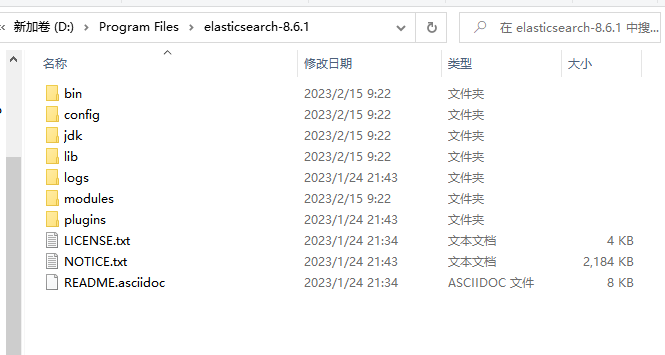
下载后解压:
2、启动 Elasticsearch
⑴、正常启动流程
由于 Elasticsearch 默认开启安全认证所以无法直接通过端口访问成功,先修改 config 目录下的配置文件elasticsearch.yml,把这两处改为 false。:
进入 bin 目录下,双击 elasticsearch.bat 文件启动 ES,访问 http://localhost:9200/:
⑵、启动过程遇到的问题
①、同Linux 默认开启安全认证,启动后无法直接访问
和Linux 一样启动后无法访问,进入logs/ 查看 elasticsearch.log 日志文件信息看到提示 received plaintext http traffic on an https channel,所以找到原因了:同上,默认开启了安全认证,不允许直接访问。
解决办法:修改配置文件 elasticsearch.yml,把这两处改为 false。
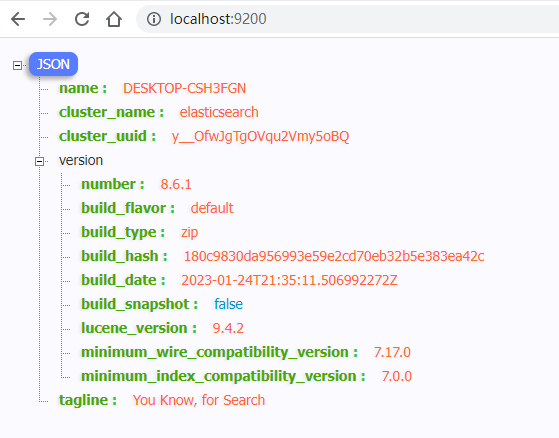
再次启动,访问9200端口成功:
三、配置文件
1、基础配置
- Cluster
cluster.name:集群名。
- Node
node.name:节点名,同一集群下节点名唯一。node.attr.[rack]:向节点添加自定义属性。
- Paths (这里的两个路径生产环境必须要修改)
path.data:存储数据的目录路径(用逗号分隔多个位置)。path.logs:日志文件的路径。
- Memory
bootstrap.memory_lock:启动时锁定内存。
- Network
network.host:默认情况下,Elasticsearch只能在本地主机上访问。在此处设置其他地址以在网络上公开此节点,设置内网地址。http.port:默认情况下,Elasticsearch从9200开始侦听第一个空闲端口上的HTTP流量。在此处设置特定的HTTP端口。
- Discovery
discovery.seed_hosts:传递初始主机列表以在启动此节点时执行发现:默认主机列表为[“127.0.0.1”,“[::1]”]。cluster.initial_master_nodes:使用主合格节点的初始集合引导群集:[“node-1”, “node-2”]。
- Readiness
readiness.port:在本地主机上启用未经验证的TCP就绪端点。
- Various
action.destructive_requires_name:允许通配符删除索引,true或false。
- Security
xpack.security.enabled:启用安全功能,默认true。xpack.security.enrollment.enabled:默认true。xpack.security.http.ssl:为HTTP API客户端连接(如Kibana、Logstash和代理)启用加密。enabled: truekeystore.path: certs/http.p12
xpack.security.transport.ssl:启用群集节点之间的加密和相互身份验证。enabled: trueverification_mode: certificatekeystore.path: certs/transport.p12truststore.path: certs/transport.p12
cluster.initial_master_nodes: 仅使用当前节点创建新群集,其他节点稍后仍可以加入群集:[“DESKTOP-CSH3FGN”]。http.host:允许从任何位置进行HTTP API连接,连接已加密,需要用户身份验证,默认:http.host: 0.0.0.0。
以下是 elasticsearch.yml 文件的内容:
# ======================== Elasticsearch Configuration =========================
#
# 注意:Elasticsearch为大多数设置提供了合理的默认值。
# 在您开始调整和调整配置之前,请确保您了解您试图实现的目标及其后果。
#
#
# 配置节点的主要方式是通过此文件。此模板列表您可能希望为生产集群配置的最重要的设置。
#
# 有关配置选项的更多信息,请参阅文档:
# https://www.elastic.co/guide/en/elasticsearch/reference/index.html
#
# ---------------------------------- Cluster -----------------------------------
#
# 设置集群名:
#
#cluster.name: my-application
#
# ------------------------------------ Node ------------------------------------
#
# 设置节点名:
#
#node.name: node-1
#
# 向节点添加自定义属性:
#
#node.attr.rack: r1
#
# ----------------------------------- Paths ------------------------------------
#
这里的两个路径生产环境必须要修改
#
# 存储数据的目录路径(用逗号分隔多个位置):
#
#path.data: /path/to/data
#
# 日志文件的路径:
#
#path.logs: /path/to/logs
#
# ----------------------------------- Memory -----------------------------------
#
# 启动时锁定内存:
#
#bootstrap.memory_lock: true
#
# 确保堆大小设置为系统上可用内存的一半左右,并且允许进程的所有者使用此限制。
#
# Elasticsearch在系统交换内存时表现不佳。
#
# ---------------------------------- Network -----------------------------------
#
# 默认情况下,Elasticsearch只能在本地主机上访问。在此处设置其他地址以在网络上公开此节点:
#
#network.host: 192.168.0.1
#
# 默认情况下,Elasticsearch从9200开始侦听第一个空闲端口上的HTTP流量。在此处设置特定的HTTP端口:
#
#http.port: 9200
#
# 有关更多信息,请参阅网络模块文档。
#
# --------------------------------- Discovery ----------------------------------
#
# 传递初始主机列表以在启动此节点时执行发现:默认主机列表为[“127.0.0.1”,“[::1]”]
#
#discovery.seed_hosts: ["host1", "host2"]
#
# 使用主合格节点的初始集合引导群集:
#
#cluster.initial_master_nodes: ["node-1", "node-2"]
#
# 有关更多信息,请参阅发现和集群形成模块文档。
#
# --------------------------------- Readiness ----------------------------------
#
# 在本地主机上启用未经验证的TCP就绪端点
#
#readiness.port: 9399
#
# ---------------------------------- Various -----------------------------------
#
# 允许通配符删除索引:
#
#action.destructive_requires_name: false
#----------------------- BEGIN SECURITY AUTO CONFIGURATION -----------------------
#
# 已自动生成以下设置、TLS证书和密钥,以在15-02-2023 01:25:15配置Elasticsearch安全功能
#
# --------------------------------------------------------------------------------
# 启用安全功能
xpack.security.enabled: true
xpack.security.enrollment.enabled: true
# 为HTTP API客户端连接(如Kibana、Logstash和代理)启用加密
xpack.security.http.ssl:
enabled: true
keystore.path: certs/http.p12
# 启用群集节点之间的加密和相互身份验证
xpack.security.transport.ssl:
enabled: true
verification_mode: certificate
keystore.path: certs/transport.p12
truststore.path: certs/transport.p12
# 仅使用当前节点创建新群集
# 其他节点稍后仍可以加入群集
cluster.initial_master_nodes: ["DESKTOP-CSH3FGN"]
# 允许从任何位置进行HTTP API连接
# 连接已加密,需要用户身份验证
http.host: 0.0.0.0
# 允许其他节点从任何位置加入群集
# 连接经过加密和相互认证
#transport.host: 0.0.0.0
#----------------------- END SECURITY AUTO CONFIGURATION -------------------------
2、认证访问
从上面安装过程我们知道 Elasticsearch 是默认开启 Security安全认证,所以无法直接通过ip加端口号访问ES,浏览器提示 该网页无法正常运作,那么既然是认证只要通过认证就可以访问成功。
在第一次启动 Elasticsearch 成功的时候会显示以下这些信息,保存下来,接下来会用到。
━━━━━━━━━━━━━━━━━━━━━━━━━━━━━━━━━━━━━━━━━━━━━━━━━━━━━━━━━━━━━━━━━━━━━━━━━━━━━━━━━━━━━━━━━━━━━━━━━━━━━━━━━━━━━━━━━━━━━━━━━━━━━━━━━━━━━━━━━━━━━━━━━━━━━━━━━━━━━━━━━━━━━━━━━━━━━━━━━━━━━━━━━━━━━━━━━━━━━━━━━━━━━━━━━━━━━━━━━━━━━━━━━━
✅ Elasticsearch security features have been automatically configured!
✅ Authentication is enabled and cluster connections are encrypted.

ℹ️  Password for the elastic user (reset with `bin/elasticsearch-reset-password -u elastic`):
  kT62lzIOXGu6NRWwNw0Q

ℹ️  HTTP CA certificate SHA-256 fingerprint:
  e879957d366063beb27b20852f7bcf403801213732e9ccfcfefae06a6f1053fe

ℹ️  Configure Kibana to use this cluster:
• Run Kibana and click the configuration link in the terminal when Kibana starts.
• Copy the following enrollment token and paste it into Kibana in your browser (valid for the next 30 minutes):
  eyJ2ZXIiOiI4LjYuMSIsImFkciI6WyIxNzIuMTcuMC4xMjo5MjAwIl0sImZnciI6ImU4Nzk5NTdkMzY2MDYzYmViMjdiMjA4NTJmN2JjZjQwMzgwMTIxMzczMmU5Y2NmY2ZlZmFlMDZhNmYxMDUzZmUiLCJrZXkiOiJxQ2pLV0lZQjRtVFF3ZXU1a2RiWDowZFdqY1BwYVJfT1U5VUxKSGFpNmFRIn0=

ℹ️  Configure other nodes to join this cluster:
• On this node:
  ⁃ Create an enrollment token with `bin/elasticsearch-create-enrollment-token -s node`.
  ⁃ Uncomment the transport.host setting at the end of config/elasticsearch.yml.
  ⁃ Restart Elasticsearch.
• On other nodes:
  ⁃ Start Elasticsearch with `bin/elasticsearch --enrollment-token <token>`, using the enrollment token that you generated.
━━━━━━━━━━━━━━━━━━━━━━━━━━━━━━━━━━━━━━━━━━━━━━━━━━━━━━━━━━━━━━━━━━━━━━━━━━━━━━━━━━━━━━━━━━━━━━━━━━━━━━━━━━━━━━━━━━━━━━━━━━━━━━━━━━━━━━━━━━━━━━━━━━━━━━━━━━━━━━━━━━━━━━━━━━━━━━━━━━━━━━━━━━━━━━━━━━━━━━━━━━━━━━━━━━━━━━━━━━━━━━━━━━
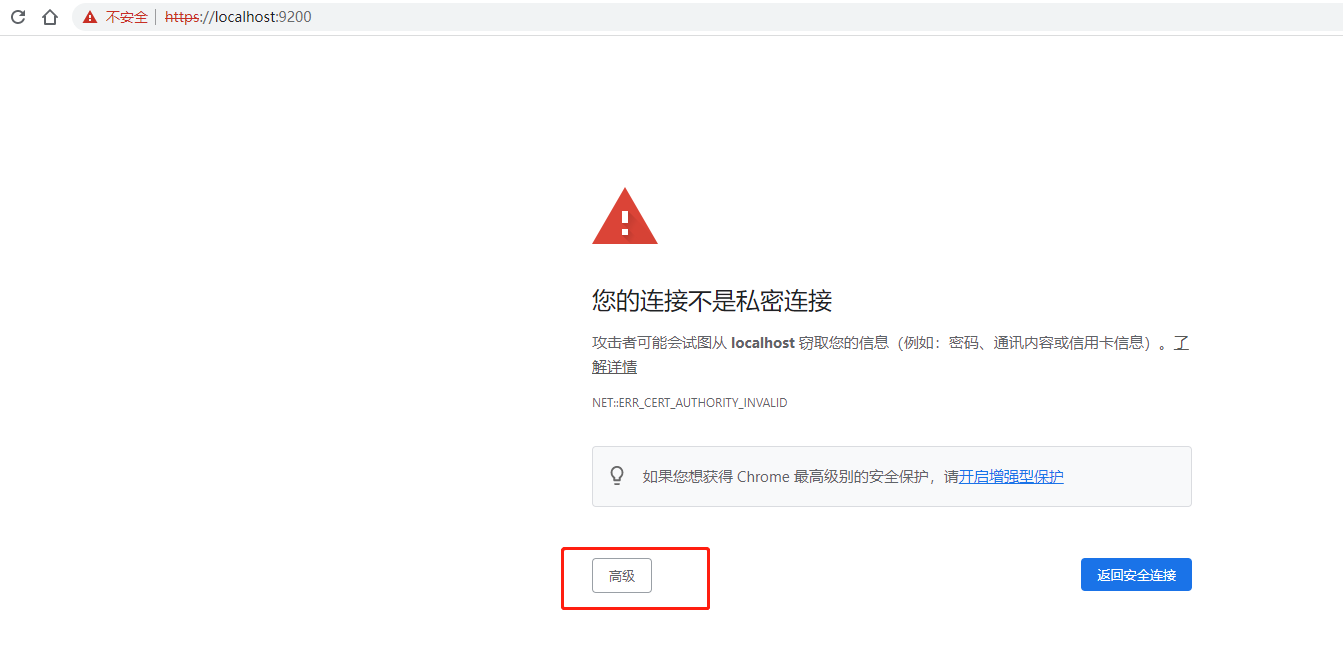
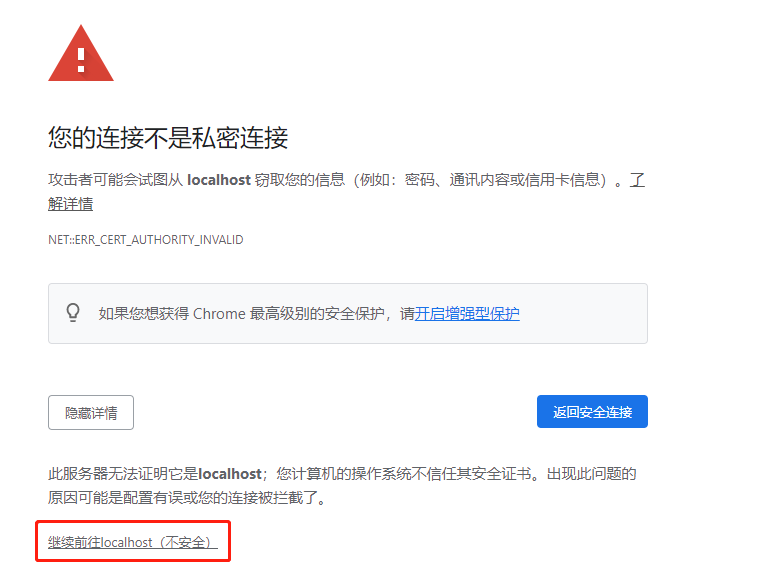
由于开启了ssl 认证,现在的访问地址是:https://localhost:9200/,访问结果如下:
继续点击高级继续前往,然后会提示输入账号密码。
这里的用户名密码就是上面保存信息中:elastic 和 kT62lzIOXGu6NRWwNw0Q。
四、配置本地集群
配置集群在提一次启动 Elasticsearch时,第四个提示告诉我们如何去配置集群:
ℹ️  Configure other nodes to join this cluster:
• On this node:
  ⁃ Create an enrollment token with `bin/elasticsearch-create-enrollment-token -s node`.
  ⁃ Uncomment the transport.host setting at the end of config/elasticsearch.yml.
  ⁃ Restart Elasticsearch.
• On other nodes:
  ⁃ Start Elasticsearch with `bin/elasticsearch --enrollment-token <token>`, using the enrollment token that you generated.
- 在当前节点操作:
- 执行
bin/elasticsearch-create-enrollment-token -s node生成一个注册令牌; - elasticsearch.yml 中 打开
transport.host的注释,设置IP(如果都没有配置 network的话,就不用修改); - 重启ES(不重启也行)。
- 执行
- 其他节点操作:
- 启动时命令
bin/elasticsearch --enrollment-token <token>,使用之前生成的令牌加入集群。
- 启动时命令
1、搭建三节点集群
⑴、再准备两个节点
因为我只有一个节点 elasticsearch-8.6.1,现在把这个改为 node1。
- 把elasticsearch-8.6.1改名为node1
- 再创建elasticsearch-8.6.1文件夹
- 把node1 移动到 elasticsearch-8.6.1
[root@VM-0-12-centos local]# mv elasticsearch-8.6.1 node1
[root@VM-0-12-centos local]# mkdir elasticsearch-8.6.1
[root@VM-0-12-centos local]# mv node1/ elasticsearch-8.6.1/
[root@VM-0-12-centos local]# cd elasticsearch-8.6.1/
[root@VM-0-12-centos elasticsearch-8.6.1]# ls
node1
在 elasticsearch-8.6.1 内继续新建两个节点:node2,node3,并启动 node1。注意这里新增的两个node 节点是从安装包中解压出来的没有启动过的节点,我试着直接用node1复制为node2却一直报错,只有使用全新节点才能启动成功。
[root@VM-0-12-centos ~]# ls
elasticsearch-8.6.1  elasticsearch-8.6.1-linux-x86_64.tar.gz  lnmp1.9  lnmp1.9.tar.gz  lnmp-install.log  mysql  reset_mysql_root_password.sh
[root@VM-0-12-centos ~]# cd /usr/local/elasticsearch-8.6.1/
[root@VM-0-12-centos elasticsearch-8.6.1]# cp -rf /root/elasticsearch-8.6.1 ./node2/
[root@VM-0-12-centos elasticsearch-8.6.1]# cp -rf /root/elasticsearch-8.6.1 ./node3/
[root@VM-0-12-centos elasticsearch-8.6.1]# ls
data  logs  node1  node2  node3
[root@VM-0-12-centos elasticsearch-8.6.1]# chown -R elastic:elastic ./node2/
[root@VM-0-12-centos elasticsearch-8.6.1]# chown -R elastic:elastic ./node3/
[root@VM-0-12-centos elasticsearch-8.6.1]# su elastic
[elastic@VM-0-12-centos elasticsearch-8.6.1]$ ./node1/bin/elasticsearch -d
...
如果开启集群了,则必须开启Security,否则启动失败。
⑵、生成注册令牌,并试node2、node3加入集群
生成注册令牌并保存,用于后续节点接入。
[elastic@VM-0-12-centos elasticsearch-8.6.1]$ ./node1/bin/elasticsearch-create-enrollment-token -s node
warning: ignoring JAVA_HOME=/usr/local/java; using bundled JDK
eyJ2ZXIiOiI4LjYuMSIsImFkciI6WyIxNzIuMTcuMC4xMjo5MjAwIl0sImZnciI6ImYxMjRhMDkzOGQxMDM1OGIyZjU4ODZhYTdkYzExZjMxMzQwMGE1YjM0YTg3ZGQxYmRlOWNlNTgzNTE5OWVmNzYiLCJrZXkiOiJxTE1nWG9ZQmgwQ1VranhDTWNpbjpuS1dVZHRmclQ2aWtCMmRnNnZhUzVRIn0=
[elastic@VM-0-12-centos elasticsearch-8.6.1]$
[elastic@VM-0-12-centos elasticsearch-8.6.1]$ ./node2/bin/elasticsearch -d --enrollment-token eyJ2ZXIiOiI4LjYuMSIsImFkciI6WyIxNzIuMTcuMC4xMjo5MjAwIl0sImZnciI6ImYxMjRhMDkzOGQxMDM1OGIyZjU4ODZhYTdkYzExZjMxMzQwMGE1YjM0YTg3ZGQxYmRlOWNlNTgzNTE5OWVmNzYiLCJrZXkiOiJxTE1nWG9ZQmgwQ1VranhDTWNpbjpuS1dVZHRmclQ2aWtCMmRnNnZhUzVRIn0=
...
[elastic@VM-0-12-centos elasticsearch-8.6.1]$ ./node3/bin/elasticsearch -d --enrollment-token eyJ2ZXIiOiI4LjYuMSIsImFkciI6WyIxNzIuMTcuMC4xMjo5MjAwIl0sImZnciI6ImYxMjRhMDkzOGQxMDM1OGIyZjU4ODZhYTdkYzExZjMxMzQwMGE1YjM0YTg3ZGQxYmRlOWNlNTgzNTE5OWVmNzYiLCJrZXkiOiJxTE1nWG9ZQmgwQ1VranhDTWNpbjpuS1dVZHRmclQ2aWtCMmRnNnZhUzVRIn0=
...
###### 第三个节点因为服务器内存不够没有启动成功,不过应该是没问题的
通过路由 _cat/nodes?v 访问节点信息搭建成功。
2、搭建集群时遇到的问题
注意:新节点加入集群,不要直接从老节点复制,重新从下载的压缩包中解压出来作为新节点,否则加入集群报错。
以下是我遇到的错误,我的解决办法就是解压新节点加入集群,不过对于配置文件的修改和 ES重启我还在不了解,后面熟悉后再补充。
⑴、从 node1 复制 node2 加入集群,报错
[elastic@VM-0-12-centos elasticsearch-8.6.1]$ ./node2/bin/elasticsearch -d --enrollment-token eyJ2ZXIiOiI4LjYuMSIsImFkciI6WyIxNzIuMTcuMC4xMjo5MjAwIl0sImZnciI6ImYxMjRhMDkzOGQxMDM1OGIyZjU4ODZhYTdkYzExZjMxMzQwMGE1YjM0YTg3ZGQxYmRlOWNlNTgzNTE5OWVmNzYiLCJrZXkiOiJjT1k1WG9ZQnh4RS1fTGNxX05ISzpoSHVSbTZla1Q1MmRtTDFKS2lHc21RIn0=
warning: ignoring JAVA_HOME=/usr/local/java; using bundled JDK

ERROR: Skipping security auto configuration because it appears that the node is not starting up for the first time. The node might already be part of a cluster and this auto setup utility is designed to configure Security for new clusters only.
[elastic@VM-0-12-centos elasticsearch-8.6.1]$
后面我又重新生成证书,修改配置文件还是不行: cannot read configured [PKCS12] keystore (as a truststore) ,node1节点都没有启动成功。
[elastic@VM-0-12-centos elasticsearch-8.6.1]$./elasticsearch-certutil ca
[elastic@VM-0-12-centos elasticsearch-8.6.1]$./elasticsearch-certutil cert --ca elastic-stack-ca.p12
然后把证书放到所有节点的 config/cert 目录下,并授权777(有的博客说是权限问题,还是不行)
[elastic@VM-0-12-centos elasticsearch-8.6.1]$ vim ./node1/config/elasticsearch.yml
修改配置文件:
 Enable encryption and mutual authentication between cluster nodes
xpack.security.transport.ssl:
  enabled: true
  verification_mode: certificate
  keystore.path: /usr/local/elasticsearch-8.6.1/node1/config/elastic-certificates.p12
  truststore.path: /usr/local/elasticsearch-8.6.1/node1/config/certs/elastic-certificates.p12

# node1 节点启动就报错
[elastic@VM-0-12-centos elasticsearch-8.6.1]$ ./node1/bin/elasticsearch -d
...
[2023-02-17T15:52:10,522][ERROR][o.e.b.Elasticsearch      ] [VM-0-12-centos] fatal exception while booting Elasticsearchorg.elasticsearch.ElasticsearchSecurityException: failed to load SSL configuration [xpack.security.transport.ssl] - cannot read configured [PKCS12] keystore (as a truststore) [/usr/local/elasticsearch-8.6.1/node1/config/certs/elastic-certificates.p12] - this is usually caused by an incorrect password; (a keystore password was provided)
        at org.elasticsearch.xcore@8.6.1/org.elasticsearch.xpack.core.ssl.SSLService.lambda$loadSslConfigurations$11(SSLService.java:605)
        at java.base/java.util.HashMap.forEach(HashMap.java:1429)
        at java.base/java.util.Collections$UnmodifiableMap.forEach(Collections.java:1553)
        at org.elasticsearch.xcore@8.6.1/org.elasticsearch.xpack.core.ssl.SSLService.loadSslConfigurations(SSLService.java:601)
        at org.elasticsearch.xcore@8.6.1/org.elasticsearch.xpack.core.ssl.SSLService.<init>(SSLService.java:156)

See logs for more details.

ERROR: Elasticsearch did not exit normally - check the logs at /usr/local/elasticsearch-8.6.1/node1/logs/elasticsearch.log
当前node1启动成功,然后从node1 复制出node2,删除 data文件夹和config下的cert,还原压缩包中最初始的 elasticsearch.yml文件,再加入集群还是报错已设置密码。
[elastic@VM-0-12-centos elasticsearch-8.6.1]$ ./node2/bin/elasticsearch -d --enrollment-token eyJ2ZXIiOiI4LjYuMSIsImFkciI6WyIxNzIuMTcuMC4xMjo5MjAwIl0sImZnciI6ImYxMjRhMDkzOGQxMDM1OGIyZjU4ODZhYTdkYzExZjMxMzQwMGE1YjM0YTg3ZGQxYmRlOWNlNTgzNTE5OWVmNzYiLCJrZXkiOiJfZ253WFlZQjNVQ09sbVI3TDRaajpKYWthYU5kZVFmV0J5VldmcVhEd0ZRIn0=
warning: ignoring JAVA_HOME=/usr/local/java; using bundled JDK

ERROR: Aborting auto configuration because the node keystore contains password settings already
五、Kibana安装
这里就只操作linux环境的Kibana安装。
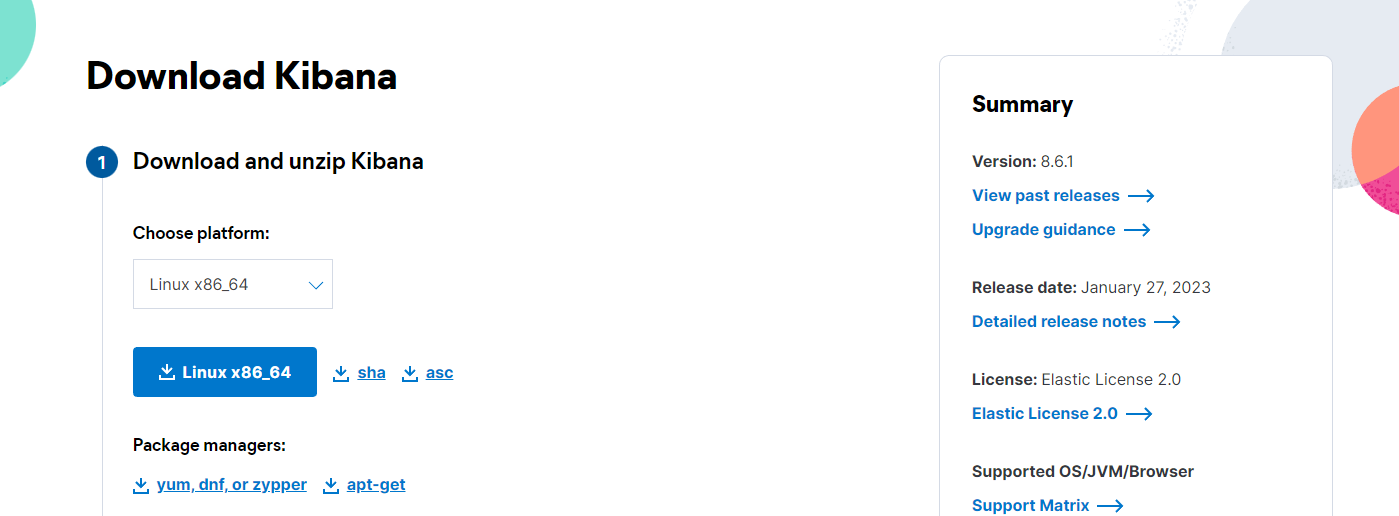
1、下载Kibana
选择与上面ES 相同版本的Kibana:
我把ES和kibana都放在了elk 这个文件夹中:
[elastic@VM-0-12-centos elk]$ ls
elasticsearch-8.6.1
[elastic@VM-0-12-centos elk]$ wget https://artifacts.elastic.co/downloads/kibana/kibana-8.6.1-linux-x86_64.tar.gz
[elastic@VM-0-12-centos elk]$ tar -zxvf kibana-8.6.1-linux-x86_64.tar.gz
[elastic@VM-0-12-centos elk]$ rm-f kibana-8.6.1-linux-x86_64.tar.gz
[elastic@VM-0-12-centos elk]$ ls
elasticsearch-8.6.1  kibana-8.6.1
2、启动kibana
首先前去服务器云平台上的安全组中配置 5601 端口对外开放。kibana的目录结构和es的基本一样,先去修改配置文件 kibana-8.6.1/config/kibana.yml :
#  取消这两行注释
server.port: 5601
server.host: "0.0.0.0" # 配置成0.0.0.0,允许所有人访问
启动 kibana:
[elastic@VM-0-12-centos elk]$ ./kibana-8.6.1/bin/kibana &
[1] 6166
[elastic@VM-0-12-centos elk]$ [2023-02-17T17:13:54.672+08:00][INFO ][node] Kibana process configured with roles: [background_tasks, ui]
[2023-02-17T17:14:06.325+08:00][INFO ][plugins-service] Plugin "cloudChat" is disabled.
[2023-02-17T17:14:06.339+08:00][INFO ][plugins-service] Plugin "cloudExperiments" is disabled.
[2023-02-17T17:14:06.339+08:00][INFO ][plugins-service] Plugin "cloudFullStory" is disabled.
[2023-02-17T17:14:06.339+08:00][INFO ][plugins-service] Plugin "cloudGainsight" is disabled.
[2023-02-17T17:14:06.345+08:00][INFO ][plugins-service] Plugin "profiling" is disabled.
[2023-02-17T17:14:06.425+08:00][INFO ][http.server.Preboot] http server running at http://0.0.0.0:5601
[2023-02-17T17:14:06.466+08:00][INFO ][plugins-system.preboot] Setting up [1] plugins: [interactiveSetup]
[2023-02-17T17:14:06.472+08:00][INFO ][preboot] "interactiveSetup" plugin is holding setup: Validating Elasticsearch connection configuration…
[2023-02-17T17:14:06.518+08:00][INFO ][root] Holding setup until preboot stage is completed.


i Kibana has not been configured.

Go to http://0.0.0.0:5601/?code=097060 to get started.


[elastic@VM-0-12-centos elk]$
我这里执行 ./kibana-8.6.1/bin/kibana & 后,会随着连接超时断掉,总是需要不断的启动,后来我使用这个命令 ./kibana-8.6.2/bin/kibana >/dev/null &,就没有自动停止了。
关键在于最后的 >/dev/null 2>&1 部分,/dev/null是一个虚拟的空设备(类似物理中的黑洞),任何输出信息被重定向到该设备后,将会石沉大海
- /dev/null 表示将标准输出信息重定向到"黑洞"
- 2>&1 表示将标准错误重定向到标准输出(由于标准输出已经定向到“黑洞”了,即:标准输出此时也是"黑洞",再将标准错误输出定向到标准输出,相当于错误输出也被定向至“黑洞”)
参考:Linux中Kibana部署。
3、使用kibana操作ES
node1 创建 token:
[elastic@VM-0-12-centos elk]$ ./elasticsearch-8.6.1/node1/bin/elasticsearch-create-enrollment-token -s kibana
warning: ignoring JAVA_HOME=/usr/local/java; using bundled JDK
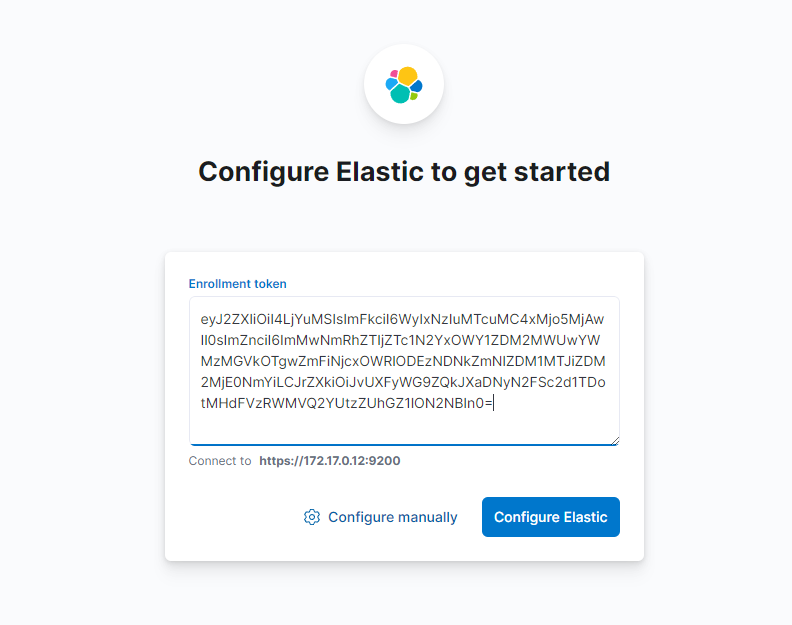
eyJ2ZXIiOiI4LjYuMSIsImFkciI6WyIxNzIuMTcuMC4xMjo5MjAwIl0sImZnciI6ImMwNmRhZTljZTc1N2YxOWY1ZDM2MWUwYWMzMGVkOTgwZmFiNjcxOWRlODEzNDNkZmNlZDM1MTJiZDM2MjE0NmYiLCJrZXkiOiJvUXFyWG9ZQkJXaDNyN2FSc2d1TDotMHdFVzRWMVQ2YUtzZUhGZ1lON2NBIn0=
[elastic@VM-0-12-centos elk]$ ls
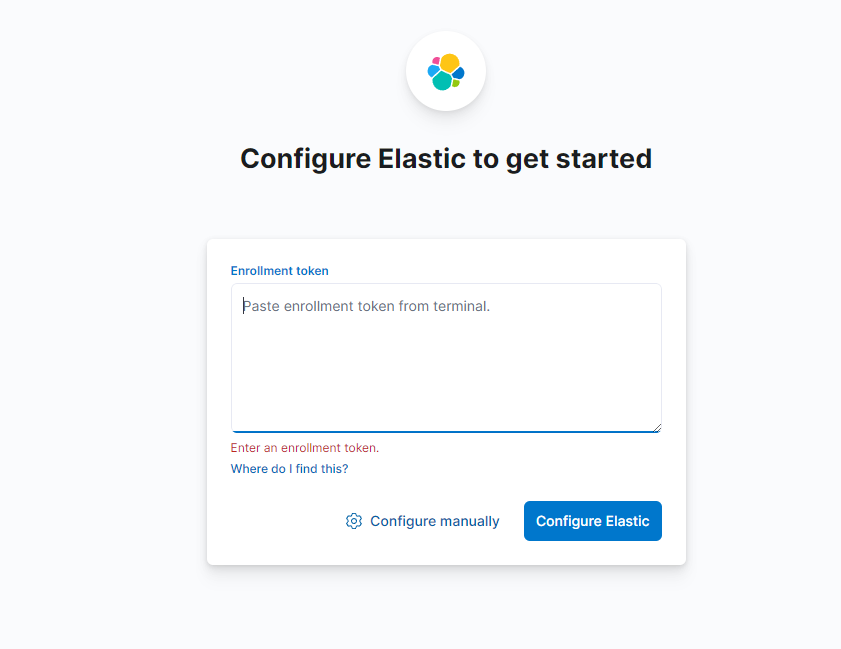
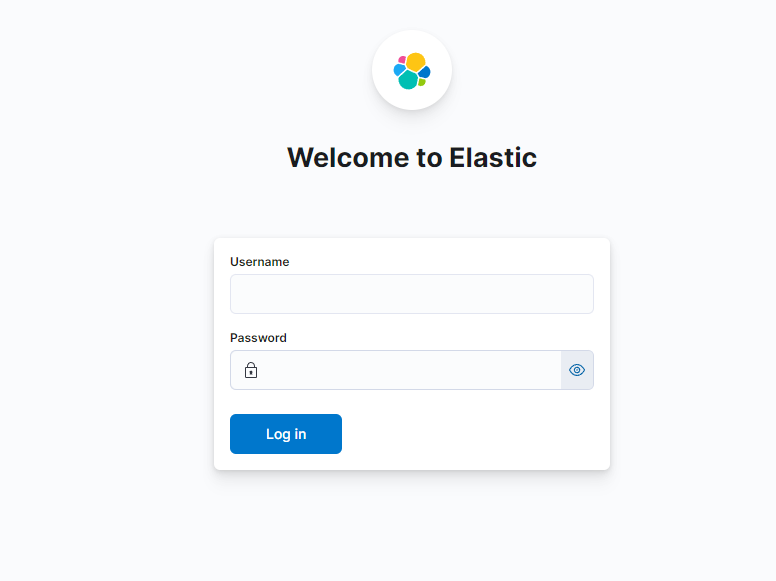
确认,下一步开始登录就是之前启动的,elastic的用户名密码:
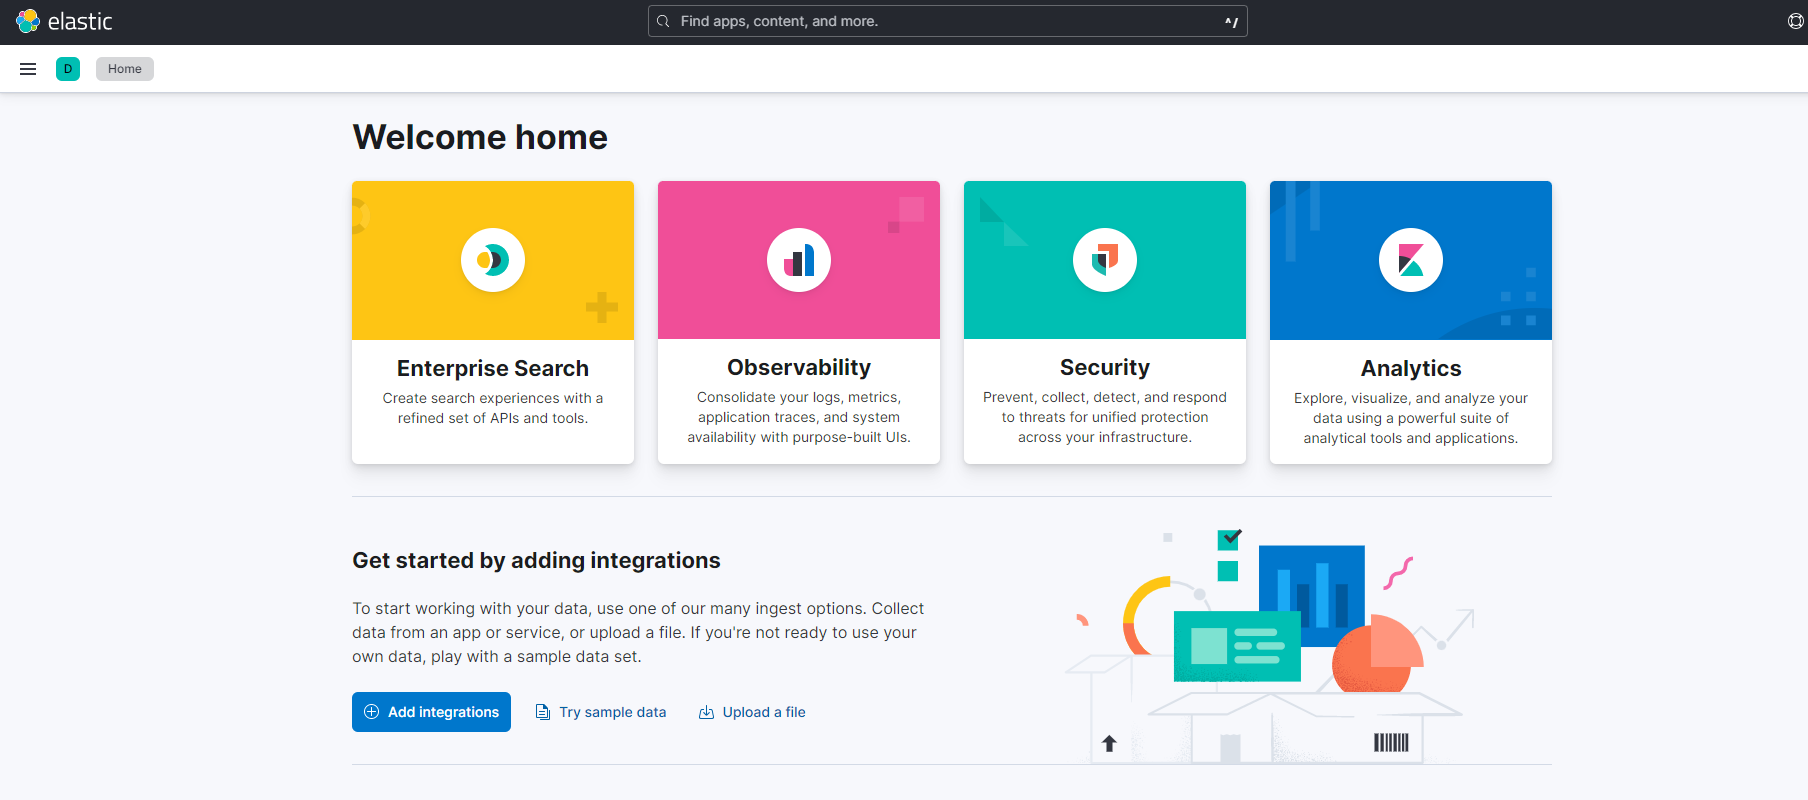
登录成功:
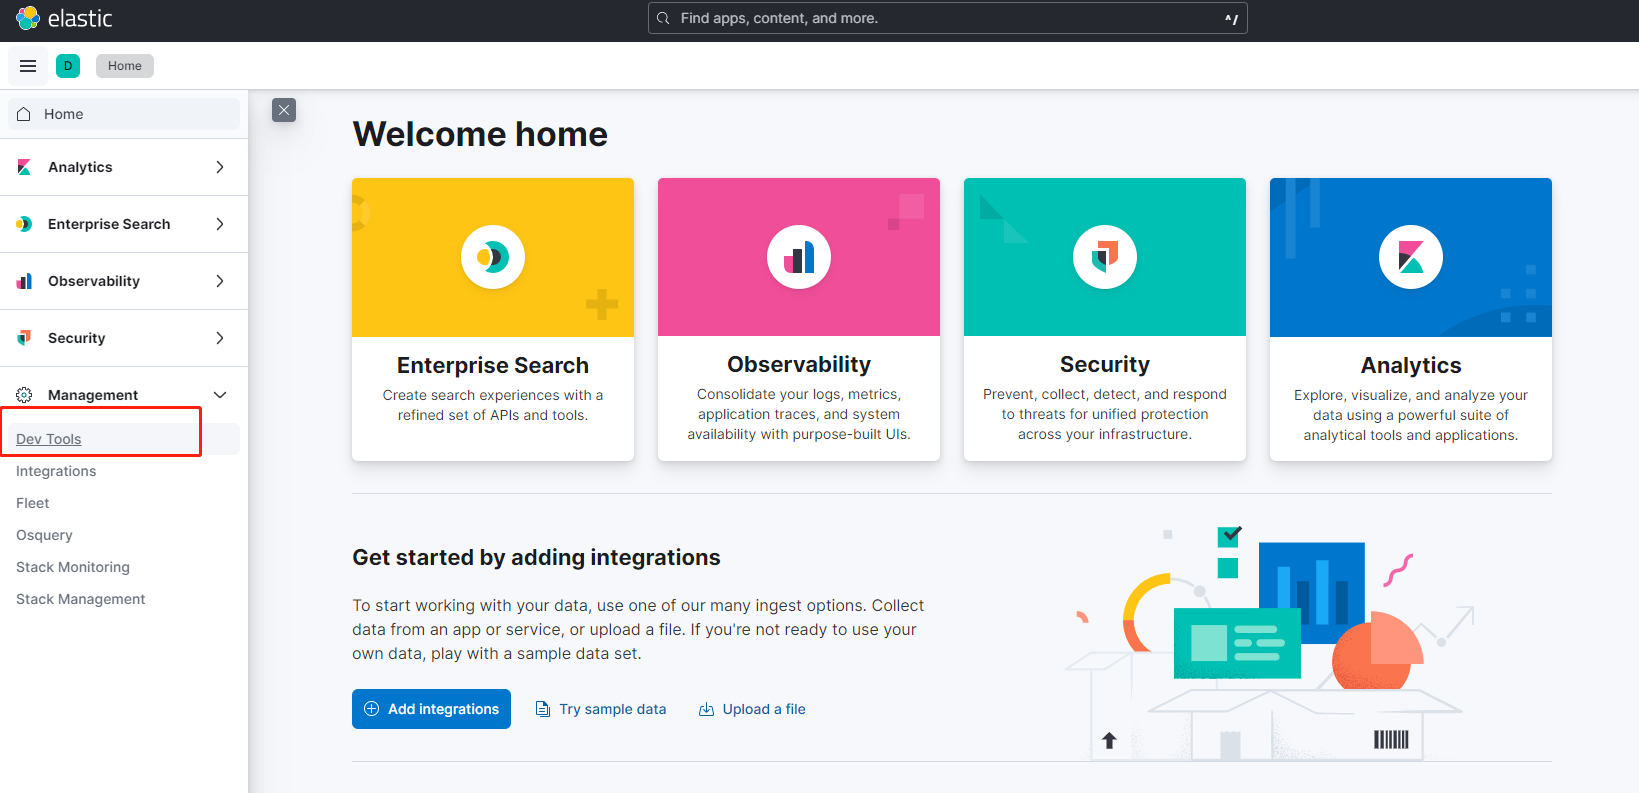
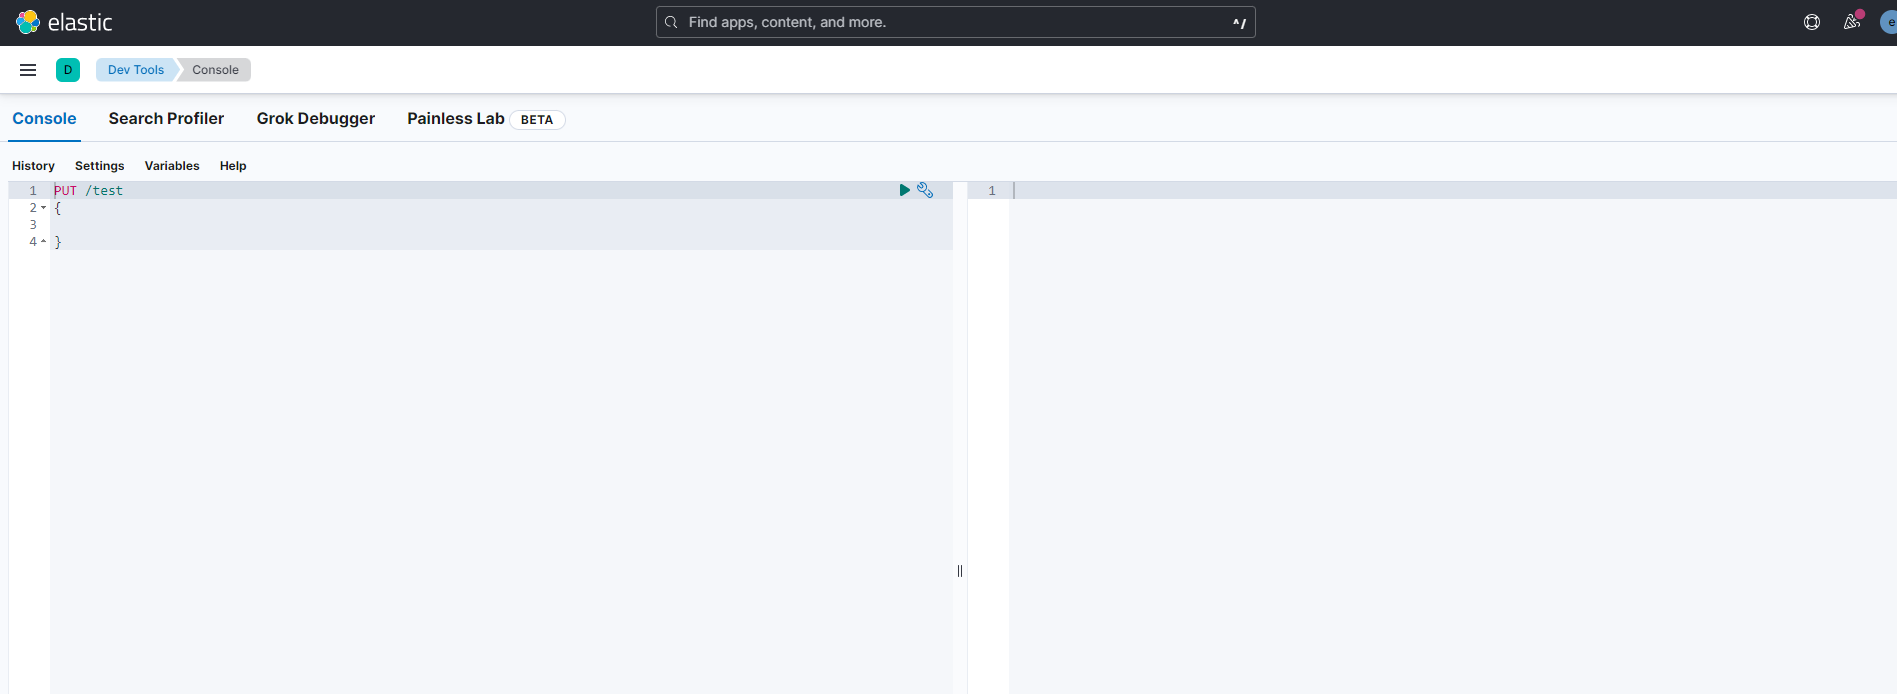
打开 Dev Tools 开发工具,开始测试:
Kibana 汉化,修改配置文件: i18n.locale: "zh-CN"。
# Specifies locale to be used for all localizable strings, dates and number formats.
# Supported languages are the following: English (default) "en", Chinese "zh-CN", Japanese "ja-JP", French "fr-FR".
i18n.locale: "zh-CN"  # 这一行默认是注释的改成 zh-CN
参考:
linux环境下安装 Elasticsearch 8
Elasticsearch基础1——搜索引擎发展史和工作流程、es/es-head/kibana的基础安装
