Taro + react 小程序分类菜单实现
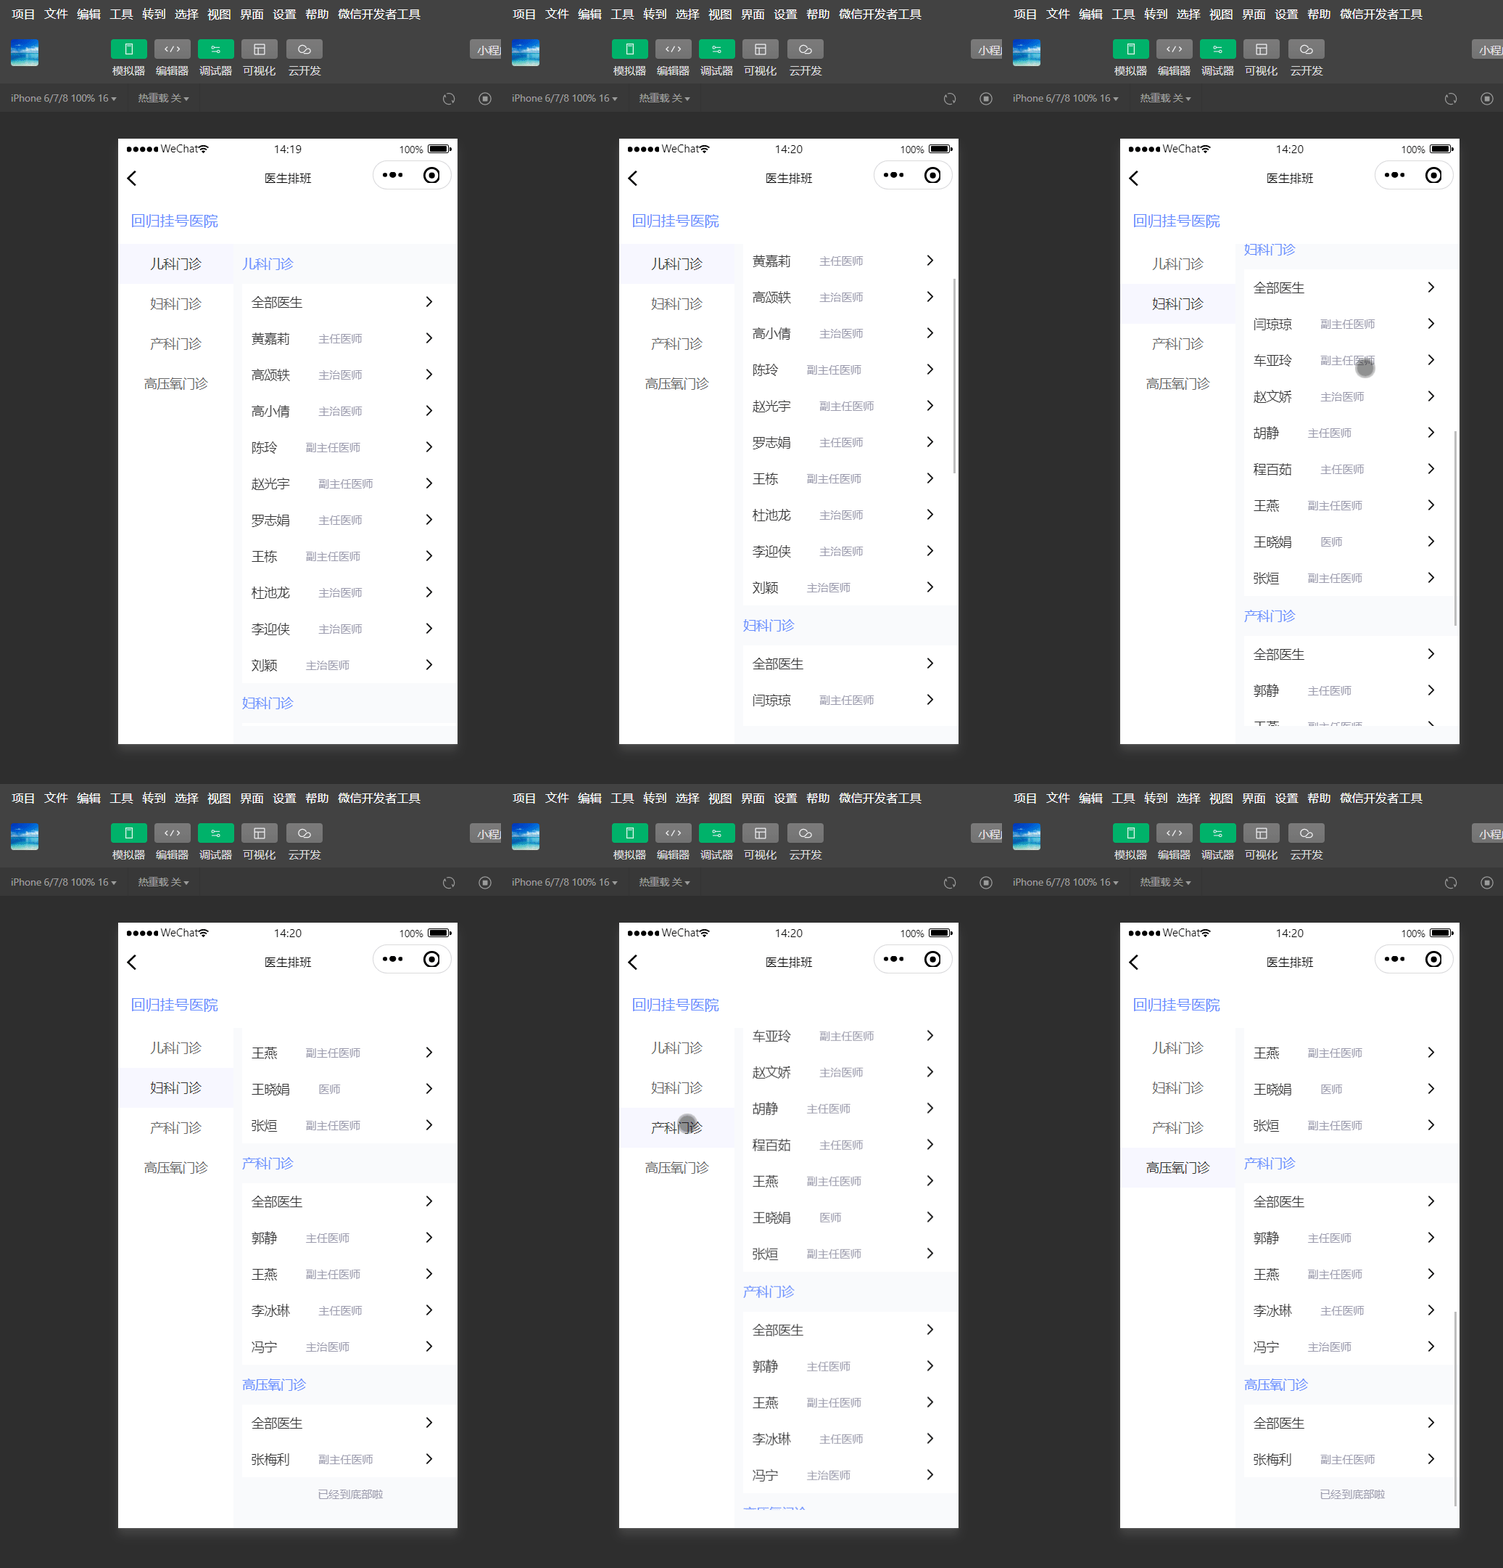
效果
滑动右侧内容区域,左侧菜单栏滑动对应分类位置。
点击左侧分类,右侧滑动到指定分类位置
思路
1.左右各位两个scroll-view,进行上下滚动。
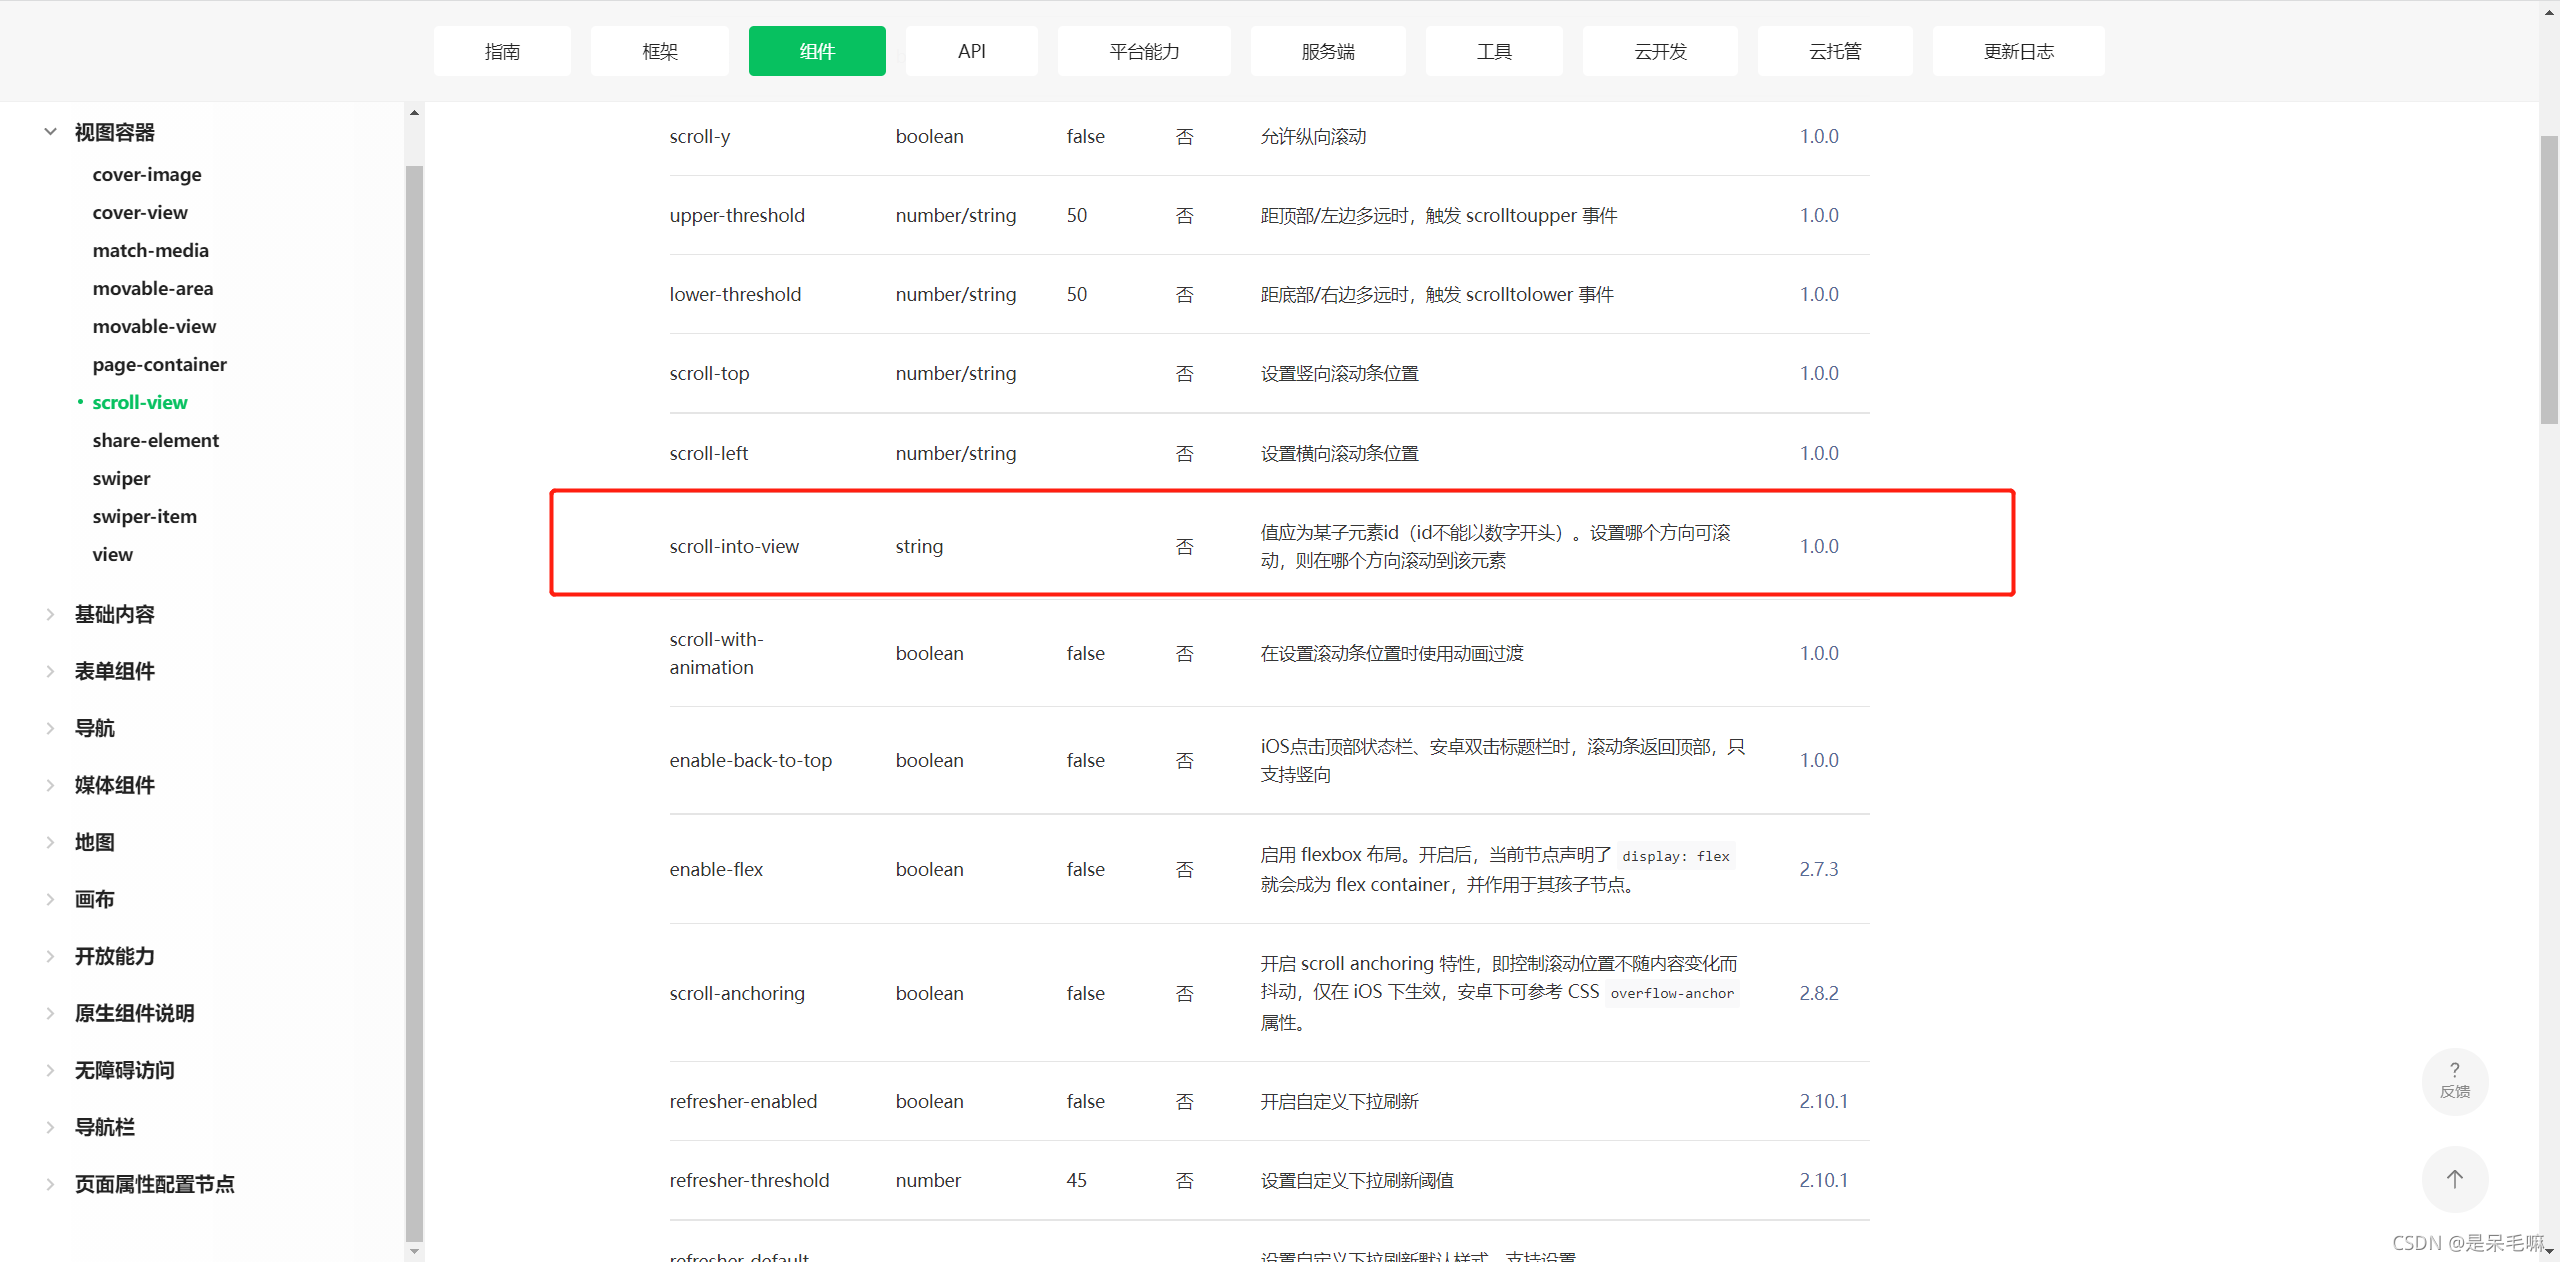
2.左侧菜单栏点击,右侧滑动指定位置,可用小程序自带的锚点 scroll-into-view
3.右侧内容区域获得对应每个模块高度,滚动判断左侧菜单栏位置。
技术
1.Taro 是一个开放式跨端跨框架解决方案,支持使用 React/Vue/Nerv 等框架来开发 微信 / 京东 / 百度 / 支付宝 / 字节跳动 / QQ 小程序 / H5 / RN 等应用。
2.小程序原生组件
3.react
实现
1.左侧菜单栏
相对而言简单些,代码如下
<View className="nav">
 {/* 这是Taro的scrollView的写法,只需将其写成小程序对应的scroll-view即可 */}
   <ScrollView scrollY style="height:100%">
    {/* 这是Taro的scrollView的写法,只需将其写成小程序对应的for循环就好 */}
     {serviceList.map((item, index) => {
       return (
         <View
           key="item"
           className={`nav_title ${index === navActive ? 'nav_active' : ''}`}
           onClick={() => navClick(index)}
         >
           {item.name}
         </View>
       )
     })}
   </ScrollView>
 </View>

  {/* 注意此处的点击事件的赋值*/}
  const [selectId, setSelectId] = useState('' as string)   //这个是对应锚点的值
  const [navActive, setAavActive] = useState(0 as number)  //这个是左侧点击选中的菜单栏下标
  //   左边菜单栏点击
  const navClick = index => {
    setAavActive(index)
    setSelectId('item' + index)
  }
此处要注意的是,因为scroll-into-view是不能以数字开头,倘若用后台返回的id值也会有以id开头的,就会报错,所以此处使用了item字符串拼接index,'item’随意任何字符串都可以
2.右侧内容区
<View className="content">
  <ScrollView
    className="content_scroll"
    style={{ height: winHeight - 72 + 'px' }}
    scrollY
    scrollWithAnimation
    //此处对应的锚点就是左侧菜单栏选中时,拼接的锚点id
    scrollIntoView={selectId}
    enhanced
    bounces={false}
    onScroll={e => onscroll(e)}
    scrollTop={scrollVal}
  >
  //此处都为Taro的写法,对应的是小程序的循环
    {serviceList.map((item, index) => {
      return (
        <View key="item" id={'item' + index} className="content_box">
          <View className="content_title">{item.name}</View>
          <View className="content_center_box">
            {item.doctors.map(it => {
              return (
                <View key="it" className="content_center" onClick={() => contentClick(it)}>
                  <View className="content_doctor">
                    {it.type === 'all' ? (
                      <View className="doctor_name" style="font-weight: 500;">
                        {it.name}
                      </View>
                    ) : (
                      <View className="doctor_name"> {it.name}</View>
                    )}
                    <View className="doctor_level">{it.level}</View>
                  </View>
                  <View className="iconfont iconmy_btn_arrow_black_big2x"></View>
                </View>
              )
            })}
          </View>
        </View>
      )
    })}
    {serviceList.length > 0 && <View className="content_footer">已经到底部啦</View>}
  </ScrollView>
</View>

  //页面加载时执行的方法
	const [scrollVal, setScrollVal] = useState(0 as number)
	const [heightArr, setHeightArr] = useState([] as Array<any>)
	const [distance, setDistance] = useState(0 as number)
	const selectHeight = () => {
	  let arr = [] as any
	  let h = 0
	  const query = Taro.createSelectorQuery()
	  query.selectAll('.content_box').boundingClientRect()
	  query.exec(function (res) {
	    res[0].forEach(item => {
	      h += item.height
	      arr.push(h)
	    })
	    //获取每一块儿content_box的高度值存储起来
	    setHeightArr(arr)
	    //内容区滚动的高度,首次加载获取第一项
	    setScrollVal(arr[navActive - 1])
	  })
	}
	//右侧滚动时方法
	const onscroll = e => {
	  //内容区域不会超出滚动就返回
	  if (heightArr.length === 0) return
	  //滚动的高度
	  let scrollTop = e.detail.scrollTop
	  // 到达底部
	  if (scrollTop + winHeight + 1 >= heightArr[heightArr.length - 1]) {
	 //到达底部要把锚点id清除,否则锚点id选中不到第一项item1,因为item1此时已经变成了默认值,无法通过锚点跳转
	    setSelectId('')
	  }
	  // 向下滚动,如果向下滚动的值大于了存储的distance值,distance默认为0,每次滚动都会把滚动值存储为distance
	  if (scrollTop >= distance) {
	    if (navActive + 1 < heightArr.length && scrollTop >= heightArr[navActive]) {
	    	//对应的左侧菜单栏的选中项进行加1
	      setAavActive(navActive + 1)
	    }
	    //向上滚动
	  } else {
	    if (navActive - 1 >= 0 && scrollTop < heightArr[navActive - 1]) {
		    //对应的左侧菜单栏的选中项进行减1
	      setAavActive(navActive - 1)
	    }
	  }
	  //存储了滚动的值
	  setDistance(scrollTop)
	}
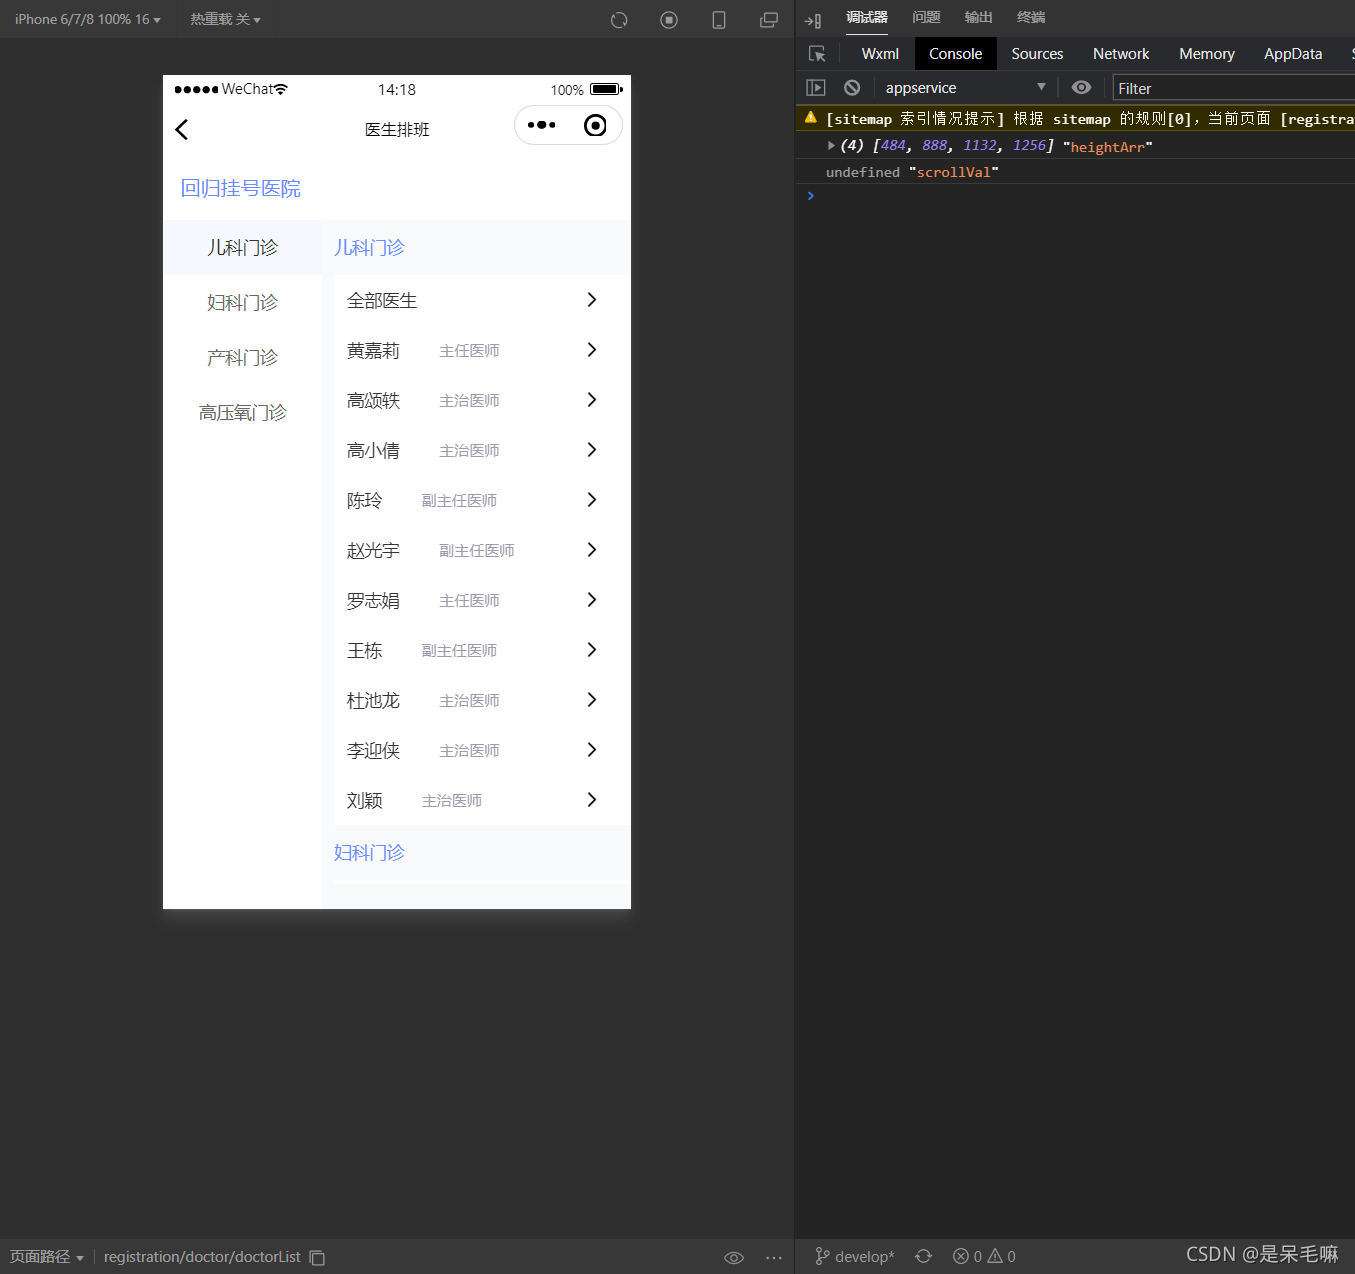
存储的高度值与滚动值首次渲染如下
此处需要注意一个点是,要先获取后台返回的list数据,再进行右侧content_box高度内容渲染,否则拿到是空数组,无法进行向上向下滚动逻辑处理,左侧分类就不会跟随改变。
3.css样式
//在最外层,我用View包裹起来,felx变成左右布局;
.center {
   display: flex;
   height: 100%;

   .nav {
     flex-basis: 255px;
     width: 255px;
     overflow-y: scroll;
     background-color: #fff;
     color: #666666;
     font-size: 28px;
     font-weight: 400;
     line-height: 40px;

     .nav_title {
       padding: 24px 42px;
       overflow: hidden;
       text-align: center;
       text-overflow: ellipsis;
       white-space: nowrap;
     }

     .nav_active {
       background: #f7f7ff;
       color: #333333;
       font-weight: 500;
     }
   }

   .content {
     flex: 1;
     margin-left: 20px;
     overflow-y: scroll;

     .content_scroll {
       height: 100%;
       overflow-y: scroll;
     }

     .content_title {
       height: 40px;
       padding: 24px 0px;
       color: #668cff;
       font-size: 28px;
       font-weight: 500;
       line-height: 40px;
     }

     .content_center_box {
       background: #ffffff;

       .content_center {
         display: flex;
         box-sizing: border-box;
         padding: 20px 40px 20px 20px;
         font-weight: 400;
         line-height: 40px;

         .content_doctor {
           display: flex;
           flex: 1;

           .doctor_name {
             margin-right: 12px;
             color: #333333;
             font-size: 28px;
           }

           .doctor_level {
             margin-left: 28px;
             color: #9c9cae;
             font-size: 24px;
           }
         }
       }
     }

     .content_footer {
       padding: 20px 0px;
       color: #9c9cae;
       font-size: 24px;
       text-align: center;
     }
   }
 }


