简介
在vue2.6版本后,会生成vue.config.js文件,本文章主要讲解如何在vue中,如何生成electron的外部配置文件,与如何读取外部配置文件。
一、配置与生成config.json文件
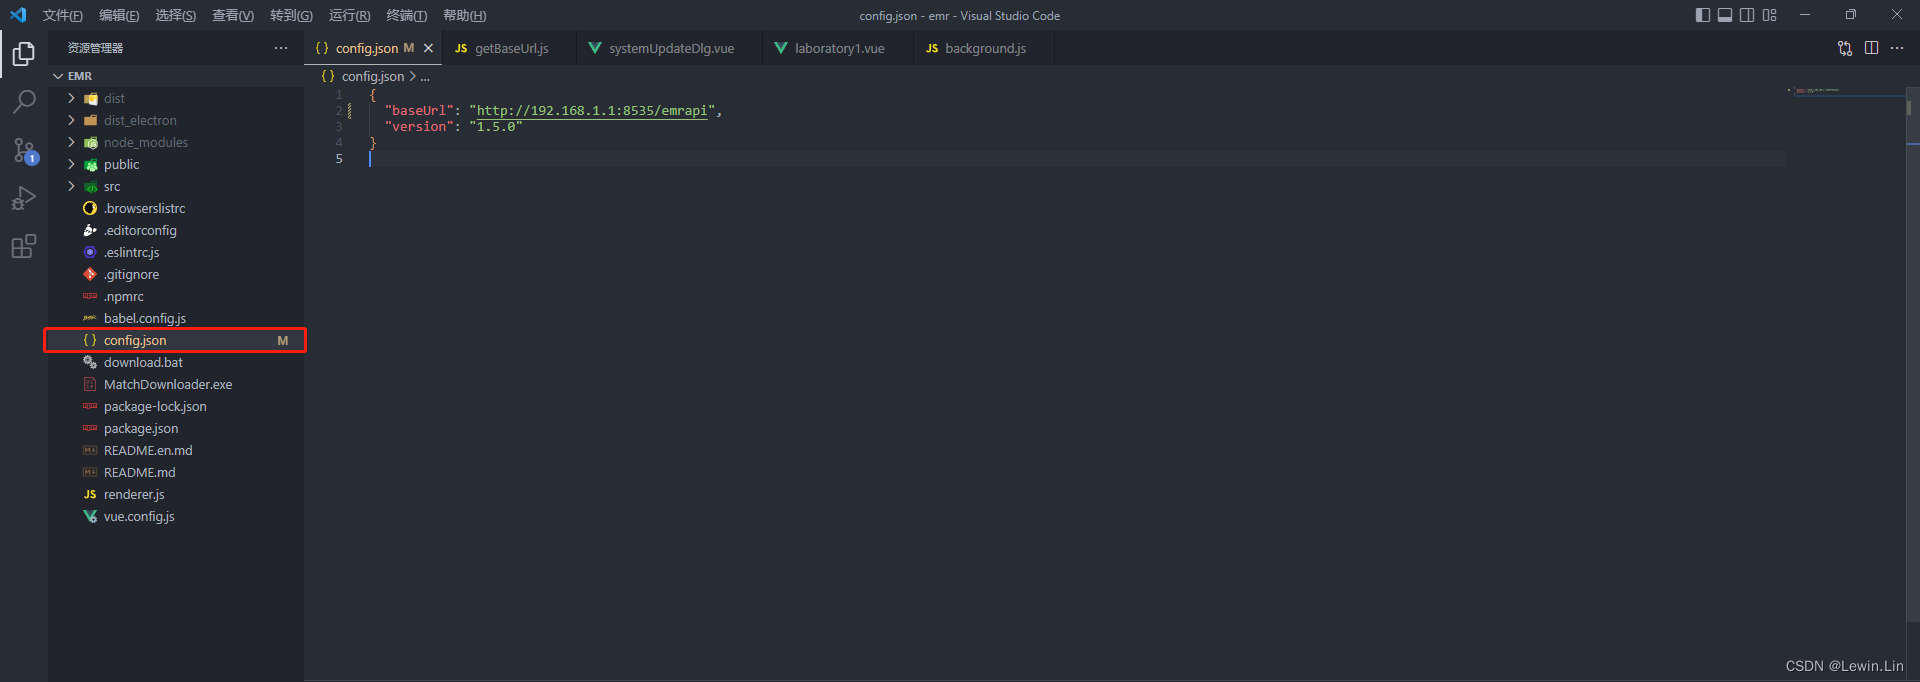
首先,要在项目下新建一个config.json文件,然后再config文件中,写入一些信息。
然后在vue.config.js中写入配置,通知electron在打包时,不要将指定文件打包进app.asar中。
pluginOptions: {

     electronBuilder: {

         builderOptions: {

             // build配置在此处
             // options placed here will be merged with default configuration and passed to electron-builder
             appId: "com.emr.app",
             extraResources: [
                 {
    "from": "./config.json", "to": "../" }
             ],
             "mac": {
    "icon": "./public/favicon.icns" },
             "win": {
    "icon": "./public/favicon.ico" }  // 配置打包后,在win下的应用图标。ico图片至少要是256*256尺寸的,尺寸太小,会打包失败。
         }
     },
 },
这里附上我的vue.config.js文件的配置,方便大家理解
const webpack = require('webpack')

module.exports = {

    lintOnSave: false,
    publicPath: "./",
    // PC端适配代码
    // css: {

    //   loaderOptions: {

    //     css: {},
    //     postcss: {

    //       plugins: [
    //         require("postcss-px2rem")({

    //           remUnit: 192,  // 以1920屏幕为标准来缩放网页
    //           propList: ['*', '!border', '!font-size'],  // border属性不进行适配
    //         })
    //       ]
    //     }
    //   }
    // },
    chainWebpack: config => {

        config.plugin('provide').use(webpack.ProvidePlugin, [{

            $: 'jquery',
            jquery: 'jquery',
            jQuery: 'jquery',
            'window.jQuery': 'jquery'
        }])
    },
    configureWebpack: {

        resolve: {

            alias: {
   }
        }
    },
    pluginOptions: {

        electronBuilder: {

            builderOptions: {

                // build配置在此处
                // options placed here will be merged with default configuration and passed to electron-builder
                appId: "com.emr.app",
                extraResources: [
                    {
    "from": "./config.json", "to": "../" },
                    {
    "from": "./MatchDownloader.exe", "to": "../" },
                    {
    "from": "./download.bat", "to": "../" },
                ],
                "mac": {
    "icon": "./public/favicon.icns" },
                "win": {
    "icon": "./public/favicon.ico" }
            }
        },
    },

    // 代理
    /* devServer: {
      port: 8080,
      // host: 'localhost',
      https: false, // https:{type:Boolean}
      open: true, // 配置自动启动浏览器
      disableHostCheck: true,
        "proxy": {
        "/*": {
            "target": "http://xxx",
            "changeOrigin": true
        }
      }
    }, */

}
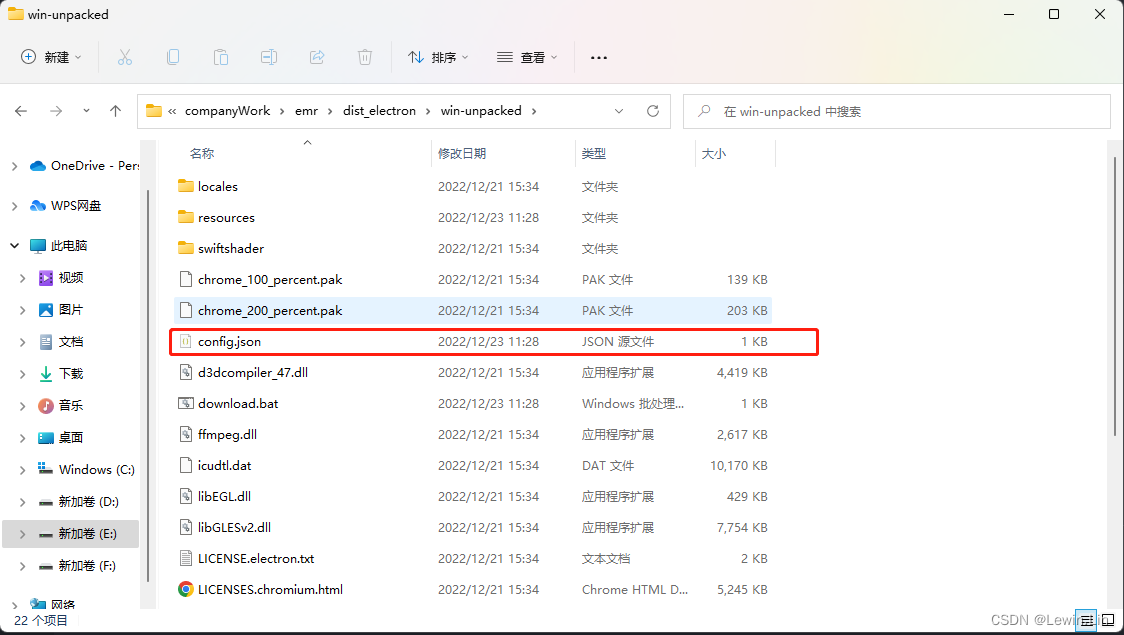
然后,在执行npm run electron:build命令后,就可以在打包后的文件里看到config.json文件被独立出来了。
至此,就完成了第一步,配置与生成config.json这个外部配置文件了。
二、读取外部配置文件 ---- config.json
至此,我们已经有了config.json这个外部配置文件,要读取这个文件的配置信息,就要用到electron的remote模块,这个模块不同electron版本的获取方式不同,这个用了是electron13.0.0的获取方法。
首先,要在electorn的入口文件(我项目里的是background.js)里,做一些配置,让html页面能访问node里面的fs模块,方便调用fs来读取文件。
// main.js
'use strict'

// Modules to control application life and create native browser window
// const { app, BrowserWindow } = require('electron')
import moment from "moment"
import {
    app, protocol, BrowserWindow, globalShortcut } from 'electron'
import {
    createProtocol, installVueDevtools } from 'vue-cli-plugin-electron-builder/lib'

// 设置运行内存350MB
process.env.NODE_OPTIONS = '--no-warnings --max-old-space-size=350'
// app.commandLine.appendSwitch('disable-site-isolation-trials');  // //这行一定是要加的,要不然无法使用iframe.contentDocument方法

const {
    ipcMain, Menu, MenuItem,
