文章目录
1.准备工作
原始YUV文件,只包含图像的原始信息,无论是播放还是进行H264压缩编码,都需要知晓文件格式。
-
像素格式:常见的格式有YUV420P、YUV422P、YUV420打包格式:NV12 NV21 等等
-
分辨率:宽度和高度
FFmpeg播放YUV文件示例:
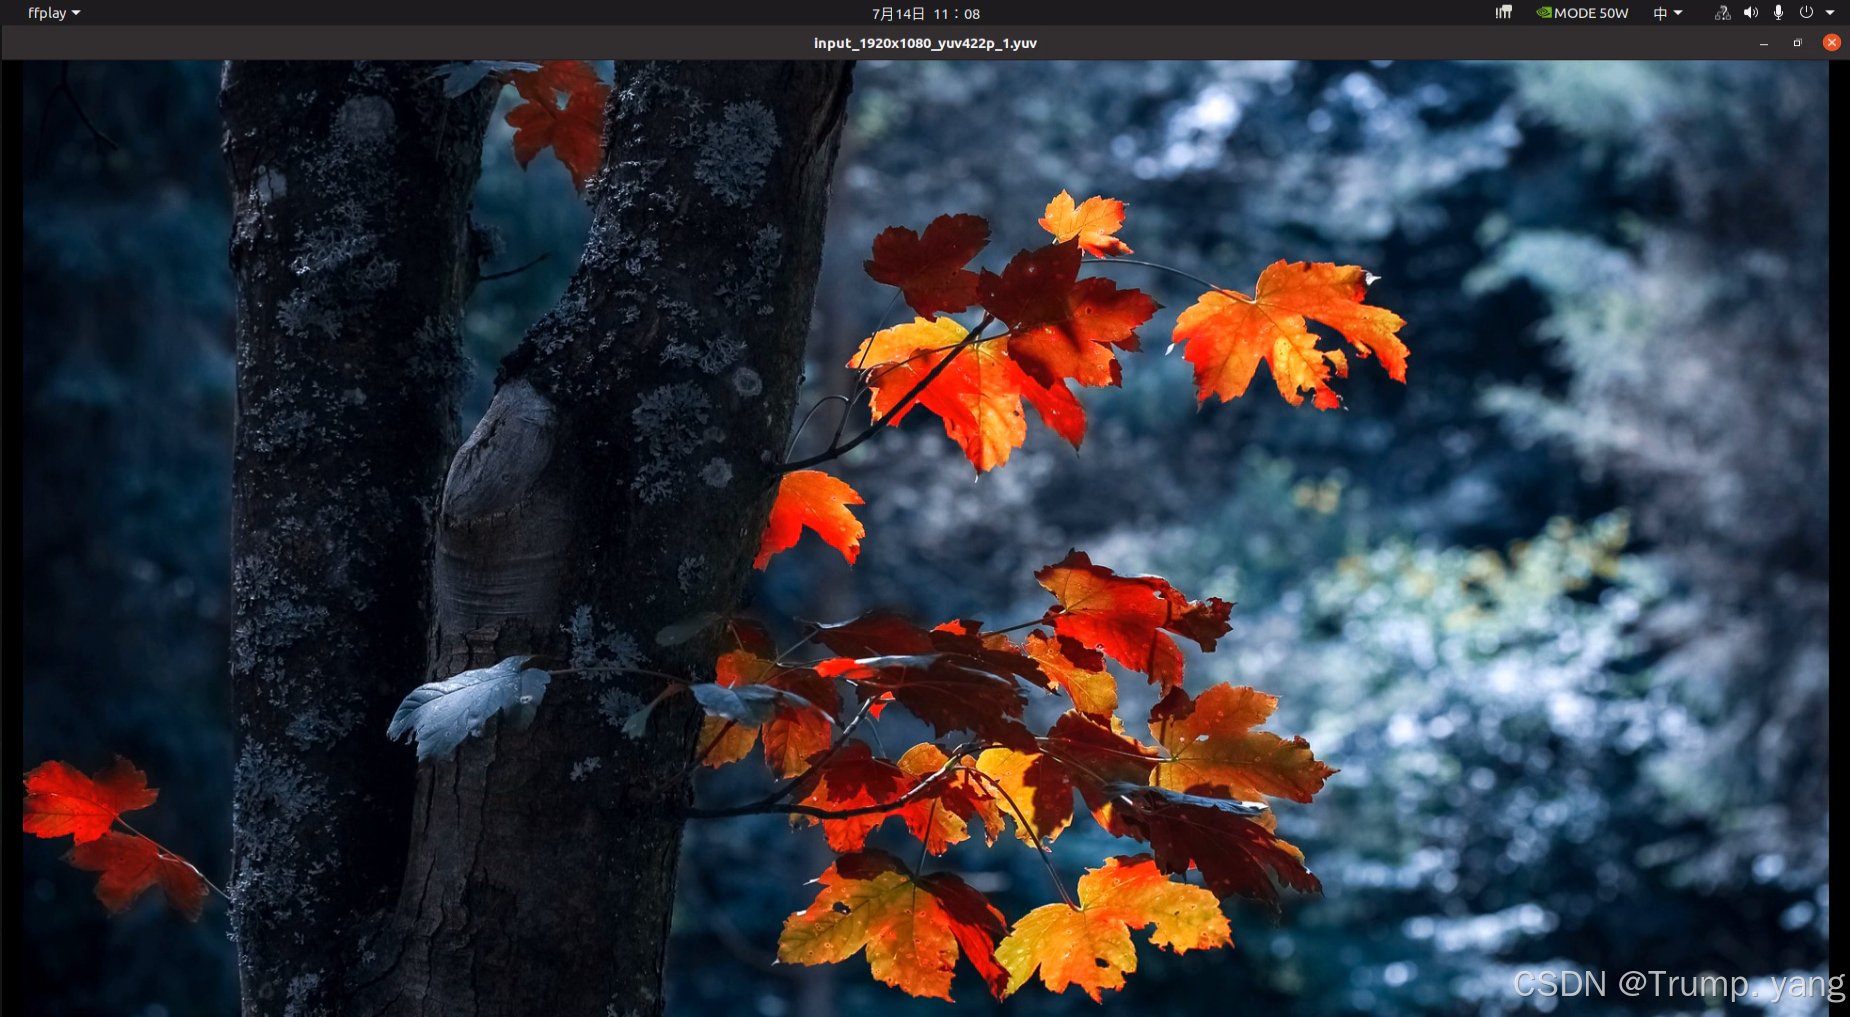
ffplay -f rawvideo -pixel_format yuv422p -video_size 1920x1080 input_1920x1080_yuv422p_1.yuv
命令解析:
ffplay: 这是用于播放视频和音频文件的命令行媒体播放器。-f rawvideo: 这个选项指定输入文件的格式。rawvideo表示输入文件是一个未经压缩处理的视频数据流。-pixel_format yuv422p: 指定了像素格式。yuv422p是一种 YUV 格式,其中 Y、U 和 V 分量是平面分隔的(p 表示平面),并且色度(U 和 V)采样是每两个像素共享一次(即 4:2:2 采样)。这个格式常见于专业视频编辑和后期处理中。-video_size 1920x1080: 设置视频的分辨率为 1920x1080 像素,这通常是全高清视频的标准分辨率。input_1920x1080_yuv422p_1.yuv: 这是输入文件的路径和名称。文件扩展名.yuv通常用于存储原始的 YUV 格式视频数据。
效果如下:这里以一张高清图片为示例
2.压缩编码工作流程
总体流程:
需要注意的是:编码H264一般使用X264的居多,要求输入的格式一般为YUV420格式,因此如果是YUV422需要转换为YUV420格式
3.详细步骤
1. 初始化日志和参数检查
 av_log_set_level(AV_LOG_DEBUG);
    av_log(NULL, AV_LOG_INFO, "FFMPEG DEBUG LOG BEGIN.....\n");

    if (argc < 5)
    {
        printf("Usage: %s <input file> <width> <height> <output file>\n", argv[0]);
        return -1;
    }
- 使用
av_log_set_level设置日志级别,用于调试信息输出。 - 检查传入的命令行参数数量,确保提供了足够的信息来进行后续处理。
2. 输入/输出文件的打开
 // 读取YUV 文件
    input_file = fopen(input_filename, "rb");
    if (!input_file)
    {

        fprintf(stderr, "Could not open input file '%s'\n", input_filename);
        CLEANUP(failure);
        return -1;
    }
    // 打开要写入的文件
    output_file = fopen(output_filename, "wb");
    if (!output_file)
    {
        fprintf(stderr, "Could not open output file '%s'\n", output_filename);
        CLEANUP(failure);
        return -1;
    }
- 尝试打开输入文件(YUV数据源)和输出文件(存储编码后的视频)。如果文件打开失败,跳转到
failure标签进行资源释放和退出。
3. 查找和初始化编码器
- 查找H264编码器。如果找不到编码器,跳转到
failure。
    // 查找编码器
    codec = avcodec_find_encoder(AV_CODEC_ID_H264);
    if (!codec)
    {

        av_log(NULL, AV_LOG_ERROR, "H264 Codec not found.....\n");
        CLEANUP(failure);
        return -1;
    }

    // 分配编码器上下文
    codec_ctx = avcodec_alloc_context3(codec);
    if (!codec_ctx)
    {
        av_log(NULL, AV_LOG_ERROR, "Could not allocate video codec context.....\n");
        CLEANUP(failure);
        return -1;
    }
- 为编码器分配上下文,并设置编码参数,如比特率、分辨率、帧率等。这些参数对最终视频的质量和文件大小有直接影响。
// 设置编码器的参数
    codec_ctx->bit_rate = 4000000;  //与图像质量直接挂钩
    codec_ctx->height = height;
    codec_ctx->width = width;
    codec_ctx->time_base = (AVRational){1, 25};
    codec_ctx->framerate = (AVRational){25, 1};
    codec_ctx->gop_size = 10;
    codec_ctx->max_b_frames = 0;             // 设置成0,可以减少编码器负担
    codec_ctx->pix_fmt = AV_PIX_FMT_YUV420P; // 使用YUV420P进行编码
4. 打开编码器
- 尝试打开已配置的编码器。如果编码器无法打开,跳转到
failure。
    // 打开编码器
    if (avcodec_open2(codec_ctx, codec, NULL) < 0)
    {
        av_log(NULL, AV_LOG_ERROR, "Could not open codec.....\n");
        CLEANUP(failure);
        return -1;
    }
5. 帧内存的分配和初始化
- 分配内存给原始帧
frame和用于转换的帧sws_frame。如果分配失败,进行资源清理并跳转到failure。 - 对这两个帧进行格式设置和内存分配。
  // 分配原始帧和转换帧
    frame = av_frame_alloc();
    sws_frame = av_frame_alloc();
    if (!frame || !sws_frame)
    {
        fprintf(stderr, "Could not allocate video frame\n");
        fclose(input_file);
        fclose(output_file);
        avcodec_free_context(&codec_ctx);
        if (frame)
            av_frame_free(&frame);
        if (sws_frame)
            av_frame_free(&sws_frame);
        return -1;
    }

    frame->format = codec_ctx->pix_fmt;
    frame->width = width;
    frame->height = height;

    ret = av_image_alloc(frame->data, frame->linesize, width, height, codec_ctx->pix_fmt, 32);
    if (ret < 0)
    {
        CLEANUP(failure);
        return -1;
    }

    sws_frame->format = AV_PIX_FMT_YUV422P;
    sws_frame->width = width;
    sws_frame->height = height;

    ret = av_image_alloc(sws_frame->data, sws_frame->linesize, width, height, AV_PIX_FMT_YUV422P, 32);
    if (ret < 0)
    {
        fprintf(stderr, "Could not allocate raw picture buffer for SWS frame\n");
        CLEANUP(failure);
        return -1;
    }
记得也要packet进行初始化,调了半个小时才发现,忘给AVPacket初始化了,一直报内存错误。。。。。。
    // 分配数据包
    av_init_packet(&packet); // 初始化packet
    packet.data = NULL;
    packet.size = 0;
6. 设置转换上下文(SWS)
- 初始化用于像素格式转换的
SwsContext。这个上下文负责将YUV422P格式转换成编码器需要的YUV420P格式。
    // 创建SWS上下文
    sws_ctx = sws_getContext(width, height, AV_PIX_FMT_YUV422P, width, height, AV_PIX_FMT_YUV420P, SWS_BICUBIC, NULL, NULL, NULL);
    if (!sws_ctx)
    {
        fprintf(stderr, "Could not initialize the conversion context\n");
        fclose(input_file);
        fclose(output_file);
        if (frame)
            av_freep(&frame->data[0]);
        if (sws_frame)
            av_freep(&sws_frame->data[0]);
        av_frame_free(&frame);
        av_frame_free(&sws_frame);
        avcodec_free_context(&codec_ctx);
        return -1;
    }
7. 读取和转换数据
- 从输入文件中读取YUV422P数据到
sws_frame,然后使用sws_scale函数进行格式转换,并存储到frame。 - 如果读取失败,输出错误信息并跳转到
failure。
fread(sws_frame->data[0], 1, width * height * 2, input_file)
sws_scale(sws_ctx, (const uint8_t *const *)sws_frame->data, sws_frame->linesize, 0, height, frame->data, frame->linesize);
8. 编码过程
- 将转换后的帧发送到编码器。
   // 数据送入编码器
        ret = avcodec_send_frame(codec_ctx, frame);
        if (ret < 0)
        {
            fprintf(stderr, "Error sending frame for encoding\n");
            CLEANUP(failure);
        }
- 循环调用
avcodec_receive_packet来接收编码后的数据,并将其写入输出文件。 - 在循环中,使用
av_packet_unref来释放已经写入文件的数据包内存。
// 接收编码后的数据包
        while (ret >= 0)
        {
            ret = avcodec_receive_packet(codec_ctx, &packet);
            if (ret == AVERROR(EAGAIN) || ret == AVERROR_EOF)
                break;
            else if (ret < 0)
            {
                fprintf(stderr, "Error during encoding\n");
                CLEANUP(failure);
                break;
            }
            // 写入到文件
            fwrite(packet.data, 1, packet.size, output_file);
            av_packet_unref(&packet);
        }
- 最后,发送一个空帧到编码器以刷新所有待处理的帧。
    // 刷新编码器
    ret = avcodec_send_frame(codec_ctx, NULL);
    if (ret < 0)
    {
        fprintf(stderr, "Error sending flush packet to encoder\n");
        CLEANUP(failure);
    }

    while (ret >= 0)
    {
        ret = avcodec_receive_packet(codec_ctx, &packet);
        if (ret == AVERROR(EAGAIN) || ret == AVERROR_EOF)
            break;
        else if (ret < 0)
        {
            fprintf(stderr, "Error during encoding\n");
            CLEANUP(failure);
            break;
        }

        fwrite(packet.data, 1, packet.size, output_file);
        av_packet_unref(&packet);
    }
9. 资源清理
- 在正常执行结束和错误处理 (
failure标签) 中,关闭文件、释放分配的内存和其他资源。
  fclose(input_file);
    fclose(output_file);
     if (frame)
        av_freep(&frame->data[0]);
    if (sws_frame)
        av_freep(&sws_frame->data[0]);
    av_frame_free(&frame);
    av_frame_free(&sws_frame);
    avcodec_free_context(&codec_ctx);
4.完整示例代码
#include <libavformat/avformat.h>
#include <libavcodec/avcodec.h>
#include <libswscale/swscale.h>
#include <libavutil/imgutils.h>
#include <libavutil/log.h>
// 错误处理和资源释放
#define CLEANUP(label) \
    do                 \
    {                  \
        goto label;    \
    } while (0)

int main(int argc, char *argv[])
{
    av_log_set_level(AV_LOG_DEBUG);
    av_log(NULL, AV_LOG_INFO, "FFMPEG DEBUG LOG BEGIN.....\n");

    if (argc < 5)
    {
        printf("Usage: %s <input file> <width> <height> <output file>\n", argv[0]);
        return -1;
    }

    // 程序输入
    const char *input_filename = argv[1];
    int width = atoi(argv[2]);
    int height = atoi(argv[3]);
    const char *output_filename = argv[4];

    // 相关变量初始化
    AVCodecContext *codec_ctx = NULL;
    AVCodec *codec = NULL;
    AVFrame *frame = NULL;
    AVFrame *sws_frame = NULL;
    AVPacket packet;
    struct SwsContext *sws_ctx = NULL;
    FILE *input_file = NULL;
    FILE *output_file = NULL;
    int ret;

    // 读取YUV 文件
    input_file = fopen(input_filename, "rb");
    if (!input_file)
    {

        fprintf(stderr, "Could not open input file '%s'\n", input_filename);
        CLEANUP(failure);
        return -1;
    }
    // 打开要写入的文件
    output_file = fopen(output_filename, "wb");
    if (!output_file)
    {
        fprintf(stderr, "Could not open output file '%s'\n", output_filename);
        CLEANUP(failure);
        return -1;
    }

    // 查找编码器
    codec = avcodec_find_encoder(AV_CODEC_ID_H264);
    if (!codec)
    {

        av_log(NULL, AV_LOG_ERROR, "H264 Codec not found.....\n");
        CLEANUP(failure);
        return -1;
    }

    // 分配编码器上下文
    codec_ctx = avcodec_alloc_context3(codec);
    if (!codec_ctx)
    {
        av_log(NULL, AV_LOG_ERROR, "Could not allocate video codec context.....\n");
        CLEANUP(failure);
        return -1;
    }

    // 设置编码器的参数
    codec_ctx->bit_rate = 4000000;  //与图像质量
    codec_ctx->height = height;
    codec_ctx->width = width;
    codec_ctx->time_base = (AVRational){1, 25};
    codec_ctx->framerate = (AVRational){25, 1};
    codec_ctx->gop_size = 10;
    codec_ctx->max_b_frames = 0;             // 设置成0,可以减少编码器负担
    codec_ctx->pix_fmt = AV_PIX_FMT_YUV420P; // 使用YUV420P进行编码

    // 打开编码器
    if (avcodec_open2(codec_ctx, codec, NULL) < 0)
    {
        av_log(NULL, AV_LOG_ERROR, "Could not open codec.....\n");
        CLEANUP(failure);
        return -1;
    }

    // 分配原始帧和转换帧
    frame = av_frame_alloc();
    sws_frame = av_frame_alloc();
    if (!frame || !sws_frame)
    {
        fprintf(stderr, "Could not allocate video frame\n");
        fclose(input_file);
        fclose(output_file);
        avcodec_free_context(&codec_ctx);
        if (frame)
            av_frame_free(&frame);
        if (sws_frame)
            av_frame_free(&sws_frame);
        return -1;
    }

    frame->format = codec_ctx->pix_fmt;
    frame->width = width;
    frame->height = height;

    ret = av_image_alloc(frame->data, frame->linesize, width, height, codec_ctx->pix_fmt, 32);
    if (ret < 0)
    {
        CLEANUP(failure);
        return -1;
    }

    sws_frame->format = AV_PIX_FMT_YUV422P;
    sws_frame->width = width;
    sws_frame->height = height;

    ret = av_image_alloc(sws_frame->data, sws_frame->linesize, width, height, AV_PIX_FMT_YUV422P, 32);
    if (ret < 0)
    {
        fprintf(stderr, "Could not allocate raw picture buffer for SWS frame\n");
        CLEANUP(failure);
        return -1;
    }

    // 创建SWS上下文
    sws_ctx = sws_getContext(width, height, AV_PIX_FMT_YUV422P, width, height, AV_PIX_FMT_YUV420P, SWS_BICUBIC, NULL, NULL, NULL);
    if (!sws_ctx)
    {
        fprintf(stderr, "Could not initialize the conversion context\n");
        fclose(input_file);
        fclose(output_file);
        if (frame)
            av_freep(&frame->data[0]);
        if (sws_frame)
            av_freep(&sws_frame->data[0]);
        av_frame_free(&frame);
        av_frame_free(&sws_frame);
        avcodec_free_context(&codec_ctx);
        return -1;
    }

    // 分配数据包
    av_init_packet(&packet); // 初始化packet
    packet.data = NULL;
    packet.size = 0;

    // 读取YUV422P数据到sws_frame中
    if (fread(sws_frame->data[0], 1, width * height * 2, input_file) == width * height * 2)
    {
        sws_scale(sws_ctx, (const uint8_t *const *)sws_frame->data, sws_frame->linesize, 0, height, frame->data, frame->linesize);

        frame->pts = 0; // 设置时间戳

        // 数据送入编码器
        ret = avcodec_send_frame(codec_ctx, frame);
        if (ret < 0)
        {
            fprintf(stderr, "Error sending frame for encoding\n");
            CLEANUP(failure);
        }

        // 接收编码后的数据包
        while (ret >= 0)
        {
            ret = avcodec_receive_packet(codec_ctx, &packet);
            if (ret == AVERROR(EAGAIN) || ret == AVERROR_EOF)
                break;
            else if (ret < 0)
            {
                fprintf(stderr, "Error during encoding\n");
                CLEANUP(failure);
                break;
            }
            // 写入到文件
            fwrite(packet.data, 1, packet.size, output_file);
            av_packet_unref(&packet);
        }
    }
    else
    {
        fprintf(stderr, "Error reading input file\n");
    }

    // 刷新编码器
    ret = avcodec_send_frame(codec_ctx, NULL);
    if (ret < 0)
    {
        fprintf(stderr, "Error sending flush packet to encoder\n");
        CLEANUP(failure);
    }

    while (ret >= 0)
    {
        ret = avcodec_receive_packet(codec_ctx, &packet);
        if (ret == AVERROR(EAGAIN) || ret == AVERROR_EOF)
            break;
        else if (ret < 0)
        {
            fprintf(stderr, "Error during encoding\n");
            CLEANUP(failure);
            break;
        }

        fwrite(packet.data, 1, packet.size, output_file);
        av_packet_unref(&packet);
    }

    // 释放资源
    fclose(input_file);
    fclose(output_file);
     if (frame)
        av_freep(&frame->data[0]);
    if (sws_frame)
        av_freep(&sws_frame->data[0]);
    av_frame_free(&frame);
    av_frame_free(&sws_frame);
    avcodec_free_context(&codec_ctx);
    return 0;

failure:
    if (input_file)
        fclose(input_file);
    if (output_file)
        fclose(output_file);
    if (frame)
        av_freep(&frame->data[0]);
    if (sws_frame)
        av_freep(&sws_frame->data[0]);
    av_frame_free(&frame);
    av_frame_free(&sws_frame);
    avcodec_free_context(&codec_ctx);
    return -1;
}
该程序输出结果为.h264的码流文件,这里并没有添加文件容器(MP4/MKV/MOV)
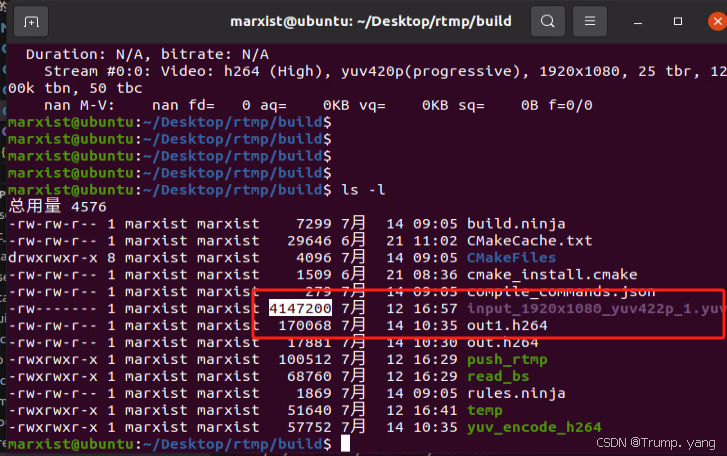
可以直接调用ffplay进行播放,无需指定任何参数,因为已经封装到了NAL单元中,查看是否压编码成功。
可以看出有了显著的压缩效果,如果就降低码率,还可以进行缩小文件大小


