介绍
NodePort:
主要特点:
为Service在每个节点上分配一个固定的端口(NodePort),允许外部流量通过节点的IP地址和NodePort访问Service。
NodePort将流量从集群外部引入到Service内部。
Service类型为NodePort时,还会创建一个ClusterIP,但它只是一个内部的ClusterIP,通常不会直接使用。
使用场景:
当需要从集群外部访问Service,但不希望使用负载均衡器或Ingress时,可以使用NodePort。
适用于开发和测试环境,以便快速访问Service。
不推荐用于生产环境,因为NodePort通常需要手动配置负载均衡,不够灵活和安全。
ClusterIP:
主要特点:
为Service创建一个内部ClusterIP,只能在集群内部访问。
ClusterIP将流量从集群外部引入到集群内部Service。
使用场景:
当Service只需要在集群内部访问,不需要从外部访问时,通常使用ClusterIP。
适用于微服务之间的通信,内部服务发现和负载均衡。
在生产环境中更为常见,因为ClusterIP提供了更好的安全性和控制,不暴露Service到公共网络。
准备
准备一个k8s集群,要求有一个master节点和一个node节点
Nodeport实现服务发现
在master节点上编写yaml配置文件:
[root@master ~]# mkdir  /service
[root@master ~]# cd /service/
[root@master service]# ls
[root@master service]# vim scnginx.yaml
[root@master service]# cat scnginx.yaml
apiVersion: apps/v1
kind: Deployment
metadata:
  name: scnginx-deployment
  labels:
    app: scnginx
spec:
  replicas: 3
  selector:
    matchLabels:
      app: scnginx
  template:
    metadata:
      labels:
        app: scnginx
    spec:
      containers:
      - name: nginx
        image: nginx
        imagePullPolicy: IfNotPresent
        ports:
        - containerPort: 80
---
apiVersion: v1
kind: Service
metadata:
  name: scnginx-service
spec:
  type: NodePort
  selector:
    app: scnginx
  ports:
  - name: name-of-service-port
    protocol: TCP
    port: 80
    targetPort: 80
    nodePort: 30009
下面是对每行命令的解释:
apiVersion: apps/v1: 指定了使用的Kubernetes API版本,这是Deployment对象的版本。
kind: Deployment: 指定了要创建的Kubernetes资源类型,这是一个Deployment(部署)对象。
metadata: Deployment的元数据部分,包含有关部署的信息。
name: scnginx-deployment: 部署的名称是 “scnginx-deployment”。
labels: 为部署添加了标签,标签的键是 “app”,值是 “scnginx”。
spec: 部署的规范部分,定义了部署的配置。
replicas: 3: 指定要创建的副本数为3,这意味着将运行3个相同的Pod实例。
selector:: 用于选择要控制的Pod的标签。
matchLabels:: 匹配Pod的标签,以确保Deployment可以控制正确的Pod。
app: scnginx: 匹配标签 “app” 的值为 “scnginx” 的Pod。
template:: 定义了要创建的Pod的模板。
metadata:: Pod的元数据部分,包含有关Pod的信息。
labels:: 为Pod添加了标签,标签的键是 “app”,值是 “scnginx”。
spec:: Pod的规范部分,定义了Pod的配置。
containers:: 定义了要在Pod中运行的容器。
name: nginx: 容器的名称是 “nginx”。
image: nginx: 使用的容器镜像是 “nginx”。
imagePullPolicy: IfNotPresent: 定义了拉取镜像的策略,如果本地不存在该镜像,则拉取。
ports:: 定义了容器的端口配置。
containerPort: 80: 将容器的端口80映射到Pod的端口。
以下部分定义了一个Service:
apiVersion: v1: 指定了使用的Kubernetes API版本,这是Service对象的版本。
kind: Service: 指定了要创建的Kubernetes资源类型,这是一个Service(服务)对象。
metadata:: Service的元数据部分,包含有关服务的信息。
name: scnginx-service: 服务的名称是 “scnginx-service”。
spec:: 服务的规范部分,定义了服务的配置。
type: NodePort: 定义了服务的类型为NodePort,这意味着Service将会公开一个节点的端口供外部访问。
selector:: 通过标签选择要路由流量到的Pod。
app: scnginx: 匹配标签 “app” 的值为 “scnginx” 的Pod。
ports: 定义了服务的端口配置。
name: name-of-service-port: 服务端口的名称。
protocol: TCP: 指定端口协议为TCP。
port: 80: 服务监听的端口号。
targetPort: 80: 将流量路由到Pod的端口80。
nodePort: 30009: 指定NodePort的端口号为30009,外部可以通过节点的IP地址和这个端口来访问Service。
这个配置文件创建了一个名为 “scnginx-deployment” 的Deployment,其中运行3个Nginx容器的Pod,并创建了一个名为 “scnginx-service” 的NodePort类型的Service,将流量路由到这三个Pod中的任何一个,通过任意节点的IP地址和端口30009进行访问。
下面检查服务是否成功运行:
[root@k8smaster service]# kubectl apply -f scnginx.yaml
deployment.apps/scnginx-deployment created
service/scnginx-service unchanged
[root@k8smaster service]# kubectl get svc
NAME              TYPE        CLUSTER-IP       EXTERNAL-IP   PORT(S)          AGE
kubernetes        ClusterIP   10.96.0.1        <none>        443/TCP          5d21h
mysql-service     NodePort    10.100.48.98     <none>        3306:30008/TCP   17m
nginx-service     ClusterIP   10.111.156.94    <none>        80/TCP           3h44m
nginx-service-2   NodePort    10.102.129.209   <none>        80:30007/TCP     3h34m
php-apache        ClusterIP   10.106.101.193   <none>        80/TCP           24h
scnginx-service   NodePort    10.98.63.131     <none>        80:30009/TCP     2m21s
[root@k8smaster service]# kubectl get pod
NAME                                 READY   STATUS    RESTARTS   AGE
mysql                                1/1     Running   0          17m
nginx                                1/1     Running   0          3h45m
nginx-2                              1/1     Running   0          3h35m
nginx-deployment-559d658b74-62hxx    1/1     Running   0          4h24m
nginx-deployment-559d658b74-zwlh4    1/1     Running   1          24h
php-apache-567d9f79d-rfv9b           1/1     Running   0          4h24m
scnginx-deployment-b975997c7-glfdb   1/1     Running   0          55s
scnginx-deployment-b975997c7-mk92v   1/1     Running   0          55s
scnginx-deployment-b975997c7-vsbt5   1/1     Running   0          55s
[root@k8smaster service]#
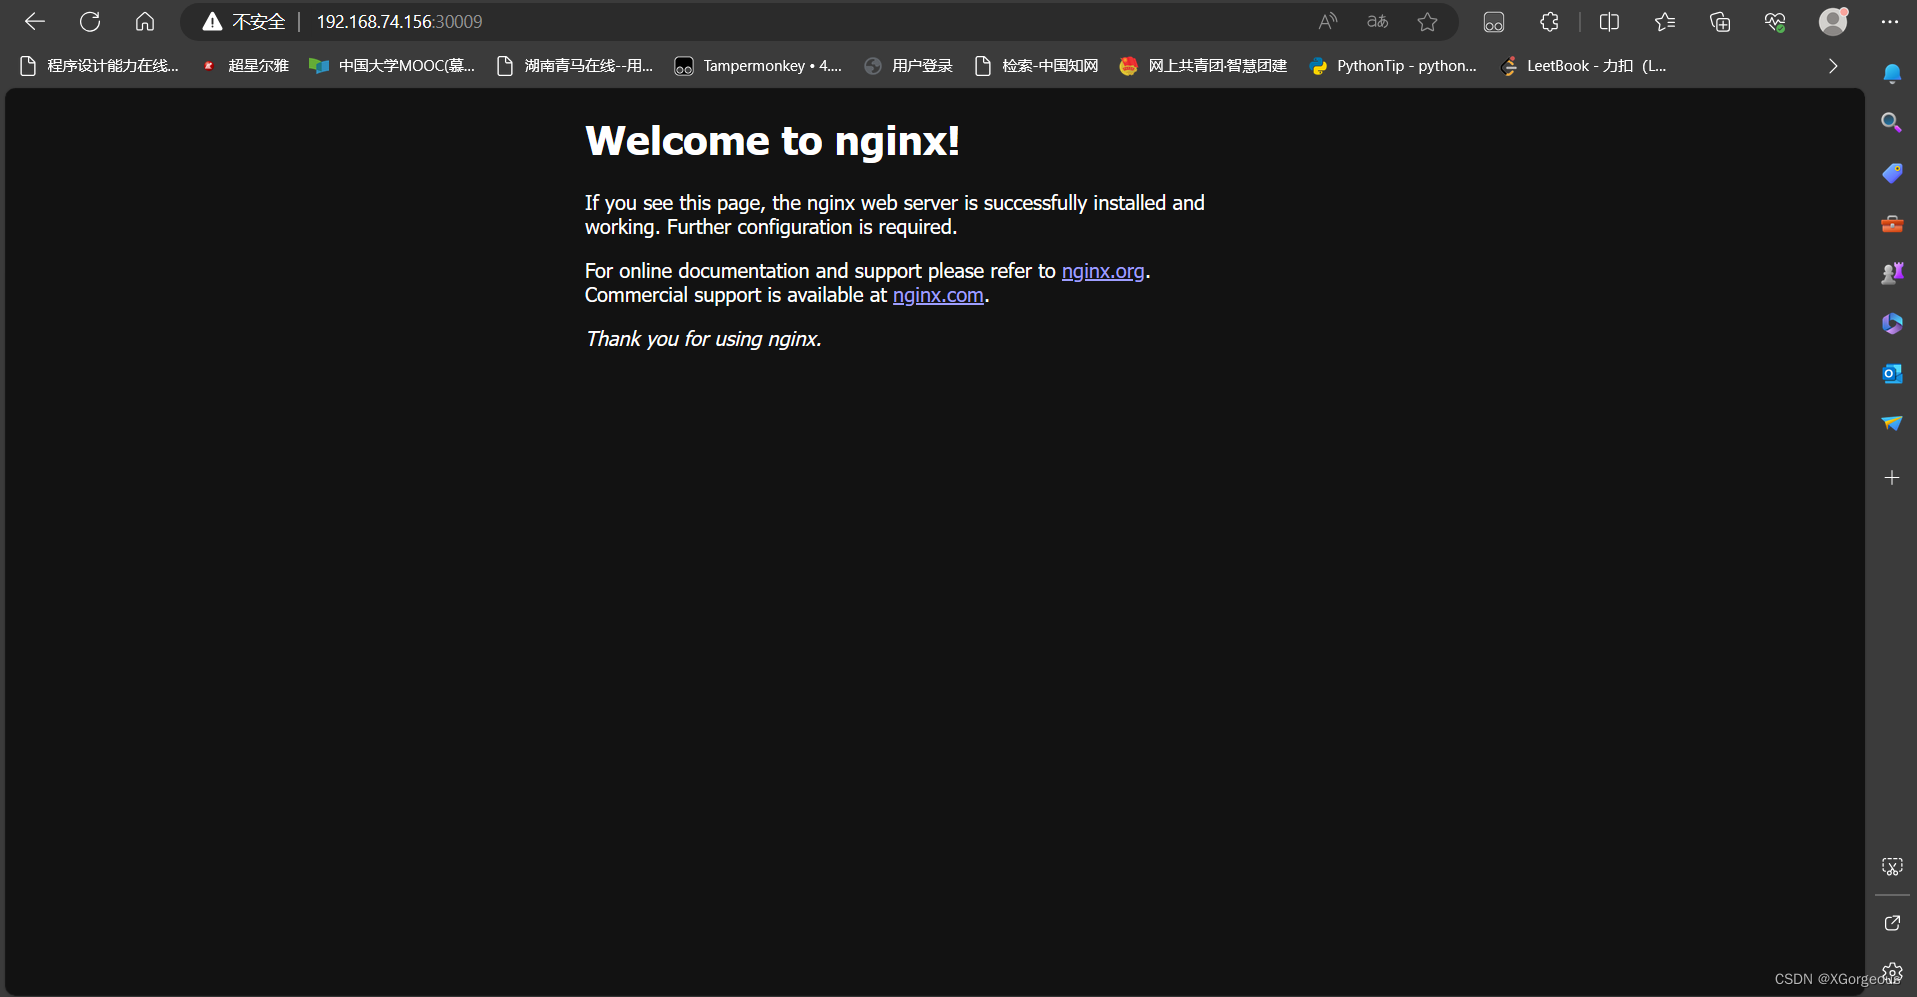
在Windows机器上访问,测试是否可以看到页面:
http://192.168.74.156:30009/ (任何节点IP+端口号30009)
ClusterIP服务发现
在master节点编写yaml配置文件:
[root@master service] cd /service
[root@master service] vim scnginx-2.yaml
[root@master service] cat scnginx-2.yaml
apiVersion: apps/v1
kind: Deployment
metadata:
  name: scnginx-deployment-2
  labels:
    app: scnginx-2
spec:
  replicas: 3
  selector:
    matchLabels:
      app: scnginx-2
  template:
    metadata:
      labels:
        app: scnginx-2
    spec:
      containers:
      - name: nginx
        image: nginx:latest
        imagePullPolicy: IfNotPresent
        ports:
        - containerPort: 80
---
apiVersion: v1
kind: Service
metadata:
  name: scnginx-service-2
spec:
  type: ClusterIP
  selector:
    app: scnginx-2
  ports:
  - name: name-of-service-port-2
    protocol: TCP
    port: 80
    targetPort: 80
    #nodePort: 30009
验证服务是否启动
[root@master-1 nginx] kubectl get svc
NAME                TYPE        CLUSTER-IP       EXTERNAL-IP   PORT(S)   AGE
kubernetes          ClusterIP   10.96.0.1        <none>        443/TCP   19d
php-apache          ClusterIP   10.107.194.238   <none>        80/TCP    16d
scnginx-service-2   ClusterIP   10.110.242.117   <none>        80/TCP    14m
在任意节点访问
该服务只能在集群内部使用,外面不能访问过来
[root@master-1 nginx] curl 10.110.242.117
<!DOCTYPE html>
<html>
<head>
<title>Welcome to nginx!</title>
<style>
html { color-scheme: light dark; }
body { width: 35em; margin: 0 auto;
font-family: Tahoma, Verdana, Arial, sans-serif; }
</style>
</head>
<body>
<h1>Welcome to nginx!</h1>
<p>If you see this page, the nginx web server is successfully installed and
working. Further configuration is required.</p>

<p>For online documentation and support please refer to
<a href="http://nginx.org/">nginx.org</a>.<br/>
Commercial support is available at
<a href="http://nginx.com/">nginx.com</a>.</p>

<p><em>Thank you for using nginx.</em></p>
</body>
</html>
成功
总结
NodePort适用于需要从集群外部直接访问Service的情况,但通常不是生产环境的首选。ClusterIP适用于内部通信和服务发现,提供了更好的隔离和安全性,适合生产环境中的大多数用例。在实际部署中,通常会结合使用不同类型的Service来满足不同的需求。
