注意:博主有个鸿蒙专栏,里面从上到下有关于鸿蒙next的教学文档,大家感兴趣可以学习下
如果大家觉得博主文章写的好的话,可以点下关注,博主会一直更新鸿蒙next相关知识
目录
3.3 在编辑窗口右上角的侧边工具栏,单击Previewer,打开预览器。
4.4 实现点击卡片跳转到首页,从而进入元服务。在卡片中增加如下示例代码,实现点击卡片空白处即可进入元服务。
1. 元服务基本概念
1.1 基本介绍
元服务(原名为原子化服务)是HarmonyOS提供的一种面向未来的服务提供方式,是有独立入口、免安装、可为用户提供一个或多个便捷服务的新型应用程序形态。
以线上购物为例:
- 传统购物应用:需要先安装应用,打开应用查找商品,加入购物车,然后完成支付。
- 调整为包含“商品浏览”、“购物车”、“支付”等多个服务的元服务:无需安装,通过丰富入口直达服务页面。例如:将心仪商品页添加桌面,实时掌握商品价格变动。等到秒杀时间点,直达购物车进行结算。
元服务基于HarmonyOS API开发,支持运行在1+8+N设备上,供用户在合适的场景、合适的设备上便捷使用。元服务相对于传统方式的需要安装的应用形态更加轻量,同时提供更丰富的入口、更精准的分发。
注意
从HarmonyOS NEXT Developer Preview1(对应API 11)版本开始:
- HarmonyOS元服务只能采用“元服务API集”进行开发,且只支持Stage模型、只支持ArkTS接口;开发者在DevEco Studio中选择开发元服务时,工具将自动过滤“元服务API集”。
- 使用配套的HarmonyOS SDK开发的元服务,只能运行在系统软件版本为HarmonyOS NEXT Developer Preview1及以上版本的设备上。
元服务类似微信小程序,无需安装,从目前编辑器更新的特性来说,元服务和应用的区别就是一个不需要安装,另外一个需要安装,其他基本一致
1.2 元服务与传统应用的对比
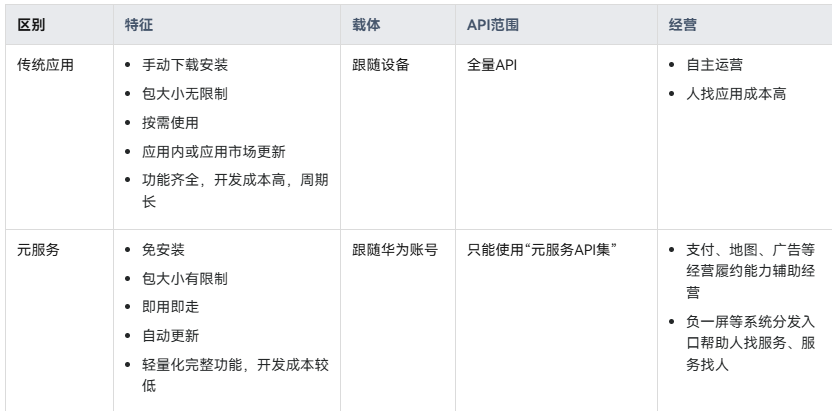
开发者基于经营目标、效率、成本、收益等因素,自主决定开发传统应用或元服务,也可以同时提供。
1.3 元服务程序包基础知识
元服务程序包基础知识
- 免安装-免安装是指无需用户通过应用市场显式安装,用户点击元服务后,由系统程序框架后台安装后即可使用。
- 分包-HarmonyOS每个应用程序包(.app)可以包含多个包文件(以.hap为后缀的HAP或以.hsp为后缀的HSP)。元服务在此基础上,进一步限制每个HAP或HSP(含其依赖的所有共享包)的大小,以实现快速启动体验,元服务的这种多包开发方案称为“分包”。
- 预加载-开发者可以通过配置预加载,由系统自动下载和安装可能需要的分包模块,从而提升进入后续模块的速度。
- 老化-系统会按照一定策略清理不活跃的元服务,释放空间,这个过程称为老化。
官方文档地址:文档中心
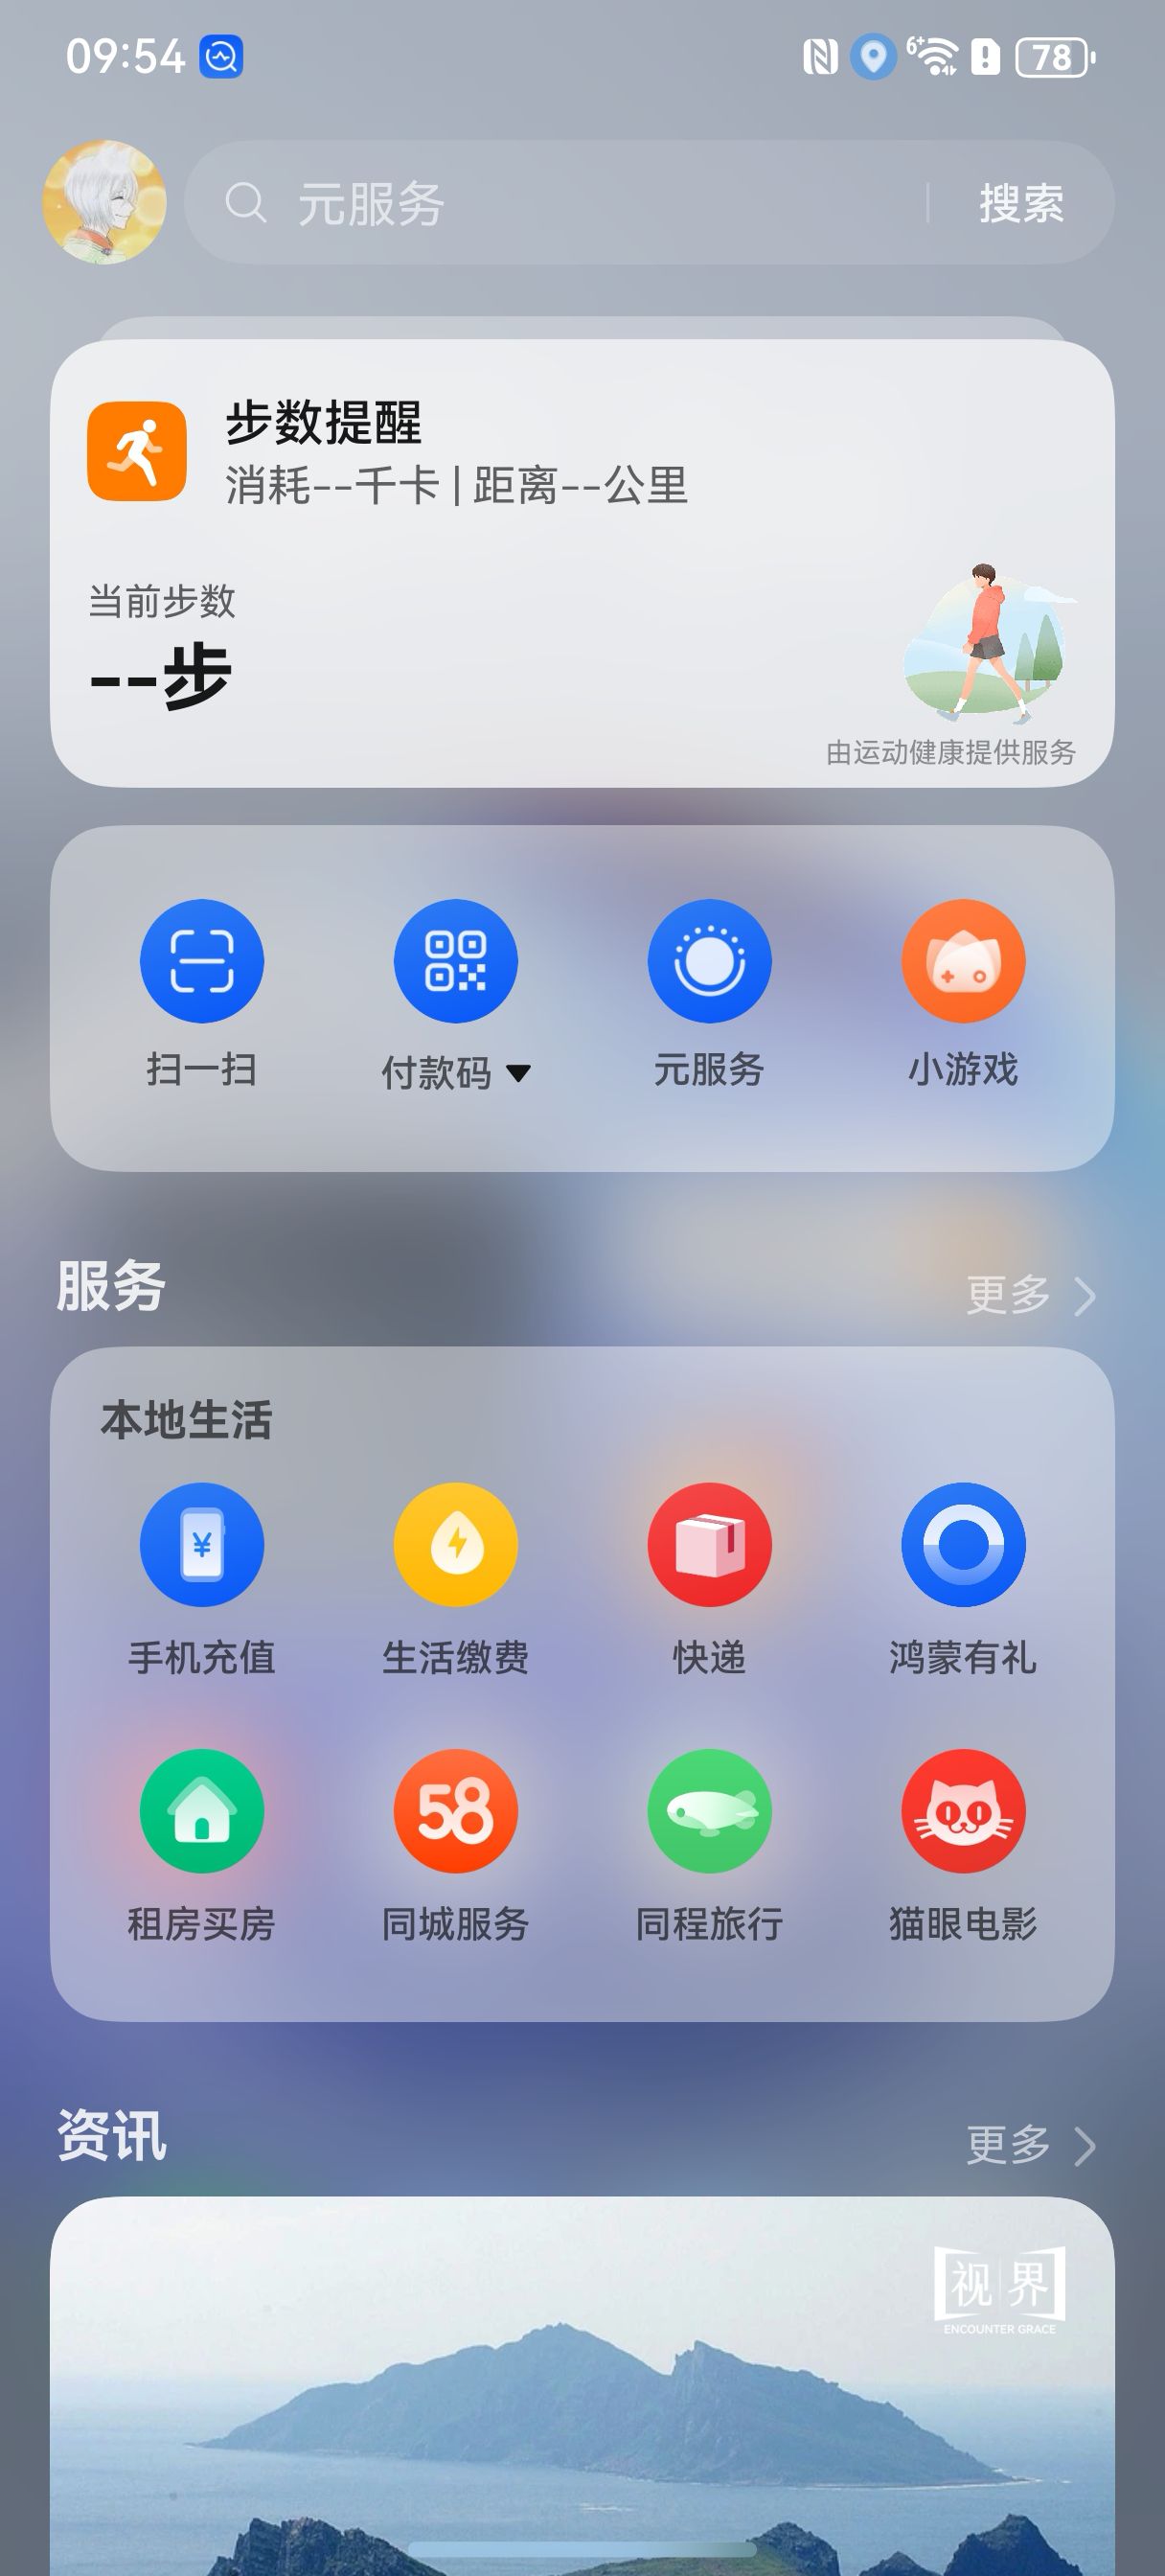
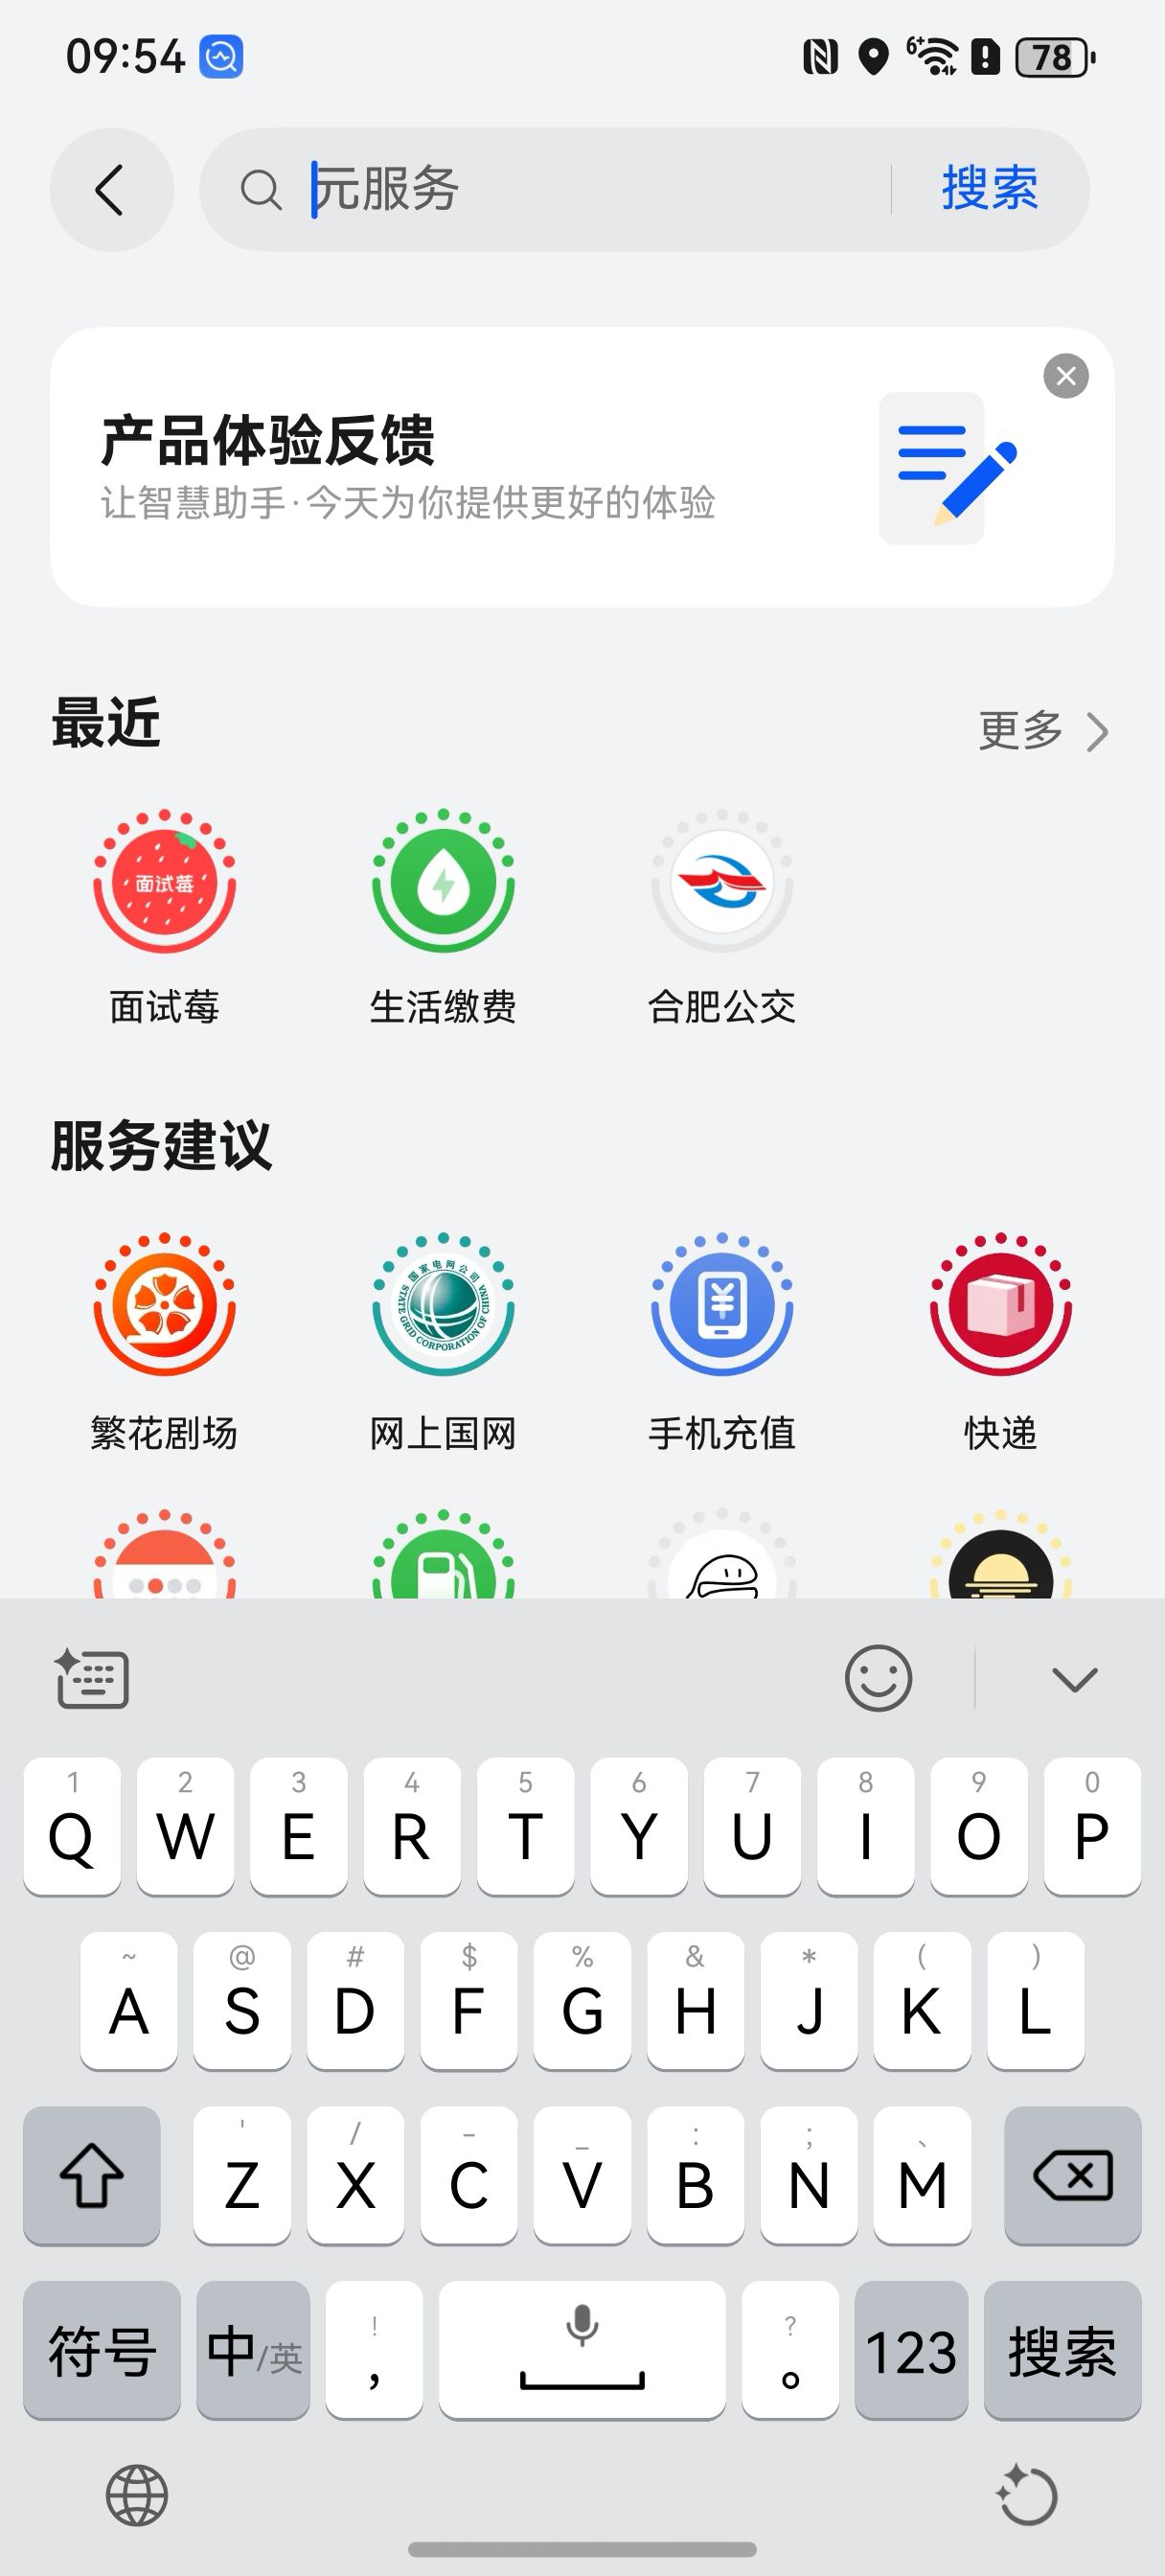
1.4 元服务入口
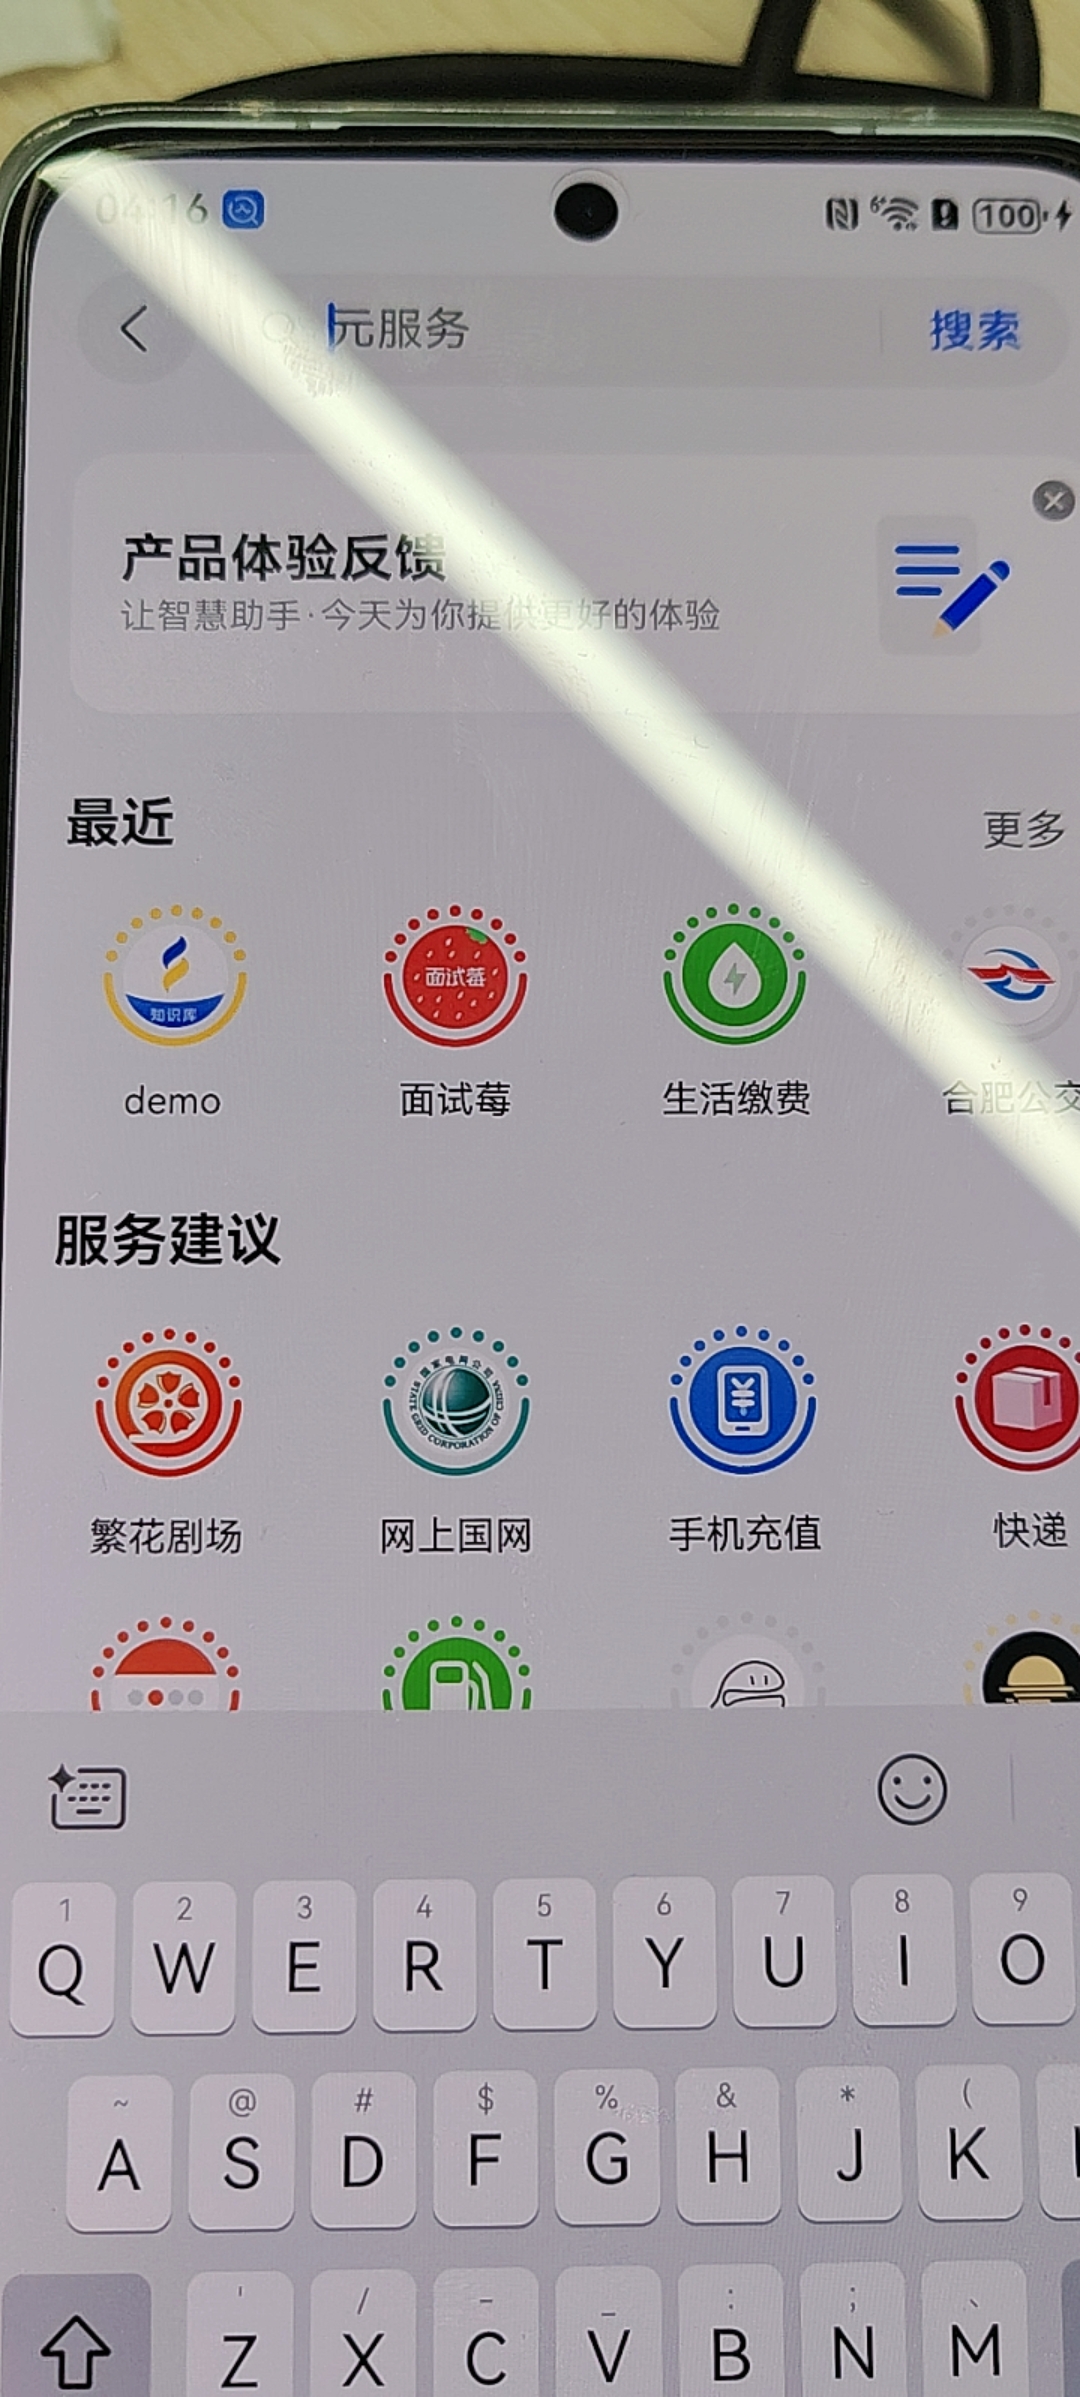
1、打开负一屏搜索页,输入关键字,搜索获取所需的元服务。
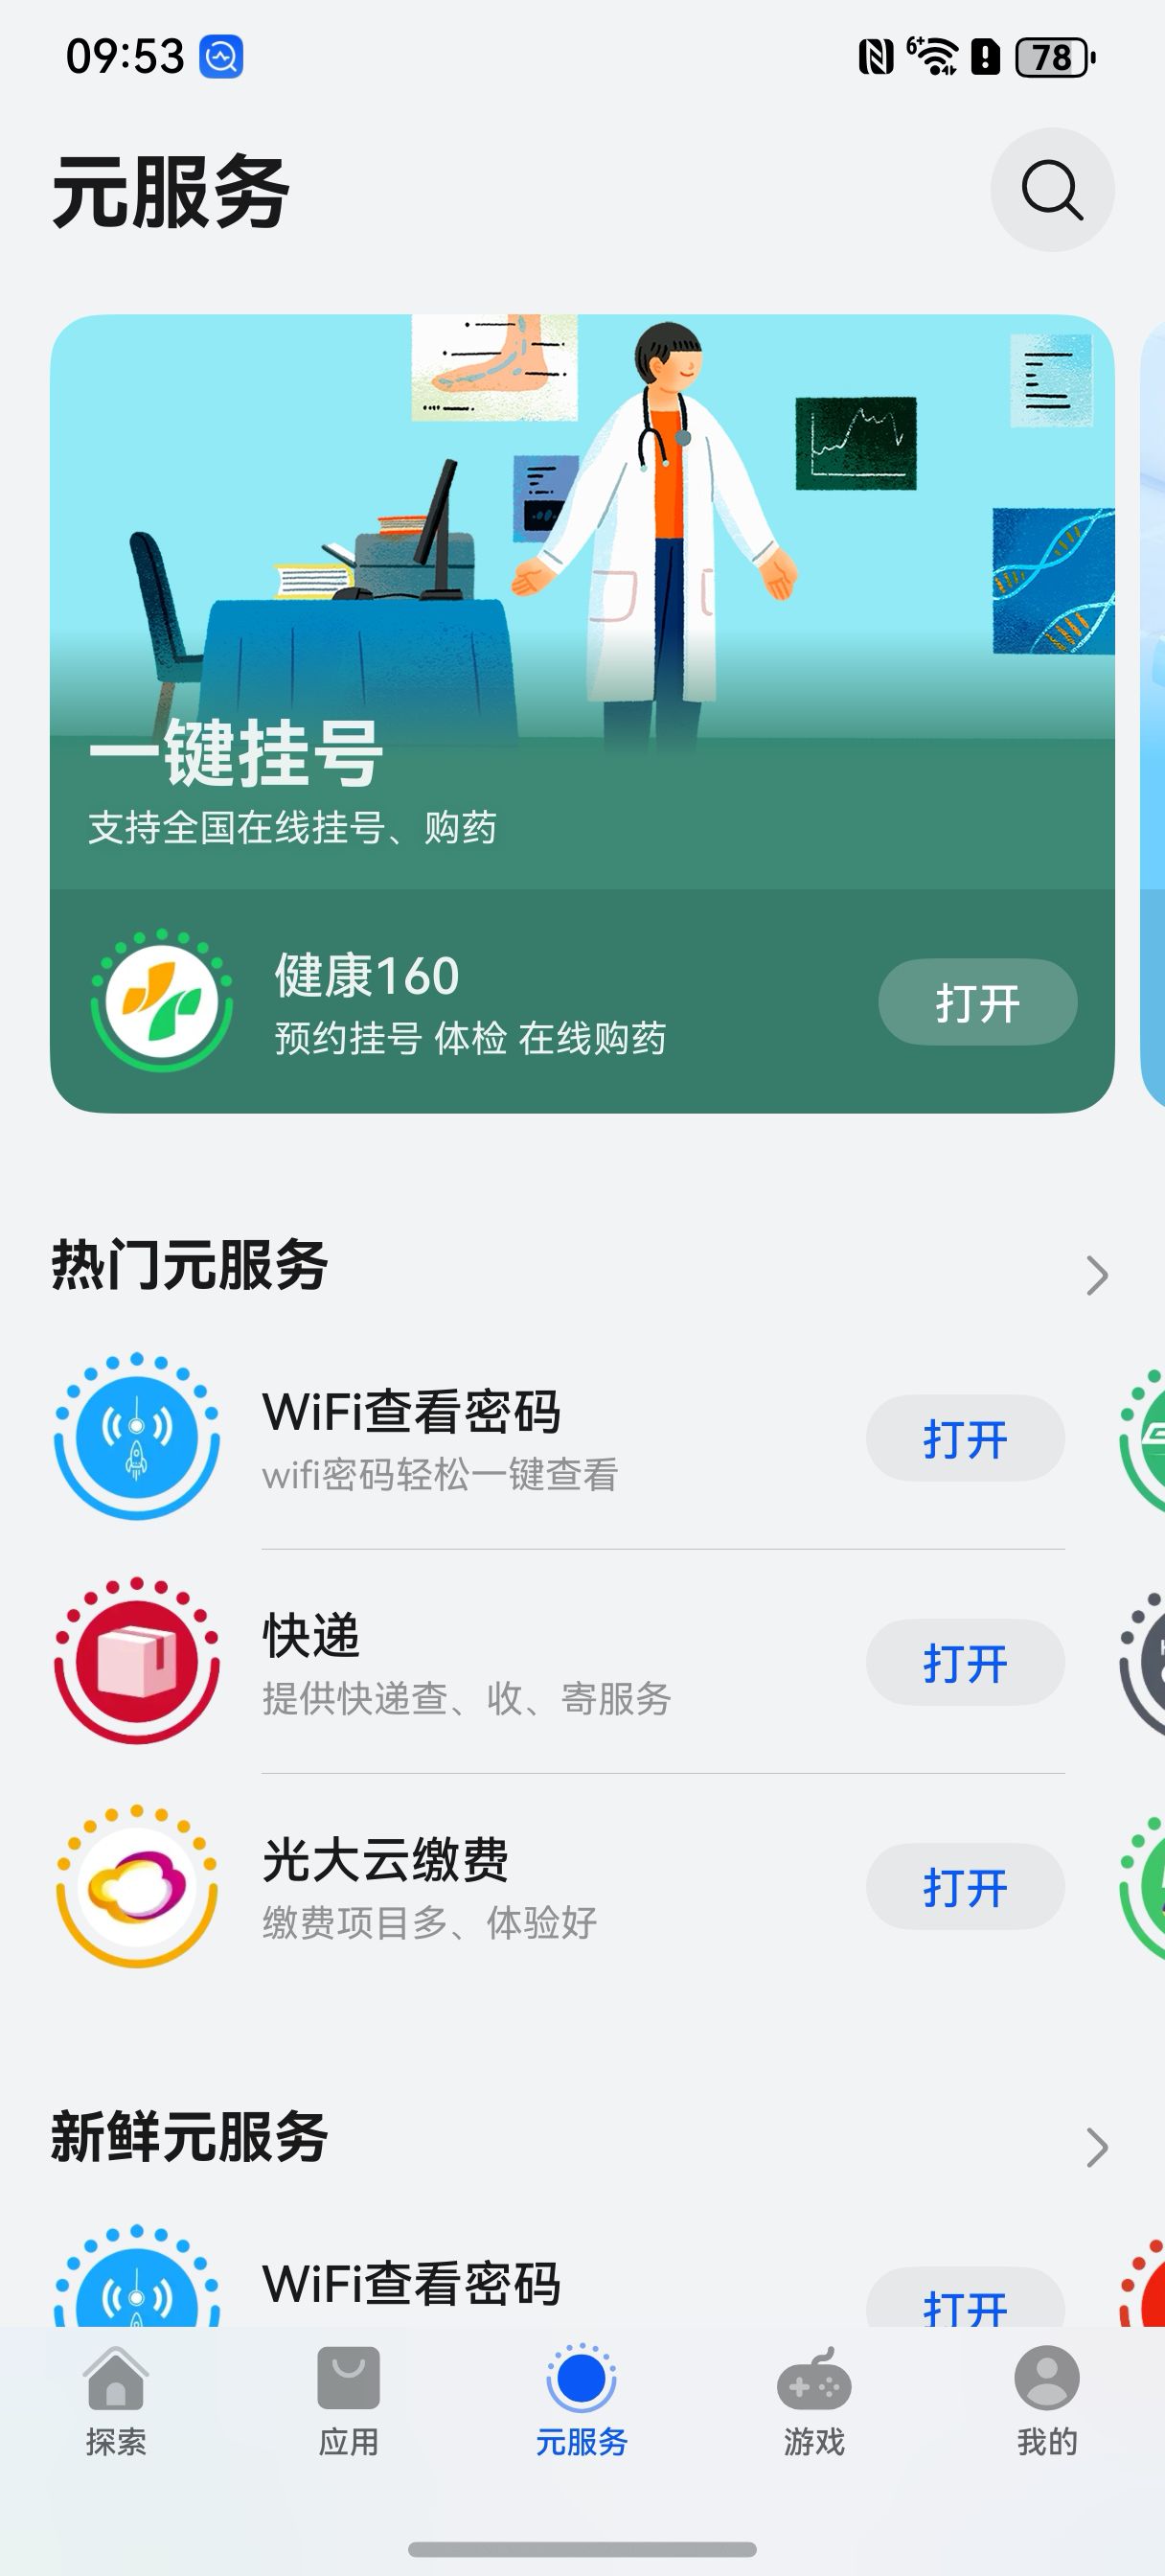
2、打开华为应用市场,点击“应用”页签,进入“元服务”专区发现并使用元服务。
2. 创建元服务
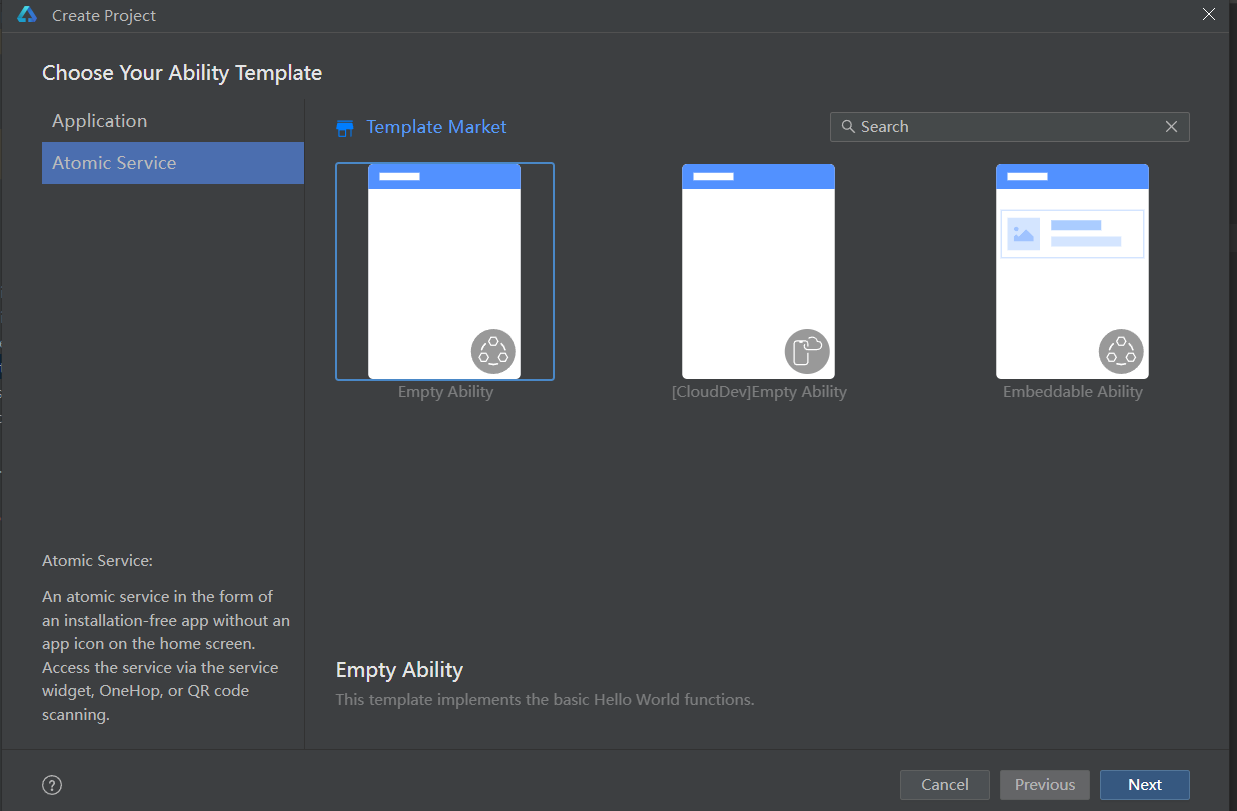
1、若首次打开DevEco Studio,请选择Create Project开始创建一个新工程。如果已经打开了一个工程,请在菜单栏选择File > New > Create Project来创建一个新工程。选择Atomic Service元服务开发,选择“Empty Ability”模板,单击Next进行下一步配置。
当前元服务支持的模板类型:
- Empty Ability:用于Phone、Tablet设备的模板,展示基础的Hello World功能。
- [CloudDev]Empty Ability:端云一体化开发通用模板。更多信息请参见端云一体化开发。
- Embeddable Ability:用于开发支持被其他应用嵌入式运行的元服务的工程模板。
说明
元服务不支持native开发方式,无法选择native工程模板开发元服务。
2、点击Sign In登录华为开发者账号进行开发,或选择访客模式体验。访客模式无需登录华为账号。
说明
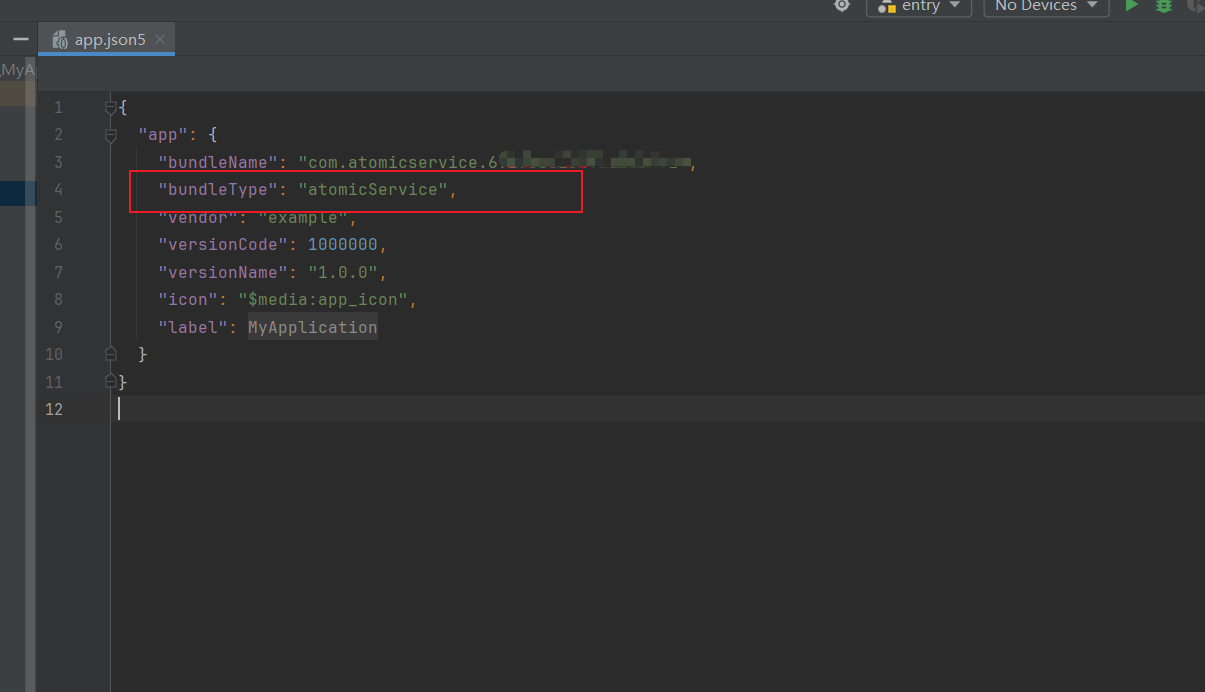
访客模式仅用于体验元服务开发功能。如需将访客模式下开发的元服务工程或历史元服务工程在真机上运行并安装,需在AppScope > app.json5文件中补充当前开发者账号下已在AppGallery注册且真实存在的包名。

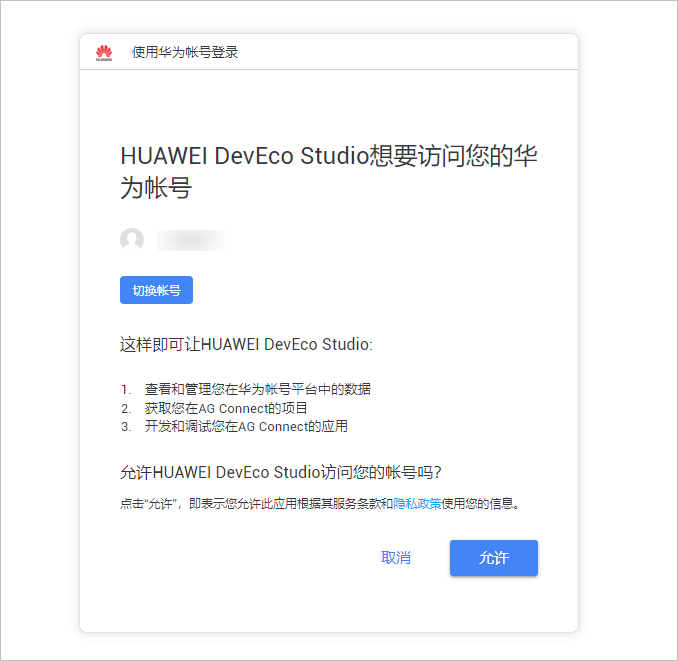
3、在弹出的网页界面中点击允许,完成访问账号授权。
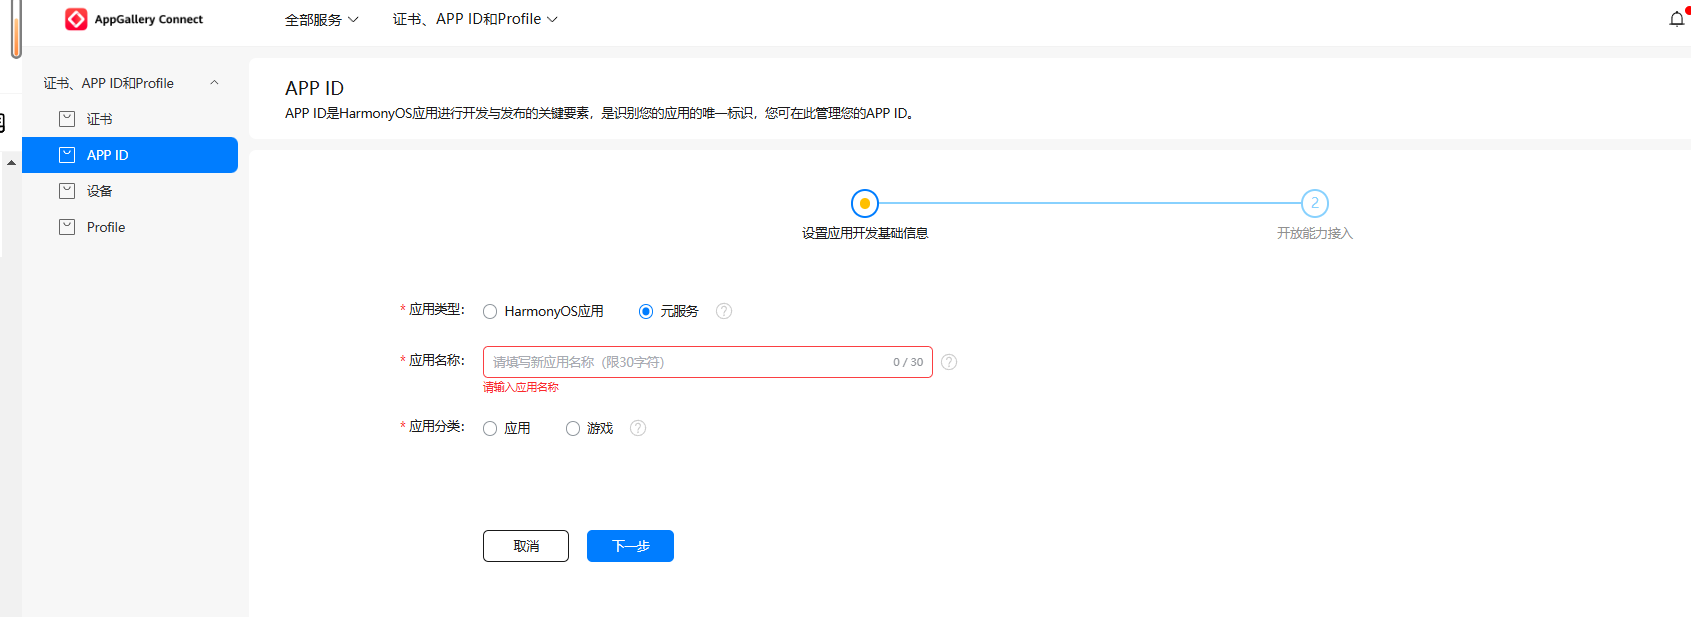
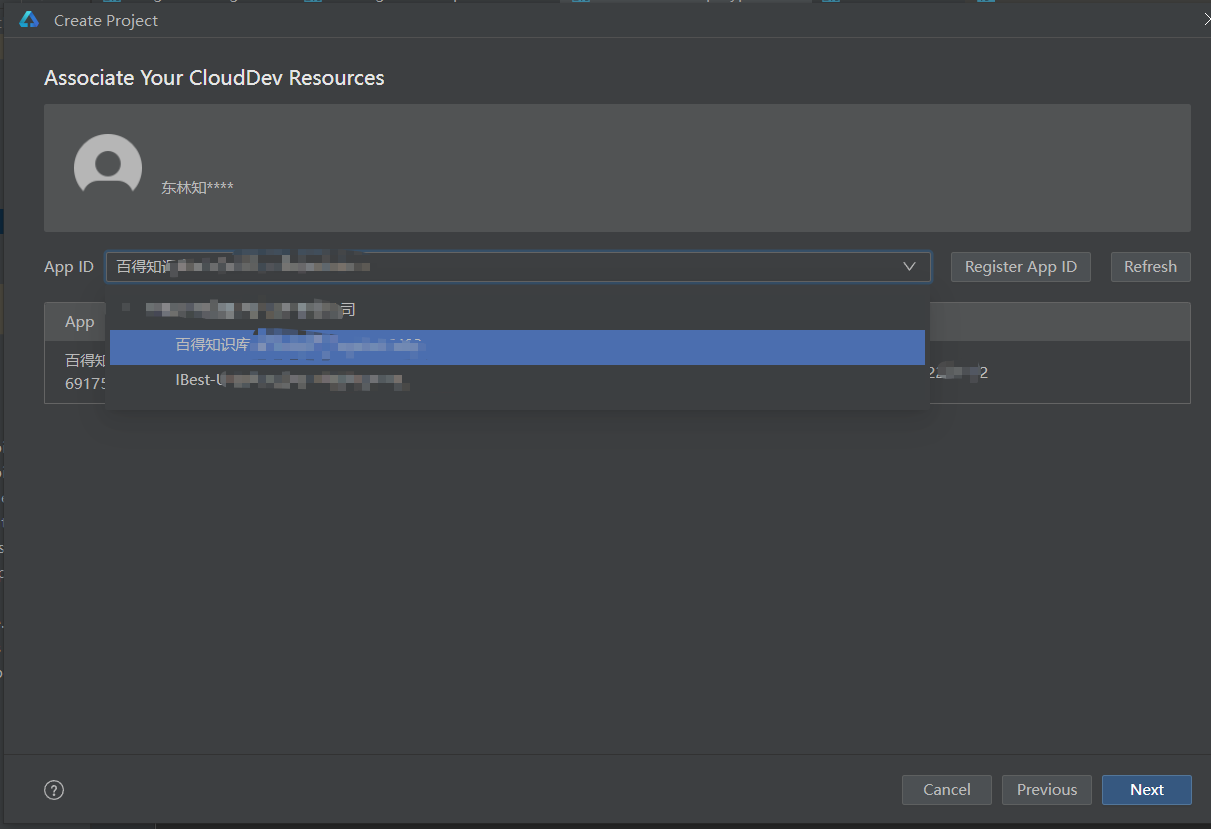
4、选择已登录账号下的APP ID。如您未在AppGallery中注册元服务应用,点击Register APP ID注册新的APP ID。
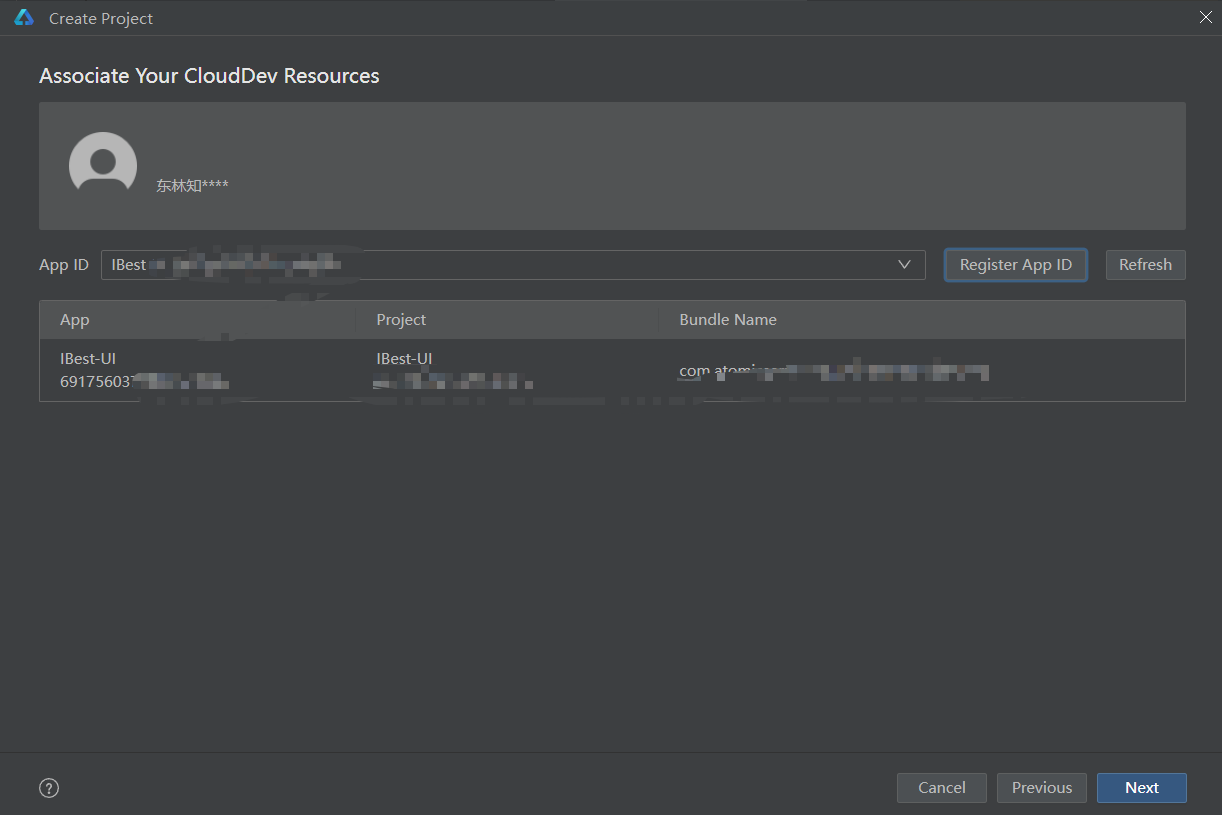
5、完成注册后,回到DevEco Studio界面,点击Refresh,刷新当前APP ID列表,选择新生成的APP ID,点击Next。
6、进入配置工程界面,填写Project name,其他参数保持默认设置即可。

7、单击Finish,工具会自动生成示例代码和相关资源,等待工程创建完成。
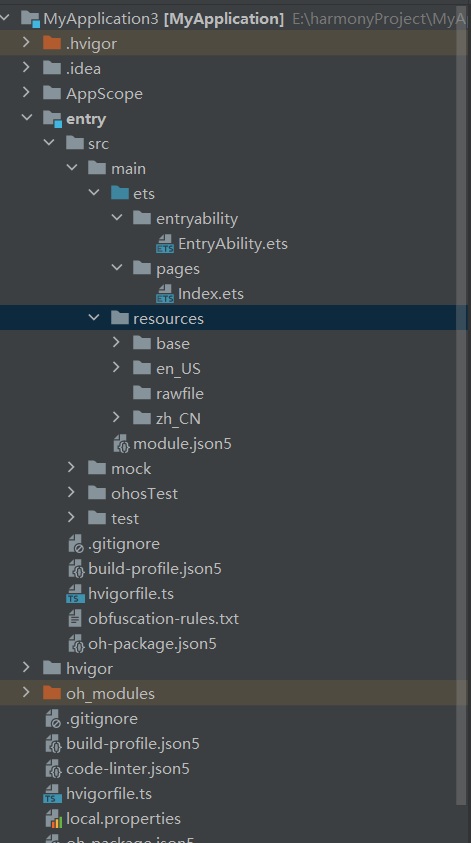
- AppScope > app.json5:元服务的全局配置信息。
- entry:HarmonyOS工程模块,编译构建生成一个HAP。
-
- src > main > ets:用于存放ArkTS源码。
- src > main > ets > entryability:元服务的入口。
- src > main > ets > pages:元服务包含的页面。
- src > main > resources:用于存放元服务所用到的资源文件,如图形、多媒体、字符串、布局文件等。关于资源文件,详见资源分类与访问。
- src > main > module.json5:模块配置文件。主要包含HAP的配置信息、元服务在具体设备上的配置信息以及元服务的全局配置信息。具体的配置文件说明,详见module.json5。
- build-profile.json5:当前的模块信息 、编译信息配置项,包括buildOption、targets配置等。
- hvigorfile.ts:模块级编译构建任务脚本,开发者可以自定义相关任务和代码实现。
- oh_modules:用于存放三方库依赖信息。
- build-profile.json5:元服务级配置信息,包括签名signingConfigs、产品配置products等。
- hvigorfile.ts:元服务级编译构建任务脚本。
有这个属性就是元服务,没有就是应用
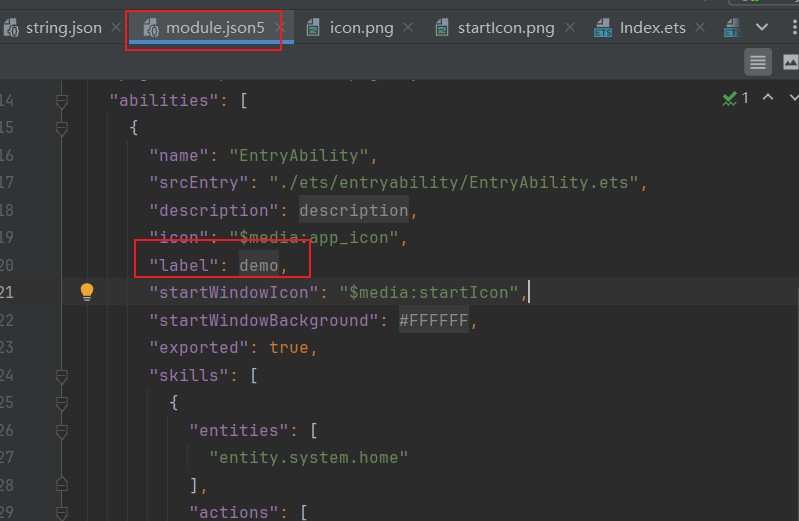
用户可以修改元服务的图标和名称
3. 构建元服务页面
3.1 使用文本组件在页面展示Hello World
import { authentication } from '@kit.AccountKit';
import { BusinessError } from '@kit.BasicServicesKit';
import { hilog } from '@kit.PerformanceAnalysisKit';

@Entry
  @Component
  struct Index {
    @State message: string = 'Hello World';

    build() {
      Column() {
        Column(){
          Text(this.message)
            .fontSize(50)
        }.width('100%')
          .height('100%')
          .justifyContent(FlexAlign.Center)
      }
      .height('100%')
        .width('100%')
    }

    aboutToAppear() {
      hilog.info(0x0000, 'testTag', '%{public}s', 'Ability onCreate');
      this.loginWithHuaweiID();
    }

    /**
   * Sample code for using HUAWEI ID to log in to atomic service.
   * According to the Atomic Service Review Guide, when a atomic service has an account system,
   * the option to log in with a HUAWEI ID must be provided.
   * The following presets the atomic service to use the HUAWEI ID silent login function.
   * To enable the atomic service to log in successfully using the HUAWEI ID, please refer
   * to the HarmonyOS HUAWEI ID Access Guide to configure the client ID and fingerprint certificate.
   */
    private loginWithHuaweiID() {
      // Create a login request and set parameters
      let loginRequest = new authentication.HuaweiIDProvider().createLoginWithHuaweiIDRequest();
      // Whether to forcibly launch the HUAWEI ID login page when the user is not logged in with the HUAWEI ID
      loginRequest.forceLogin = false;
      // Execute login request
      let controller = new authentication.AuthenticationController();
      controller.executeRequest(loginRequest).then((data) => {
        let loginWithHuaweiIDResponse = data as authentication.LoginWithHuaweiIDResponse;
        let authCode = loginWithHuaweiIDResponse.data?.authorizationCode;
        // Send authCode to the backend in exchange for unionID, session

      }).catch((error: BusinessError) => {
        hilog.error(0x0000, 'testTag', 'error: %{public}s', JSON.stringify(error));
        if (error.code == authentication.AuthenticationErrorCode.ACCOUNT_NOT_LOGGED_IN) {
          // HUAWEI ID is not logged in, it is recommended to jump to the login guide page

        }
      });
    }
  }
3.2 在页面上添加一个按钮
import { authentication } from '@kit.AccountKit';
import { BusinessError } from '@kit.BasicServicesKit';
import { hilog } from '@kit.PerformanceAnalysisKit';

@Entry
  @Component
  struct Index {
    @State message: string = 'Hello World';

    build() {
      Column() {
        Column() {
          Text(this.message)
            .fontSize(50)
          // 添加按钮
          Button('点我去下一页')
            .width('50%')
            .height('50')
        }.width('100%')
          .height('100%')
          .justifyContent(FlexAlign.Center)
      }
      .height('100%')
        .width('100%')
    }

    aboutToAppear() {
      hilog.info(0x0000, 'testTag', '%{public}s', 'Ability onCreate');
      this.loginWithHuaweiID();
    }

    /**
   * Sample code for using HUAWEI ID to log in to atomic service.
   * According to the Atomic Service Review Guide, when a atomic service has an account system,
   * the option to log in with a HUAWEI ID must be provided.
   * The following presets the atomic service to use the HUAWEI ID silent login function.
   * To enable the atomic service to log in successfully using the HUAWEI ID, please refer
   * to the HarmonyOS HUAWEI ID Access Guide to configure the client ID and fingerprint certificate.
   */
    private loginWithHuaweiID() {
      // Create a login request and set parameters
      let loginRequest = new authentication.HuaweiIDProvider().createLoginWithHuaweiIDRequest();
      // Whether to forcibly launch the HUAWEI ID login page when the user is not logged in with the HUAWEI ID
      loginRequest.forceLogin = false;
      // Execute login request
      let controller = new authentication.AuthenticationController();
      controller.executeRequest(loginRequest).then((data) => {
        let loginWithHuaweiIDResponse = data as authentication.LoginWithHuaweiIDResponse;
        let authCode = loginWithHuaweiIDResponse.data?.authorizationCode;
        // Send authCode to the backend in exchange for unionID, session

      }).catch((error: BusinessError) => {
        hilog.error(0x0000, 'testTag', 'error: %{public}s', JSON.stringify(error));
        if (error.code == authentication.AuthenticationErrorCode.ACCOUNT_NOT_LOGGED_IN) {
          // HUAWEI ID is not logged in, it is recommended to jump to the login guide page

        }
      });
    }
  }
3.3 在编辑窗口右上角的侧边工具栏,单击Previewer,打开预览器。
3.4 构建元服务的第二个页面
@Entry
  @Component
  struct Second {
    @State message: string = 'Hello Second';

    build() {
      RelativeContainer() {
        Text(this.message)
          .id('SecondHelloWorld')
          .fontSize(50)
          .fontWeight(FontWeight.Bold)
          .alignRules({
            center: { anchor: '__container__', align: VerticalAlign.Center },
            middle: { anchor: '__container__', align: HorizontalAlign.Center }
          })
      }
      .height('100%')
        .width('100%')
    }
  }
3.5 实现页面间的跳转
页面间的导航可以通过页面路由router来实现。页面路由router根据页面url找到目标页面,从而实现跳转。使用页面路由请导入router模块。
import { authentication } from '@kit.AccountKit';
import { BusinessError } from '@kit.BasicServicesKit';
import { hilog } from '@kit.PerformanceAnalysisKit';
import { router } from '@kit.ArkUI';

@Entry
  @Component
  struct Index {
    @State message: string = 'Hello World';

    build() {
      Column() {
        Column() {
          Text(this.message)
            .fontSize(50)
          // 添加按钮
          Button('点我去下一页')
            .width('50%')
            .height('50')
            .onClick(()=>{
              router.pushUrl({url:'pages/Second'})
            })
        }.width('100%')
          .height('100%')
          .justifyContent(FlexAlign.Center)
      }
      .height('100%')
        .width('100%')
    }

    aboutToAppear() {
      hilog.info(0x0000, 'testTag', '%{public}s', 'Ability onCreate');
      this.loginWithHuaweiID();
    }

    /**
   * Sample code for using HUAWEI ID to log in to atomic service.
   * According to the Atomic Service Review Guide, when a atomic service has an account system,
   * the option to log in with a HUAWEI ID must be provided.
   * The following presets the atomic service to use the HUAWEI ID silent login function.
   * To enable the atomic service to log in successfully using the HUAWEI ID, please refer
   * to the HarmonyOS HUAWEI ID Access Guide to configure the client ID and fingerprint certificate.
   */
    private loginWithHuaweiID() {
      // Create a login request and set parameters
      let loginRequest = new authentication.HuaweiIDProvider().createLoginWithHuaweiIDRequest();
      // Whether to forcibly launch the HUAWEI ID login page when the user is not logged in with the HUAWEI ID
      loginRequest.forceLogin = false;
      // Execute login request
      let controller = new authentication.AuthenticationController();
      controller.executeRequest(loginRequest).then((data) => {
        let loginWithHuaweiIDResponse = data as authentication.LoginWithHuaweiIDResponse;
        let authCode = loginWithHuaweiIDResponse.data?.authorizationCode;
        // Send authCode to the backend in exchange for unionID, session

      }).catch((error: BusinessError) => {
        hilog.error(0x0000, 'testTag', 'error: %{public}s', JSON.stringify(error));
        if (error.code == authentication.AuthenticationErrorCode.ACCOUNT_NOT_LOGGED_IN) {
          // HUAWEI ID is not logged in, it is recommended to jump to the login guide page

        }
      });
    }
  }
import { router } from '@kit.ArkUI';
@Entry
@Component
struct Second {
@State message: string = 'Hello Second';
build() {
Column() {
Text(this.message)
.id('SecondHelloWorld')
.fontSize(50)
.fontWeight(FontWeight.Bold)
.alignRules({
center: { anchor: '__container__', align: VerticalAlign.Center },
middle: { anchor: '__container__', align: HorizontalAlign.Center }
})
Button('返回第一页')
.width('50%')
.height('50')
.onClick(()=>{
router.back()
})
}
.height('100%')
.width('100%')
.justifyContent(FlexAlign.Center)
}
}4. 服务卡片的开发
卡片用来显示或者提示一些基本信息或者进行一些基本操作。注意不能做重逻辑,所有重要逻辑全部交给应用
因为元服务不提供桌面应用图标,我们可以通过用户手动的方式在桌面上添加一张卡片,通过点击卡片来唤起元服务。
4.1 新建卡片
在元服务中新建一个卡片
在“Project”窗口,在“entry”模块目录右键选择“New > Service Widget > Dynamic Widget”,进入卡片模板选择界面,如下图所示:
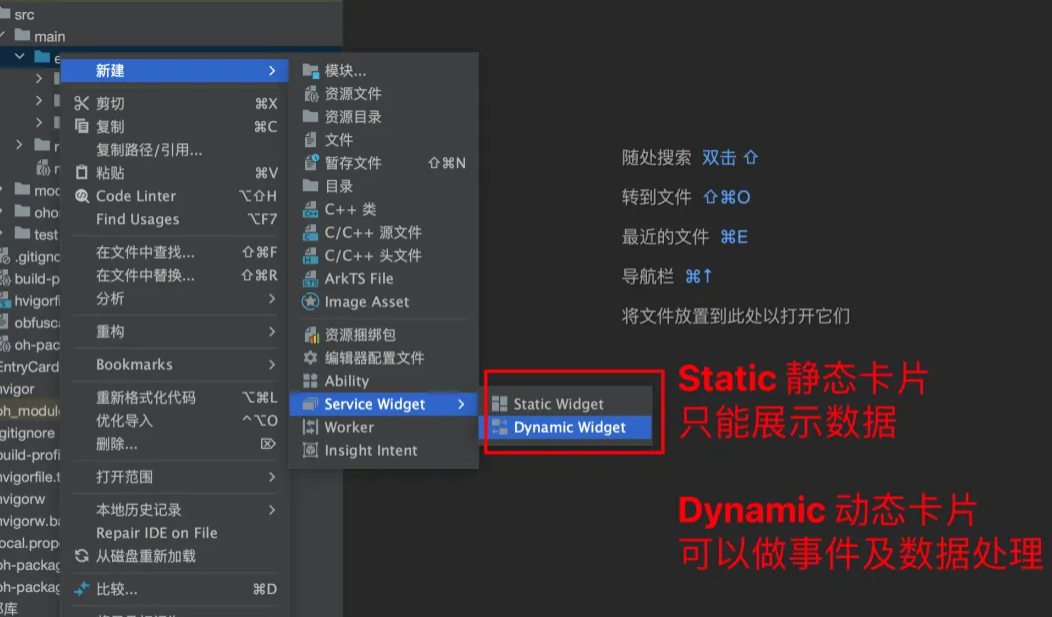
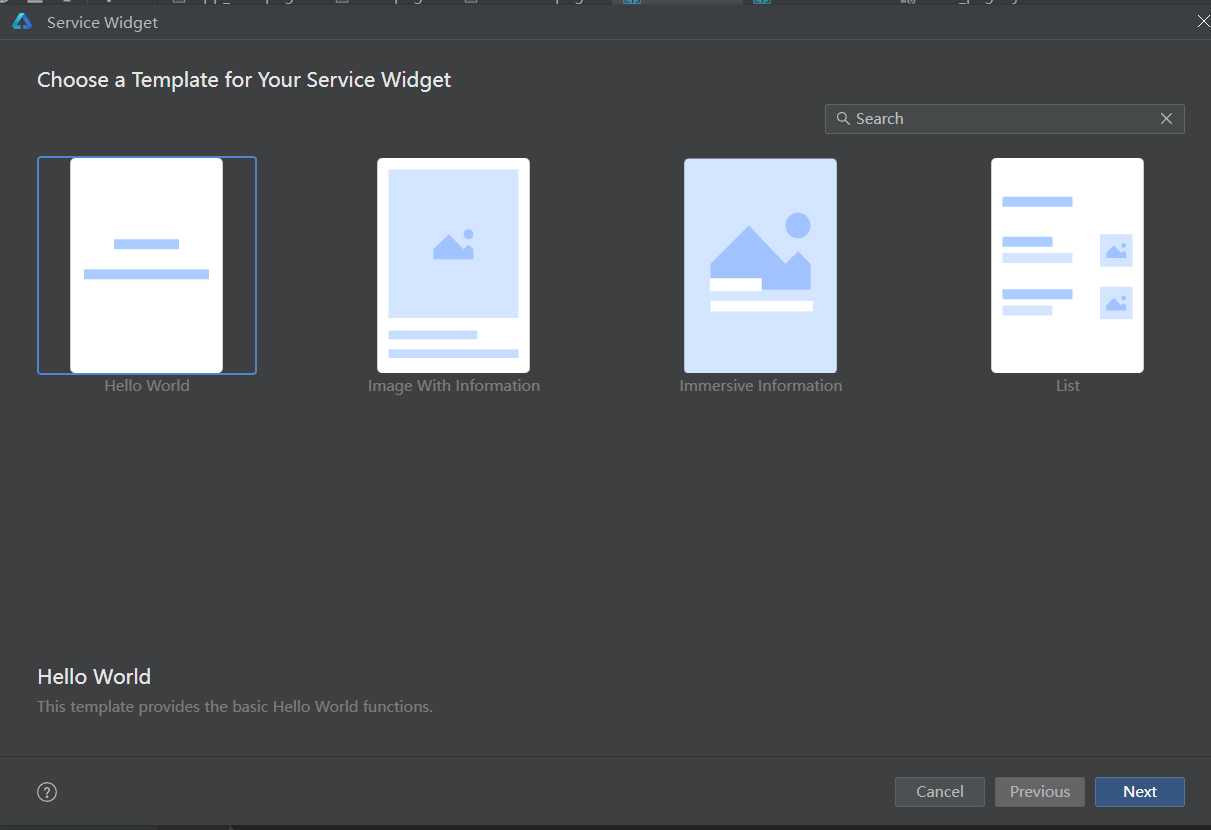
4.2 选择动态卡片
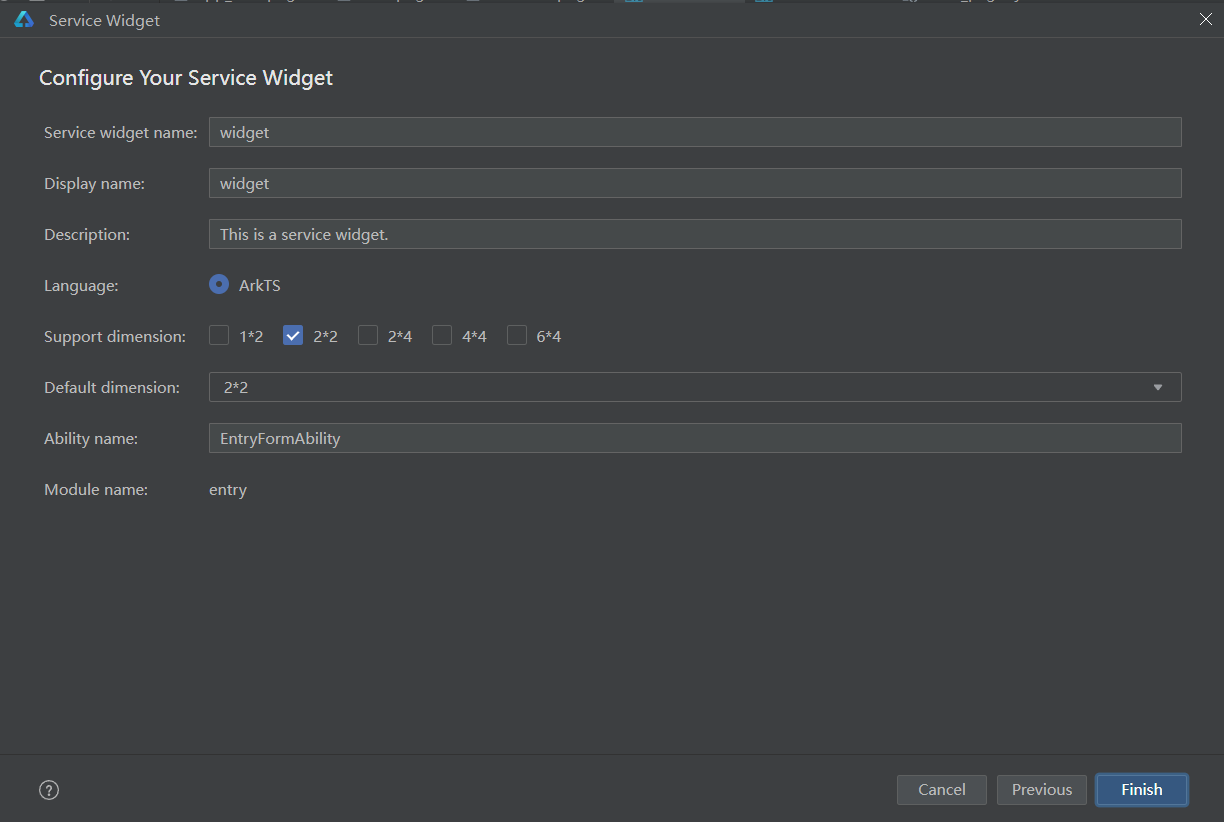
- Service widget name:卡片的名称,在同一个应用/服务中,卡片名称不能重复,且只能包含大小写字母、数字和下划线。
- Display name:卡片预览面板上显示的卡片名称。仅API 11 及以上Stage工程支持配置该字段。
- Description:卡片的描述信息。
- Language:界面开发语言,可选择创建ArkTS/JS卡片。说明
元服务只支持ArkTS卡片,不支持JS卡片。
- Support dimension:选择卡片的规格。部分卡片支持同时设置多种规格。首次创建服务卡片时,将默认生成一个EntryCard目录,用于存放卡片快照。
- Default dimension:在下拉框中可选择默认的卡片。
- Ability name:选择一个挂靠服务卡片的Form Ability,或者创建一个新的Form Ability。
- Module name:卡片所属的模块。
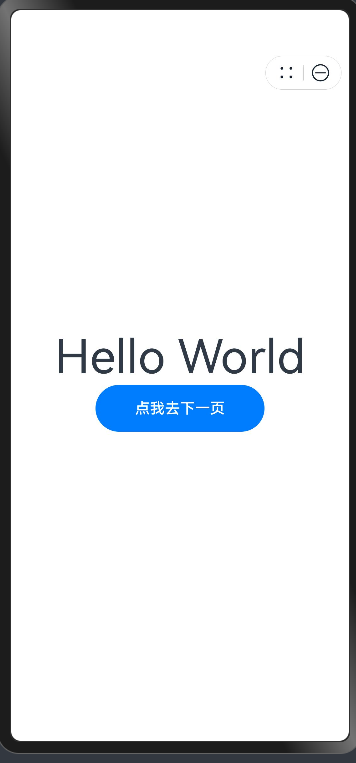
4.3 预览卡片
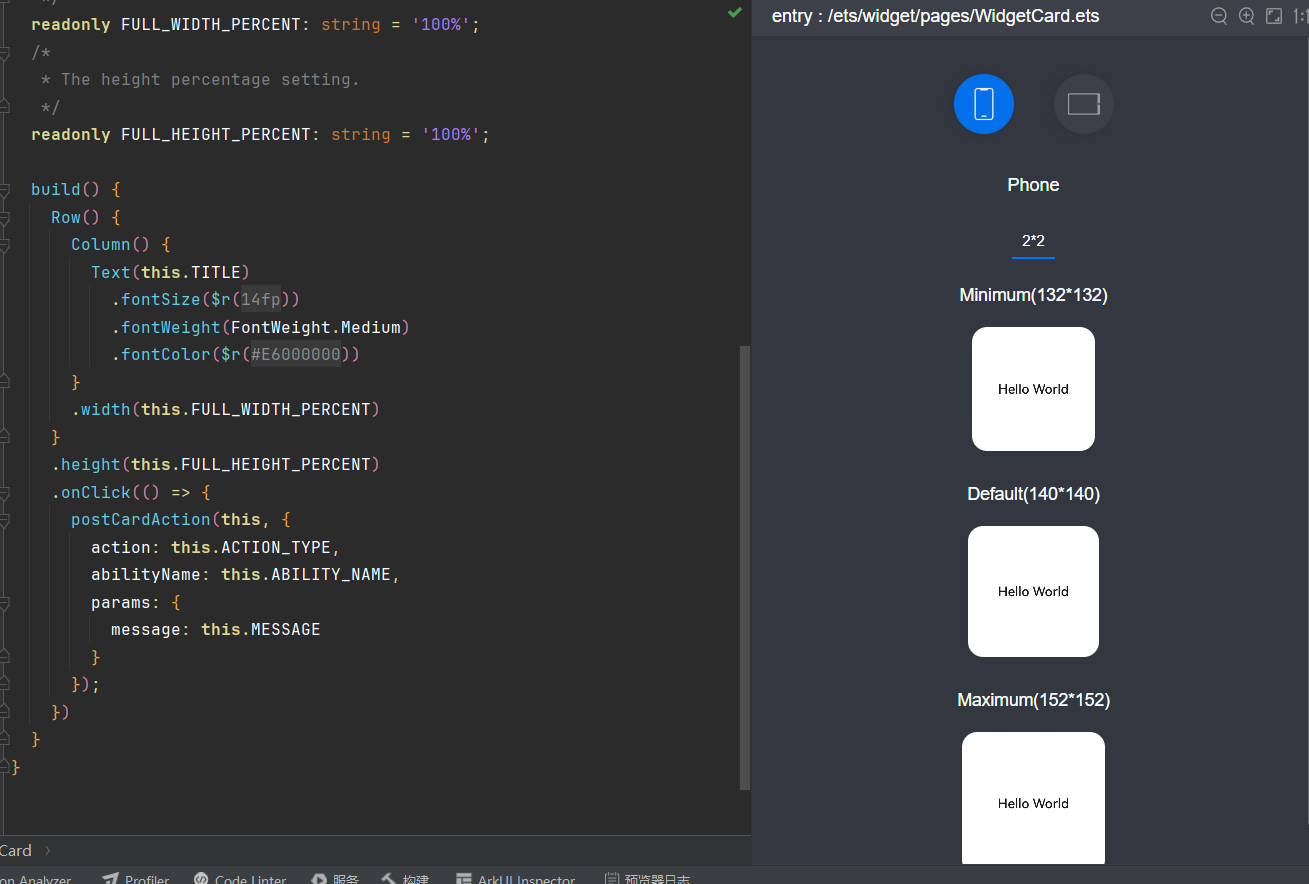
卡片特点:
- 卡片可以承载少量的内容显示和交互
- 卡片可以充当元服务的入口,点击卡片可以唤起元服务
4.4 实现点击卡片跳转到首页,从而进入元服务。在卡片中增加如下示例代码,实现点击卡片空白处即可进入元服务。
@Entry
  @Component
  struct WidgetCard {
    @State x: number = 1
    @State y: number = 1

    build() {
      Column() {
        Button('Click to enlarge')
          .onClick(() => {
            this.x = 1.1
            this.y = 1.1
          })
          .scale({ x: this.x, y: this.y })
          .animation({
            curve: Curve.EaseOut,
            playMode: PlayMode.AlternateReverse,
            duration: 200,
            onFinish: () => {
              this.x = 1
              this.y = 1
            }
          })
      }
      .padding('10vp')
        .width('100%')
        .height('100%')
        .justifyContent(FlexAlign.Center)
        .onClick(() => {
          postCardAction(this, {
            "action": 'router',
            "abilityName": 'EntryAbility',
            "params": {
              "message": 'router test'
            }
          });
        })
    }
  }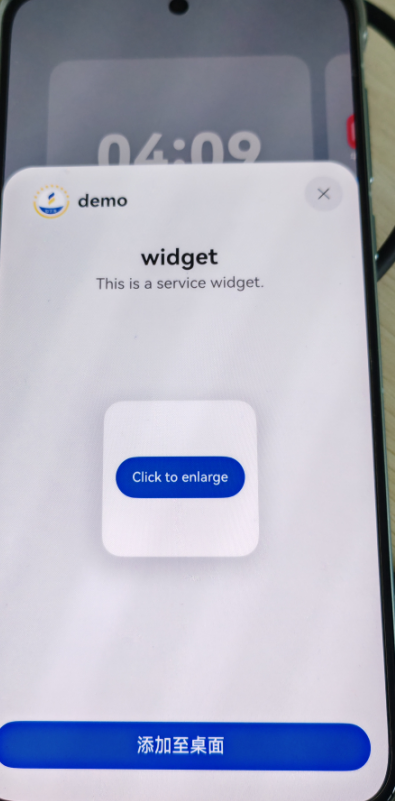
4.5 真机测试
将元服务的卡片添加到桌面,以便访问元服务。
-
- 在桌面上双指捏合,进入桌面的编辑模式。
- 点击底部的“服务卡片”。
- 在卡片添加页面,选择要添加到桌面的卡片,点击“添加到桌面”,完成卡片添加。
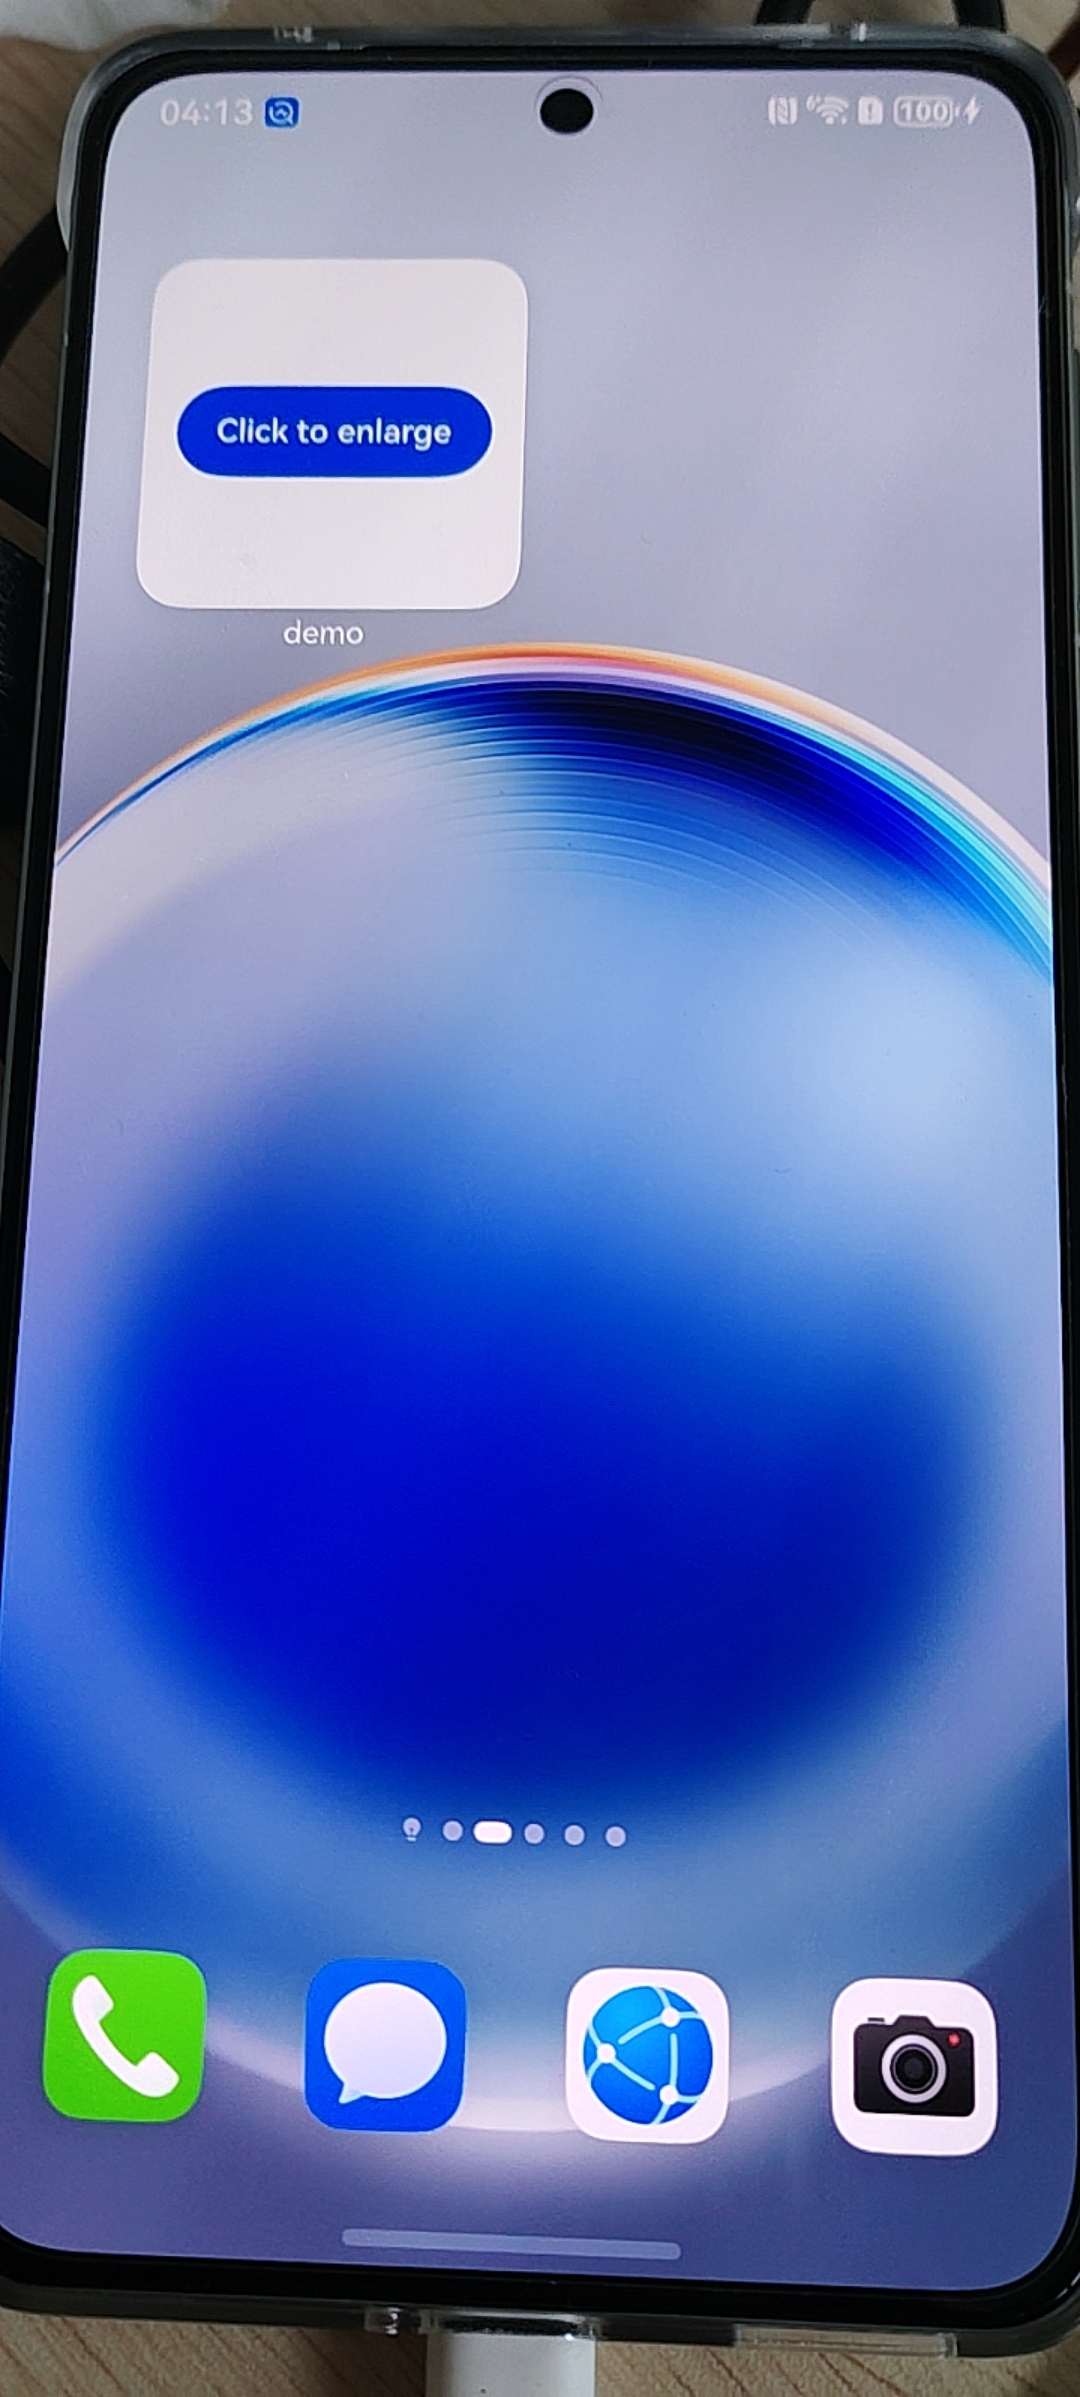
完成卡片添加后,可以在真机上测试元服务卡片的动效,也可点击卡片空白区域测试拉起元服务页面的功能。
官方文档地址:文档中心