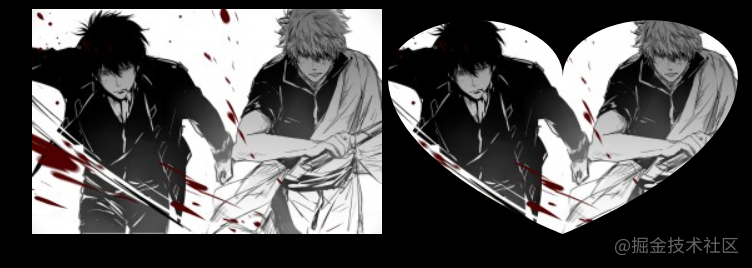
clip-path 属性
clip-path 属性是clip 属性的升级版。clip-path 属性使用裁剪方式创建元素的可显示区域。区域内的部分显示,区域外的隐藏。clip 属性只能作用于 position 为 absolute 和 fixed 的元素且剪裁区域只能是正方形。- 第一类值
basic-shape一种形状,由不同的函数绘制。 - 第二类值
clip-source用<url>的方式引用SVG的<clipPath>来作为剪裁路径。 - 第三类值
geometry-box它将为基本形状提供相应的参考框盒。利用确定的盒子边缘包括任何形状边角(比如说,被border-radius定义的剪切路径)。该属性大部分浏览器都不支持。
basic-shape
inset(top, right, bottom, left, round radius) 矩形
- 可以传入5个参数,分别对应
top,right,bottom,left的裁剪位置,round radius(可选,圆角)。
<!DOCTYPE html>
<html lang="en">
  <style>
    .img {
      margin-left: 50px;
    }
    .img1 {
      clip-path: inset(10px 20px);
    }
    .img2 {
      clip-path: inset(2em 1em 30% 20%);
    }
    .img3 {
      clip-path: inset(10px 20px 10% 20% round 50px);
    }
    .img4 {
      clip-path: inset(10px 20px 10% 20% round 40%);
    }
  </style>
  <body>
    <img src="./1.jpg" />
    <img class="img1" src="./1.jpg" />
    <img class="img2" src="./1.jpg" />
    <img class="img3" src="./1.jpg" />
    <img class="img4" src="./1.jpg" />
  </body>
</html>
circle(radius, at position) 圆
- 传入两个参数:
radius圆的半径,默认元素宽高中短的那个为直径,支持百分比。 使用百分比时圆的半径 = (sqrt(width^2+height^2)/sqrt(2)) * 百分比,width、height分别为被剪裁元素的宽高 。at position圆心位置,默认为元素中心点。
<!DOCTYPE html>
<html lang="en">
  <style>
    .img {
      margin-left: 50px;
    }
    .img1 {
      clip-path: circle(100px);
    }
    .img2 {
      clip-path: circle(100px at 50px 100px);
    }
    .img3 {
      clip-path: circle(at center);
    }
    .img4 {
      clip-path: circle(20% at center);
    }
  </style>
  <body>
    <img src="./1.jpg" />
    <img class="img1" src="./1.jpg" />
    <img class="img2" src="./1.jpg" />
    <img class="img3" src="./1.jpg" />
    <img class="img4" src="./1.jpg" />
  </body>
</html>
ellipse( radius-x, radius-y, at position ) 椭圆
- 可以传人3个可选参数:
radius-x椭圆的X轴半径,默认是宽度的一半,支持百分比。radius-y椭圆的Y轴半径,默认是高度的一半,支持百分比。at position椭圆中心位置,默认是元素的中心点。
<!DOCTYPE html>
<html lang="en">
  <style>
    .img {
      margin-left: 50px;
    }
    .img1 {
      clip-path: ellipse(50px 100px at 50% 50%);
    }
    .img2 {
      clip-path: ellipse(45% 30% at 100px 50px);
    }
    .img3 {
      clip-path: ellipse(40% 30%);
    }
    .img4 {
      clip-path: ellipse(at 50% 50%);
    }
  </style>
  <body>
    <img src="./1.jpg" />
    <img class="img1" src="./1.jpg" />
    <img class="img2" src="./1.jpg" />
    <img class="img3" src="./1.jpg" />
    <img class="img4" src="./1.jpg" />
  </body>
</html>
polygon( [<fill-rule>,]? [<shape-arg> <shape-arg>]#) 多边形
- 可传入两种类型的值:
<fill-rule>代表了填充规则(可选)。即,如何填充该多边形。可选值为nonzero和evenodd。该参数的默认值为nonzero。<shape-arg> <shape-arg>多组,每一对在列表中的参数都代表了多边形顶点的坐标。
<!DOCTYPE html>
<html lang="en">
  <style>
    .img {
      margin-left: 50px;
    }
    .img1 {
      clip-path: polygon(0% 100%, 50% 0%, 100% 100%);
    }
    .img2 {
      clip-path: polygon(5% 5%, 100% 0%, 100% 75%, 75% 75%, 75% 100%, 50% 75%, 0% 75%);
    }
    .img3 {
      clip-path: polygon(0% 38.31%, 50% 0%, 100% 38.31%, 80.86% 100%, 19.14% 100%);
    }
    .img4 {
      clip-path: polygon(50% 0, 65% 40%, 100% 40%, 72% 60%, 85% 100%, 50% 75%, 15% 100%, 28% 60%, 0 40%, 35% 40%);
    }
  </style>
  <body>
    <img src="./1.jpg" />
    <img class="img1" src="./1.jpg" />
    <img class="img2" src="./1.jpg" />
    <img class="img3" src="./1.jpg" />
    <img class="img4" src="./1.jpg" />
  </body>
</html>
path( [<fill-rule>,]? <string>) SVG Path 绘制图形
- 可传入两个参数:
<fill-rule>代表了填充规则(可选)。即,如何填充该多边形。可选值为nonzero和evenodd。该参数的默认值为nonzero。<string>SVG Path字符串。- 改属性目前是,实验属性,部分浏览器不支持。
<!DOCTYPE html>
<html lang="en">
  <style>
    body {
      background-color: black;
    }
    .img {
      margin-left: 50px;
    }
    .img1 {
      clip-path: path('M 0 200 L 0,75 A 5,5 0,0,1 150,75 L 100 100 z');
    }
    .img2 {
      clip-path: path('M 10,30 A 20,20 0,0,1 50,30 A 20,20 0,0,1 90,30 Q 90,60 50,90 Q 10,60 10,30 z');
    }
    .img3 {
      clip-path: path('M0 31c109.323 19.23 189.323 28.845 240 28.845 50.677 0 130.677-9.615 240-28.845v100H0V31z');
    }
    .img4 {
      clip-path: path('M0 31.398C109.323 10.466 189.323 0 240 0c50.677 0 130.677 10.466 240 31.398V131.52H0V31.398z');
    }
  </style>
  <body>
    <img src="./1.jpg" />
    <img class="img1" src="./1.jpg" />
    <img class="img2" src="./1.jpg" />
    <img class="img3" src="./1.jpg" />
    <img class="img4" src="./1.jpg" />
  </body>
</html>
clip-source
获取SVG轮廓裁剪图像。
<!DOCTYPE html>
<html lang="en">
  <style>
    body {
      background-color: black;
    }
    .img {
      margin-left: 50px;
    }
    .img1 {
      clip-path: url(#myPath);
    }
  </style>
  <body>
    <svg>
      <clipPath id="myPath" clipPathUnits="objectBoundingBox">
        <path
          d="M0.5,1
          C 0.5,1,0,0.7,0,0.3
          A 0.25,0.25,1,1,1,0.5,0.3
          A 0.25,0.25,1,1,1,1,0.3
          C 1,0.7,0.5,1,0.5,1 Z"
        />
      </clipPath>
    </svg>
    <img src="./1.jpg" />
    <img class="img1" src="./1.jpg" />
  </body>
</html>
常用方式
实现图片从上往下加载
<!DOCTYPE html>
<html lang="en">
  <style>
    body {
      background-color: black;
    }
    .img {
      width: 280px;
      height: 180px;
    }
    img {
      overflow: hidden;
      -webkit-clip-path: polygon(0 0, 0 0, 100% 0, 100% 0);
      clip-path: polygon(0 0, 0 0, 100% 0, 100% 0);
      opacity: 0;
      transition: clip-path 1.1s ease-in, opacity 1.1s ease 167ms, -webkit-clip-path 1.1s cubic-bezier(0.19, 1, 0.22, 1);
    }
    .img:hover img {
      opacity: 1;
      -webkit-clip-path: polygon(0 0, 0 100%, 100% 100%, 100% 0);
      clip-path: polygon(0 0, 0 100%, 100% 100%, 100% 0);
    }
  </style>
  <body>
    <div class="img">
      <img src="./1.jpg" />
    </div>
  </body>
</html>
- 开始先设置图片剪切(
clip-path: polygon(0 0, 0 0, 100% 0, 100% 0))和透明度(opacity: 0)为0。 - 通过
transition自动补间动画,由上向下逐渐增大剪切面积,实现效果
根据滚动实现图片切换
<!DOCTYPE html>
<html lang="en">
  <style>
    body {
      background-color: black;
    }

    .home {
      margin-top: 100px;
      width: 100%;
      /* 测试添加滚动条 */
      padding-bottom: 56.25%;
      position: relative;
    }

    .top,
    .bottom {
      width: 100%;
      height: 200px;
      position: absolute;
      top: 0;
      left: 0;
      right: 0;
    }

    .top {
      z-index: 1;
      background: url(./4.jpg) no-repeat center center;
      background-size: cover;
    }

    .bottom {
      z-index: 2;
      background: url(./3.jpg) no-repeat center center;
      background-size: cover;
    }
  </style>
  <body>
    <div class="home">
      <div class="top"></div>
      <div class="bottom"></div>
    </div>
  </body>
  <script type="text/javascript">
    var percentage
    var direction = 0 // 0: 正向,1: 反向

    var scrollTem = 0 // 滚动高度
    function update() {
      const home = document.querySelector('.home')
      const top = document.querySelector('.top') // 上层
      const bottom = document.querySelector('.bottom') // 下层

      // 操作 top 的裁剪实现交替 修改 top 在上面 并设置 裁剪面积为0
      top.style.zIndex = '2'
      bottom.style.zIndex = '1'

      if (direction == 0) {
        // 正向
        scrollTem = window.scrollY
      }
      // 初始化 正向滚动
      if (window.scrollY === 0) {
        direction = 0
      }
      // 反向滚动
      if (window.scrollY < scrollTem && direction !== 1) {
        direction = 1
      }
      if (direction === 1) {
        // 反向
        percentage = 1 - window.scrollY
      } else if (direction === 0) {
        // 正向
        percentage = window.scrollY
      }
      var radius = percentage * Math.sqrt(top.clientWidth * 2 + top.clientHeight * 2)
      if (direction === 0) {
        top.style['clip-path'] = `circle(${radius + 'px'} at 0% 0%)`
      } else if (direction === 1) {
        top.style['clip-path'] = `circle(${radius + 'px'} at 0% 0%)`
      }
    }

    window.onscroll = update
  </script>
</html>
- 这里使用的是最简单的方式,先根据层级绝对定位要切换的图片。然后通过滚动条的高度对上层图片进行裁剪,实现效果。


