📢博客主页:https://blog.csdn.net/2301_779549673
📢欢迎点赞 👍 收藏 ⭐留言 📝 如有错误敬请指正!
📢本文由 JohnKi 原创,首发于 CSDN🙉
📢未来很长,值得我们全力奔赴更美好的生活✨
📢前言
mysql的基础,我们之前已经学过,后面我们只关心使用
要使用C语言连接mysql,需要使用mysql官网提供的库,大家可以去官网下载
我们使用C接口库来进行连接
要正确使用,我们需要做一些准备工作:
- 保证mysql服务有效
- 在官网上下载合适自己平台的mysql connect库,以备后用
🏳️🌈安装所需API - 法一 - 官网下载
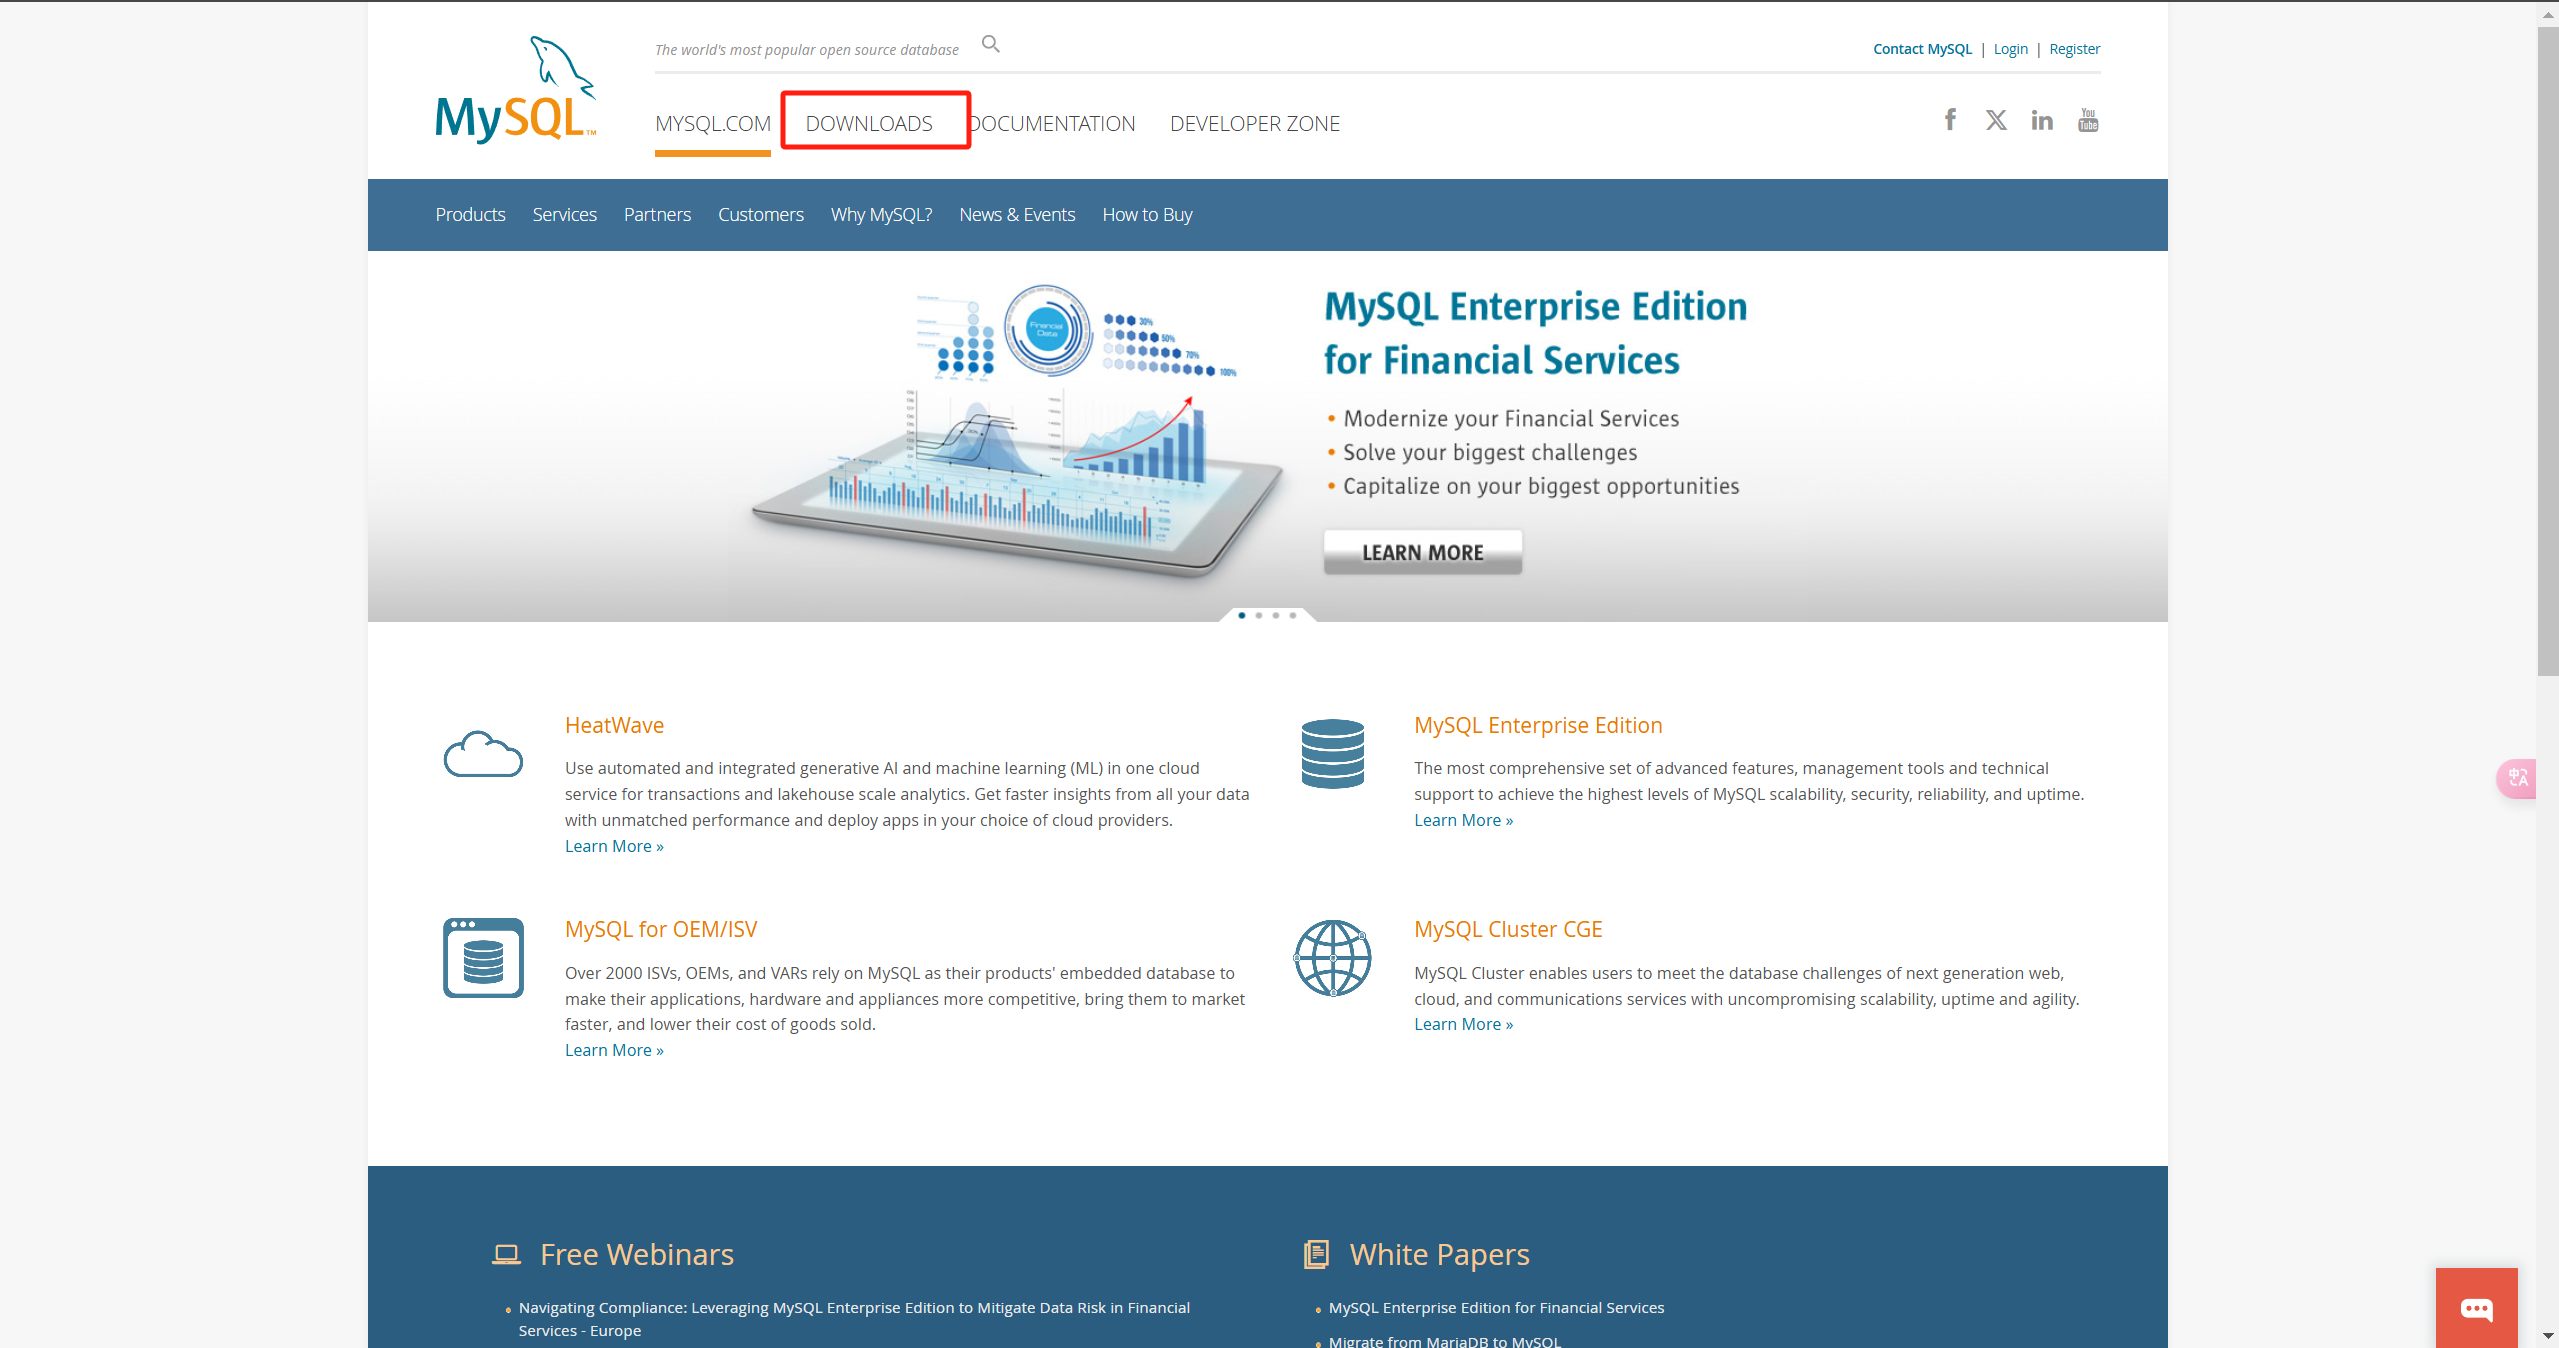
- 进入mysql官网,点击
download一栏
链接: https://www.mysql.com/
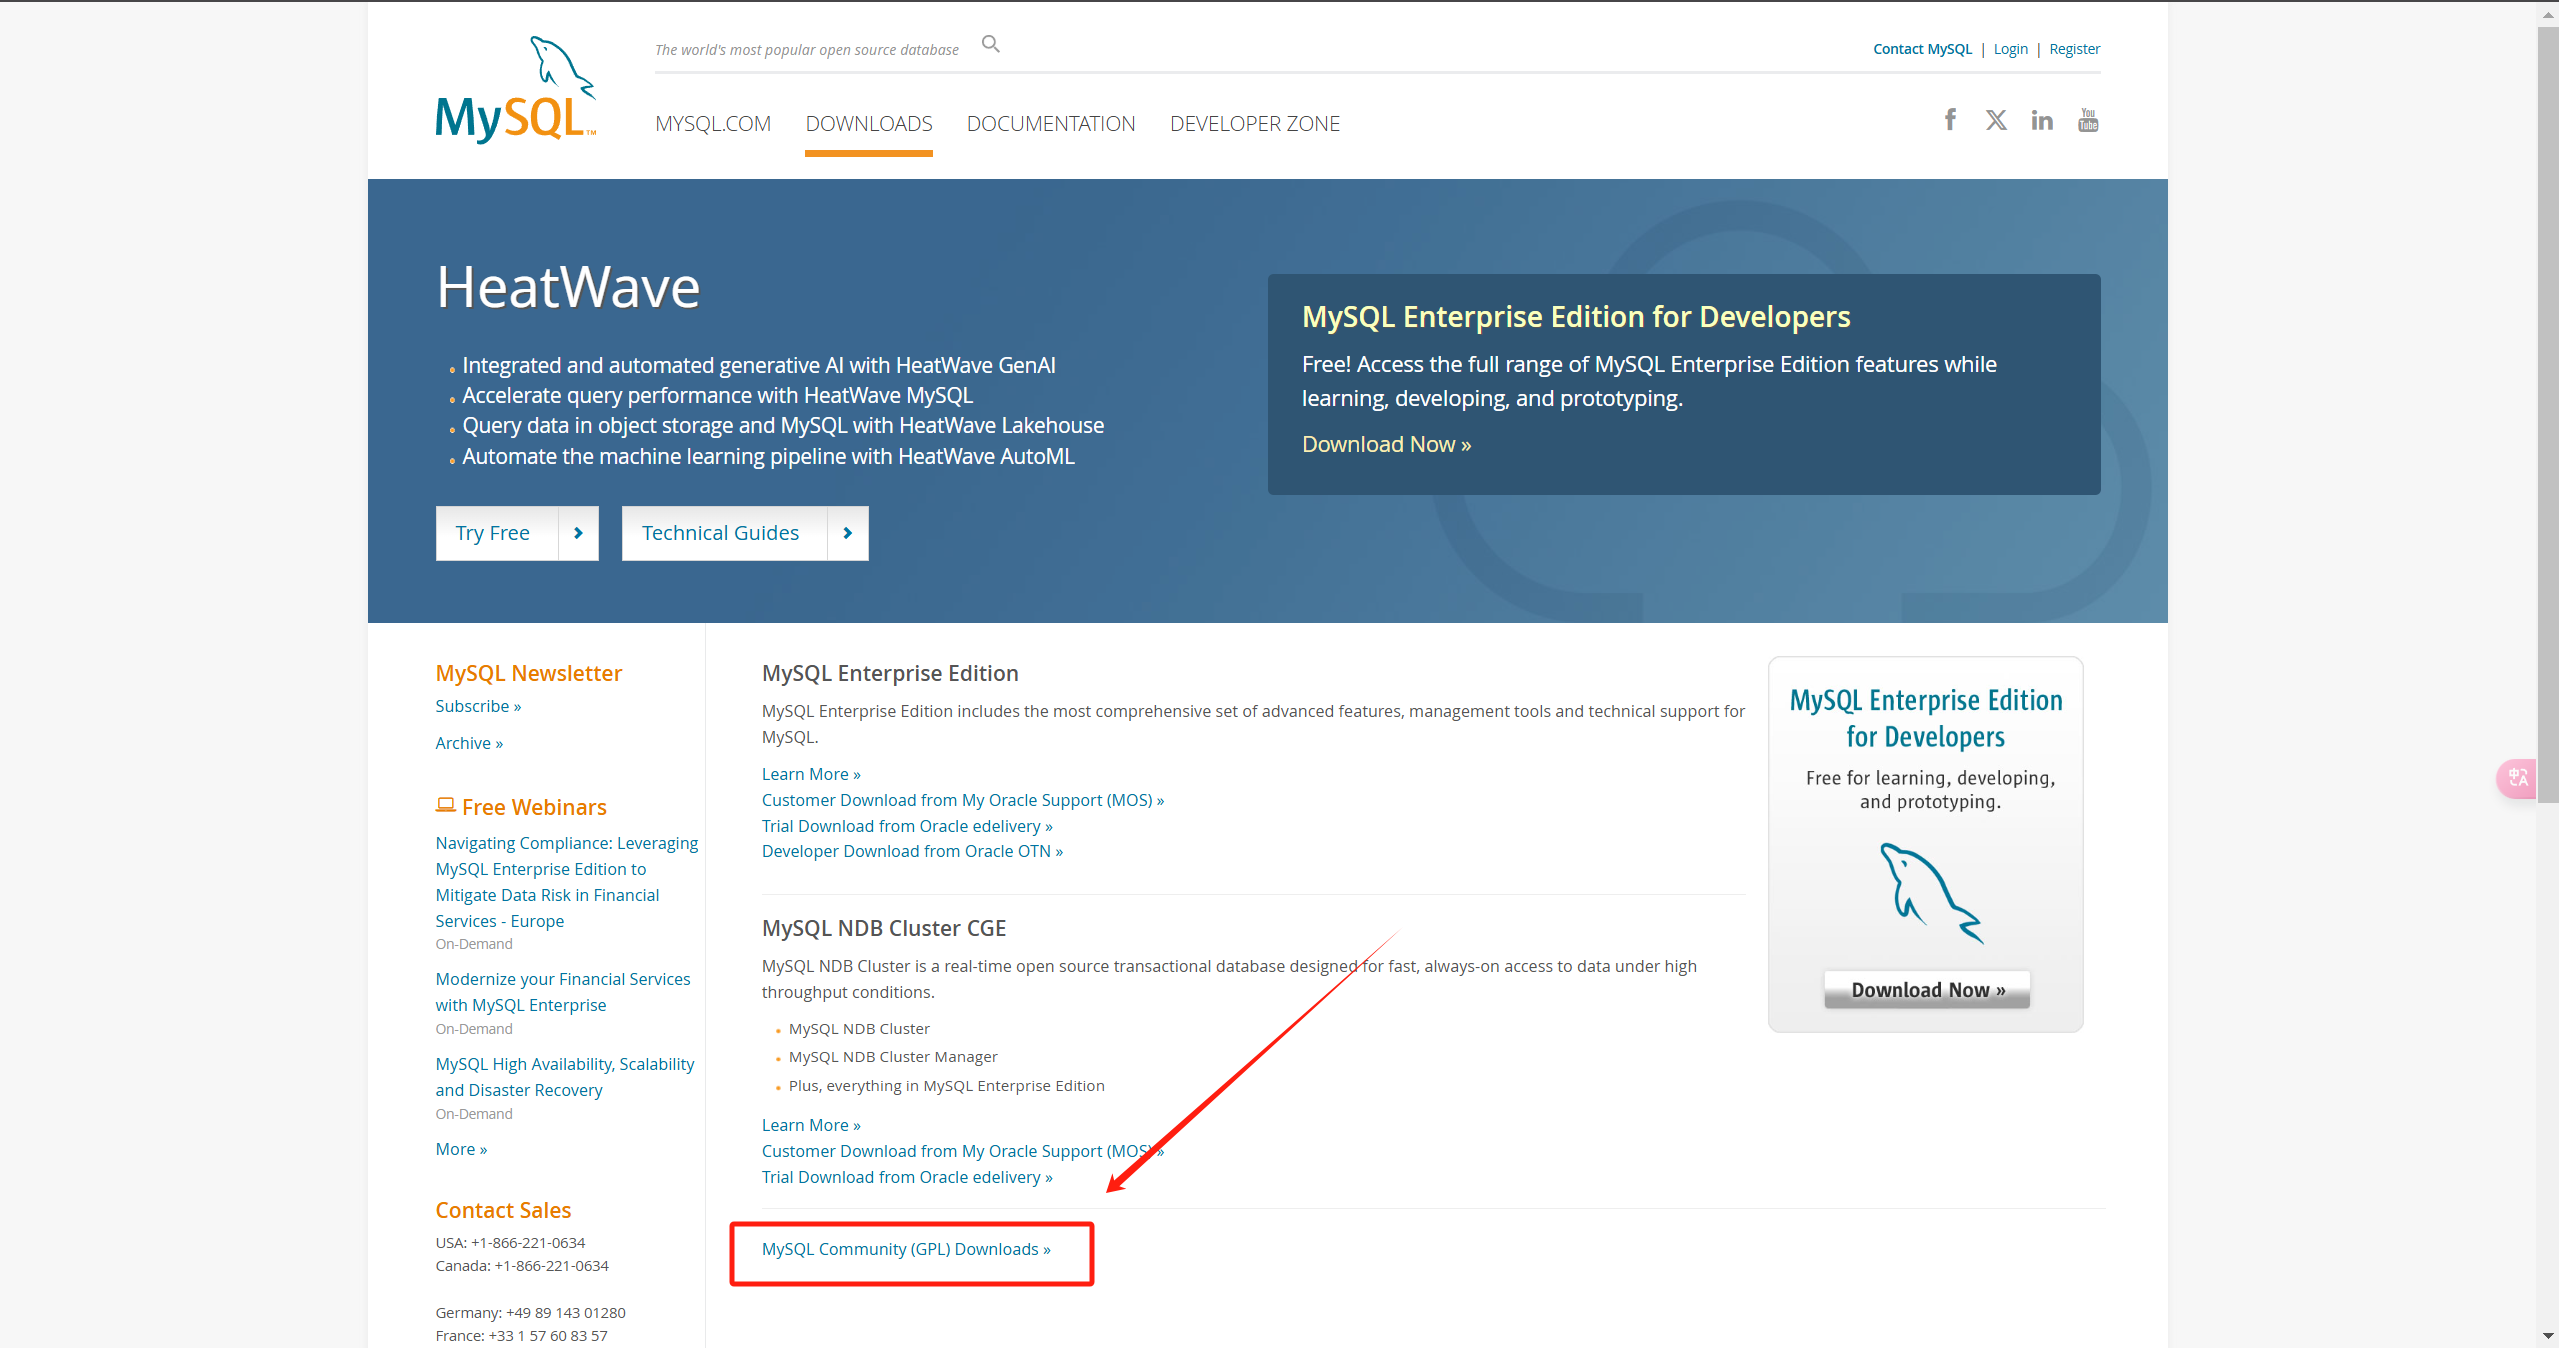
- 找到社区版下载
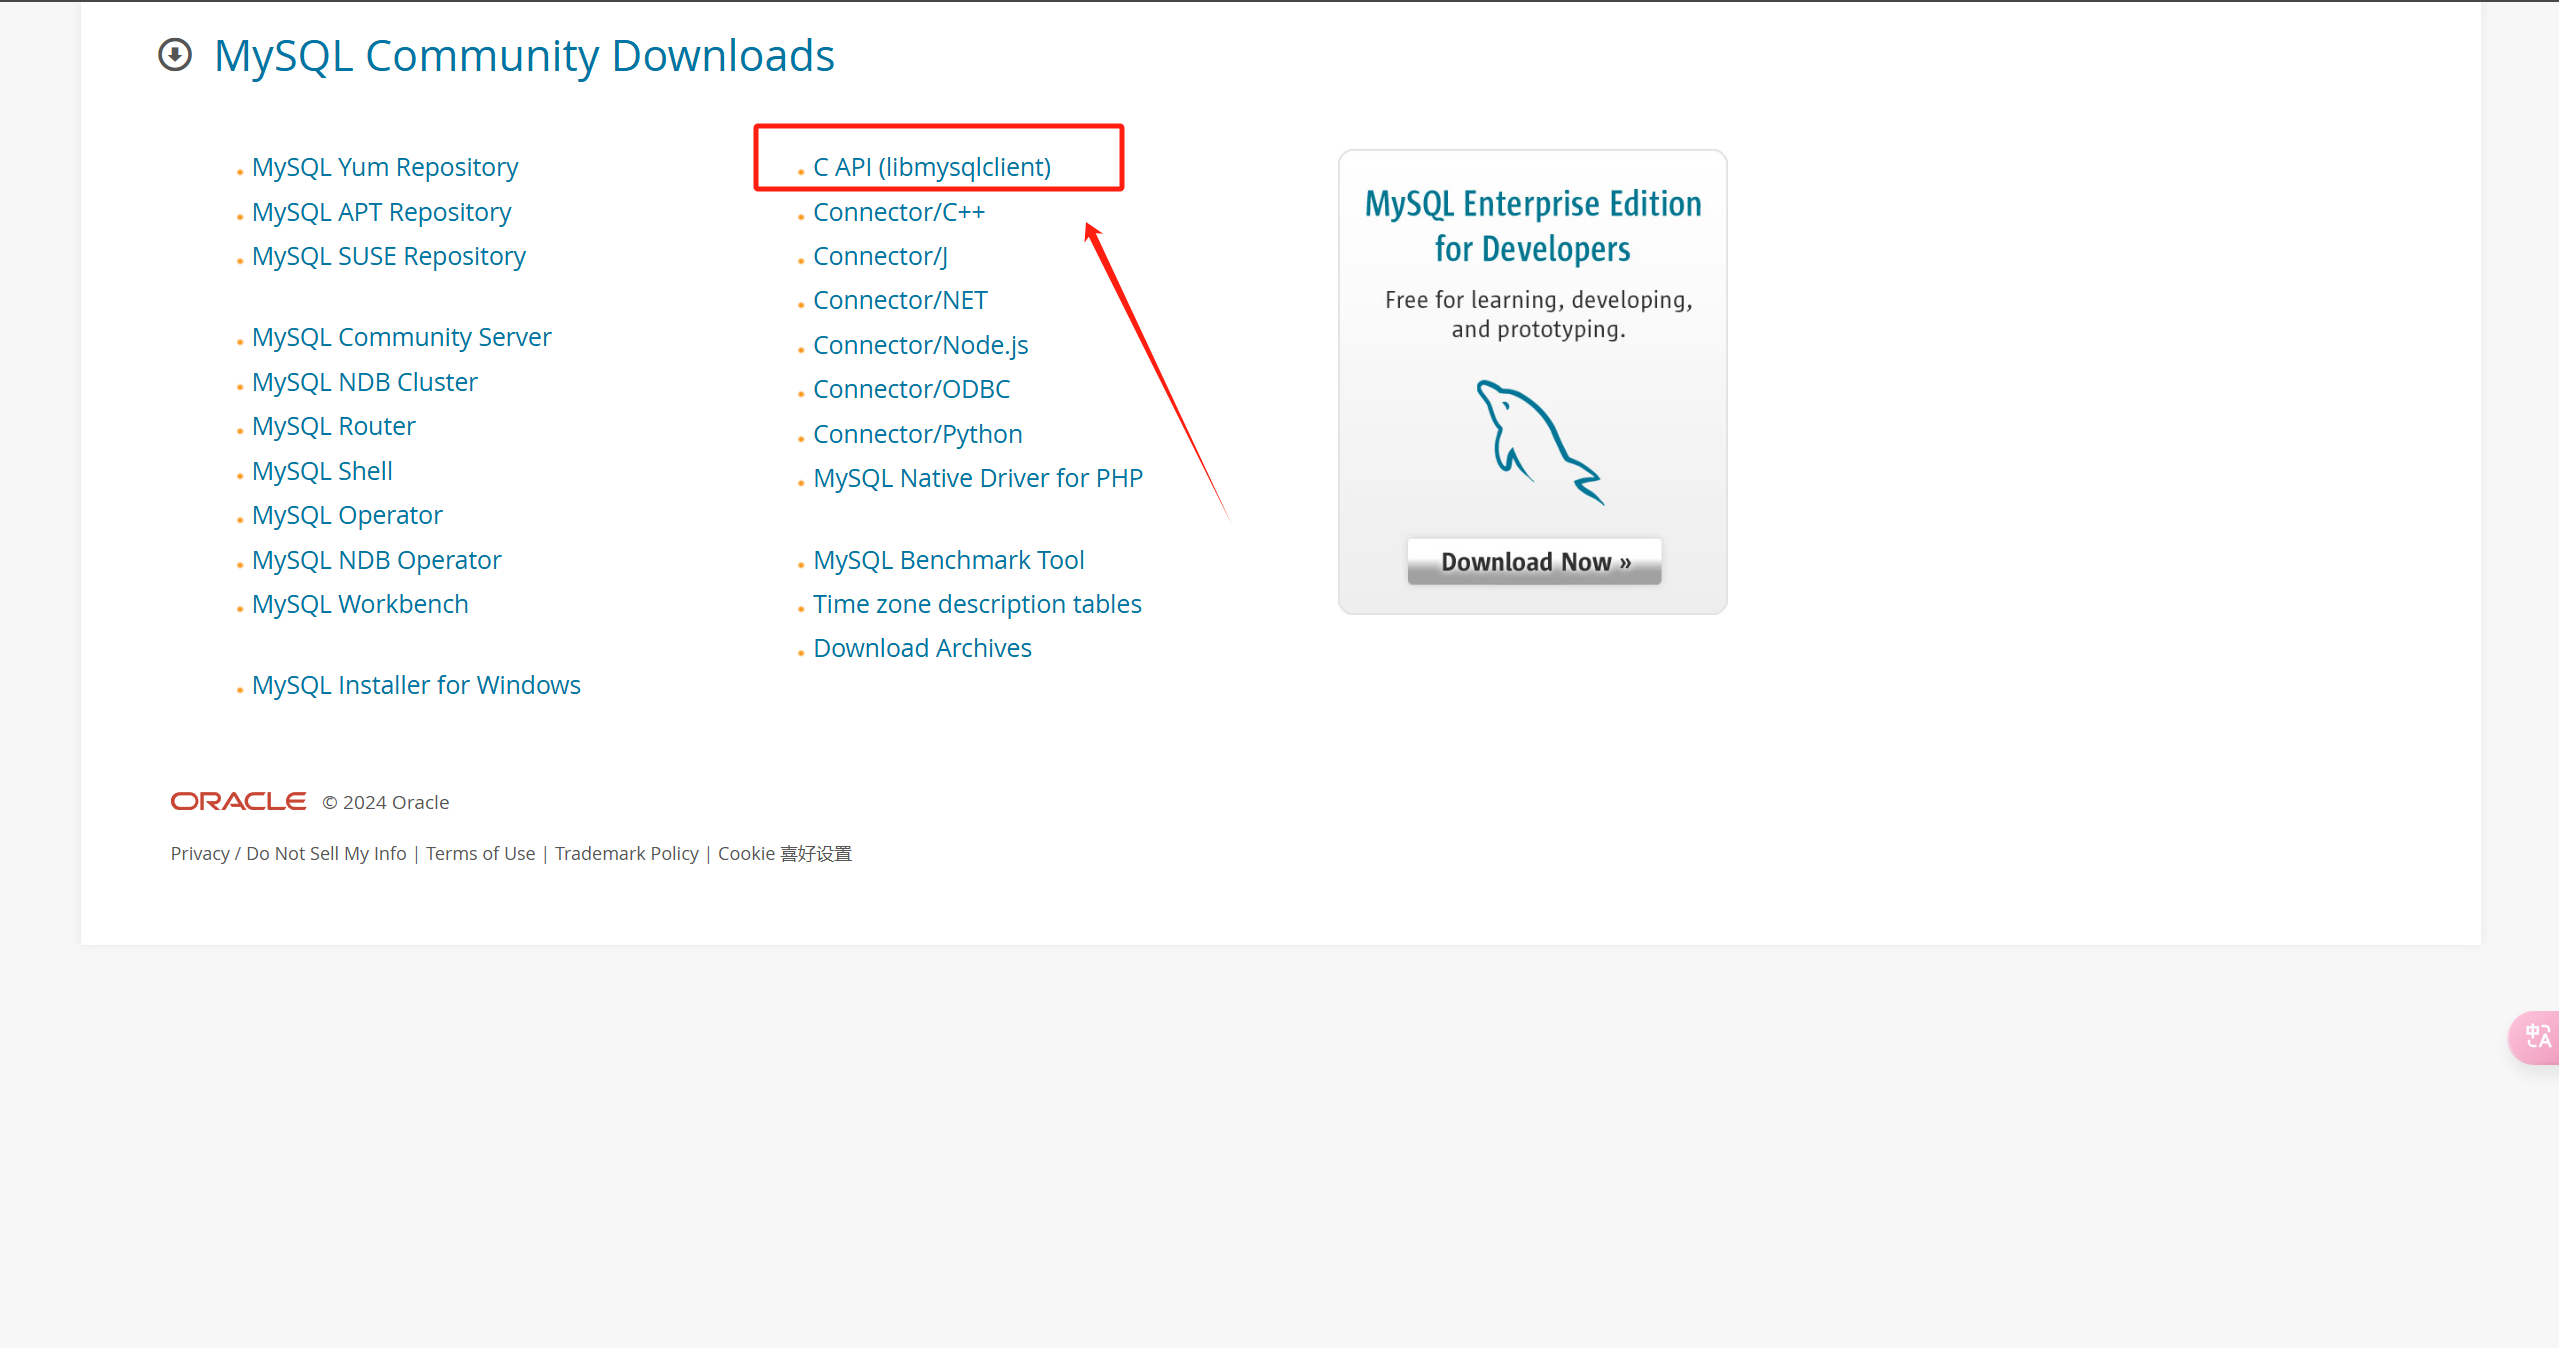
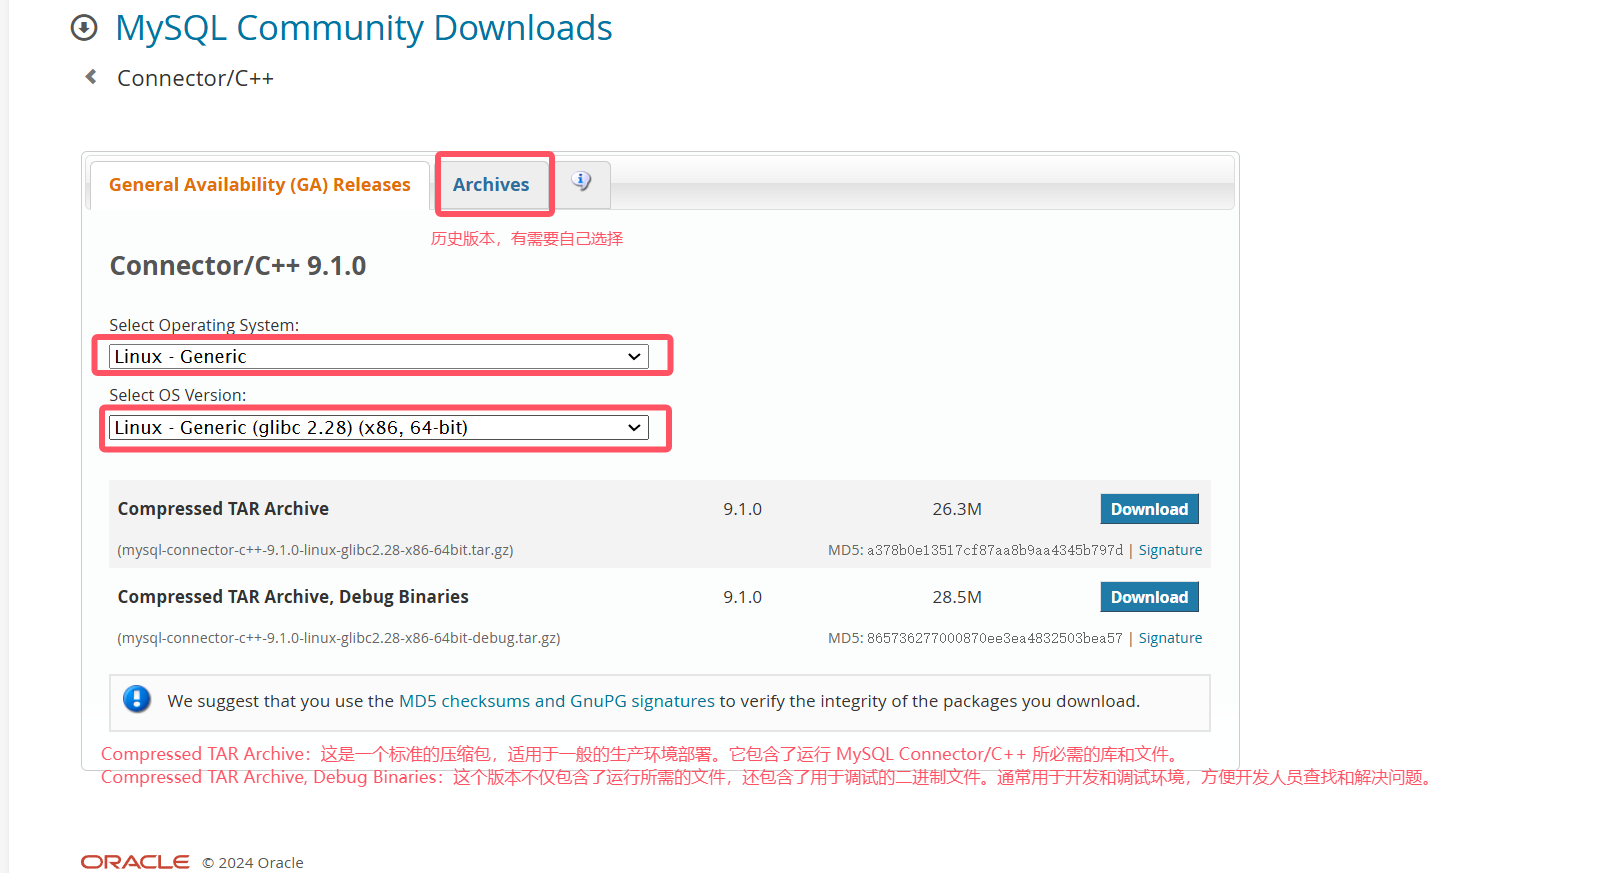
- 找到C API 点击下载
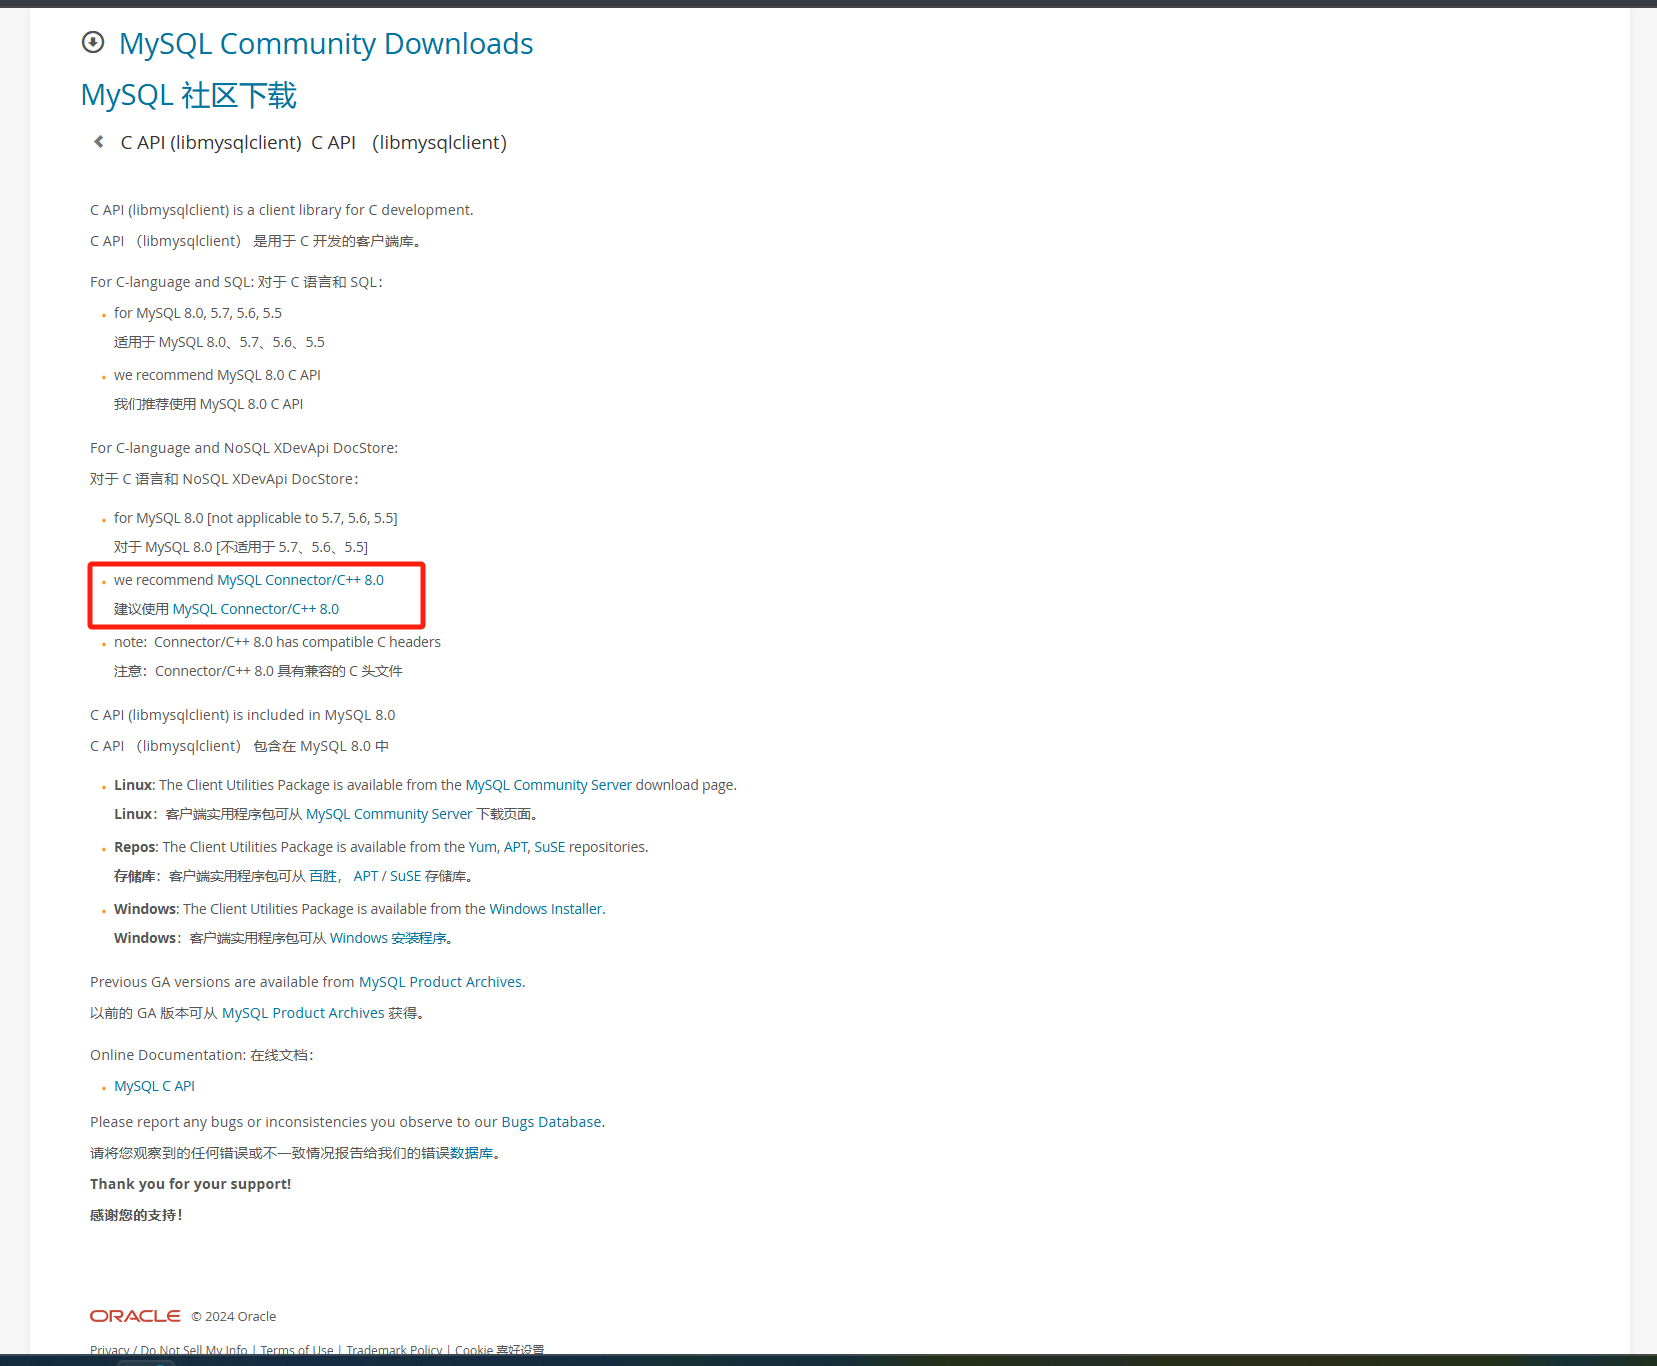
- 这里我翻译了一下,我们找到MySQL Connector/C++ 8.0
- 我用的环境是
Linux X86,我们依次选择一下
- 这里插一下嘴,可以通过下面这种方法查看自己的
MySQL版本,我的是 5.7.44
ERROR 1045 (28000): Access denied for user 'wzy'@'localhost' (using password: NO)
[wzy@VM-20-5-centos ~]$ mysql --version
mysql  Ver 14.14 Distrib 5.7.44, for Linux (x86_64) using  EditLine wrapper
- 一般选择第二个下载,下载好后,选择
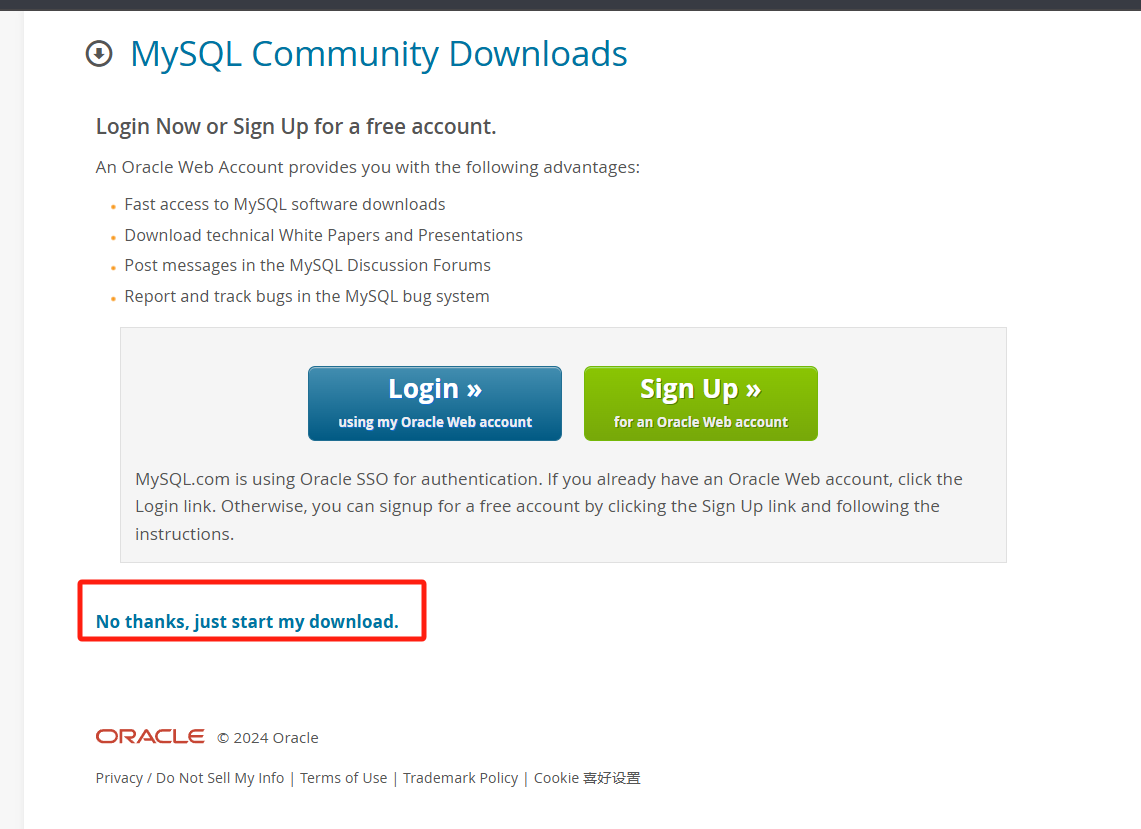
谢谢,只要开始下载,一般来说这个文件就会出现在你当前计算机用户的下载文件夹中
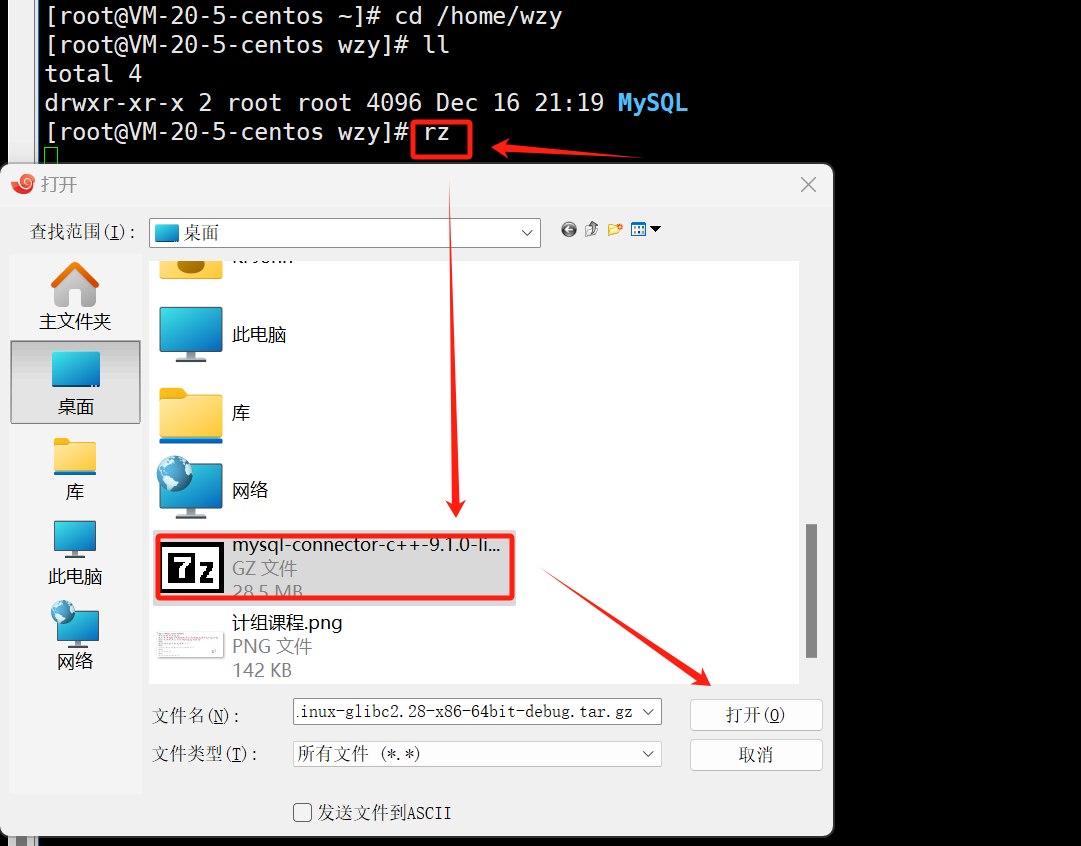
- 使用
rz指令将这个文件上传到Linux中 - 这只是一个压缩安装包,笔者之前的mysql安装包就在这个目录下
- 直到安装完成,如果传输失败了,可能是网络或路径问题,重新传输一遍或者换个路径就行了
[root@VM-20-5-centos wzy]# ll
total 29232
drwxr-xr-x 2 root root     4096 Dec 16 21:19 MySQL
-rw-r--r-- 1 root root 29927614 Dec 17 18:57 mysql-connector-c++-9.1.0-linux-glibc2.28-x86-64bit-debug.tar.gz
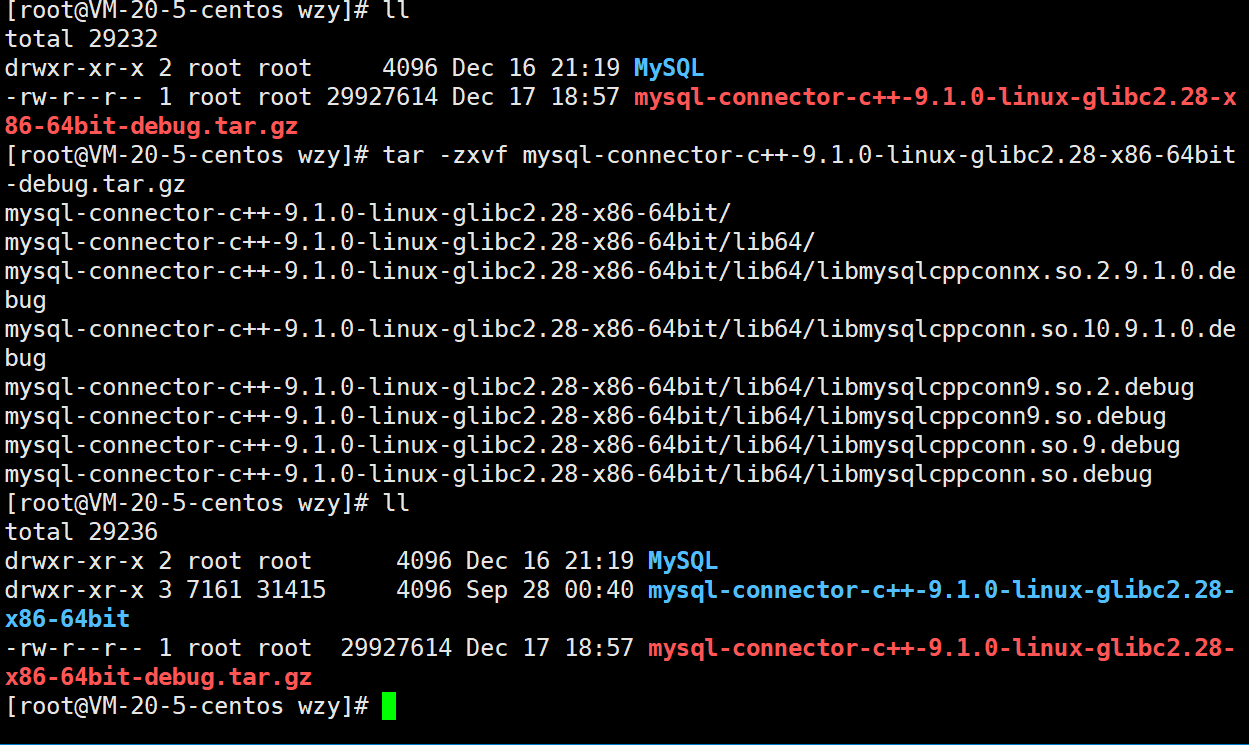
- 使用
tar指令进行解压
命令格式:tar -zxvf mysql-connector-c+±9.1.0-linux-glibc2.28-x86-64bit-debug.tar.gz
解释:
- tar是操作命令。
- -z表示使用gzip来解压。
- -x表示解压操作。
- -v表示显示详细的解压过程(可选,用于查看解压的文件列表)。
- -f表示指定要解压的文件。
- cd 这个解压好的文件夹,里面有个 lib64, 再 cd 进去,会有一些动静态数据库
[root@VM-20-5-centos wzy]# ll
total 29236
drwxr-xr-x 2 root root      4096 Dec 16 21:19 MySQL
drwxr-xr-x 3 7161 31415     4096 Sep 28 00:40 mysql-connector-c++-9.1.0-linux-glibc2.28-x86-64bit
-rw-r--r-- 1 root root  29927614 Dec 17 18:57 mysql-connector-c++-9.1.0-linux-glibc2.28-x86-64bit-debug.tar.gz
[root@VM-20-5-centos wzy]# cd mysql-connector-c++-9.1.0-linux-glibc2.28-x86-64bit
[root@VM-20-5-centos mysql-connector-c++-9.1.0-linux-glibc2.28-x86-64bit]# ll
total 4
drwxr-xr-x 2 7161 31415 4096 Sep 28 00:40 lib64
[root@VM-20-5-centos mysql-connector-c++-9.1.0-linux-glibc2.28-x86-64bit]# cd lib64
[root@VM-20-5-centos lib64]# ll
total 106388
lrwxrwxrwx 1 7161 31415       27 Sep 28 00:40 libmysqlcppconn9.so.2.debug -> libmysqlcppconn9.so.*.debug
lrwxrwxrwx 1 7161 31415       27 Sep 28 00:40 libmysqlcppconn9.so.debug -> libmysqlcppconn9.so.2.debug
-rwxr-xr-x 1 7161 31415 31126288 Sep 28 00:40 libmysqlcppconn.so.10.9.1.0.debug
lrwxrwxrwx 1 7161 31415       33 Sep 28 00:40 libmysqlcppconn.so.9.debug -> libmysqlcppconn.so.10.9.1.0.debug
lrwxrwxrwx 1 7161 31415       26 Sep 28 00:40 libmysqlcppconn.so.debug -> libmysqlcppconn.so.9.debug
-rwxr-xr-x 1 7161 31415 77804440 Sep 28 00:40 libmysqlcppconnx.so.2.9.1.0.debug
一般来说库文件在 lin64 文件夹里,假设在lib64文件夹中找到库文件后,确定库名。通常库名可能是mysqlcppconn之类的(具体需要根据实际文件来确定),使用-l选项指定库名,如-lmysqlcppconn
我们就可以使用下面这串指令,来编译一些代码
g++ -o test test.cpp -L$(pwd)/lib64 -lmysqlcppconn
🏳️🌈安装所需API - 法二 - yum源下载(推荐)
我们可以使用如下指令安装mysql client 和mysql devel
sudo yum install -y mysql-community-server
sudo yum install -y mysql-community-devel
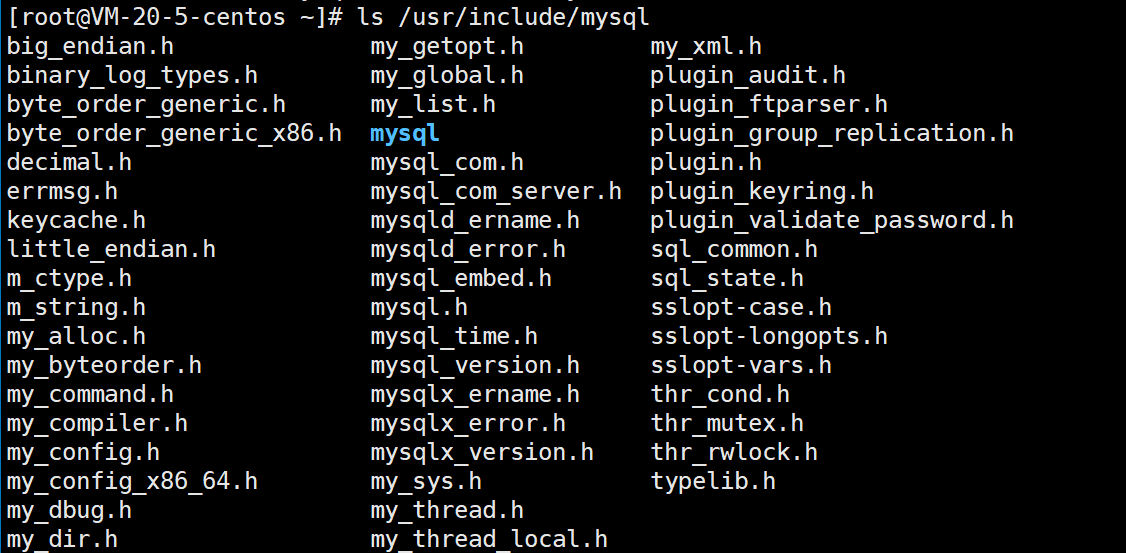
安装完毕后我们就可以在 /usr/include/mysql 目录下找到 mysql 相关的头文件了
同时,我们也可以在 /lib64/mysql/ 以及 /usr/lib64/mysql 目录下找到 mysql 对应的动态库以及静态库了
🏳️🌈验证是否安装成功
写一段 C\C++ 代码,使用下面的格式去编译
g++ -o mytest test.cc -L/lib64/mysql -lmysqlclient
尝试链接mysql client
通过 mysql_get_client_info() 函数,来验证我们的引入是否成功
[root@VM-20-5-centos wzy]# mkdir test_db;
[root@VM-20-5-centos wzy]# cd test_db
[root@VM-20-5-centos test_db]# ll
total 0
[root@VM-20-5-centos test_db]# pwd
/home/wzy/test_db
[root@VM-20-5-centos test_db]# touch test.cc
[root@VM-20-5-centos test_db]# vim test.cc
[root@VM-20-5-centos test_db]# vim test.cc
[root@VM-20-5-centos test_db]# cat test.cc
#include <iostream>
#include <mysql/mysql.h>

int main(){
    std::cout << "mysql client version: " << mysql_get_client_info() << std::endl;
    return 0;
}

[root@VM-20-5-centos test_db]# g++ -o mytest test.cc -L/lib64/mysql -lmysqlclient
[root@VM-20-5-centos test_db]# ll
total 16
-rwxr-xr-x 1 root root 9040 Dec 17 19:53 mytest
-rw-r--r-- 1 root root  158 Dec 17 19:50 test.cc
[root@VM-20-5-centos test_db]# ./mytest
mysql client version: 5.7.44
如果没有成功编译,可以在编译语句中加一个 -I 用来指定头文件
g++ -o mytest test.cc -I/usr/include/mysql -L/lib64/mysql -lmysqlclient
🏳️🌈mysql接口介绍
案例
- 先创建一个用户,将用来测试连接的
database授权给它
// 在终端A中创建用户 connector 并授权
mysql> create user 'connector'@'localhost' identified by 'nijiale123!';
Query OK, 0 rows affected (0.00 sec)

mysql> select user, host from user;
+---------------+-----------+
| user          | host      |
+---------------+-----------+
| njl           | %         |
| connector     | localhost |
| mysql.session | localhost |
| mysql.sys     | localhost |
| root          | localhost |
| wzy           | localhost |
+---------------+-----------+
6 rows in set (0.00 sec)

mysql> create database coon;
Query OK, 1 row affected (0.00 sec)

mysql> grant all on coon.* to 'connector'@'localhost';
Query OK, 0 rows affected (0.00 sec)

mysql> flush privileges;
Query OK, 0 rows affected (0.00 sec)

// 在终端B中查看 connector 所能使用的数据库,包括了这个用来测试连接的 coon
[wzy@VM-20-5-centos ~]$ mysql -u connector -p
Enter password:
Welcome to the MySQL monitor.  Commands end with ; or \g.
Your MySQL connection id is 16
Server version: 5.7.44 MySQL Community Server (GPL)

Copyright (c) 2000, 2023, Oracle and/or its affiliates.

Oracle is a registered trademark of Oracle Corporation and/or its
affiliates. Other names may be trademarks of their respective
owners.

Type 'help;' or '\h' for help. Type '\c' to clear the current input statement.

mysql> show databases;
+--------------------+
| Database           |
+--------------------+
| information_schema |
| coon               |
+--------------------+
2 rows in set (0.00 sec)
初始化 mysql_init()
要使用库,必须先进行初始化!
MYSQL *mysql_init(MYSQL *mysql);
初始化完毕之后,必须先链接数据库,在进行后续操作。(mysql网络部分是基于TCP/IP的)
❤️
🧡
💛
💚
💙
👥总结
本篇博文对 ? 做了一个较为详细的介绍,不知道对你有没有帮助呢
觉得博主写得还不错的三连支持下吧!会继续努力的~


