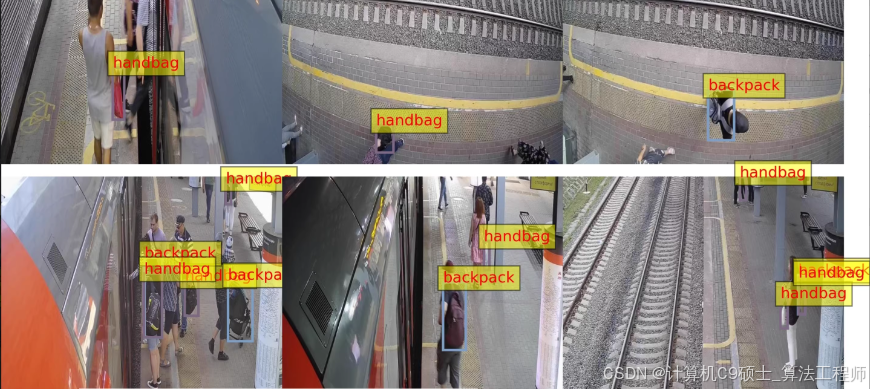
深度学习_如何构建使用YOLOv8训练一个车站行李及车辆检测系统 对车站的手提包自行车背包摩托车行李箱婴儿车进行检测
文章目录
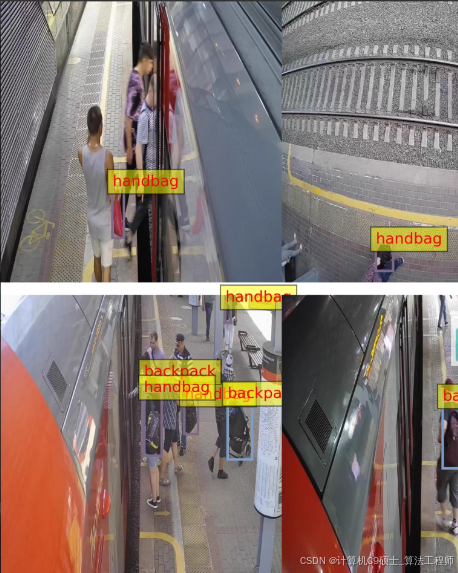
车站行李及车辆检测数据集 轨道交通数据集
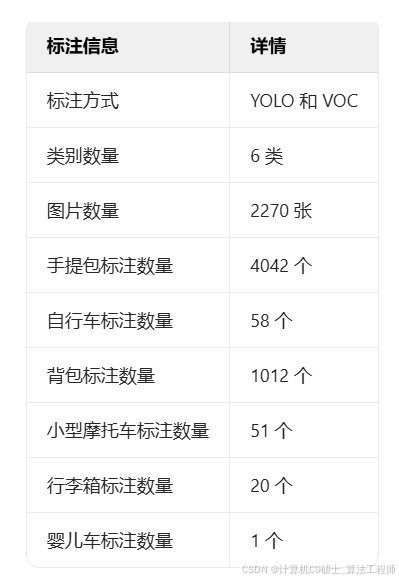
2270张,yolo和voc两种标注方式,
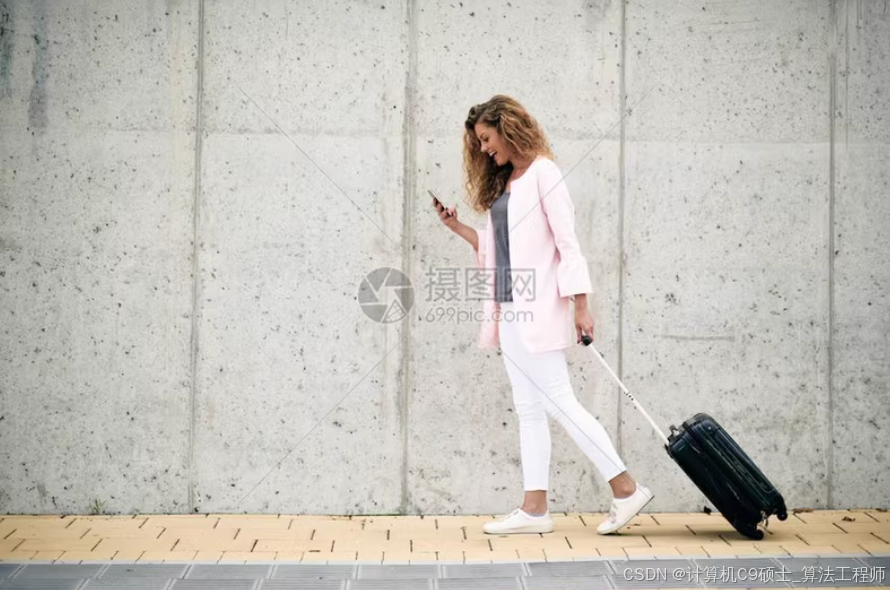
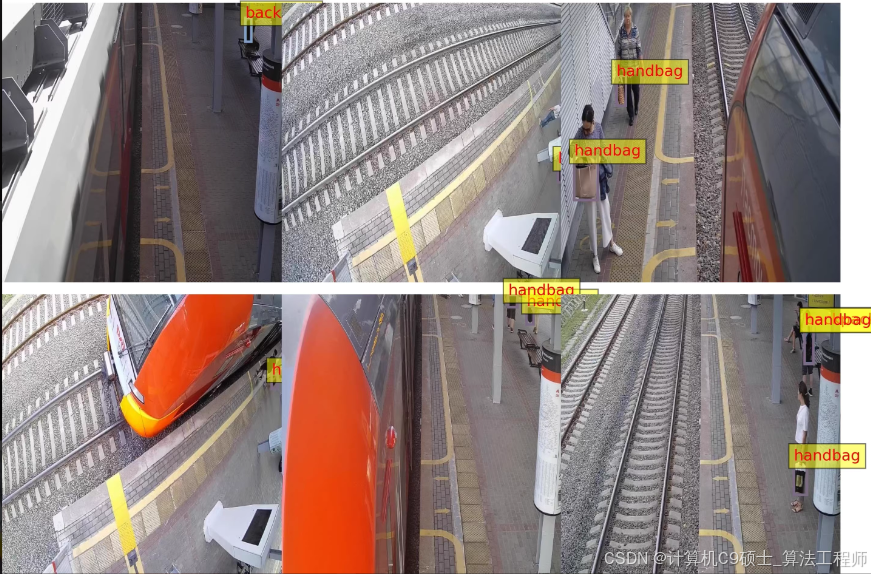
6类,标注数量:
handbag: 4042
bicycle: 58
backpack: 1012
scooter: 51
suitcase: 20
stroller: 1
image num: 2270
使用YOLOv8训练一个车站行李及车辆检测系统,基于数据集(包含handbag, bicycle, backpack, scooter, suitcase, stroller六类标签,YOLO和VOC两种标注方式),
几个步骤:安装必要的依赖、准备数据集、配置模型训练参数、执行训练、评估模型性能以及可视化预测结果。以下是详细的步骤说明和代码示例。
1. 安装依赖
首先确保你的环境中已经安装了必要的库:
pip install ultralytics opencv-python matplotlib
2. 数据集准备
假设你的数据集已经按照比例划分成了训练集、验证集和测试集,并且每个图像都有对应的.txt格式的标签文件(对于YOLO格式)或XML格式的标签文件(对于VOC格式)。我们创建一个data.yaml文件来描述这些信息:
train: ./path/to/train/images/  # 训练集图片路径
val: ./path/to/val/images/      # 验证集图片路径
test: ./path/to/test/images/    # 测试集图片路径(可选)

nc: 6  # 类别数量
names: ['handbag', 'bicycle', 'backpack', 'scooter', 'suitcase', 'stroller']  # 类别名称
请根据实际路径替换上述./path/to/...部分。
如果你的数据集是以VOC格式标注的,需要将其转换为YOLO格式,这里提供一个简单的转换脚本:
import os
import xml.etree.ElementTree as ET

def convert_voc_to_yolo(voc_dir, yolo_dir, classes):
    if not os.path.exists(yolo_dir):
        os.makedirs(yolo_dir)

    for xml_file in os.listdir(voc_dir):
        if not xml_file.endswith('.xml'):
            continue

        tree = ET.parse(os.path.join(voc_dir, xml_file))
        root = tree.getroot()

        size = root.find('size')
        width = int(size.find('width').text)
        height = int(size.find('height').text)

        txt_filename = os.path.splitext(xml_file)[0] + '.txt'
        with open(os.path.join(yolo_dir, txt_filename), 'w') as f:
            for obj in root.iter('object'):
                difficult = obj.find('difficult').text
                if int(difficult) == 1:
                    continue

                cls = obj.find('name').text
                if cls not in classes:
                    continue

                cls_id = classes.index(cls)

                xmlbox = obj.find('bndbox')
                b = (float(xmlbox.find('xmin').text), float(xmlbox.find('xmax').text),
                     float(xmlbox.find('ymin').text), float(xmlbox.find('ymax').text))

                bb = [((b[1] + b[0]) / 2) / width, ((b[3] + b[2]) / 2) / height,
                      (b[1] - b[0]) / width, (b[3] - b[2]) / height]

                f.write(f"{cls_id} {' '.join(map(str, bb))}\n")

# 使用方法
classes = ['handbag', 'bicycle', 'backpack', 'scooter', 'suitcase', 'stroller']
convert_voc_to_yolo('path/to/voc_labels/', 'path/to/yolo_labels/', classes)
3. 训练模型
接下来,编写Python脚本来加载YOLOv8模型并开始训练过程。这里是一个完整的例子,包括详细的注释以帮助理解每一步的作用。
训练脚本 (train.py)
from ultralytics import YOLO
import os

def train_yolov8_model():
    """
    使用YOLOv8训练车站行李及车辆检测模型。
    """
    # 加载预训练的YOLOv8模型
    model = YOLO('yolov8n.pt')  # 可以选择其他变体如'yolov8s.pt', 'yolov8m.pt'等

    # 开始训练
    results = model.train(
        data='path/to/data.yaml',  # 数据集配置文件路径
        epochs=100,  # 根据需要调整epoch数
        imgsz=640,  # 输入图像尺寸
        batch=16,  # 批次大小
        name='station_luggage_vehicle_detection',  # 实验名称
        save=True,  # 自动保存最佳模型
        exist_ok=True,  # 如果目录存在则不报错
        patience=50,  # 当验证损失不再改善时提前停止训练的轮数
        lr0=0.01,  # 初始学习率
        lrf=0.1,  # 最终学习率(lr0 * lrf)
        optimizer='SGD',  # 优化器类型
        augment=True,  # 启用数据增强
        device='',  # 使用GPU或CPU ('cuda' or 'cpu')
        workers=8,  # 数据加载的工作线程数
        project='runs/detect',  # 保存结果的项目目录
        verbose=True,  # 显示详细输出
    )

if __name__ == "__main__":
    # 设置当前工作目录为脚本所在目录,以便相对路径正确
    script_dir = os.path.dirname(os.path.abspath(__file__))
    os.chdir(script_dir)

    # 调用训练函数
    train_yolov8_model()
4. 评估模型
训练完成后,可以使用验证集评估模型性能:
评估脚本 (validate.py)
from ultralytics import YOLO

def validate_model():
    """
    使用验证集评估YOLOv8模型性能。
    """
    model = YOLO('runs/detect/station_luggage_vehicle_detection/weights/best.pt')  # 加载最佳模型
    metrics = model.val()  # 进行验证
    print(f"Validation mAP: {metrics.box.map}")  # 输出mAP值作为性能指标之一

if __name__ == "__main__":
    validate_model()
5. 可视化预测结果
我们可以对单张图片进行预测,并可视化其结果:
预测与可视化脚本 (predict_and_visualize.py)
from ultralytics import YOLO
import cv2
import matplotlib.pyplot as plt

def predict_and_visualize(image_path):
    """
    对指定图片进行预测,并显示预测结果。
    :param image_path: 图片路径
    """
    model = YOLO('runs/detect/station_luggage_vehicle_detection/weights/best.pt')  # 加载最佳模型
    results = model.predict(image_path, conf=0.5)  # 进行预测,设置置信度阈值

    for result in results:
        for box in result.boxes:
            cls, conf = box.cls.item(), box.conf.item()
            x1, y1, x2, y2 = map(int, box.xyxy)
            label = model.model.names[int(cls)]
            image = cv2.imread(image_path)
            cv2.rectangle(image, (x1, y1), (x2, y2), (0, 255, 0), 2)
            cv2.putText(image, f'{label} {conf:.2f}', (x1, y1 - 10), cv2.FONT_HERSHEY_SIMPLEX, 0.9, (0, 255, 0), 2)

    rgb_image = cv2.cvtColor(image, cv2.COLOR_BGR2RGB)
    plt.imshow(rgb_image)
    plt.axis('off')
    plt.show()

if __name__ == "__main__":
    # 示例调用
    predict_and_visualize("path/to/your/image.jpg")
6. 运行步骤
-
转换VOC到YOLO格式(如果需要):
python convert_voc_to_yolo.py -
训练模型:
python train.py -
评估模型:
python validate.py -
预测与可视化:
python predict_and_visualize.py
确保在运行脚本之前根据实际情况修改脚本中的路径,例如data.yaml的位置、模型权重文件位置以及待预测图片的位置。