CSS练习一:简洁版小米侧边栏
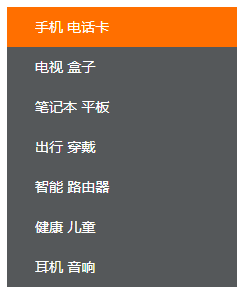
实现效果图
代码实现:
<!DOCTYPE html>
<html lang="en">

<head>
    <meta charset="UTF-8">
    <meta http-equiv="X-UA-Compatible" content="IE=edge">
    <meta name="viewport" content="width=device-width, initial-scale=1.0">
    <title>简洁版小米侧边栏</title>
    <style>
        /* a是行内元素,要竖着排列需要转换为行内元素 */
        a {
            display: block;
            /* 每一个a的大小需要重新设置一下 */
            width: 230px;
            height: 40px;
            background-color: #55585a;
            /* 文字大小颜色设置一下即可*/
            color: #fff;
            font-size: 14px;
            /* 去除链接下划线 */
            text-decoration: none;
            /* 目前阶段可以使用缩进两个效果图来显示 */
            text-indent: 2em;
            /* 让文字的行高等于盒子的高度,就可以让文字在当前盒子内垂直居中*/
            line-height: 40px;
        }
        /* 2、鼠标经过a给链接设置背景颜色 */
        a:hover{
            background-color: rgb(255, 111, 0);
        }
    </style>

</head>

<body>
    <a href="#">手机 电话卡</a>
    <a href="#">电视 盒子</a>
    <a href="#">笔记本 平板</a>
    <a href="#">出行 穿戴</a>
    <a href="#">智能 路由器</a>
    <a href="#">健康 儿童</a>
    <a href="#">耳机 音响</a>
</body>

</html>
注意点
单行文字垂直居中
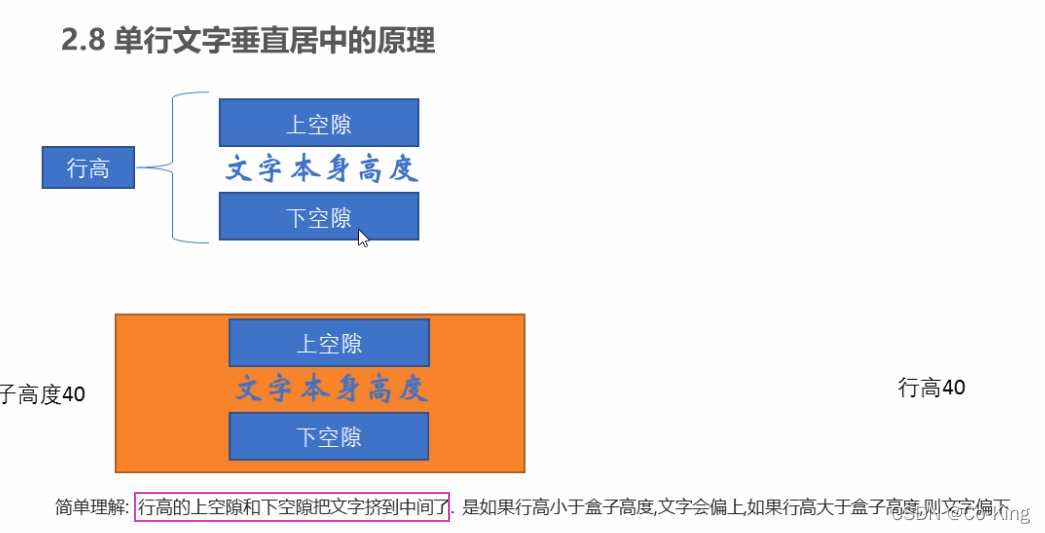
- CSS没有给我们提供文字垂直居中的代码,我们这里使用一个小技巧来实现:解决方案:让文字的行高等于盒子的高度,就可以让文字在当前盒子内垂直居中
实现的原理
CSS练习二:大背景 + 小背景页面显示
实现效果图一
代码实现
<!DOCTYPE html>
<html lang="en">

<head>
    <meta charset="UTF-8">
    <meta http-equiv="X-UA-Compatible" content="IE=edge">
    <meta name="viewport" content="width=device-width, initial-scale=1.0">
    <title>Document</title>
    <style>
        h3 {
            width: 118px;
            height: 40px;
            /* background-color: pink; */
            font-size: 14px;
            font-weight: 400;
            line-height: 40px;
            /* 小的这种图片一般是通过插入来使用的 */
            background-image: url(demo01/icon4.png);
            /* 因为背景图片默认是平铺的,但是我们这里默认是不平铺的 */
            background-repeat: no-repeat;
            background-position: left center;
            text-indent: 1.5em;
        }
    </style>
</head>

<body>
    <h3>成长守护平台</h3>
</body>

</html>
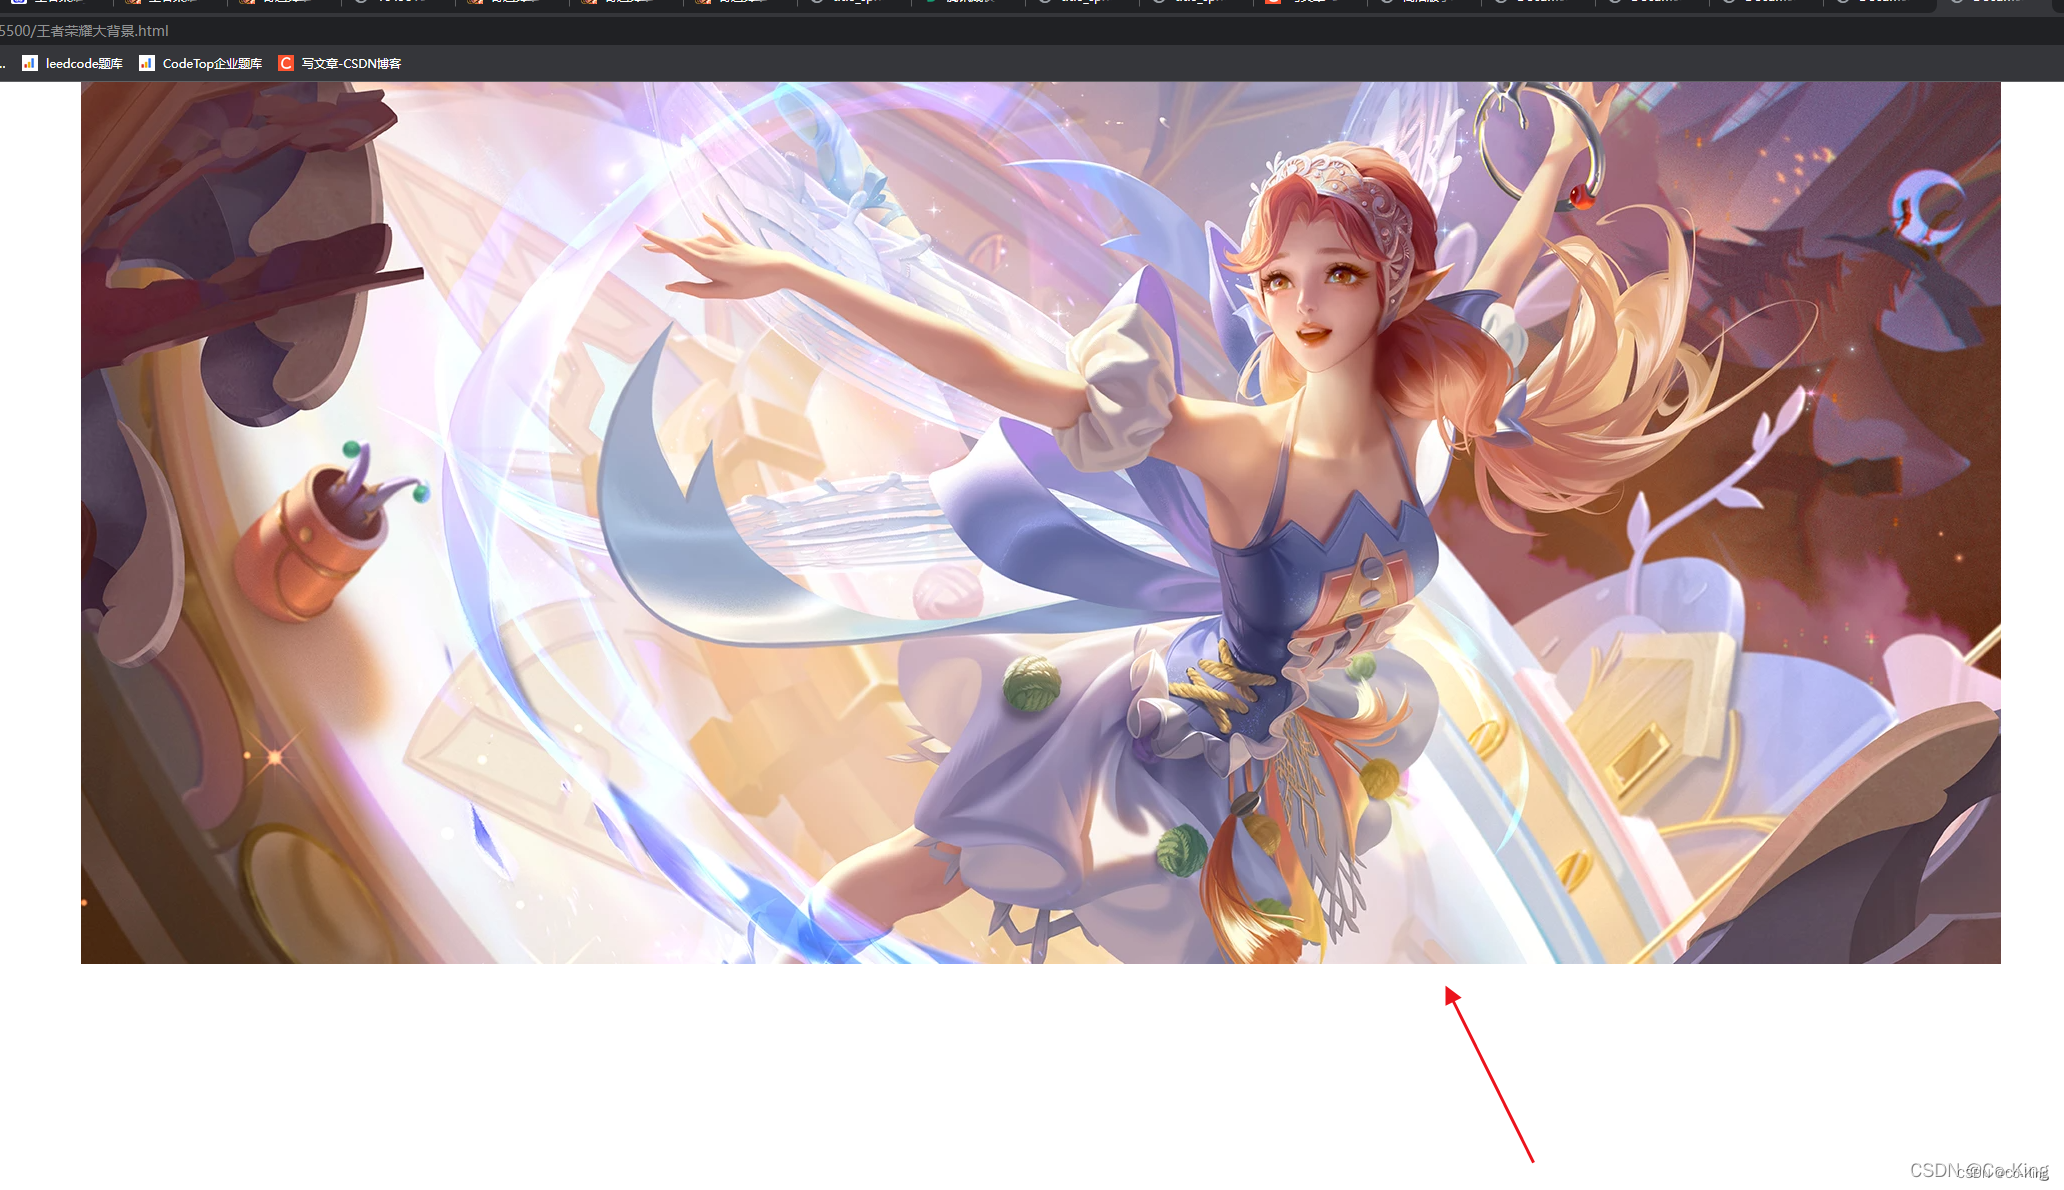
实现效果图二
把图片最重要的位置显示出来
代码实现
<!DOCTYPE html>
<html lang="en">
<head>
    <meta charset="UTF-8">
    <meta http-equiv="X-UA-Compatible" content="IE=edge">
    <meta name="viewport" content="width=device-width, initial-scale=1.0">
    <title>Document</title>
    <style>
        body{
            background-image: url(demo01/icon5.webp);
            background-repeat: no-repeat;
            /*
                把图片最中心的内容显示出来,水平居中等
            */
            background-position: center top;

        }
    </style>
</head>
<body>

</body>
</html>
CSS练习三:五彩导航
实现效果图
代码实现
<!DOCTYPE html>
<html lang="en">

<head>
    <meta charset="UTF-8">
    <meta http-equiv="X-UA-Compatible" content="IE=edge">
    <meta name="viewport" content="width=device-width, initial-scale=1.0">
    <title>五彩导航</title>
    <style>
        .nav a{
            display: inline-block;
            width: 120px;
            height: 58px;
            background-color: pink;
            text-align: center;
            line-height: 48px;
            color: #fff;
            text-decoration: none;
        }
        .nav .bg1{
            /* 写了多个背景属性的时候,就是使用background */
            background: url(demo01/bg1.png) no-repeat;
        }
        .nav .bg1:hover{
            background-image: url(demo01/bg5.png);
        }

        .nav .bg2{
            /* 写了多个背景属性的时候,就是使用background */
            background: url(demo01/bg2.png) no-repeat;
        }

        .nav .bg2:hover{
            background-image: url(demo01/bg6.png);
        }
    </style>
</head>

<body>
    <div class="nav">
        <a href="#" class="bg1">五彩导航</a>
        <a href="#" class="bg2">五彩导航</a>
        <a href="#">五彩导航</a>
        <a href="#">五彩导航</a>
        <a href="#">五彩导航</a>
    </div>
</body>

</html>
CSS练习四:新浪导航栏的实现
实现效果图
代码实现
<!DOCTYPE html>
<html lang="en">
<head>
    <meta charset="UTF-8">
    <meta http-equiv="X-UA-Compatible" content="IE=edge">
    <meta name="viewport" content="width=device-width, initial-scale=1.0">
    <title>新浪导航栏</title>
    <style>
        .nav{
            height: 41px;
            border-top: 3px solid #ff8500;
            border-bottom: 1px solid #edeef0;
            background-color: #fcfcfc;
            line-height: 41px;
        }
        .nav a{
            /* a是属于行内元素,此时必须转换为行内块元素 */
            display: inline-block;
            height: 41px;

            padding: 0 20px;
            font-size: 12px;
            color: #4c4c4c;
            text-decoration: none;
        }
        /* 鼠标移入显示 */
        .nav a:hover{
            background-color: #eee;
            color: #ff8500;
        }
    </style>
</head>
<body>
    <div class="nav">
        <a href="#">新浪导航</a>
        <a href="#">手机新浪网</a>
        <a href="#">移动客户端</a>
        <a href="#">微博</a>
        <a href="#">三个字</a>
    </div>
</body>
</html>
CSS练习五:产品模块实现
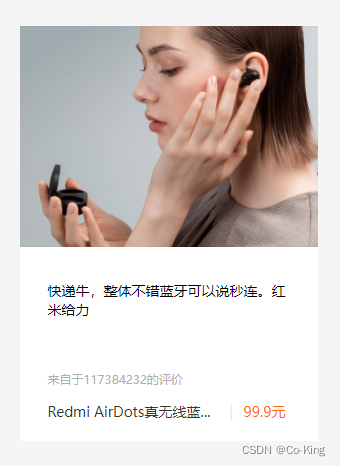
实现效果图
代码实现
<!DOCTYPE html>
<html lang="en">
<head>
    <meta charset="UTF-8">
    <meta http-equiv="X-UA-Compatible" content="IE=edge">
    <meta name="viewport" content="width=device-width, initial-scale=1.0">
    <title>产品模块分析</title>
    <style>
        *{
            margin: 0px;
            padding: 0px;
        }
        body{
            background-color: #f5f5f5;

        }
        a{
            color:#333;
            text-decoration: none;
        }
        .box{
            width: 298px;
            height: 415px;
            background-color: #fff;
            /* 让块级盒子水平居中 */
            margin: 100px auto;
        }
        /* 图片太宽了,让图片宽度和父亲一样宽即可,则有 */
        .box img{
            /* 图片的宽度和父亲一样宽,不会超过 */
            width: 100%;
        }

        .review{
            height: 70px;
            font-size: 14px;
            /* 因为这个段落没有width属性,所以padding不会撑开盒子的宽度 */
            padding: 0 28px;
            margin-top: 30px;
        }
        .appraise{
            font-size: 12px;
            color: #b0b0b0;
            margin-top: 20px;
            padding: 0 28px;
        }
        /* 转成行内块即可放在同一行当中,这一点很关键 */
        .info{
            font-size: 14px;
            margin-top: 15px;
            padding: 0 28px;
        }
        .info h4{
            display: inline-block;
            font-weight: 400;
        }
        .info span{
            color: #ff6700;
        }

        .info em{
            font-style: normal;
            color: #ebe4e0;
            margin: 0 6px 0 15px;
        }
    </style>
</head>
<body>
    <div class="box">
        <img src="demo01/xiaomi.jpg" alt="">
        <p class="review">快递牛,整体不错蓝牙可以说秒连。红米给力</p>
        <!-- 盒子里面是可以接着放盒子的 -->
        <div class="appraise">来自于117384232的评价</div>
        <div class="info">
            <h4><a href="#">Redmi AirDots真无线蓝...</a></h4>
            <em>|</em>
            <span>99.9元</span>
        </div>
    </div>
</body>
</html>
CSS6:综合案例-快报模块
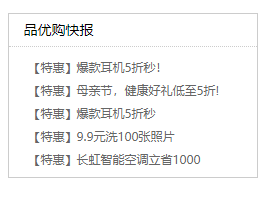
实现效果图
代码实现
<!DOCTYPE html>
<html lang="en">
<head>
    <meta charset="UTF-8">
    <meta http-equiv="X-UA-Compatible" content="IE=edge">
    <meta name="viewport" content="width=device-width, initial-scale=1.0">
    <title>快报模块</title>
    <style>
        *{
            margin: 0px;
            padding: 0px;

        }
        .box{
            width: 248px;
            height: 163px;
            border: 1px solid #ccc;
            margin: 100px auto;
        }
        .box h3{
            height: 32px;
            /* 要想搞出那条横线,需要搞出一个下边框 */
            border-bottom: 1px dotted #ccc;
            font-size: 14px;
            font-weight: 400;
            line-height: 32px;
            padding-left: 15px;
        }
        li{
            /* 去掉li里面的小圆点 */
            list-style: none;
        }
        .box ul li a{
            font-size: 12px;
            color: #666;
            text-decoration: none;

        }

        .box ul li a:hover{
            text-decoration: underline;
        }

        .box ul li{
            height: 23px;
            line-height: 23px;
            padding-left: 20px;
        }

        .box ul{
            margin-top: 7px;;
        }
    </style>
</head>
<body>
    <div class="box">
        <h3>品优购快报</h3>
        <ul>
            <li><a href="#">【特惠】爆款耳机5折秒!</a></li>
            <li><a href="#">【特惠】母亲节,健康好礼低至5折!</a></li>
            <li><a href="#">【特惠】爆款耳机5折秒</a></li>
            <li><a href="#">【特惠】9.9元洗100张照片</a></li>
            <li><a href="#">【特惠】长虹智能空调立省1000</a></li>
        </ul>
    </div>
</body>
</html>
CSS练习7:小米布局案例1(盒子模型 + 浮动)
实现效果图
代码实现
<!DOCTYPE html>
<html lang="en">
<head>
    <meta charset="UTF-8">
    <meta http-equiv="X-UA-Compatible" content="IE=edge">
    <meta name="viewport" content="width=device-width, initial-scale=1.0">
    <title>小米布局案例</title>
    <style>
        /* ul本身没有外边距,但是ul是有的,所以 */
        *{
            margin:0;
            padding: 0;
        }
        li{
            list-style:none;
        }

        .box{
            width: 1226px;
            height: 285px;
            background-color: pink;
            margin: 0 auto;
        }
        .box li{
            width: 296px;
            height: 285px;
            float:left;
            background-color: purple;
            margin-right: 14px;
        }
        /* 权重问题,使用.last 是不能清掉margin-right的,这一点很关键 */
        /* 使用浮动来进行相应布局才行 */
        .box .last{
            margin-right: 0;
        }
    </style>
</head>
<body>
    <ul class="box">
        <li>1</li>
        <li>2</li>
        <li>3</li>
        <li class="last">4</li>
    </ul>
</body>
</html>
CSS练习8:小米布局案例2(盒子模型 + 浮动)
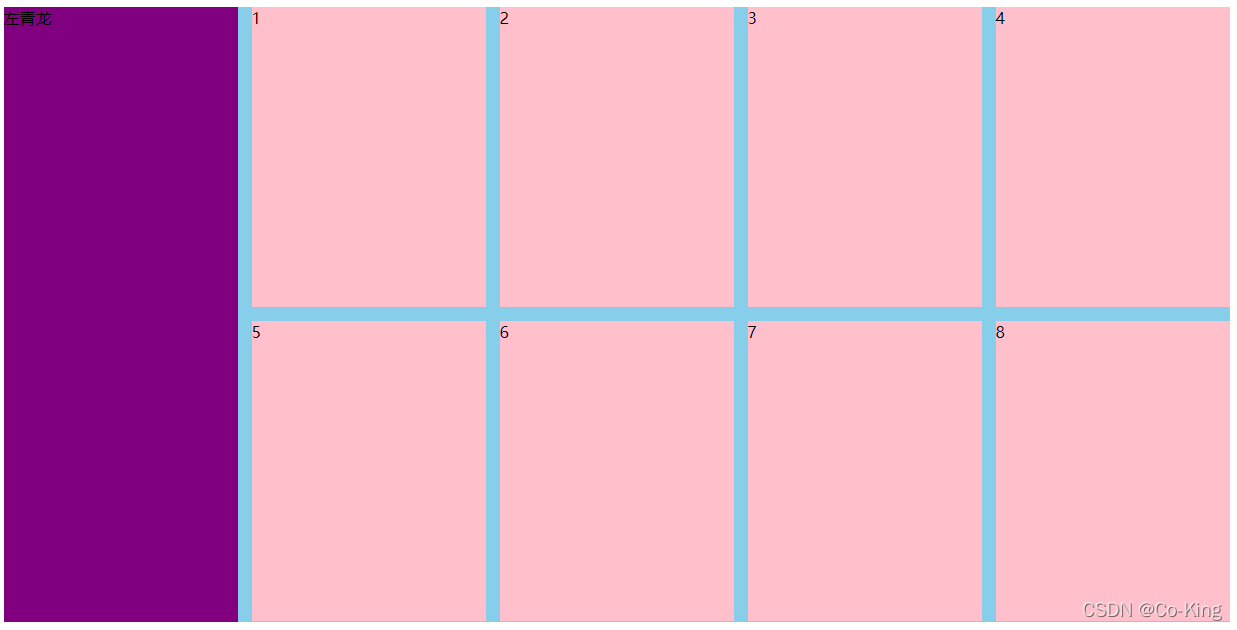
实现效果图
代码实现
<!DOCTYPE html>
<html lang="en">
<head>
    <meta charset="UTF-8">
    <meta http-equiv="X-UA-Compatible" content="IE=edge">
    <meta name="viewport" content="width=device-width, initial-scale=1.0">
    <title>小米布局</title>
    <style>
        .box{
            width: 1226px;
            height: 615px;
            background-color: pink;
            margin: 0 auto;
        }
        .left{
            float: left;
            width: 234px;
            height: 615px;
            background-color: purple;

        }
        .right{
            float: left;
            width: 992px;
            height: 615px;
            background-color: skyblue;
        }
        .right>div{
            float: left;
            width: 234px;
            height: 300px;
            background-color: pink;
            margin-left: 14px;
            margin-bottom: 14px;
        }
    </style>
</head>
<body>
    <div class="box">
        <!-- .left + .right -->
        <div class="left">左青龙</div>
        <div class="right">
            <div>1</div>
            <div>2</div>
            <div>3</div>
            <div>4</div>
            <div>5</div>
            <div>6</div>
            <div>7</div>
            <div>8</div>
        </div>
    </div>
</body>
</html>
CSS练习9:
实现效果图
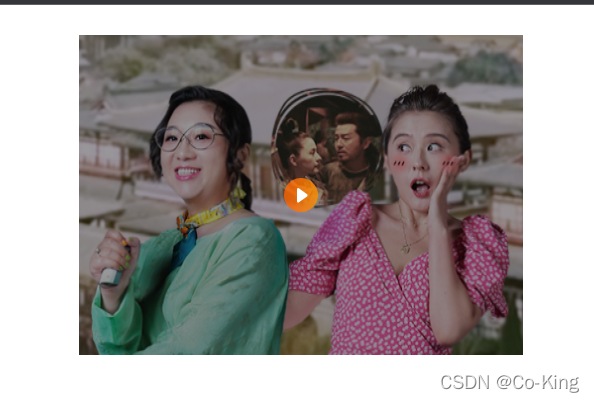
鼠标移入的时候,会显示出新的效果图
实现代码
<!DOCTYPE html>
<html lang="en">
<head>
    <meta charset="UTF-8">
    <meta http-equiv="X-UA-Compatible" content="IE=edge">
    <meta name="viewport" content="width=device-width, initial-scale=1.0">
    <title>综合案例-土豆</title>
    <script></script>
    <style>
        .tudou{
            position: relative;
            width: 444px;
            height: 320px;
            background-color: pink;
            margin: 30px auto;
        }
        /* 将图片的宽和高修改的和图片一样大 */
        .tudou img{
            width: 100%;
            height: 100%
        }

        .mask{
            /* 隐藏遮罩层 */
            display: none;
            /* 定位的口诀是子绝父相 */
            position: absolute;
            top: 0;
            left: 0;
            width: 100%;
            height: 100%;
            /* 存放多个内容的时候,用的是background */
            background: rgba(0, 0, 0, 0.4) url(./study/taobao/images/arr.png) no-repeat center;
        }

        /* 当我们鼠标经过了 土豆这个盒子,就让里面的遮罩层显示出来 */
        /* 而是显示元素,还是非常关键的 */
        /* 真正显示出来才行 */
        .tudou:hover .mask{
            display: block;
        }
    </style>
</head>
<body>
    <div class="tudou">
        <div class="mask"></div>
        <img src="./study/taobao/images/tudou.jpg" alt="">
    </div>
</body>
</html>
注意点
- 背景中有多个内容的时候,使用background,放入对应的参数即可!
- 在一个盒子里面插入一个图片以后,我们可以将图片的样式设置成 百分百的形式,这样子才是最关键的!
- 子绝父相,这个千万不要忘记!父亲用相对定位,孩子用绝对定位!
CSS练习10:进度条
实现效果图
鼠标放到盒子上面,进度条会进行移动
实现代码
<!DOCTYPE html>
<html lang="en">

<head>
    <meta charset="UTF-8">
    <meta http-equiv="X-UA-Compatible" content="IE=edge">
    <meta name="viewport" content="width=device-width, initial-scale=1.0">
    <title>css3过渡练习-进度条</title>
    <style>
        .bar {
            width: 150px;
            height: 15px;
            border: 1px solid red;
            /* 将边框来设置一定的圆角弧度,这一点也是很关键的 */
            /* 要想要设置一定的弧度,用到的就是border-radius 非常关键*/
            border-radius: 7px;
        }
        .bar_in{
            width: 50%;
            height: 100%;
            background-color: red;

            /* 谁做过渡给谁加属性即可 */
            transition: all .7s;

        }
        /* 经过的时候肯定是经过父盒子,才会发生这么大的变化 */
        .bar:hover .bar_in{
            width: 100%;
        }
    </style>
</head>

<body>
    <div class="bar">
        <div class="bar_in"></div>
    </div>
</body>

</html>
注意点:
- border-radius : 7px;
- transition:all .7s;
