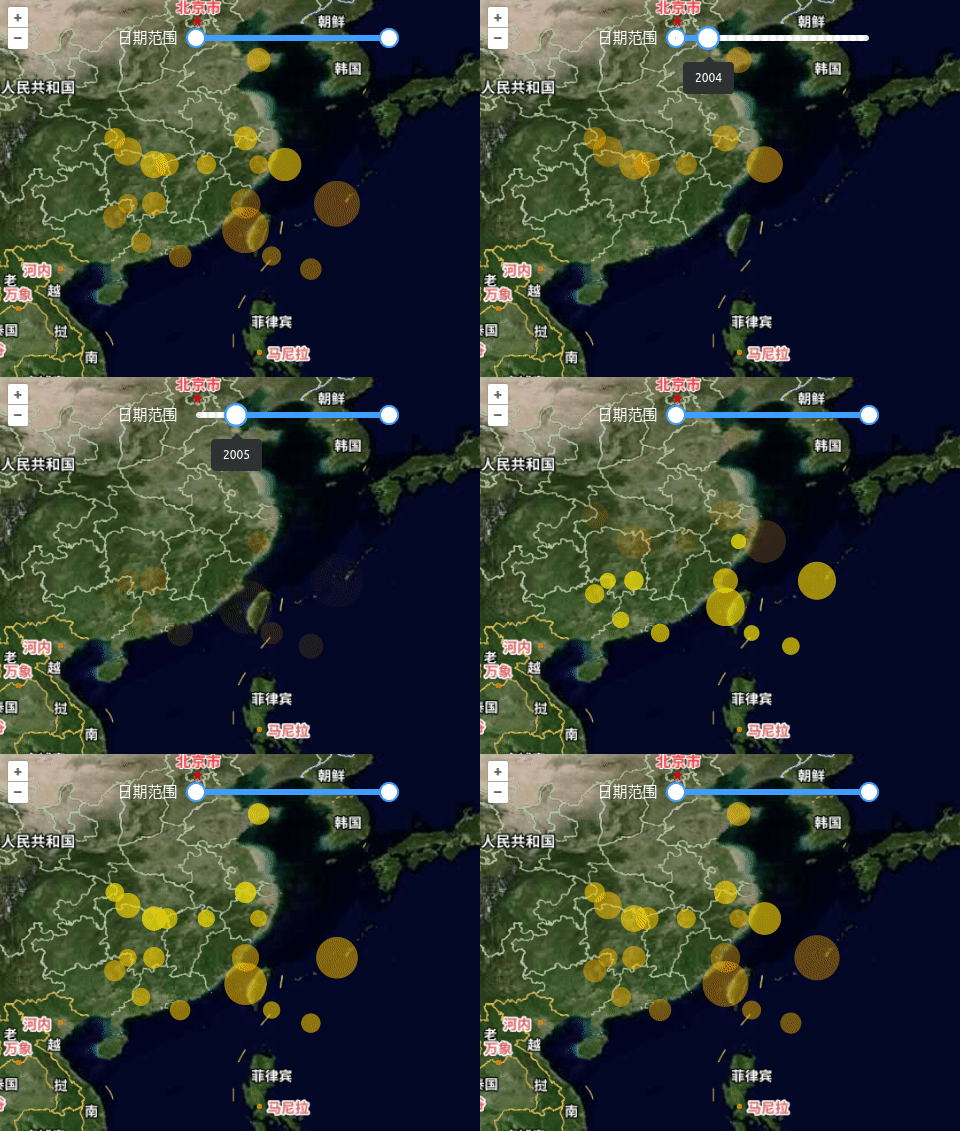
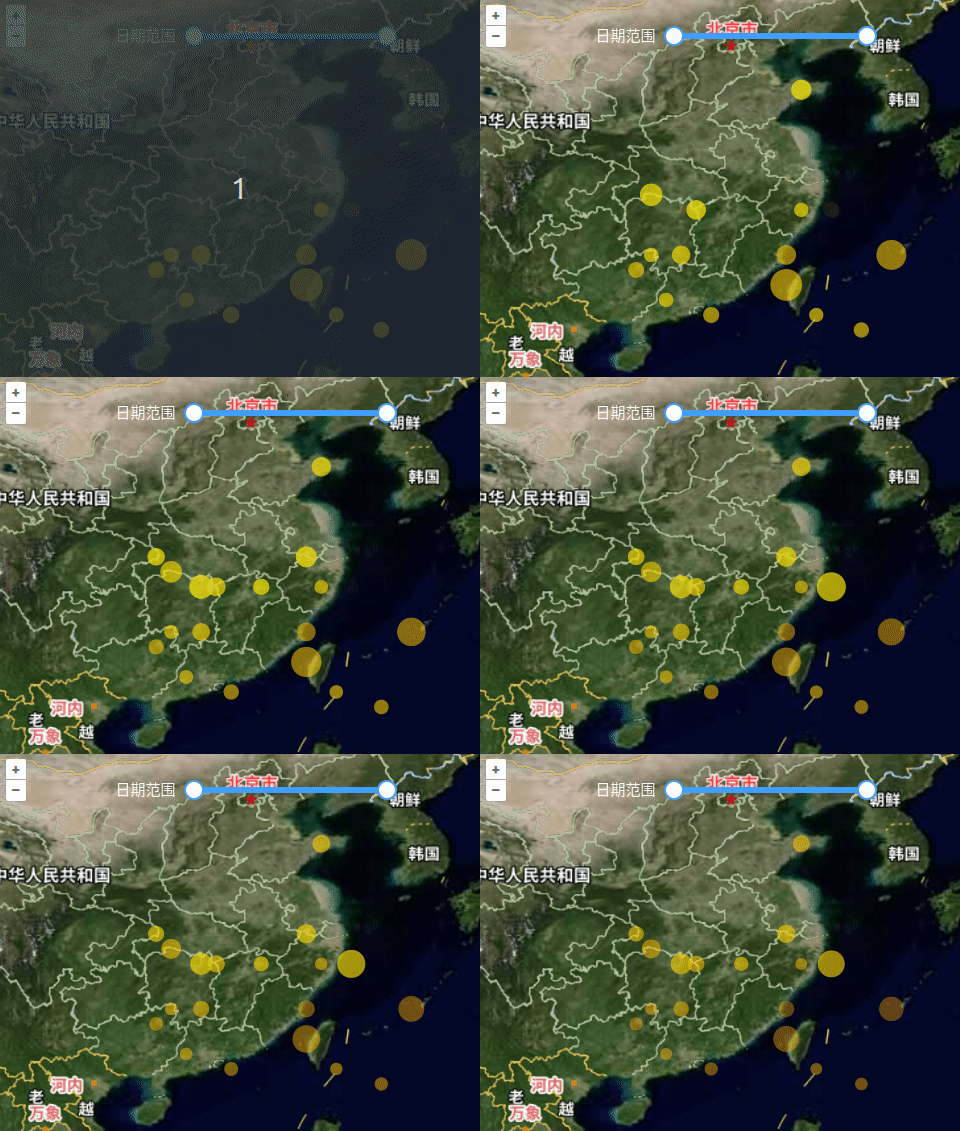
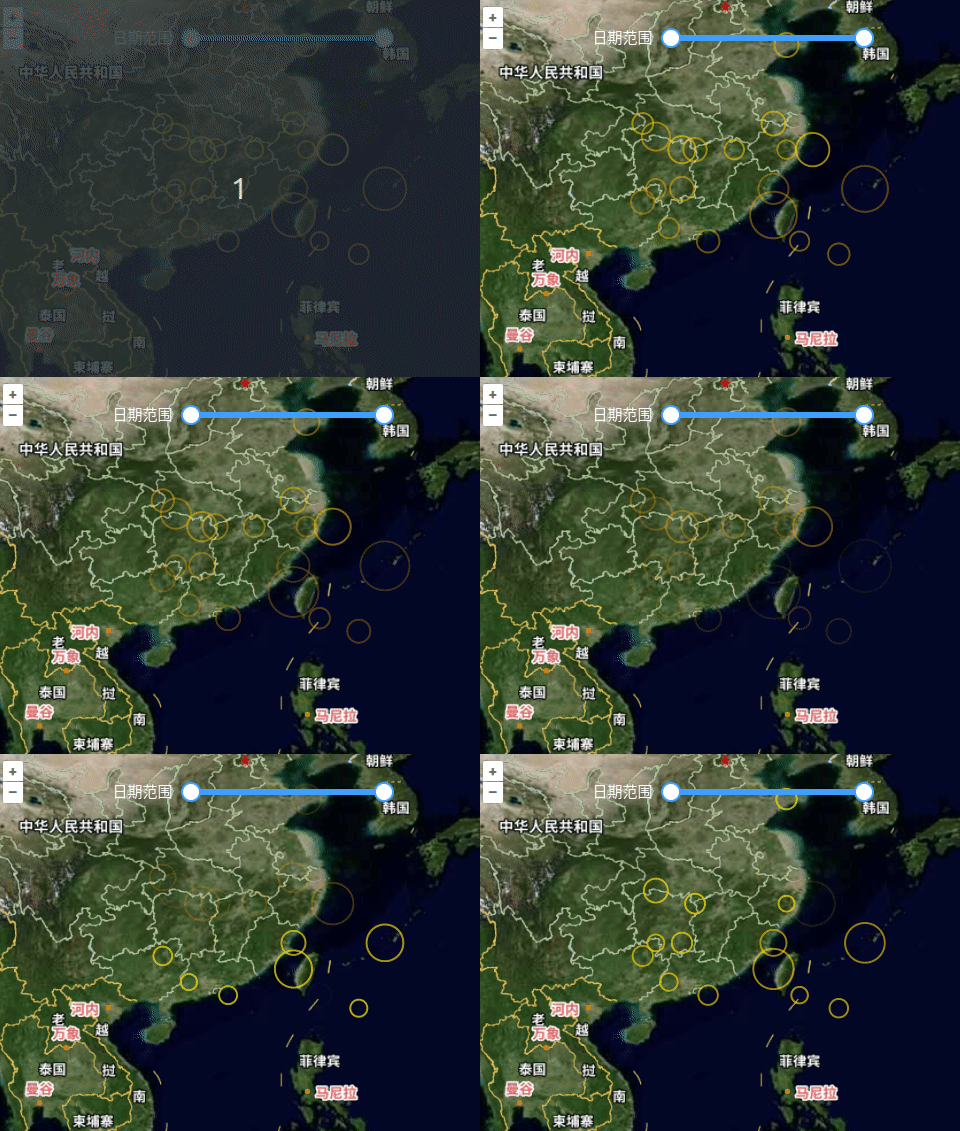
本篇介绍一下使用 openlayers WebGLPoints图层应用(光环、光晕扩散收缩)
1 需求
- WebGL渲染的光环、光晕扩散收缩
2 分析
- WebGLPoints图层应用
- ol/expr/expression 的简单使用官网解释
WebGLPoints 的 style 属性比较多(基本都是图标、填充色、描边宽度及颜色之类的)具体参见源码v9.2.4(src/ol/style/webgl.js) github地址
3 实现
3.1 光晕扩散
<template>
  <div id="map" class="map"></div>
  <div class="toolbar">
      <div>
        <span>日期范围</span>
        <el-slider
          v-model="date"
          :min="2000"
          :max="2024"
          range
          show-stops
          @input="handleInput"
        ></el-slider>
      </div>
  </div>
</template>

<script setup lang="ts">
import { Feature, Map, View } from 'ol';
import { WebGLTile as WebGLTileLayer } from 'ol/layer';
import { get } from 'ol/proj';
import { XYZ } from 'ol/source';
import { Vector as VectorSource } from 'ol/source.js';
import { Point } from 'ol/geom';
import WebGLPointsLayer from 'ol/layer/WebGLPoints';

const projection = get('EPSG:4326');
const key = '替换为天地图key';
const layerTypeMap = {
  vector: ['vec', 'cva'], // [矢量底图, 矢量注记]
  image: ['img', 'cia'], // [影像底图, 影像注记]
  terrain: ['ter', 'cta'] // [地形晕渲, 地形注记]
};
const startColor = 'rgba(255, 242, 0,0.7)';
const endColor = '#ff7f00';
const period = 10;
const date = ref([2000, 2024]);
let map = null;

const rate = [
  '/',
  [
    '%',
    ['+', ['time'], ['interpolate', ['linear'], ['get', 'date'], 2000, 0, 2024, period]],
    period
  ],
  period
];

const variables = computed(() => {
  return {
    min: date.value[0],
    max: date.value[1]
  };
});

const source = new VectorSource();

const pointerLayer = new WebGLPointsLayer({
  source: source,
  style: {
    variables: variables.value,
    filter: ['between', ['get', 'date'], ['var', 'min'], ['var', 'max']],
    'circle-radius': [
      '*',
      ['interpolate', ['linear'], ['get', 'count'], 0, 5, 100000, 15],
      ['+', 1.5, ['*', rate, 0.8]]
    ],
    'circle-fill-color': ['interpolate', ['linear'], rate, 0, startColor, 1, endColor],
    'circle-opacity': ['-', 1.0,  rate]
  }
});

onMounted(() => {
  initMap('image');
  initPoints();
});

const initMap = (layerType = 'image') => {
  // c: 经纬度 w: 墨卡托
  const matrixSet = 'c';
  map = new Map({
    target: 'map',
    view: new View({
      center: [116.406393, 39.909006],
      projection: projection,
      zoom: 5,
      maxZoom: 17,
      minZoom: 1
    }),
    layers: [
      // 底图
      new WebGLTileLayer({
        source: new XYZ({
          url: `https://t{0-7}.tianditu.gov.cn/DataServer?T=${layerTypeMap[layerType][0]}_${matrixSet}&tk=${key}&x={x}&y={y}&l={z}`,
          projection
        })
      }),
      // 注记
      new WebGLTileLayer({
        source: new XYZ({
          url: `https://t{0-7}.tianditu.gov.cn/DataServer?T=${layerTypeMap[layerType][1]}_${matrixSet}&tk=${key}&x={x}&y={y}&l={z}`,
          projection
        })
      }),
      pointerLayer
    ]
  });

  pointerLayer.on('postrender', function (event) {
    map.render();
  });
};

const initPoints = () => {
  const points = [
    {
      count: 50000,
      date: 2000,
      coordinates: [123, 29]
    },
    {
      count: 20000,
      date: 2001,
      coordinates: [120, 31]
    },
    {
      count: 6000,
      date: 2002,
      coordinates: [117, 29]
    },
    {
      count: 17900,
      date: 2003,
      coordinates: [121, 37]
    },
    {
      count: 500,
      date: 2005,
      coordinates: [121, 29]
    },
    {
      count: 1500,
      date: 2006,
      coordinates: [122, 22]
    },
    {
      count: 6500,
      date: 2007,
      coordinates: [125, 21]
    },
    {
      count: 70500,
      date: 2008,
      coordinates: [120, 24]
    },
    {
      count: 66500,
      date: 2009,
      coordinates: [127, 26]
    },
    {
      count: 30000,
      date: 2001,
      coordinates: [113, 29]
    },
    {
      count: 10000,
      date: 2002,
      coordinates: [110, 31]
    },
    {
      count: 16000,
      date: 2003,
      coordinates: [114, 29]
    },
    {
      count: 27900,
      date: 2004,
      coordinates: [111, 30]
    },
    {
      count: 15000,
      date: 2005,
      coordinates: [113, 26]
    },
    {
      count: 2500,
      date: 2006,
      coordinates: [111, 26]
    },
    {
      count: 3500,
      date: 2007,
      coordinates: [112, 23]
    },
    {
      count: 9500,
      date: 2007,
      coordinates: [115, 22]
    },
    {
      count: 10500,
      date: 2008,
      coordinates: [110, 25]
    },
    {
      count: 26500,
      date: 2009,
      coordinates: [120, 26]
    }
  ];
  points.forEach(p => {});
  source.addFeatures(
    points.map(
      p =>
        new Feature({
          count: p.count,
          date: p.date,
          geometry: new Point(p.coordinates)
        })
    )
  );
};

const handleInput = () => {
  pointerLayer.updateStyleVariables(variables.value);
};
</script>
<style scoped lang="scss">
.map {
  width: 100%;
  height: 100%;
}
.toolbar {
  position: absolute;
  top: 20px;
  left: 100px;
  display: flex;
  flex-direction: column;
  justify-content: center;
  align-items: center;
  color: #fff;
  .el-slider {
    margin-right: 10px;
    margin-left: 10px;
  }
  div {
    width: 300px;
    height: 40px;
    display: flex;
    justify-content: center;
    align-items: center;
    span {
      width: 120px;
      margin-left: 10px;
    }
  }
}
</style>
3.2 光晕收缩
只需要将下面代码:
['+', 1.5, ['*', rate, 0.8]]
修改为:
['-', 1.5, ['*', rate, 0.8]]
3.3 光环扩散和收缩
只需要将下面代码:
'circle-fill-color': ['interpolate', ['linear'], rate, 0, startColor, 1, endColor],
修改为:
'circle-stroke-width':2,
'circle-stroke-color': ['interpolate', ['linear'], rate, 0, startColor, 1, endColor],


