清空关闭防火墙
[root@localhost ~]# iptables -F
[root@localhost ~]# systemctl stop firewalld
[root@localhost ~]# systemctl disable  firewalld
Removed symlink /etc/systemd/system/multi-user.target.wants/firewalld.service.
Removed symlink /etc/systemd/system/dbus-org.fedoraproject.FirewallD1.service.
关闭selinux
查看selinux状态
[root@localhost ~]# sestatus
SELinux status: enabled
SELinuxfs mount: /sys/fs/selinux
SELinux root directory: /etc/selinux
Loaded policy name: targeted
Current mode: enforcing
Mode from config file: disabled
Policy MLS status: enabled
Policy deny_unknown status: allowed
Max kernel policy version: 28
临时关闭selinux
[root@localhost ~]# setenforce 0
永久关闭,可以修改配置文件/etc/selinux/config,将其中SELINUX设置为disabled
[root@localhost ~]# cat /etc/selinux/config

# This file controls the state of SELinux on the system.
# SELINUX= can take one of these three values:
#     enforcing - SELinux security policy is enforced.
#     permissive - SELinux prints warnings instead of enforcing.
#     disabled - No SELinux policy is loaded.
SELINUX=disabled
# SELINUXTYPE= can take one of three values:
#     targeted - Targeted processes are protected,
#     minimum - Modification of targeted policy. Only selected processes are protected.
#     mls - Multi Level Security protection.
SELINUXTYPE=targeted
[root@test ~]# sestatus
SELinux status:                 disabled
网络yum源
阿里云镜像源站点(http://mirrors.aliyun.com/)
centos镜像参考:http://mirrors.aliyun.com/help/centos
下载新的CentOS-Base.repo 到/etc/yum.repos.d/
[root@test ~]# wget -O /etc/yum.repos.d/CentOS-Base.repo http://mirrors.aliyun.com/repo/Centos-7.repo
之后运行yum makecache生成缓存
[root@test ~]# yum makecache
安装epel源
 [root@test ~]# yum install epel-release -y
[root@localhost ~]# ln -svf /lib/systemd/system/runlevel3.target
安装包:
OpenSSH服务需要4 个软件包
openssh-5.3p1-114.el6_7.x86_64:包含OpenSSH服务器及客户端需要的核心文件
openssh-clients-5.3p1-114.el6_7.x86_64:OpenSSH客户端软件包
openssh-server-5.3p1-114.el6_7.x86_64:OpenSSH服务器软件包
openssh-askpass-5.3p1-114.el6_7.x86_64:支持对话框窗口的显示,是一个基于X 系统的密码
诊断工具
这四个软件包在我们的RHEL镜像软件安装包里有。
ssh与ssl区别
ssl是通讯链路的附加层。可以包含很多协议。https, ftps, …
ssh只是加密的shell,最初是用来替代telnet的。通过port forward,也可以让其他协议通过ssh的隧道而起到加密的效果。
SSL是一种国际标准的加密及身份认证通信协议,您用的浏览器就支持此协议。SSL(Secure Sockets Layer)最初是由美国Netscape公司研究出来的,后来成为了Internet网上安全通讯与交易的标准。SSL协议使用通讯双方的客户证书以及CA根证书,允许客户/服务器应用以一种不能被偷听的方式通讯,在通讯双方间建立起了一条安全的、可信任的通讯通道。它具备以下基本特征:信息保密性、信息完整性、相互鉴定。 主要用于提高应用程序之间数据的安全系数。SSL协议的整个概念可以被总结为:一个保证任何安装了安全套接字的客户和服务器间事务安全的协议,它涉及所有TC/IP应用程序。
SSH的英文全称是Secure SHell。通过使用SSH,你可以把所有传输的数据进行加密,这样“中间人”这种攻击方式就不可能实现了,而且也能够防止DNS和IP欺骗。还有一个额外的好处就是传输的数据是经过压缩的,所以可以加快传输的速度。SSH有很多功能,它既可以代替telnet,又可以为ftp、pop、甚至ppp提供一个安全的“通道”。SSH是由客户端和服务端的软件组成的,有两个不兼容的版本分别是:1.x和2.x。用SSH 2.x的客户程序是不能连接到SSH 1.x的服务程序上去的。OpenSSH 2.x同时支持SSH 1.x和2.x。SSH的安全验证是如何工作的从客户端来看,SSH提供两种级别的安全验证。第一种级别(基于口令的安全验证)只要你知道自己帐号和口令,就可以登录到远程主机。所有传输的数据都会被加密,但是不能保证你正在连接的服务器就是你想连接的服务器。可能会有别的服务器在冒充真正的服务器,也就是受到“中间人”这种方式的攻击。第二种级别(基于密匙的安全验证)需要依靠密匙,也就是你必须为自己创建一对密匙,并把公用密匙放在需要访问的服务器上。如果你要连接到SSH服务器上,客户端软件就会向服务器发出请求,请求用你的密匙进行安全验证。服务器收到请求之后,先在你在该服务器的家目录下寻找你的公用密匙,然后把它和你发送过来的公用密匙进行比较。如果两个密匙一致,服务器就用公用密匙加密“质询”(challenge)并把它发送给客户端软件。客户端软件收到“质询”之后就可以用你的私人密匙解密再把它发送给服务器。用这种方式,你必须知道自己密匙的口令。但是,与第一种级别相比,第二种级别不需要在网络上传送口令。第二种级别不仅加密所有传送的数据,而且“中间人”这种攻击方式也是不可能的(因为他没有你的私人密匙)。但是整个登录的过程可能需要10秒。
OpenSSL------一个C语言函数库,是对SSL协议的实现。
OpenSSH-----是对SSH协议的实现。
ssh 利用 openssl 提供的库。openssl 中也有个叫做 openssl 的工具,是 openssl 中的库的命令行接口。
从编译依赖上看:
openssh依赖于openssl,没有openssl的话openssh就编译不过去,也运行不了。
linux 编译安装的基础依赖包
centos
[root@localhost ~]# openssl req -new -newkey rsa:2048 -nodes -keyout yyloooo.com.key -out yyloooo.com.csr
yum install gcc* automake zlib-devel libjpeg-devel giflib-devel freetype-devel
[root@localhost ~]# openssl req -new -newkey rsa:2048 -nodes -keyout yyloooo.com.key -out yyloooo.com.csr
yum -y install make gcc-c++ cmake bison-devel ncurses-devel
openssl安装
https://www.openssl.org/source/ 官网
[root@localhost ~]# wget  https://www.openssl.org/source/openssl-1.1.1.tar.gz
[root@localhost ~]#tar -zxvf openssl-1.1.1.tar.gz
[root@localhost ~]#cd openssl-1.1.1
[root@localhost openssl-1.1.1#./config
[root@localhost openssl-1.1.1]#make
[root@localhost openssl-1.1.1]#make install
在Centos7上编译安装openssl后,运行openssl version出现如下错误:
openssl: error while loading shared libraries: libssl.so.1.1: cannot open shared object file: No such file or directory
这是由于openssl库的位置不正确造成的。
解决方法:
root下执行
[root@localhost ~]#ln -s /usr/local/lib64/libssl.so.1.1 /usr/lib64/libssl.so.1.1
[root@localhost ~]#ln -s /usr/local/lib64/libcrypto.so.1.1 /usr/lib64/libcrypto.so.1.1
执行后就没有报错了
[root@localhost ~]# openssl req -new -newkey rsa:2048 -nodes -keyout yyloooo.com.key -out yyloooo.com.csr
openssh安装
[root@localhost openssh-7.9p1]# rpm -qa |grep openssh  #确认软件包是否已经安装:
openssh-7.4p1-16.el7.x86_64
openssh-clients-7.4p1-16.el7.x86_64
openssh-server-7.4p1-16.el7.x86_64
[root@test ~]#wget -c https://cdn.openbsd.org/pub/OpenBSD/OpenSSH/portable/openssh-7.9p1.tar.gz
[root@test ~]#tar -xzf openssh-7.9p1.tar.gz
[root@test ~]#cd openssh-7.9p1/
[root@test ~]#./configure --with-md5-passwords --with-pam --with-selinux --with-privsep-path=/var/lib/sshd/ --sysconfdir=/etc/ssh
[root@test ~]#make && make install
[root@test ~]#ssh -V

查看软件安装生产的文件:
[root@localhost ~]# rpm -ql openssh
OpenSSH配置文件
OpenSSH常用配置文件有两个/etc/ssh/ssh_config和/etc/sshd_config。
ssh_config为客户端配置文件
sshd_config为服务器端配置文件
[root@localhost ~]#service sshd restart/stop/start/status   #服务启动关闭脚本
[root@localhost ~]#chkconfig sshd on   #开机启动服务
[root@localhost ~]# systemctl list-unit-files | grep sshd
sshd-keygen.service                           static
sshd.service                                  enabled
[email protected]                                 static
sshd.socket                                   disabled
修改sshd服务默认监听的端口为222
vim/etc/ssh/sshd_config
[root@localhost ~]#service sshd restart   #改完重启服务
[root@localhost ~]#netstat -tlunp | grep sshd  #查看监听端口
tcp        0      0 0.0.0.0:222                 0.0.0.0:*                   LISTEN      4139/sshd
tcp        0      0 :::222                      :::*                        LISTEN      4139/sshd
修改完端口默认端口后,登录方法:
[root@localhost ~]#ssh -p 222 10.10.100.144
设置sshd服务器绑定的IP 地址,0.0.0.0 表示侦听所有地址
这个值可以写成本地IP地址也可以写成所有地址
Protocol 2
# 选择的 SSH 协议版本,可以是 1 也可以是 2 ,CentOS 5.x 预设是仅支援 V2。
安全考虑,设置为最新的协议版本
#HostKey /etc/ssh/ssh_host_key
设置包含计算机私人密匙的文件
SyslogFacility AUTHPRIV
# 当有人使用 SSH 登入系统的时候,SSH 会记录信息,这个信息要记录的类型为AUTHPRIV。
sshd服务日志存放在: /var/log/secure 。
例: 为什么sshd配置文件中没有指定日志,但日志却存放在了: /var/log/secure ?
# The authpriv file has restricted access.
authpriv.*                                              /var/log/secure
#LogLevel INFO
# 登录记录的等级!INFO级别以上
下面是安全调优的重点:
LoginGraceTime 2m       #grace 优雅
# 当使用者连上 SSH server 之后,会出现输入密码的画面,在该画面中,
# 在多久时间内没有成功连上 SSH server 就强迫断线!若无单位则默认时间为秒!
# PermitRootLogin yes
#是否允许 root 登入!预设是允许的,但是建议设定成 no !
真实的生产环境服务器,是不允许root账号直接登陆的!!!
PasswordAuthentication yes
# 密码验证当然是需要的!所以这里写 yes,也可以设置为no
#在真实的生产服务器上,根据不同安全级别要求,有的是设置不需要密码登陆的,通过认证的秘钥来登陆
# PermitEmptyPasswords no
# 若上面那一项如果设定为 yes 的话,这一项就最好设定为 no ,
# 这个项目在是否允许以空的密码登入!当然不许!
# PrintMotd yes
# 登入后是否显示出一些信息呢?例如上次登入的时间、地点等等,预设是 yes
# 亦即是打印出 /etc/motd这个文档的内容。
可以根据实际情况来修改实际
给sshd服务添加一些警告信息
[root@localhost ~]# cat /etc/motd
[root@localhost ~]# echo 'Warning ! From now on, all of your operation has been record!'> /etc/motd
[root@localhost ~]# ssh 10.10.100.175
The authenticity of host '10.10.100.175 (10.10.100.175)' can't be established.
ECDSA key fingerprint is SHA256:ZOoGXkiFPKbWak4Cxl5tUdKBDI98thuCdX1JFOWfXDw.
Please type 'yes' or 'no': yes
Warning: Permanently added '10.10.100.175' (ECDSA) to the list of known hosts.
[email protected]'s password:
Last login: Mon Oct 14 15:49:15 2019 from 10.10.100.29
Warning ! From now on, all of your operation has been record!
警告!从现在开始,你所有的操作已经被记录!
#PrintLastLog yes
#显示上次登入的信息!预设也是 yes !
Last login: Mon Oct 14 15:49:15 2019 from 10.10.100.29 #就是这个信息
#UseDNS yes
#一般来说,为了要判断客户端来源是正常合法的,因此会使用 DNS 去反查客户端的主机名
#不过如果是在内网互连,这项目设定为 no 会让联机速度比较快。
SSHD服务防止暴力破解
防止暴力破解的方法有三种:
方法一、
配置安全的sshd服务
1、 密码足够的复杂,密码的长度要大于8位最好大于20位。密码的复杂度是密码要尽可能有数字、大小写字母和特殊符号混合组成,
2、修改默认端口号
3 、不允许root账号直接登陆,添加普通账号,授予root的权限
互动:是否可以禁止root身份登录? 不行,因为有些程序需要使用root身份登录并运行。另外判断一个用户是不是超级管理员,看的是用户的ID是否为0。
4、不允许密码登陆,只能通过认证的秘钥来登陆系统
通过密钥认证实现sshd认证
客户端生成密钥对,然后把公钥传输到服务端
[root@localhost ~]# ssh-keygen
Generating public/private rsa key pair.
Enter file in which to save the key (/root/.ssh/id_rsa):
Enter passphrase (empty for no passphrase):
Enter same passphrase again:
Your identification has been saved in /root/.ssh/id_rsa.
Your public key has been saved in /root/.ssh/id_rsa.pub.
The key fingerprint is:
SHA256:rSXMH1A4pwuQOX1qfLpQu4CiFYbJSc3Sv+yaCLeSL20 [email protected]
The key’s randomart image is:
±–[RSA 2048]----+
| + + … |
| o += . +… |
|ooo .+ o.+ |
|ooo .ooo |
| . o.o.=S.+ |
|. o ooo .= . |
|o=. .o o. . |
|.E…o |
| *oo. |
±—[SHA256]-----+
[root@localhost ~]# cd /root/.ssh/
[root@localhost .ssh]# ls
id_rsa id_rsa.pub known_hosts
发布公钥到服务端:
使用ssh-copy-id 命令将客户端生成的公钥发布到远程服务器10.10.100.164
[root@localhost .ssh]# ssh-copy-id -i 10.10.100.164
/usr/bin/ssh-copy-id: INFO: Source of key(s) to be installed: “/root/.ssh/id_rsa.pub”
The authenticity of host ‘10.10.100.164 (10.10.100.164)’ can’t be established.
ECDSA key fingerprint is SHA256:5U+N9+ZYwNmRQMtx0QXiRklF61J+RzxrdP3xl06ftl4.
ECDSA key fingerprint is MD5:94:c7:77:76:e3:d8:c9:6f:a4:f3:3f:c5:3b:52:20:94.
Are you sure you want to continue connecting (yes/no)? yes
/usr/bin/ssh-copy-id: INFO: attempting to log in with the new key(s), to filter out any that are already installed
/usr/bin/ssh-copy-id: INFO: 1 key(s) remain to be installed – if you are prompted now it is to install the new keys
[email protected]’s password:
Number of key(s) added: 1
Now try logging into the machine, with: “ssh ‘10.10.100.164’”
and check to make sure that only the key(s) you wanted were added.
#这个时候可以通过ssh 无密钥直接登陆主机
[root@localhost .ssh]# ssh 10.10.100.164
Last login: Mon Oct 14 16:35:52 2019 from 10.10.100.29
注意:如果服务器不是监听22端口,则需要这样传输密钥:
ssh-copy-id -i ~/.ssh/id_rsa.pub “-p 222 [email protected]”
方法二:通过开源的防护软件来防护安全
简单、灵活、功能强大
简单来说其功能就是防止暴力破解。工作的原理是通过分析一定时间内的相关服务日志,将满足动作的相关IP利用iptables加入到dorp列表一定时间。
注:重启iptables服务的话,所有DORP将重置。
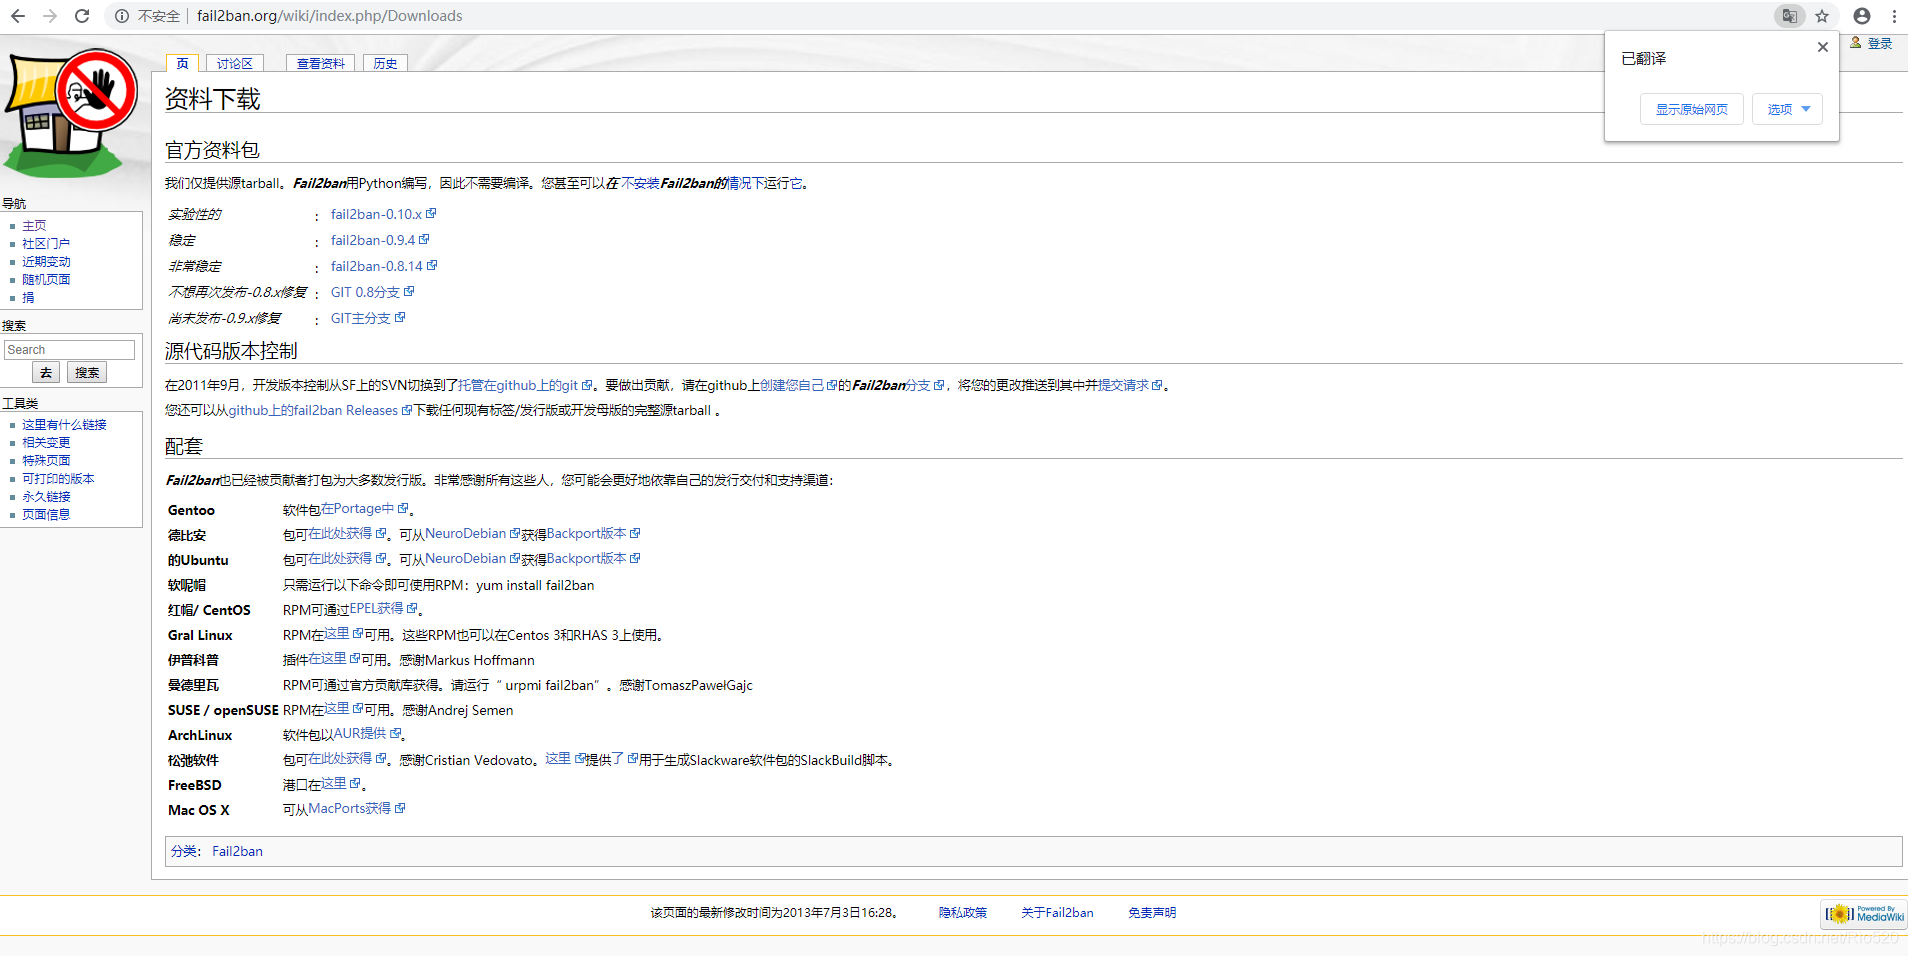
下载软件包:
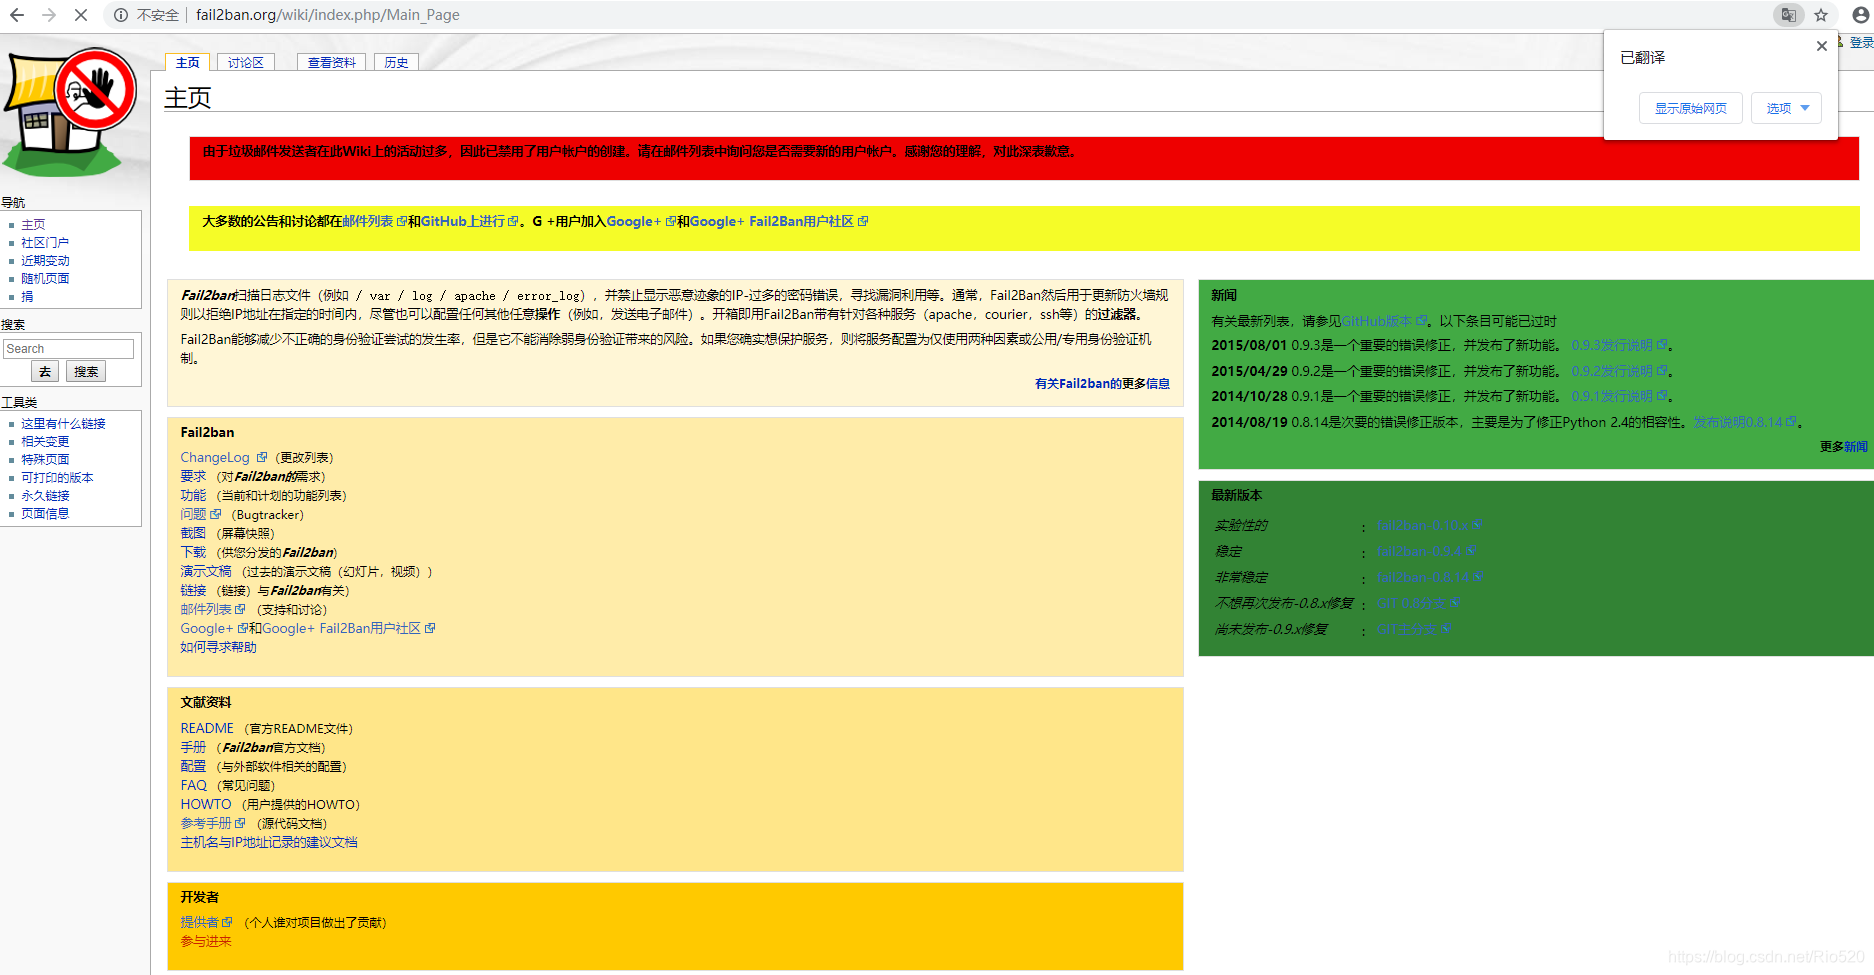
官方地址:
http://www.fail2ban.org
http://www.fail2ban.org/wiki/index.php/Downloads
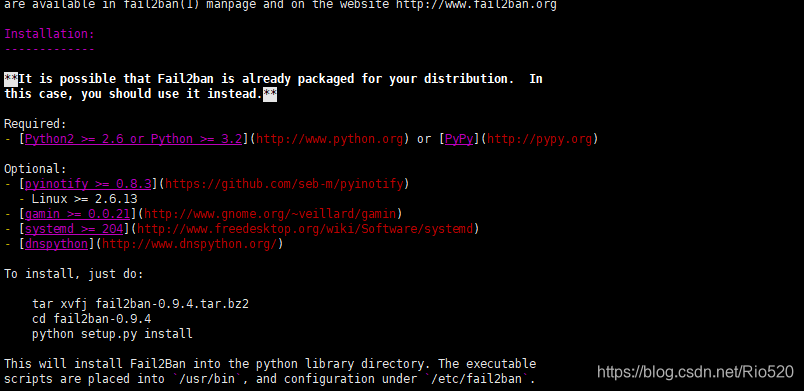
这个陌生的软件包如何安装?
解压查看readme文件
[root@localhost ~]#wget https://github.com/fail2ban/fail2ban/archive/0.9.4.tar.gz
[root@localhost ~]# tar -zxvf 0.9.4.tar.gz
[root@localhost ~]#cd fail2ban-0.9.4/
[root@localhost fail2ban-0.9.4]# vim README.md
需要安装python开发环境,并且版本要大于2.4
查看当前系统中python的版本:
[root@localhost ~]#python -V
Python 2.7.5
安装
[root@localhost fail2ban-0.9.4]# python setup.py install
相关主要文件说明:
/etc/fail2ban/action.d #动作文件夹,内含默认文件。iptables以及mail等动作配置
/etc/fail2ban/fail2ban.conf #定义了fai2ban日志级别、日志位置及sock文件位置
/etc/fail2ban/filter.d #条件文件夹,内含默认文件。过滤日志关键内容设置
/etc/fail2ban/jail.conf #主要配置文件,模块化。主要设置启用ban动作的服务及动作阀值
#jail [dʒeɪl]监狱
[root@localhost fail2ban-0.9.4]# pwd
/root/fail2ban-0.9.4
[root@localhost fail2ban-0.9.4]# cp files/redhat-initd  /etc/init.d/fail2ban
[root@localhost fail2ban-0.9.4]# chkconfig --add fail2ban    #开机自动启动
怎么知道要复制这个文件? 一个新的软件包,后期怎么可以知道哪个文件是启动脚本文件?
这就要找服务器启动脚本文件中有什么特点,然后过滤出来对应的文件名。
[root@localhost fail2ban-0.9.4]# grep chkconfig ./* -R --color
./files/redhat-initd:# chkconfig: - 92 08
启动脚本里都包含chkconfig 字段
应用实例
设置条件:ssh远程登录5分钟内3次密码验证失败,禁止用户IP访问主机1小时,1小时该限制自动解除,用户可重新登录。
因为动作文件(action.d/iptables.conf)以及日志匹配条件文件(filter.d/sshd.conf )安装后是默认存在的。基本不用做任何修改。所有主要需要设置的就只有jail.conf文件。启用sshd服务的日志分析,指定动作阀值即可。
文件/etc/fail2ban/jail.conf及说明如下:
[DEFAULT]               #全局设置
ignoreip = 127.0.0.1/8       #忽略的IP列表,不受设置限制
bantime  = 600             #屏蔽时间,单位:秒
findtime  = 600             #这个时间段内超过规定次数会被ban掉
maxretry = 3                #最大尝试次数
backend = auto            #日志修改检测机制(gamin、polling和auto这三种)

[ssh-iptables]               #单个服务检查设置,如设置bantime、findtime、maxretry和全局冲突,服务优先级大于全局设置。
enabled  = true             #是否激活此项(true/false)修改成 true
filter   = sshd              #过滤规则filter的名字,对应filter.d目录下的sshd.conf
action   = iptables[name=SSH, port=ssh, protocol=tcp]             #动作的相关参数,对应action.d/iptables.conf文件
sendmail-whois[name=SSH, dest=[email protected], sender=[email protected]
om, sendername="Fail2Ban"]#触发报警的收件人
logpath  = /var/log/secure   #检测的系统的登陆日志文件。这里要写sshd服务日志文件。 默认为logpath  = /var/log/sshd.log
#5分钟内3次密码验证失败,禁止用户IP访问主机1小时。 配置如下
bantime  = 3600   #禁止用户IP访问主机1小时
findtime  = 300    #在5分钟内内出现规定次数就开始工作
maxretry = 3    #3次密码验证失败
启动服务:
[root@localhost fail2ban-0.9.4]# systemctl start fail2ban
[root@localhost fail2ban-0.9.4]# systemctl enable fail2ban
fail2ban.service is not a native service, redirecting to /sbin/chkconfig.
Executing /sbin/chkconfig fail2ban on
测试
[root@localhost fail2ban-0.9.4]# > /var/log/secure #清空日志
[root@localhost fail2ban-0.9.4]# systemctl restart fail2ban #重启
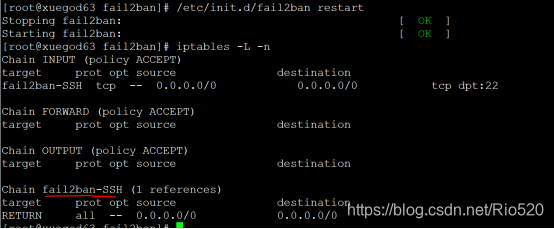
[root@xuegod63 fail2ban]# iptables -L -n
会多生成一个规则链。
测试:故意输入错误密码3次,再进行登录时,会拒绝登录
[root@localhost fail2ban-0.9.4]# ssh 10.10.100.164
[email protected]’s password:
Permission denied, please try again.
[email protected]’s password:
Permission denied, please try again.
[email protected]’s password:
Permission denied (publickey,password).
[root@localhost fail2ban-0.9.4]# ssh 10.10.100.164
ssh: connect to host 10.10.100.164 port 22: Connection refused
[root@localhost fail2ban-0.9.4]# iptables -L |tail -4
Chain fail2ban-SSH (1 references)
target prot opt source destination
DROP all – 10.10.100.164 anywhere
RETURN all – anywhere anywhere
[root@localhost fail2ban-0.9.4]# fail2ban-client status#配置好之后我们检测下fail2ban是否工作。
Status
|- Number of jail: 1
- Jail list: ssh-iptables #具体看某一项的状态也可以看,如果显示被ban的ip和数目就表示成功了,如果都是0,说明没有成功。 [root@localhost fail2ban-0.9.4]# fail2ban-client status ssh-iptables Status for the jail: ssh-iptables |- filter | |- File list: /var/log/secure | |- Currently failed: 0 |- Total failed: 3
- action |- Currently banned: 1 |- IP list: 10.10.100.164
`- Total banned: 1
查看fail2ban的日志能够看到相关的信息
[root@localhost fail2ban-0.9.4]# tail /var/log/fail2ban.log
2019-10-14 19:43:59,233 fail2ban.actions[12132]: WARNING [ssh-iptables] Ban 10.10.100.164
需要注意的四点:
1、如果做错了,想清空一下记录,还原:
只需要把 > /var/log/secure 清空就可以了。
service fail2ban restart
2、另外如果后期需要把iptables清空后或iptables重启后,也需要把fail2ban重启一下。
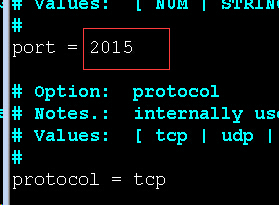
3、如果修改ssh默认端口22为2015后 。 配置fail2ban来监控sshd服务
需要修改配置文件:
[root@localhost fail2ban-0.9.4]# vim jail.conf
#修改iptables动作中的端口号。 默认为ssh。
改:port=ssh 为 port=2015
[root@localhost fail2ban-0.9.4]# vim /etc/fail2ban/action.d/iptables.conf #修改动作文件中默认端口号。 改: port=ssh 为port=2015
重启服务即可
4、如果想要使用fail2ban发送告警邮件,请确保系统的邮件服务能够正常发送邮件!
可以发一封测试邮件到指定邮箱来测试下:
echo “test mail”|mail -s test [email protected]
补充:
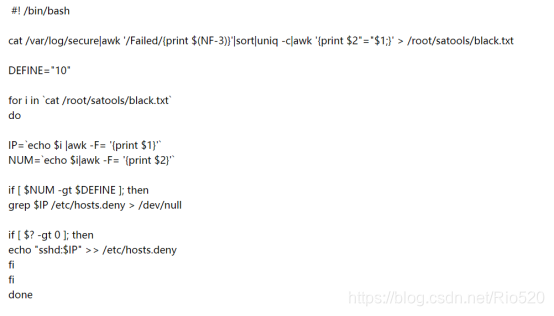
1、通过shell脚本来防止暴力破解ssh
通过自定义的shell脚本来防护安全
通过pam 模块来防止暴力破解ssh
[root@localhost fail2ban-0.9.4]# vim /etc/pam.d/sshd
在第一行下面添加一行:
auth required pam_tally2.so deny=3 unlock_time=600 even_deny_root root_unlock_time=1200
说明:尝试登陆失败超过3次,普通用户600秒解锁,root用户1200秒解锁
手动解除锁定:
查看某一用户错误登陆次数:
pam_tally –-user
例如,查看work用户的错误登陆次数:
pam_tally –-user work
清空某一用户错误登陆次数:
pam_tally –-user –-reset
例如,清空 work 用户的错误登陆次数,
pam_tally –-user work –-reset
3、denyhosts 软件防护
当我们的服务器对外提供服务的时候,难免的会受到其他用户的扫描和试图登录的操作,以侵入服务器,这样不仅会浪费系统的资源,有可能还会被其他用户进行N多次尝试后登录系统,对系统造成破坏影响业务系统的正常运行。DenyHosts是一个使用python编写的脚本文件,通过运行这个脚本(可以通过命令行运行、计划任务或者是作为服务运行)可以有效的阻止对SSH服务器的攻击。DenyHosts具有如下特性:
- 对/var/log/secure日志文件进行分析,查找所有的登录尝试,并且过滤出失败和成功的尝试。
2.记录下所有失败的登录尝试的用户名和主机,如果超过阀值,则记录主机。
3.保持对每一个登录失败的用户(存在系统中或不存在系统中的用户)的跟踪
4.对每一个可疑的登录进行跟踪。(虽然登录成功,但是有很多次登录失败的记录)
5.将可疑地址的主机加入到/etc/hosts.deny文件中。
