CSS3
1. 浏览器前缀
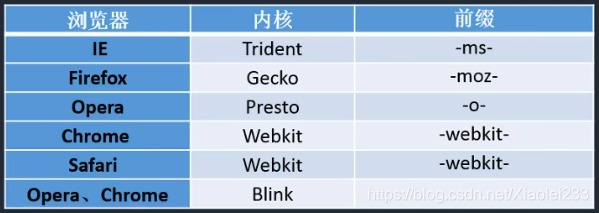
CSS3还没有真正的标准。各个浏览器为提前抢占市场,根据CSS3草案自己实现一些功能,这些功能是非标准的,所以浏览器厂商实施这些功能的时候自己加了前缀,表示是自己实现的,而非正式标准。
每个浏览器都有自己的前缀,主要解决css3中的兼容问题。针对旧的浏览器做兼容,新浏览器基本不需要添加前缀。
内核:内部如何解析代码
注:记住5大浏览器和内核/前缀!
以chrome浏览器为例:
chrome老版本中写法:(此时在ie浏览器中是不起作用的)
div{ width: 200px; height: 200px;background: red;
  -webkit-animation: 1s move;}

@-webkit-keyframes move{
   0%{ opacity: 0;}
   100%{ opacity: 1;}
}
chrome新版本中写法:(此时对于老版本的chrome也是不起作用的,但在ie中有作用)
div{ width: 200px; height: 200px;background: red;
  animation: 1s move;}

@keyframes move{
   0%{ opacity: 0;}
   100%{ opacity: 1;}
}
2. transition 过渡
使用伪类的方式触发
transition-property  :  规定设置过渡效果的CSS属性的名称。
transition-duration  :  规定完成过渡效果需要多少秒或毫秒。
transition-delay  :  定义过渡效果何时开始。  ( 延迟(数值为正数),也可以提前(数值为负数) )
transition-timing-function  :  规定速度效果的速度曲线。

注:
1. 不要加到hover上,不然移开鼠标的时候过渡不会起作用;
2. 在transition的这四个属性中,只有transition-duration是必需且不能为0的,transition-duration与transition-delay都表示时间,当这两个放在一起的时候,第一个是transition-duration,第二个是transition-delay,当只有一个时,表示的是transition-duration,transition-delay默认值是0;
3. transition的这四个属性不能用逗号隔开,能用逗号隔开的是不同的属性(transition能有多个不同的属性),如:width,height,background-color,用空格隔开的是不同属性的四个子属性
<style>
    /* div{ width: 100px;height: 100px; background: red;
    transition-property:all;
    transition-duration: 3s;
    transition-delay: -2s;
    transition-timing-function:cubic-bezier(.49,-0.75,.88,1.74) ;}
    div:hover{ width: 200px;height: 200px;background: blue;} */
    div{ width: 100px;height: 100px; background: red;
    transition:1s 2s linear;}
    div:hover{ width: 200px;height: 200px;background: blue;}
</style>
练习:过渡的导航
<style>
    ul li{ margin:0;padding:0;list-style: none;}
    ul{ width: 360px;}
    ul li{ width: 60px; height: 70px; float: left; background: url(./img/aNavBg.png); transition: .5s;}
    ul li:nth-child(1){ background-position: 0 -70px;}
    ul li:nth-child(2){ background-position: -60px -70px;}
    ul li:nth-child(3){ background-position: -120px -70px;}
    ul li:nth-child(4){ background-position: -180px -70px;}
    ul li:nth-child(5){ background-position: -240px -70px;}
    ul li:nth-child(6){ background-position: -300px -70px;}

    ul li:hover:nth-child(1){ background-position: 0 0;}
    ul li:hover:nth-child(2){ background-position: -60px 0;}
    ul li:hover:nth-child(3){ background-position: -120px 0;}
    ul li:hover:nth-child(4){ background-position: -180px 0;}
    ul li:hover:nth-child(5){ background-position: -240px 0;}
    ul li:hover:nth-child(6){ background-position: -300px 0;}
</style>
练习: http://www.neusoft.edu.cn/
<!DOCTYPE html>
<html lang="en">
<head>
    <meta charset="UTF-8">
    <meta http-equiv="X-UA-Compatible" content="IE=edge">
    <meta name="viewport" content="width=device-width, initial-scale=1.0">
    <title>Document</title>
    <style>
        *{ margin:0;padding:0;}
        ul,ol{ list-style: none;}
        img{ display: block;}
        a{ text-decoration: none; color: #000000;}
        h1,h2,h3{ font-size: 16px;}

        .l{ float: left;}
        .r{ float: right;}
        .clear:after{ content: ""; display: block; clear: both;}

        .container{ width: 1104px; margin:100px auto; position:relative;}

        .title{ height: 44px; overflow: hidden;}
        .title h1{ font-size: 22px; font-family: 'Times New Roman', Times, serif; color: black; float: left; line-height: 44px;}
        .title span{ height: 100%; display: inline-block; font-size:14px; color: #858585; margin:20px 0 0 18px; }
        .title span:before{ content: "/"; color: #858585; font-size:13px;padding-right:10px;}
        .title a{ font-size:12px; color: #858585; display: none;}
        .title span:hover a{ display: inline-block; margin-left: 10px; margin-top: -14px;}
        .title a:hover{color:#1F8DD6; cursor: pointer;}

        .news_left{ width: 442px; height: 412px; overflow: hidden;}
        .news_left ul{ width: 2000px;}
        .news_left ul li{ float: left;}
        .news_left a{ width:100%; height: 100%;}
        .news_left div{ width: 442px; height: 231px; overflow: hidden;}
        .news_left img{ width: 100%; height: 100%;}
        .news_left h3{ font-size: 16px; font-weight: normal; line-height: 25px; margin-top:22px;}
        .news_left h3:hover{ color: #1F8DD6;}
        .news_left p{ font-size: 14px; color:#adadad; line-height: 22px; margin-top:17px; margin-bottom:30px;}

        .news_btn{ width: 100%; text-align: center; }
        .news_btn li{ display: inline-block; width: 8px; height: 8px; border-radius: 4px; background-color: #e6e6e6; margin:0 4px; cursor: pointer;}
        .news_btn li.active{ background: #c3c3c3;}

        .news_right{ width: 662px; overflow: hidden; }
        .news_right_list{ width: 100%; margin-left:55px;}
        .news_right_list li{ width: 270px; float: left; margin-bottom: 45px; margin-right:33px; cursor: pointer;}
        .news_right_list li div{ width: 91px; height: 2px; background-color: #2f80ed; margin-bottom: 22px; transition: 1s;}
        .news_right_list li:hover div{ width: 152px;}
        .news_right_list li:hover h3{ color: #2f80ed;}
        .news_right_list h3{ font-size: 15px; font-weight: normal; line-height: 23px; }
        .news_right_list p{ font-size: 12px; color:#adadad; margin-top:14px;}
    </style>
</head>
<body>
    <main id="news" class="container">
        <hgroup class="title clear">
            <h1>新闻</h1>
            <span>
                News
                <a href="#">+ 更多</a>
            </span>

        </hgroup>
        <article class="news_area clear">
            <section class="news_left l">
                <ul class="news_left_list">
                    <li>
                        <a href="#">
                            <div>
                                <img src="http://upload.neusoft.edu.cn/2021/0506/thumb_880_460_1620262675789.jpg" alt="省委教育工委高校党史学习教育第三巡回指导组到我校检查指导">
                            </div>
                            <h3>省委教育工委高校党史学习教育第三巡回指导组到我校检查指<br>导</h3>
                        </a>
                        <p>4月29日,省委教育工委高校党史学习教育第三巡回指导组组长、省教<br>育厅副厅长、一级巡视员花蕾,指导组成员...</p>
                    </li>
                    <li>
                        <a href="#">
                            <div>
                                <img src="http://upload.neusoft.edu.cn/2021/0524/thumb_880_460_1621835403698.jpg" alt="我校党委书记、校长温涛当选第一届中国通信学会职业教育工作委员会主任委员">
                            </div>
                            <h3>我校党委书记、校长温涛当选第一届中国通信学会职业教育工作委员会主任委员</h3>
                        </a>
                        <p>2021年5月17日,中国通信学会职业教育工作委员会成立大会暨一届一次会议在河南郑州隆重举行,大连东软信息...</p>
                    </li>
                </ul>
                <ol class="news_btn">
                    <li class="active"></li>
                    <li></li>
                    <li></li>
                </ol>
            </section>
            <section class="news_right l">
                <ul class="news_right_list">
                    <li>
                        <a href="#">
                            <div></div>
                            <h3>东软集团与我校多个专业开展精英定制培养</h3>
                            <p>2021.05.13 / 学校新闻</p>
                        </a>
                    </li>
                </ul>
            </section>
        </article>
    </main>
</body>
</html>
3. transform变形
transform取值:
translate : 位移
    translateX
    translateY
    translateZ   ( 3d )

scale : 缩放 (值是一个比例值,正常大小就是1,会以当前元素中心点进行缩放,对于复合样式,若宽高设置相同,可只写一个值)
    scaleX
    scaleY
    scaleZ   (3d)

rotate : 旋转 ( 旋转的值,单位是角度 deg 或者弧度rad)
    rotateX  (3d)
    rotateY  (3d)
    rotateZ  ( 和rotate是等价关系,那正值按顺时针旋转,负值按逆时针旋转 )

skew : 斜切
    skewX : 单位也是角度deg,正值向左倾斜,负值向右倾斜。
    skewY
<style>
    .box1{width: 300px; height: 300px; border:1px black solid; margin:30px auto;}
    .box2{width: 100px; height: 100px; background: red; transition:2s;}
    .box1:hover .box2{ /* transform: translate(100px,100px);*/
    /* transform: translateX(100px);*/
    /* .box1:hover .box2{ transform: scale(2,.5);} */
    /* transform: scale(2); */
    /* transform: scaleX(2); */
    /* transform: rotateZ(45deg); */
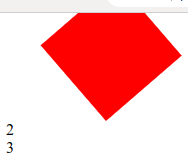
    transform: skew(-30deg,-30deg);
    }
</style>
<div class="box1">
    <div class="box2"></div>
</div>
transform的注意事项:
    1. 变形操作不会影响到其他元素。
    2. 变形操作只能添加给块元素,但是不能添加给内联元素。
    3. 复合写法(空格),可以同时添加多个变形操作。
        执行是有顺序的,先执行后面的操作,再执行前面的操作。
        translate会受到 rotate、scale、skew的影响
    4. transform-origin : 基点的位置(以该点为中心做变形),默认是center center,支持英文单词和数值
        x y z(3d)
.box1{width: 100px; height: 100px; background-color: red;}
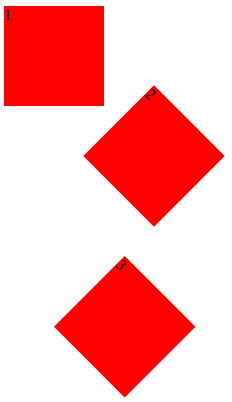
.box2{width: 100px; height: 100px; background-color: red; transform: translate(100px,0) scale(.5);}
.box3{width: 100px; height: 100px; background-color: red; transform:  scale(.5) translate(100px,0);}
注:box3中translate会受到scale影响,先位移50px(不是100px)再缩放。
.box2{width: 100px; height: 100px; background-color: red; transform: translate(100px,0) rotate(45deg);}
.box3{width: 100px; height: 100px; background-color: red; transform:  rotate(45deg) translate(100px,0);}
注:box3中translate会受到rotate影响,先沿45度方向位移100px再旋转。
.box1{width: 100px; height: 100px; background-color: red; transition: 1s; transform-origin: 100px 100px;}
.box1:hover{ transform: rotate(180deg);}
注:基点位置超出容器范围也是可以的
斜切的导航练习:
<style>
    *{ margin:0; padding:0;}
    ul{ list-style: none;}
    ul{ width: 435px; margin: 30px auto; overflow: hidden;}
    ul li{ float: left; width: 100px; height: 30px; background: red;
    color: white; line-height: 30px; text-align: center; margin:0 5px; transform:skew(-30deg);}
    ul li span{ transform:skew(30deg); display: block;}
    ul li:first-child{ padding-left: 10px; margin-left:-10px;}
    ul li:last-child{ padding-right: 20px; margin-right:-20px;}
    ul li.active{background: blue;}
</style>
<div>
    <ul>
        <li class="active"><span>首页</span></li>
        <li><span>关于我们</span></li>
        <li><span>联系方式</span></li>
        <li><span>详情</span></li>
    </ul>
</div>
变形练习:
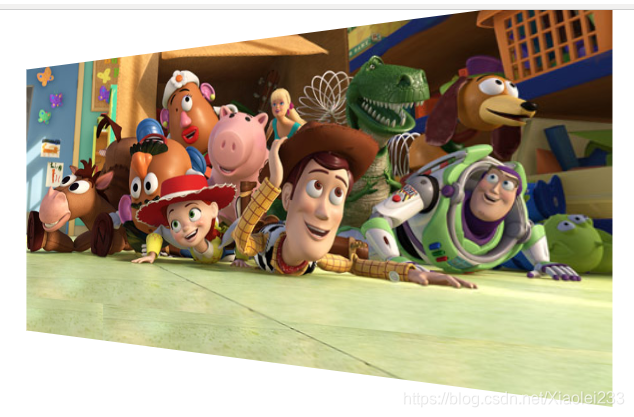
注:要先找到最终的目标点,先做终点,再做起点!
<style>
    *{ margin:0; padding:0;}
    ul{ list-style: none;}
    img{ display: block;}

    .list{ width: 250px; margin:30px auto;}
    .list li{ height: 97px; border-bottom: 1px #d0d6d9 dashed; overflow: hidden;}
    .list li:last-child{ border-bottom:none;}
    .list .list_photo{ width: 112px; height: 77px; float: left; margin:10px 9px 0 5px; position: relative;}
    .list .list_photo .list_photo_box{ width: 92px; height: 57px; border:1px solid white;
    position:absolute; left: 9px; top: 9px; transform: translate(0,-60px) rotate(-90deg); transition: 1s; transform-origin: 0 0;}
    .list .list_photo .list_photo_text{ width:100%; position: absolute; bottom: 30px; color: white;
    text-align: center; font-size: 14px; transform: translate(0,90px); transition: 1s;}
    .list .list_photo img{ width: 100%; height: 100%;}
    .list .list_text{ float: left; width: 114px; font-size: 12px; line-height: 21px; margin-top: 10px;}

    .list li:hover .list_photo_box{ transform: translate(0,0) rotate(0);}
    .list li:hover .list_photo_text{ transform: translate(0,0) rotate(0);}
</style>

<body>
    <ul class="list">
        <li>
            <div class="list_photo">
                <img src="./img/list_photo.jpg" alt="">
                <div class="list_photo_box"></div>
                <div class="list_photo_text">玩具总动员</div>
            </div>
            <div class="list_text">
                <p>文字测试文字测试文字测试文字测试</p>
            </div>
        </li>
        <li>
            <div class="list_photo">
                <img src="./img/list_photo.jpg" alt="">
                <div class="list_photo_box"></div>
                <div class="list_photo_text">玩具总动员</div>
            </div>
            <div class="list_text">
                <p>文字测试文字测试文字测试文字测试</p>
            </div>
        </li>
        <li>
            <div class="list_photo">
                <img src="./img/list_photo.jpg" alt="">
                <div class="list_photo_box"></div>
                <div class="list_photo_text">玩具总动员</div>
            </div>
            <div class="list_text">
                <p>文字测试文字测试文字测试文字测试</p>
            </div>
        </li>
    </ul>
</body>
变形练习:
<style>
    *{ margin:0; padding:0;}
    ul{ list-style: none;}
    img{ display: block;}
    h1,h2{ font-size: 16px;}
    .clear:after{ content: ""; display: block; clear: both;}

    #main{ width:830px; border: 1px solid #cccccc; margin: 20px auto;}
    .list{ width: 100%;}
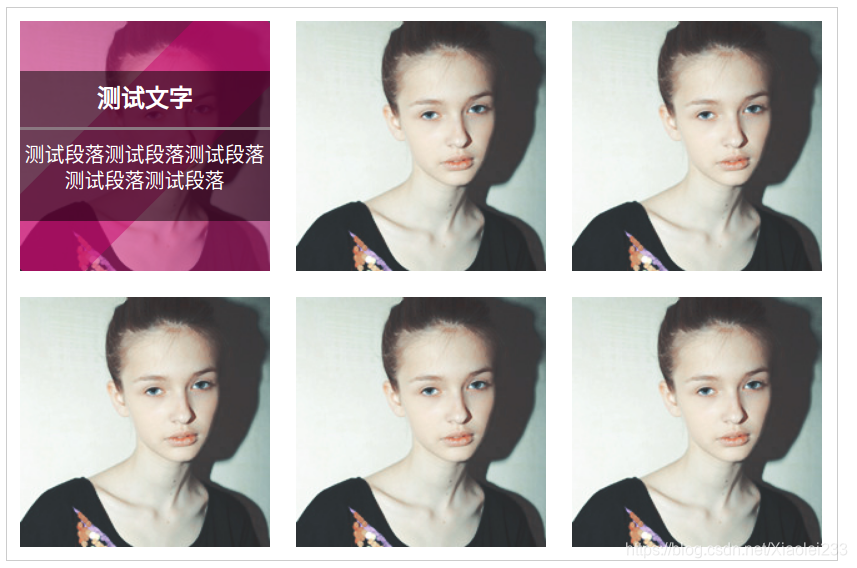
    .list li{ width: 250px; height:250px; float: left; margin: 13px; position: relative; overflow: hidden;}
    .list_text{ width: 100%; height:0px; background:rgba(0,0,0,.5); position: absolute; left: 0; top:50px; transform: rotate(45deg); transition: .5s; z-index: 2; overflow:hidden;}
    .list_text h2{ height: 56px; border-bottom: 3px solid #8a7881; font-size: 24px; color:white; text-align:center;
    line-height:56px;}
    .list_text p{ font-size: 20px; line-height:26px;color:white; text-align:center; padding-top:12px;}

    .list_maskUp{ width:350px; height:350px; background:rgba(199,4,109,.5); position:absolute; left:0; top:-300px; transform: rotate(45deg) translate(-200px,0); transition:.5s; z-index: 1;}
    .list_maskDown{ width:350px; height:350px; background:rgba(199,4,109,.5);position:absolute; left:0; top: 300px; transform: rotate(45deg) translateX(50px); transition:.5s; z-index: 1;}

    .list li:hover .list_text{ height:150px;transform:rotate(0);}
    .list li:hover .list_maskUp,.list li:hover .list_maskDown{ top:0;}
</style>
<body>
    <div id="main">
        <ul class="list clear">
            <li>
                <img src="./img.png" alt="">
                <div class="list_text">
                    <h2>测试文字</h2>
                    <p>测试段落测试段落测试段落测试段落测试段落</p>
                </div>
                <div class="list_maskUp"></div>
                <div class="list_maskDown"></div>
            </li>
            <li>
                <img src="./img.png" alt="">
                <div class="list_text">
                    <h2>测试文字</h2>
                    <p>测试段落测试段落测试段落测试段落测试段落</p>
                </div>
                <div class="list_maskUp"></div>
                <div class="list_maskDown"></div>
            </li>
            <li>
                <img src="./img.png" alt="">
                <div class="list_text">
                    <h2>测试文字</h2>
                    <p>测试段落测试段落测试段落测试段落测试段落</p>
                </div>
                <div class="list_maskUp"></div>
                <div class="list_maskDown"></div>
            </li>
            <li>
                <img src="./img.png" alt="">
                <div class="list_text">
                    <h2>测试文字</h2>
                    <p>测试段落测试段落测试段落测试段落测试段落</p>
                </div>
                <div class="list_maskUp"></div>
                <div class="list_maskDown"></div>
            </li>
            <li>
                <img src="./img.png" alt="">
                <div class="list_text">
                    <h2>测试文字</h2>
                    <p>测试段落测试段落测试段落测试段落测试段落</p>
                </div>
                <div class="list_maskUp"></div>
                <div class="list_maskDown"></div>
            </li>
            <li>
                <img src="./img.png" alt="">
                <div class="list_text">
                    <h2>测试文字</h2>
                    <p>测试段落测试段落测试段落测试段落测试段落</p>
                </div>
                <div class="list_maskUp"></div>
                <div class="list_maskDown"></div>
            </li>
        </ul>
    </div>
</body>
4. animation 动画
animation-name : 设置动画的名字 (自定义的)
animation-duration : 动画的持续时间
animation-delay : 动画的延迟时间
animation-iteration-count : 动画的重复次数 ,默认值就是1 ,infinite无限次数
animation-timing-function : 动画的运动形式

注:
    1. 运动结束后,默认情况下会返回在起始位置。
    2. @keyframes :  from 等价 0%   ,  to 等价 100%
划入划出的小图标练习:
<style>
    *{ margin:0; padding:0;}
    ul{ list-style: none;}
    ul{ width: 150px; margin:30px auto;}
    ul li{ width: 50px; height:50px; float: left; position: relative;}
    ul li img{ position: absolute; left:50%;top: 50%; margin:-10px 0 0 -11px;} /*让img居中*/
    ul li:hover img{ animation:move .5s;}
    @keyframes move{
        0%{ transform:translate(0,0); opacity: 1;}
        60%{ transform: translate(0,-50px); opacity: 0;}
        61%{ transform: translate(0,30px);}
        100%{ transform: translate(0,0); opacity: 1;}
    }
</style>
<ul>
    <li>
        <img src="./img/1.png" alt="">
    </li>
    <li>
        <img src="./img/2.png" alt="">
    </li>
    <li>
        <img src="./img/3.png" alt="">
    </li>
</ul>
加载效果练习1:
<style>
     .loading{ width: 40px; height: 40px; margin:30px auto; position:relative;}
     .loading .box1,.loading .box2{ width:100%; height:100%; position:absolute;}
     .loading .box2{ transform: rotate(45deg);}
     .loading .box1 div,.loading .box2 div{ width:10px;height: 10px; background: blue; border-radius: 50%;
     position:absolute; animation:loadingMove 1.5s infinite linear;}

     .loading .box1 div:nth-child(1),.loading .box2 div:nth-child(1){ left:0; top:0;}
     .loading .box1 div:nth-child(2),.loading .box2 div:nth-child(2){ right:0; top:0;}
     .loading .box1 div:nth-child(3),.loading .box2 div:nth-child(3){ right:0; bottom:0;}
     .loading .box1 div:nth-child(4),.loading .box2 div:nth-child(4){ left:0; bottom:0;}

     @keyframes loadingMove{
         0%{ transform:scale(1);}
         50%{ transform:scale(0);}
         100%{ transform: scale(1);}
     }
     .loading .box1 div:nth-child(1){ animation-delay: -0;}
     .loading .box2 div:nth-child(1){ animation-delay: -.2s;}
     .loading .box1 div:nth-child(2){ animation-delay: -.4s;}
     .loading .box2 div:nth-child(2){ animation-delay: -.6s;}
     .loading .box1 div:nth-child(3){ animation-delay: -.8s;}
     .loading .box2 div:nth-child(3){ animation-delay: -1s;}
     .loading .box1 div:nth-child(4){ animation-delay: -1.2s;}
     .loading .box2 div:nth-child(4){ animation-delay: -1.4s;}
 </style>
<body>
    <div class="loading">
        <div class="box1">
            <div></div>
            <div></div>
            <div></div>
            <div></div>
        </div>
        <div class="box2">
            <div></div>
            <div></div>
            <div></div>
            <div></div>
        </div>
    </div>
</body>
加载效果练习2:
<style>
    .loading{ width:190px; margin:30px auto; display: flex; justify-content: space-around;}
    .loading div{ width: 30px; height: 30px; background:rgba(0,255,0,0.5); border-radius: 50%; animation:loadingMove 1s infinite linear;}

    @keyframes loadingMove{
        0%{ transform: scale(1);}
        30%{ transform: scale(2);}
        70%{ transform: scale(1);}
        100%{ transform: scale(1);}
    }
    .loading div:nth-child(1){ animation-delay: -.9s;}
    .loading div:nth-child(2){ animation-delay: -.8s;}
    .loading div:nth-child(3){ animation-delay: -.7s;}
    .loading div:nth-child(4){ animation-delay: -.6s;}
    .loading div:nth-child(5){ animation-delay: -.5s;}
</style>
<body>
    <div class="loading">
        <div></div>
        <div></div>
        <div></div>
        <div></div>
        <div></div>
    </div>
</body>
注:在设置display:flex,justify-content: space-between时,它会把子元素靠边对齐平均分剩余的空间。
animation-fill-mode
规定动画播放之前或之后,其动画效果是否可见。
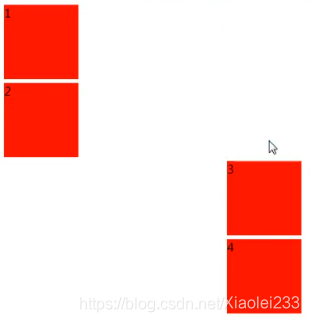
none (默认值) : 在运动结束之后回到初始位置,在延迟的情况下,让0%在延迟后生效
backwards  :  在延迟的情况下,让0%在延迟前生效
forwards  :  在运动结束的之后,停到结束位置
both  :  backwards和forwards同时生效
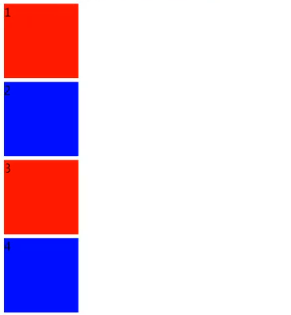
<style>
    .box1,.box2,.box3,.box4{ width: 100px;height: 100px;background:red; margin:5px;}
    .box1{ animation:2s move 2s;}
    .box2{ animation:2s move 2s; animation-fill-mode: backwards;}
    .box3{ animation:2s move 2s; animation-fill-mode: forwards;}
    .box4{ animation:2s move 2s; animation-fill-mode: both;}

    @keyframes move{
        0%{ transform: translate(0,0); background:blue;}
        100%{ transform: translate(300px,0);}
    }
</style>
初始:
运动结束:
animation-direction
属性定义是否应该轮流反向播放动画。
 	alternate  :  一次正向(0%~100%),一次反向(100%~0%)
 	reverse : 永远都是反向 , 从100%~0%
 	normal (默认值) : 永远都是正向 , 从0%~100%
<style>
div{ width: 100px;height:100px; background: red; animation:1s move infinite linear;
/* animation-direction: reverse; */
animation-direction:alternate;
}
@keyframes move{
    0%{ transform: translate(0,0);}
    100%{ transform: translate(300px,0);}
}
</style>
注:这两项也可写入复合样式中。
5. css3动画库
一款强大的预设css3动画库。
官网地址
百度云 提取码:jrhq
animate.min.css是旧版本
Animate.css的最新v4版本新加了动画种类:使用基类前要加前缀animate__,所以基类变为animate__animated
animate.compat.css是新版本,但不需要加前缀,基类仍是animated
基本使用:
    animated : 基类(基础的样式,每个动画效果都需要加)
    infinite : 动画的无限次数
<link rel="stylesheet" href="./animate.css/animate.compat.css">
<img src="./img/list_photo.jpg" alt="" class="animated tada infinite">
自己实现tada:
<style>
    img{ margin:100px; animation: tada infinite 1s;}
    @keyframes tada{
        0%{ transform:scale(1) rotate(0);}
        10%,30%,50%{ transform:scale(1.3) rotate(5deg);}
        20%,40%,60%{ transform:scale(1.3) rotate(-5deg);}
        70%,90%{ transform:scale(1.1) rotate(3deg);}
        80%,100%{ transform:scale(1.1) rotate(-3deg);}
    }
</style>
抖一抖!
6. 3D操作
transform相关:
   rotateX() : 正值向上翻转
   rotateY() : 正值向右翻转
   (这两个方向记忆点:无论x还是y轴,正值都向第一象限内侧进行旋转)

   translateZ() : 正值向前,负值向后
   scaleZ() : 立体元素的厚度

3d写法
    scale3d() : 三个值 x y z
    translate3d() : 三个值 x y z
    rotate3d() : 四个值 0|1(x轴是否添加旋转角度)
    			 0|1(y轴是否添加旋转角度)
    			 0|1(z轴是否添加旋转角度)
    			 deg
transform: scale3d(1,1,2);效果和transform: scaleZ(2);一样,沿z轴放大2倍
transform: translate3d(0,0,100px);沿z轴向右平移100px
transform: rotate3d(0,0,1,30deg); 沿z轴旋转30度
辅助:
perspective(景深): 相机离屏幕多远的距离去观察元素,值越大幅度越小。(针对平面,加给最外层元素)

perspective-origin : 景深-基点位置,观察元素的角度。
					(top bottom left right center)

transform-origin: center center -50px;
				 (Z轴只能写数值,不能写单词)

transform-style :  flat  (默认值2d) | preserve-3d   (产生一个三维空间)
				  (针对有厚度立体,加给内层元素)

backface-visibility : 背面隐藏
hidden、visible (默认值)
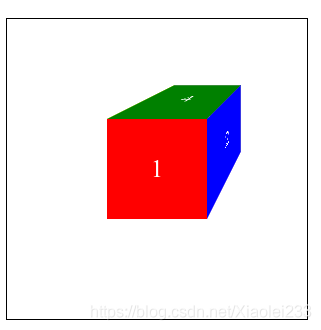
立方体练习:
<style>
    *{ margin:0; padding:0;}
    ul{ list-style: none;}
    .box{ width: 300px; height: 300px; border:1px black solid; margin:30px auto; perspective:200px;}
    .box ul{ width: 100px; height: 100px; margin:100px; position:relative; transform-style: preserve-3d; transition: 2s; transform-origin: center center -50px;}
    .box ul li{ width: 100px; height: 100px; position: absolute; line-height: 100px; text-align: center; color: white; font-size: 26px;}

    .box ul li:nth-child(1){ background: red;left: 0;top: 0;}
    .box ul li:nth-child(2){ background: blue;left: 100px;top: 0; transform-origin: left; transform: rotateY(90deg);}
    .box ul li:nth-child(3){ background: yellow;left: -100px;top: 0; transform-origin: right; transform: rotateY(-90deg);}
    .box ul li:nth-child(4){ background: green;left: 0;top: -100px; transform-origin: bottom; transform: rotateX(90deg);}
    .box ul li:nth-child(5){ background: pink;left: 0;top: 100px; transform-origin: top; transform: rotateX(-90deg);}
    .box ul li:nth-child(6){ background: gray;left: 0;top: 0; transform: translateZ(-100px) rotateY(180deg);}

    .box:hover ul{ transform: rotateY(360deg);}
</style>
<body>
    <div class="box">
        <ul>
            <li>1</li>
            <li>2</li>
            <li>3</li>
            <li>4</li>
            <li>5</li>
            <li>6</li>
        </ul>
    </div>
</body>
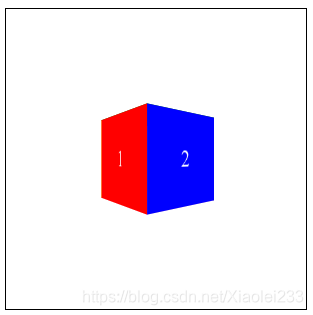
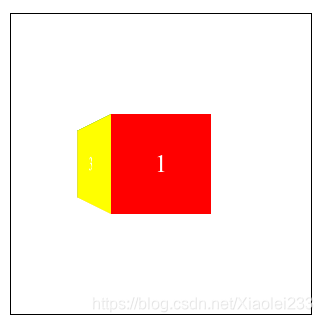
perspective-origin: left
perspective-origin: top right
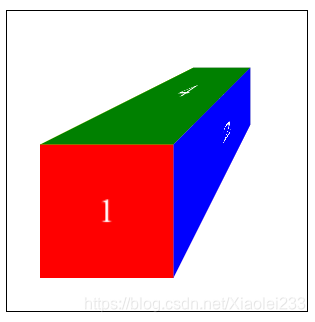
transform: scaleZ(2);加给ul
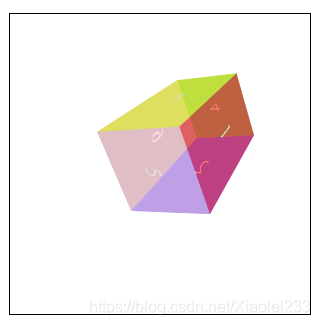
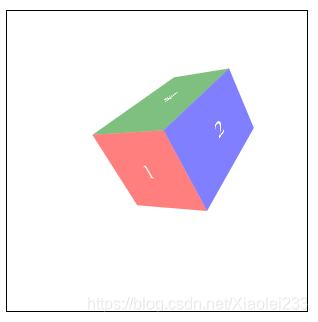
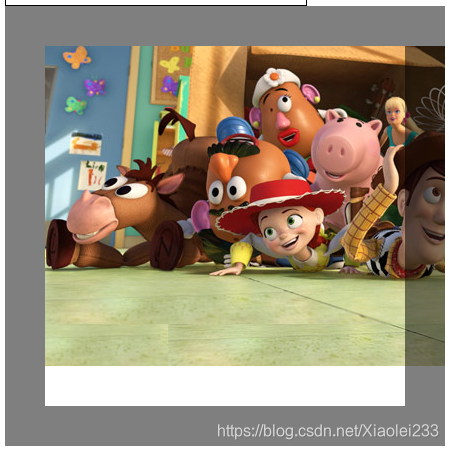
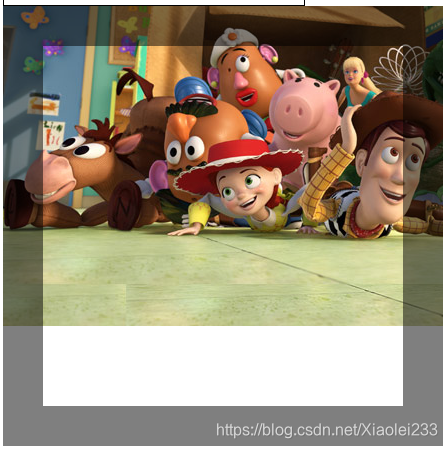
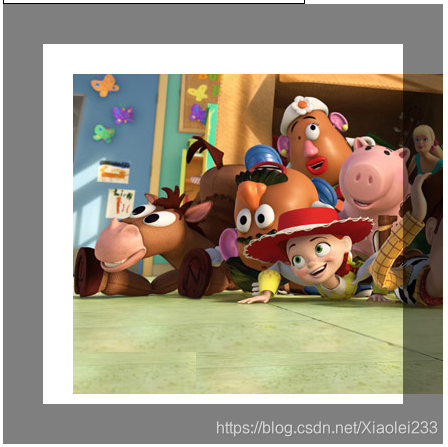
将li设置为opacity: 0.5;
加backface-visibility: hidden;前:
加backface-visibility: hidden;后:
3D旋转木马效果练习:
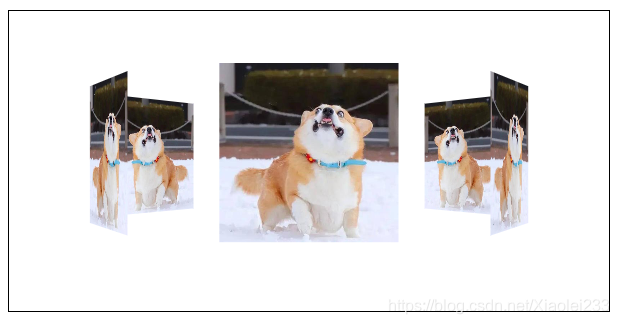
思路:将6张图叠到一起,每张图进行旋转后位移,再加hover
<style>
    *{ margin:0; padding:0;}
    ul{ list-style: none;}
    img{ display: block;}
    .parent{ width:600px;height: 300px; border:1px black solid; margin:30px auto; perspective: 700px;}
    .parent ul{ width: 128px; height:128px; margin:80px auto; position:relative;
    transform-style: preserve-3d; transition: 2s;}
    .parent ul li{ width: 100%;height:100%; position:absolute; left:0; top:0;}
    .parent ul img{ width: 100%;height:100%;}
    .parent ul li:nth-child(1){ transform: rotateY(0) translateZ(200px);}
    .parent ul li:nth-child(2){ transform: rotateY(60deg)translateZ(200px);}
    .parent ul li:nth-child(3){ transform: rotateY(120deg) translateZ(200px);}
    .parent ul li:nth-child(4){ transform: rotateY(180deg) translateZ(200px);}
    .parent ul li:nth-child(5){ transform: rotateY(240deg) translateZ(200px);}
    .parent ul li:nth-child(6){ transform: rotateY(300deg) translateZ(200px);}

    .parent:hover ul{ transform: rotateY(360deg);}
</style>
<body>
    <div class="parent">
        <ul>
            <li>
                <img src="./img2/0.jpg" alt="">
            </li>
            <li>
    </div>
</body>
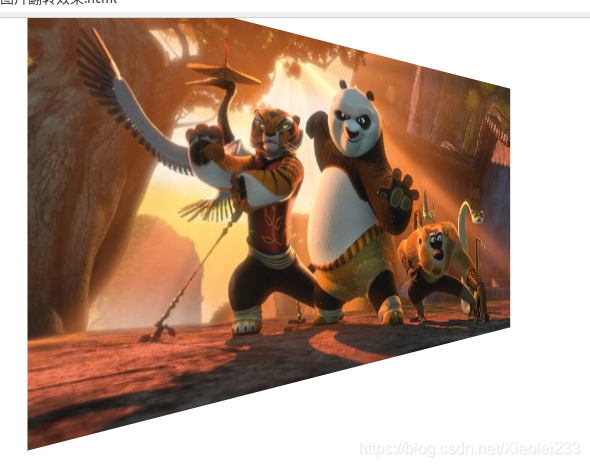
3D图片翻转效果练习
<style>
    *{ margin:0;padding:0;}
    img{ display: block;}
    .parent{ width: 640px; height:320px; margin:30px auto; position:relative; perspective: 700px;}
    .parent div{ width: 100%; height: 100%; position: absolute; left: 0; top:0; transition: 1s; backface-visibility: hidden;}

    .parent div:first-child{ transform: rotateY(0);}
    .parent div:last-child{ transform: rotateY(-180deg);}

    .parent:hover div:first-child{ transform: rotateY(180deg);}
    .parent:hover div:last-child{ transform: rotateY(0);}
</style>
<body>
    <div class="parent">
        <div>
            <img src="./img2/img1.jpg" alt="">
        </div>
        <div>
            <img src="./img2/img2.jpg" alt="">
        </div>
    </div>
</body>
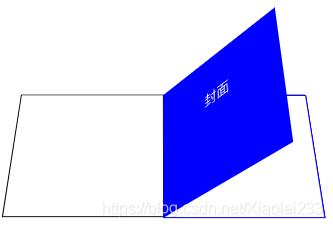
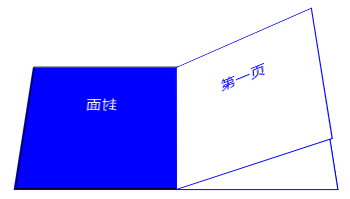
翻书效果练习:
<style>
    body{ perspective: 600px; perspective-origin: bottom;}
    .parent{ width:300px; height: 150px; border:1px black solid; margin:100px auto; position:relative;
        transform-style: preserve-3d; transform:rotateX(30deg); }
    .parent div{ width: 150px; height: 150px;border:1px blue solid; text-align: center; line-height: 100px;
    position:absolute; left:150px; transform-origin:left;}

    .parent div:nth-child(1){ background: blue; color:white; z-index: 4; animation: 4s move1 forwards;}
    .parent div:nth-child(2){ background:white; color: blue; z-index:3; animation: 4s move2 4s forwards;}
    .parent div:nth-child(3){ background:white; color: blue; z-index:2; animation: 4s move3 8s forwards;}
    .parent div:nth-child(4){ background:white; color: blue; z-index:1; animation: 4s move4 12s forwards;}

    @keyframes move1{
        0%{ transform:rotateY(0);}
        100%{ transform:rotateY(-180deg); z-index: 1;}
    }
    @keyframes move2{
        0%{ transform:rotateY(0);}
        100%{ transform:rotateY(-180deg); z-index: 2;}
    }
    @keyframes move3{
        0%{ transform:rotateY(0);}
        100%{ transform:rotateY(-180deg); z-index: 3;}
    }
    @keyframes move4{
        0%{ transform:rotateY(0);}
        100%{ transform:rotateY(-180deg); z-index: 4;}
    }
</style>
<body>
    <div class="parent">
        <div>封面</div>
        <div>第一页</div>
        <div>第二页</div>
        <div>第三页</div>
    </div>
</body>
7. CSS3提供的扩展背景样式
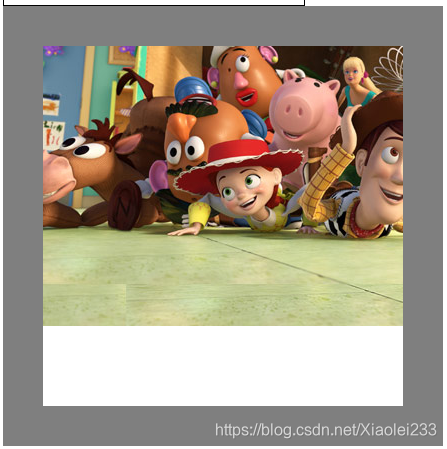
background-size : 背景图的尺寸大小
数字: 第一个值设置宽度,第二个值设置的高度。如果只给出一个值,第二个是设置为 auto(自动)

百分比: 将计算相对于背景定位区域的百分比。第一个值设置宽度,第二个值设置的高度。如果只给出一个值,第二个是设置为"auto(自动)"

cover : 覆盖

contain : 包含
background-size: cover;
background-size: contain;
用处:适应不同分辨率的屏幕页面显示
background-origin : 背景图的填充位置
padding-box (默认)
border-box
content-box
默认是padding-box;
background-origin: border-box;
background-origin: content-box;
background-clip : 背景图的裁切方式
padding-box
border-box (默认)
content-box

注:复合样式的时候,第一个是位置,第二个是裁切
background-origin: border-box; background-clip:padding-box;
等同于复合样式:background: border-box padding-box;
8. CSS3渐变
1. 线性渐变 -> linear-gradient是值,需要添加到background-image属性上
   参数可以是  point || angle 指定渐变方向
			  color          指定渐变颜色
			  percentage     指定渐变范围

注:对于指定渐变方向的angle:0度是在页面下边,正值会按照顺时针旋转,负值按逆时针旋转。
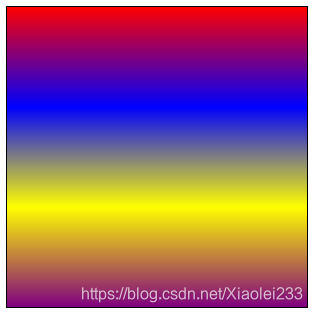
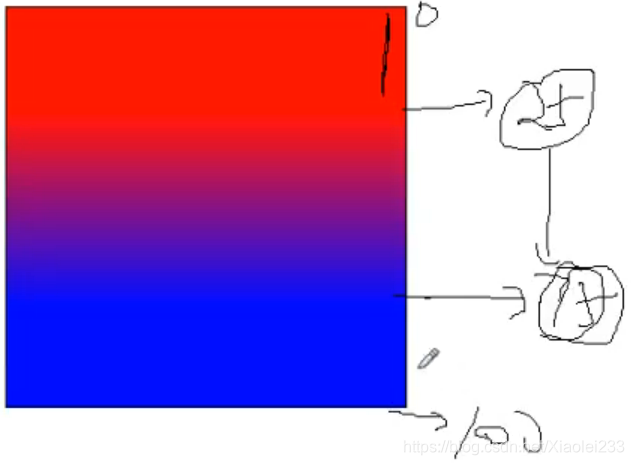
background-image: linear-gradient(red,blue,yellow,purple); 默认渐变是从上到下
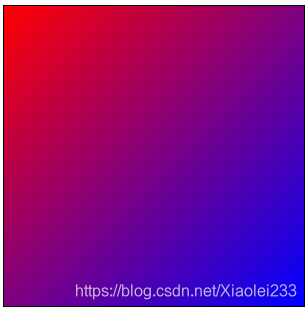
background-image: linear-gradient(to right bottom,red,blue);可指定渐变方向
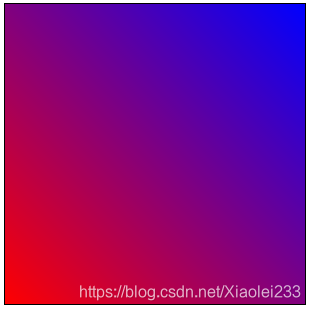
background-image: linear-gradient(45deg,red,blue); (在background-image: linear-gradient(0deg,red,blue)的基础上顺时针45度旋转)
background-image: linear-gradient(red 25%,blue 75%);
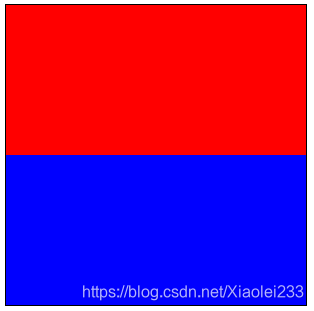
background-image: linear-gradient(red 50%,blue 50%);添加等分效果
2. 径向渐变 -> radial-gradient
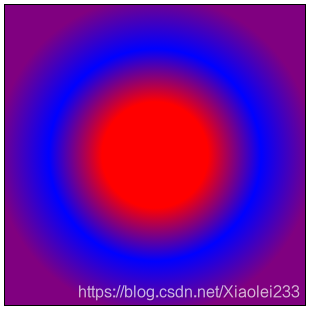
background-image: radial-gradient(red 25%,blue 50%,purple 75%);
渐变的进度条练习:
<style>
    .progress{ width: 300px; height:30px; border:1px black solid; margin:100px; background-image: linear-gradient(to right top,#999 25%,#080 25%,#080 50%, #999 50%,#999 75%,#080 75%); background-size:30px; animation:move infinite 5s linear;}/*此时background-repeat默认是平铺的*/

    @keyframes move{
        0%{ background-position: 0 0;}
        100%{ background-position: 300px 0;}
    }
</style>
渐变光标练习:
<style>
    #box{ width:640px; height:320px; position:relative; overflow: hidden;}
    #box div{ width:30px; height:200%; position: absolute; left: 0; top:-50px; background-image: linear-gradient(to right, rgba(255,255,255,0),rgba(255,255,255,.8),rgba(255,255,255,0)); transform:translateX(-300px) rotate(30deg); transition: 1s;}

    #box:hover div{ transform: translateX(700px) rotate(30deg);}
</style>
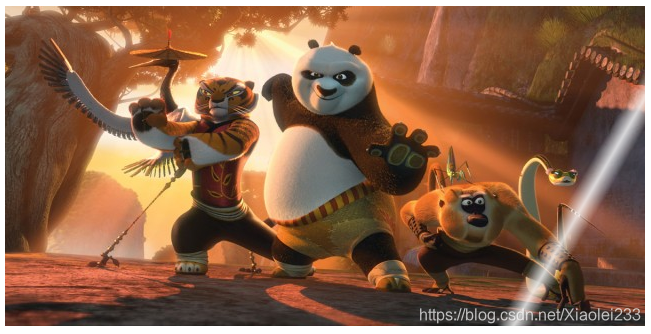
<div id="box">
    <img src="./渐变练习/img1.jpg" alt="">
<div></div>
</div>
9. 字体图标
font-face是CSS3中的一个模块,他主要是把自己定义的Web字体嵌入到你的网页中。

  好处:
  	1.可以非常方便的改变大小和颜色
            font-size    color
  	2.放大后不会失真
  	3.减少请求次数和提高加载速度
  	4.简化网页布局
    5.减少设计师和前端工程师的工作量
    6.可使用计算机没有提供的字体

使用:
    @font-face语法

        像.woff等文件都是做兼容平台处理的, mac、linux等。
以下示例来自天猫:
可通过添加伪类来简化:
.gouwuche::after{ content: "";}
<div class="gouwuche"></div>
使用总结:
1.定义font-face
2.自定义font-family
3.引入地址
4.通过在别的容器内写font-family进行映射
5.在容器内加图标对应的字
阿里的矢量图标库的使用
- 最好添加到购物车后添加到项目里,防止以后找不着;
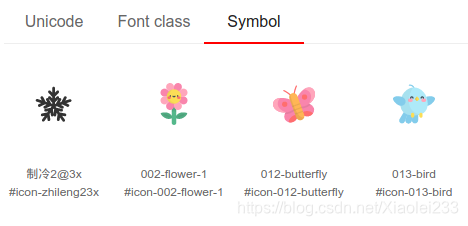
- 对于多色的图标,除了ttf、woff、woff2等文件也要将js文件添加到css文件夹中,再在项目中引入。
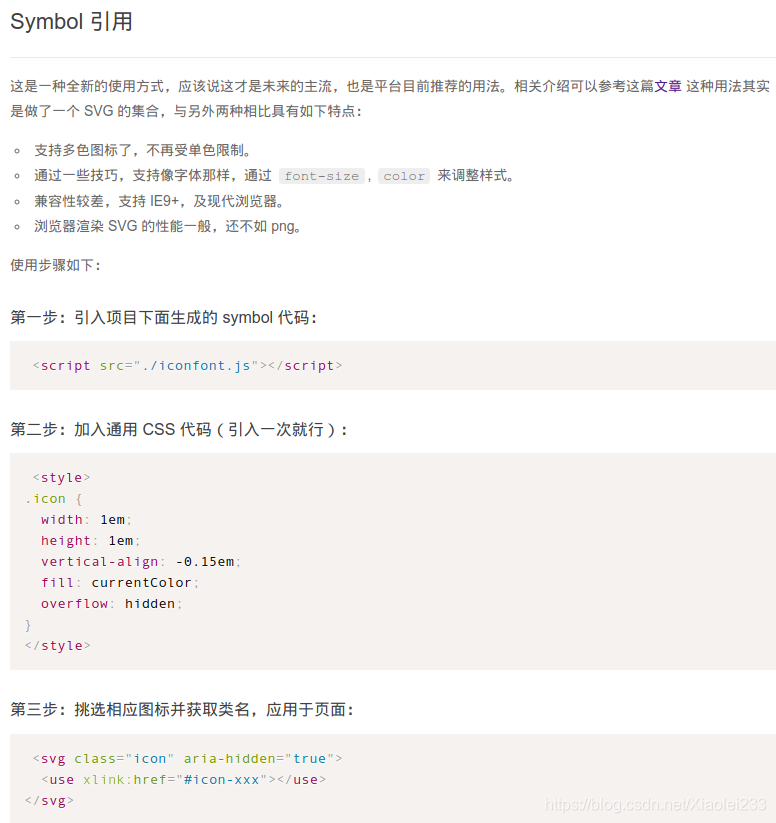
- demo.html中是详细的使用说明,对于多色图标必须得用symbol的方式引入,并且写出icon的样式。
<head>
    <link rel="stylesheet" href="./css/iconfont.css">
    <script src="./css/iconfont.js"></script>
    <style>
        .icon {
          width: 1em;
          height: 1em;
          vertical-align: -0.15em;
          fill: currentColor;
          overflow: hidden;
        }
    </style>
</head>
<body>
    <span class="iconfont icon-zhileng23x"></span>
    <span class="iconfont icon-012-butterfly"></span>
    <svg class="icon" aria-hidden="true">
        <use xlink:href="#icon-012-butterfly"></use>
    </svg>
</body>
注:多色的图标如果用普通的class引入就会是黑色的
自定义字体图标
icomoon在线生成字体图标
得自己会svg相关操作。
<link rel="stylesheet" href="./css2/style.css">
<span class="icon-yuan"></span>
使用方法(class)和阿里的类似,注意引入的css中font-face的url路径。
