UI结构概述
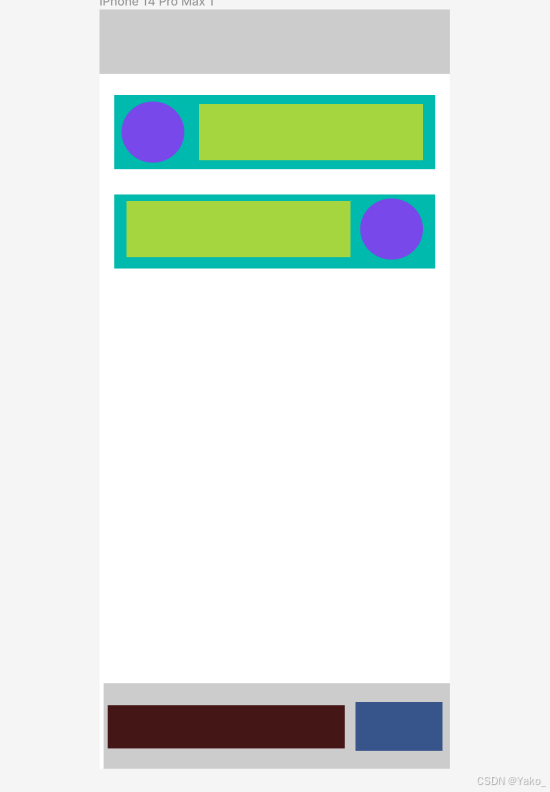
整个聊天页面的UI分为三大部分:
-
顶部标题栏
-
消息列表区域
-
底部输入区域
1. 顶部标题栏设计
@Component
export struct Title {
  private text: string = ''

  build() {
    Flex({ alignItems: ItemAlign.Center, justifyContent: FlexAlign.Center }) {
      Text(this.text)
        .fontSize('18fp')
        .padding('20px')
    }
    .height('120px')
    .backgroundColor("gery")
  }
}-
使用
Title组件显示页面标题信息,通过this.text动态配置。
2. 消息列表区域设计
Column(){
  List() {
    ForEach(this.messages, (item: message) => {
      ListItem() {
        if (item.senderId !== this.userId) {
          LeftDialogBox({
            name:params.username,
            message:item.message
          })
        } else {
          RightDialogBox({
            name:this.myName,
            message:item.message
          })
        }
      }
    })
  }
  .height("85%")
}
.backgroundColor("#E2EAF4")-
-
使用
List容器动态加载消息内容,支持实时更新。 -
根据消息发送者动态调用
LeftDialogBox或RightDialogBox,分别代表对方和自己发送的消息。
-
LeftDialogBox:接收消息框
LeftDialogBox 用于展示对方发送的消息,结构和样式上强调信息接收者的身份。
@Component
export struct LeftDialogBox {
  name: string = '';
  message: string = '';
  senderColor: string = '#ffffff';
  time: Date = new Date();

  build() {
    Row() {
      // 头像区域
      Flex({ alignItems: ItemAlign.Center, justifyContent: FlexAlign.Center }) {
        Text(this.name.charAt(0))
          .fontSize(18)
          .fontColor('#140404') // 白色字体
          .fontWeight(FontWeight.Bold);
      }
      .width(39)
      .height(39)
      .borderRadius(20) // 圆形头像
      .backgroundColor(this.senderColor) // 背景色
      .margin({ left: '14px', right: '14px' });

      // 消息气泡
      Text(this.message)
        .fontSize('14fp')
        .backgroundColor('#cccccc') // 灰色气泡
        .padding(10)
        .borderRadius(10)
        .margin({ right: '280px' });
    }
    .width('100%')
    .margin({ top: '20px', bottom: '20px' })
    .alignItems(VerticalAlign.Top);
  }
}
- 头像部分:
- 圆形头像(
borderRadius(20)),显示对方名字的首字母。 - 使用自定义颜色
senderColor,可根据聊天对象动态生成。
- 圆形头像(
- 消息气泡:
- 灰色背景(
#cccccc)区分对方消息,配以圆角设计提升柔和度。 - 通过
margin({ right: '280px' })限制宽度,避免占满屏幕。
- 灰色背景(
RightDialogBox:发送消息框
RightDialogBox 用于展示当前用户发送的消息,结构上与 LeftDialogBox 相似,但方向与样式不同。
@Component
export struct RightDialogBox {
  name: string = '';
  message: string = '';
  myColor: string = '#1296db';

  build() {
    Flex({ direction: FlexDirection.RowReverse }) {
      // 头像区域
      Flex({ alignItems: ItemAlign.Center, justifyContent: FlexAlign.Center }) {
        Text(this.name.charAt(0))
          .fontSize(18)
          .fontColor('#140404') // 白色字体
          .fontWeight(FontWeight.Bold);
      }
      .width(39)
      .height(39)
      .borderRadius(20) // 圆形头像
      .backgroundColor(this.myColor) // 自定义背景色
      .margin({ left: '14px', right: '14px' });

      // 消息气泡
      Flex({ direction: FlexDirection.RowReverse, justifyContent: FlexAlign.Start }) {
        Text(this.message)
          .fontSize('14fp')
          .backgroundColor('#1dde40') // 绿色气泡
          .padding(10)
          .borderRadius(10)
          .margin({ left: '140px' });
      }
    }.margin({ top: '20px', bottom: '20px' });
  }
}
- 方向调整:
- 通过
FlexDirection.RowReverse实现消息框和头像的反向排列。
- 通过
- 头像部分:
- 与接收消息框一致,使用动态背景色
myColor以突出自己的消息。
- 与接收消息框一致,使用动态背景色
3. 底部输入区域设计
Row() {
  Image($r('app.media.file4chat'))
    .width(30).height(30).margin({right:10})
    .onClick(() => { /* 附件逻辑 */ });

  TextInput({
    placeholder: '在此输入消息',
    text:this.message,
    controller:this.controller
  })
    .width('60%')
    .margin({right:10})
    .onChange((value) => {
      this.message = value;
    });

  Button('发送')
    .width('15%')
    .onClick(() => {
      if (this.message.trim()) {
        this.sendMessage()
        this.message = ''
      }
    });
}
.height('10%')
.padding(10)
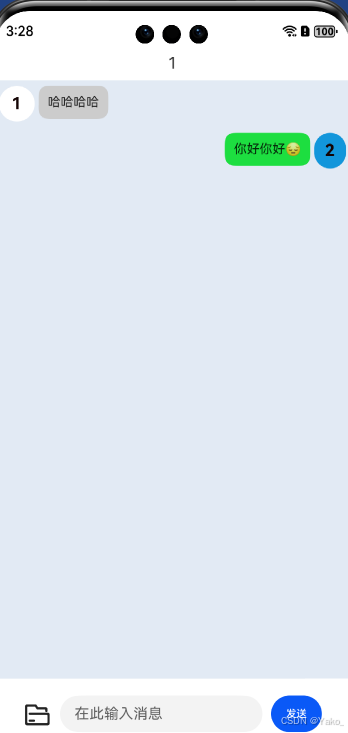
效果图:

