转载请注明出处
作者:小风筝0010
原文:http://blog.csdn.net/Zheng548/article/details/60348332
引言
今天面试的时候,被问到View的绘制流程,我简单说了下,但不是真正掌握,不过我转移话题到View的事件分发机制,回答地还比较流利,希望今下午能给面试官一个好的印象。说实话,面试官真心不错,像个大哥哥,十分亲切,很有亲和力,虽然只是电话面试,但能感觉到面试官哥哥非常nice,在这里为蚂蚁金服的哥哥点赞。
好,切入主题。
关于这篇文章的说明,这篇文章是参考的了郭霖的博客,他的一篇 Android视图绘制流程完全解析,带你一步步深入了解View(二)写得很不错,在这里表示感谢,不过郭霖前辈那篇有点早,一小部分源码与现在的有略微差别,于是我想从最新源码的角度分析下,同时也梳理下顺序,希望能帮到和我一样在求职的童鞋们。谢谢支持!
引例
为了不至于枯燥,咱们一步步用实例来说明吧。
新建项目.
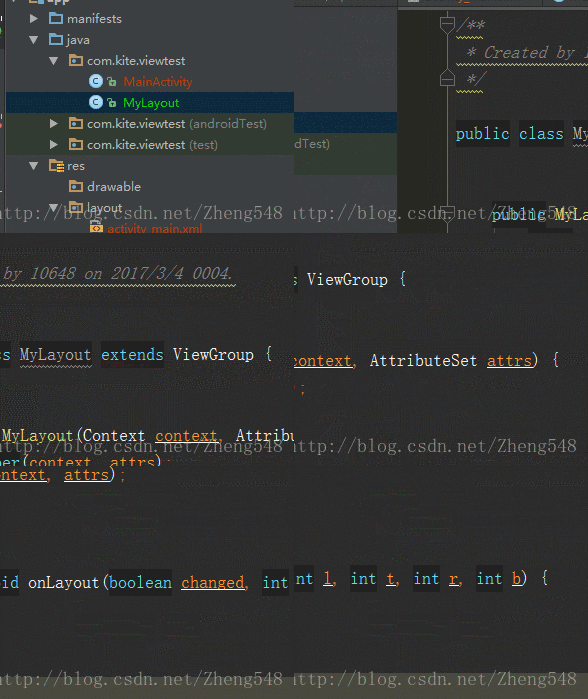
建好如下所示,这是没有修改的项目。
自定义ViewGuop
自定义的这个布局目标很简单,只要能够包含一个子视图,并且让子视图正常显示出来就可以了。那么就给这个布局起名叫做MyLayout吧.
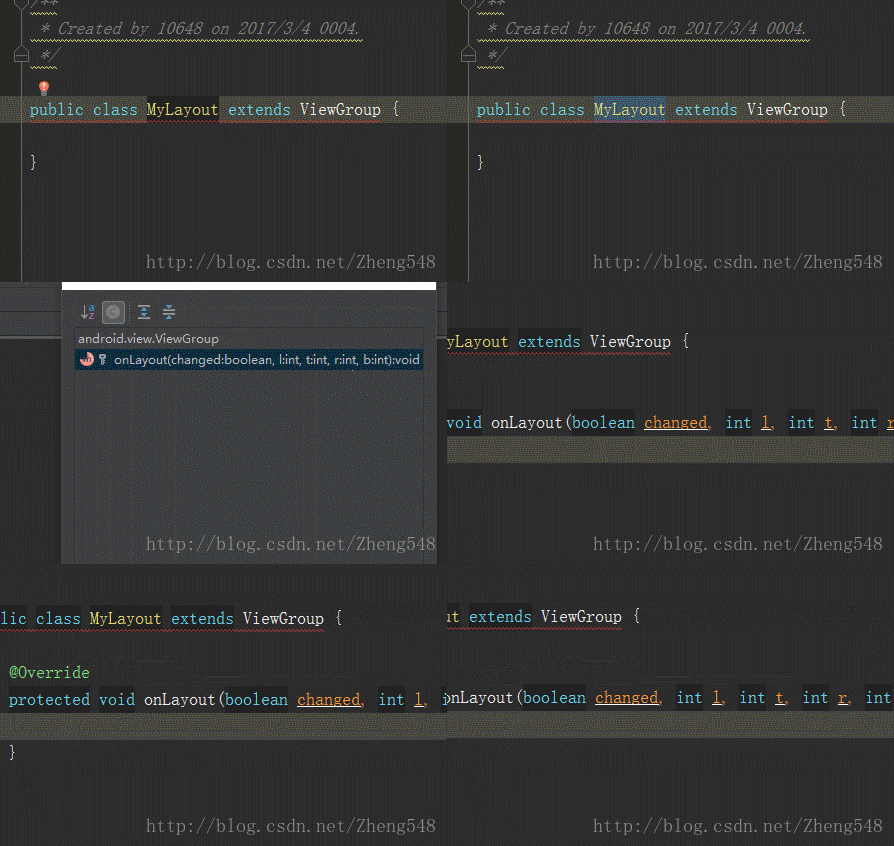
新建MyLayout类,并继承ViewGuop, 你会发现有红色横杠,提示错误。我们在光标指向错误出,同时按下Alt+Enter,自动生成代码,如下GIf所示:
代码如下:
public class MyLayout extends ViewGroup {


    public MyLayout(Context context, AttributeSet attrs) {
        super(context, attrs);
    }

    @Override
    protected void onLayout(boolean changed, int l, int t, int r, int b) {

    }
}
首先重写onMeasure方法。
    @Override
    protected void onMeasure(int widthMeasureSpec, int heightMeasureSpec) {
        super.onMeasure(widthMeasureSpec, heightMeasureSpec);
        //在onMeasure()方法中判断SimpleLayout中是否有包含一个子视图,
        // 如果有的话就调用measureChild()方法来测量出子视图的大小
        if (getChildCount() > 0) {
            View childView = getChildAt(0);
            measureChild(childView, widthMeasureSpec, heightMeasureSpec);
        }
    }
这里在onMeasure()方法中判断SimpleLayout中是否有包含一个子视图,如果有的话就调用measureChild()方法来测量出子视图的大小。
下面我们来重写onLayout方法
 @Override
    protected void onLayout(boolean changed, int l, int t, int r, int b) {
        //判断SimpleLayout是否有包含一个子视图
        if (getChildCount() > 0) {
            View childView = getChildAt(0);
            //调用这个子视图的layout()方法来确定它在SimpleLayout布局中的位置
            childView.layout(0, 0, childView.getMeasuredWidth(),
                    childView.getMeasuredHeight());
        }
首先判断MyLayout是否有包含一个子视图,然后调用这个子视图的layout()方法来确定它在MyLayout布局中的位置,这里传入的四个参数依次是0、0、childView.getMeasuredWidth()和childView.getMeasuredHeight(),分别代表着子视图在SimpleLayout中左上右下四个点的坐标。其中,调用childView.getMeasuredWidth()和childView.getMeasuredHeight()方法得到的值就是在onMeasure()方法中测量出的宽和高。
定义布局文件
这样就已经把MyLayout这个布局定义好了,下面就是在XML文件中使用它了,如下所示:
<?xml version="1.0" encoding="utf-8"?>
<com.kite.viewtest.MyLayout xmlns:android="http://schemas.android.com/apk/res/android"
    android:layout_width="match_parent"
    android:layout_height="match_parent">

    <ImageView
        android:layout_width="wrap_content"
        android:layout_height="wrap_content"
        android:src="@drawable/asmallkite"/>

</com.kite.viewtest.MyLayout>
可以看到,我们能够像使用普通的布局文件一样使用MyLayout,只是注意它只能包含一个子视图,多余的子视图会被舍弃掉。这里MyLayout中包含了一个ImageView,并且ImageView的宽高都是wrap_content。
运行显示
现在运行一下程序,结果如下图所示:
源码分析onLayout
刚刚在第二个Gif中,我们可以看到。当我们继承了ViewGroup之后,后有错误提示,需要我们重写onLayout方法。那么我们就先看看onLayout方法吧。一起来看。
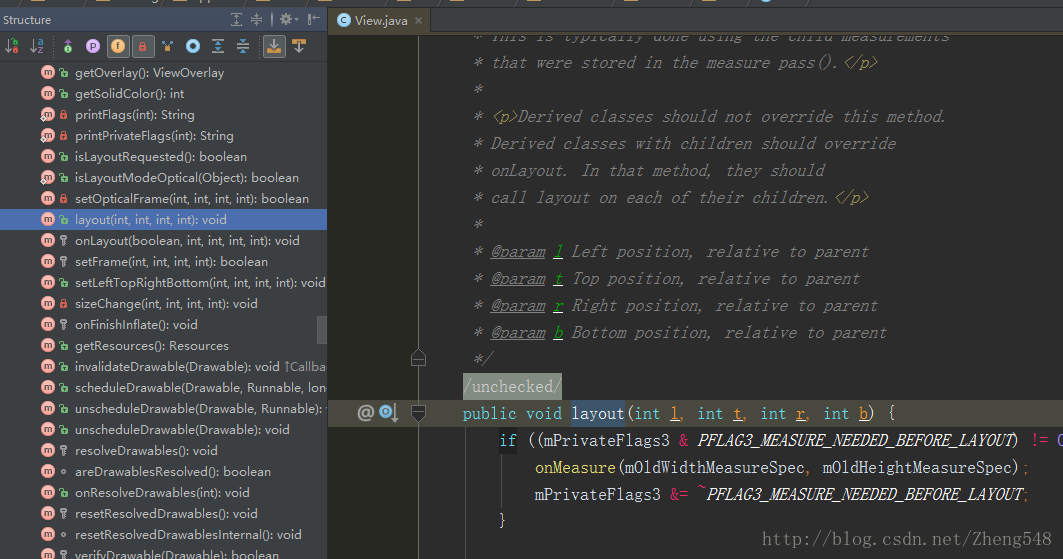
layout()方法在View.java这个类里面。

先看layout这个方法有什么作用?
Assign a size and position to a view and all of its descendants
分配一个view和它的子元素的大小和位置This is the second phase of the layout mechanism.
(The first is measuring). In this phase, each parent calls
layout on all of its children to position them.
This is typically done using the child measurements
这是view绘制机制的第二个时期(第一个是measuring)。在这个时期,当ViewGroup的位置确定后,它在onLayout中会遍历所有子元素并调用其layout方法。
上面提到,onMeasure在onLayout之前,我们稍后在看onMeasure吧。现在来看View的layout方法。
layout()方法接收四个参数,分别代表着左、上、右、下的坐标,当然这个坐标是相对于当前视图的父视图而言的。
 public void layout(int l, int t, int r, int b) {
        if ((mPrivateFlags3 & PFLAG3_MEASURE_NEEDED_BEFORE_LAYOUT) != 0) {
            onMeasure(mOldWidthMeasureSpec, mOldHeightMeasureSpec);
            mPrivateFlags3 &= ~PFLAG3_MEASURE_NEEDED_BEFORE_LAYOUT;
        }

        int oldL = mLeft;
        int oldT = mTop;
        int oldB = mBottom;
        int oldR = mRight;

        boolean changed = isLayoutModeOptical(mParent) ?
                setOpticalFrame(l, t, r, b) : setFrame(l, t, r, b);

        if (changed || (mPrivateFlags & PFLAG_LAYOUT_REQUIRED) == PFLAG_LAYOUT_REQUIRED) {
            onLayout(changed, l, t, r, b);

            if (shouldDrawRoundScrollbar()) {
                if(mRoundScrollbarRenderer == null) {
                    mRoundScrollbarRenderer = new RoundScrollbarRenderer(this);
                }
            } else {
                mRoundScrollbarRenderer = null;
            }

            mPrivateFlags &= ~PFLAG_LAYOUT_REQUIRED;

            ListenerInfo li = mListenerInfo;
            if (li != null && li.mOnLayoutChangeListeners != null) {
                ArrayList<OnLayoutChangeListener> listenersCopy =
                        (ArrayList<OnLayoutChangeListener>)li.mOnLayoutChangeListeners.clone();
                int numListeners = listenersCopy.size();
                for (int i = 0; i < numListeners; ++i) {
                    listenersCopy.get(i).onLayoutChange(this, l, t, r, b, oldL, oldT, oldR, oldB);
                }
            }
        }

        mPrivateFlags &= ~PFLAG_FORCE_LAYOUT;
        mPrivateFlags3 |= PFLAG3_IS_LAID_OUT;
    }
其中,有这行代码:
 boolean changed = isLayoutModeOptical(mParent) ?
                setOpticalFrame(l, t, r, b) : setFrame(l, t, r, b);
在layout()方法中,首先会调用setFrame()方法来判断视图的大小是否发生过变化,以确定有没有必要对当前的视图进行重绘,同时还会在这里把传递过来的四个参数分别赋值给mLeft、mTop、mRight和mBottom这几个变量。不信,点开setFrame,看到:
 protected boolean setFrame(int left, int top, int right, int bottom) {
           ····//省略无关代码
            mLeft = left;
            mTop = top;
            mRight = right;
            mBottom = bottom;
             ····//省略无关代码
            }
接下来会在第16行调用onLayout()方法,我们先不管onLayout()方法是干什么呢,先睹为快:
 protected void onLayout(boolean changed, int left, int top, int right, int bottom) {
    }
我天!竟然是一个空方法。来看看它的官方注释:
/**
* Called from layout when this view should
* assign a size and position to each of its children.
*
* Derived classes with children should override
* this method and call layout on each of
* their children.
* @param changed This is a new size or position for this view
* @param left Left position, relative to parent
* @param top Top position, relative to parent
* @param right Right position, relative to parent
* @param bottom Bottom position, relative to parent
*/
layout是用来确定View本身的位置,而onLayout方法则会确定所有子元素的位置。还记得那个引例MyLayout吗?它不就是一开始就重写了onLayout吗?
onLayout()过程是为了确定视图在布局中所在的位置,而这个操作应该是由布局来完成的,即父视图决定子视图的显示位置。既然如此,我们来看下ViewGroup中的onLayout()方法是怎么写的吧,代码如下:
   @Override
    protected abstract void onLayout(boolean changed,int l, int t, int r, int b);
可以看到,ViewGroup中的onLayout()方法竟然是一个抽象方法,这就意味着所有ViewGroup的子类都必须重写这个方法。没错,像LinearLayout、RelativeLayout等布局,都是重写了这个方法,然后在内部按照各自的规则对子视图进行布局的。
现在请你回到我们的引例,想想MyLayout,是不是收获很多?
既然View和ViewGroup都没有真正实现onLayout方法。接下来,我没呢可以看看LinearLayout的onLayout方法。
    protected void onLayout(boolean changed, int l, int t, int r, int b) {
        if (mOrientation == VERTICAL) {
            layoutVertical(l, t, r, b);
        } else {
            layoutHorizontal(l, t, r, b);
        }
    }
首先判断布局方向,是竖直布局还是水平布局。接下来调用layoutVertical( )或者layoutHorizontal( ).那我们就分析下layoutVertical( )吧,代码如下:
 void layoutVertical(int left, int top, int right, int bottom) {
                 //····
    final int count = getVirtualChildCount();
                //····
     for (int i = 0; i < count; i++) {
            final View child = getVirtualChildAt(i);
            if (child == null) {
                childTop += measureNullChild(i);
            } else if (child.getVisibility() != GONE) {
                final int childWidth = child.getMeasuredWidth();
                final int childHeight = child.getMeasuredHeight();

                final LinearLayout.LayoutParams lp =
                        (LinearLayout.LayoutParams) child.getLayoutParams();
                        //····
                           if (hasDividerBeforeChildAt(i)) {
                    childTop += mDividerHeight;
                }

                childTop += lp.topMargin;
                setChildFrame(child, childLeft, childTop + getLocationOffset(child),
                        childWidth, childHeight);
                childTop += childHeight + lp.bottomMargin + getNextLocationOffset(child);

                i += getChildrenSkipCount(child, i);
            }
        }
我们一起来看一下layoutVertical( )的代码逻辑,可以看到,此方法会首先用此方法final int count = getVirtualChildCount(); 去得到布局中子元素的数量,然后遍历所有子元素并调用setChildFrame(child, childLeft, childTop + getLocationOffset(child), 为子元素指定对应的位置,其中childTop会逐渐增大,这就意味着后面的子元素会被放在靠下的位置,刚好符合竖直方向的LinearLayout的特性。
childWidth, childHeight);
    private void setChildFrame(View child, int left, int top, int width, int height) {
        child.layout(left, top, left + width, top + height);
}可以看到,setChildFrame仅仅是调用子元素的layout方法。这样父元素在layout方法中完成自己的定位以后,就通过onLayout方法去调用子元素的layout方法,子元素通过自己的layout方法确定自己的位置。这样一层层地传递下去就完成了整个View树的layout过程。
至此,分析完了onLayout过程,来总结一下:
1. 在View的层级树中,layout确定View本身的位置,而onLayout确定所有子元素的位置
2. 每一层的View,先判断视图是否变化,再调用setFrame确定四个顶点的位置,这样View在父容器的位置就确定了。
3. 然后调用onLayout方法,确定子元素的位置。
4. 这样一层一层传递下去就完成了整个View树的layout过程。
onMeasure源码分析
在刚才,我们分析了onLayout的源码分析,提到onMeasure在onLayout之前,那么接下来我们分析下onMeasure吧。
先看measure方法:
public final void measure(int widthMeasureSpec, int heightMeasureSpec) {
 //省略无关代码
            if (cacheIndex < 0 || sIgnoreMeasureCache) {
                // measure ourselves, this should set the measured dimension flag back
                onMeasure(widthMeasureSpec, heightMeasureSpec);
                mPrivateFlags3 &= ~PFLAG3_MEASURE_NEEDED_BEFORE_LAYOUT;
            }
}我们可以看到,measure是一个final方法,这意味者我们不能重写此方法。接着我们发现它调用了onMeasure(widthMeasureSpec, heightMeasureSpec);这里才是真正去测量并设置View大小的地方
    protected void onMeasure(int widthMeasureSpec, int heightMeasureSpec) {
        setMeasuredDimension(getDefaultSize(getSuggestedMinimumWidth(), widthMeasureSpec),
                getDefaultSize(getSuggestedMinimumHeight(), heightMeasureSpec));
    }
这里面有两个关键方法:
1. setMeasuredDimension
2. getDefaultSize
我们先看getDefaultSize。
 public static int getDefaultSize(int size, int measureSpec) {
        int result = size;
        int specMode = MeasureSpec.getMode(measureSpec);
        int specSize = MeasureSpec.getSize(measureSpec);

        switch (specMode) {
        case MeasureSpec.UNSPECIFIED:
            result = size;
            break;
        case MeasureSpec.AT_MOST:
        case MeasureSpec.EXACTLY:
            result = specSize;
            break;
        }
        return result;
    }
这里传入的measureSpec是一直从measure()方法中传递过来的。然后调用MeasureSpec.getMode()方法可以解析出specMode,调用MeasureSpec.getSize()方法可以解析出specSize。接下来进行判断,如果specMode等于AT_MOST或EXACTLY就返回specSize,这也是系统默认的行为。
之后会在onMeasure()方法中调用setMeasuredDimension()方法来设定测量出的大小,这样一次measure过程就结束了。
分析完setMeasuredDimension 和getDefaultSize,那么MeasureSpec.UNSPECIFIED:
和MeasureSpec.AT_MOST 以及MeasureSpec.EXACTLY 是什么呢?
原来在View类中有个静态内部类MeasureSpec
MeasureSpec, 顾名思义,“测量规格”,“测量规格说明书”,MeasureSpec很大程度上决定一个View的尺寸规格。
 int specMode = MeasureSpec.getMode(measureSpec);
int specSize = MeasureSpec.getSize(measureSpec);在getDefaultSize中,有getMode 和getSize 两个方法,它们分别得到SpecSize和SpecMode。SpecSize指在某种测量模式下的规格大小,SpecMode指测量模式。
SpecMode有三类,MeasureSpec里面有如下代码:
 /**
         * Measure specification mode: The parent has not imposed any constraint
         * on the child. It can be whatever size it wants.
         */
        public static final int UNSPECIFIED = 0 << MODE_SHIFT;
父容器不对View有任何限制,这种情况一般用于系统内部,表示一种测量状态。
/**
         * Measure specification mode: The parent has determined an exact size
         * for the child. The child is going to be given those bounds regardless
         * of how big it wants to be.
         */
        public static final int EXACTLY     = 1 << MODE_SHIFT;
父容器已经检测出View所需的精确大小,这个时候View的最终大小是SpecSize所指定的值。它对应于LayoutParams中的match_parent和具体的值这两张模式。
 /**
         * Measure specification mode: The child can be as large as it wants up
         * to the specified size.
         */
        public static final int AT_MOST     = 2 << MODE_SHIFT;
父容器指定了一个可用大小,View不能大于这个值。它对应于LayoutParams中的wrap_content.
draw源码分析
Draw过程在measure和layout之后,才真正开始去视图进行绘制。它的作用是将View绘制到屏幕上面。View的绘制过程有下面几步:
1. 绘制背景
2. 绘制自身内容
3. 绘制子元素
4. 绘制装饰
 /*
         * Draw traversal performs several drawing steps which must be executed
         * in the appropriate order:
         *
         *      1. Draw the background
         *      2. If necessary, save the canvas' layers to prepare for fading
         *      3. Draw view's content
         *      4. Draw children
         *      5. If necessary, draw the fading edges and restore layers
         *      6. Draw decorations (scrollbars for instance)
         */

        // Step 1, draw the background, if needed
        int saveCount;

        if (!dirtyOpaque) {
            drawBackground(canvas);
        }

        // skip step 2 & 5 if possible (common case)
        final int viewFlags = mViewFlags;
        boolean horizontalEdges = (viewFlags & FADING_EDGE_HORIZONTAL) != 0;
        boolean verticalEdges = (viewFlags & FADING_EDGE_VERTICAL) != 0;
        if (!verticalEdges && !horizontalEdges) {
            // Step 3, draw the content
            if (!dirtyOpaque) onDraw(canvas);

            // Step 4, draw the children
            dispatchDraw(canvas);

            // Overlay is part of the content and draws beneath Foreground
            if (mOverlay != null && !mOverlay.isEmpty()) {
                mOverlay.getOverlayView().dispatchDraw(canvas);
            }

            // Step 6, draw decorations (foreground, scrollbars)
            onDrawForeground(canvas);

            // we're done...
            return;
        }
View绘制过程的传递是通过dispatchDraw来实现的,dispatchDraw会遍历调用所有子元素的draw方法,如此一层层地传递下去。
总结
关于View的绘制流程,有如下几点:
1. ViewRoot ViewRoot是连接windowManager和DecorView的纽带,View的三大绘制流程都是通过ViewRoot来完成的。
2. ViewRoot的performTraversals. View的绘制流程是从ViewRoot的performTraversals开始的,它会依次调用performMeasure、performLayout、performDraw这三个方法,分别完成View的测量,布局和绘制三大流程。
3. measure measure完成对自身的测量,接着调用onMeasure方法,对所有的子元素进行测量。这时候,measure的流程就从父容器传到子容器中,完成一次measure。 接着,子元素重复父容器的measure过程,一层一层直到完成整个View树的measure。
4. Layout layout方法用于确定自身在父容器中的位置,它先判断视图是否发生变化,再调用setFrame确定四个顶点,这样就确定了View本身年的位置。接着调用onLayout,确定所有子元素的位置。这样layout流程就从父容器传到子容器,完成一次layout。接着,子元素重复父容器的layout过程,一层一层直到完成整个View树的layout。
5. draw 绘制背景-> 绘制自身内容->绘制子元素->绘制装饰


