问题描述:
搭建接口测试框架,执行用例请求多个不同请求方式的接口
实现步骤:
① 创建配置文件config.ini,写入部分公用参数,如接口的基本url、测试报告文件路径、测试数据文件路径等配置项
-
1 [DATABASE] -
2 data_address = ./data/data.xlsx -
3 report_address = ./report/ -
4 driver = ./drivers/chromedriver.exe -
5 -
6 [HTTP] -
7 base_url = https://***.***.cn//
② 从配置文件中读取并返回文件中内容,或写入配置文件的方法,文件命名 readConfig.py
-
1 import os -
2 import configparser -
3 -
4 # 获取当前py文件地址 -
5 proDir = os.path.split(os.path.realpath(__file__))[0] -
6 # 组合config文件地址 -
7 configPath = os.path.join(proDir,"config.ini") -
8 -
9 class ReadConfig: -
10 def __init__(self): -
11 # 获取当前路径下的配置文件 -
12 self.cf = configparser.ConfigParser() -
13 self.cf.read(configPath) -
14 -
15 def get_config(self,field,key): -
16 # 获取配置文件中的key值 -
17 result = self.cf.get(field,key) -
18 return result -
19 -
20 def set_config(self,field,key,value): -
21 # 向配置文件中写入配置信息 -
22 fb = open(configPath,'w') -
23 self.cf.set(field,key,value) -
24 self.cf.write(fb)
③ 从配置文件中获取到接口的基本url后,根据不同的接口请求方式读取请求体或其他参数信息,参数信息从excel中读取,因此文件readExcel.py用于读取并返回excel文件中内容,或写入Excel的方法
-
1 import xlrd -
2 import xlutils.copy -
3 from Base.readConfig import ReadConfig -
4 import time -
5 -
6 class ReadExcel: -
7 -
8 def __init__(self,section,field,sheet): -
9 # 打开工作表,并定位到sheet -
10 data_address = ReadConfig().get_config(section,field) -
11 workbook = xlrd.open_workbook(data_address) -
12 self.table = workbook.sheets()[sheet] -
13 -
14 -
15 def get_rows(self): -
16 # 获取excel行数 -
17 rows = self.table.nrows -
18 return rows -
19 -
20 def get_cell(self,row,col): -
21 # 获取单元格数据 -
22 cell_data = self.table.cell(row,col).value -
23 return cell_data -
24 -
25 def get_col(self,col): -
26 # 获取整列数据 -
27 col_data = self.table.col_value(col) -
28 return col_data -
29 -
30 class WriteExcel: -
31 def __init__(self,section,field,sheet): -
32 # 打开工作表 -
33 self.address = ReadConfig().get_config(section,field) -
34 self.workbook = xlrd.open_workbook(self.address) -
35 self.wf = xlutils.copy.copy(self.workbook) -
36 self.ws = self.wf.get_sheet(sheet) -
37 -
38 def set_cell(self,row,col,value): -
39 #设置单元格数据 -
40 self.ws.write(row,col,value) -
41 -
42 def save_excel(self,filename,format): -
43 #获取当前时间 -
44 self.time = time.strftime("%Y%m%d%H%M%S", time.localtime()) -
45 #生成文件的文件名及格式 -
46 self.report = filename + '_' +self.time + format -
47 #保存文件 -
48 self.wf.save(self.report)
④ 将获取接口的url、请求头、参数等方法封装成类并写入base.py中,用于测试框架中测试集的直接调取
-
1 from Base.readConfig import ReadConfig -
2 from Base.readExcel import ReadExcel -
3 -
4 # 实例化 -
5 readexcel = ReadExcel('DATABASE','data_address',0) -
6 -
7 class BasePage(object): -
8 def __init__(self, selenium_driver): -
9 self.driver = selenium_driver -
10 -
11 def get_api(self, row, col): -
12 # 获取url -
13 self.base_url = ReadConfig().get_config('HTTP', 'base_url') -
14 -
15 # 获取excel中的接口地址,与url进行拼接 -
16 self.url = self.base_url + readexcel.get_cell(row, col) -
17 print(self.url) -
18 return self.url -
19 -
20 def get_cell(self, row, col): -
21 # 获取excel单元格数据,获取接口请求的参数 -
22 self.cell = readexcel.get_cell(row, col) -
23 return self.cell
⑤ 从base.py文件获取到请求地址后,需要组合不同类型的请求方式,如get请求直接将参数与地址进行拼接,或post请求以json数据格式等为请求体请求接口,然后再获取接口对象,得到接口返回的数据,此过程涉及的方法封装到request_way.py(注:该实例get请求返回数据格式为jsonp,因此需要jsonp格式数据转换为json格式的方法)
-
1 from Base.readExcel import ReadExcel -
2 from base import BasePage -
3 import requests -
4 import urllib.parse -
5 import json -
6 import re -
7 -
8 # 实例化 -
9 readexcel = ReadExcel('DATABASE','data_address',0) -
10 -
11 # jsonp格式数据转换为json格式 -
12 def jsonp_to_json(_jsonp): -
13 # 解析jsonp数据格式为json -
14 try: -
15 return json.loads(re.match(".*?({.*}).*", _jsonp, re.S).group(1)) -
16 except: -
17 raise ValueError('Invalid Input') -
18 -
19 class RequestPage(BasePage): -
20 # post方式请求,json格式为请求体 -
21 def post_requests(self, url, i): -
22 # 定义请求数据,获取excel中参数信息赋值给data,以json格式拼接好数据 -
23 data_1_json = json.dumps(BasePage(self.driver).get_cell(i, 4)) -
24 data_2_json = json.dumps(BasePage(self.driver).get_cell(i + 1, 4)) -
25 data = "{" + data_1_json + ":" + data_2_json + "}" -
26 print(data) -
27 # 打开请求,获取对象 -
28 response = requests.post(url, data) -
29 # 打印状态码 -
30 print(response) -
31 return response -
32 -
33 # get方式请求 -
34 def get_request(self, url, j): -
35 # 定义请求数据,获取excel中参数信息赋值给values -
36 #values = {} -
37 values = BasePage(self.driver).get_cell(j, 4) -
38 # 如果参数不止一个则对请求数据进行编码拼接'&' -
39 #data = urllib.parse.urlencode(values) -
40 # 将数据与url进行拼接 -
41 req = url + '?' + values -
42 print(req) -
43 # 打开请求,获取对象 -
44 response = urllib.request.urlopen(req) -
45 # 打印Http状态码 -
46 print(response.status) -
47 # 读取服务器返回的数据,对HTTPResponse类型数据进行读取操作,bytes格式数据编译成中文编码 -
48 the_page = response.read().decode("unicode_escape") -
49 # 将返回的bytes格式数据先转换成str,再将返回的jsonp格式数据转换成json格式 -
50 the_page = jsonp_to_json(str(the_page)) -
51 return the_page
⑥ 得到接口实际返回结果后,需要与预期结果做比对,判断用例执行结果,所以封装校验类到check.py文件。校验方式其一是校验json数组内每个数值是否一致,其二是直接简单校验数组中的status值和message是否返回正确
-
1 from base import BasePage -
2 from Base.readExcel import WriteExcel -
3 -
4 # 实例化 -
5 writeexcel = WriteExcel('DATABASE','data_address',0) -
6 -
7 class CheckPage(BasePage): -
8 # 校验json数组内每个值是否一致 -
9 def check_value(self, i, actualresult, expectresult): -
10 # 遍历字典的值value,并将value赋值给实际接口数据的值 -
11 for value in actualresult.values(): -
12 actualresult_value = value -
13 # 遍历字典的值value,并将value赋值给excel中预期数据的值 -
14 for value in expectresult.values(): -
15 expectresult_value = value -
16 # 如果实际接口返回的每个键值与excel中预期返回的数据的每个键值一样,则接口测试用例执行通过,如果不是则打印预期结果和实际结果,可比较差异 -
17 if actualresult_value == expectresult_value: -
18 writeexcel.set_cell(i, 8, 'SUCCESS') -
19 print("接口用例执行结果通过") -
20 else: -
21 writeexcel.set_cell(i, 8, 'FAILURE') -
22 writeexcel.set_cell(i, 7, str(actualresult)) -
23 print('第', i + 1, '行用例执行失败:预期结果是', expectresult, '实际结果是', actualresult) -
24 -
25 # 保存测试报告 -
26 writeexcel.save_excel('testreport', '.xls') -
27 -
28 -
29 # 校验json数组中的status值和message是否返回成功 -
30 def easy_check_value(self, i, actualresult,expectresult): -
31 # 判断实际接口值是否状态码和消息返回成功 -
32 if actualresult['status'] == 1 and actualresult['message'] == '完成': -
33 writeexcel.set_cell(i, 8, 'SUCCESS') -
34 print('第', i+1, '行用例执行结果正确,用例通过') -
35 else: -
36 writeexcel.set_cell(i, 8, 'FAILURE') -
37 writeexcel.set_cell(i, 7, str(actualresult)) -
38 print('第', i + 1, '行用例执行失败:预期结果是', expectresult, '实际结果是', actualresult) -
39 -
40 # 保存测试报告 -
41 writeexcel.save_excel('testreport', '.xls')
⑦ 最后编写测试集 testcase.py,其中用例包含有执行post和get方式的请求,增加用例可直接在该文件继续添加编写
-
1 import unittest -
2 from selenium import webdriver -
3 from Base.readConfig import ReadConfig -
4 from base import BasePage -
5 from requests_way import RequestPage -
6 from check import CheckPage -
7 from packages.HTMLTestRunner import HTMLTestRunner -
8 -
9 driver = webdriver.Chrome(ReadConfig().get_config('DATABASE', 'driver')) -
10 -
11 class SmokeTest(unittest.TestCase): -
12 #初始化 -
13 def setUp(self): -
14 self.driver = driver -
15 -
16 def test_case_10(self): -
17 """以json格式数据为请求体的post方式接口请求""" -
18 # 获取url -
19 self.url = BasePage(self.driver).get_api(1,1) -
20 -
21 # 将接口实际返回数据转换为json可序列化,使用json.dumps()时需要对象相应的类型是json可序列化的 -
22 i = 3 -
23 actualresult = RequestPage(self.driver).post_requests(self.url, i).json() -
24 -
25 # 获取excel中的预期结果 -
26 expectresult = eval(BasePage(self.driver).get_cell(i, 6)) -
27 -
28 # 校验实际接口返回结果和用例预期结果是否一致(校验json数组内每个值是否一致) -
29 CheckPage(self.driver).check_value(i, actualresult, expectresult) -
30 -
31 def test_case_11(self): -
32 """get方式接口请求""" -
33 # 获取url -
34 self.url = BasePage(self.driver).get_api(8, 1) -
35 -
36 # 获取接口实际返回值与excel中的预期结果 -
37 j = 8 -
38 actualresult = RequestPage(self.driver).get_request(self.url, j) -
39 expectresult = eval(BasePage(self.driver).get_cell(j, 6)) -
40 -
41 # 校验实际接口返回结果和用例预期结果是否一致(校验json数组中的status值和message是否返回成功) -
42 CheckPage(self.driver).easy_check_value(j, actualresult, expectresult) -
43 -
44 # 释放资源 -
45 def test_case_12(self): -
46 self.driver.quit() -
47 -
48 -
49 if __name__ == '__main__': -
50 #构造测试集合 -
51 suite = unittest.TestSuite() -
52 suite.addTest(SmokeTest('test_case_10')) -
53 suite.addTest(SmokeTest('test_case_11')) -
54 suite.addTest(SmokeTest('test_case_12')) -
55 -
56 #创建html文件 -
57 filename = ReadConfig().get_config('DATABASE', 'report_address') + 'testreport.html' -
58 fp = open(filename, 'wb') -
59 -
60 #执行测试并生成html测试报告 -
61 runner = HTMLTestRunner(stream=fp, description='接口用例执行情况:', title='接口自动化测试报告') -
62 runner.run(suite) -
63 -
64 #关闭文件 -
65 fp.close()
⑧ 其中涉及HTMLTestRunner.py原生HTML测试报告库,是用于生成测试报告testreport.html,模块下载后直接集成到该项目
模块下载地址:HTMLTestRunner - tungwaiyip's software
⑨ 以python文件模式执行脚本才能生成测试报告
参考:https://www.cnblogs.com/kristin/p/10332815.html
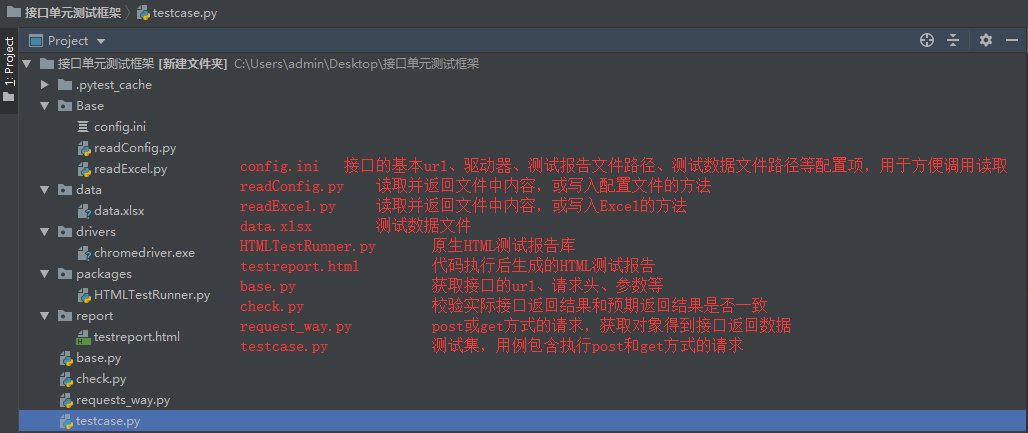
以上,整体框架如下图
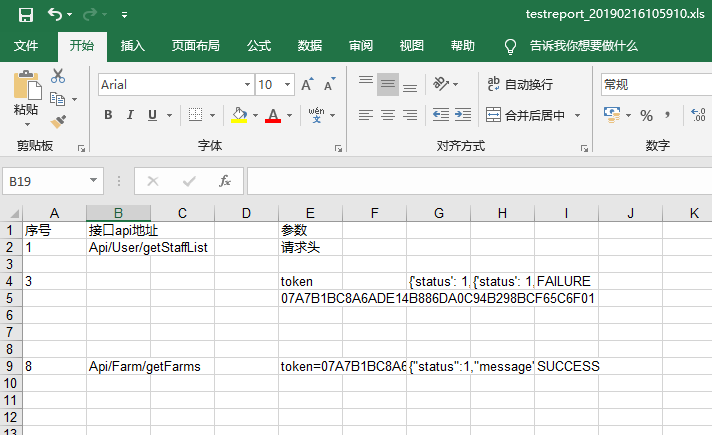
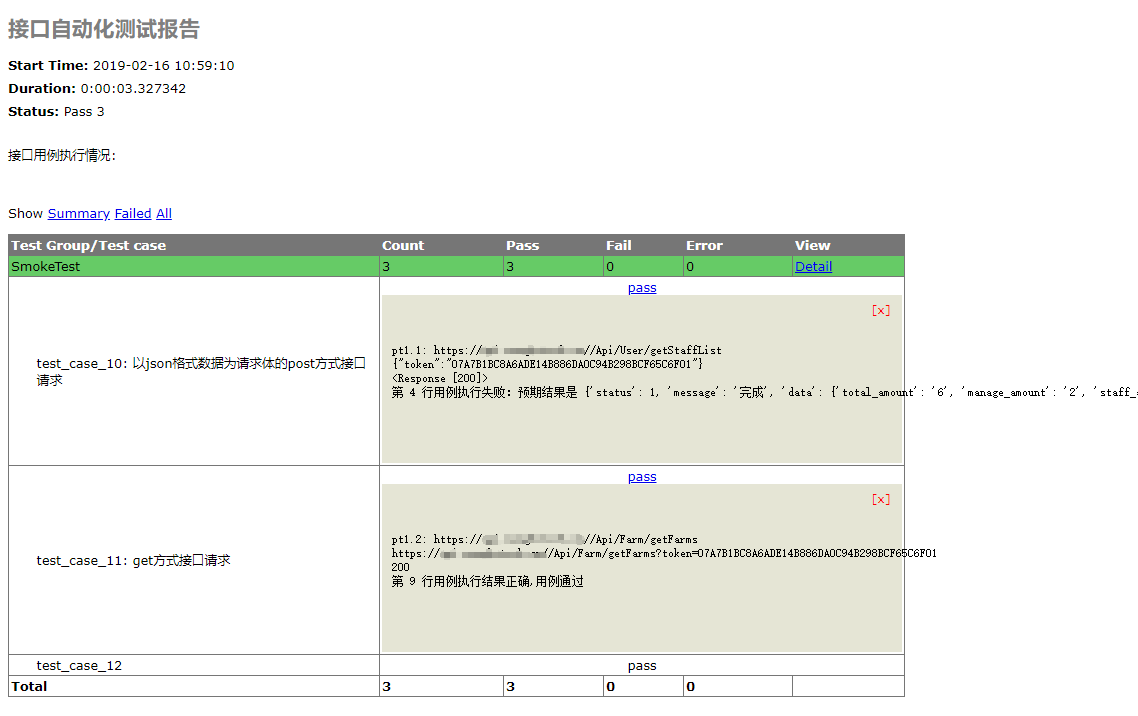
执行方式正确得到以下两种类型测试报告,excel表和html测试报告
感谢每一个认真阅读我文章的人,礼尚往来总是要有的,虽然不是什么很值钱的东西,如果你用得到的话可以直接拿走:
这些资料,对于【软件测试】的朋友来说应该是最全面最完整的备战仓库,这个仓库也陪伴上万个测试工程师们走过最艰难的路程,希望也能帮助到你!有需要的小伙伴可以点击下方小卡片领取
