文章目录
1、简介
https://github.com/OSGeo/gdal
https://gdal.org/index.html
GDAL 是用于栅格和矢量地理空间数据格式的转换器库,由开源地理空间基金会在 MIT 风格的开源许可下发布。作为一个库,它向调用应用程序提供单个栅格抽象数据模型和单个矢量抽象数据模型,用于所有支持的格式。它还带有各种有用的命令行实用程序,用于数据转换和处理。
2、下载和编译(C++)
https://gdal.org/download.html
2.1 二进制构建
2.1.1 Conda
Conda 可以在多个平台(Windows、macOS 和 Linux)上使用 安装软件包和管理环境。
conda install -c conda-forge gdal
2.1.2 Vcpkg
vcpkg 中的 gdal 端口由 Microsoft 团队成员和社区贡献者保持最新状态。 vcpkg 的 url 为:https://github.com/Microsoft/vcpkg 。 您可以使用 vcpkg 依赖项管理器下载并安装 gdal:
git clone https://github.com/Microsoft/vcpkg.git
cd vcpkg
./bootstrap-vcpkg.sh  # ./bootstrap-vcpkg.bat for Windows
./vcpkg integrate install
./vcpkg install gdal
2.2 源代码构建
GDAL 的主存储库位于 GitHub 的 https://github.com/OSGeo/GDAL。
您可以通过发出以下命令来获取活动源代码的副本 命令:
git clone https://github.com/OSGeo/GDAL.git
比如这里需要编译gdal2.4.4这个版本,也可以通过如下网址访问源码:
https://download.osgeo.org/gdal/2.4.4/
2.2.1 nmake.opt方式构建
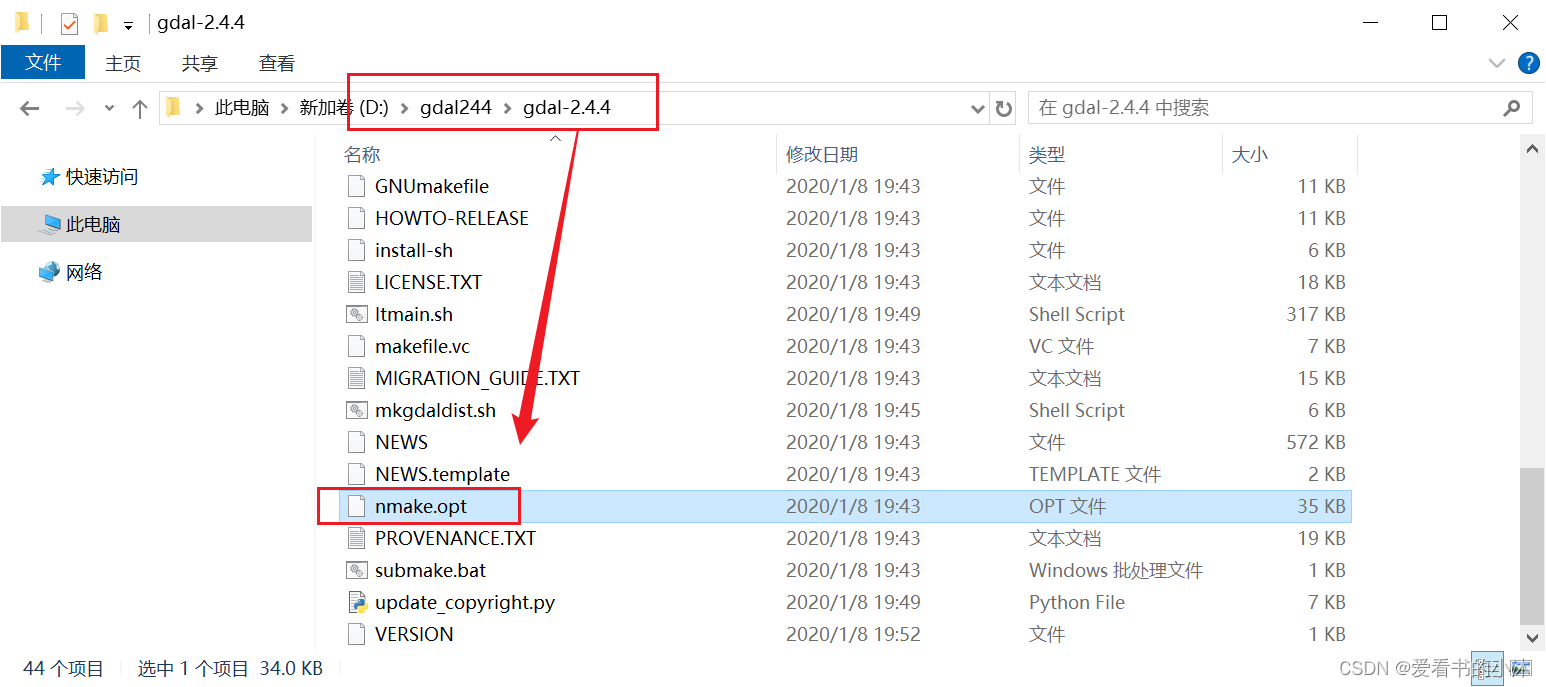
在解压后的文件夹中找到nmake.opt文件,修改几个配置参数;
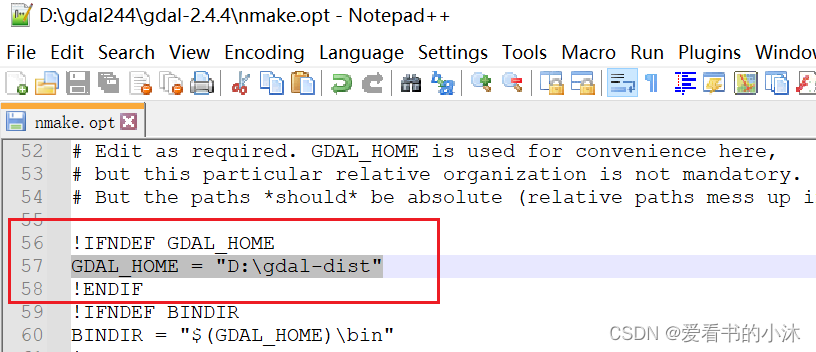
第57行,GDAL_HOME = “C:\warmerda\bld"这个路径是用来存储编译后的头文件、静态库、动态库等;这个路径可以自定义,这里改成了"D:\gdal-dist”。
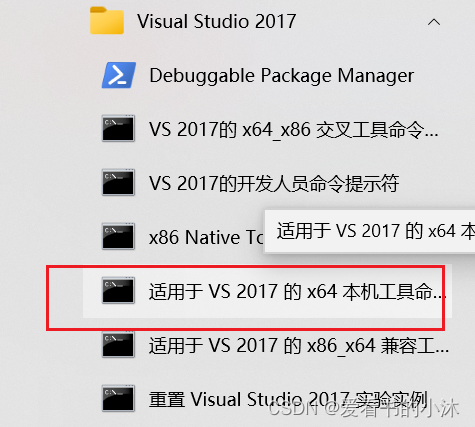
打开VS2017下的兼容工具命令提示符,选择管理员身份运行;
目录切换到你解压的GDAL-2.4.4的文件夹下,输入命令:
# nmake -f makefile.vc
# nmake -f makefile.vc MSVC_VER=1900
# nmake -f makefile.vc MSVC_VER=1900 DEBUG=1
# nmake -f makefile.vc MSVC_VER=1900 DEBUG=1 ANALYZE=1
# nmake -f makefile.vc MSVC_VER=1900 DEBUG=1 ANALYZE=1 WITH_PDB=1
# nmake -f makefile.vc MSVC_VER=1900 WIN64=1

nmake -f makefile.vc  WIN64=1
编译完成如下:
再次输入命令。这个命令是用来生成bin、html、data文件夹 。
nmake /f makefile.vc install WIN64=1
输入命令,用来生成lib/include文件夹 。
nmake /f makefile.vc devinstall WIN64=1
2.2.2 generate_vcxproj.bat方式构建
执行这个generate_vcxproj.bat文件可以生成gdal库的vc工程文件。
打开VS2017下的兼容工具命令提示符,选择管理员身份运行;
执行命令:
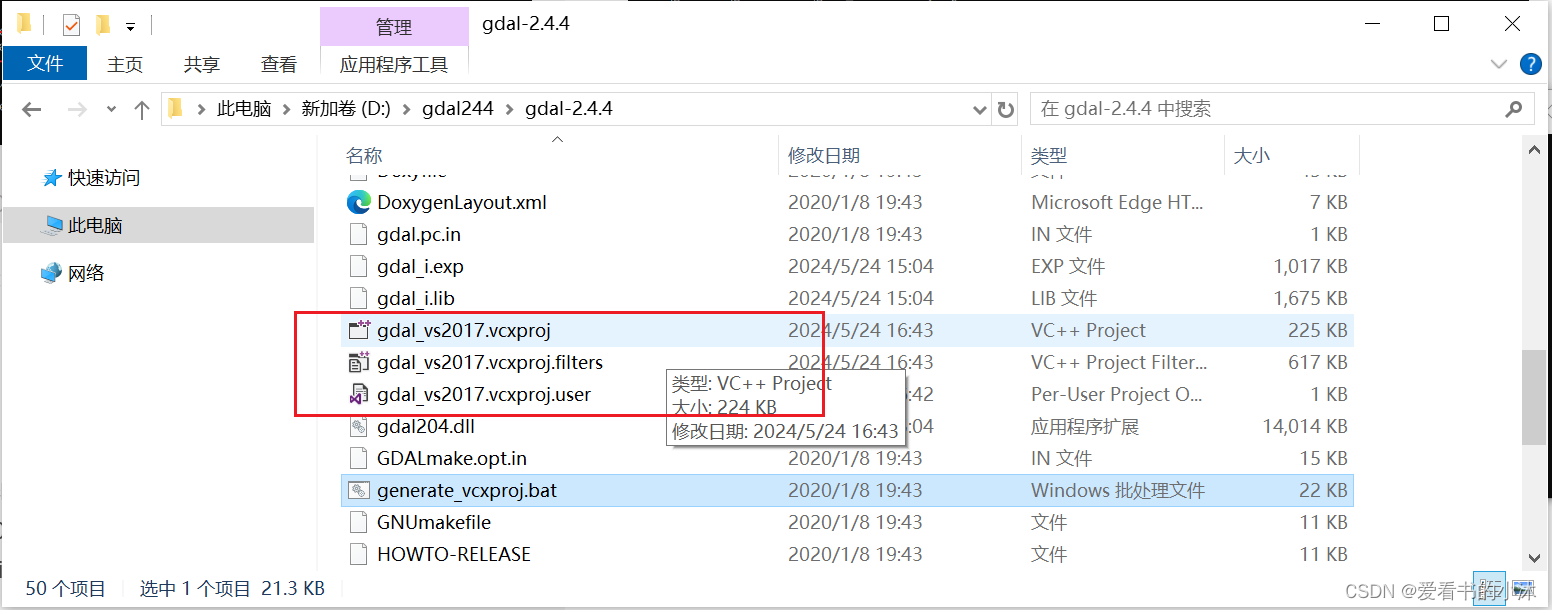
generate_vcxproj 15.0 64 gdal_vs2017
生成对应的vs2017的工程文件如下:
2.3 命令行测试
2.3.1 获取S57海图数据
https://gdal.org/drivers/vector/s57.html
S-57 驱动程序模块生成 S-57 中所有 S-57 功能的功能 S-57 文件和相关更新。S-57 (ENC) 文件通常具有 扩展名“.000”。
S-57 读取器依赖于具有两个支持文件, s57objectclasses.csv,s57attributes.csv在运行时可用 以特定于对象类的方式转换特征。这些 应该在环境变量指向的目录中 S57_CSV,或在当前工作目录中。
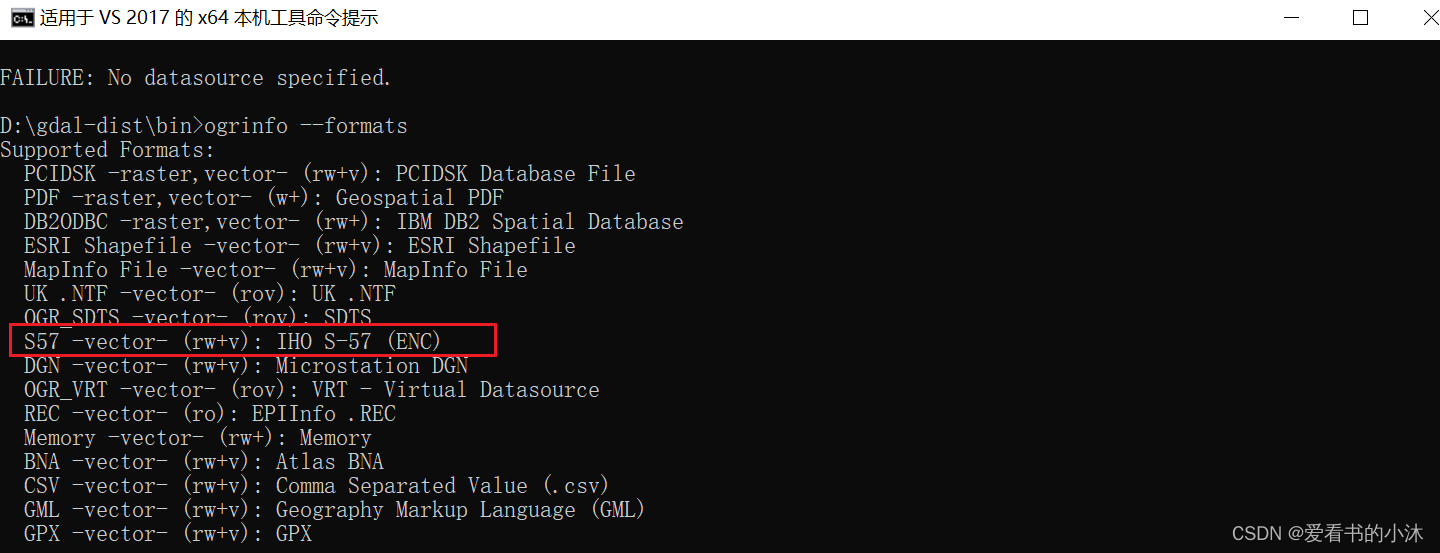
- (1)列出OGR所支持的数据信息。
ogrinfo --formats
- (2)ogrinfo查看s57的数据中包含的图层
ogrinfo d:\C1100103.000
- (3)将s57中的图层转为shp数据
知道了s57数据中包含的图层,下面就可以使用ogr2ogr工具来将s57中的图层转为shp数据。
ogr2ogr.exe -f "ESRI Shapefile" D:\s57polygon.shp D:\C1100103.000 Area
注意事项:
在C++程序开始中使用下面的代码即可读取到S57的图层。
CPLSetConfigOption("GDAL_DATA","C:\warmerda\bld\data");
如果使用的ogrinfo的命令行工具,在命令行中加入下面的参数也可以。
--config GDAL_DATA C:\warmerda\bld\data
2.4 代码测试
2.4.1 读取tiff信息
- pro工程文件设置:
INCLUDEPATH +=$$PWD/gdal244/include

LIBS +=-L$$PWD/gdal244/lib\
       -lgdal_i
DESTDIR = ../bin
- 主程序代码文件(main.cpp):
#include "gdal_priv.h"
#include <QDebug>

int main(int argc, char *argv[])
{
    GDALAllRegister();//注册驱动
    GDALDataset  *poDataset;

    //请输入你的正确的数据文件路径
    poDataset = (GDALDataset *) GDALOpen( "D:/earth/osgearth/data/boston-inset-wgs84.tif", GA_ReadOnly );
    if( poDataset == NULL )
    {
        qDebug()<<"poDataset is NULL"<<endl;
        return 0;
    }

    //获取图像宽、高、波段数
    int width = poDataset->GetRasterXSize();
    int height = poDataset->GetRasterYSize();
    int bandCount = poDataset->GetRasterCount();

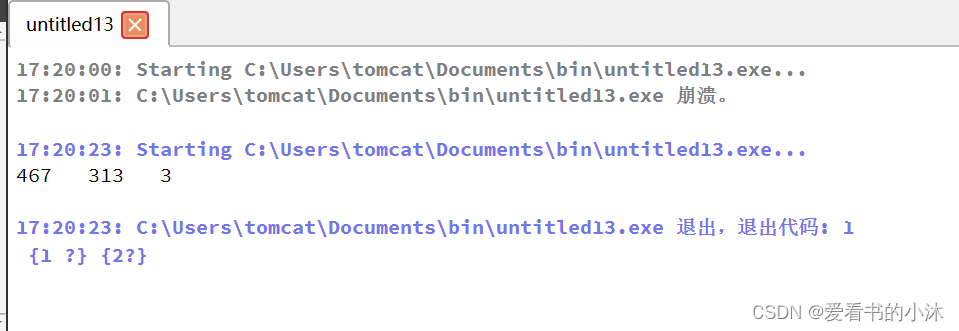
    qDebug()<<width<<" "<<height<<" "<<bandCount<<endl;

    GDALClose(poDataset);//记得关闭数据
    return 1;
}
- 运行后结果如下:
3、Python
3.1 安装
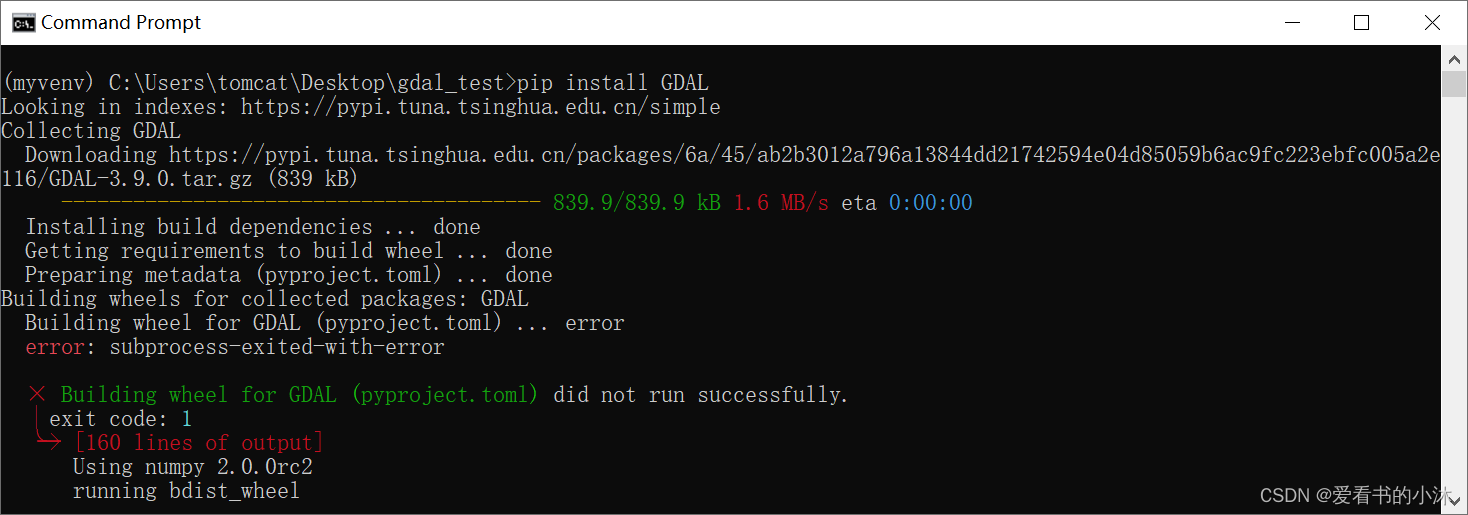
- (1)这里尝试直接安装gdal库。
pip install GDAL
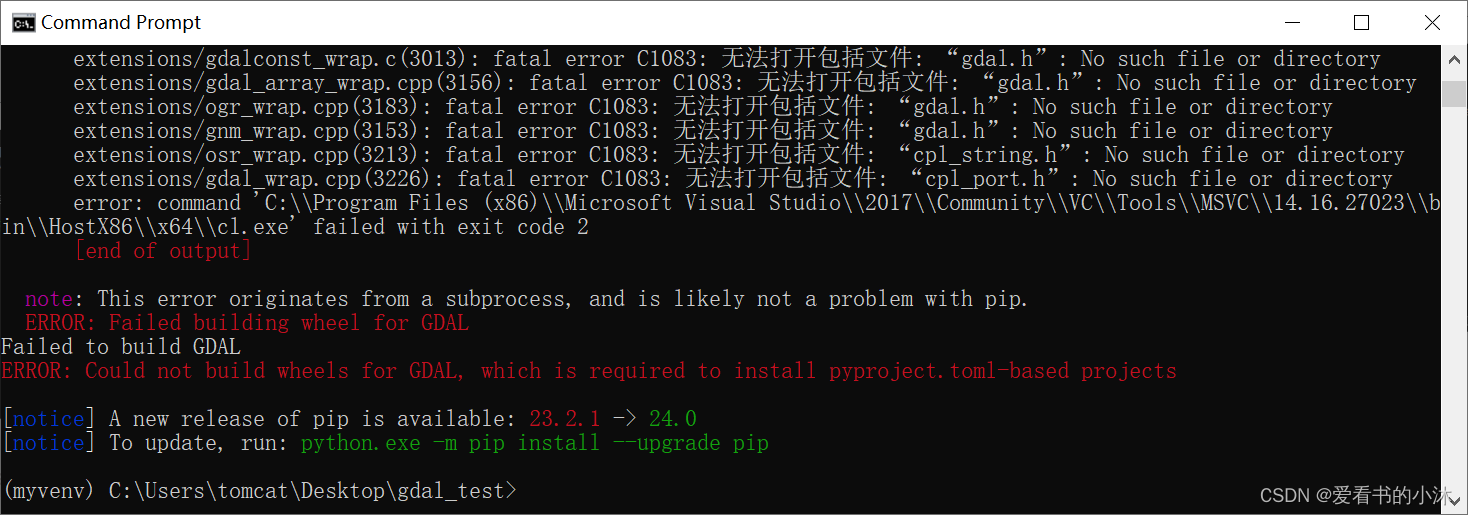
安装失败了。
- (2)使用conda安装。
conda install gdal -c conda-forge
- (3)使用第三方whl文件安装
https://github.com/cgohlke/geospatial-wheels/releases
pip install D:/test/GDAL-3.4.3-cp38-cp38-win_amd64.whl
3.2 测试
3.2.1 获取版本信息
from osgeo import gdal
ver = gdal.VersionInfo('VERSION_NUM')
print(ver)
3.2.2 读取TIFF数据
from osgeo import gdal

# 开启异常
gdal.UseExceptions()
gdal.AllRegister()

# 打开不存在的数据集
ds = gdal.Open("D:/earth/osgearth/data/boston-inset-wgs84.tif")

bands = ds.RasterCount # 获取波段数
img_width, img_height = ds.RasterXSize, ds.RasterYSize # 获取影像的宽高
geotrans = ds.GetGeoTransform() # 获取影像的投影信息
proj = ds.GetProjection() # 获取影像的投影信息

print("bands", bands)
print("width", img_width)
print("height", img_height)
print("geotrans", geotrans)
print("proj", proj)
3.2.3 获取shapefile要素
import os
from osgeo import ogr

daShapefile = r"data/100000.shp"
driver = ogr.GetDriverByName('ESRI Shapefile')
dataSource = driver.Open(daShapefile, 0) # 0 只读. 1 读写.

# 检查数据源是否有效.
if dataSource is None:
    print ('不能打开 %s' % (daShapefile))
else:
    print ('打开 %s' % (daShapefile))
    layer = dataSource.GetLayer()
    featureCount = layer.GetFeatureCount()
    print ("%s 要素个数: %d" % (os.path.basename(daShapefile),featureCount))

    for i in range(layer.GetFeatureCount()):
        feature = layer.GetFeature(i)

        # 获取field信息
        for j in range(feature.GetFieldCount()):
            field = feature.GetField(j)
            print("field", field)

        # 获取几何信息
        geometry = feature.GetGeometryRef()
        print("geometry: ", geometry)

        # 获取几何类型
        geometryType = geometry.GetGeometryName()
        print("geometryType: ", geometryType)
结语
如果您觉得该方法或代码有一点点用处,可以给作者点个赞,或打赏杯咖啡;╮( ̄▽ ̄)╭
如果您感觉方法或代码不咋地//(ㄒoㄒ)//,就在评论处留言,作者继续改进;o_O???
如果您需要相关功能的代码定制化开发,可以留言私信作者;(✿◡‿◡)
感谢各位大佬童鞋们的支持!( ´ ▽´ )ノ ( ´ ▽´)っ!!!


