目录
1.整体效果三个页面
初衷是做一个祝福生日的模板,从第一张到最后一张是三个页面点击跳转依次显示,用gif图制作一些动画效果还是挺好的很可爱,最后一张以信的形式写祝福的话语或者别的。总体都是基本的js和css3动画效果。
blessing template
2.P1时空穿梭
html代码:
 <div id="scene">
         <div class="wrap">
             <div class="wall  wall-right"></div>
             <div class="wall  wall-left"></div>
             <div class="wall  wall-top"></div>
             <div class="wall  wall-bottom"></div>
             <div class="wall  wall-back"></div>
         </div>
         <div class="wrap">
             <div class="wall  wall-right"></div>
             <div class="wall  wall-left"></div>
             <div class="wall  wall-top"></div>
             <div class="wall  wall-bottom"></div>
             <div class="wall  wall-back"></div>
        </div>
    </div>
css:
 .wall {
        background-image: url('./img/kongjian-img/xuanwo.png');
        background-size: cover;
    }

    html,
    body{
        width: 100%;
        height: 100%;
        overflow: hidden;
    }

    body{
        background: #000;
        text-align: center;
    }

    body::before{
        content: '';
        display: inline-block;
        height: 100%;
        vertical-align: middle;
    }

    #scene{
        display: inline-block;
        vertical-align: middle;
        perspective: 5px;
        perspective-origin: 50% 50%;
        position: relative;
    }

    .wrap{
      position: absolute;
      width: 1000px;
      height: 1000px;
      left: -500px;
      top:-500px;
      transform-style: preserve-3d;
      animation:  move 15s infinite linear;
    }

    .wrap:nth-child(2){
              animation:  move 15s infinite linear;
    }

    .wall{
        width: 100%;
        height: 100%;
        position: absolute;
        opacity: 0;
        animation:fade 12s infinite linear;
    }

    .wall-right{
        transform:  rotateY(90deg) translateZ(500px) ;
    }
    .wall-left{
        transform:  rotateY(-90deg) translateZ(500px);
    }
    .wall-top{
        transform:  rotateX(90deg) translateZ(500px) ;
    }
    .wall-bottom{
        transform:  rotateX(-90deg) translateZ(500px) ;
    }
    .wall-back{
        transform:  rotateX(180deg) translateZ(500px) ;
    }

    @keyframes move{
        from{
            transform:  translateZ(-500px) rotate(0deg);
        }
        to{
            transform:  translateZ(500px) rotate(0deg);
        }
    }

    @keyframes fade{
        from{
            opacity: 0;
        }
        25%{
            opacity: 1;
        }
        75%{
            opacity: 1;
        }
        to{
            opacity: 0;
        }
    }
3.P2主页
页面总体布局左边随便一张自己觉得好看的图片,上面是一个css3魔方,中间普通的js轮播图,下面一个会跑的gif图,右边也是很普通的css做的下落的星星
魔方:
开启绝对定位将图片重叠一起,通过旋转平移将图片分到魔方的六个面,再通过动画属性旋转起来一圈。
css
body{
    perspective:800px;
   }

    .outer{
        width: 160px;
        height:160px;
        margin:0 auto;
        margin-top: 80px;
        transform-style:preserve-3d;
        animation: identifier infinite 8s linear;

    }

    .outer div{
        position: absolute;

    }

    .outer  img {
       width: 160px;
       height: 160px;
       opacity: .8;
       vertical-align: top;

    }

    .box1{
        transform: rotateY(90deg) translateZ(80px)
    }

    .box2{
        transform: rotateY(-90deg) translateZ(80px)
    }

    .box3{
        transform: rotateX(-90deg) translateZ(80px)
    }

    .box4{
        transform: rotateX(90deg) translateZ(80px)
    }

    .box5{
        transform:rotateX(180deg) translateZ(80px)
    }

    .box6{
        transform: rotateX(0deg) translateZ(80px)
    }

    @keyframes identifier {
        from{
            transform: rotateX(0) rotateZ(0);
        }
        to{
            transform: rotateX(1turn) rotateZ(1turn);
        }
    }
轮播图:
通过设置left值移动,鼠标移入暂停定时器,移开开启定时器。底下会跑的gif图也是同样的道理。
JS:
 var list=document.getElementById('list')
        let left = 0;
        let timer;
        startMove();

        function startMove() {
            // clearInterval(timer);
            timer = setInterval(function () {

                left -= 4;
                if (left <= -2640) {
                    left = 0;
                }
                list.style.left = left +'px';
            }, 20);
        }


        function stopMove() {
            clearInterval(timer);
        }

        banner.onmouseenter = function () {
            stopMove();
        };

        banner.onmouseleave = function () {
            startMove();
        };
坠落星星:
这里也是用css3动画实现,我的其实方法挺笨的但也很简单,用图标字体做好星星样式后,分别为他们设置动画速度,将他们颜色设置为和整体背景同样的白色,这样加载页面后虽然看不见但其实星星是在动的,点击按钮背景变黑,同时星星颜色变为黄色,这样就有一种视觉上的反差感。
css部分:
#star1{
    animation:starMove linear 3s infinite;
}
#star2{
    animation:starMove linear 2s infinite;
}
#star3{
    animation:starMove linear 3.5s infinite;
}
#star4{
    animation:starMove linear 3.2s infinite;
}
#star5{
    animation:starMove linear 2.2s infinite;
}
#star6{
    animation:starMove linear 2.5s infinite;
}
#star7{
    animation:starMove linear 2.7s infinite;
}
#star8{
    animation:starMove linear 3s infinite;
}

@keyframes starMove{
    from{
        transform: rotateY(0deg) translateY(0);
    }

    to{
        transform: rotateY(360deg) translateY(600px);
    }
}
JS:
 let starList=document.getElementById('starList')
      let btn1=document.getElementById('btn1')
      let html = document.documentElement;

      btn1.onclick=()=>{
        starList.style.color='yellow';
        html.style.background='black';

      }
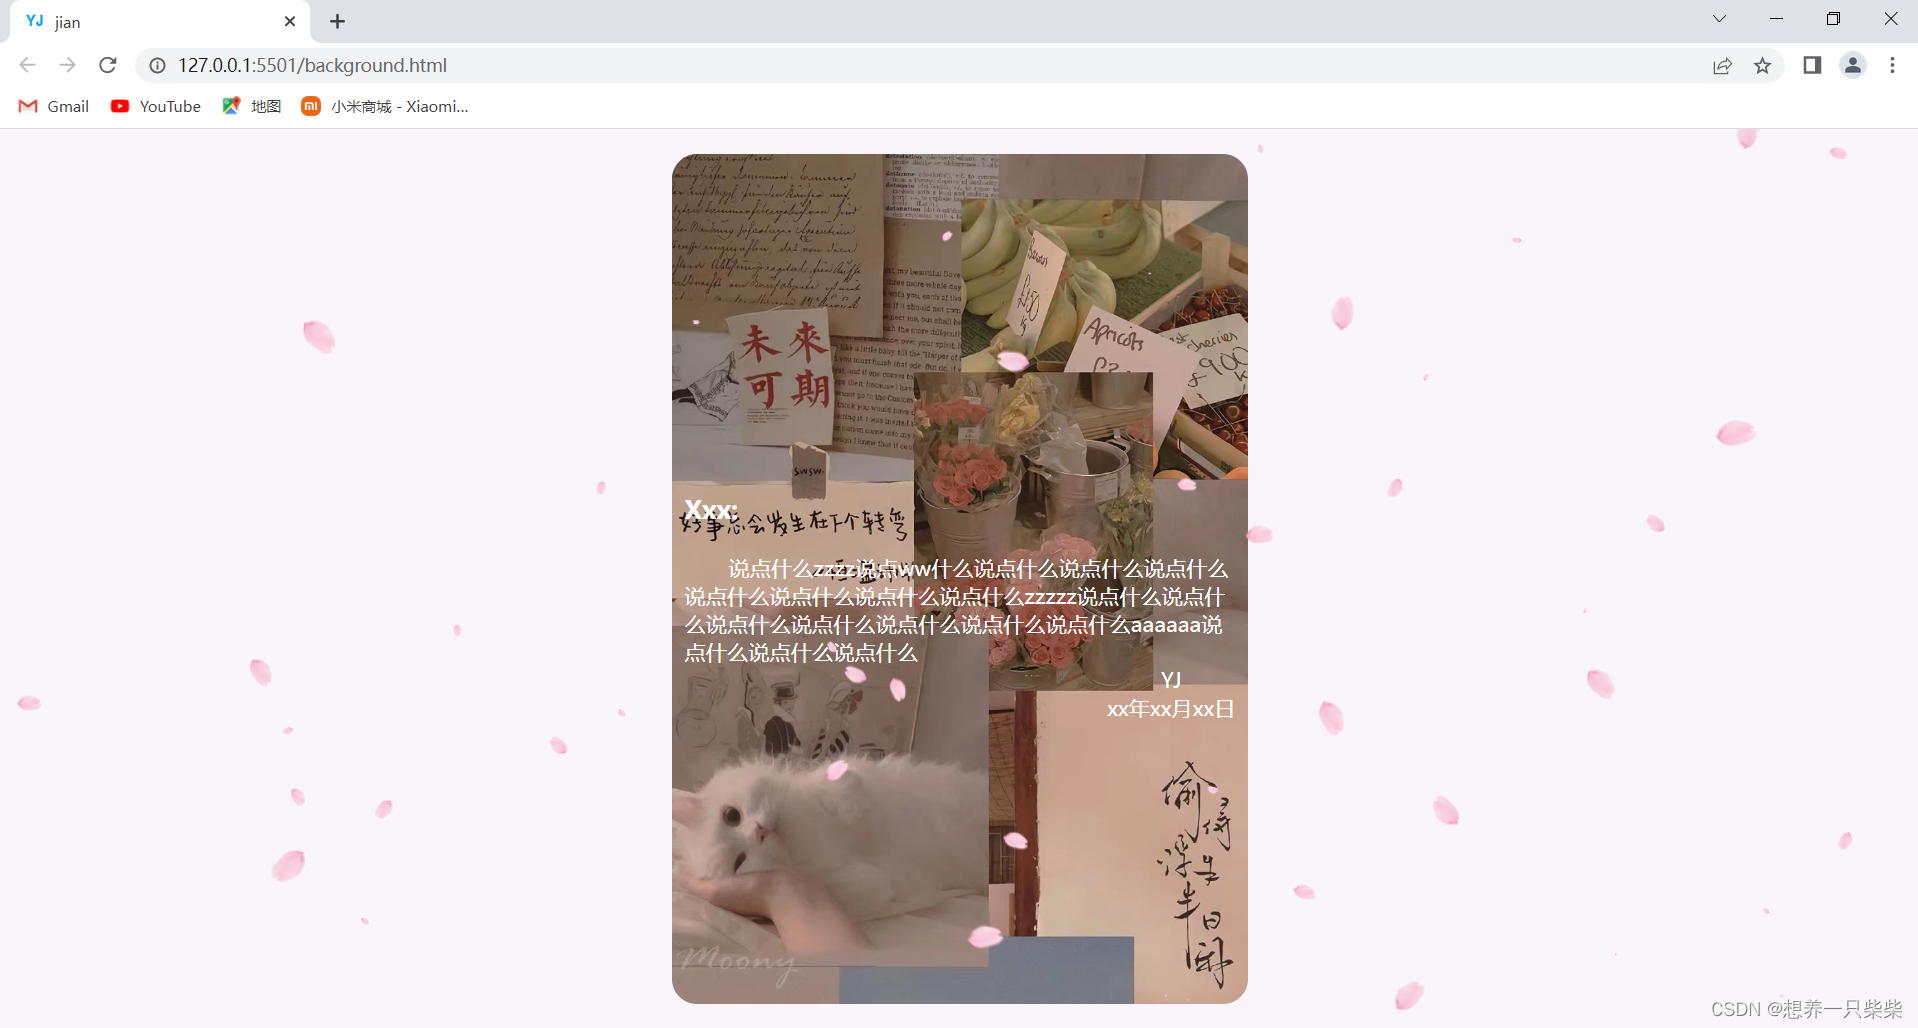
4.P3樱花
这里的樱花是出自多年前的一位不知名大佬,需要的可以从网址直接拿取原JS代码,如果想让樱花特效盖住页面其他元素,直接从z-index修改层级即可。https://blog-static.cnblogs.com/files/izbw/yinghua.js
写信格式html:
<div class="xinfeng">
<div class="inner">
<h3>
Xxx:
</h3>
<br>
<span>
       说点什么zzzz说点ww什么说点什么说点什么说点什么说点什么说点什么说点什么说点什么zzzzz说点什么说点什么说点什么说点什么说点什么说点什么说点什么aaaaaa说点什么说点什么说点什么
</span>
<div class="name">
<p>
YJ
<br>
xx年xx月xx日
</p>
</div>
</div>
</div>css:
 *{
           margin: 0;
           padding: 0;
       }

       body{
           background-color:rgb(250, 244, 251);
       }

        .xinfeng{
           width: 30%;
           height: 680px;
           margin:20px auto;
           background-image: url('./img/p3/1.jpg');
           background-size: cover;
           border-radius: 20px;
           color: white;
           font-size: 17px;
           display: flex;
       }

       .inner{
           position: relative;
           margin: auto 10px;

       }

       .name p{
           position: absolute;
           text-align: center;
           right: 0;
       }

