下载安装:
https://packages.gitlab.com/gitlab/gitlab-ce

ce表示开源

el表示centos   选64位

el7对应CentOS 7
安装GitLab
创建存放gitlab安装包的目录,并将下载好的gitlab安装包放进去
mkdir /home/soft/gitlab_soft
安装PRM包
rpm -ivh gitlab-ce-15.0.5-ce.0.el7.x86_64.rpm
安装成功后显示
Thank you for installing GitLab!
GitLab was unable to detect a valid hostname for your instance.
Please configure a URL for your GitLab instance by setting `external_url`
configuration in /etc/gitlab/gitlab.rb file.
Then, you can start your GitLab instance by running the following command:
  sudo gitlab-ctl reconfigure

For a comprehensive list of configuration options please see the Omnibus GitLab readme
https://gitlab.com/gitlab-org/omnibus-gitlab/blob/master/README.md

Help us improve the installation experience, let us know how we did with a 1 minute survey:
https://gitlab.fra1.qualtrics.com/jfe/form/SV_6kVqZANThUQ1bZb?installation=omnibus&release=15-0
打开配置文件
vim /etc/gitalb/gitlab.rb
external_url 'http://instance-0ndv0diu'  -- 原来的
external_url 'http://你的IP'  --修改后

备注: 此配置在文件最前边的几行,不需要往后翻很多,要留意
然后执行 生效配置代码
gitlab-ctl reconfigure
提示以下信息就说明安装成功了
Running handlers:
There was an error running gitlab-ctl reconfigure:

Cannot set unsupported config value eternal_url.

Running handlers complete
Cinc Client failed. 0 resources updated in 06 seconds
查看服务状态
gitlab-ctl status
会看到如下信息(看到下面就说明彻底安装成功了)
Running handlers:
Running handlers complete
Cinc Client finished, 608/1619 resources updated in 07 minutes 14 seconds

Notes:
Default admin account has been configured with following details:
Username: root
Password: You didn't opt-in to print initial root password to STDOUT.
Password stored to /etc/gitlab/initial_root_password. This file will be cleaned up in first reconfigure run after 24 hours.

NOTE: Because these credentials might be present in your log files in plain text, it is highly recommended to reset the passcurity/reset_user_password.html#reset-your-root-password.

gitlab Reconfigured!
[root@localhost opt]# gitlab-ctl status
run: alertmanager: (pid 13062) 27s; run: log: (pid 12551) 136s
run: gitaly: (pid 13042) 28s; run: log: (pid 11793) 399s
run: gitlab-exporter: (pid 13013) 29s; run: log: (pid 12444) 212s
run: gitlab-kas: (pid 12967) 30s; run: log: (pid 12114) 379s
run: gitlab-workhorse: (pid 12987) 30s; run: log: (pid 12280) 255s
run: grafana: (pid 13161) 26s; run: log: (pid 12924) 42s
run: logrotate: (pid 11683) 412s; run: log: (pid 11712) 409s
run: nginx: (pid 12335) 252s; run: log: (pid 12358) 249s
run: node-exporter: (pid 12998) 30s; run: log: (pid 12410) 240s
run: postgres-exporter: (pid 13153) 26s; run: log: (pid 12606) 121s
run: postgresql: (pid 11936) 389s; run: log: (pid 11957) 386s
run: prometheus: (pid 13024) 28s; run: log: (pid 12504) 178s
run: puma: (pid 12190) 270s; run: log: (pid 12201) 267s
run: redis: (pid 11724) 406s; run: log: (pid 11732) 405s
run: redis-exporter: (pid 13015) 29s; run: log: (pid 12469) 192s
run: sidekiq: (pid 12219) 264s; run: log: (pid 12234) 263s
(1小结内容来源于https://blog.csdn.net/fhj_fhj/article/details/129277740)
gitLab初始密码查看
gitlab 安装初始化后,默认账户名是root,密码存放在配置文件
查看初始化密码命令:
cat /etc/gitlab/initial_root_password
[root@lv conf]# cat /etc/gitlab/initial_root_password
# WARNING: This value is valid only in the following conditions
#          1. If provided manually (either via `GITLAB_ROOT_PASSWORD` environment variable or via `gitlab_rails['initial_root_password']` setting in `gitlab.rb`, it was provided before database was seeded for the first time (usually, the first reconfigure run).
#          2. Password hasn't been changed manually, either via UI or via command line.
#
#          If the password shown here doesn't work, you must reset the admin password following https://docs.gitlab.com/ee/security/reset_user_password.html#reset-your-root-password.

Password: GDQoVST7jMd8IlvJ+zIX+r0YGQWHUoPMe96sxsCDOWA=

# NOTE: This file will be automatically deleted in the first reconfigure run after 24 hours.
######密码存放在初始化文件里面,但是只存放24小时,登录gitlab要及时更改密码 ,默认用户是root
这个文件将在首次执行reconfigure后24小时自动删除。----切记
更改GitLab服务端口,防止被攻击
首先,进入GitLab服务器的控制台,执行以下命令:
sudo vim /etc/gitlab/gitlab.rb
编辑器会打开GitLab的配置文件,找到以下行:
external_url 'http://example.com'
将其修改为(这里我设置的8081端口):
external_url 'http://服务器ip:8081'
保存修改,然后执行以下命令使配置文件生效:
sudo gitlab-ctl reconfigure
GitLab将重新加载配置文件并启动服务。
启动防火墙并开放指定的http端口
查看防火墙状态
systemctl status firewalld
永久开启防火墙(启用开机自启)
systemctl enable firewalld
开放指定端口(需要重新加载生效 )
firewall-cmd --zone=public --add-port=8081/tcp -- permanent
立即生效(重新加载)
firewall-cmd --reload
查看开放端口
firewall-cmd --zone=public --list-ports
访问GitLab并更改原始密码
现在,你可以通过访问http://配置的服务器地址:8081来访问GitLab了
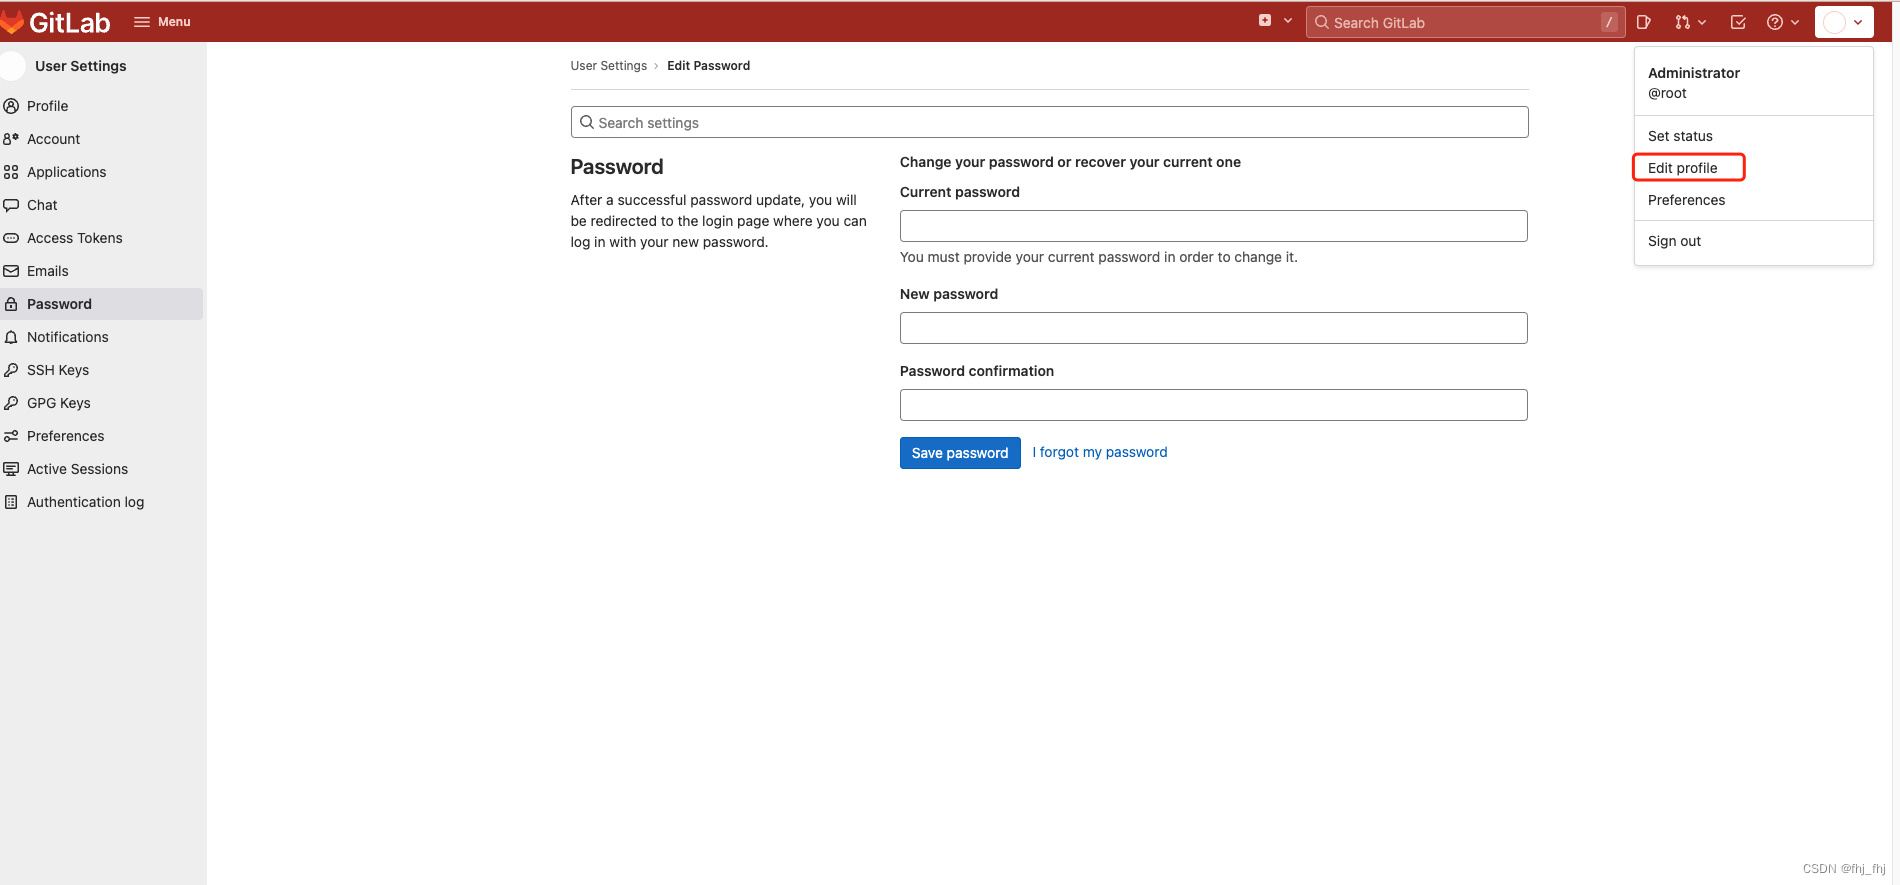
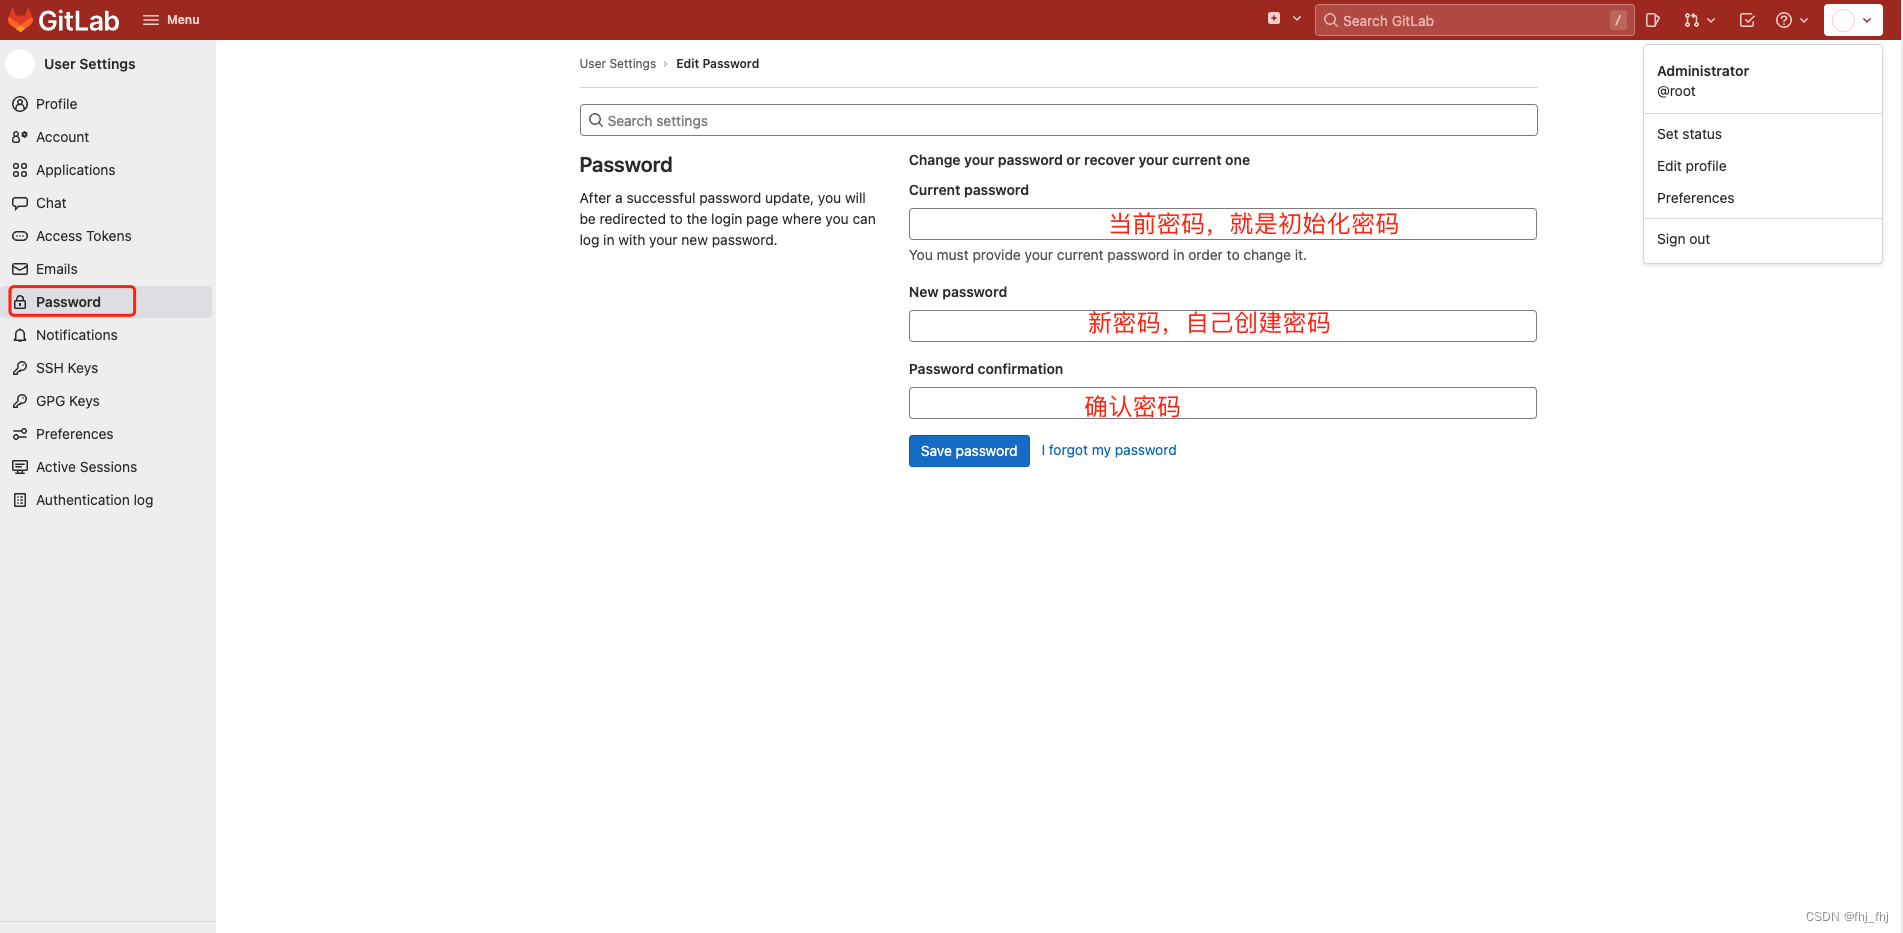
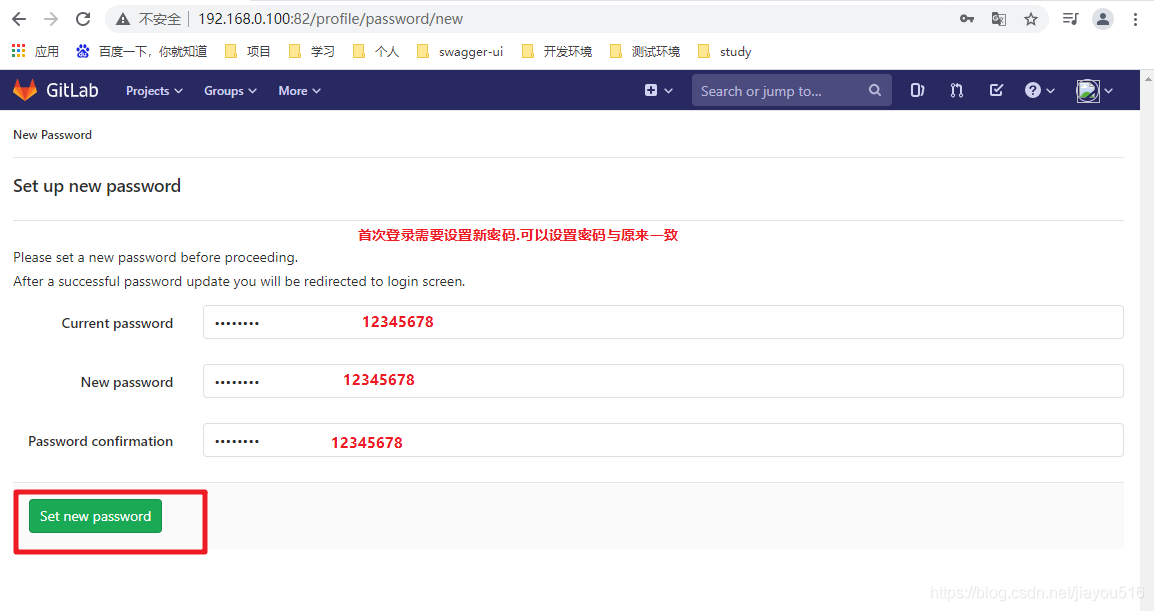
更改密码:
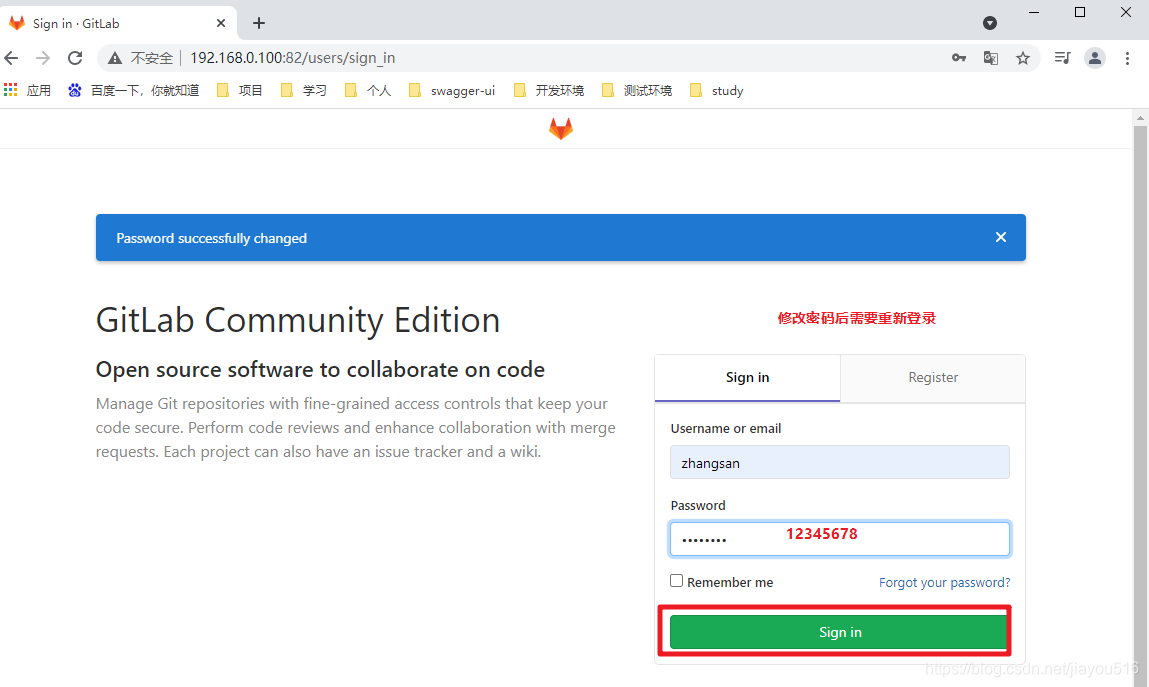
更改完重新登陆就可以了!
忘记GitLab密码后进行密码重置
添加密码重置这一步, 是因为我更改密码的时候,好像是其中一个字母两遍都输错了, 结果我输入正确的时候, 却不是我设置的密码, (这就很尴尬), 导致需要重置密码
还有是如果gitLab服务器密码忘记了,很多人实在想不起来,干脆就卸载重新安装;当然此方法可行,但是如果GitLab上存放了项目源码及很多配置文件时,那么就需要重置管理员密码
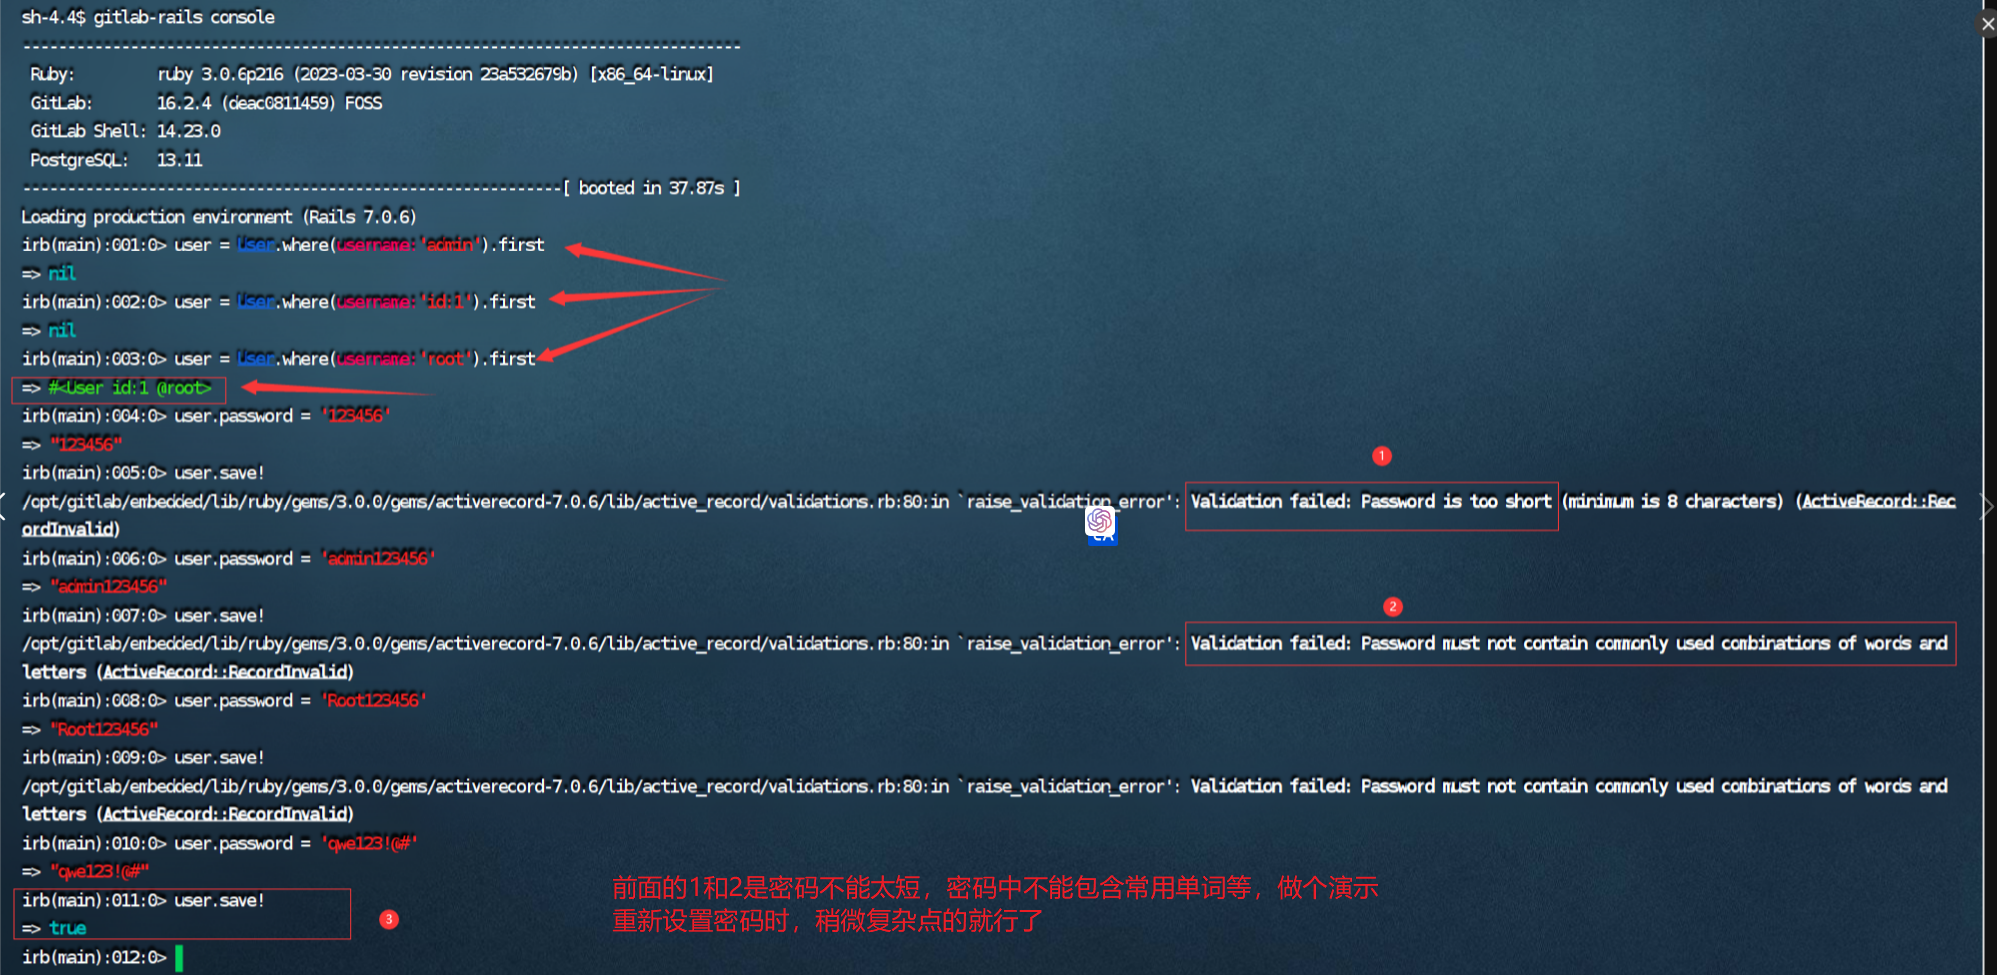
重置管理员密码代码如下:
su git                                        #切换成git用户
gitlab-rails console                          #打开gitlab的 Rails控制台
user = User.where(username:'admin').first     #查找名为admin的用,查询为nil(空),接着查询
user = User.where(username:'id:1').first      #查询id为1的用户
user = User.where(username:'root').first      #查询用户名为 root的用户
user.password = '新密码'                       #设置新密码
user.save!                                    #保存密码
ctrl + d 保存密码并退出                         #退出控制台
注意: 重置密码会出现,密码不能太短,密码中不能包含常用单词等,设置密码时,稍微复杂点的就行了
最后记得重启一下gitLab再重新登录。
gitlab-ctl restart
上述密令查询到的管理员用户是root 并非admin
(6小结内容来源于https://blog.csdn.net/qq_42211536/article/details/133901386)
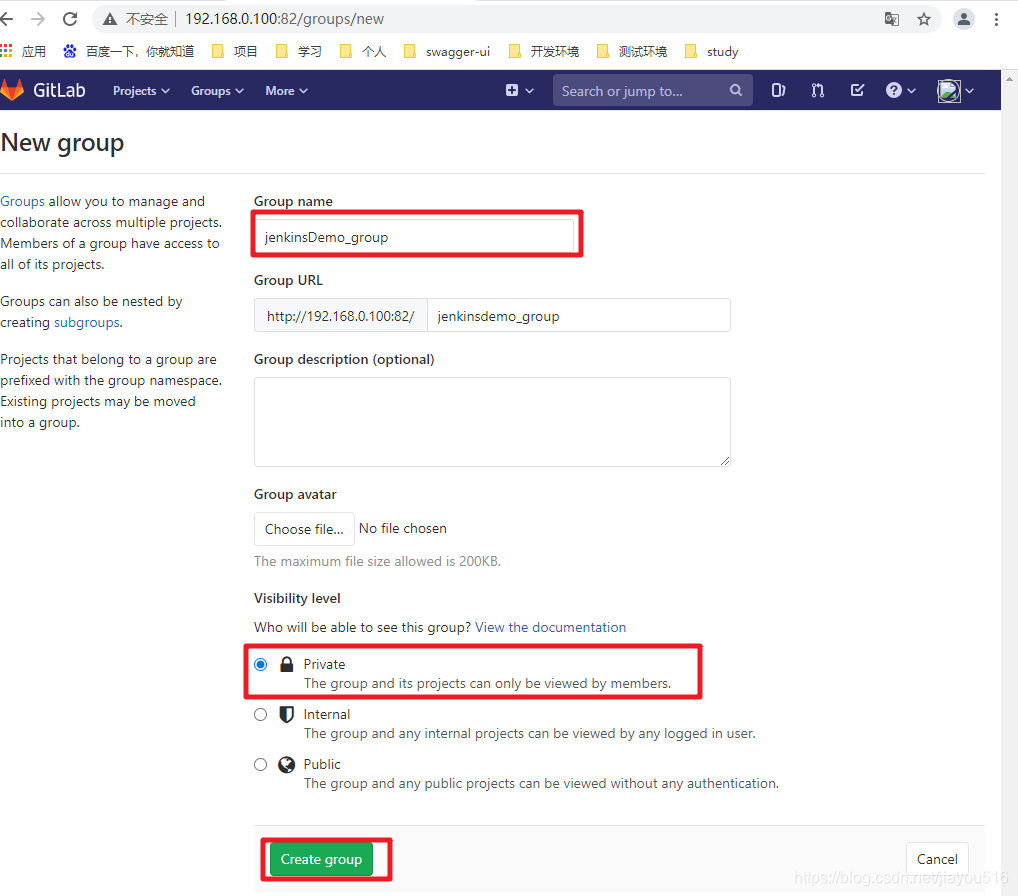
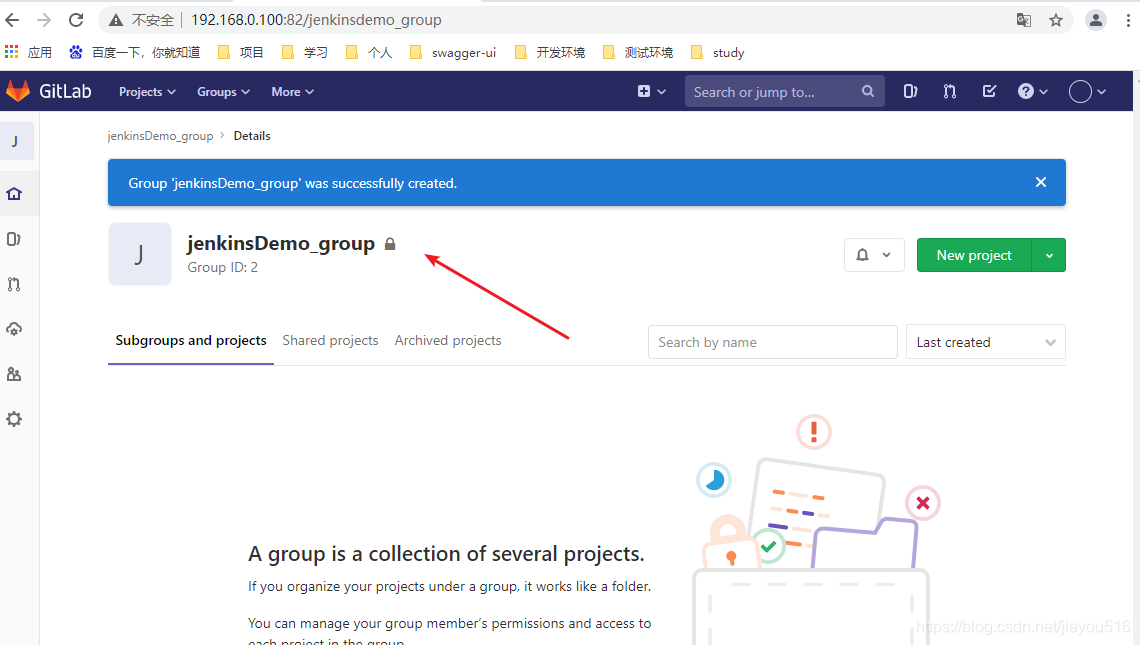
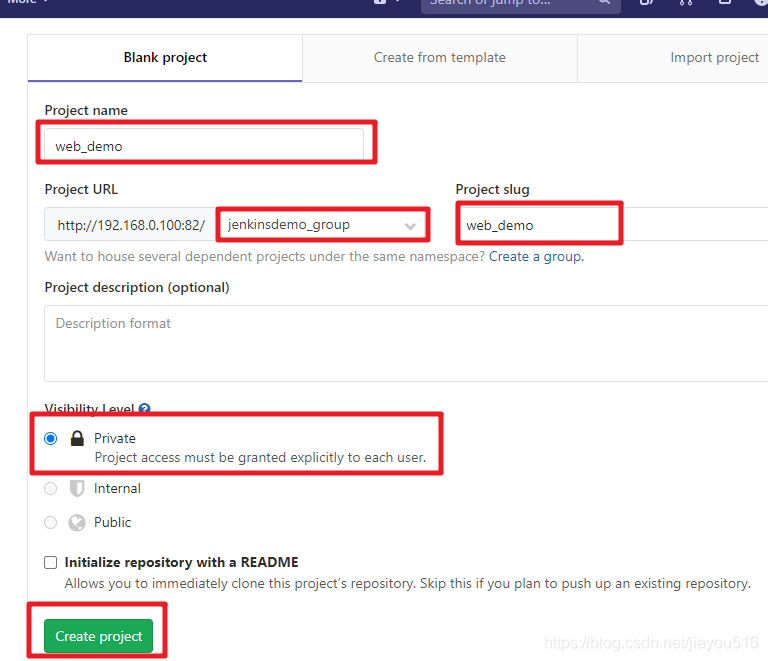
GitLab添加组, 并在组中创建项目
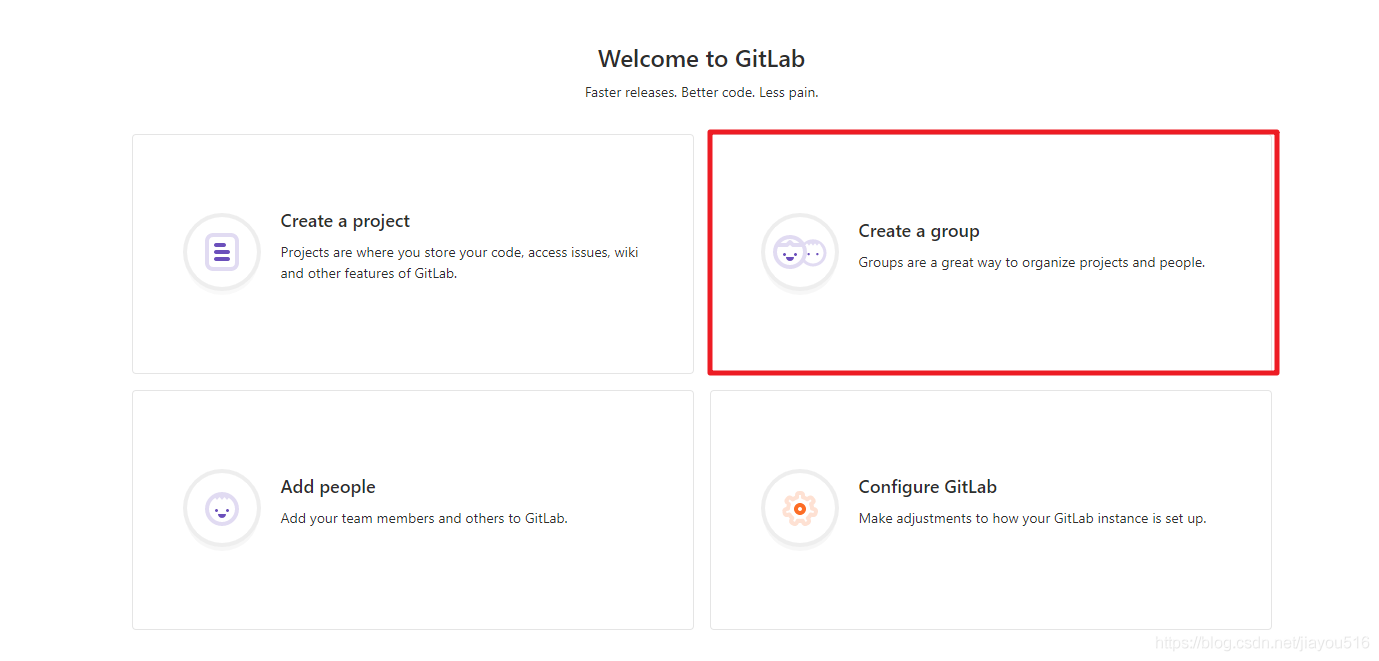
1)创建组
使用管理员 root 创建组,一个组里面可以有多个项目分支,可以将开发添加到组里面进行设置权限,不同的组就是公司不同的开发项目或者服务模块,不同的组添加不同的开发即可实现对开发设置权限的管理
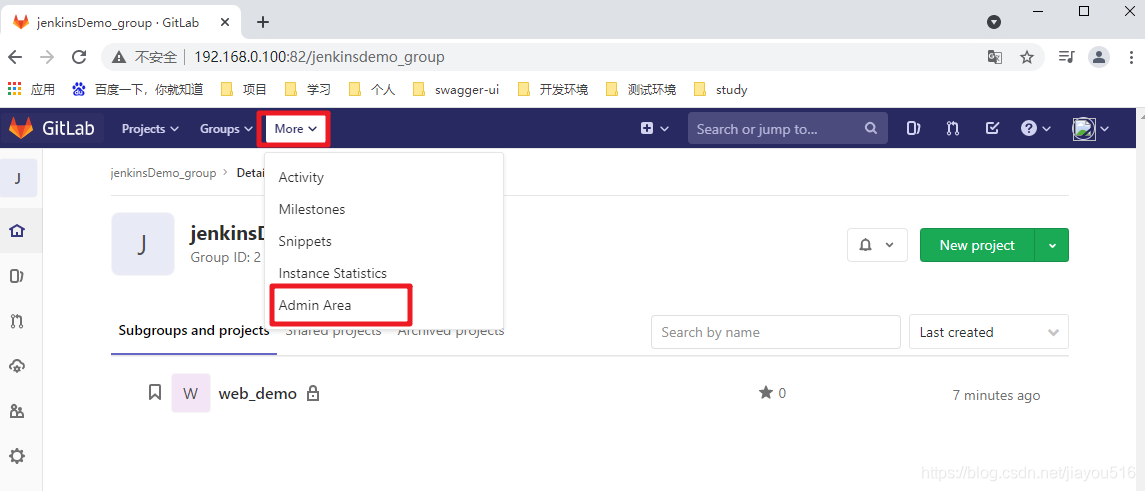
2)在组中创建项目
以刚才创建的新用户身份登录到Gitlab,然后在用户组中创建新的项目
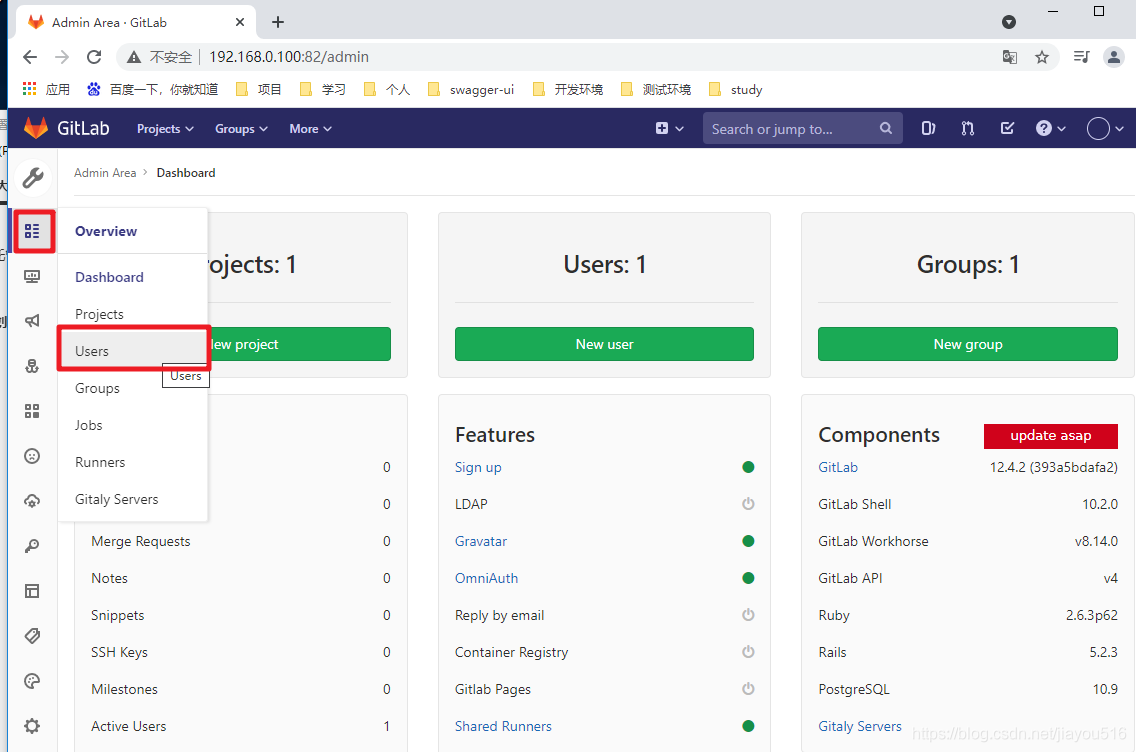
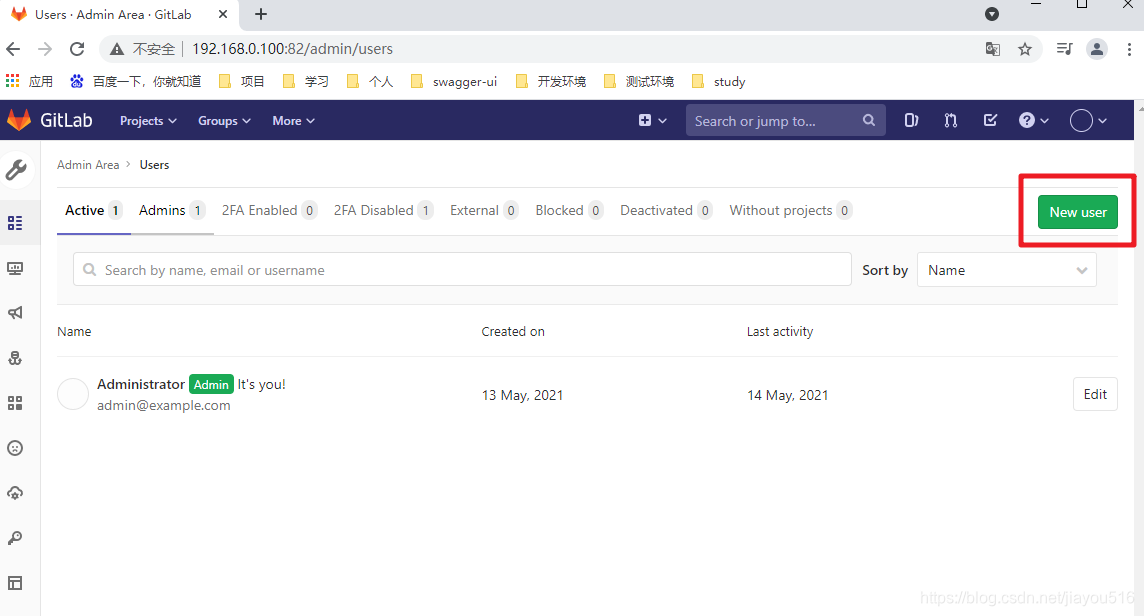
GitLab创建用户,并将用户添加到组中
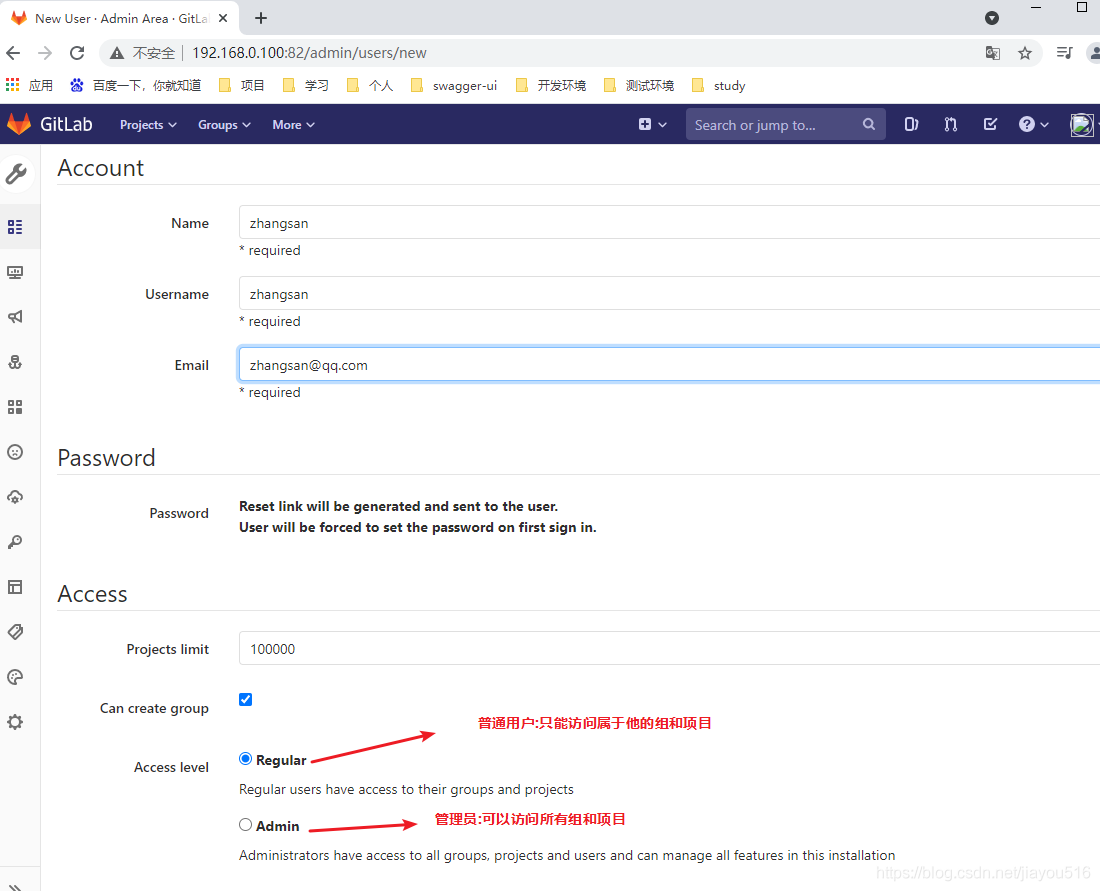
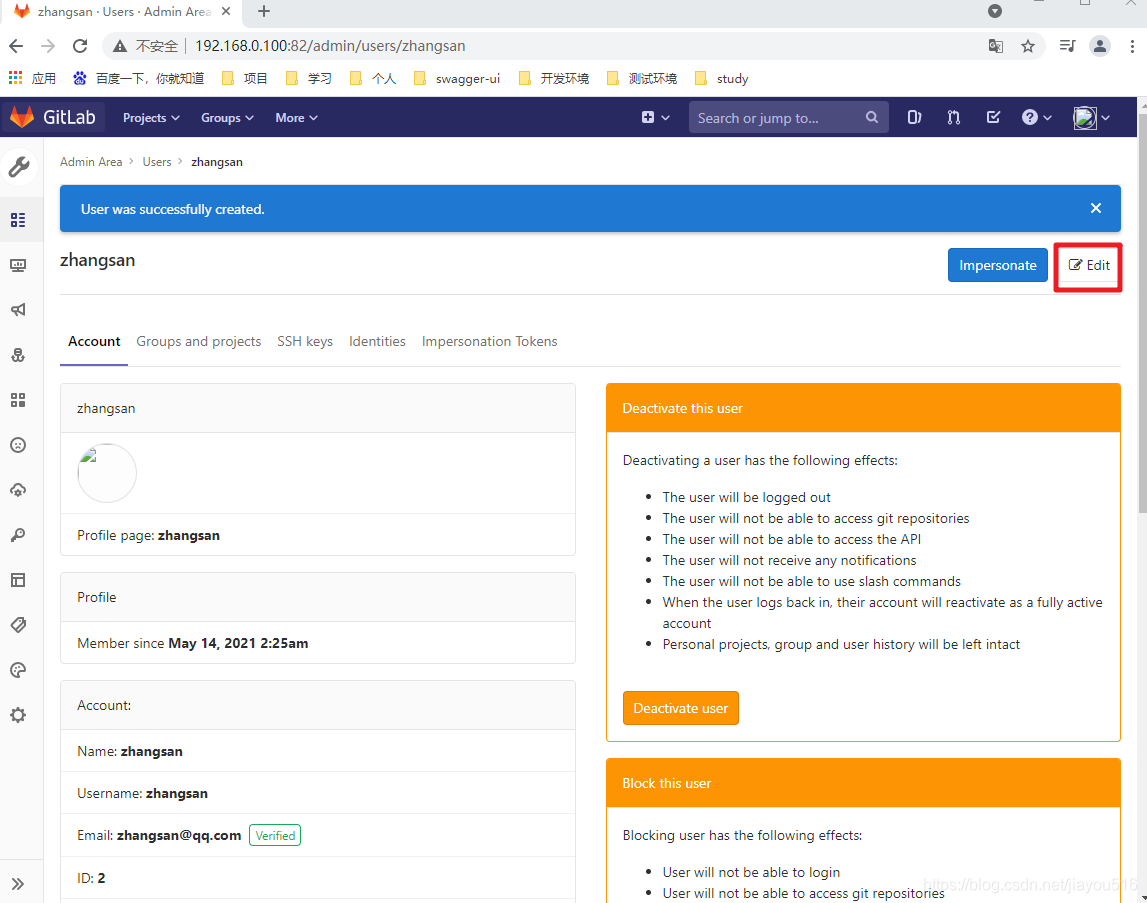
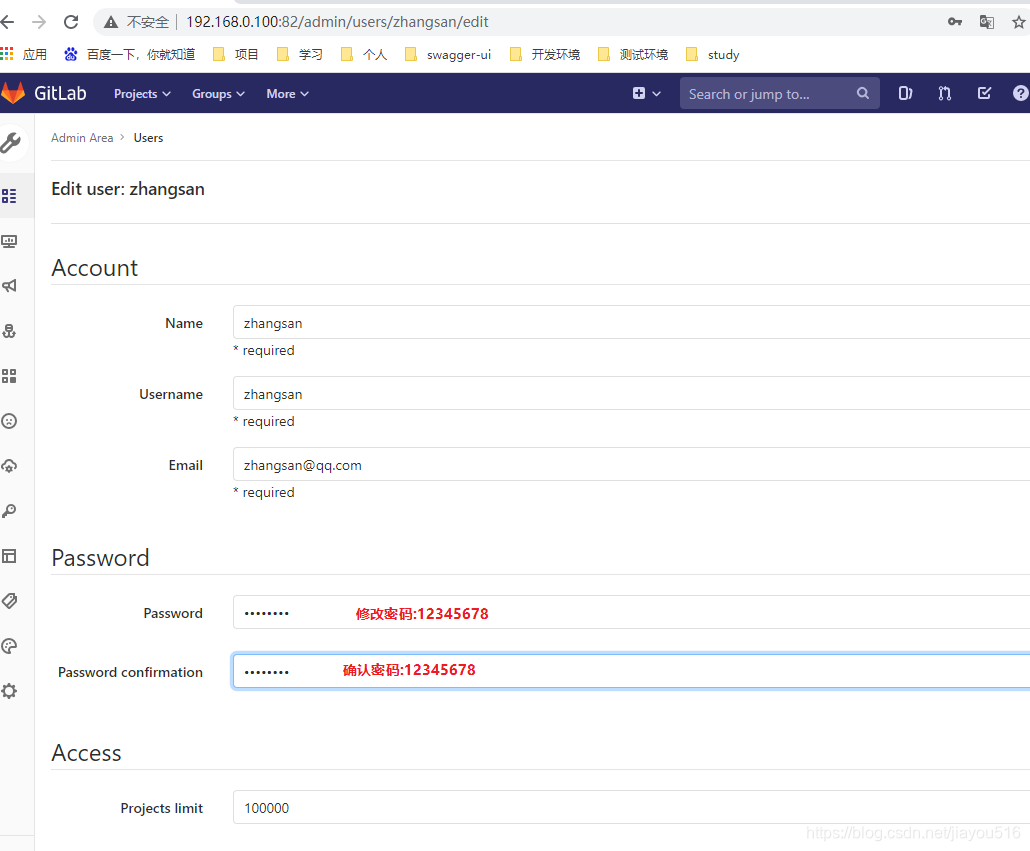
3)创建用户
备注: 创建用户的时候,可以选择Regular或Admin类型。
创建完用户后,立即修改密码
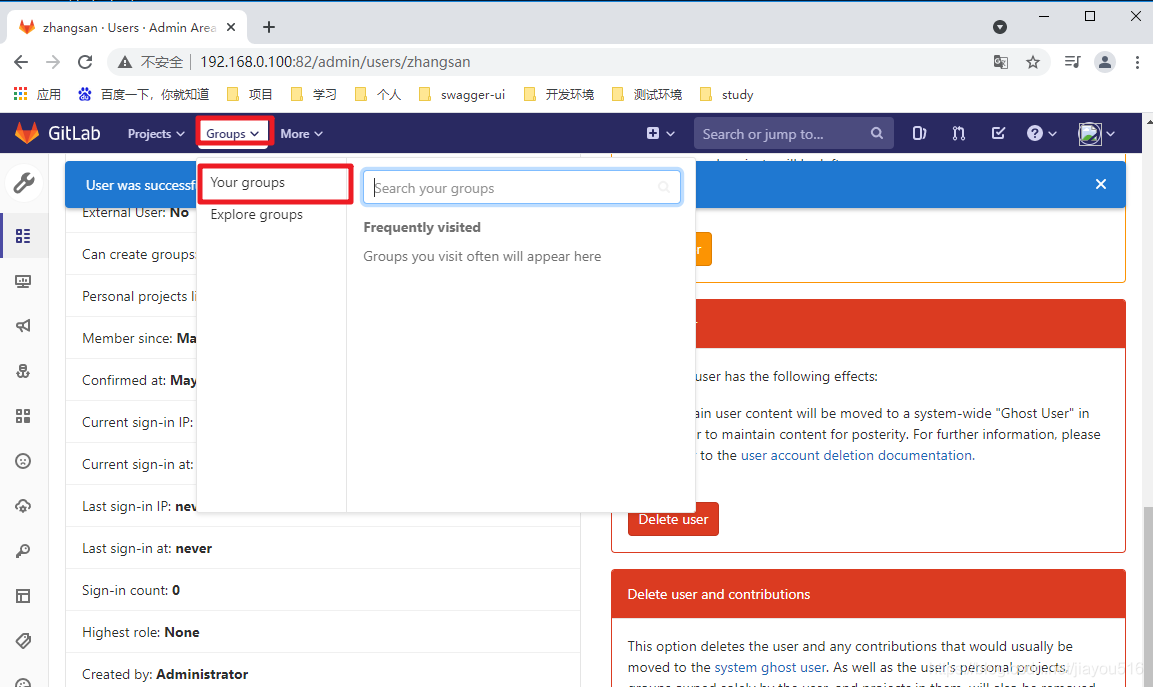
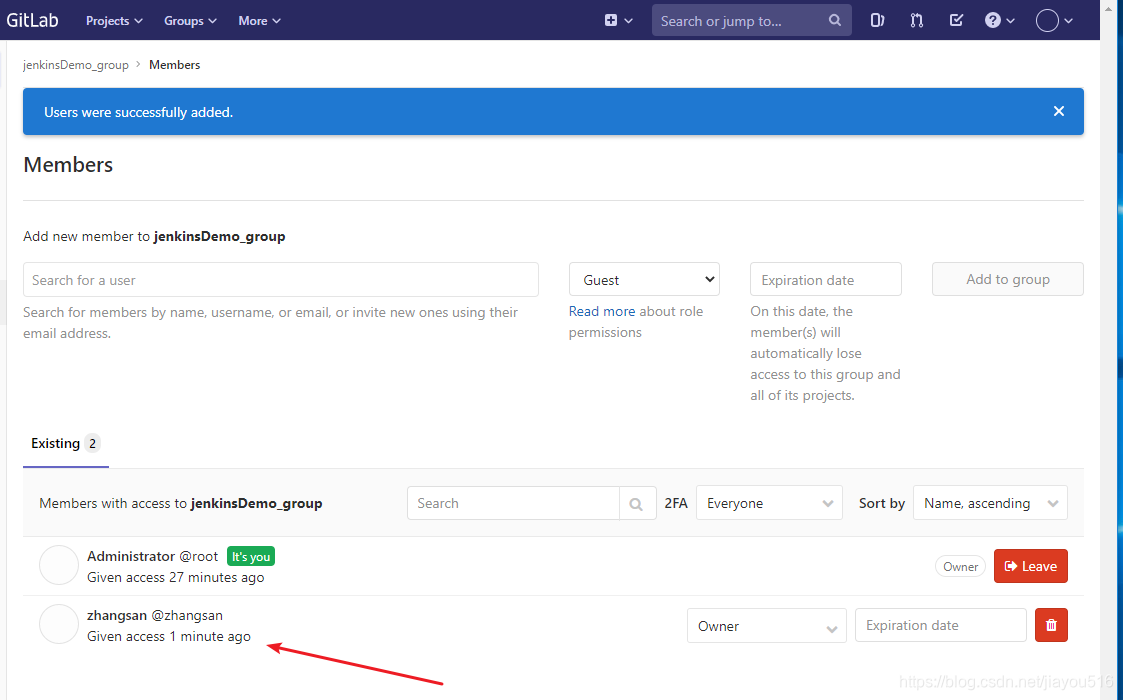
4)将用户添加到组中
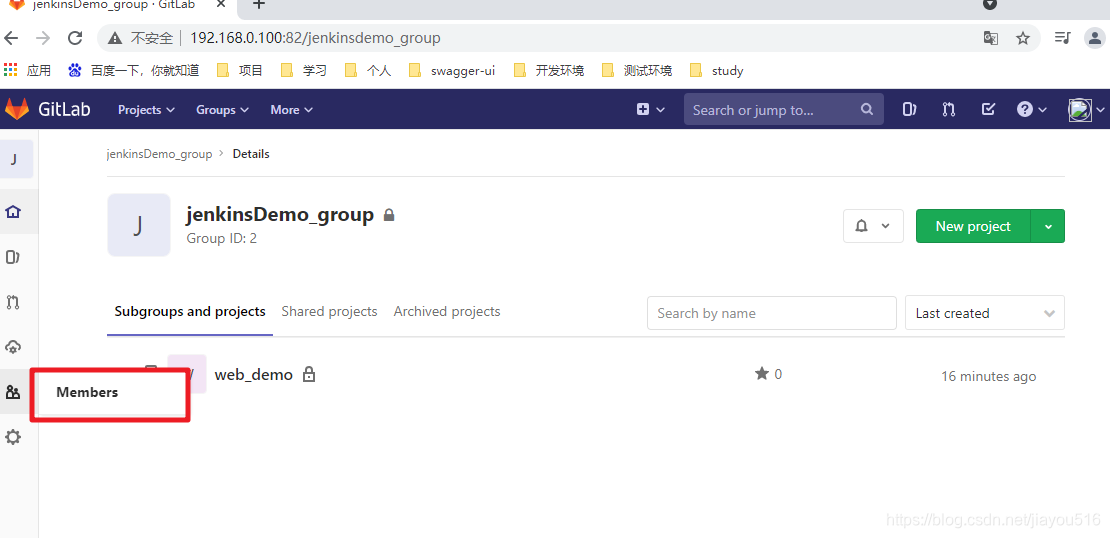
选择某个用户组,进行Members管理组的成员
Gitlab用户在组里面有5种不同权限:
Guest:可以创建issue、发表评论,不能读写版本库 Reporter:可以克隆代码,不能提交,QA、PM
可以赋予这个权限 Developer:可以克隆代码、开发、提交、push,普通开发可以赋予这个权限
Maintainer:可以创建项目、添加tag、保护分支、添加项目成员、编辑项目,核心开发可以赋予这个
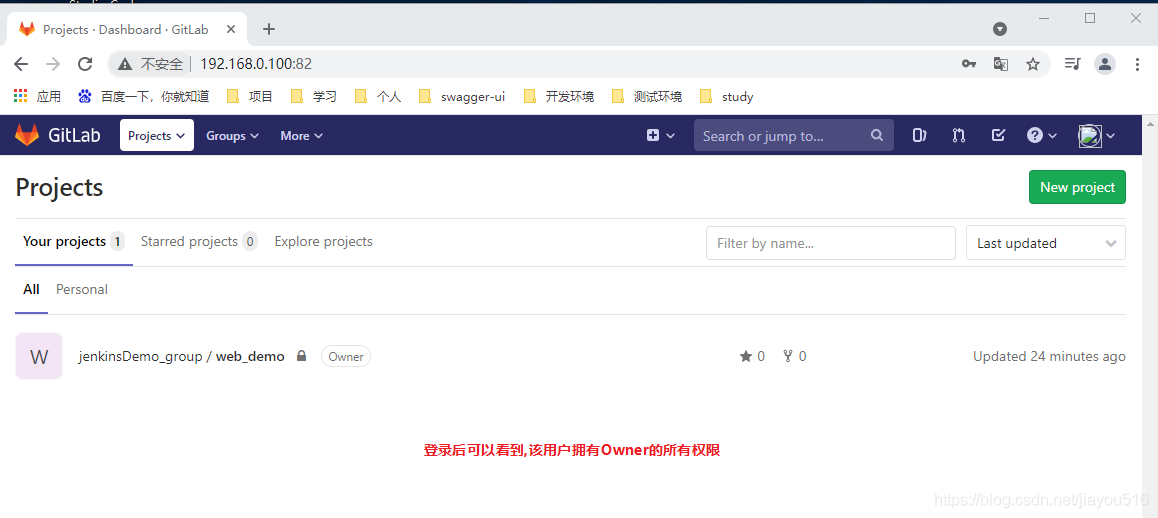
权限 Owner:可以设置项目访问权限 - Visibility Level、删除项目、迁移项目、管理组成员,开发组组长可以赋予这个权限
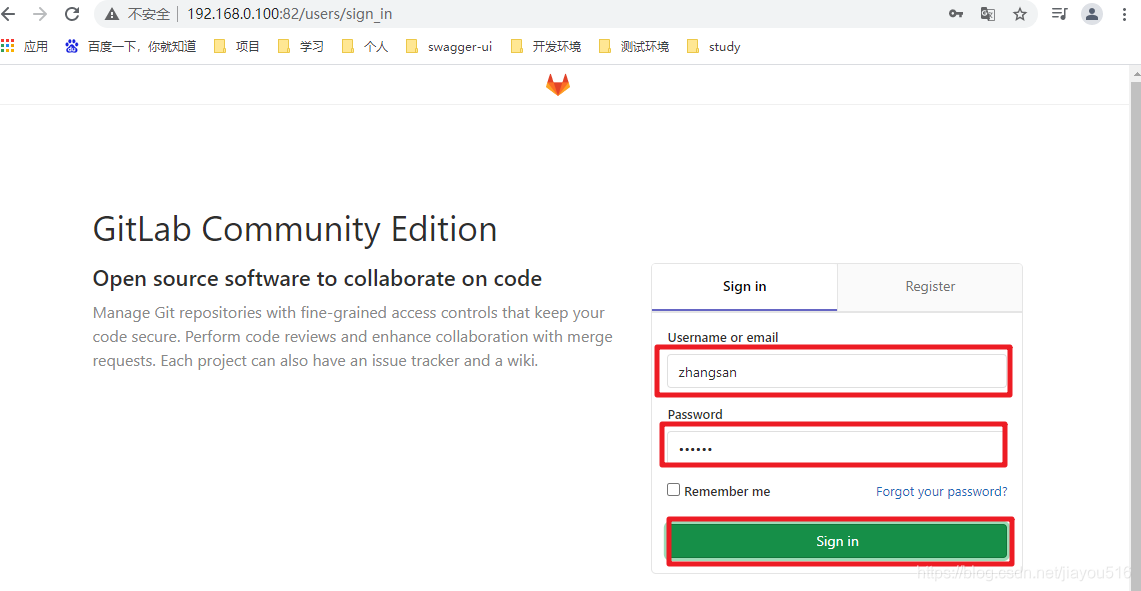
5)退出当前用户,登陆新的用户
(7/8小结内容来源于https://www.xjx100.cn/news/405294.html?action=onClick)
