1 labelme的安装
工作环境:
- ubuntu16 + anconda
安装命令:
- 安装不同的工程python相关库,建议创建不同的虚拟环境,然后进行安装(当然直接安装在base环境下,也可正常运行)。
- 选择使用清华镜像源,安装速度会加快。
conda create -n labelme python=3.6
source activate labelme
pip install -i https://pypi.tuna.tsinghua.edu.cn/simple pyqt5
pip install -i https://pypi.tuna.tsinghua.edu.cn/simple labelme
2 启动labelme
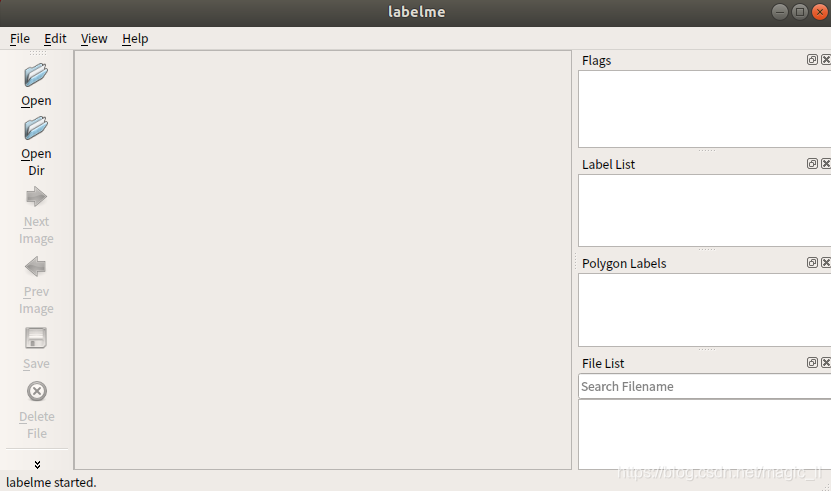
在刚才的终端运行:
labelme,即可打开主界面
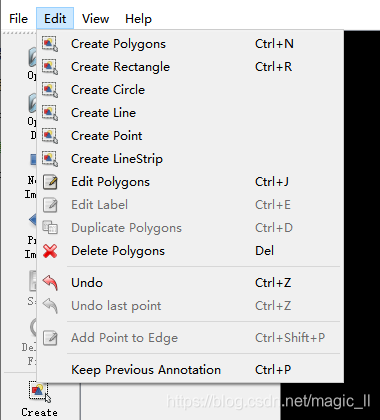
在界面的上端的【Edit】下,可以选择不同的标记方案:
3 语义分割的标注
1 点击左侧的 【Open Dir】选择路径
2 选择 【Create Polygons】
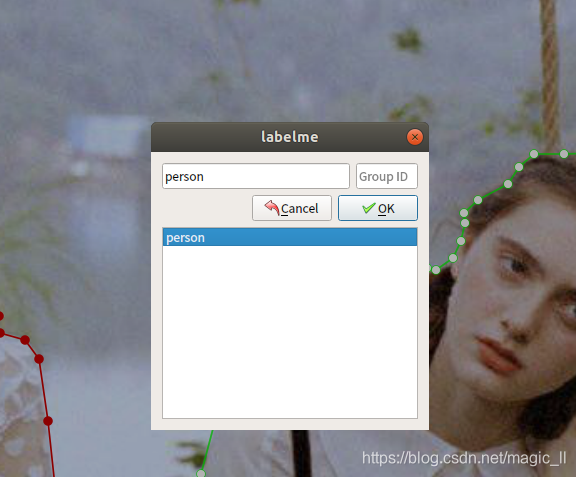
3 对图片的标注区域进行勾选,当最后一个点与第一个点相连,构成了一个闭合的区域,然后就会弹出窗口进行配置标签
4 如果需要修改标签,点击左侧的【Edit Polygons】;然后将鼠标移至需要修改的位置,即可推动标注点,右击即可修改标签类别。
5 将保存的 json文件,转化成掩码图片:在终端中输入
labelme_json_to_dataset ***.json
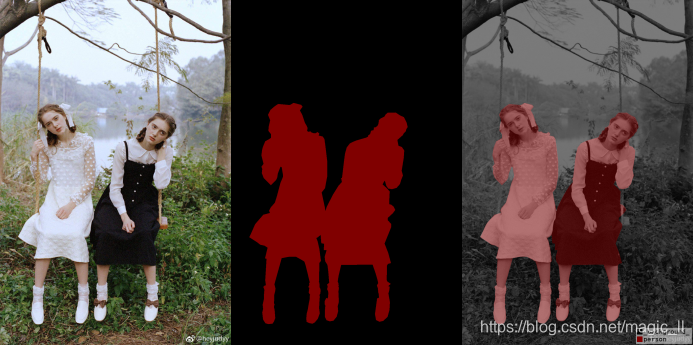
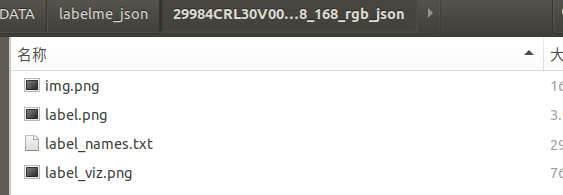
结果如下,图片以此为:原图、制作的标签、原图+标签的显示效果图。
其中需要注意的是制作标签的png图片是单通道的,与PASCSL 数据集提供的标签格式相同。
6 批量转换 json 文件:
编辑一个json2png.sh脚本,内容如下:
let i=1
path=./
cd ${path}
for file in *json
do
    labelme_json_to_dataset ${file}
    let i=i+1
done
将该脚本放入与 json 文件同级的目录下,然后执行 如下命令
chmod +x json2png.sh
./json2png.sh
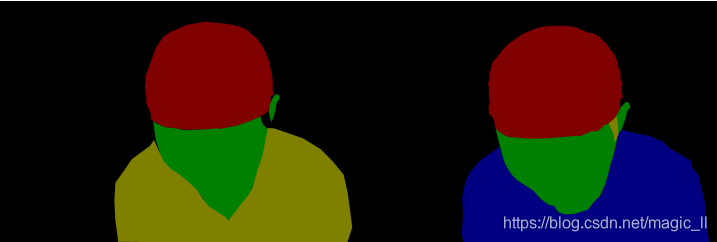
4 批量转换时,颜色错位的问题
假设总共分4类
当图片中出现4类,labelme_json_to_dataset ***.json转换的时候会识别该图片中共有4类,并使用属于第 0/1/2/3/4 的颜色去标注
当图片中只出现3类,labelme_json_to_dataset ***.json转换的时候会识别该图片中共有3类,并使用属于第0/1/2的颜色去标注,此时出现的3类可能属于4类中任意一类。
这样的结果如下,出现了批量标注颜色错位的问题。
解决方案:
其实问题的出现原因是因为 labelme 无法提前知道自己标注分类的总数,所以只能单张图 独立的处理。
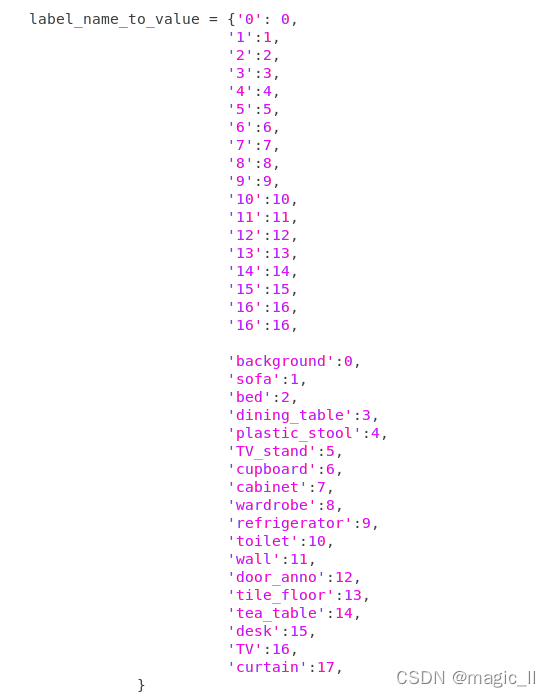
想要处理这个问题,只需要在源码中设定好总类别数量以及我们的标签与索引的对应关系即可。
找到文件【anaconda3/envs/TF14/lib/python3.6/site-packages/labelme/cli/json_to_dataset.py】,
其中,变量 label_name_to_value 为单张图片中出现的标签的记录,代码如下:
   label_name_to_value = {"_background_": 0}
   for shape in sorted(data["shapes"], key=lambda x: x["label"]):
       label_name = shape["label"]
      if label_name in label_name_to_value:
          label_value = label_name_to_value[label_name]
       else:
           label_value = len(label_name_to_value)
           label_name_to_value[label_name] = label_value
然后将这段代码注释掉,添加如下内容。
   label_name_to_value = {'_background_': 0,
                          'cap':1,
                          'skin':2,
                          'hair':3,
                          'cloth':4}
修改后,就可正确的批量转换语义分割的 json文件了。
修改后的完整脚本【2020.11.19 记录】
import argparse
import base64
import json
import os
import os.path as osp

import imgviz
import PIL.Image

from labelme.logger import logger
from labelme import utils

def main():
   logger.warning(
       "This script is aimed to demonstrate how to convert the "
       "JSON file to a single image dataset."
   )
   logger.warning(
       "It won't handle multiple JSON files to generate a "
       "real-use dataset."
   )

   parser = argparse.ArgumentParser()
   parser.add_argument("json_file")
   parser.add_argument("-o", "--out", default=None)
   args = parser.parse_args()

   json_file = args.json_file

   if args.out is None:
       out_dir = osp.basename(json_file).replace(".", "_")
       out_dir = osp.join(osp.dirname(json_file), out_dir)
   else:
       out_dir = args.out
   if not osp.exists(out_dir):
       os.mkdir(out_dir)

   data = json.load(open(json_file))
   imageData = data.get("imageData")

   if not imageData:
       imagePath = os.path.join(os.path.dirname(json_file), data["imagePath"])
       with open(imagePath, "rb") as f:
           imageData = f.read()
           imageData = base64.b64encode(imageData).decode("utf-8")
   img = utils.img_b64_to_arr(imageData)

   # label_name_to_value = {"_background_": 0}
   # for shape in sorted(data["shapes"], key=lambda x: x["label"]):
   #     label_name = shape["label"]
   #     if label_name in label_name_to_value:
   #         label_value = label_name_to_value[label_name]
   #     else:
   #         label_value = len(label_name_to_value)
   #         label_name_to_value[label_name] = label_value

   label_name_to_value = {'_background_': 0,
                          'maozi':1,
                          'pifu':2,
                          'toufa':3,
                          'yifu':4}

   lbl, _ = utils.shapes_to_label(
       img.shape, data["shapes"], label_name_to_value
   )

   label_names = [None] * (max(label_name_to_value.values()) + 1)
   for name, value in label_name_to_value.items():
       label_names[value] = name

   lbl_viz = imgviz.label2rgb(
       label=lbl, img=imgviz.asgray(img), label_names=label_names, loc="rb"
   )

   PIL.Image.fromarray(img).save(osp.join(out_dir, "img.png"))
   utils.lblsave(osp.join(out_dir, "label.png"), lbl)
   PIL.Image.fromarray(lbl_viz).save(osp.join(out_dir, "label_viz.png"))

   with open(osp.join(out_dir, "label_names.txt"), "w") as f:
       for lbl_name in label_names:
           f.write(lbl_name + "\n")

   logger.info("Saved to: {}".format(out_dir))

if __name__ == "__main__":
   main()
到这里核心内容已经结束了。包括软件的安装,语义的标注、标签的转换。接下来的内容,是我自己遇到的实际情况在这里记录下,下次遇到了方便直接使用。读者不必仔细阅读下面的内容
5 统一 [相同的目标 多次标注使用不同的标签命名] 的问题
因为客观原因,前后两批数据相同的目标种类,使用了不同的标签名字,但是我们想要同一数据标签进行转换并使用,只需要修改代码中的
label_name_to_value变量的设定:相同的目标两次不同的标签命名的key,对应相同的value 即可。并且将想要保留的标签命名写在后面即可。
6 标注图片整理
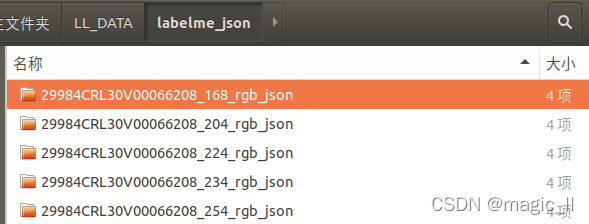
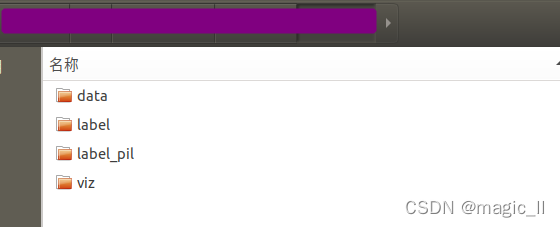
我们运行完sh文件后,会在路径下生成很多文件夹,每个文件夹下有三张图片。
实际使用时
- 要将这些图片重新整理布局
def copy_Data_label()- 标签那图片的转换
def convert_PIL_cv()
神经网络训练时,一般代码中都是用opencv读取图片,而labelme保存的是PIL的调色板模式,使用opencv无法正确读取标签数值,所以这里需要将图片使用opencv保存成单通道图片。如果代码是使用PIL直接读取,则无需转换。- 生成神经网络的 train.txt/val.txt/test.txt
def gen_TrainValTest_file()
代码非常简单,但每次用每次写也很是白做工,故这里记录下,以便每次用时可以直接拷贝:
import os
import numpy as np
import shutil
from PIL import Image
import cv2
import random

def makedir(path):
   os.makedirs(path) if not os.path.exists(path) else None

def copy_Data_label(P_dataset, out_path, Pimg, Plabel, Pviz):
   Pimg = os.path.join(out_path, Pimg)
   Plabel = os.path.join(out_path, Plabel)
   Pviz = os.path.join(out_path, Pviz)
   makedir(Pimg)
   makedir(Plabel)
   makedir(Pviz)

   for file in os.listdir(P_dataset):

       if not os.path.isdir(os.path.join(P_dataset, file)): continue
       try:

           shutil.copy(os.path.join(P_dataset, file, "img.png"), os.path.join(Pimg, file[:-5] + ".png"))
           shutil.copy(os.path.join(P_dataset, file, "label.png"), os.path.join(Plabel, file[:-5] + ".png"))
           shutil.copy(os.path.join(P_dataset, file, "label_viz.png"), os.path.join(Pviz, file[:-5] + ".png"))
       except:
           None


def convert_PIL_cv(out_path, Pinput, Poutput):

   Pinput = os.path.join(out_path, Pinput)
   Poutput = os.path.join(out_path, Poutput)
   makedir(Poutput)
   files = os.listdir(Pinput)
   # print(files)
   for file in files:
       print(os.path.join(Pinput, file))

       img = Image.open(os.path.join(Pinput, file))
       img_np = np.array(img)
       cv2.imwrite(os.path.join(Poutput, file), img_np)

       # ===========================================
       # print(np.unique(img_np))
       # img = cv2.imread(file, 0)
       # print(np.unique(img))
       # ===========================================


def gen_TrainValTest_file(root, image_path, label_path, txt_path):
   namelist = os.listdir(os.path.join(root, image_path))
   print(len(namelist))
   random.shuffle(namelist)

   makedir(os.path.join(root, txt_path))
   ftrain = open(os.path.join(root, txt_path, "train.lst"), "w")
   fval = open(os.path.join(root, txt_path, "val.lst"), "w")
   ftest = open(os.path.join(root, txt_path, "test.lst"), "w")

   for i in range(len(namelist)):
       img_file = os.path.join(image_path, namelist[i])
       label_file = os.path.join(label_path, namelist[i])
       string = "{} {}\n".format(img_file, label_file)
       """=============================================="""

       if i in range(6500): ftrain.write(string)
       if i in range(6500, 7000): fval.write(string)
       if i in range(7000, len(namelist)): ftest.write(string)


if __name__ == "__main__":
   P_dataset = "../SEG_label/"  ## sh文件运行后的到的转换文件的总路径
   out_path = "../CNNout/"   ## 图片重整理的保存路径

   SVP_img = "data"  ## 彩色图片
   SVP_label_pil = "label_pil"  # 标签图片的调色板模式
   SVP_viz = "viz"  # 彩色图片+标签可视化 路径
   SVP_label_cv = "label"  # opencv可正确读取的标签图片
   txt_path = "list"    # 神经网络使用train.txt/val.txt/test.txt

   copy_Data_label(P_dataset, out_path, SVP_img, SVP_label_pil, SVP_viz)
   # convert_PIL_cv(out_path, SVP_label_pil, SVP_label_cv)
   # gen_TrainValTest_file(out_path, SVP_img, SVP_label_cv, txt_path)
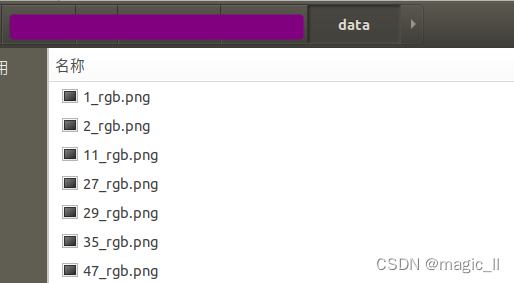
整理结果:
进入【文件夹data】
其他
对于opencv的读取图片:
image = cv2.imread(image_path, -1)第二个参数,在我们进行mask单通道图片的读取时,一定要注意设置为-1。
- 第二个参数为1:默认读出3通道
第二个参数为0:默认读出单通道(灰度图)
第二个参数为-1:不做任何转换的读出数据本身,如果是4通道,读出4通道…
老用但老忘,多多注意下
